McGill’s Flower of the Month: Floral Rose
Hi readers! Happy Tuesday!
I have an inspiring card to show you today! McGill is a company that always strives to have the most creative and innovated paper punches- and they do a “Flower of the Month” project to highlight their flower punches! This is their October Flower/project:
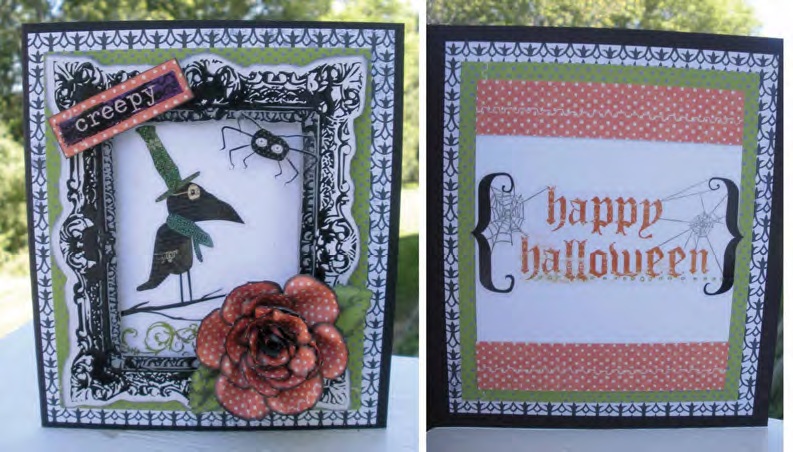

Check out this zoom in of a floral rose that was enhanced with Crackle Accents!!
Here are the steps for creating the flower…to learn the rest of the instructions for the card (including other supplies used) just check out McGill’s page here.
Check out this awesome tutorial below for how to make a garden or floral rose with lots more inspirations to look at. You can also take note of our instructions below to follow when making your rose!
1) Use the McGill Floral Petals punch and punch out the shape 6 times
2) Ink the edge of each petal with black ink
3) Place the petals on the McGill Craft Molding Mat. With the large ball stylus #8, move the stylus around in small circular motions with medium pressure to shape each petal. The petals will start to curl on the edges.
4) Place the tweezers at the smaller, defined end of the petal. Use your index finger and thumb to pinch the shape around the end of the tweezers. Holding the pinched end between your finger and thumb, use the tweezers to grasp the side of the shape and roll back to form petal.
5) Punch a snowflake using the McGill Alpine Snowflake punch out of black cardstock. Lay the snowflake on the Craft Molding Mat, use the #8 stylus and move in small circular motion in the center of the snowflake. The snowflake will cup up. This will be used as our flower base.
6) Start with the cupped snowflake. Working with the largest petals first, dip the end of each individual petal into the glue and adhere the petal to the snowflake base. Continuing with the next largest petals to the smallest, glue to the base one by one until you get to the center. The last couple of small petals curl inward to create center.
7) Punch two leaves from the McGill Birch Leaf punch. Ink the edge of each leaf with black ink.
8) Draw the veins onto the leaves, and glue them onto your bloom. Then you are all set!

This tool kit is a must have to make realistic looking flowers with McGill punches!
I hope you all get a chance to try this flower! I think it’s awesome how you can use the Alpine Snowflake punch for a flower- it’s perfect for year round!
If you’d be interested in some blog candy from today’s post… join our following and then comment with a technique you have to reuse your seasonal items year round! You could win an Amuse wood stamp that’s all about peace!
Congratulations to the blog candy winner of yesterday’s, Breast Cancer Awareness: Think Pink blog, Lisa aka Myran!
Please email Fran at [email protected] to claim your prize!
Thanks for reading!
Follow us on Twitter
Like us on Facebook
-Michelle


There are no comments.
Leave the first?