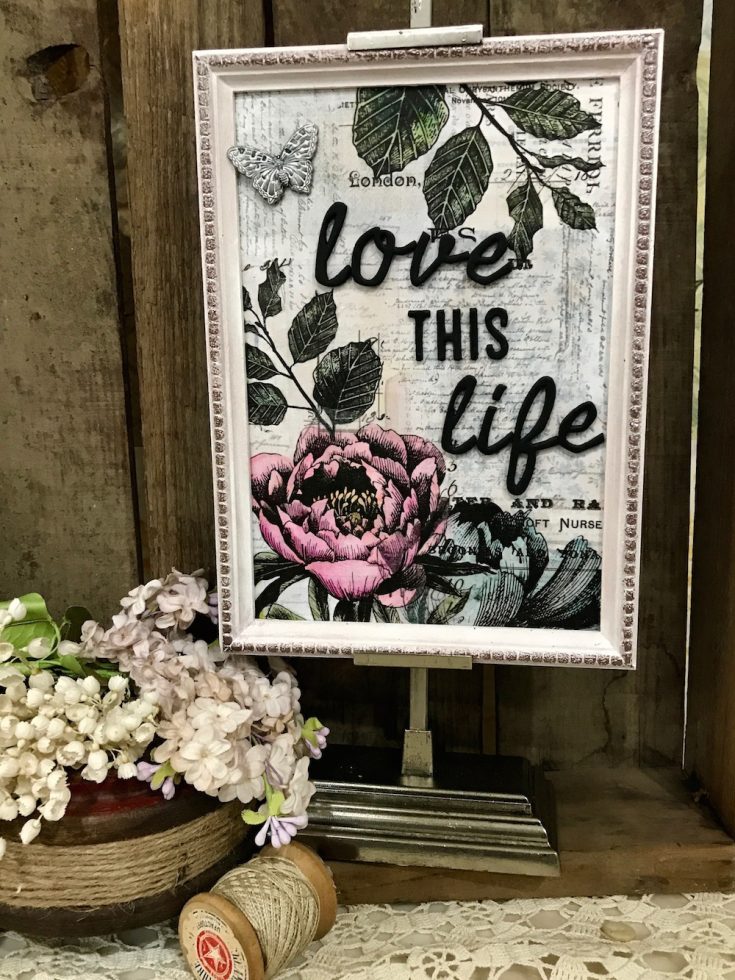
Love this Life Framed Panel by Richele Christensen
Hi friends! Happy Wednesday! Please join me in a big welcome back to very special gust Richele Christensen! Please read on to find out more details of how she made this gorgeous art and enjoy!
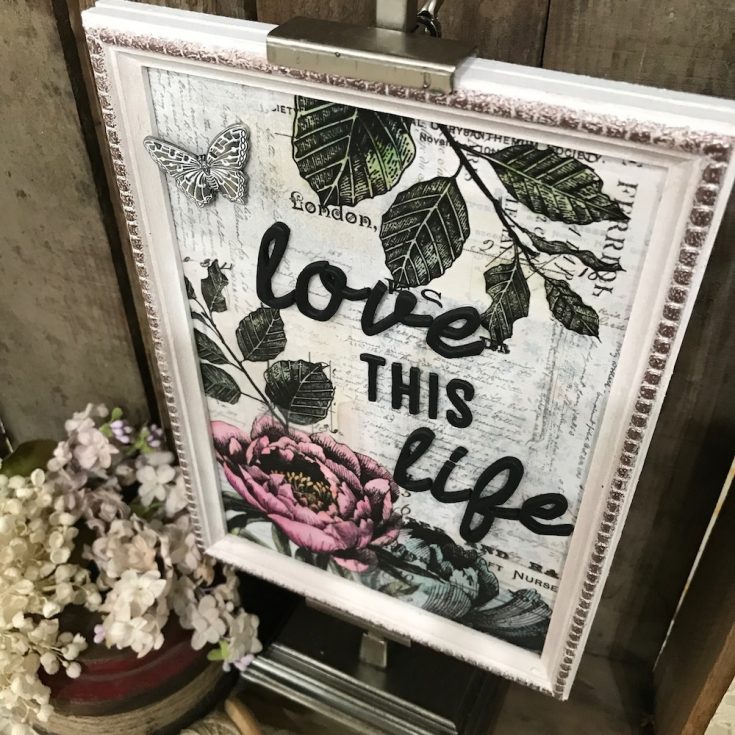
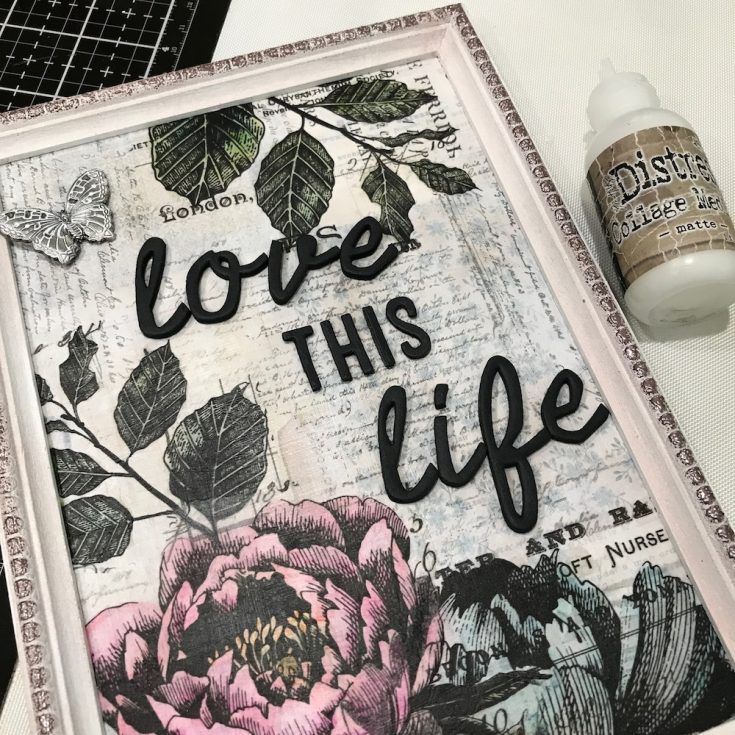
Hello, friends, it’s Richele, thank you so much for joining me today! Spring is one of my favorite times of the year and I love all the pretty flowers that it brings. I have a beautiful decor piece to share with you using the new Tim Holtz Botanical Collage Paper just look at all the gorgeous flowers! The Collage Papers are semi-translucent and comes in a few different prints. Botanical, the one in my project today, which is black and white and can be colored, Aviary has beautiful printed birds, Floral has dreamy roses printed on it and then Plain that can be stamped on or altered to your heart’s content. Perfect for Mixed Media and collage.
Instructions:
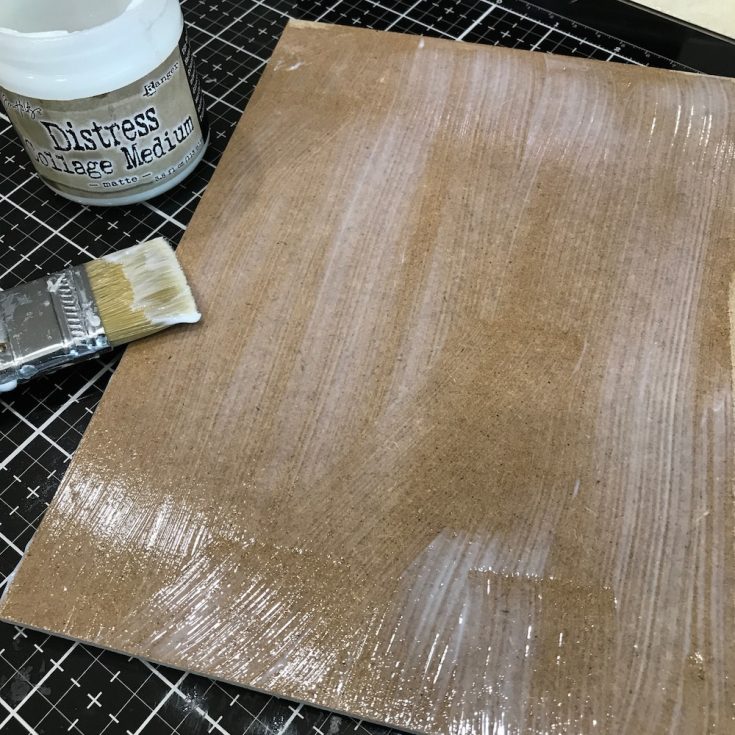
1. Apply a generous amount of Distress Collage Medium to the base of the Framed Panel.
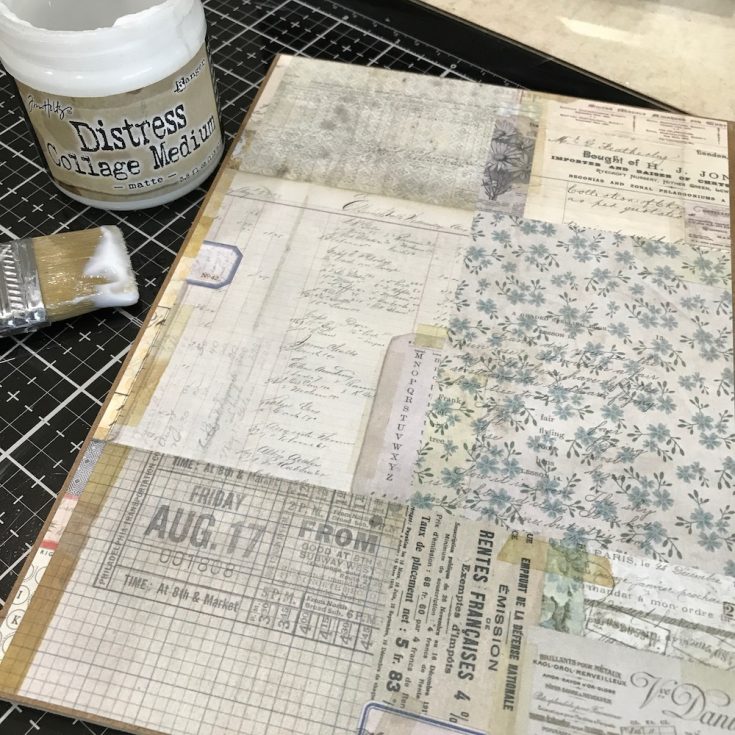
2. Cut a 6” x 8 1/2” piece of Memoranda Paper Stash and adhere to back Panel then apply a thin layer of Collage Medium over the top.

3. Whitewash the background with Dina Wakley Media White Gesso. Be sure to use a very thin random layer to let the paper show through.
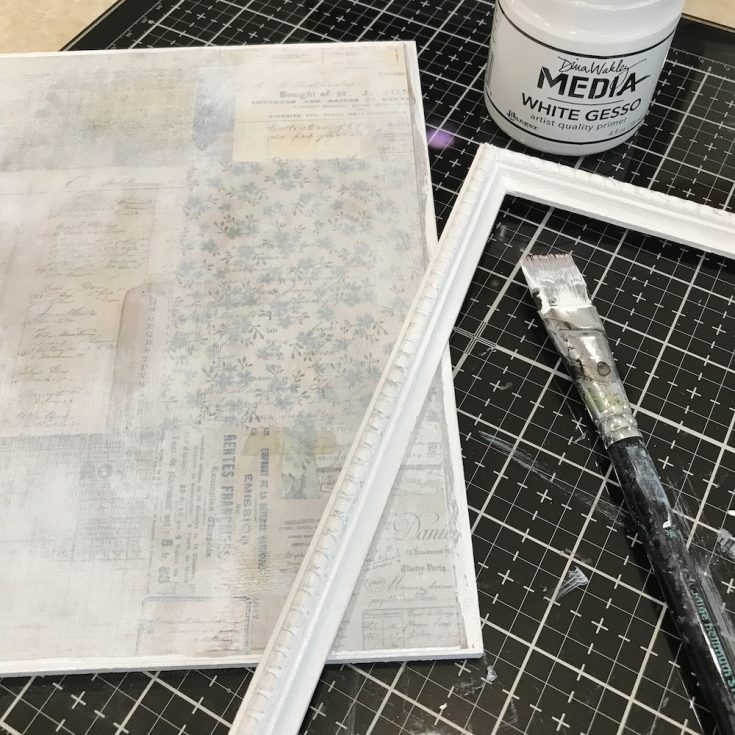
4. Paint the Frame and the side of the Panel with the White Gesso.

5. Use a Waterbrush to create a tear line on the Collage Paper. Work in small sections leaving some of the background areas to create interest.
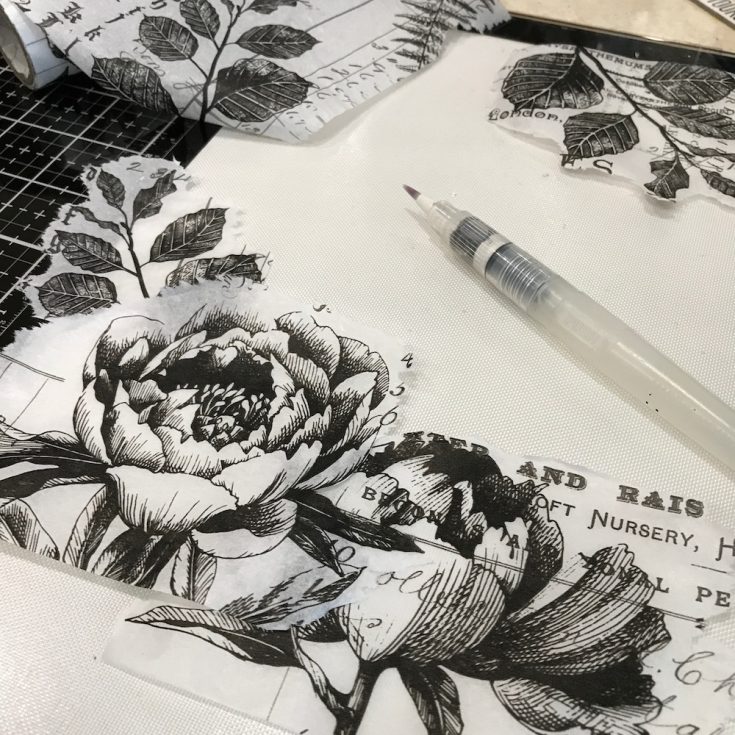
6. Choose a few flowers and a few leaf sections and tear out with above technique.
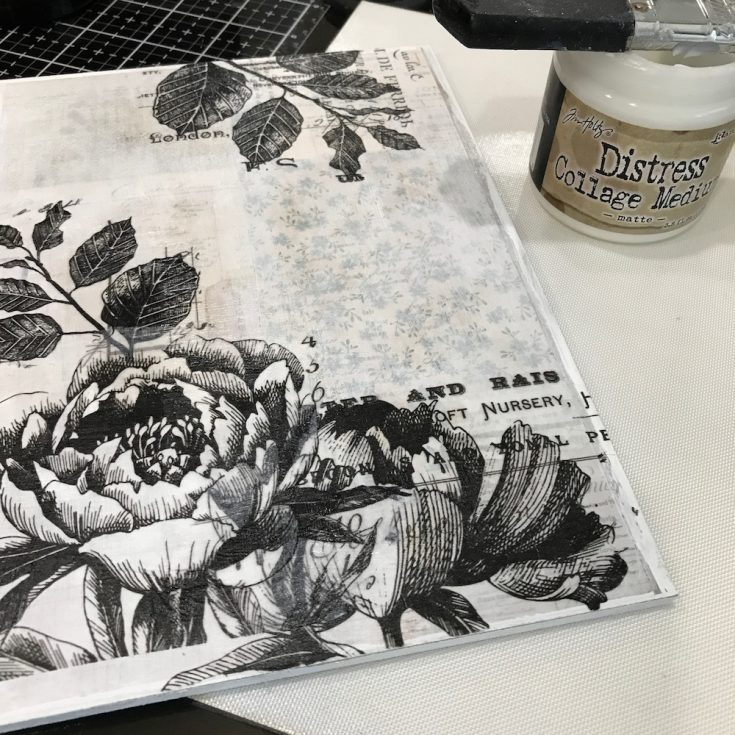
7. Apply a layer of Distress Collage Medium to the background, carefully add flowers and leaves, apply a thin layer of Collage Medium over the top and let dry or dry with heat tool. Tip: when the tissue is wet it will tear very easily so be careful.
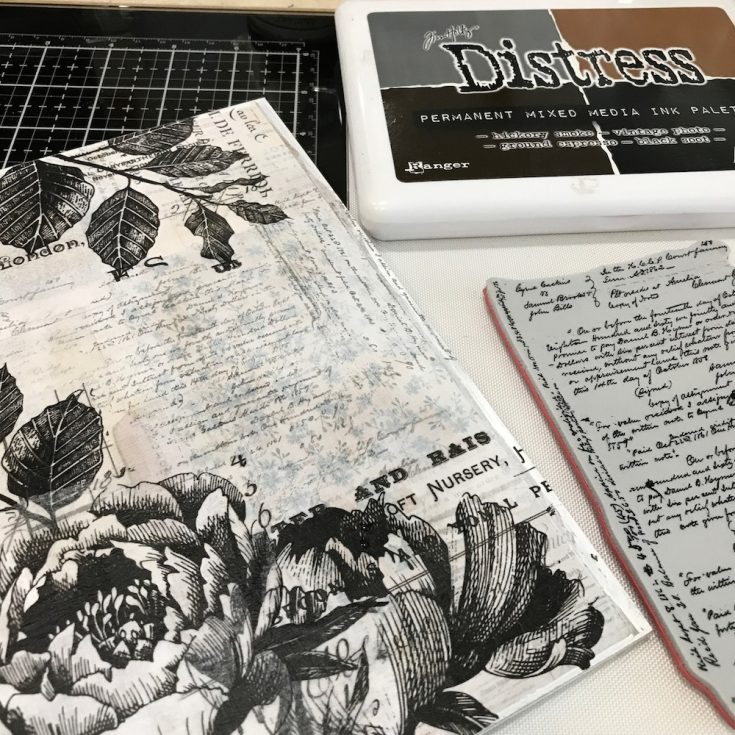
8. Stamp text over the background with Hickory Smoke Ink from the Distress Permanent Mixed Media Ink Palette.
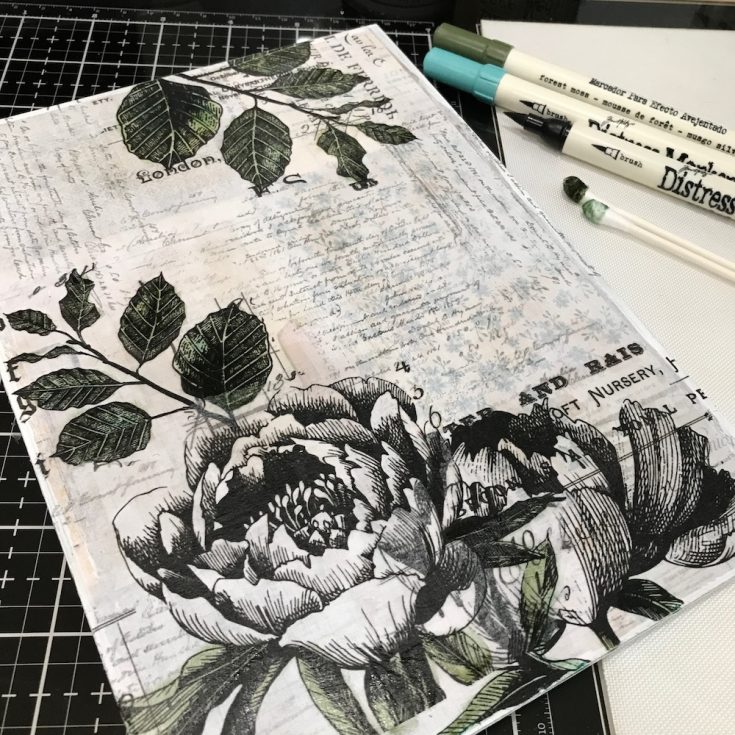
9. Color Leaves with Distress Markers using a few colors like (Forest Moss, Peeled Paint, Evergreen Bough). Use a cotton swab to blend the ink. I like using a few colors to create a more natural look for the flowers and the leaves.
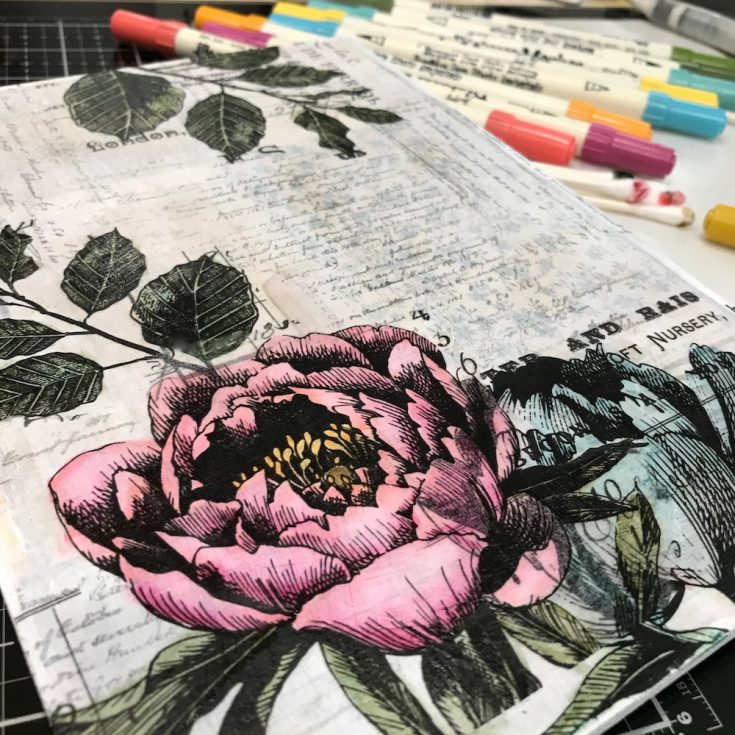
10. Color the flowers with Distress Markers (Abandoned Coral, Broken China, Fossilized Amber, Ground Espresso, Mustard Seed, Picked Raspberry) and blend with a cotton swab. If you color over the lines not to worry use a cotton swab to clean up the edges.
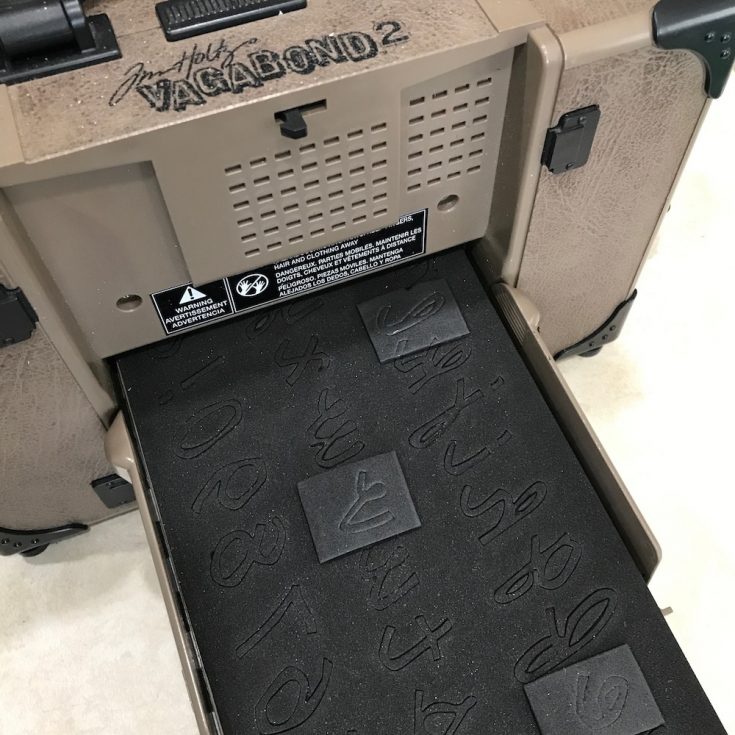
11. Apply black cardstock to one side of the Sizzix Foam Adhesive Sheets, cut into small pieces to fit die area and die cut letters “love + life” using the CutOut Script Bigz XL die and the Vagabond.
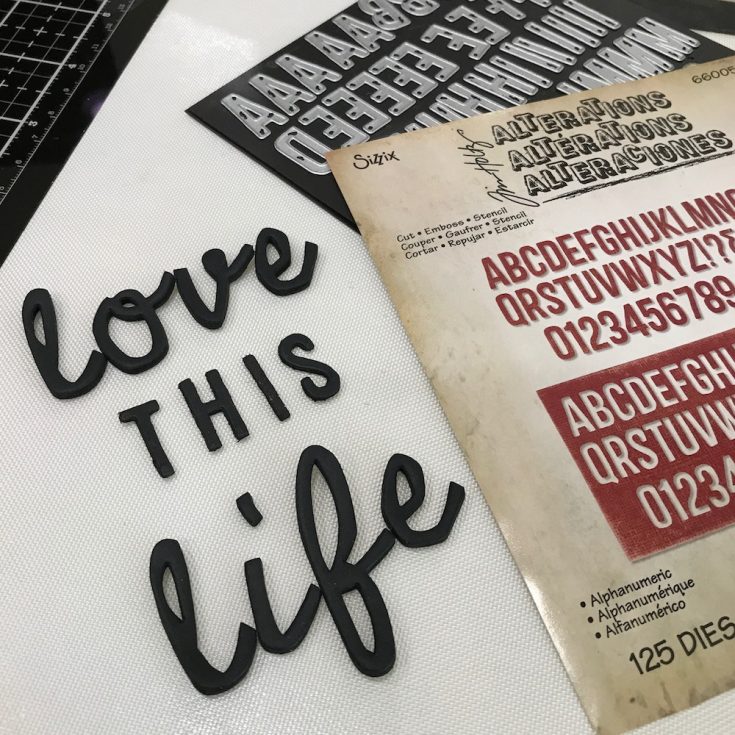
12. Cut the word “THIS” from the Alphanumeric Thinlits die set from black cardstock adhered to the Sizzix Foam Adhesive Sheets using the Vagabond.
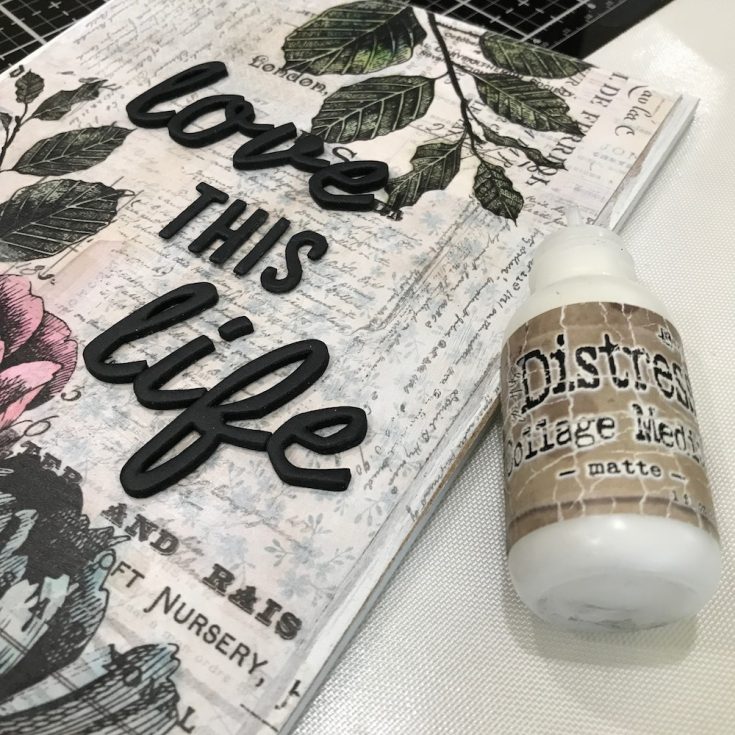
13. Arrange letters and adhere to the panel using Distress Collage Medium if needed.
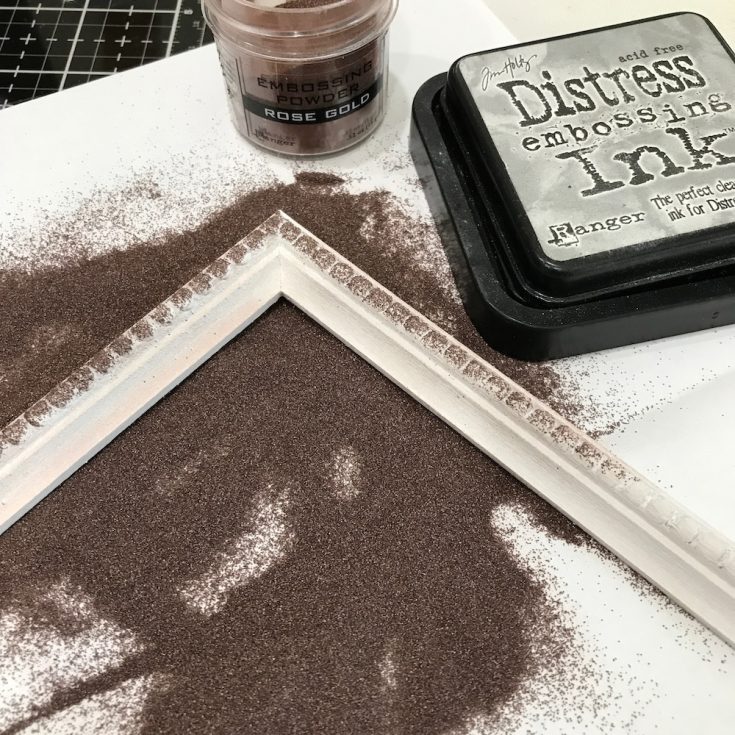
14. Working in small sections lightly pounce Distress Embossing Ink on the raised area of the frame, pour Rose Gold Embossing Powder over the frame and shake off excess powder.
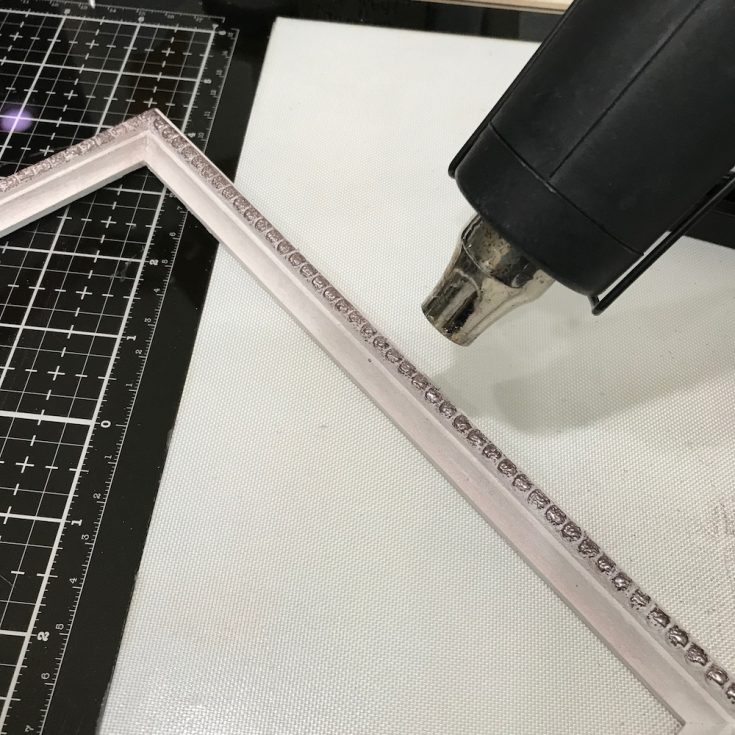
15. Heat with a heat tool until powder melts.
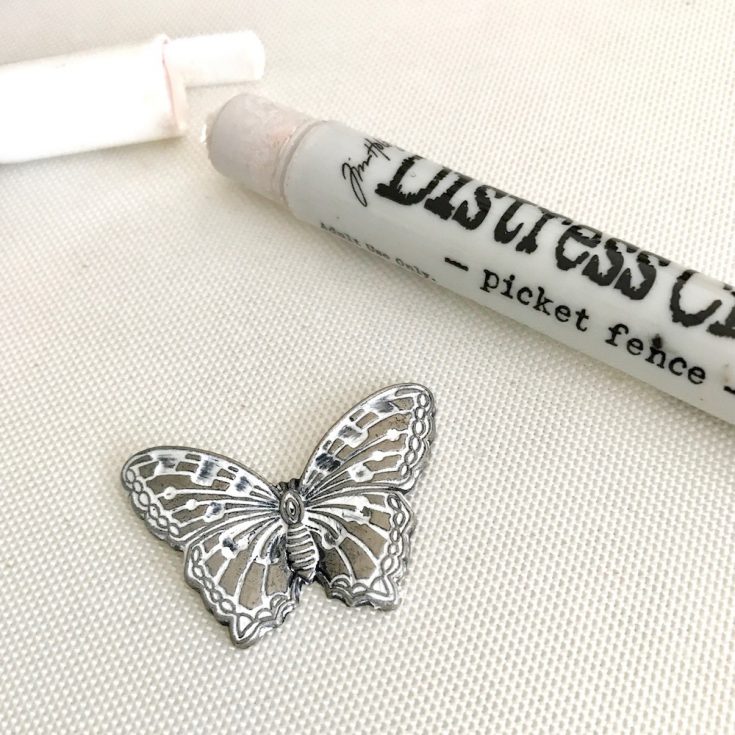
16. Apply Picket Fence Distress Crayon to Adornment Butterfly and work into the crevasses, wipe off excess crayon. The crayon will stay in the crevasses.
17. Adhere frame with a bead of Distress Collage Medium on the back of the frame. Place pieces together and set aside to dry. Tip: Add a few books to help weight the frame down. Adhere butterfly with a piece of foam tape.
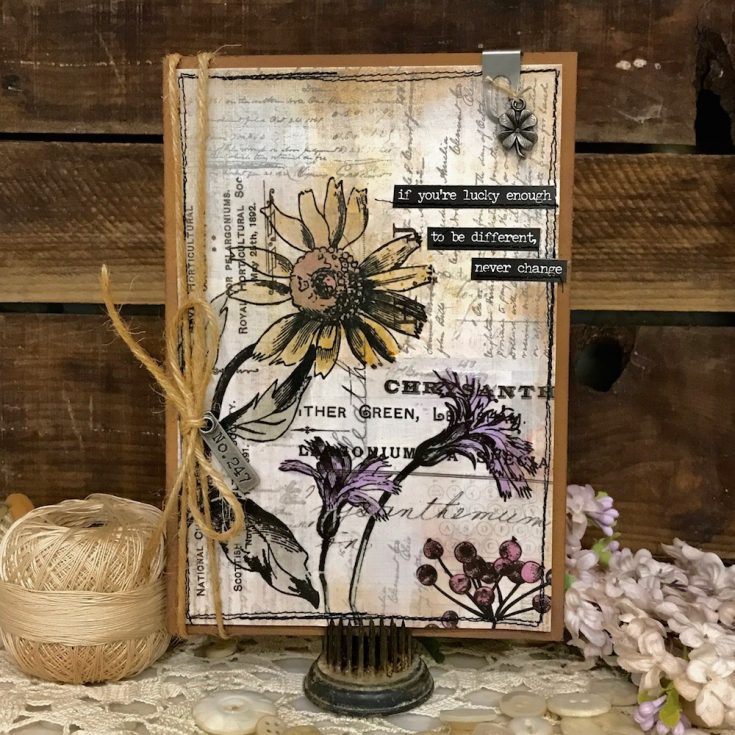
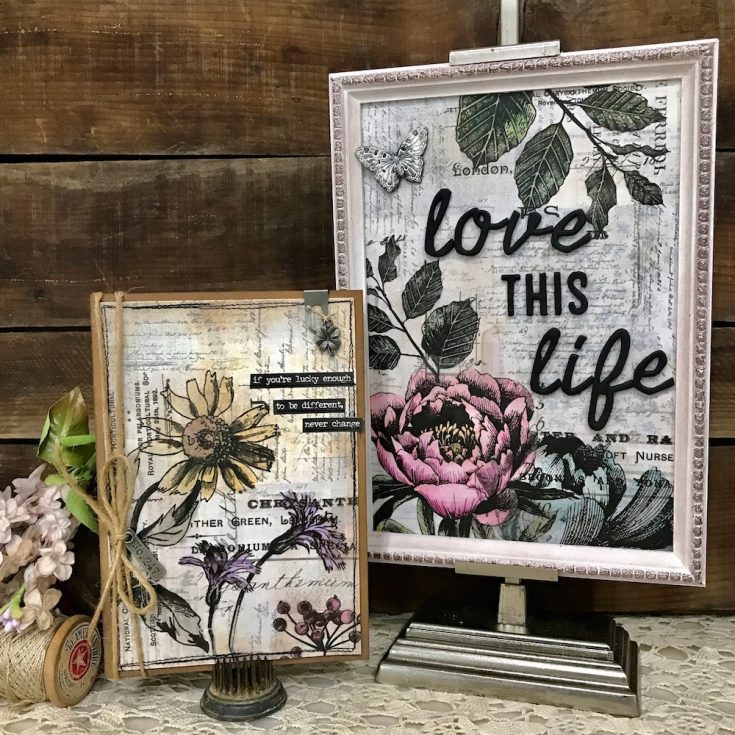
For those of you that are card makers, you can do the same techniques to create beautiful cards with any of the new Tim Holtz Collage Papers. Which design is your favorite?
Thanks so much for joining me on this creative journey and don’t forget to” love this life”!
Richele
SUPPLIES:
|


Thanks so much for stopping by, and to Richele for being our guest!

Blog Candy Alert!! Follow our blog via email and comment on this post for a chance to win special blog candy!
Congrats! Blog Candy Winners!
From: Studio Monda with Nina-Marie: Embellishing & Altering Die Cutting: Aimee LaCroix-Slocum!
From: Yippee for Yana: Stamped Floral Pattern Cards: Jeanne Beam!
From: Simon Says Stamp Exclusive Fluttering by Collection is Ready for You!: Janet Mack, Annette Reed, Lisa Byers, Marisela Delgado, Marcia Scantlin, Jennifer Petersen, Christine Nixon, Becca Yahrling, Ashlee Diane, and Arianna Barbara
From: Especially for You by Jill Foster: Rebecca RamirezBarnes!
From: Creativity Takes Courage Tag by Emma Williams: Tammy Arndt!
From: Tone on Tone Die-Cutting by Dawn Woleslagle: NatQuebec!
From: Brand NEW Neat & Tangled Inspiration!: Jodi Warren!
From: No Line Watercoloring with Smiling Set: Betty Neville!
From: Flora & Fauna Unicorn Trio: Gerrina!
Please email [email protected] with the name of the blog you won from, the prize you won, and your address (if applicable) to redeem your prize(s)!


WOW! so fascinating!!
Cristina
thehouseoftheblackbirds.blogspot.it
Gorgeous project. I especially like the subtle touches of color. Who knew you could use embossing powder on a frame — great idea. Thanks
Beautiful collage… I love that you made it into framed art.
Awesome collage! Congrats winners!
I love this one and congrats to all the winners.
Very beautiful. Love the pops of color.
So So pretty! Love the flowers and the soft colouring with the black collage background!
wow this projects is just gorgeous – thanks for sharing how you made it!
Absolutely stunning art!
Great art piece
These are fabulous! Gorgeous creations. LOVE the designs ♥
All these layers and subtle colors look beautiful together.
What a gorgeous project!
Both beautiful pieces – I love the use of the die cut foam to make the dimensional lettering. I am definitely keeping that in mind for myself!
Fantastic.
Something to be proud to display
in your house or give as a gift.
thanks for sharing
txmlhl(at)yahoo(dot)com
Stunning creation! Congrats to all the winners!
WOW – so many EXCITING techniques and such wonderful pieces of ART! I’m especially inspired by “love this life”
PS – CONGRATULATIONS to all the winners :)
Beautiful pieces of art. Thanks for sharing…
Wow…this is amazing! Thank you for sharing your steps on your beautiful decor
Wow! What a gorgeous project!!
Beautiful framed artwork. Thanks for sharing.
Linda D.
Wow! Awesome projects!!!
I’m so happy to see my name as one of the winners! Congrats to all the others!!! <3
This framed art
looks so pretty!
And congrats to
all the winners.
Carla from Utah
Gorgeous projects! I love seeing how all the details came together, too.
What a cool project! I love that you can do something similar for a card, too :)
Like the wonderful mixed media creations. Congrats to the blog hop winners.
Melissa
“Sunshine HoneyBee”
Beautiful projects. Thanks for the inspiration
WOW Richele, what a beautiful art deco piece! You have done an amazing job on it. I definitely need a few of these supplies before attempting this. LOL TFS!
Congratulations to all of the winners!
Very framed panel and card. Love how you used Tim Holtz products!
Gorgeous artwork!! Love the butterfly with the Distress crayon. Thanks for the tips!!
So feminine and pretty, I love it. Have to take another look at that paper pad.
Congrats to all the blog candy winners … and thank you!! :-)
Beautiful project and Happy Dance to all winners! Yeah!
Love seeing home decor projects & these are really gorgeous!
This project is awesome…such wonderful attention to details. tfs and congratulations to the Blog candy winners!
Very pretty!!
Very nice project!
Beautiful mixed media project! Thanks for the inspiration!
Amazing projects. Crafting is part of this life that I love. Thanks for sharing!
Lovely artwork–and thanks for the great tutorial on how to make this!
Oh wow, this is gorgeous! I love all your special touches and the embossing on the frame! That’s such a cool idea!!! Thank you!
This frame is gorgeous! I love that flower!
Thank you so much for having my project on the blog today! and thanks everyone for all your sweet comments!
Wow!!! These are really Beautiful!!!!
Beautiful project, love all the details.
Stunning collage, I love all of the details! So happy to see my name as one of the winners, congrats to the others as well!
So beautiful.
❤️ LOVE!!!!
This whole piece is lovely and so cohesive, but I think what impresses me the most is how you did the frame. I really thought those were jewels/crystals stuck onto the frame instead of embossing powder. What an inspired way use the texture of the frame! Thanks for sharing such a lovely idea with us.
I love the framed piece, it’s just beautiful!! And I love the step-by-step photos and instructions!! Thank you so much for the instructions, I’d like to do a frame one day, they look like so much fun!! Thanks for sharing!
How fantastic, thank you for all the detailed information and instructions!