Kathy Racoosin teaches Copic Coloring Techniques for STAMPtember™

Hi Bloggers!
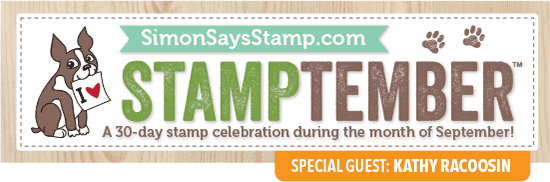
Wow!! 4 Magnificent cards! Let’s get some tips and tricks from Kathy so that we can all make them!
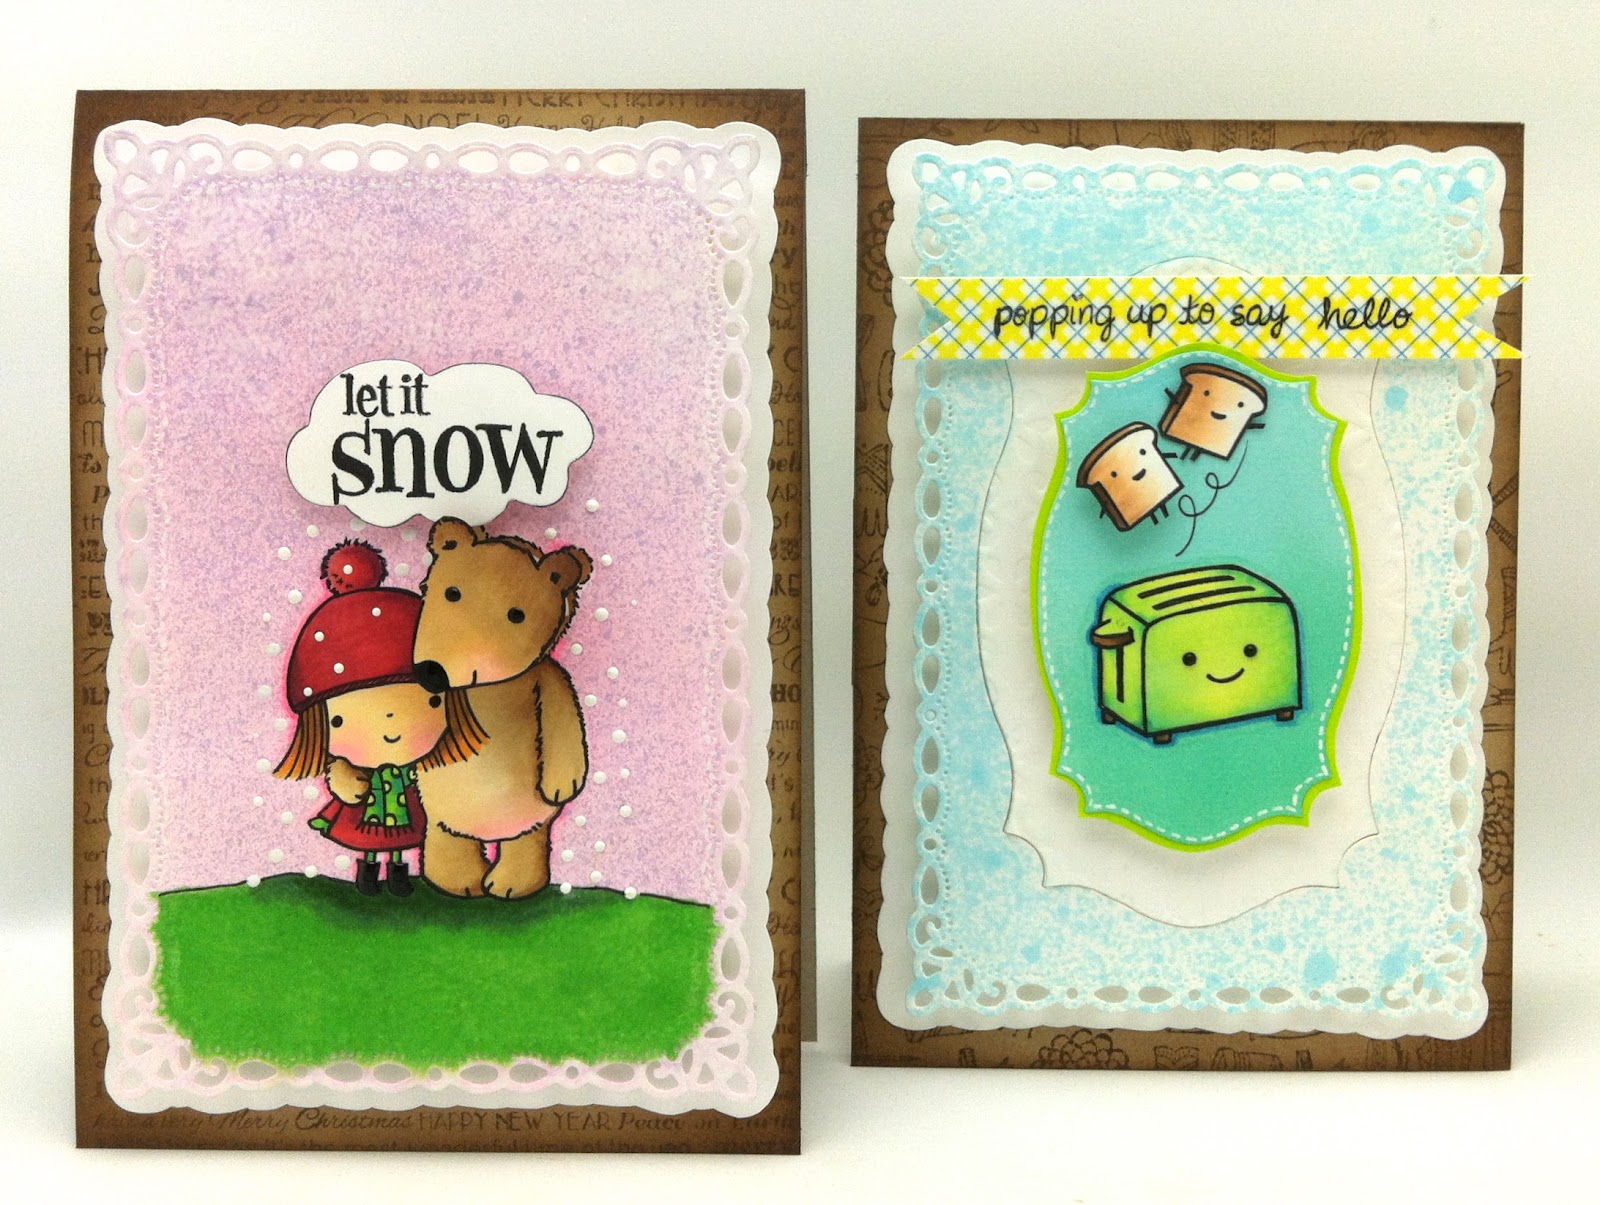
Deciding what to do with background after coloring your images can be problematic. This technique is great because you get the results that you might get with a airbrushing generator with ease and zero maintenance. These are the colors I selected to spray on the backgrounds with the mini misters. Why a mini mister you might ask. Because the tubing touches the bottom of the mister and many don’t. The mini misters above are filled with the Copic reinkers.

These are the stamped images and the extra images that will colored and popped on my cards. I love using stamping masking paper. Save the blue part of the masking paper because when you are finished spraying you can stick the masked part back on to the blue and save it for future use. Now I am ready to spray….
For this image I sprayed RV00 and after spraying I like to apply a little heat especially if you will be coloring so you don’t over-saturate the paper resulting with the lines bleeding. (Click on the image for a larger view)

Notice anything here?? After my first spray I decided to mix it up and sprayed a second spritz of a different Copic color. So much fun and I love the results. After removing the mask (be sure to save it for future use)outline you image with the same color that you sprayed or a darker marker. This was sprayed with BV00 and outlined with BV02. (Click on the image for a larger view)

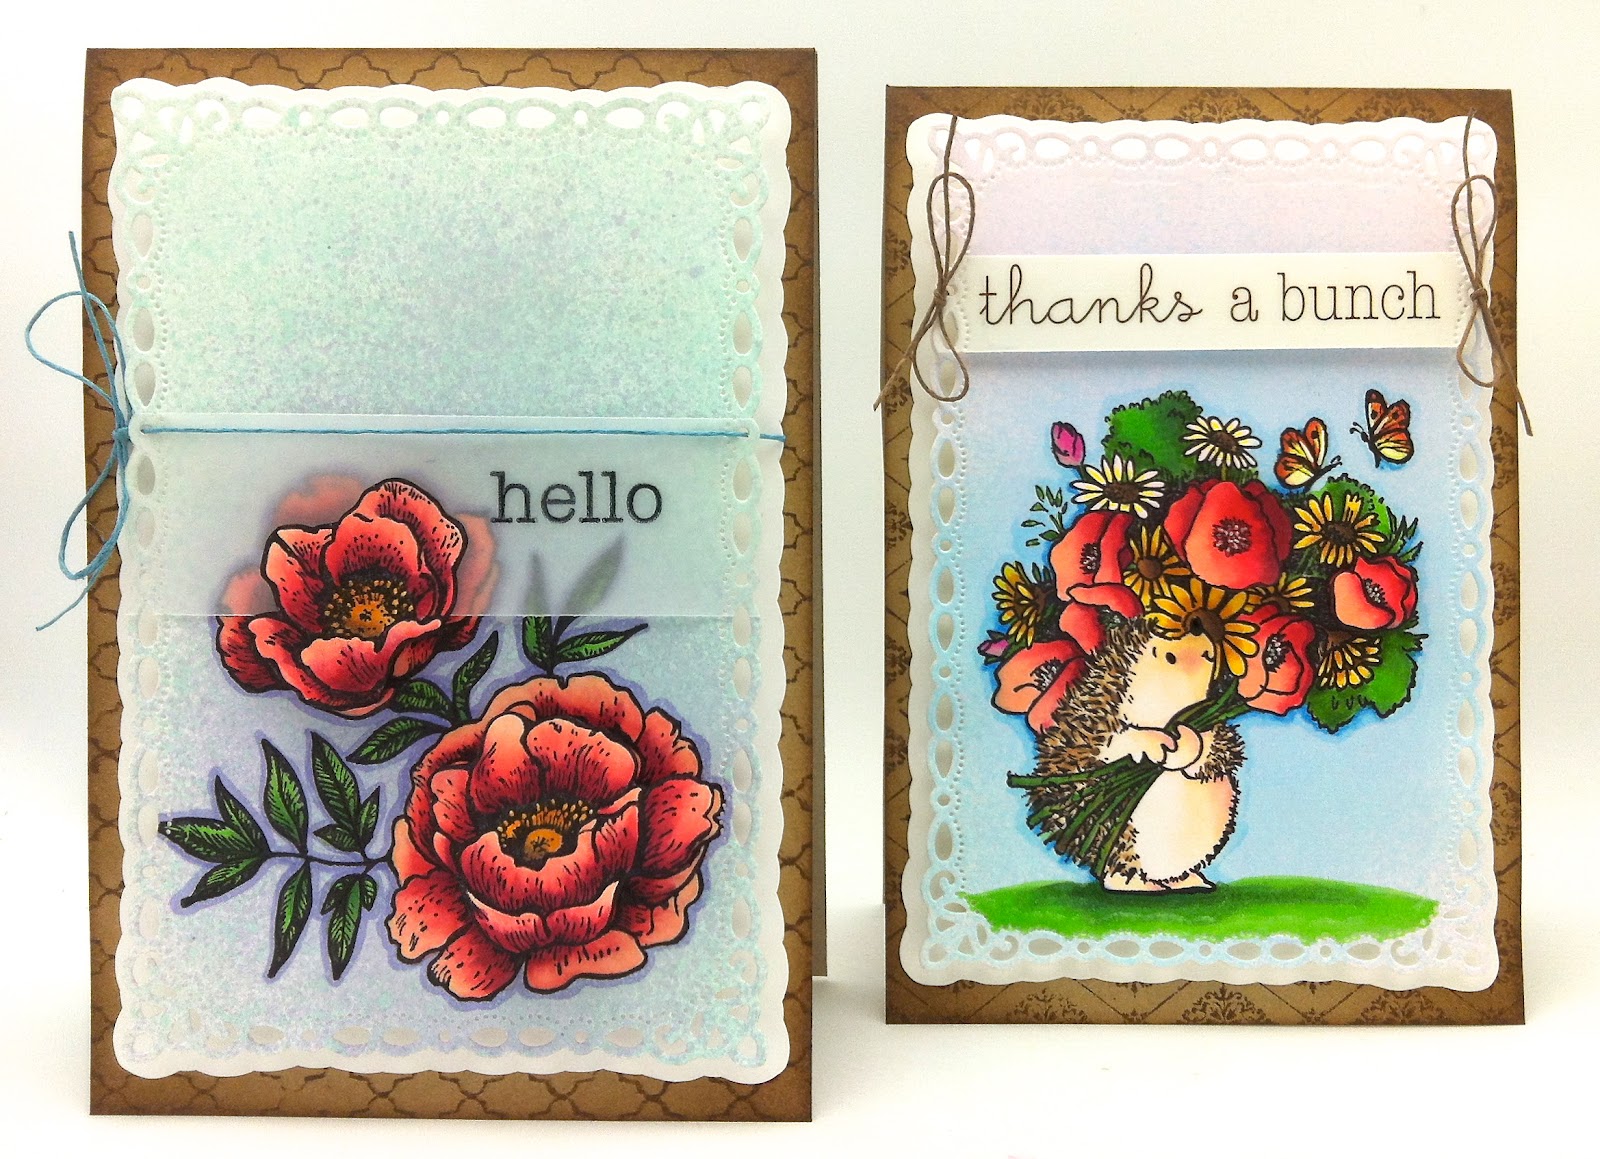
I didn’t plan ahead and mask the snow so I removed some of the color with “Copic Various Ink” and a rag. (be sure to use in a ventilated area) After some of the pink background was blotted off with the various ink, dry with a heat gun and color green. (I would recommend drying the paper again so you don’t over-saturate the paper) Dampen your rag and dab onto the green, pause and continue to work the area to add texture.
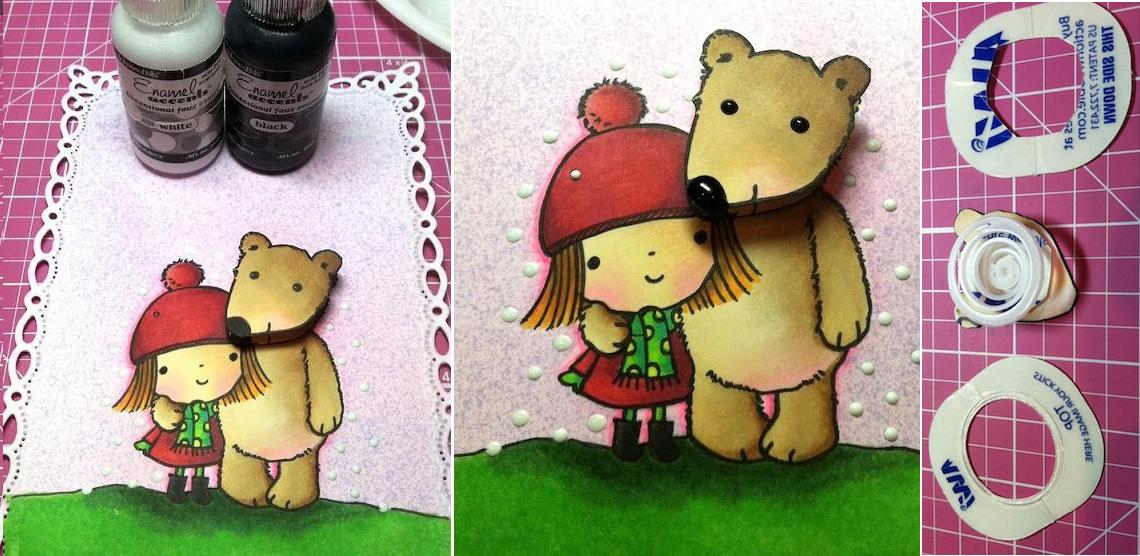
After coloring your the image add some extra details. On “Mimi” I enlarged her eyes. Add some white enamel accents for the snow. I always recommend that you dab a few dots on some scrap paper to make sure you have all the air bubbles out and to practice a few before you start on your card. When the white is dry (in about one hour…tap on your test snow to see) then you can add the black enamel accents on the bears eyes and nose. Set aside to let dry. (note: If I added the black to anything else I feel it would have been to much..like her eyes or boots) I added glossy accents to the boots. Have you wished that the wobble came in a smaller size? I just cut mine apart and customized it to the head. I used glossy accents to adhere!
SUPPLIES:
 |
 |
 |
 |
 |
 |
 |
 |
 |
 |
 |
 |
|
|
 |
 |
 |
 |
 |
 |
 |
|
|
 |
Guess what!? Kathy has a special BONUS for you! Be sure to hop on over to Kathy’s blog for a SPECIAL discount code that you’ll only find on Kathy’s blog! Also, she’s giving out free stamps and a set of Spellbinders dies to make your own creations!! Check it out!!
Have you heard about “KICK START” with Online Card Classes!? Kathy will be a guest teacher during class! Want to win a front row seat? Let us know which of Kathy’s 4 cards inspire you the most by commenting below and 1 lucky winner will be chosen for a spot in class Tuesday, September 11.
Do you ever find yourself stuck in a creative slump? Never fear! Break down the mental blocks that keep you from creating! In KICK START, Kristina Werner, Jennifer Mcguire and a team of all star artists give you a front row seat to their creative process and explore ways to get back your creative mojo!
Kick Start’s 20+ videos will cover many topics including organizing inspiration, making the most of card making sketches, getting more from your supplies, smart shopping, and much, much more.
Many cards will be shared along the way too. This two week interactive class includes free downloads, prizes, shopping discounts, galleries, a Q&A forum and lifetime access. Class runs from September 17 – 29, but content will be available for a lifetime!


Steph


There are no comments.
Leave the first?