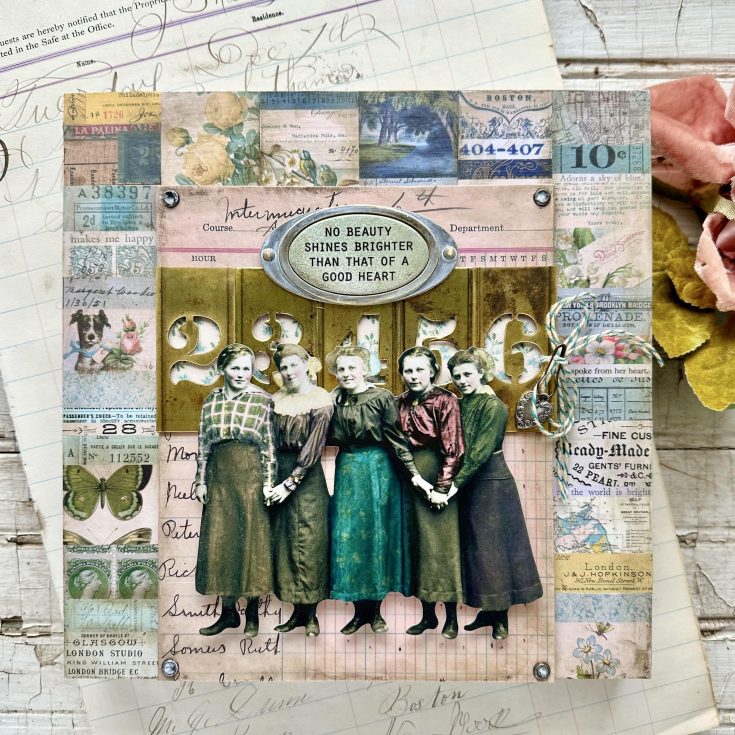
Good Heart Vignette Display Panel
Hi friends! We’re beyond excited to welcome back the super-talented Paula Cheney to our blog as a special guest! She is an absolute genius at coloring the paper dolls, so I was super excited to see some new tips and tricks on doing that! Read on and enjoy this fun new mixed media project!
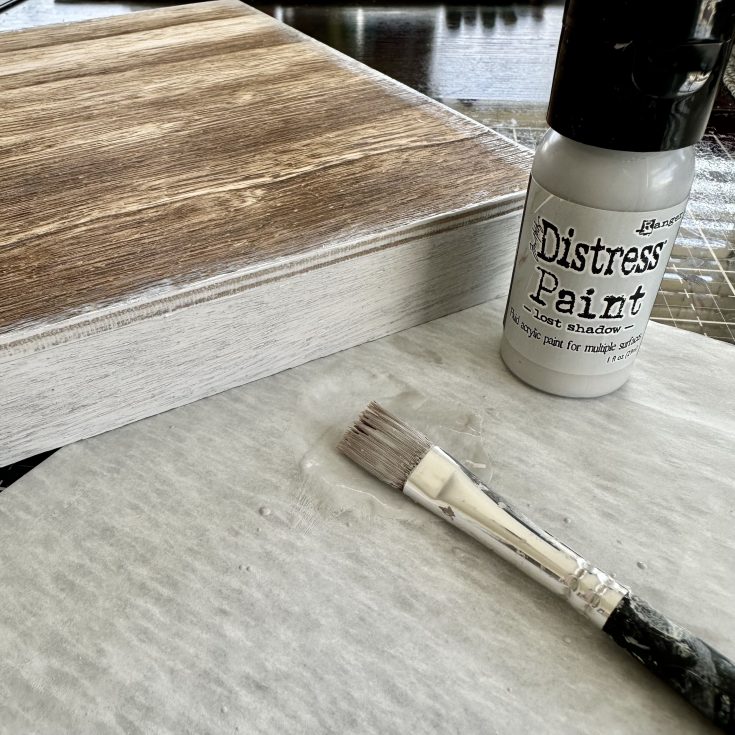
Paint the edges of the idea-ology Vignette Display Panel with Lost Shadow Distress Paint. It’s the perfect neutral color for this project! Let dry.
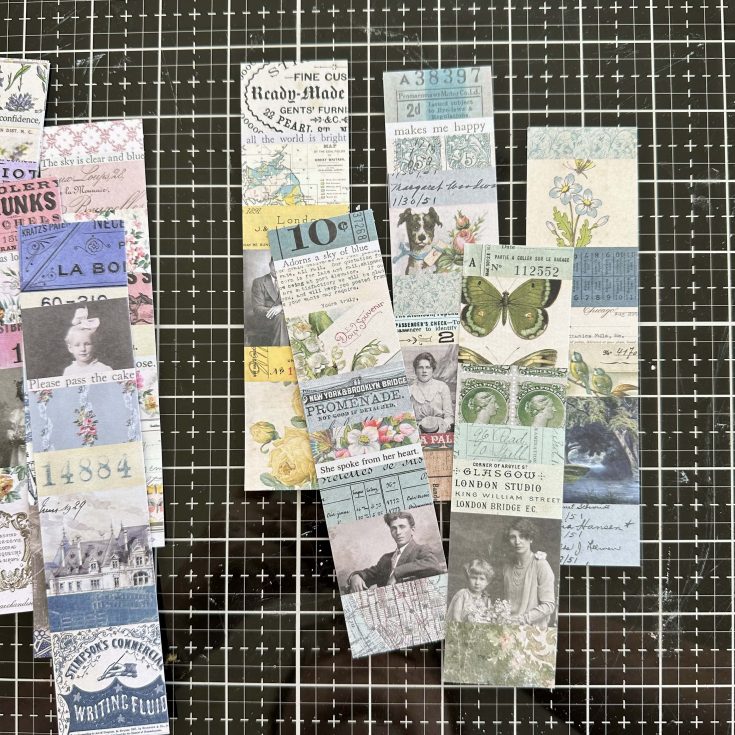
Choose five or six Collage Strips for front of Display Panel. I chose a greens and blues, but any color combination will work.
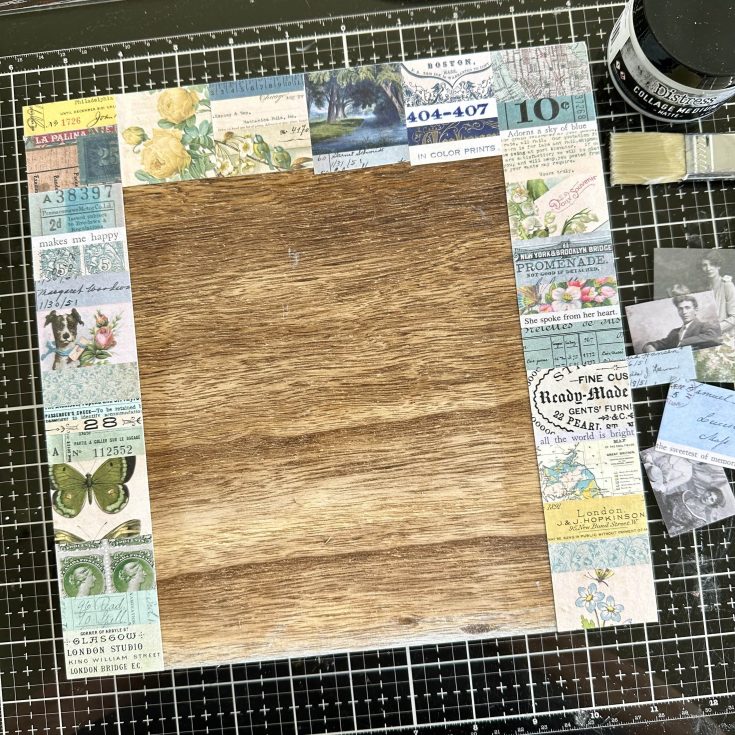
Use Collage Medium to adhere Collage Strips around three sides of the Display Panel. You might notice I cut the Collage Strips since I did not want to use the small photos on this piece. It was easy to just cut them out and reconnect the strips on the panel when I was gluing them into place. Once complete, add a layer of Collage Medium over the top of the paper, then let dry before moving onto the next step.
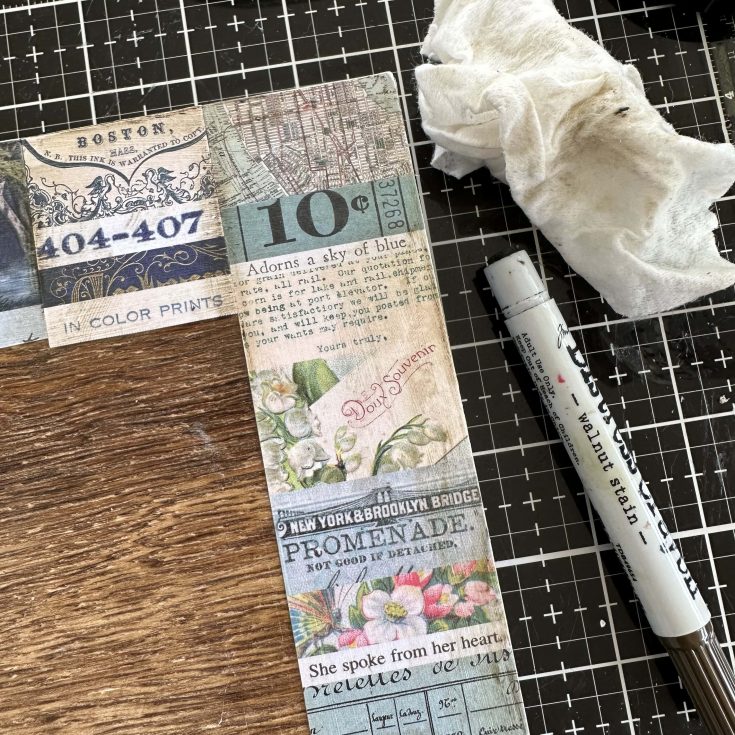
Scribble Walnut Stain Distress Crayon over edges of Display Panel. Disperse crayon with a damp fingertip or wet wipe. Because the paper has been sealed with Collage Medium, if you get to much on, you can wipe it away. Just dry the surface before adding more crayon.
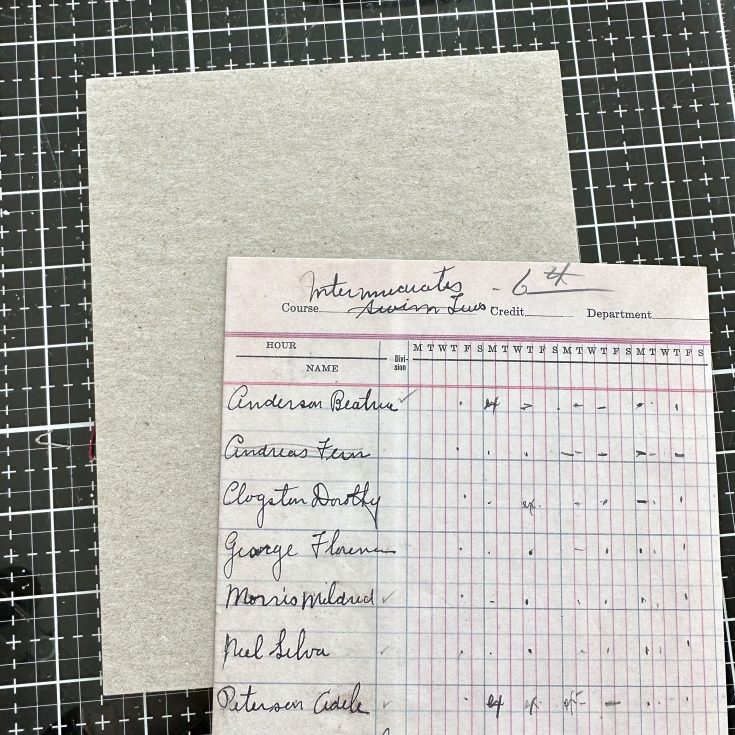
Cut a 6 x 7 1/2” piece of Backdrop 4 paper (ledger) and a matching piece of chipboard.
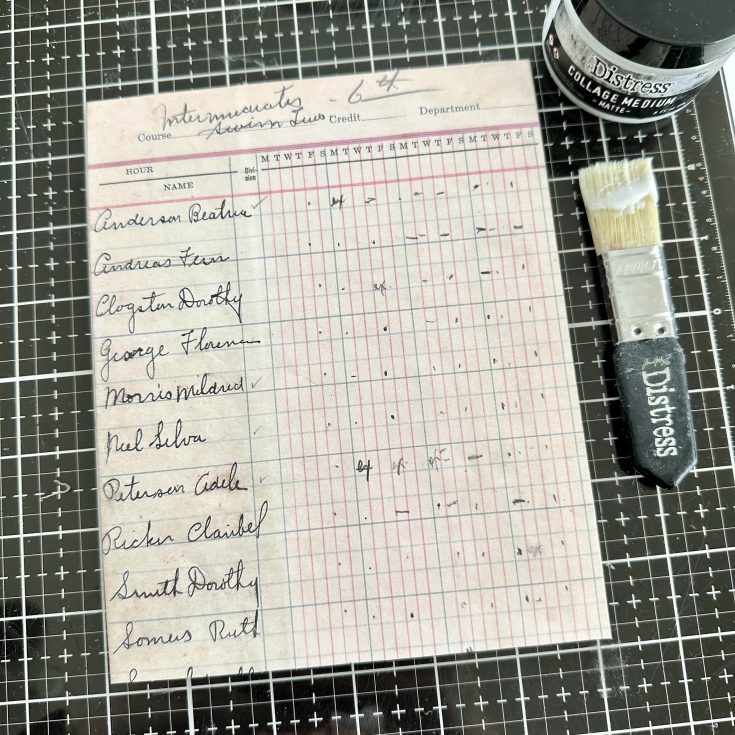
Use Collage Medium to adhere the paper to the chipboard. Add a layer of Collage medium over the top. Let dry.
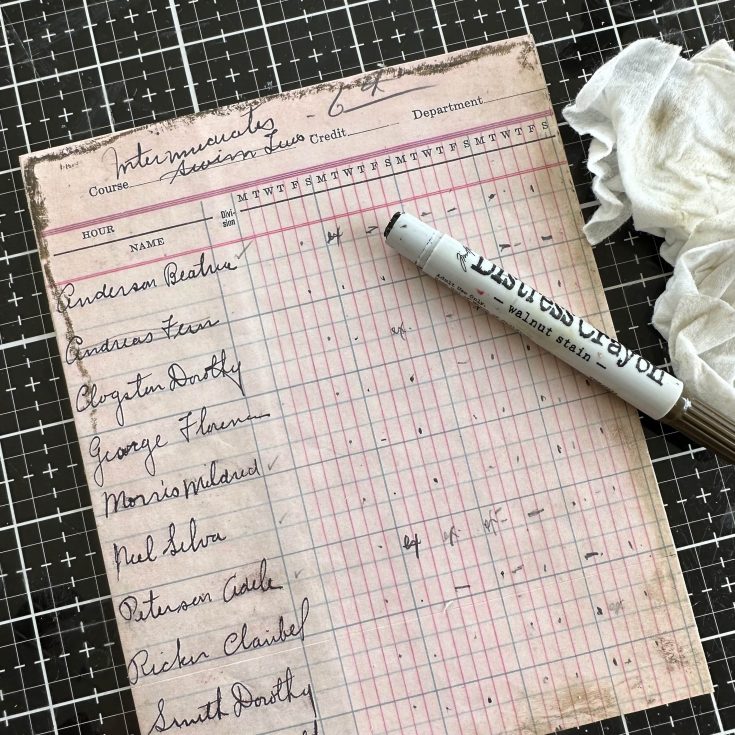
Repeat step 4, adding Walnut Stain Distress Crayon to the edges of the ledger paper.
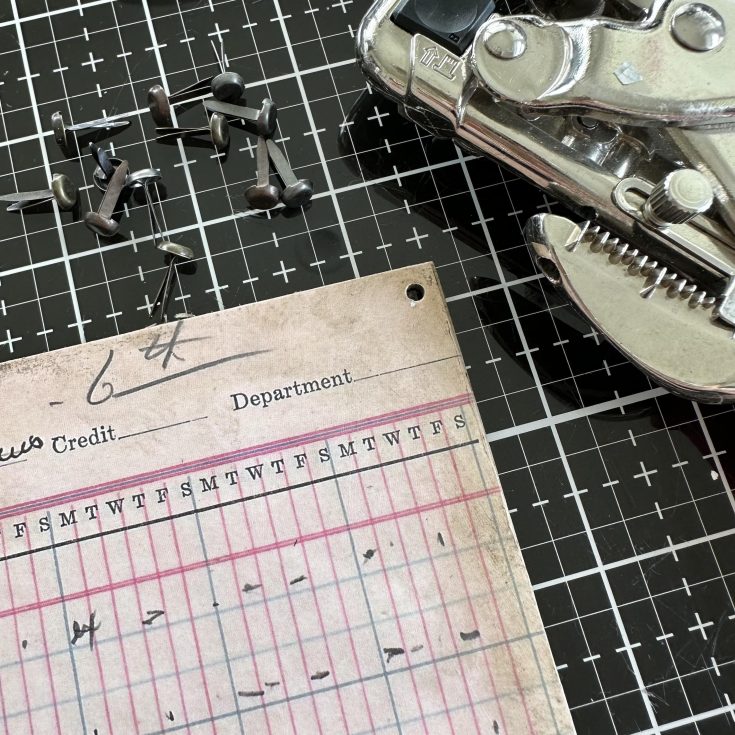
Using the small hole on a Crop-A-Dile, punch a hole in each corner of the chipboard.
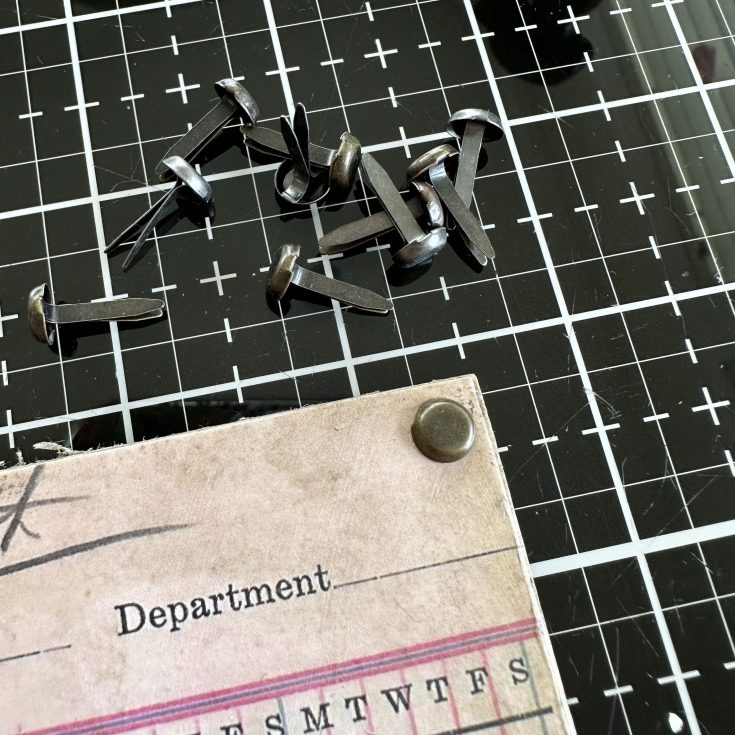
Add a Large Fastener to each hole.
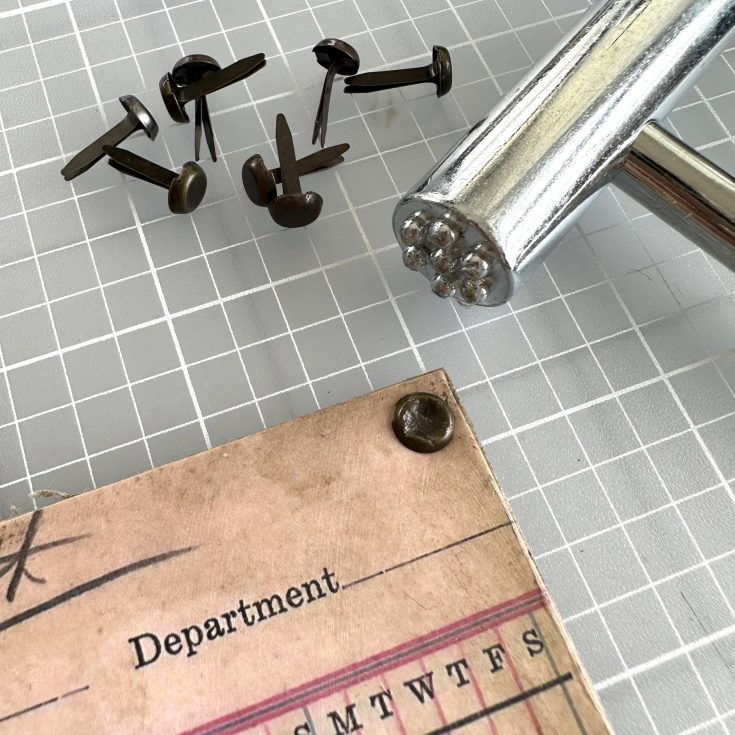
Use Tim Holtz Texture Hammer to add random dents to each the Large Fasteners.
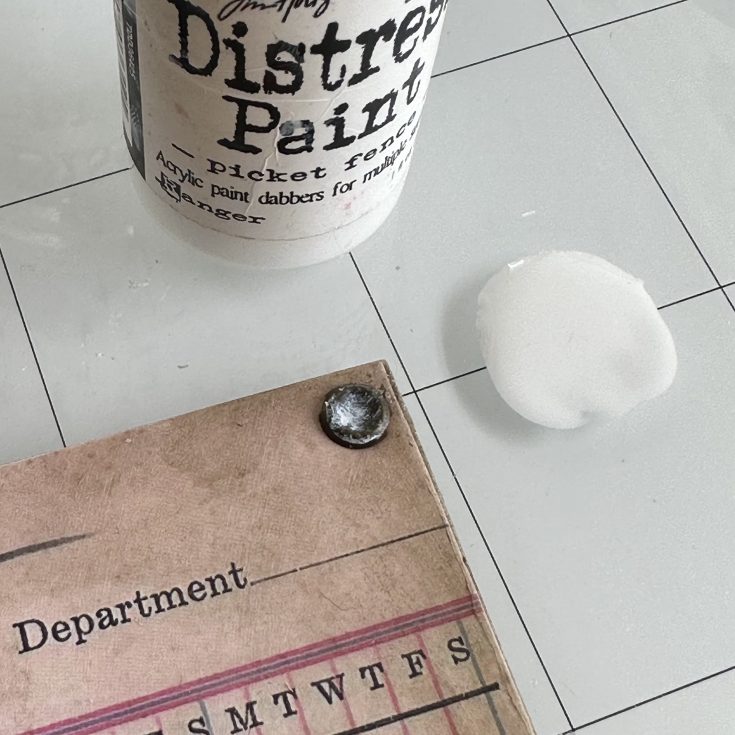
Use your fingertip tip to add Picket Fence Distress Paint over each Large Fastener to highlight the dented portion. Wipe away excess with a small brush or your fingertip.
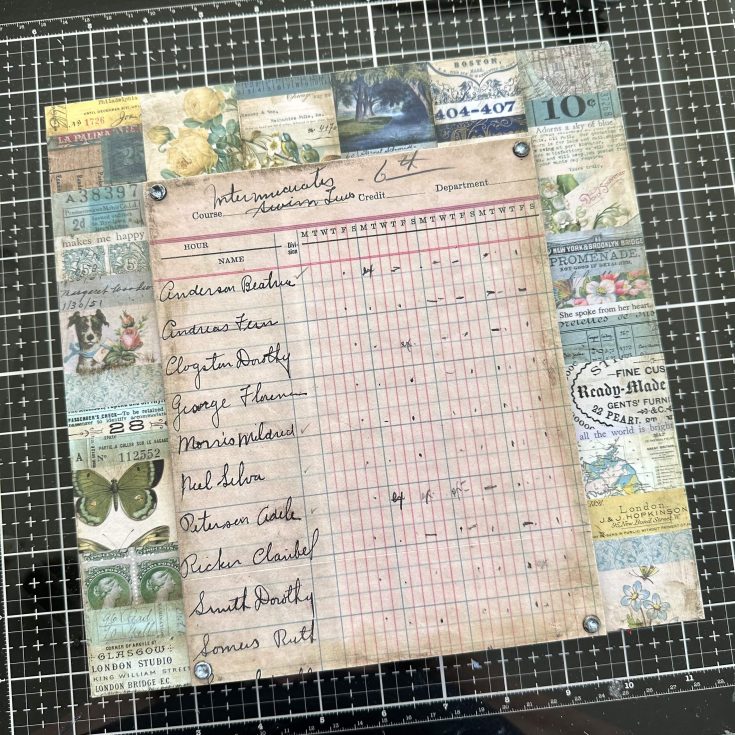
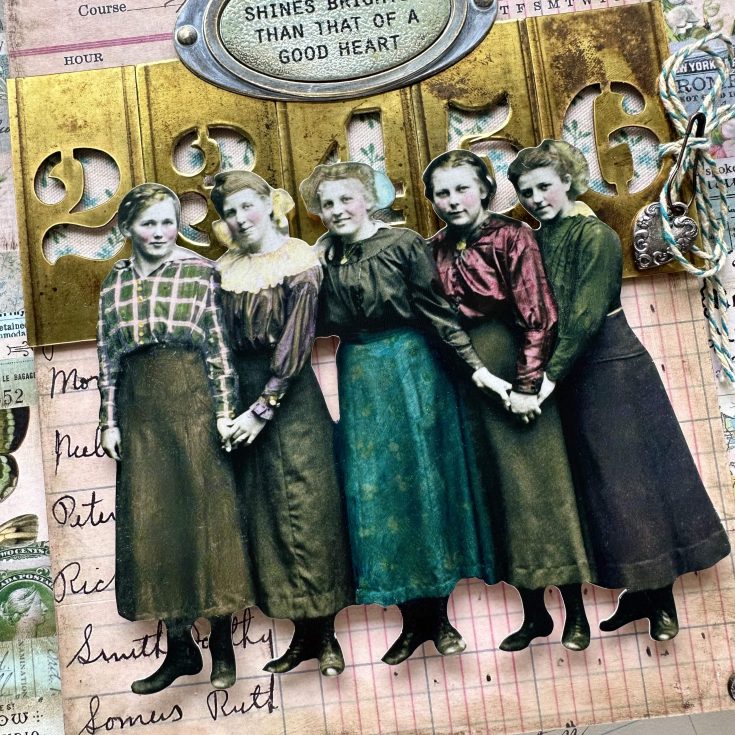
Use foam tape to add chipboard ledger to the Display Panel.
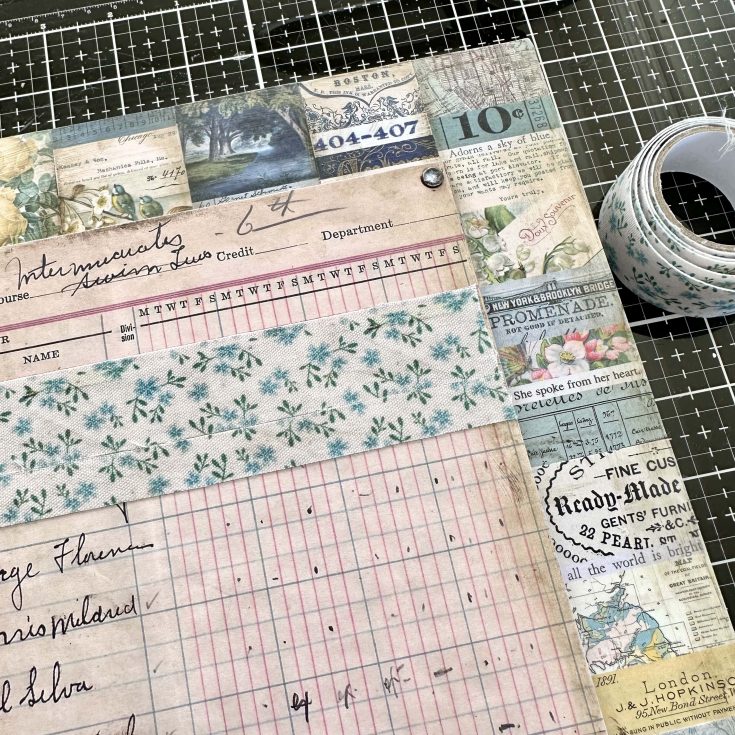
Add two strips of floral Linen Tape, about 1 1/2” from the top of the chipboard. Do not worry about the seam between the tape strips, it will be covered later on. Set panel aside till step 17.
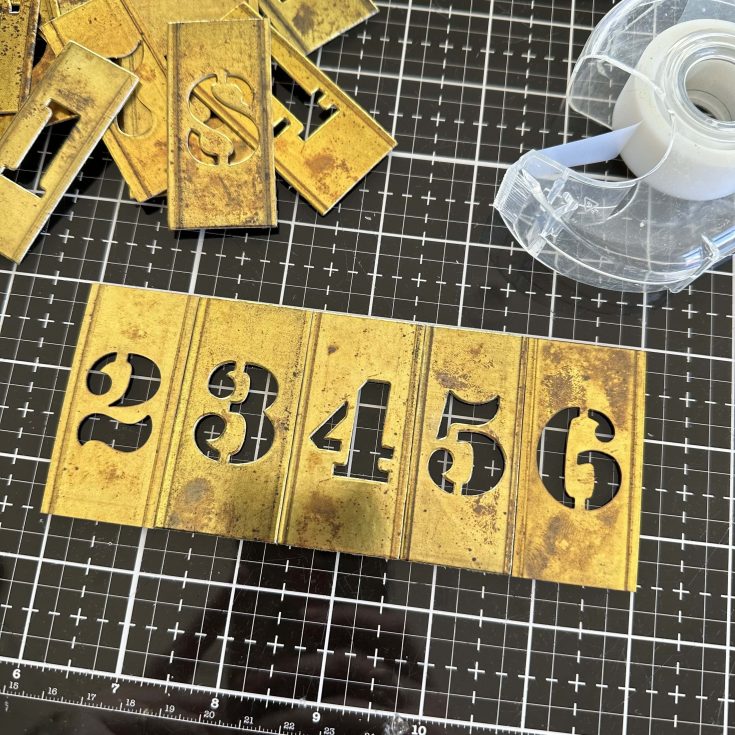
Use tape (on the back) to combine five Stencil Chips. You can use any combination of numbers or letters, as long as they come out about 6” across.
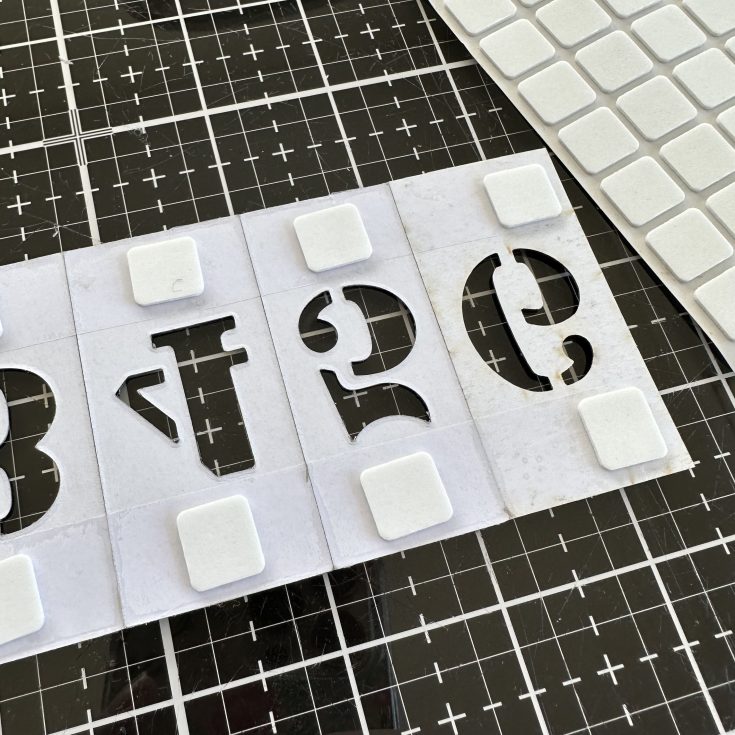
Add foam squares or foam tape across the back of the Stencil Chips.
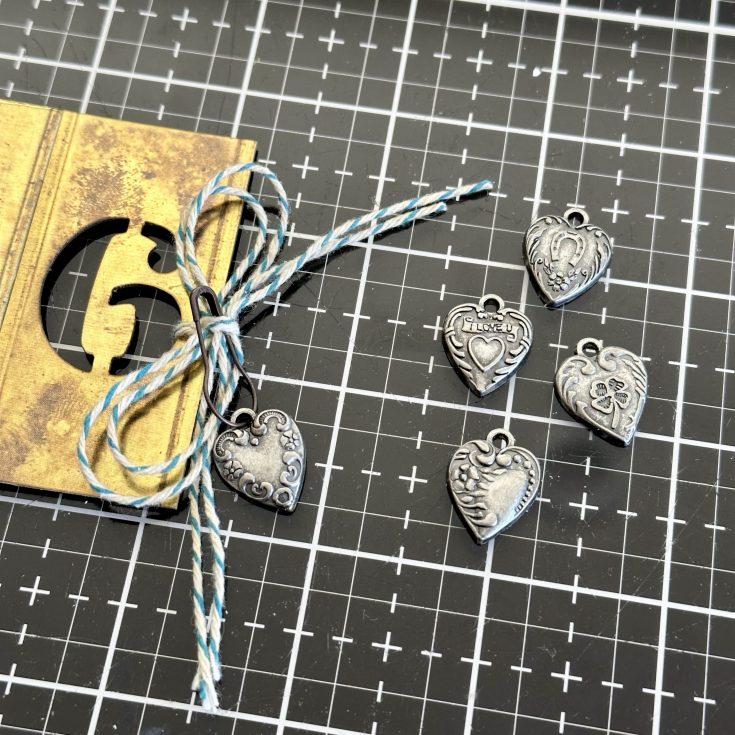
Cut two pieces of string, 12” long. Thread the strings through the number/letter on the right end of the Stencil Chip band, tie a bow. Add a Heart Adornment to a Loop Pin, then add the Loop Pin to the knot in the bow. Trim ends of string.
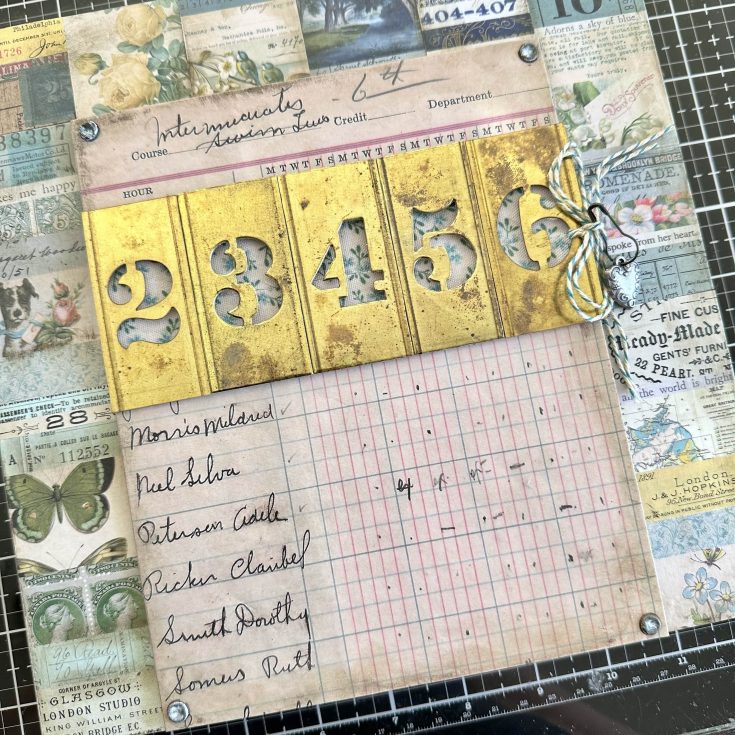
Peel the protective paper off the foam squares/foam tape and add Stencil Chip band to the chipboard, over the Linen Tape. Set aside.
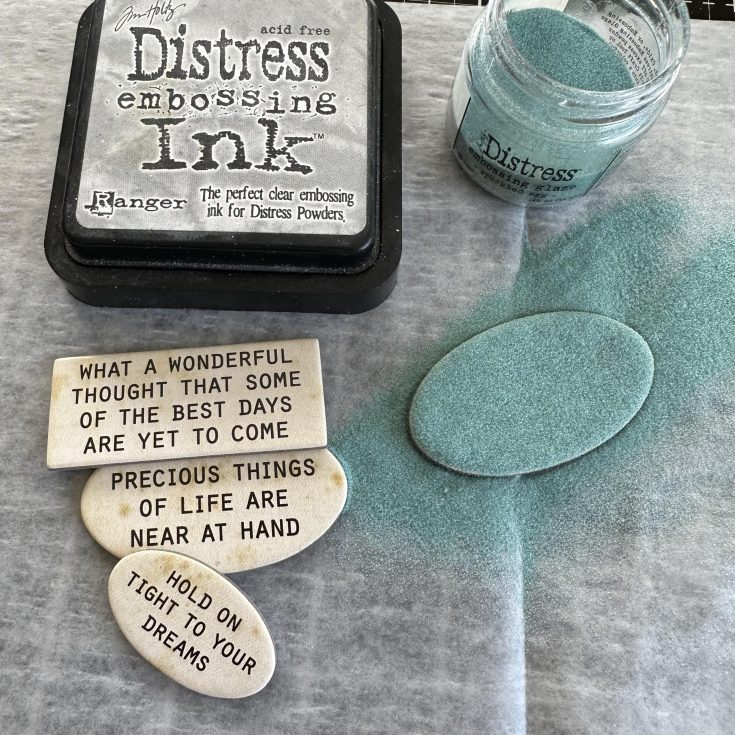
Press Distress Embossing Ink over one of the Label Quote Chips. Pour Speckled Egg Distress Embossing Glaze over the top. Tap off excess and return to the jar.
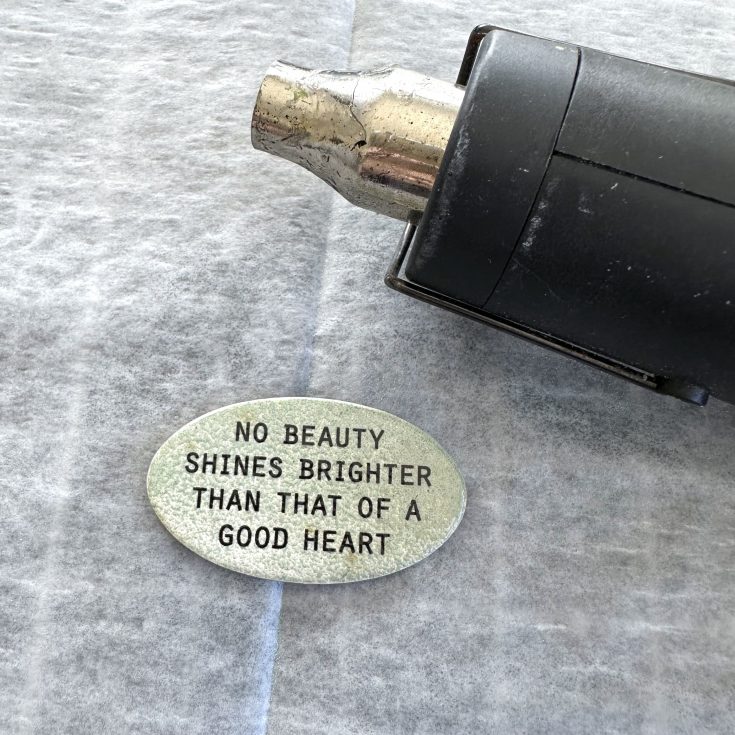
Heat Speckled Egg Embossing Glaze with an embossing gun till glaze is melted. You must watch it closely, as Embossing Glaze is very quick to melt…you do not want to over-melt the glaze or it will loose it’s texture.
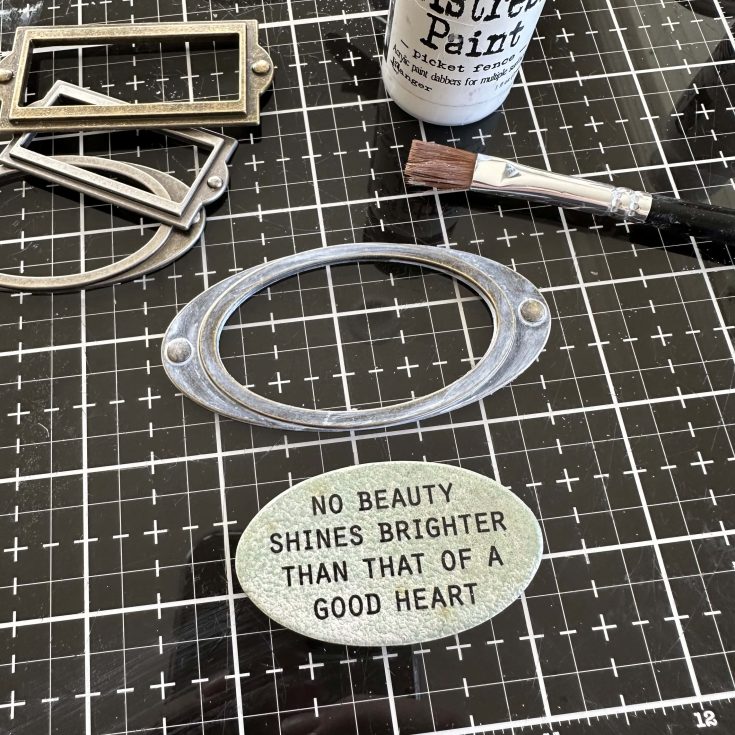
Add a bit of Picket Fence Distress Paint to a Label Frame. Wipe away excess paint with your hands or a brush so you can still see the metal underneath. Once the paint is dry, add Quote Chip to the center of the frame, then add to the Display Panel with foam squares. TIP: I only added foam squares on the top half of the framed quote, since the bottom half will sit directly on the raised Stencil Chips.
NOTE: Label Frames match up with all the different sizes/shapes of the Label Quote Chips.
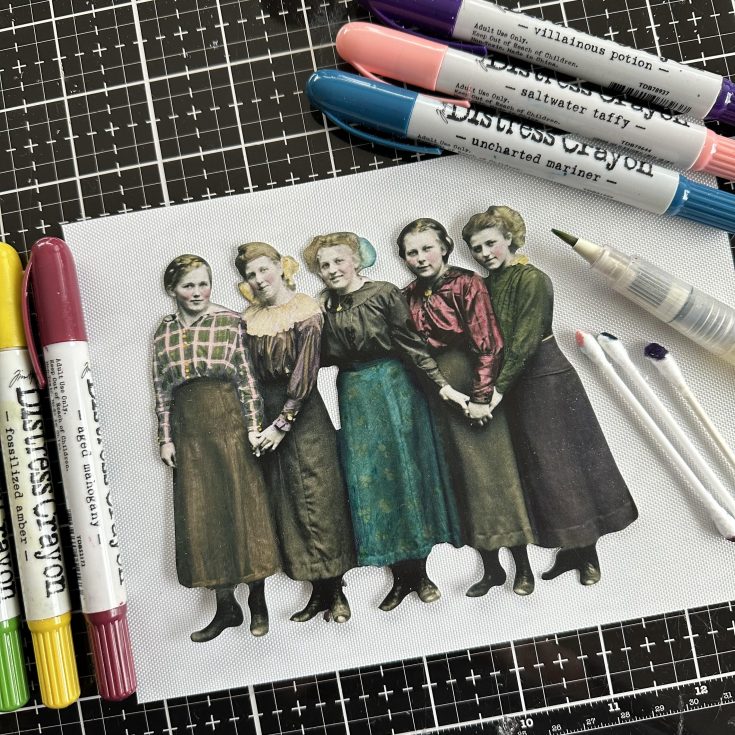
Choose an image from the Paper Doll Groups pack. The images are larger and very easy to color/tint with Distress Crayons. I started with the new Distress Crayon Pack #14 that comes with Saltwater Taffy, Uncharted Mariner, and Villainous Potion. Then added a bit of Aged Mahogany, Fossilized Amber and Mowed Lawn. There are a couple of ways I like to color/tint the Paper Dolls:
- For a large area (like a skirt or blouse) color directly on the Paper Doll with the crayon, then rub color with cotton swab moving it to the edges. This works best when the crayons are creamy like my new #14 set.
- For smaller areas (like coloring plaid, hair bows, jewelry, etc), I scribble the crayon on a craft sheet, then pick it up with a damp Detailer Water Brush. The stiff bristles of the water brush easily pick up the crayon and transfer it to the image. For instance, the plaid shirt on the left – I colored the shirt directly with Saltwater Taffy and smoothed out with a cotton swab. Then went back with a Detailer Water Brush and Mowed Lawn Crayon to add in the green spots to make the plaid. I also picked up Fossilized Amber on the Detailer Brush to add color for the buttons on her shirt.
Use foam squares to add Paper Dolls to the panel. You will need single foam squares at the top and double stacks at the bottom portion since the Paper Dolls cross over two levels.
SUPPLIES:
|


Thanks so much for stopping by, and thanks to Paula for being our guest!


Really Beautiful!!!
Tetszik a bejegyzése, miután elolvastam a bejegyzését, és ráakadtam erre a webhelyre: https://kaszinoworld.com/ ahol számos online kaszinó oldalt láthatok, ahol online kaszinójátékokat játszhatok és valódi pénzt kereshetek.
This is so cool
so beautiful