Doodling with Debby: Simple Heat Embossing For An Easy Masculine Mixed Media Card
Hi friends! Happy Thursday! Please join me in welcoming back the amazingly talented and inspiring Debby Hughes! Keep reading, and be sure to watch the video for all the details! Enjoy!
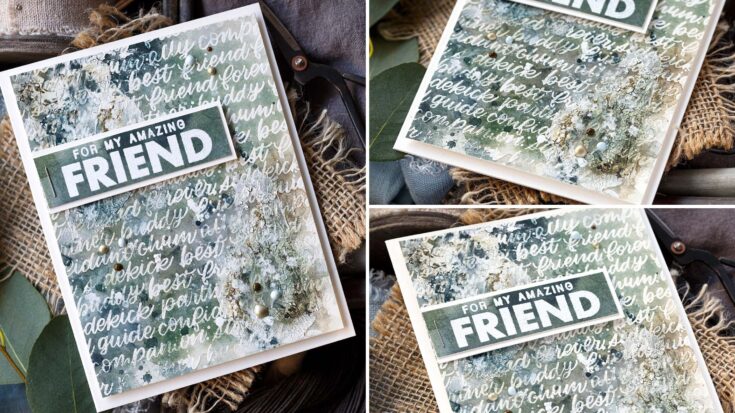
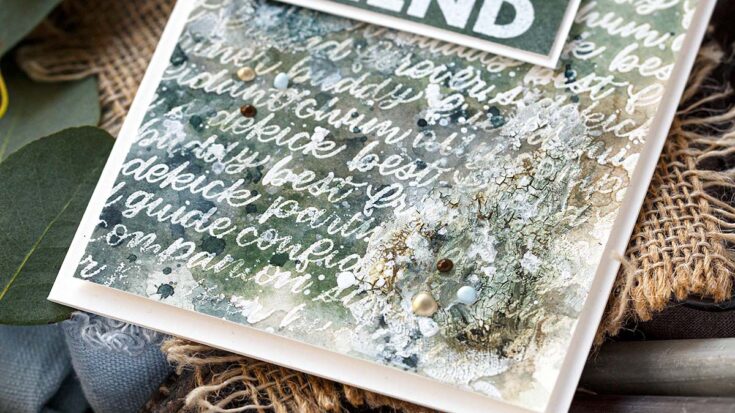
Hello, it’s Debby here with my Doodling With Debby series. I seem to be in a mixed media phase at the moment and the simple heat embossing on this card made for an easy masculine mixed media card full of interest and texture.
Heat embossing is one of my go-to techniques when working with watercolours. It is magic the first time you see the slick surface repel the water sending it pooling around the base of the image. In addition, heat embossing provides an excellent background as a starting point for a mixed media card.
Step by Step How-to:
- On a piece of Arches Hot Pressed watercolour card, pre-treated with anti-static powder, stamp the Handlettered Friends set in Versamark ink.
- Sprinkle with white embossing powder and heat set.
- Tape the card to a board with Painter’s Tape.
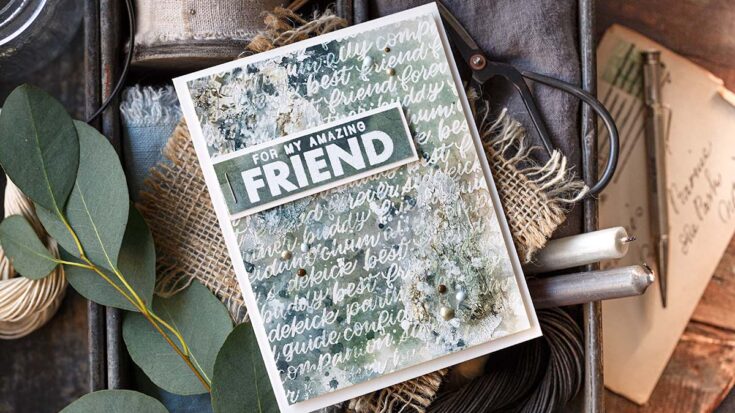
- Use your favourite water media, be it watercolours or Distress Ink and lightly wash over the heat embossing. The slick surface resists the paint mixture. However, it helps to keep the lettering clear if, once dry, you wipe the letters with a bit of water and a cloth.
- Keep layering the paint over the heat embossed background.
- Add in white gouache for a hazy, opaque look in places.
- Splatter with white gouache, left-over paint and plain clear water. Let the puddles mix and blend until dry.
- Splatter some more – you can never have too much splatter!
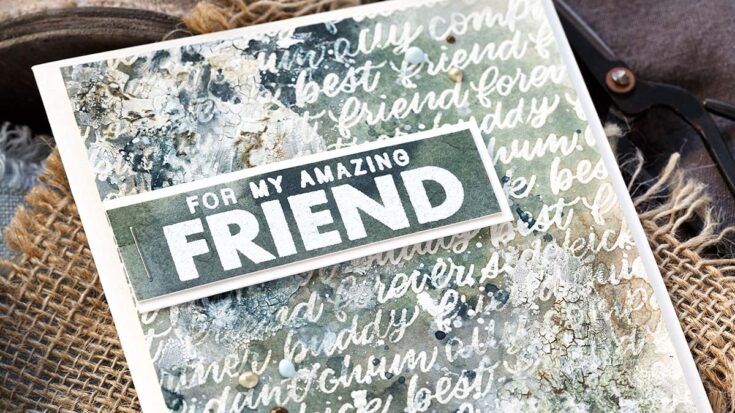
- Trim the piece to fit on an A2 card base.
- Apply Distress Crackle Paste with a spatula and scrape around over the heat embossing.
- Leave to dry, or if time is short, dry with a heat tool.
- Scrape off some of the crackle paste for a more distressed look.
- Rub Crooked Broomstick and Walnut Stain Distress Crayons into the cracks of the paste. Rub with a finger to spread the crayon around, blend in with water and dab off any excess.
- Add more layers of paint to help the crackle blend into the design.
- On a piece of watercoloured card treated with anti-static powder, stamp a sentiment from the Friend Greetings set in Versamark ink and heat emboss with white embossing powder.
- Trim the greeting out with a craft knife, clear metal-edged ruler and a craft mat. Adhere the greeting to Ivory card and trim to leave a skinny border on three sides.
- Staple the sentiment to the background and add foam adhesive under the far end to slightly raise the greeting off the panel.
- Adhere the panel with more foam adhesive to a card base cut and scored from Ivory card.
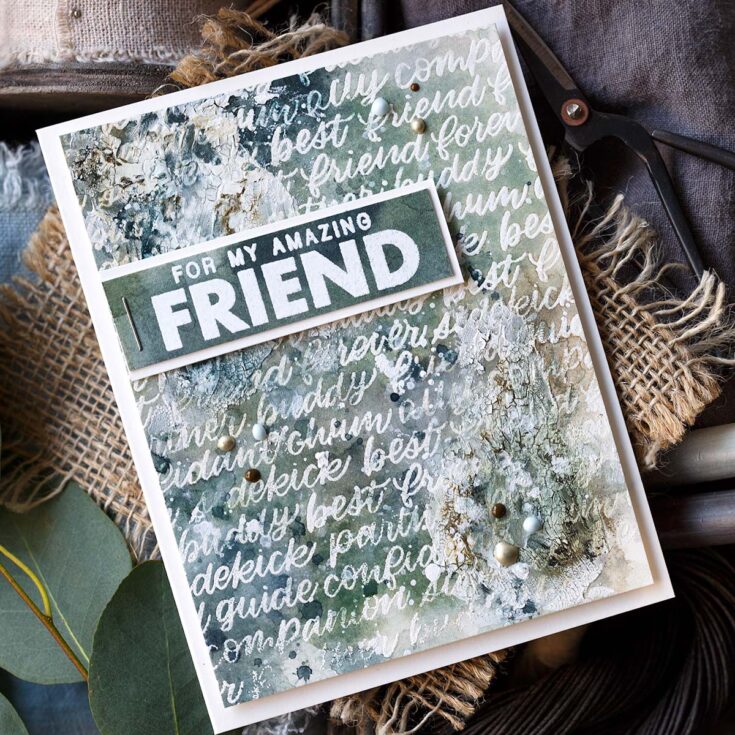
- Add a triangle of Nuvo Crystal Drops around the greeting using Duck Egg Blue, Dark Walnut and Pale Gold droplets.
Well, that’s me for this month. I hope you enjoyed this tutorial; you’ll find the video below. Thanks for joining me, and I hope to see you next time for Doodling With Debby.
WATCH THE VIDEO:
SUPPLIES:
|


Thanks so much for stopping by, and thanks to Debby for being our guest!


This card is beautiful! Thank you for the detailed description and video on how you put it together.
Amazing card design for the men in our lives!!! TFS
Looks very cute.
This is really cool