Doodling with Debby: Blended Distress Oxide Background
Hi friends! Happy Wednesday! Thanks so much for stopping by the blog today and thanks to the always inspiring Debby Hughes for being our guest in the latest edition of Doodling with Debby, a monthly blog series on our blog! Read on, watch the video, and enjoy!

Hi, it’s Debby here and today for my Doodling With Debby feature for Simon Says Stamp I’m being inspired by the fabulous Kristina Werner and her Distress Oxide

I started with the three
I use baby wipes to clean my glass mat of excess ink and prevent it from being blended into the wrong section, and I also use baby wipes to clean my brush when moving from darker to lighter colours. I rub the brush head over a baby wipe several times and then rub it over a dry tissue to remove any moisture and then I’m set to go again. If I’d left the remains of the black soot on the brush as I worked more Evergreen Bough into the transition then the Black Soot would likely have overpowered the Evergreen Bough but with the clean brush I was able to apply more of the Evergreen Bough to blend the transition and even the colour out as I wanted it to be. I repeated the cleaning process to remove the Evergreen Bough ink before turning to the Old Paper ink to work the colours over those transition areas. And once I’d finished giving a good coating of the Old Paper to the top of the panel, I was happy with the overall blending of colours from one to another.
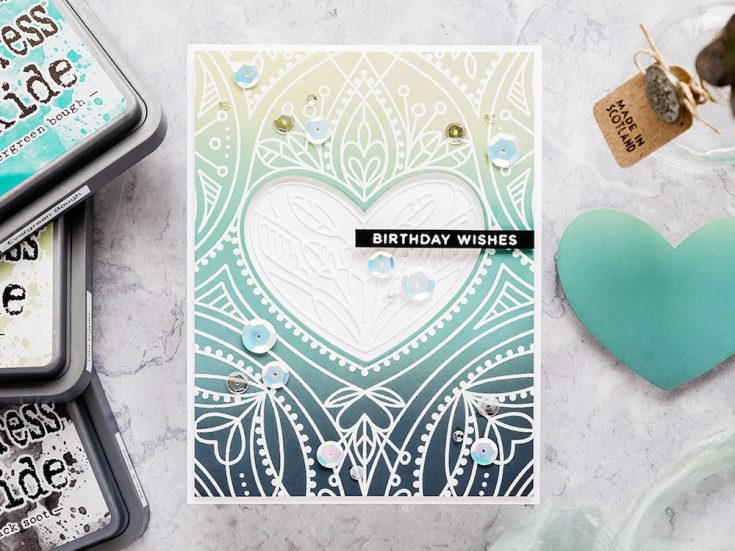
I planned on using the Center Cut Heart background stamp from Simon Says Stamp, and white heat embossing the design over the ink blended background. Having lined up the stamp on the panel in the Misti, I then made sure the panel was fully dry before stamping. The moisture from the Distress Oxides could easily cause embossing powder to stick everywhere, and so I dried the panel thoroughly with a heat tool before treating it with an anti-static powder bag. This will again help prevent embossing powder randomly sticking everywhere. I stamped the image in clear embossing ink from Simon Says Stamp; this is a clear sticky ink that the embossing powder will easily stick to. I made sure to press down firmly over the whole of the image to get a good impression. Having said that I didn’t actually use the whole of the image. The Center Cut Heart background stamp has a central heart area which can be removed, and I chose to stamp the image without the center heart as I have plans to die cut this area afterward. Having stamped the image, I sprinkled white embossing powder from Simon Says Stamp over the sticky ink and then heat set it with a pre-heated heat tool. I let the embossing powder cool and then trimmed the panel to be just slightly smaller than an A2 card base.
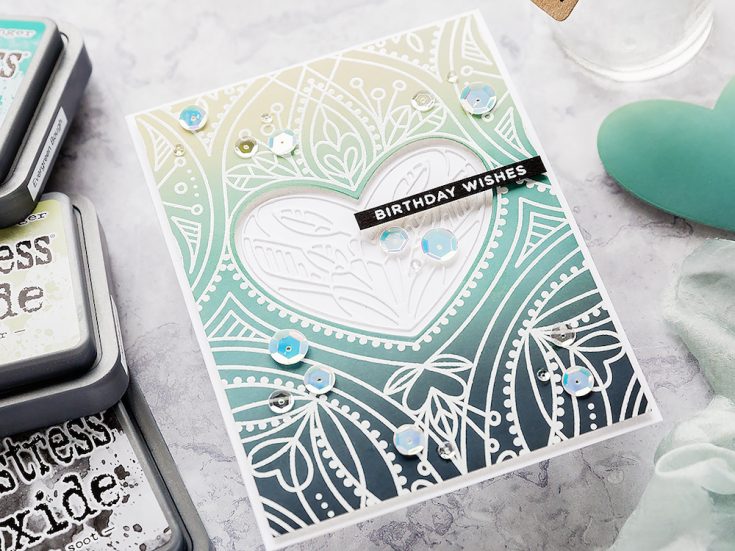
Now, let’s return to that center heart area. A recently released Deco Heart die coordinates with this stamp set. There are two dies in the set one which will cut out just the heart area and one which will cut out a matching decorative pattern. You could cut the pattern from the open area of the stamped design. However, I chose to cut the whole area out with one die and then die cut the decorative die from white card to add to the middle of the heart window. I added foam adhesive to the back of the ink-blended panel and mounted it onto a white A2 card cut and scored from Neenah Solar White card in the 110lb weight. I added little dots of Gina K Connect glue over the back of the decorative die cut and then dabbed any excess glue off on a scrap piece of card before adding it in the heart window. I love how on the white card base the white decorative die cut adds a lovely tone on tone detail and elegance.
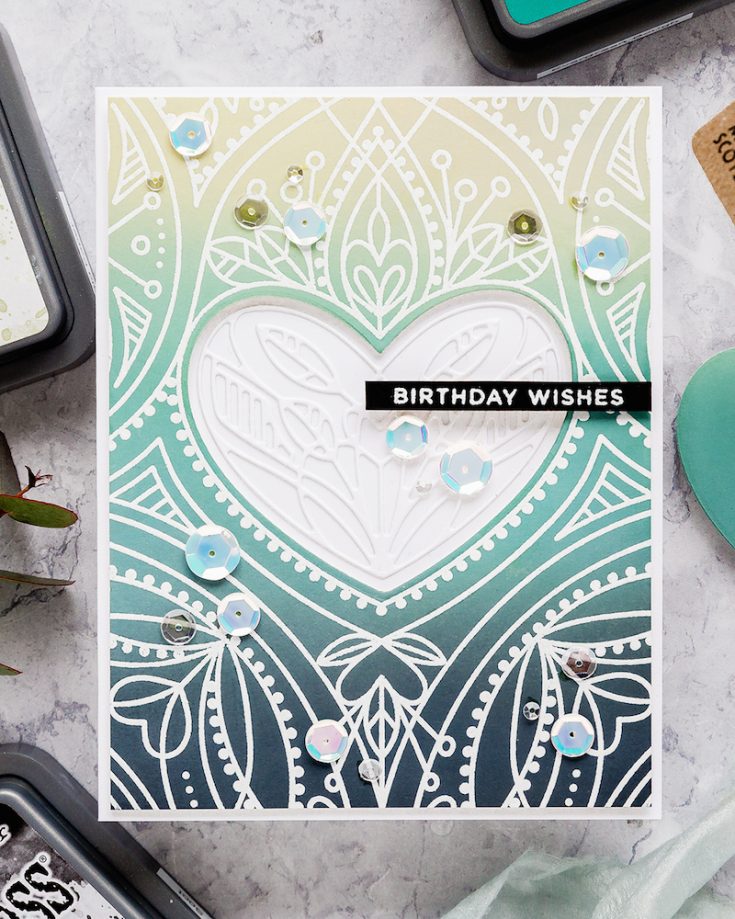
I am still in love with simple skinny strips for a sentiment banner, and so I chose the Simple Sentiments 02 set from CZ Design and Simon Says Stamp for the greeting. I often like to use a dark grey card for a sentiment strip, but with the Black Soot Distress Oxide ink in this blend, I felt that a black sentiment strip would work better. I treated a piece of Black card with an anti-static powder bag and then stamped the Birthday Wishes greeting in clear embossing ink before sprinkling with white embossing powder and heat setting. I trimmed the sentiment to a skinny banner with a scalpel and ruler and then added foam adhesive to the back and used a T-square ruler to ensure I added it on straight to the card.
I can’t finish a card without a little sparkle, and so I chose some opalescent sequins from the Butterfly Kisses sequin pack and a few clear sequins from the Girl’s Best Friend pack both from Simon Says Stamp and kept them in place with Gina K Connect Glue.Thanks for joining me today, and I’ll see you next time for Doodling With Debby.
Watch below or in HD on Youtube.
SUPPLIES
|


Thanks so much for stopping by, and thanks to Debby for being our guest!

Blog Candy Alert!! Follow our blog via email and comment on this post for a chance to win special blog candy!


Thanks for even more inspiration using Kristina’s beautiful ink blended ideas. This combo is so rich yet soft. Perfectly executed in your beautiful style!
This is a beautiful card Debby, love the colours of the blending so pretty!
Thanks for the video! I just loved watching the ink blending technique. Your card is stunning. And I also learned that the die coordinates with the stamp set. Which I am soooo excited about. How cool is that! The card is stunning and how I want both the die and the stamp.
LOOKS SO INTRIQUENT
JUST LOVELY
I love the colors in your ombre. That black really is a cool mist with those other two colors. I’m definitely going to be trying this blen out! I love the embossing on top… Beautiful and elegant card!
This is such an elegant card Debby. A great choice of background stamp with this colour combo. I think Kristina has us all enthralled with this series…. Your card is a real beauty!
Very lovely – I quite like the unusual blended colours too – it adds subtle drama!
That is a beautiful card and beautiful coloring!
So gorgeous!
What a beautiful color combination!! I love the blending and thanks for the baby wipe tips!!!
GORGE-JUSS!!!!! The white embossing is the key to this amazing card. WOW
What a beautifully intricate looking card! The Distress Ink colors are stunning. The white really pops.
What a great card – really, really lovely :-)
Absolutely stunning!
Card is stunning! Beautiful color blending. Didn’t realize the Deco Heart coordinates with that stamp. AWESOME! Added those 2 to my wish list. Thanks for the video and sharing your inspiration.
Beautiful oxide ink color combination! I especially like the white embossing detail also!
Beautiful card Debbie. Very elegant. I also have been watching Kristina Warner Blend combo. and find it very helpful.
Stunning background and I love the white embossing!
What a beautiful card. I have got to try Distress Oxide blending on my cards.
HOW GORGEOUS, Debby!!! ;)
Love the shading on the card.
Very elegant. thanks for sharing
txxmlhl(at)yahoo(dot)com
So beautiful! The colors are perfect and the overall card reflects that. I keep saying I need this set…
Such a beautiful card! Love the color blending for your background.
Thanks so much for sharing…
I have been trying my hand at ink blending more, but I don’t know if I have the wrong blending tool or the wrong paper as it just doesn’t seem to blend well. Your post today is helpful for me to find the right products, tfs!
Beautiful card! Thanks for the tutorial. I have the stamp but will need to purchase the coordinating dies.
I love the colors you used to blend on the card. Beautiful choice.
This card is absolutely beautiful!!!
Gorgeous card Debby!! This is my favorite blend of Kristina’s so far!!
Such a beautiful card Debby!!
Beautiful and so stylish!
Your card is so lovely. I have seen Kristina’s series and found it to be intriguing. You did very well and I think these colors are perfect together.
Lovely card. The ink blending looks so velvety! And the card is beautiful and elegant.
It really is a beautiful color combination!
The color combo in your card is stunning! I love it! TFS
I absolutely love this color combo, as well as the stamp and heart die. They remind me of a tattoo I have, believe it or not. ;) Guess I had better add these lovelies to my wish list then! Wonderful card!
what an elegant card. thanks for the inspiration
You had me at the color blending but all those beautiful heart images and embossing makes this outstanding!
Stunningly beautiful card!
Beautiful card Debby, love the ink blending and the intricate heart die is gorgeous!
Lovely! The blending of those colors is stunning! Love the CENTER CUT HEART with the cutout. So beautiful!
Wow, Debbie – this card is gorgeous – LOVE your ink blending technique tutorial!!
Beautiful ink blending and love the embossed background!
FABULOUS! Im so going to give these colors a try! Love this so much!
An absolutely gorgeous card! So nice to show that a heart can be more than just Valentine’s Day!
This is very elegant looking.
Beautiful details and colors! love the stamp!
What a gorgeous card! I love this ink blending. :)
Beautiful card. Those brushes look really neat to work with.
What a beautiful background!
Beautiful card! Love the color combo! And why did I not realize that die went with that stamp? Thanks for sharing your card!