DIY Decor featuring Prima
Hi readers! Thanks for popping by today! We’re pleased to welcome back Prima queen and super designer Sharon Laakkonen as a guest on our store blog! She has another kiddo with wedding bells in his future and was inspired by the happy occasion to create this piece of art! Read on and enjoy!

My family is crazy big…which means we always have a lot going on! This year is no exception. My oldest son, Billy, is getting married in June to his sweetheart, Bethany! Our whole family has been busy crafting away for it.
Today’s DIY wedding project is by far one of my favorites yet…because it is FAST and EASY to create! And you can customize it to fit any color scheme or theme. (I might just make another one for my home!) Let’s jump right in!
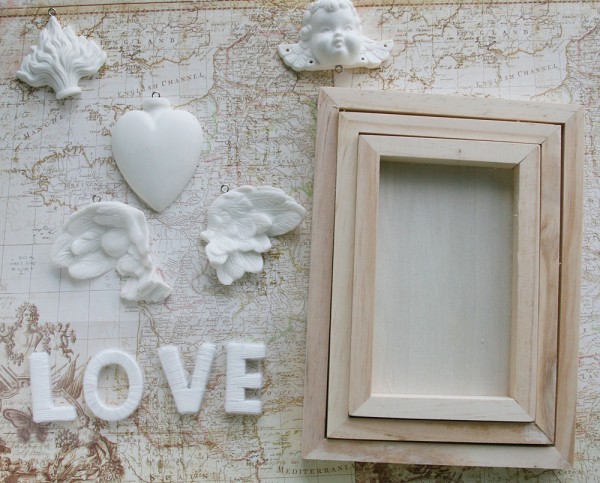
1. Start with Prima’s new line: Relics & Artifacts. These gorgeous cast pieces are ready for anything you want to throw at them, but you know what? They are absolutely beautiful unaltered too! I chose a few I thought would fit a “love” theme and grabbed the new wood frames to go with them. Then I started to play!
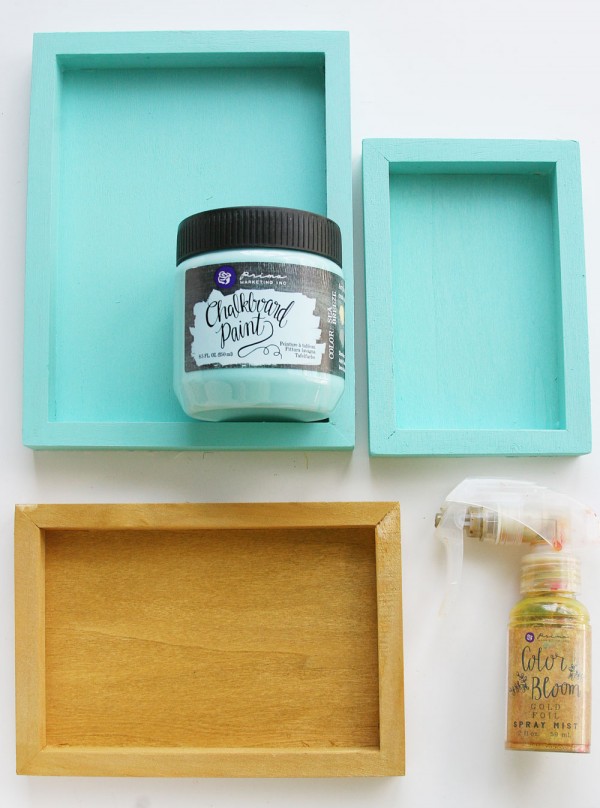
2. Once I narrowed down my Relics & Artifacts choices I grabbed Chalkboard Paint that matched their wedding colors…along with a Color Bloom spray in Gold Foil. I painted two frames with Sea Breeze paint, then sprayed the middle frame sparkling, brilliant GOLD! (I’m obviously smitten with Gold Foil as you can see by the heavily used bottle!) Dry all frames. (I only used one coat of paint on the frames as the chalkboard paint is quite thick.)
3. Now comes the FUN part! I chose a few Prima embellies that matched everything beautifully:
-
one pack of Isabella Roses (Nicia-581688)
-
Memory Hardware Glass Pearls (just pick out the gold ones! 990398)
-
a Bloom Girl Thread Word (LOVE-980474)
-
and the luxurious Memory Hardware Grande Rosette Trim (990466)
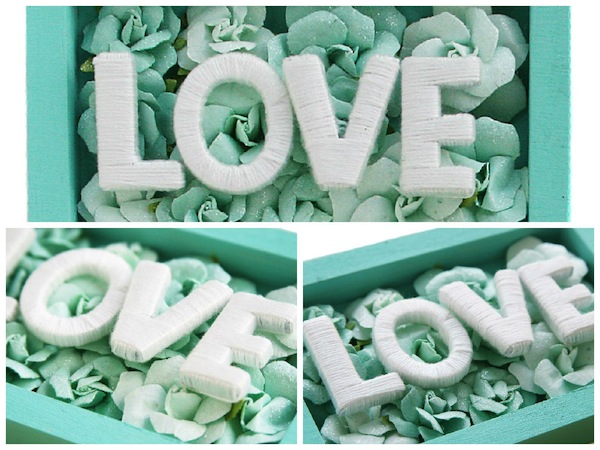
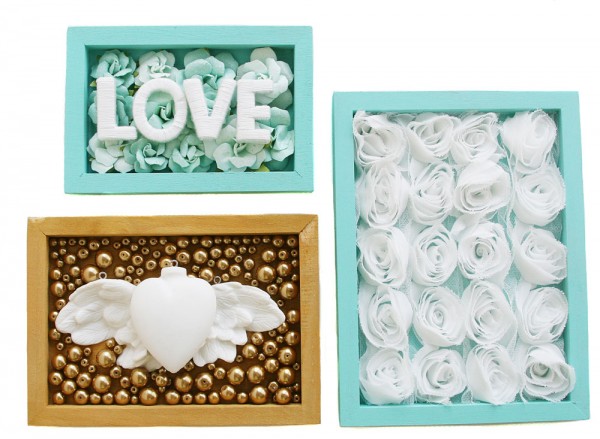
4. Add roses to smallest tray. Set letters on top. If letters do not rest evenly move flowers around. Adhere everything with hot glue.
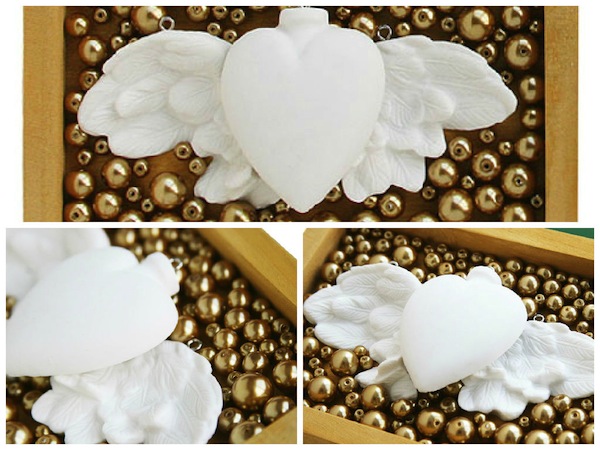
5. Add a thick layer of gel medium to the inside bottom of the tray. Set the wings on the gel. Brush gel medium on back of heart and set on top of the wings. Pour gold glass pearls in! (Save a handful of to fill in any spots left open.)
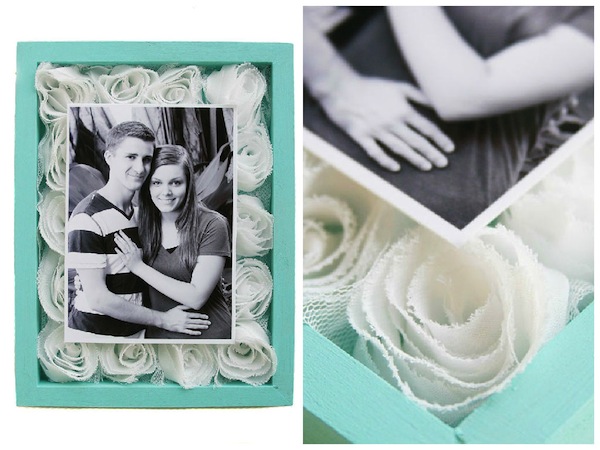
6. Cut four pieces of Rosette trim. (Each one will be 5 rosettes long.) Adhere to large tray. Print out a photo (3.5 x 5″) and adhere gently to top of trim.
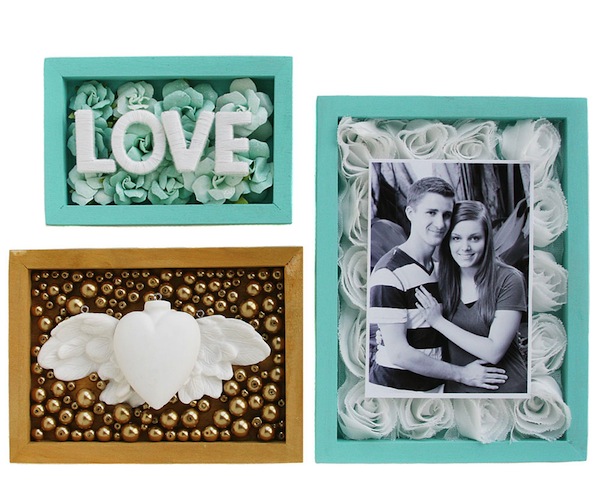
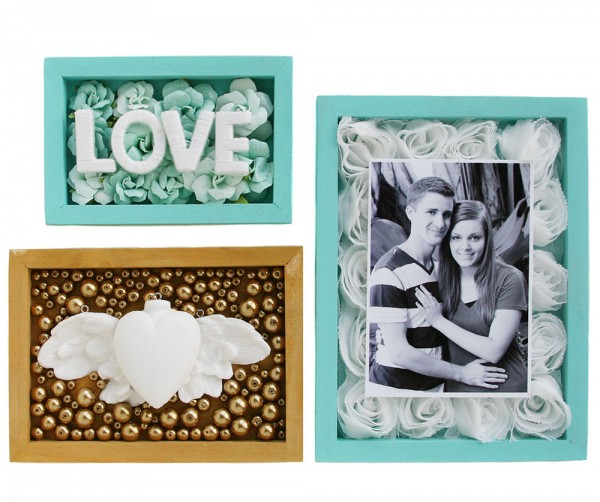
That’s it! It really is fast once you get going! And you can customize the frames with your favorite Prima embellies making this a really fun project! Just think of the possibilities: hang them to make a mini gallery wall, set on easels for a cute entry display, or give as a adorable wedding favors!

Thank you, SSS, for inviting me to create for you! It is always a huge pleasure!!! ~Sharon Laakkonen
SUPPLIES:
 |
 |
 |
 |
 |
 |
 |
 |
 |
 |

Blog Candy Alert!! Follow our blog via email and comment on this post for a chance to win a special blog candy!


Nice framed creations. Pretty wedding decor.
Melissa
“Sunshine HoneyBee”
Lovely frames
stamping sue
http://stampingsueinconnecticut.blogspot.com/
These are beautiful.
beautiful!! Gorgeous picture in black and white
Very pretty!
Love the flowers insides the frames. Give me an idea for a card with items from my stash. Thanks for the inspiration.
love the minty frame, congrats to your son getting married, he seems a bit young though? or is that just a good picture? then I want that photographer..lol…happy day!
Gorgeous project! A very beautiful picture too!
What beautiful wedding keepsakes.
Great projects! ;-)
such beautiful projects! congratulations to the happy couple! :)
Wow, these are super easy and look like they are high-end. Thanks for the inspiration!
Congratulations, as well!
lovely decor!! the golden one is just awesome!! thanks for sharing these ideas with us Sharon
Love these beautiful wedding projects, thanks for the tutorial! My favorite is the framed photo with the organza roses – I have a bride friend who would love it, thanks for sharing.
What a happy occasion to craft! Congrats to the beautiful couple!!
Absolutely amazing!!
So beautiful!!
Awesome!! I LOVE these!! Such a NEAT Idea!! THANKS for sharing and have a Fabulous Weekend!! ;)
What a beautiful idea, I love it!
Wonderful inspirational creations. Love the colors and the different embellishments you used to create these frames:)
Thanks for sharing your amazing talent with us! Your projects are gorgeous!
That is such a cute idea.
Gorgeous frames ! I love these :-)
Good Luck to your son and his fianceé :-)
luv
Lols x x x
Wow gorgeous and romantic wedding projects!! LOVE!! Thanks for sharing with us!
Love these breathtakingly beautiful projects. Such creative and pretty ideas!!!
Love the colors…very pretty!
These are lovely projects for a very special occasion. Thanks for sharing with us.
I love the roses frame. Too cute.
Love your work.
Such beautiful projects, love them!! Congratulations to the sweet couple!
Sharon, These are simply perfection!!!
These pieces are gorgeous! Love the picture on the Rosette trim.
Gorgeous projects! Thanks for sharing with us, Sharon.
Beautiful projects. And congrats
Great projects for wedding décor. It’s fun in the preparation for a wedding to have some hand made creations.
Beautiful projects!!!
Beautiful, and very inspiring. Michelle t
So beautiful! Congratulations to the couple!
Beautiful pieces! Love those frames!
Sharon, thanks for sharing these beautiful wedding projects! My son gets married on May 30th to the love of his life and I was looking for a special project. Thanks for the inspiration!
I love it
Gorgeous colours and i love the matt finish. Hugz
Lovely projects.
Especially love the “love” frame!
Congrats! And adorable design.
Sharon, I loved your projects and congratulations on your son’s upcoming marriage!! Am so happy you shared your loving inspiration with us today!!!
Ohhh these are gorgeous!
Thanks for sharing. Primal makes some pretty flowers
Very pretty! And congratulations to your son.
Lovely wedding, love, projects for a very nice couple soon to be.