Dip Dye Technique
Hi readers! Happy Thursday to you! I’m pleased to welcome back guest designer Jocelyn Olson to our blog for a fun technique and a spotlight on Paper Smooches stamps and dies! Doesn’t this dip dye technique have a pretty effect? Read on for more details!

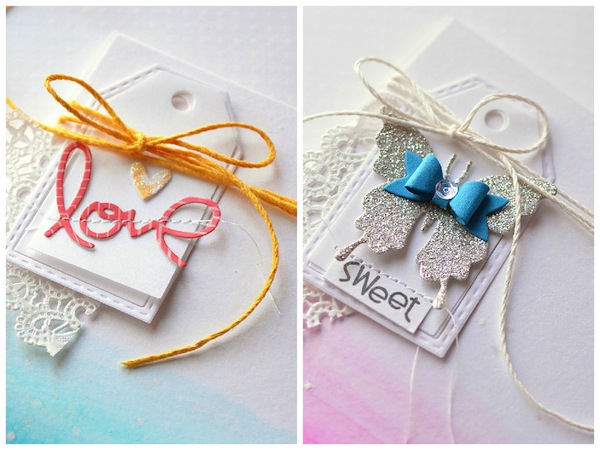
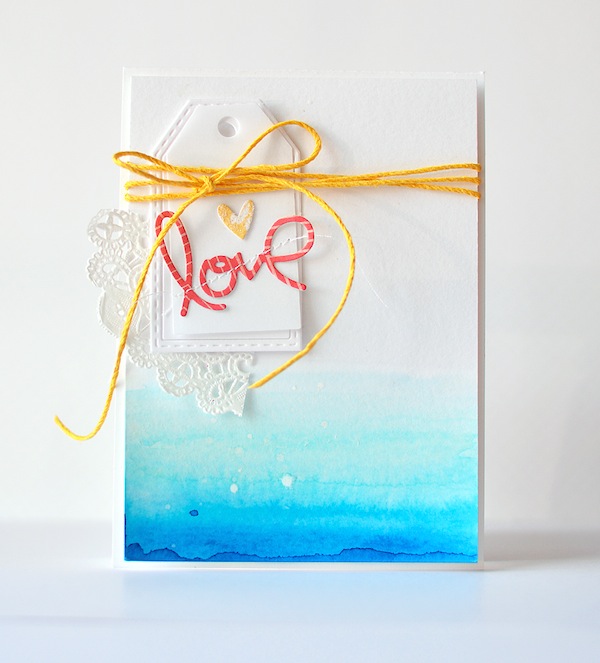
Recently, I’ve seen some cards and tags with dip-dyed bottoms, like these examples on my Pinterest Design Inspiration page. I love this trend, and using some Paper Smooches stamps and dies, I went about trying to recreate the dip-dyed look:
I’ve got a step-by-step tutorial to achieve this look.
-
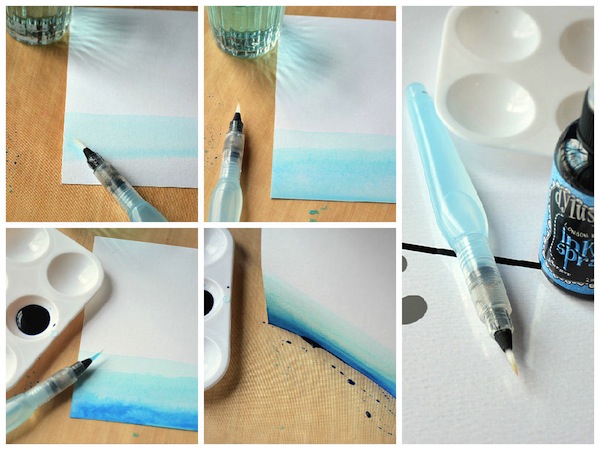
First, gather your supplies….a waterbrush, watercolor paper, a craft mat, and watercolor medium. I wanted an intense look, so I used spray mists. Dye reinkers (watered down) would work, too. When I tried watercolors, they worked, but the results were more muted.
-
The next step is to brush water onto the bottom half of the watercolor paper. While the paper is wet, dip the brush into the spray mist and then dip the brush in water. When most of the ink is removed, brush it onto the paper.
-
Next, water down the ink (a lot). When the lightest layer is still wet, brush on the next layer. I found the trick was to work quickly while the layers are wet and keep blending the layers.
-
For the third layer, add a little water to the ink and brush onto the paper. Once these layers are on, allow the panel to dry (or heat emboss if you’re impatient like me). When the paper is dry, lightly brush over the layers to blend them.
-
The last step is to put the spray mist on your craft mat and drag the bottom of the card into the ink. Once the card was dry, I added some white splatter and layers.
I die-cut the Paper Smooches Gift Tags 2 die out of both vellum and cardstock. The border of the die is separate from the inside, so I added tape on the back to hold the layers together. Using the Paper Smooches Love and Cherish dies, I die-cut the “love” and stitched it. The Love and Cherish dies have a heart, and I added glitter a little glitter.
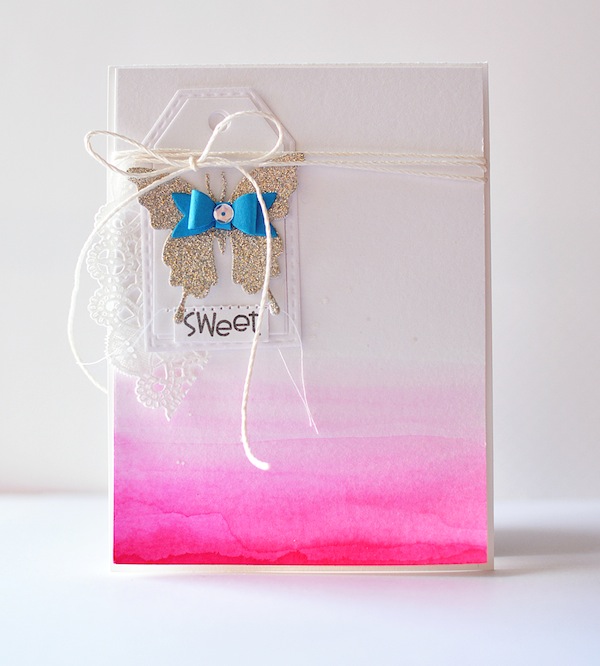
Using the same technique, I made a second card:
For this card, I used the same Tag 2 die, and then layered the new Paper Smooches Butterfly Duet die and the Baby Bow die. Isn’t that bow so cute? I finished the card with a sentiment from the Fruitastic set.
Thanks to Stephanie and Heidi for having me on the blog!


Joselyn, I love your both cards! May I lift them?! They a gorgeous!
Love anything water-color-y, and this is a particularly pretty effect. Thanks Jocelyn!
Very pretty. Certainly not something I would’ve thought of. Can’t wait to try it. Thanks for the inspiration.
These are just stunning!
Stunning technique! Thanks for sharing the tutorial.
Fabulous technique!!! Will have to try this soon
Cool technique !!!
Such a pretty technique.
Talk about a major WOW factor! These cards are STUNNING!! TY for sharing!!
Fabulous technique!! These cards are so beautiful!!Thanks
Loving the gradient look.
Cool projects and thanks for sharing the great technique!
Those look fabulous! I must try this technique!
Gorgeous idea and definitely one that a lot of people will try I bet!!
Love the dip dye effect and the overall design and colours! TFS
Very pretty technique. Love the cards, Jocelyn!
Such pretty cards. Each one is lovely. I follow the blog by email.
Very interesting
Such a pretty card. Never would have thought about doing if it that way. TFS
Pretty :-D
These are just stunning. I love the colours and the tags are beautiful.
Such beautiful cards!! I love that technique!! I am definitely going to have to try this one!!!
Wow! I’m definitely going to try this technique! Awesome cards!!
Lovely cards. Reinker is becoming so handy for many things besides reinking.
These are really pretty! Love the graduated colors.
Beautiful cards and awesome technique! Thank you so much for sharing this idea, I love the watercoloring effect and I’ll surelly try it!
Such a unique and creative look!
Thanks for sharing another great new technique! Us newbies really appreciate it! Love your glittery butterfly!
Very cool, thanks for the tips. Must try!
Awesome technique.
Yikes! ANOTHER technique – and a pretty, pretty one!! Cool cards!
Great technique. Thank you for sharing the tutorial.
Wow, what a beautiful watercolor technique! I love a gradient – Pinned this!
What a fun technique! Have not seen this before! Might have to try this for myself! Thank you for the inspiration!
Thanks for sharing! I will try it too!
These are beautiful, and what a fun new technique to try!
LOVE the Dip dye technique, so cool. Also will have to get that cute little bow die, thanks for sharing.
Love the dip dyed effect! Great tutorial :)
Gonna have to try that technique, love the results!
Never heard of this before but I love it. Makes beautiful cards. TFS
Very pretty effect! Both cards are gorgeous!
Very pretty. I just did something very similar yesterday to make a fire effect. Thanks for sharing, the cards are so lovely. =)
You make beautiful cards and the ombre effect on these ones make them so on trend right now. Thanks for inspiring us!
Very nice technique. It looks like it would really be fun to try. Thanks for sharing.
Liked this thechnique. Have to try it.
Thanks for sharing the technique. The cards are stunning!
Cool cards – I like just about anything watercolor these days!
Awesome technique!!! Definitely going to give it a try. Your cards turned out PERFECT!
Oh, these are just beautiful!!!
Love th new dipped dye techinique. Wtercolors are so much fun