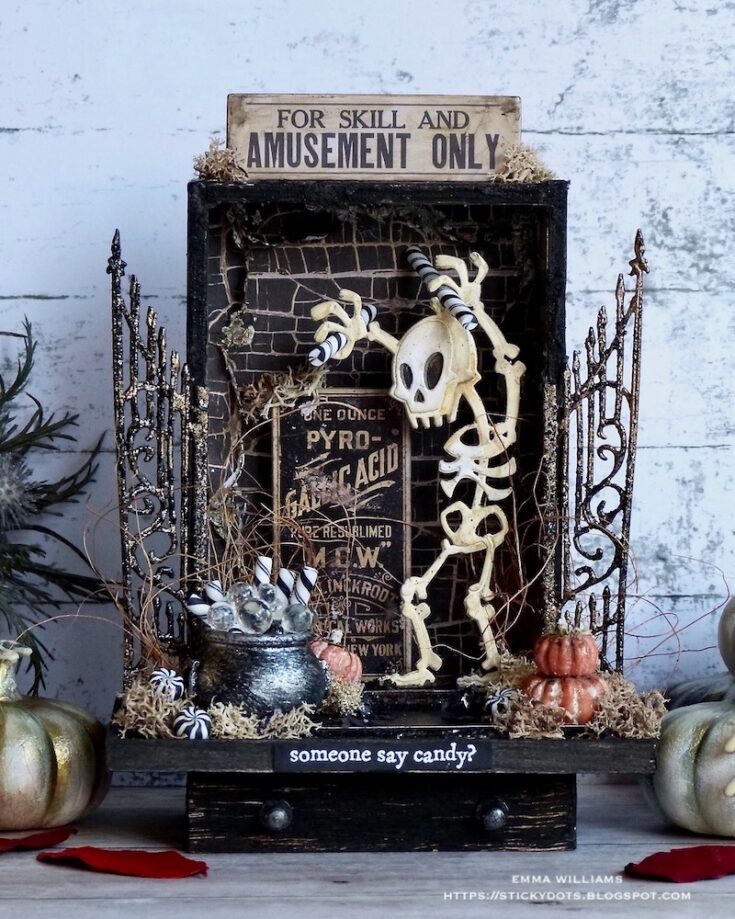
Did someone say candy? Halloween Vignette by Emma
Hi friends! Happy Sunday! As always, I’m delighted to welcome back special guest Emma Williams with this gorgeous mixed media vignette that is perfect for Halloween fans! Read on to learn more and enjoy!
Hello everyone! With Halloween just around the corner, I’ve created a fun home decor project that can be displayed in your home for the most spooktacular month of the year and I’m so happy to be able to share my make with you today, using some of the gorgeous new Halloween products from Tim Holtz and Sizzix.
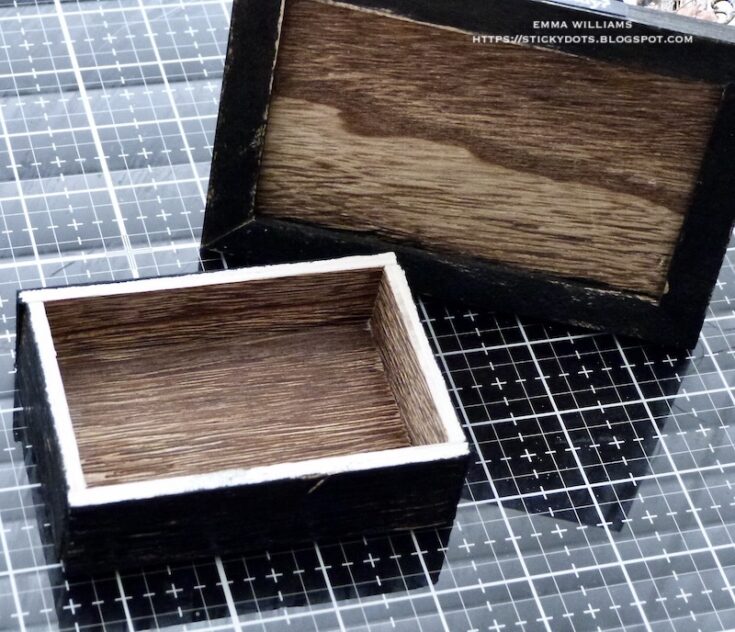
So, let’s get begin and to start this project you will need two Vignette Boxes, the largest and smallest size in the set of four, the second largest Vignette Panel and largest size of Vignette Frame.
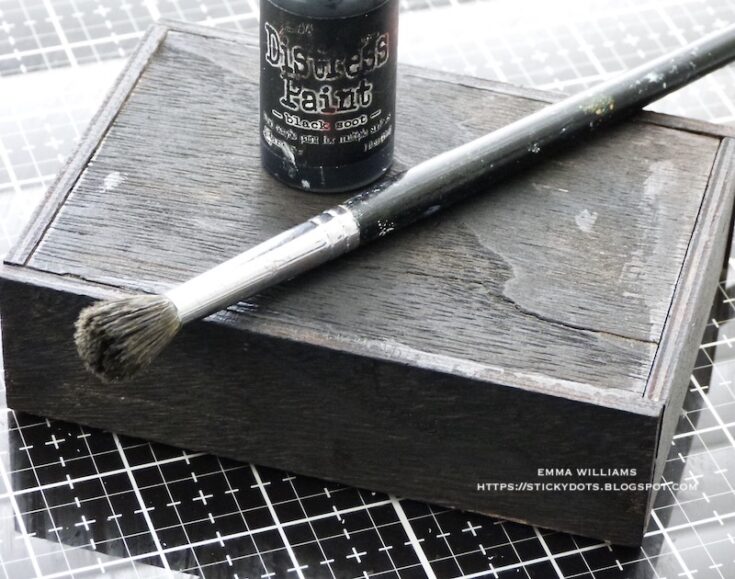
Starting with the larger sized Vignette Box, I painted the front facing edges and the outside of the box with Black Soot Distress Paint.
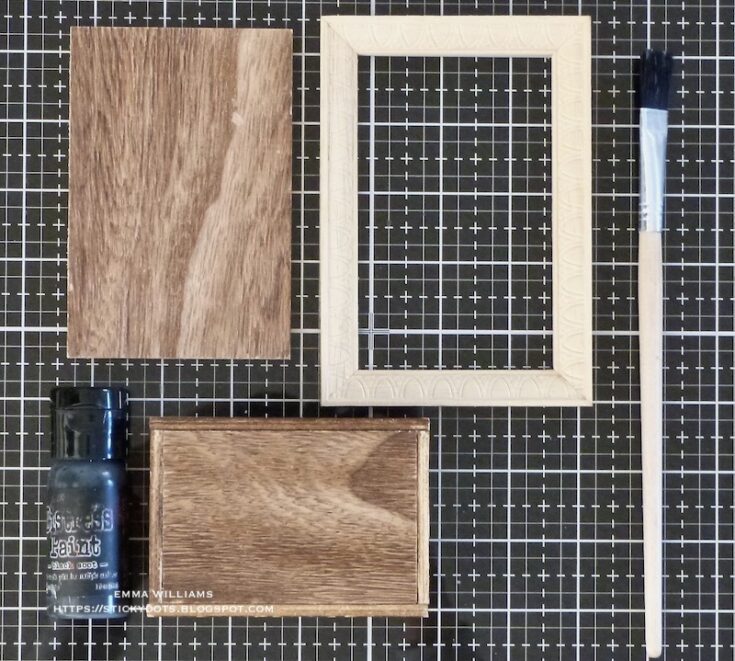
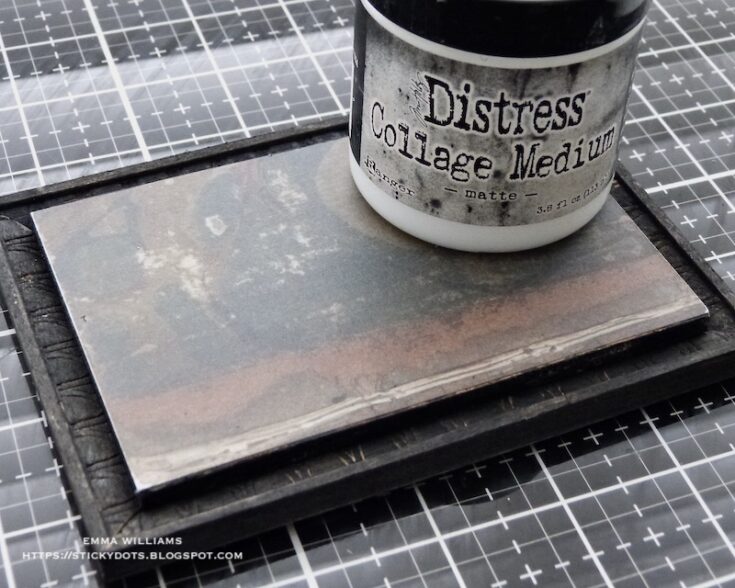
At this stage, I also painted the smaller sized Vignette Box, the sides of the Vignette Panel and the back and front of the Vignette Frame with the Black Soot Distress Paint.
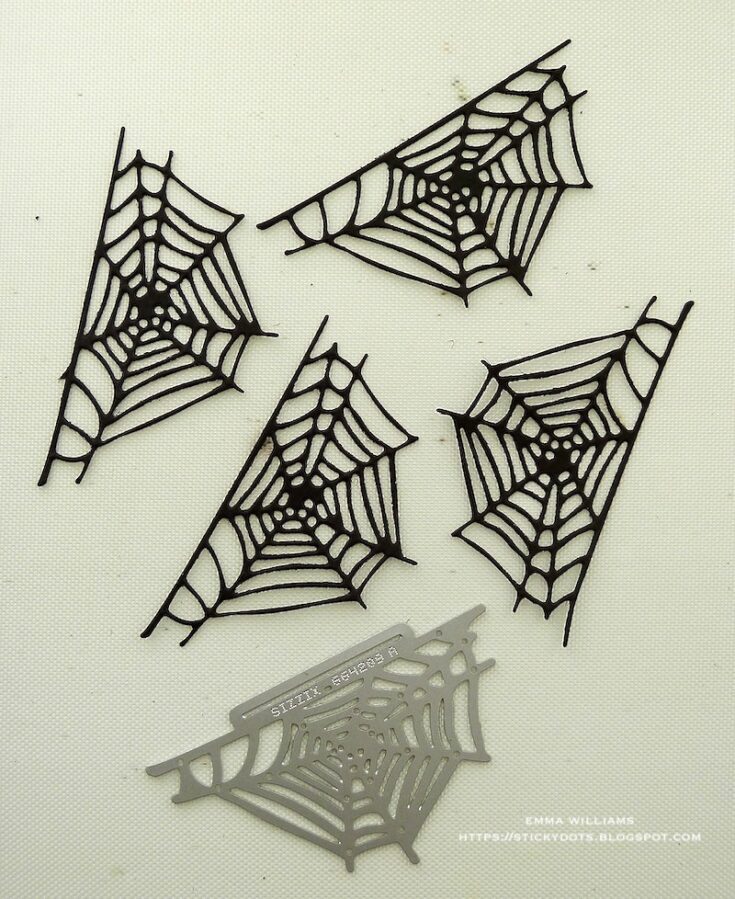
Whilst the paint is dry, I cut some spider webs from black card, using the web die from the Sizzix Frightful Things Thinlits Die Set by Tim Holtz.
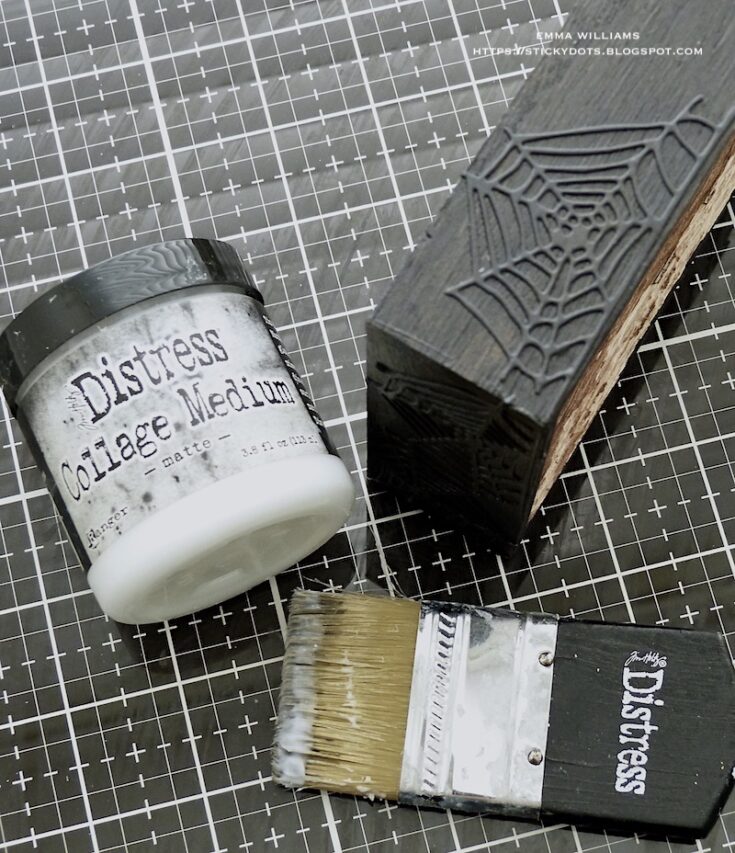
Using Matte Collage Medium I adhered the webs along the top of the large vignette box, and down each of the sides. Allow for the medium to dry before the next stage.
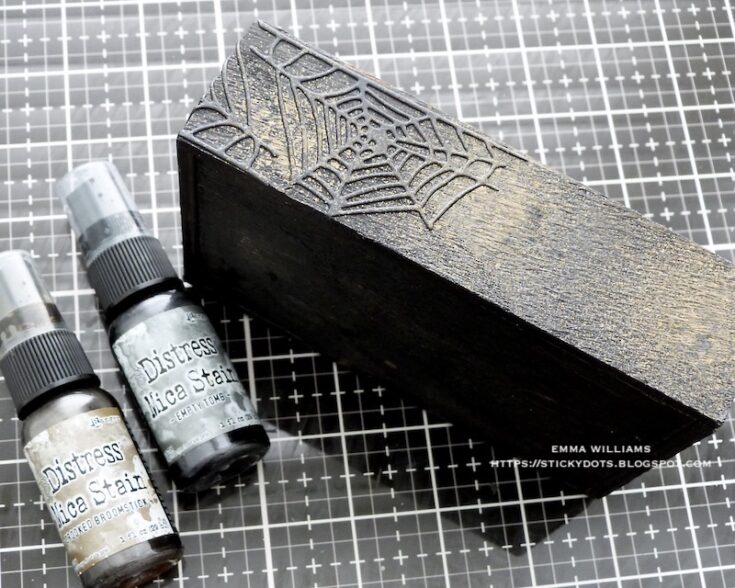
Apply a very gentle spritz of Crooked Broomsticks and Empty Tomb Mica Spray by Tim Holtz over the sides of the box and allow to dry. This unfortunately is a seasonal release and has now sold out…so, if you don’t have it in your collection, don’t worry ~ it’s not essential to the piece, it just creates a lovely shimmer!
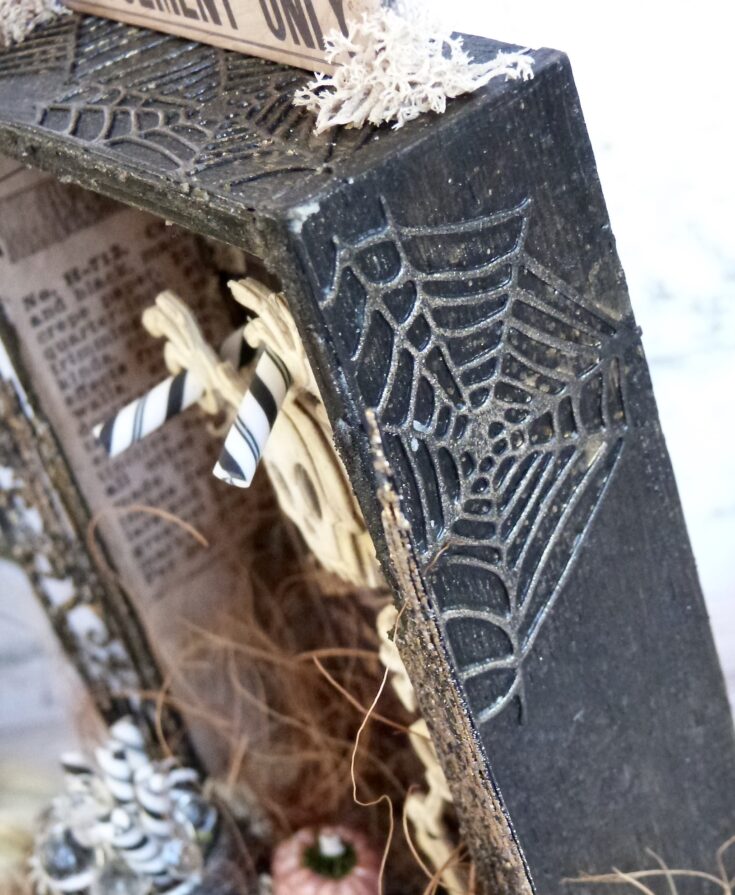
Once the mica spray is thoroughly dry, I applied a final touch of shimmer with my fingertips to accentuate the webs using Old Silver Gilding Wax by Prima Marketing.
Adhere paper from the Halloween Backdrops Paper Set to the Vignette Panel using Matte Collage Medium and then, attach the covered Vignette Panel to the frame, placing it to sit inside the recess. This creates the stand for your project. Allow to dry to ensure the two pieces are securely in place.
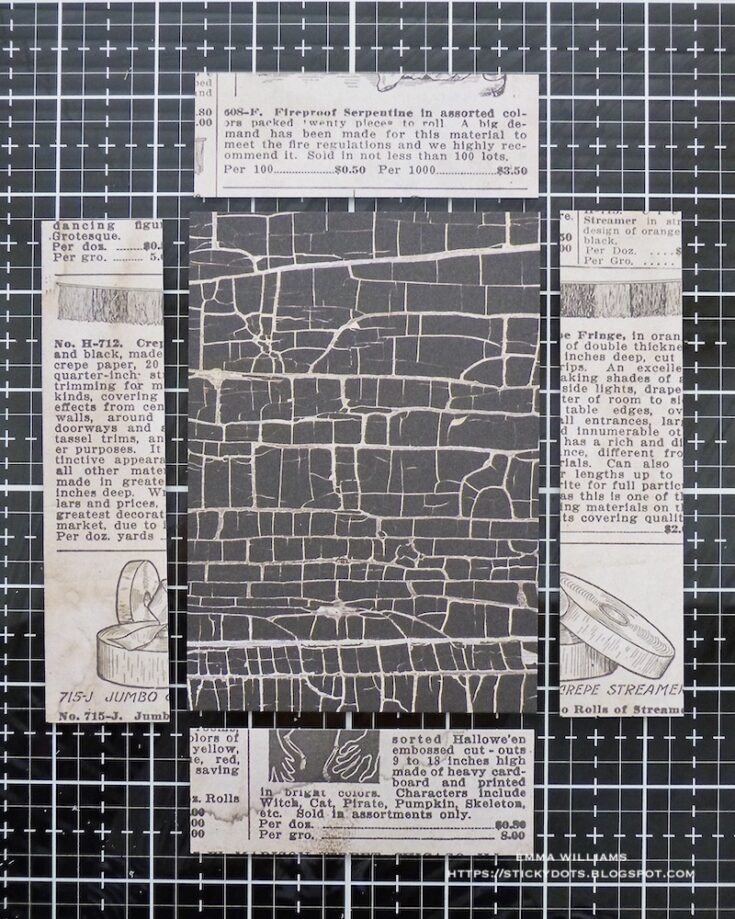
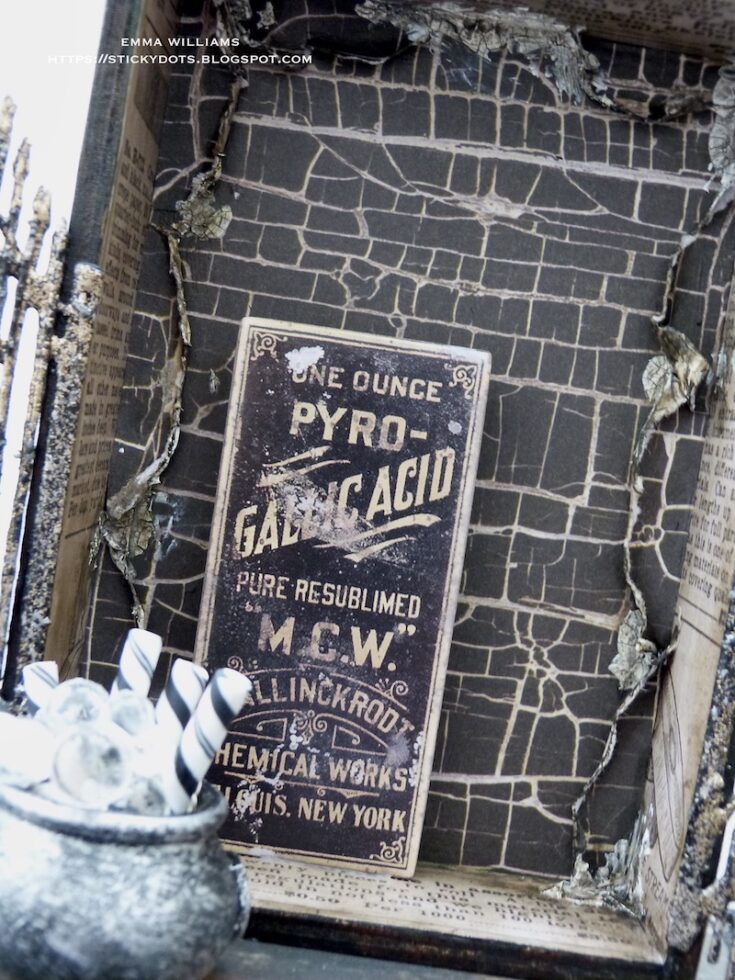
Using a second design of the papers from the Halloween Backdrops set, cut panels to fit the back and the sides on the inside of the box. I used one sheet, the black crackle on the back of the box and because these papers are double sided, I flipped the remaining paper over to give me a different design to adhere to the sides of the box. Adhere into place with Matte Collage Medium and apply a coat over the entire box to seal it.

I wanted to create some texture on the inside and for this I used tiny offcuts of the same crackle design paper. I tore the offcuts into small sections and adhered the ripped pieces around the edges, curling the torn paper edges. Apply Crackle Paste, in and around the ripped pieces of paper to add even more texture and allow for the crackle to dry before adding color to the crackle and the ripped edges with Walnut Stain Distress Crayon. I scribble the crayon onto my glass mat and then apply it directly to the paper with a water brush.
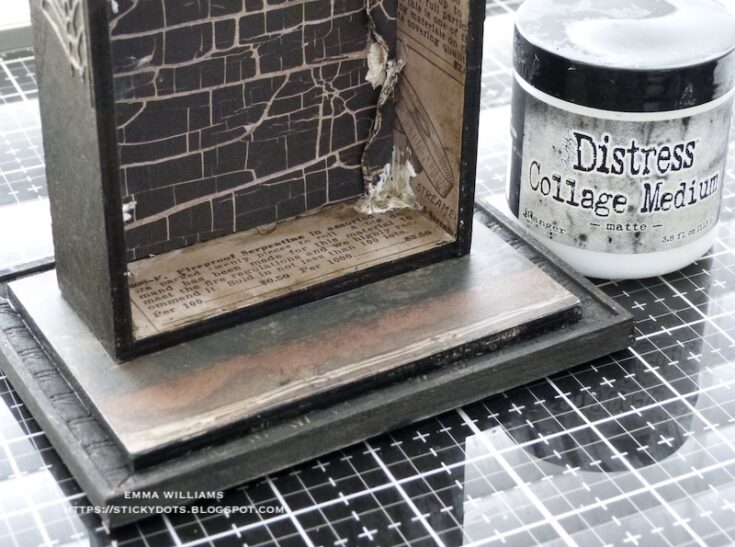
Attach the larger Vignette box to the stand with Matte Collage Medium.
Using Matte Collage Medium, adhere the completed Vignette Box with stand over the top of the smaller vignette box, placing this inside the framed panel.
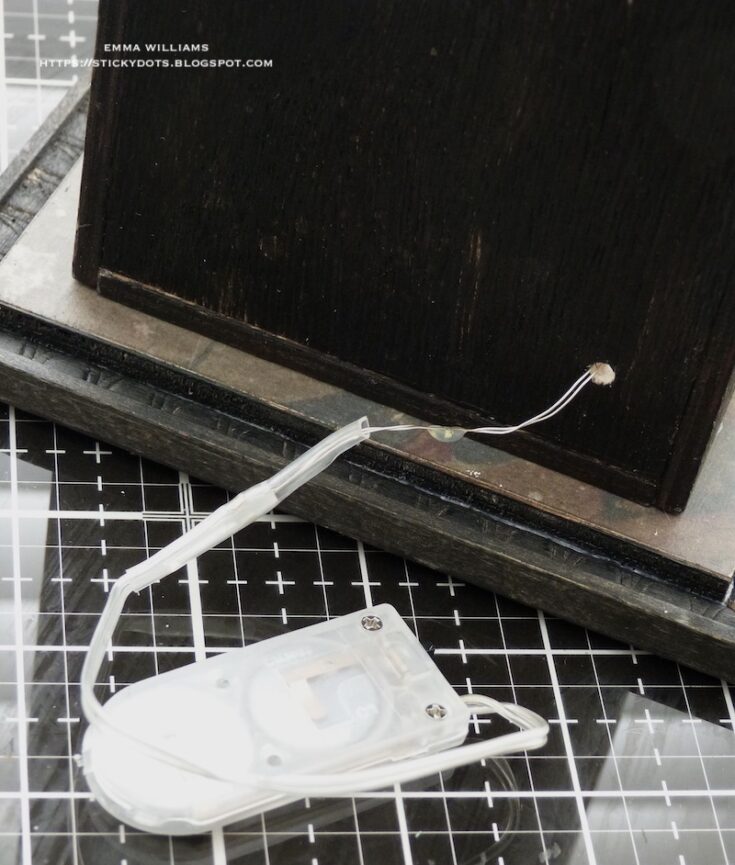
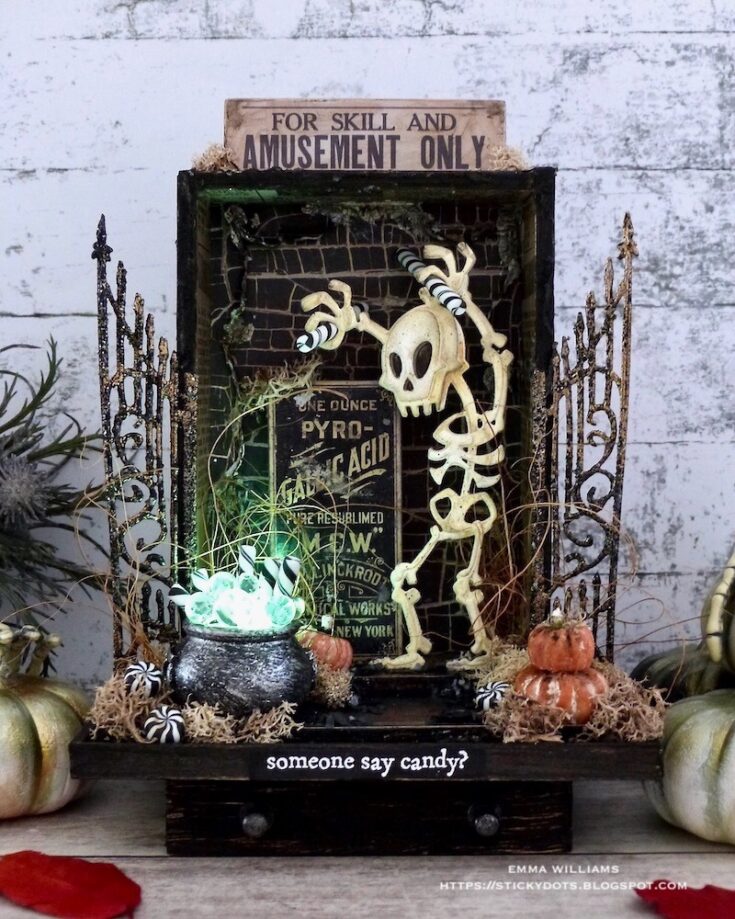
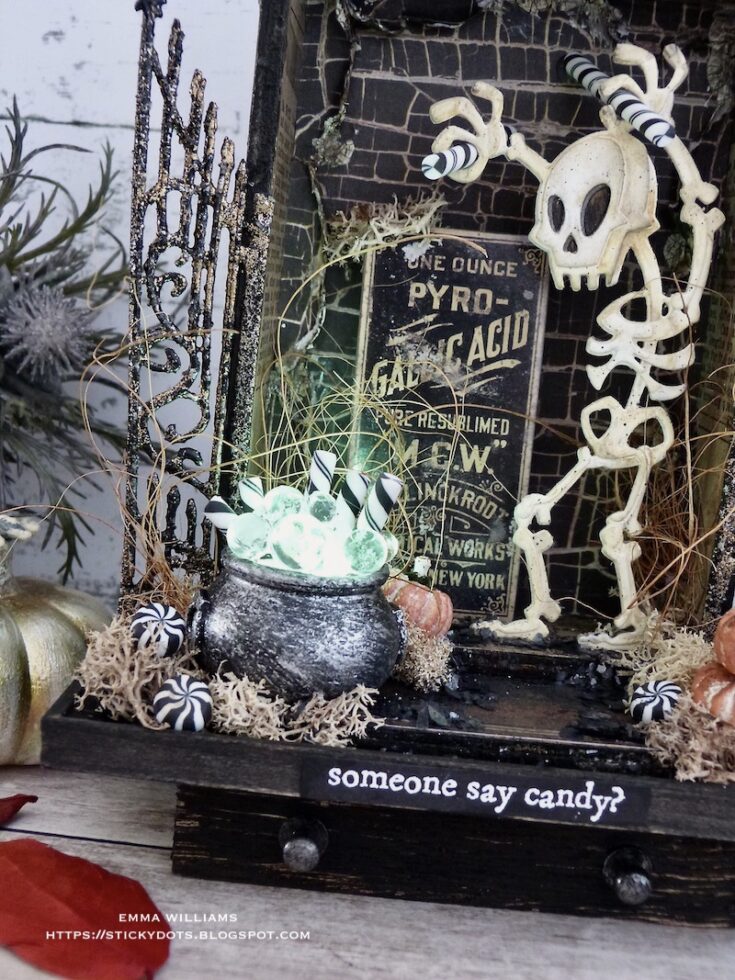
To attach the tiny lights, I drilled a tiny hole through the back of the box, pulled the lights through and fixed the battery box to the back. I used the green lights from the set of two, (the other set is purple in color) and I placed and attached the wire to run from the back of the box, along and into the cauldron.

Wrapping the wire from the lights around my fingers, I placed them into the cauldron securing them with a small amount of hot glue in the base ~ do not add any hot glue directly to the bulbs, only the wires. Attach the cauldron to the Vignette Panel base with Matte Collage Medium.
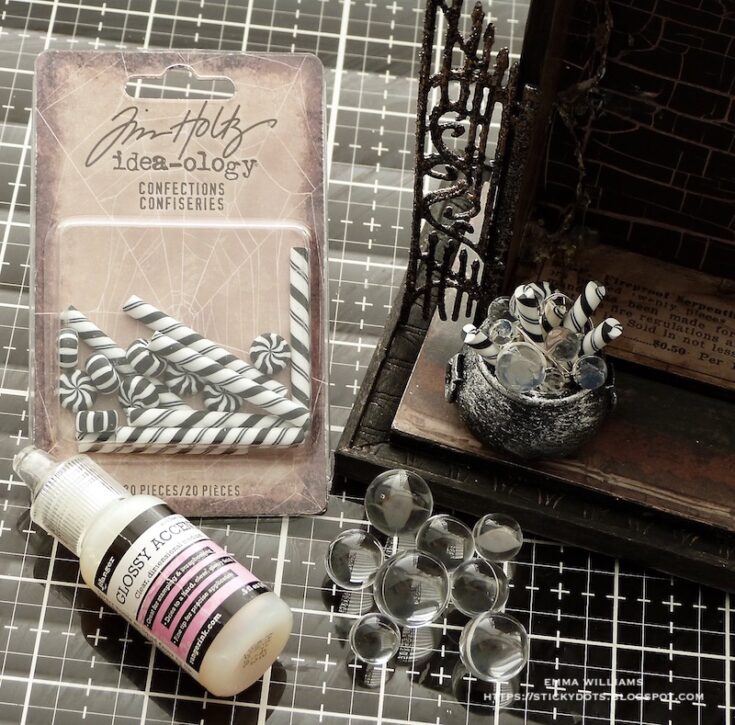
Arrange a selection of Tim Holtz Bubbles, together with pieces of Halloween Confections inside the lit cauldron, attaching the pieces with Glossy Accents. Set aside to dry.
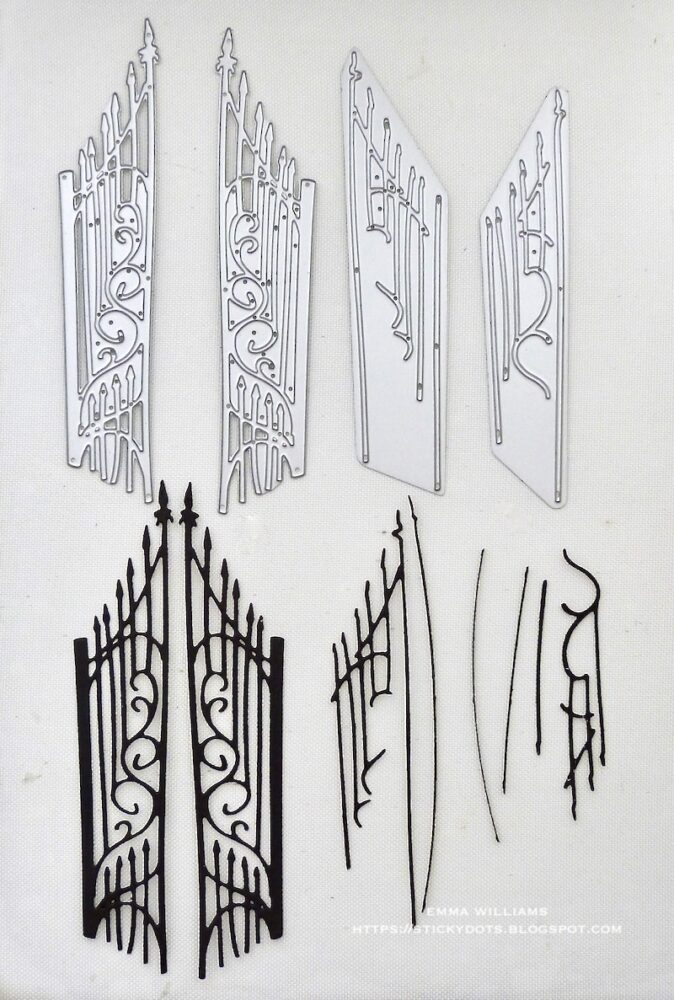
For the gates on either side, I used the Gatekeeper Thinlits Die Set to cut black card and then assembled the die cut pieces to create my two gates.
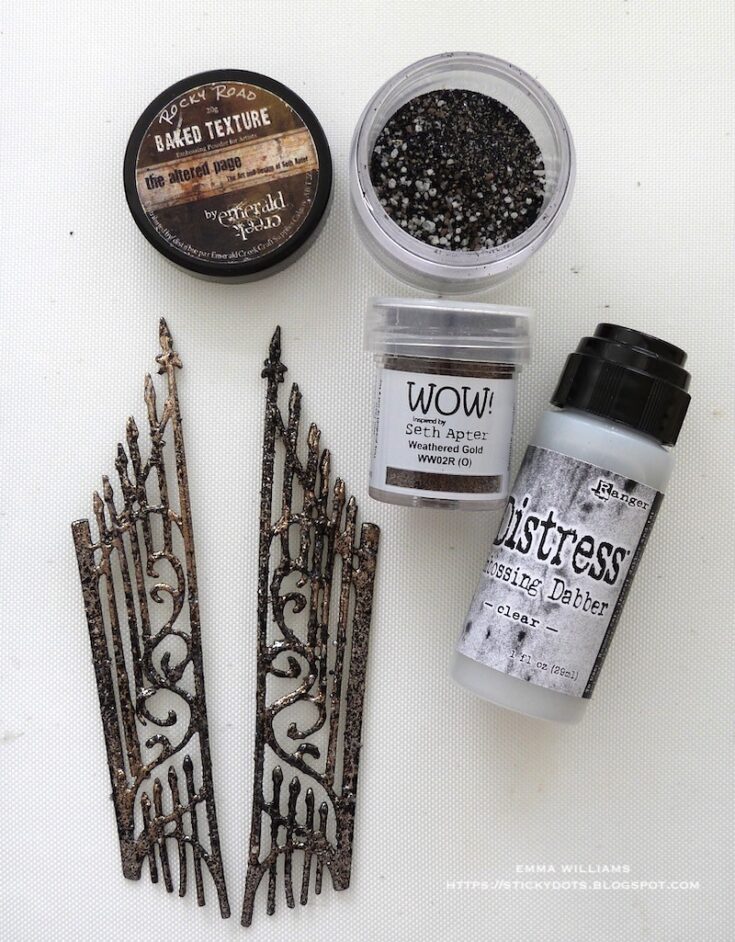
For the wrought iron look, apply Tim Holtz’s Embossing Dabber directly onto the gates and sprinkle with Emerald Creek Rocky Road Baked Texture Embossing Powder, by Seth Apter. Heat emboss until molten. Once cool, I re-applied the dabber over the embossed surface and sprinkled a very light dusting of the Wow Weathered Gold Embossing Powder over the surface, removing the powder from areas where I didn’t want it to be a solid block of gold. I heat embossed the gates once again.
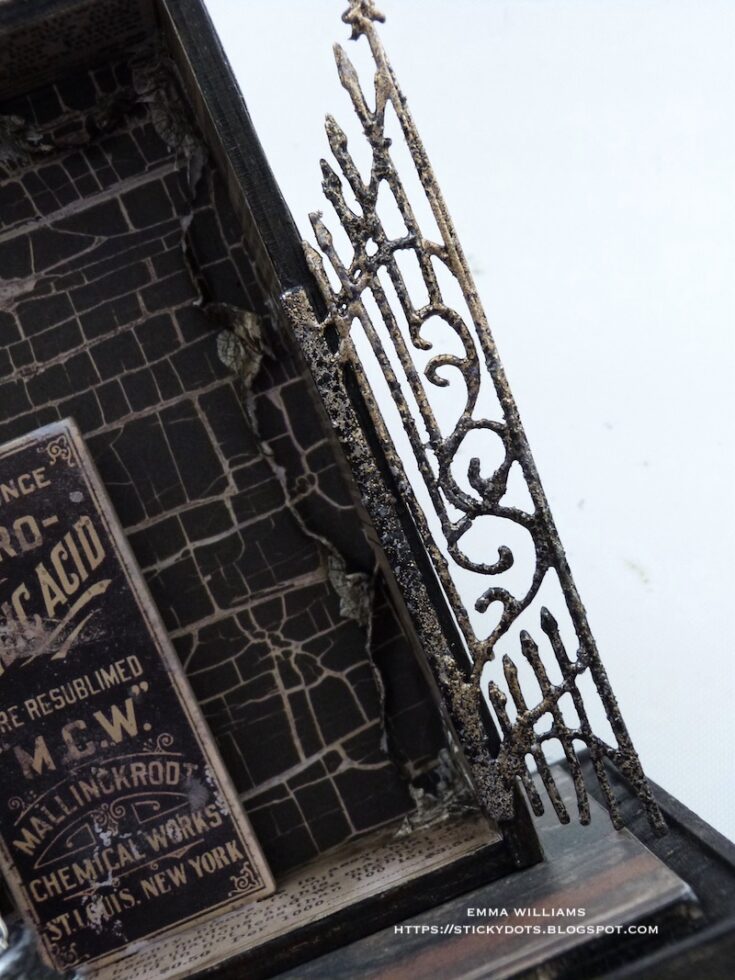
I attached the gates to either side of my box using Matte Collage Medium.
Now to create my scene inside. I began by attaching the Halloween Baseboard piece into the back of the box, using two layers of foam pads for dimension.
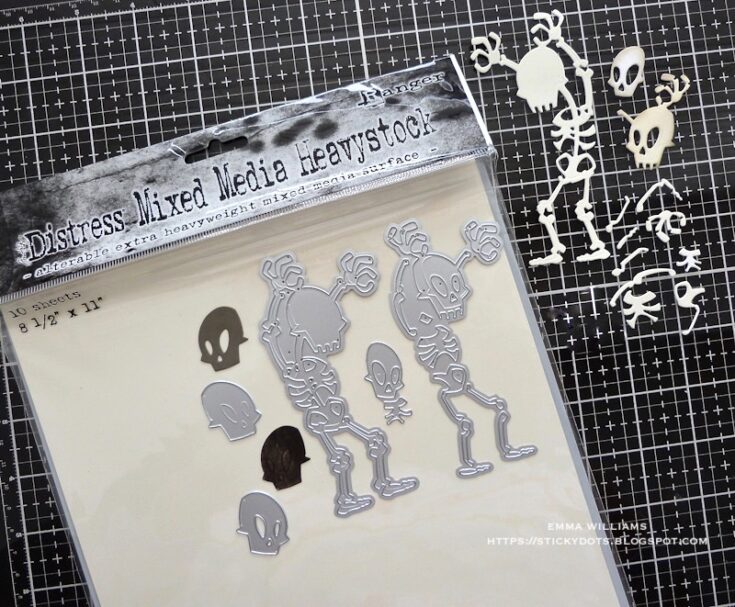
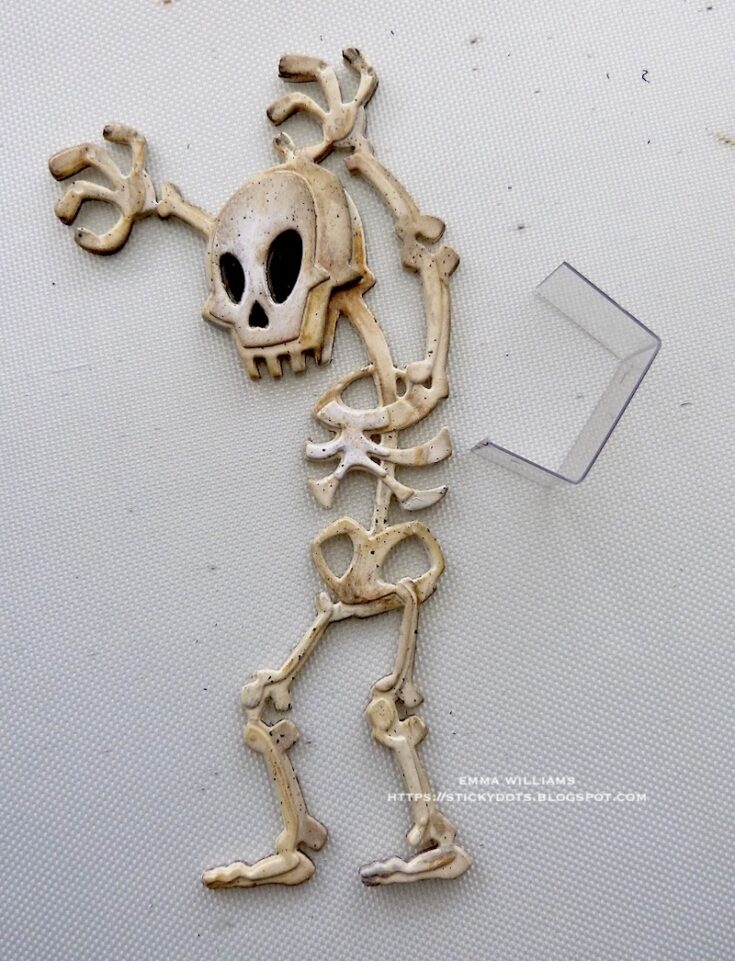
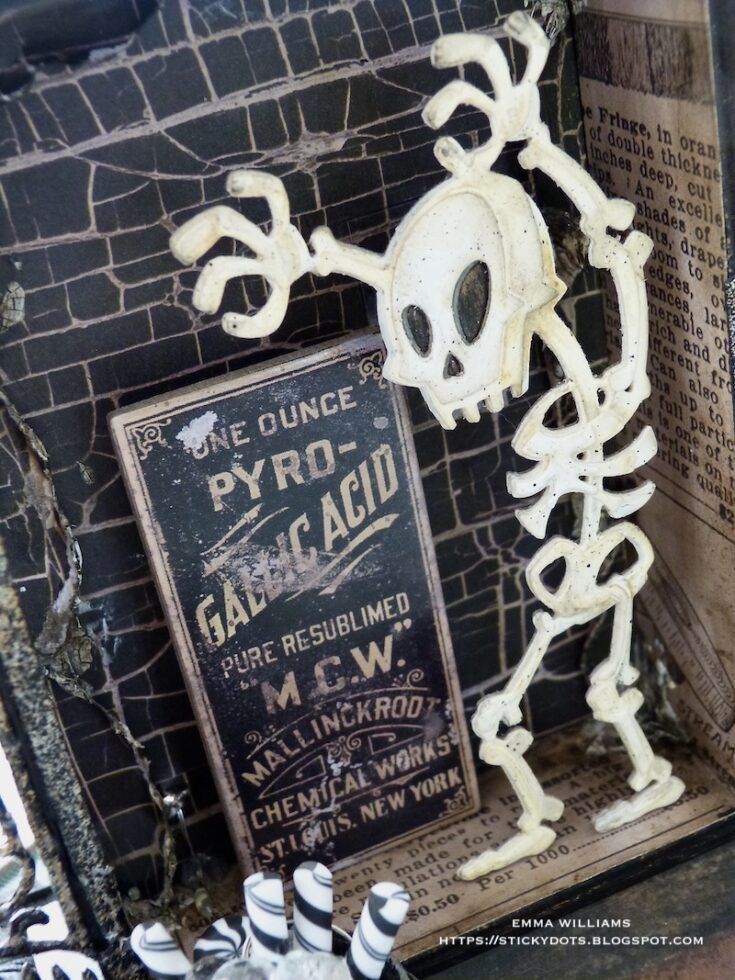
To create the star of the show, I used the Sizzix Mr Bones Colorize Die Set by Tim Holtz to die cut Distress Mixed Media Heavystock card. Assemble the die cut pieces to form Mr Bones and because I wanted to make Mr Bones freestanding, I then cut two extra layers of the complete skeleton image and attached these to the back of the die cut image. This helps to add stability to him when he is attached inside the box.
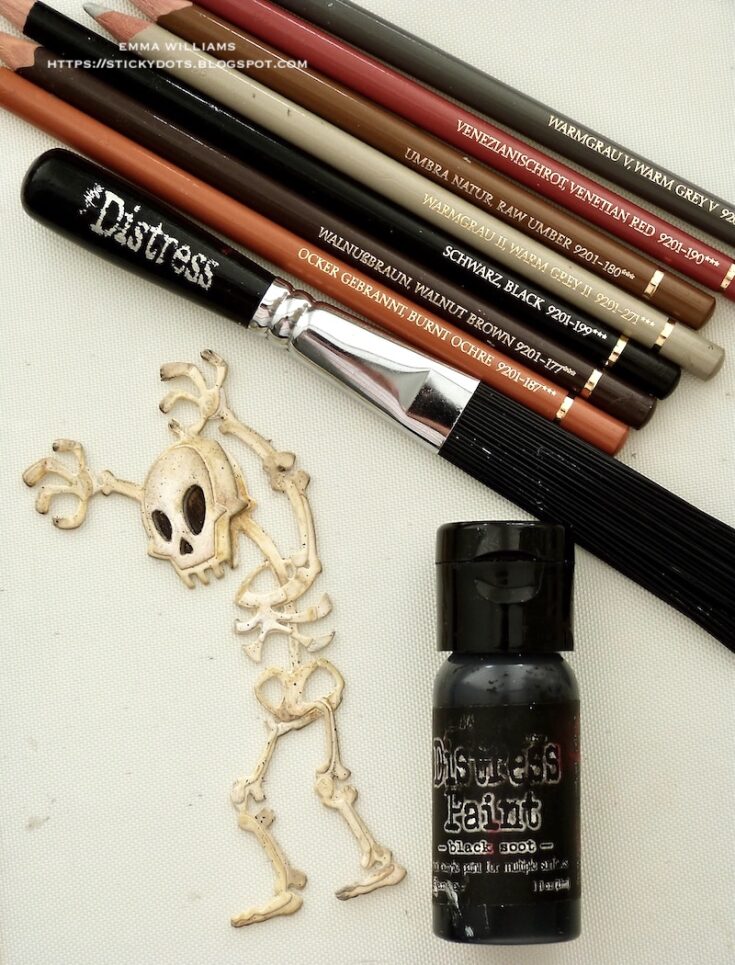
I used Polychromos Pencils to add shading and color to the die cut and then lightly splattered Black Soot Distress Paint over the top of Mr Bones. Photo 20
To attach Mr Bones into the box, I used a strip of acetate, which I scored and folded to create a bracket.
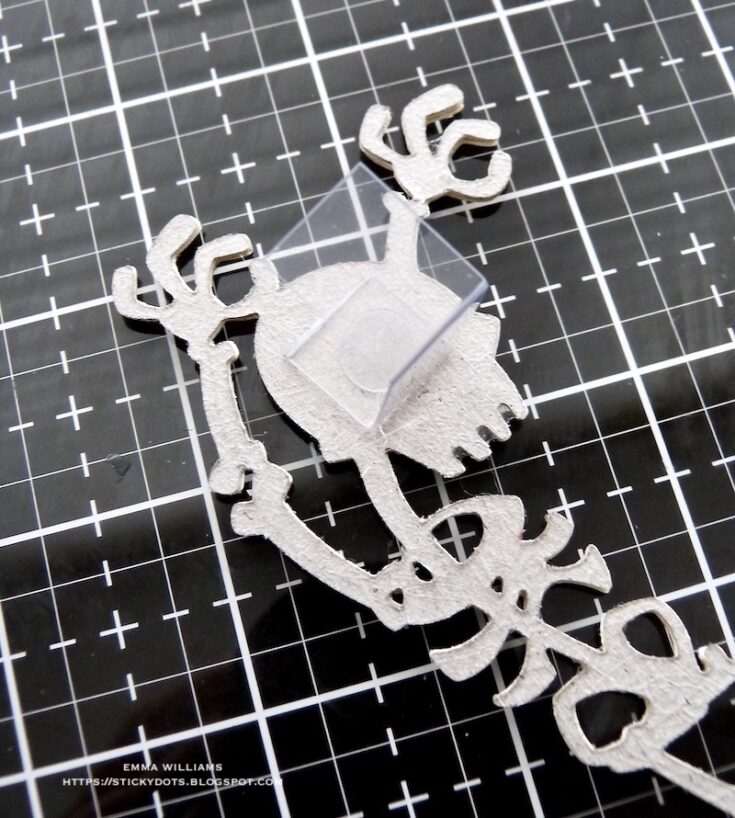
Attach one side of the acetate bracket to the back of the box and the other side to the back of Mr Bones and secure him into the box.
Add some Matte Collage Medium along the bottom of his feet to secure him into place.
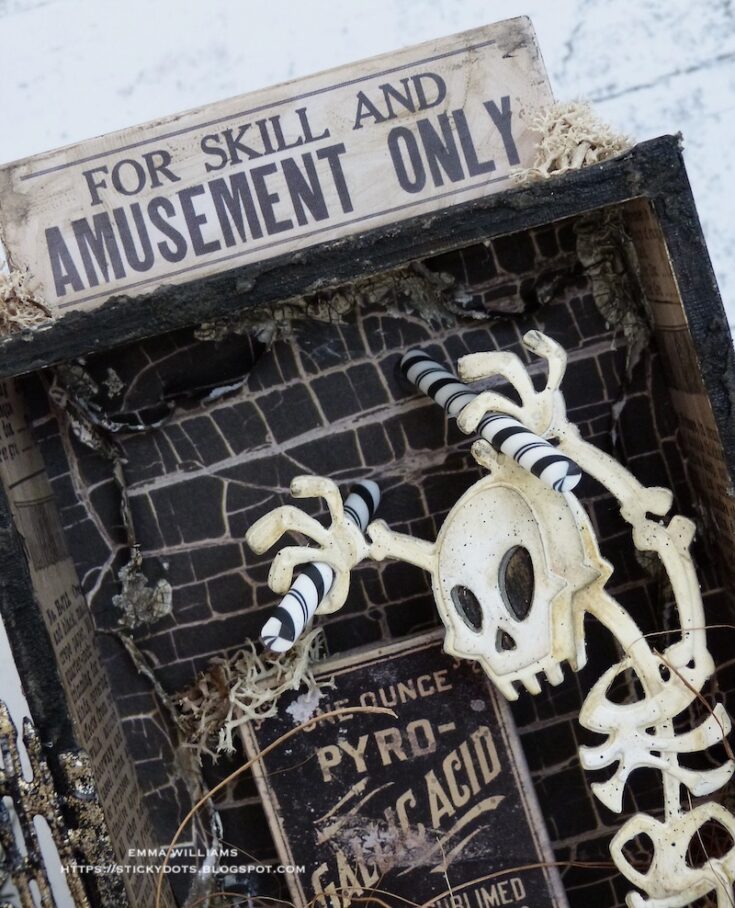
In his hands, I placed a two pieces of the candy, pushing them through his open fingers and securing them with Matte Collage Medium.
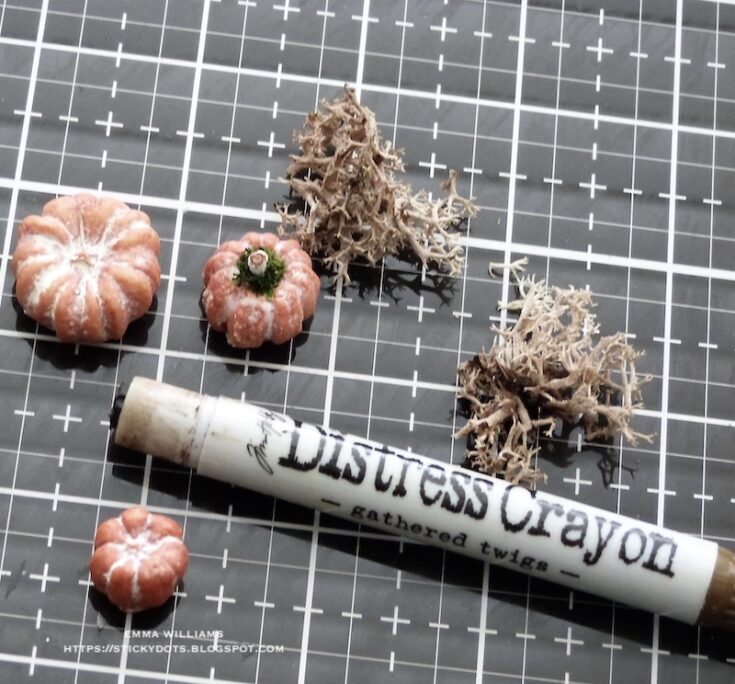
The box is ready to add the finishing touches and I began by attaching three pumpkins, one larger size and two small complete with grassy stalks. For these, I applied a small dot of Matte Collage Medium in the centre of the smaller pumpkins, and place a clump of moss and a tiny twig cut from my garden to create the stalk.
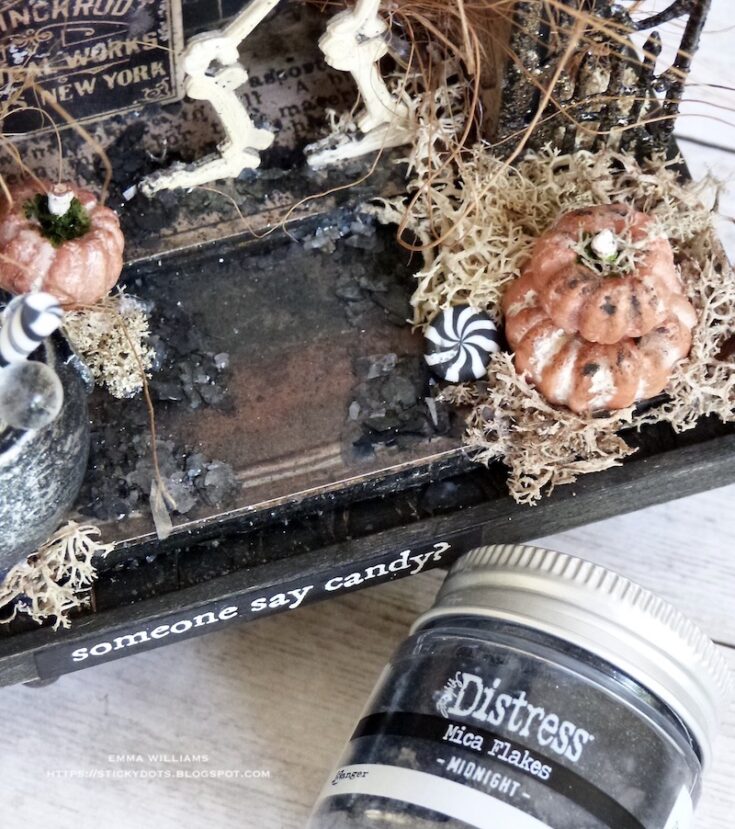
I adhered the pumpkins to the base of my vignette, and added some moss and floristry fibers that I have in my stash, in and around the embellishments and the gates. I also added some more Confectionary pieces around the base of the cauldron.
I added some Midnight Mica Flakes from the Tim Holtz Distress Halloween Sparkle Set. I sprinkled these over the top of puddles of Glossy Accents that I applied directly around the mossy areas and the base of Mr Bones feet. Allow to dry.
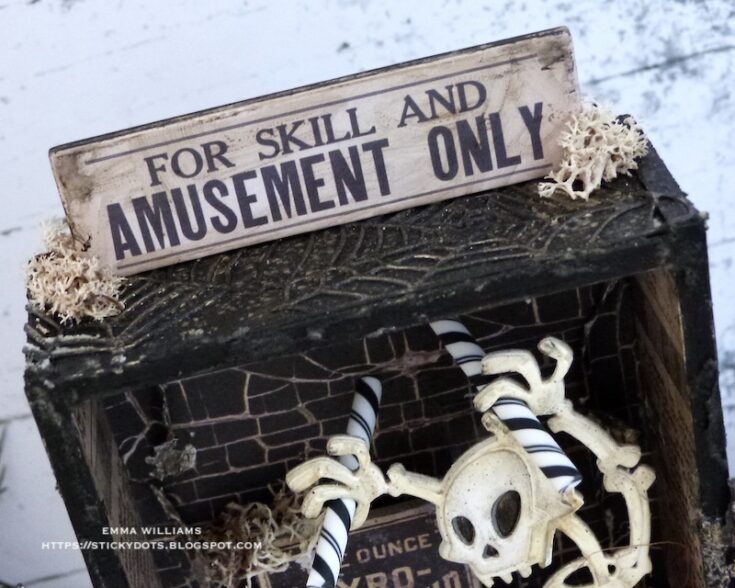
Along the top of the Vignette Box, I attached a second Halloween Baseboard piece, ‘For Skill and Amusement Only’. This is secured into place by applying a small amount of Matte Collage Medium along the bottom edge of the chipboard and then to add a final touch of stability to the chipboard piece, I attached some moss either side using hot glue.
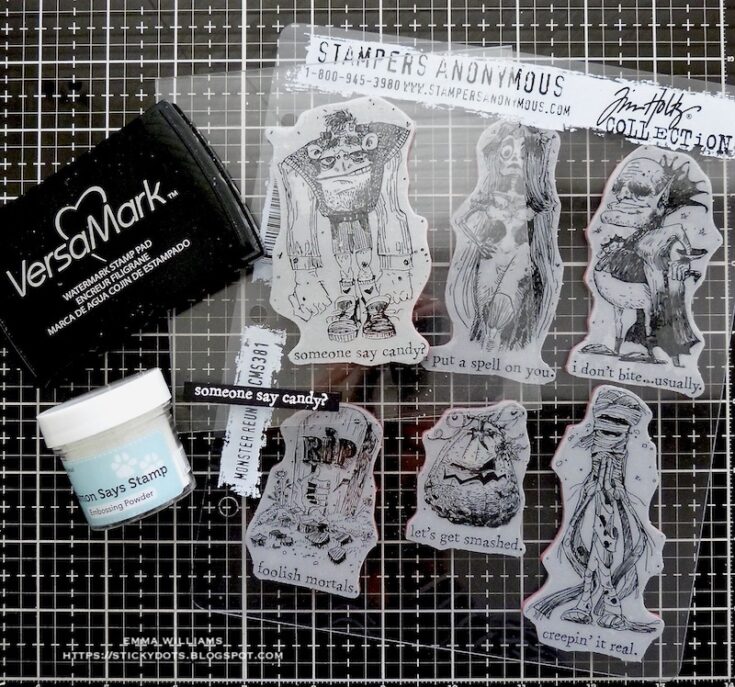
Finally, I inked up the ‘someone say candy?’ stamp from the Monster Reunion set with clear embossing ink and stamped this onto a strip of black card before heat embossing it with white embossing powder.
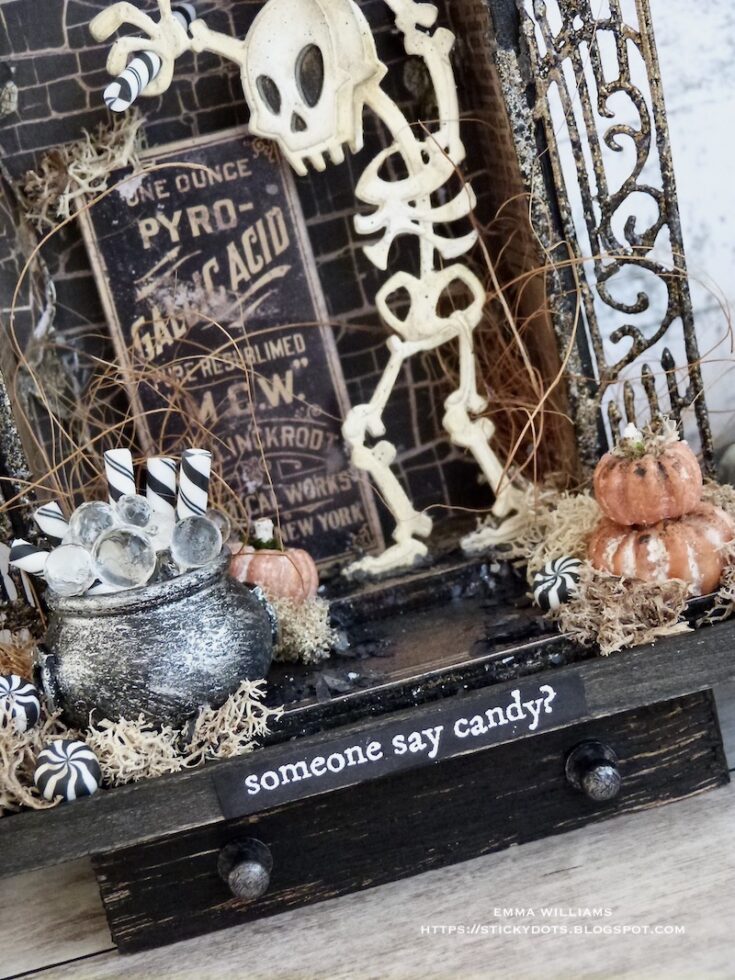
I attached the sentiment strip to the centre of the base of the Vignette Frame and to complete the project, I added two Hitch Fasteners on the smaller vignette box.
This piece was so much fun to make and I really hope you love it and you’ve been inspired by it and the techniques I’ve used to create the scene.
See you again soon, stay safe and happy Halloween crafting…Emma x
SUPPLIES:
|


Thanks so much for stopping by, and thanks to Emma for being our guest!


This is the cutest thing I’ve ever seen. How many hours did it take to complete your masterpiece? Well done and Happy Halloween!!!
I love it!!! Super Spooky Cute!!!!!!
OMG, this is really just amazing. Really, so creative!!
WOW!!! This is so so cool
BRILLIANT!!! Love this Emma!!! WOW!!!
Love the project…Mr. Bones is having a good time, the candy in his hands is the best….
Wow! This is great and love how you used the products. Love it.
I was not a big fan of this skeleton at first, but seeing him here makes we want to try my hand! This is an awesome project, thank you for sharing the process!
Incredible make, as always!! I love that he is holding candy! Sweet ?
Wow! I love it!
I adore everything you make Emma! Your creativity, and “problem” solving, amazes me :) Happy Halloween!!!!
so wonderful