Cupid’s Arrow is Pointed: Heart Textured Tag
Hi readers! Happy Monday to you! I hope you all had a wonderful weekend and are ready to hit the ground running! How about a fun tag tutorial in the name of love? Let’s welcome back guest designer and Monday Challenge design team member Mona Pendleton!
Ready? Let’s go!
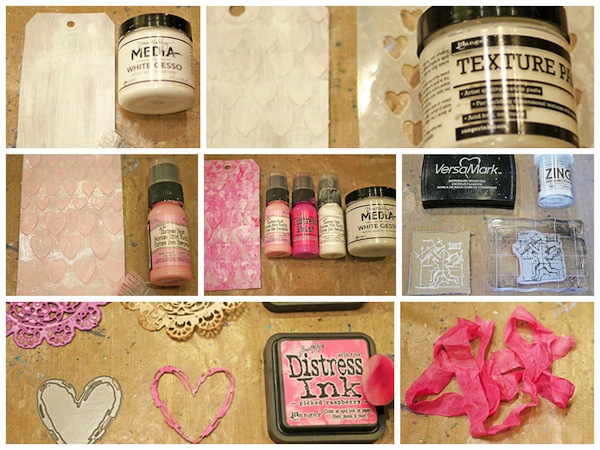
Step 1: Apply White Gesso to tag. Allow to dry.
Step 2: Add texture to tag using Hearts stencil and Texture Paste. Allow to dry.
Step 3: Apply Distress Paint to tag.
Step 4: Repeat Step 3 using various Distress Paints and Gesso until desired look is achieved.
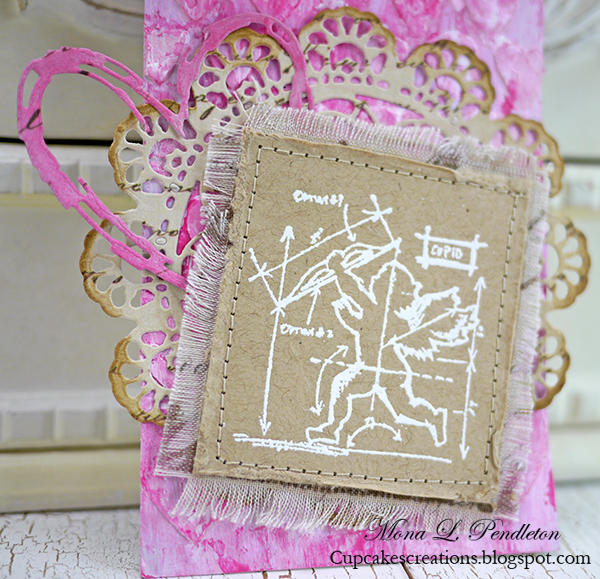
Step 5: Stamp / heat emboss image layer on top of fabric stitch in place.
Step 6: Die cut doily and heart die cuts then apply Distress Inks.
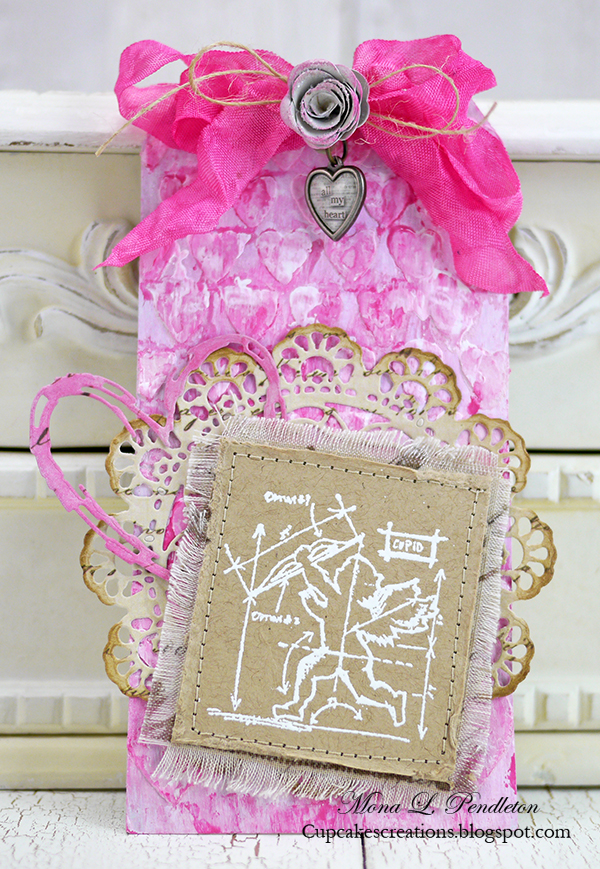
Step 7: Apply Distress Ink to ribbon. Layer and adhere embellishments to tag.
SUPPLIES:
 |
 |
 |
 |
 |
 |
 |
 |
 |
 |
 |
 |
 |
 |
 |
 |
 |
 |
 |
 |
 |
 |
 |
 |
 |

Blog Candy Alert!! Follow our blog via email and comment on this post for a chance to win a special blog candy!


DELIGHTFUL tag Mona!!!
LOVE your layers & textures – WOW!!!
THANK YOU for sharing your RECIPE FOR CRAFTY AWESOMENESS!!!
OMG What a super adorable Valentine. I just love the all the lace and pretty hearts and that cupid stamp is just as precious as can be. What an outstanding creative job!! WOW!! I love it!!
Lucky so lucky person who gets it….this is frame worthy for sure. YOU so ROCK!!
OMG so sorry got so carried away with my love of the Cupid stamp and the lace of it all I said card….YIIKES I mean tag and love all the textures….it’s just one amazing piece and still say lucky person who gets it and your tag is still frame worthy and by frame I thinking shadow box!!
YOU so ROCK!!! YOU post made my day!!!
Amazing medley of textures & layers! Thanks, Mona, for the great inspiration and tutorial!
Beautiful texture!
Love the colors! Texture/embossing paste is one of my favorite supplies right now too! :)
AWESOME Valentine’s tag! I love its texture, its colors, the die cuts, the embellishments, the stamp…everything! Thank you Mona for being so inspiring!!!
Wow! Gorgeous tag!! Love the texture!
This is such a cute tag, love the pink!
Nice layering.
Thank you for sharing your work.
This is just great. I love it I love it I love it!
Love The texture And colors of The tag!
Valentine’s are my favorite cards to make…this one is gorgeous!!
Very pretty!
Wow…that turned out wonderful!!!
Love all the shapes and textures!! The die cuts and the frayed fabric really add interest!!
<3 J
jwoolbright at gmail dot com
HerPeacefulGarden.blogspot.com
Loving all the layers and textures on the tag…so pretty.
love the direct instructions. Makes it easy to apply to my projects.
Lovely tag! TFS ;-)
super cute tag, thank you for the great inspiration
Gorgeous! I love that technique you used for the background, definitely going to give that a go! Beautiful colours and wonderful dies! hugs :)
Fantastic tag Mona. Love that heart background with the ‘hot’ pink. The stitching looks great on the kraft panel… also love the fabric piece.
I like the colors and the use of materials. They look so good together! Awesome tag!
It’s already been said in the previous comments, but what a gorgeous tag!!! Love the color combination and all the elements go so well together :)
Such a beautiful tag! Thanks for the step by step guide complete with pictures!
Beautiful tag! Love the colors!
Love the idea of a Valentine tag. Great job!
Such an amazing tag!! Thanks for the inspiration and tutorial:)
OMG OMG OMG!! This is ABSOLUTELY BEAUTIFUL!! I LOVE ALL the Layers!! =) THANKS for sharing and have a FABULOUS WEEK!! =)
Layers upon layers of beauty.
LOVE IS IN THE AIR!
Love all the lovely layers on this tag. Thanks, Mona.
Love this inspirational post, such fabulous projects!!!!
Really unusual Cupid’d tag – Thank you for explaining how you made this so clearly. I am going mohave to buy some of this textured paste – it’s awesome!
Thank you for your inspiration:)
I like the layers and textures.
Wonderful mix of textures on this tag!
Mona, your tag is AWESOME! I love the texture, colors, and the mini blueprint!
Simply Gorgeous! Love the layers, the textures, the colors. Thank you for sharing!
Beautiful–love all the layers and textures used.
Very pretty tag…love the different layers.
The tag is awesome. Your steps make the process seem easy.
I love how crisp is the image.
How adorably sweet!!!! Thank you for sharing ♥ Fabulous tag!
Beautiful tag!
Nice colors!
Love the tag. It’s “shabby chic”, fabulous and a beautiful Valentine! Love that stamp set by Tim Holtz.
What a gorgeous tag, love all the texture and that awesome stamp!
Love the texture.
ADORABLE!!! :-D
Gorgeous tag. Love the pink. Hugz
What a beautiful tag!! I love all the details and textures.