Cupcake Break
Hi readers! Are you ready for a cupcake break? Say what? Cupcakes? Yes, please! I’ll take one of each! Today I’m stoked to have the amazing and talented Richele Christensen back as a guest on our blog showing some cheerful Tim Holtz inspired cards for guys and gals! How fun! Are you ready to learn how to make them for yourself? Read on!
Enjoy!
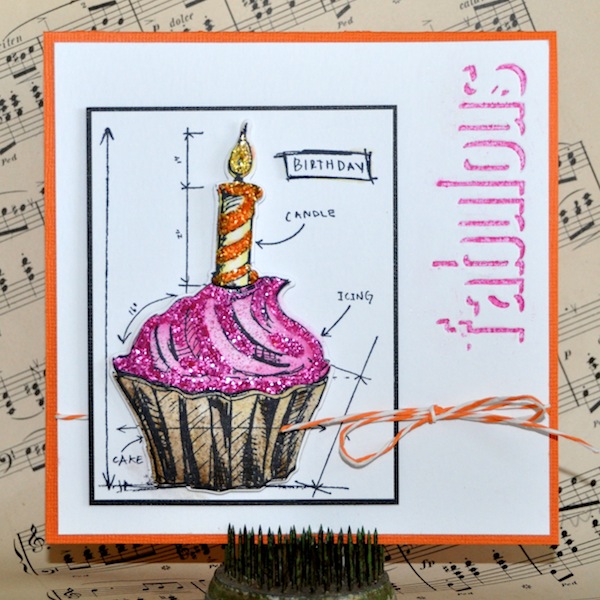
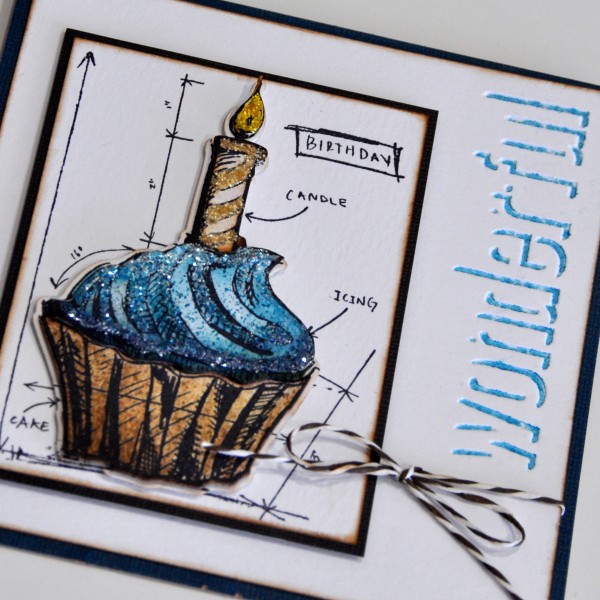
Hello friends and happy Saturday! I’m so excited to be back on the Simon Says Stamp blog. My project today features Shadowpress, Framelits with Stamps, Mini Distress Ink pads, and Distress Glitter. I loved using the Shadowpress de-bossing folders with the Mini Distress Ink pads to create a fun colored shadow effect. Another favorite today is the Framelits and Stamp sets, no more detail cutting to create multi layered cards. Framelits makes it so quick and easy!
Instructions:

- Stamp Cupcake image with Jet Black Archival Ink onto Watercolor Cardstock. Die cut all the pieces using from the Cupcake Framelits on the Magnetic Platform. Tip: Place one cutting pad on top of the magnetic platform, line up the stamped images with the Framelits, place another cutting pad on top and run through your machine. The Magnetic Platform is very helpful to hold the Framelits in place, no taping necessary.
- Color all the layers with Distress Markers.
- Using a Detail Water Brush smooth out the colors for a blended look and let dry.
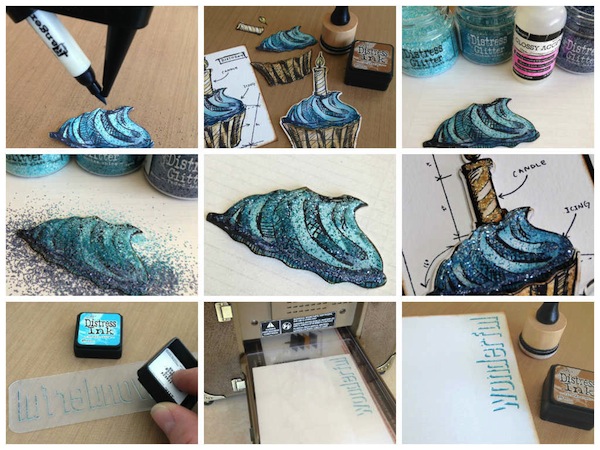
- Spritz some color onto the Cupcake top with the Distress Spritzer and the middle value Distress Marker. Hold the Spritzer about 6” above your project. I really like the little specs that are created with the Spritzer. and the Spritzer fits a wide variety of markers.
- Ink the edges of all the layers with Vintage Photo Distress Ink on a Mini Blending Tool.
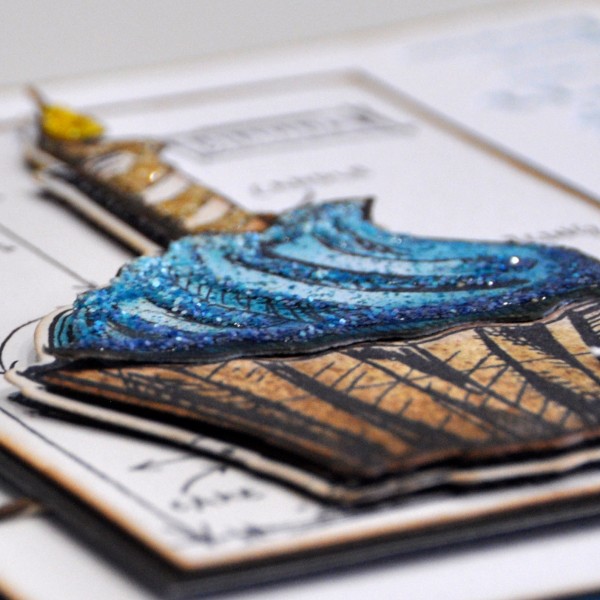
- Add Glossy Accents in a few areas for the Distress Glitter, leaving some areas and the black outline untouched.
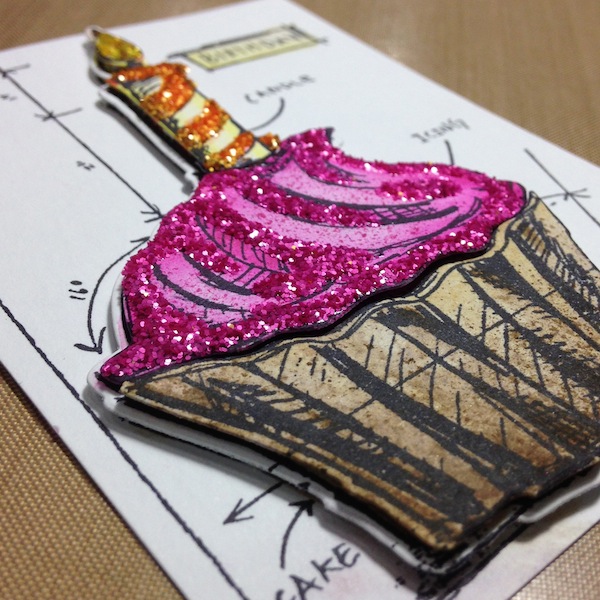
- Use your fingers to take a pinch of Distress Glitter and sprinkle over the Glossy Accents. To create an ombré effect start with the lightest color and lightly glitter the top of the cupcake, add the next two colors with the darkest Distress Glitter on the bottom of the Cupcake.
- Shake off the excess and set aside to dry.
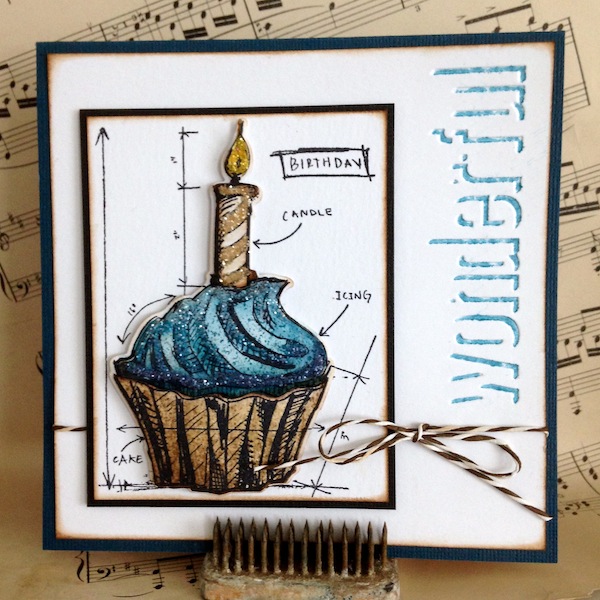
- Add Distress Glitter to the Candle and the Flame the same way. Adhere Cupcake layers together with foam tape, mat with black Kraft’core cardstock and adhere to card.
- Ink the Shadowpress de-bossing folder carefully with a Mini Distress Ink Pad. This took some practice so grab some scraps and give it a try. You’ll want to ink the raised area of the letters on the folder. Tip: Once you get the ink where you want it, lightly mist the ink with a little water. Also Archival Ink is a great choice in creating a smoother shadow because the oil based ink covers the plastic better.
- Position the edge of the folder with the edge of your Watercolor cardstock then run through your die cutting machine.
- Ink the outer edges of the de-bossed cardstock with a little Vintage Photo Distress Ink on a Mini Ink Blending Tool. Tie Striped Paper String around Watercolor cardstock and adhere piece to a Kraft’core card with foam tape.
I’m in love with this ombré effect with Distress Glitter! You can change the colors of your cupcake for a super girlie card like this pink one or use blues and browns for a more masculine card. What color will you make your next Birthday Cupcake? Picked Raspberry…Spiced Marmalade…Festive berries…they all sound good enough to eat.
Thank so much for stopping in!
Richele
SUPPLIES:
 |
 |
 |
 |
 |
 |
 |
 |
 |
 |
 |
 |
 |
 |
 |
 |
 |
 |
 |
 |
 |
 |
 |
 |
Thanks for reading today and thanks to Richele for being our guest!
Blog Candy Alert!! Follow our blog via email and comment on this post for a chance to win a special blog candy!


I like the chunky look of the glitter
These cards are fabulous! I want a cupcake now!
Gorgeous cards Richele! Love the glitter and great dimension.
Look very yummy. Great job!
These are the best takes I’ve seen with the cupcake stamp! Awesome!
What a beautiful effect; that glitter on these great stamp! Something to try myself…
wow! what fun cards to look at and enjoy!
The cupcake looks delicious with all the glitters!
Awesome cards! I love the different colours on each one – have to pull out my supplies now!
What great cards! Up to this point I haven’t been enthralled with all the cupcake stamps -BUT I really like these cards!! Nice job!
These are SO cute!!!
Love the glitter and the shadowpress sentiments!!! Fabulous cards Richelle!
Beautiful cards, love the chunky glitter!
Wow- these are amazing. So much detail here- beautiful job, Richele.
Beautiful card love the glitter!!!
Yum makes me hungry!!!
Gorgeous cards and delicious looking cupcakes.
Can’t beat a good cupcake and these look gorgeous
Stunning card
Awesome, Richele! These are amazing!
Beautiful – the glitter is fantastic :)
The sparkly glitter on top of cupcake make it look so yummy. Thanks for the inspiration
So lovely!
I love Distress Glitter.
Yummy cupcake cards and I love how you airbrushed the swirls on the icing of the cupcakes.
Yummy never looks so good!
Loving these FUN Cards!! ;) I LOVE the Sparkle and the FUN Embossing!! ;)
Lovely cupcake cards Richele. Thank you for sharing with us. Love distress, inks, glitter, markers.
Great cards!
Beautiful cards! I really love the cupcakes.
I love this cupcake stamp
At first glance I thought the words were new dies. Cards look very effective.
Beautiful cards. I love the colored frosting & now I’m really hungry!
Love the way that cupcake frosting looks.
Awesome! I love that cupcake blue print stamp! So fun!
I love how the glitter looks like sprinkles! Very yummy looking :)
Yummy! Love this card.
I love the distress spritzer idea and the beautiful glitter! Great cards. :) Thanks for sharing.
Katie B.
Love the cupcakes and the glitter – super cute cards.
Fantastic cupcakes, I love the glitter look on them too.
Super yummy cards! So creative!
Yummy cupcakes
The glitter is such a great touch. Definitely need to get this stamp set
Looks good enough to eat! Love these cards!!
Both are lovely! I really like the sparkle!
Adorable! Love all the glitter!
Yummy! I did not know about those Tim Holtz stamp&die sets–super cute. And I love Richelle’s idea of using a gradation of glitter colours to add shading. Looks good enough to eat!
Love the TH cupcake
WHAT SWEET TREATS!!!
THANK YOU for sharing your recipe for SPARKLY WONDERFUL Richele :)
These are really wonderful! Perfect for anyone who needs to be celebrated! TFS!