Build Your Own Distress Christmas Village
Hi Bloggers! Happy Friday before Christmas! If you’re anything like me, you’re feeling the holiday pinch a little tighter now and getting in last minute shopping & baking before the parties and celebrations begin! I instantly smiled when I saw this sweet village created by Nicole Wright, and thought you (our readers) would enjoy as well!
As you may expect, since this is Die-Cember™, there were a lot of dies used in making this village! See the supplies list below for the full list!
Join me in “visiting” this quaint Christmas village, won’t you? ….
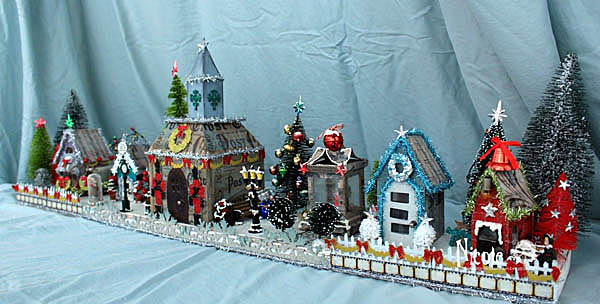
Welcome to my little Christmas village. Well maybe not so little. Nicole here and I am thrilled to be a guest here and show you my Christmas Village. I’ve always wanted a Christmas village so this year I decided to build one. I used two 1 foot pieces of wooden plank and a 2 foot plank, painted white. This makes it easier for storing.
Supplies Used:
|
|
 |
|
 |
|
 |
 |
 |
 |
 |
 |
 |
 |
 |
|
|
|
 |
 |
|
 |
 |
 |
 |
 |
 |
 |
I cut grunge board with the artful dwellings die creating the houses. I cut each roof with chipboard creating a 1/4″ over hang.
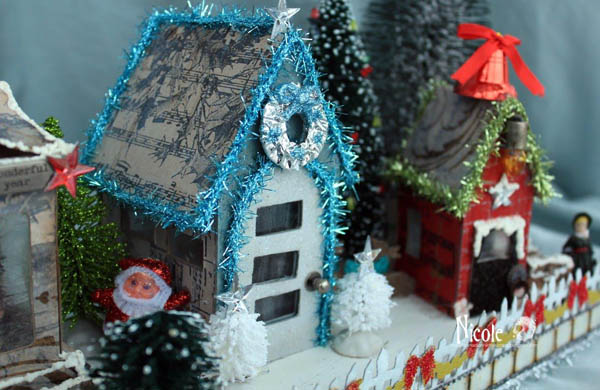
All the buildings are layered with paper stash Christmas kraft resist paper. Then I used distress stain picket fence, weathered wood and iced spruce.
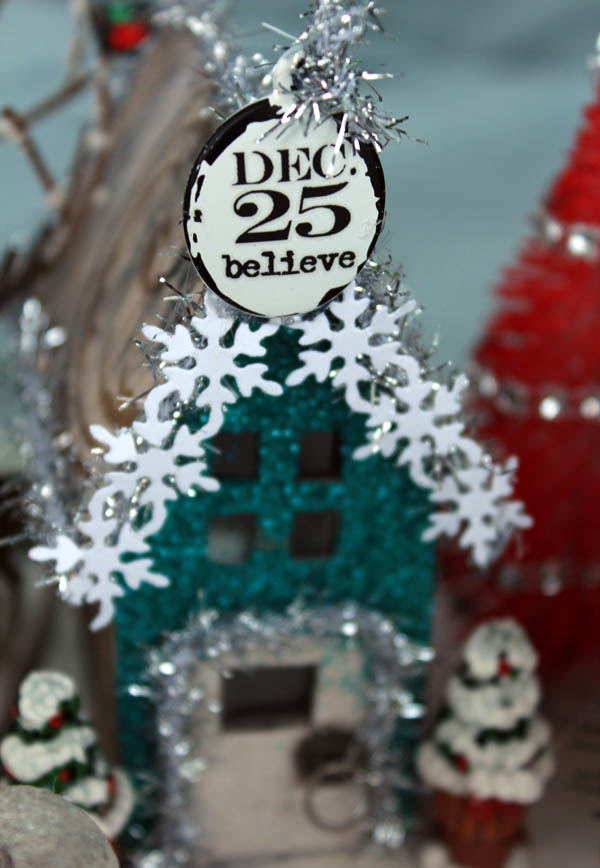
I adore enamel tags and use them on everything! The Christmastime remnant rubs are so fun as well.
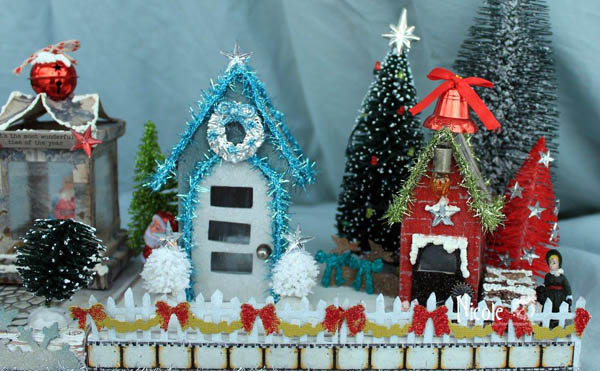
The Christmas tinsel twine is a great addition to the houses and is a great way to hide the edging.
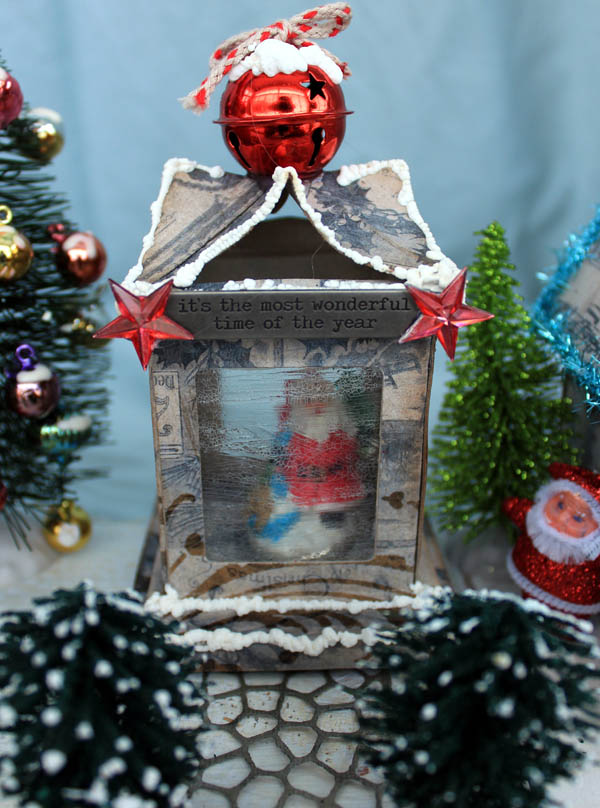
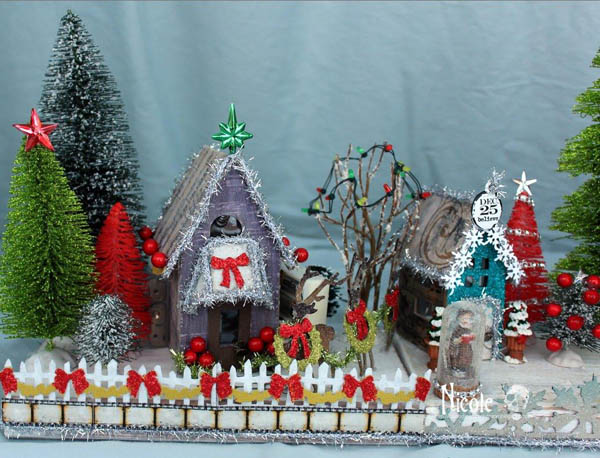
For this 3D luminary I tucked a little vintage Santa inside and used a cracked glass technique for the windows.

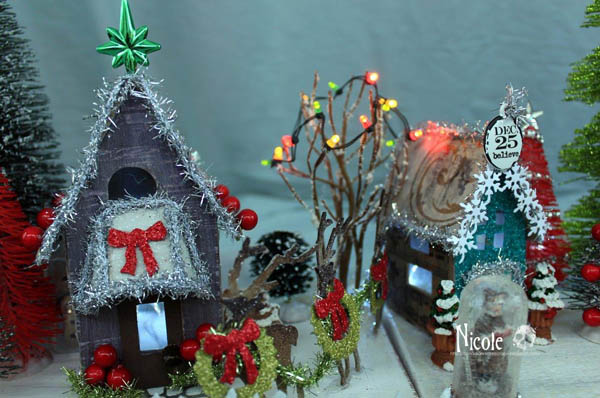
Using the movers and shapers mini wreath and mini soldiers covered in distress glitter makes the church festive!

Combining different movers and shapers brings these reindeer to life.
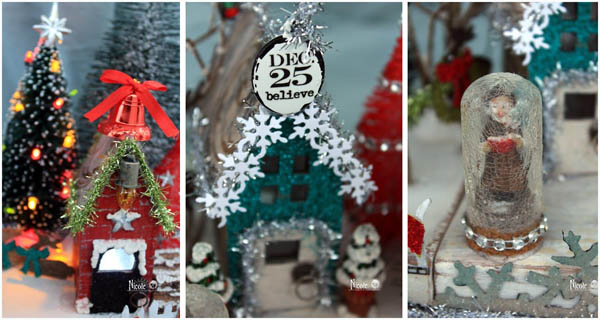
These corked domes are so versatile. Below I’ve used the cracked glass technique again and tucked a caroler inside.
More notes:
-
The mini openings are a must for making windows lined with clear acetate. When the lights are on it creates a warm glow from within.
-
I have a lot of trees. I found vintage ornaments at my dollar store and hot glued them onto the branches.
-
A little battery operated string of lights weaves in and out of all the houses. There are also colored lights for the trees.
-
At night all a glow this little Christmas village twinkles and sparkles.

Thank you so much for checking out my Christmas village. I invite you to swing by my blog to see more of my creations.
Thanks for reading today, and thanks to Nicole for providing us fabulous and unique inspiration!

Blog Candy Alert!! Follow our blog via email and comment on this post for a chance to win a special blog candy!


Amazing project! I’d love to make this!!!
WOW – that is a labor of love for sure.
I am stunned! What amazing creativity!
Wow, Nicole this is absolutely gorgeous!! Thank you for sharing this with us. Happy Holidays to all!!
Oh, this is so charming! I love all the little details and sparkle!
Nicely made village. The houses have such neat paper, details,snow and sparkle. Love the fence w/wreaths and the reindeer, too. :)
WOW, just wow. What a fantastic village. So beautiful and so many details. Merry merry to you
This is an absolutely fabulous display… Congratulations on a job well done and a beautiful Christmas decoration.
Wow–what an incredible project! Truly a treasure!
Fabulous!
1 word WOW! Hugs Traci
What a great work of art this is! I can’t imagine how long it took you to put this together, it is so amazing. I can tell you put a lot of thought into this. Thanks for sharing.
I love Christmas villages! Yours is beautiful and I imagine it was a lot of work, but fun to do.
Wowza! The village is stunning! Every single detail is amazing. Your hard work really shows.
This village is adorable!
Amazing project!
Wow, this is just amazing! I love all of the wreaths and the tinsel. So much work, wonderful job!! Thanks for sharing.
Katie B.
What a beautiful village! I love all of the bling and details.
Nicole’s Christmas village is beautiful!! Man, I wish I had time to play. I love little villages and have many ceramic houses with little people. I’ve massed a decent collection, but just don’t have a place to put them out without a lot of work, this year. Thanks so much Nicole, for this great holiday inspiration.
Oh, my gosh, this is so darling! I must make one for my mantel for next year!
Wow im impressed, nice job!!
Wow! Amazing project! TFS
Oh my!! This is simply amazing and wonderful!!
Your village is so beautiful! Thanks for sharing this lovely idea!
Wow. That’s all I can say. Wow.
What an amazing project!
What an amazing labour of love.
Fun idea!
WOW! What a fabulous project!
Ha! Yah, right! Maybe you could have a contest to just give THAT one away right there! That is absolutely STUNNING!
Oh, my… these are amazing. Love every little details about the little houses and the scene.
Gorgeous village! I can only image the work you put into it. It is a wonderful piece to put out for many Christmas years to come.
WOW!!! It might take me a year to make something like this but it is so beautiful!
amazing project!!
What a cute Christmas village!
I so admire the dedication it takes to complete a project like this. It’s beautiful.
Such an amazing project…such an inspiration.
Super cool! OMG I love it!
What a stunning holiday village display… WOW!!!