A Mixed Media DELIGHT! Fringed Flowers from Bottle Brush Trees
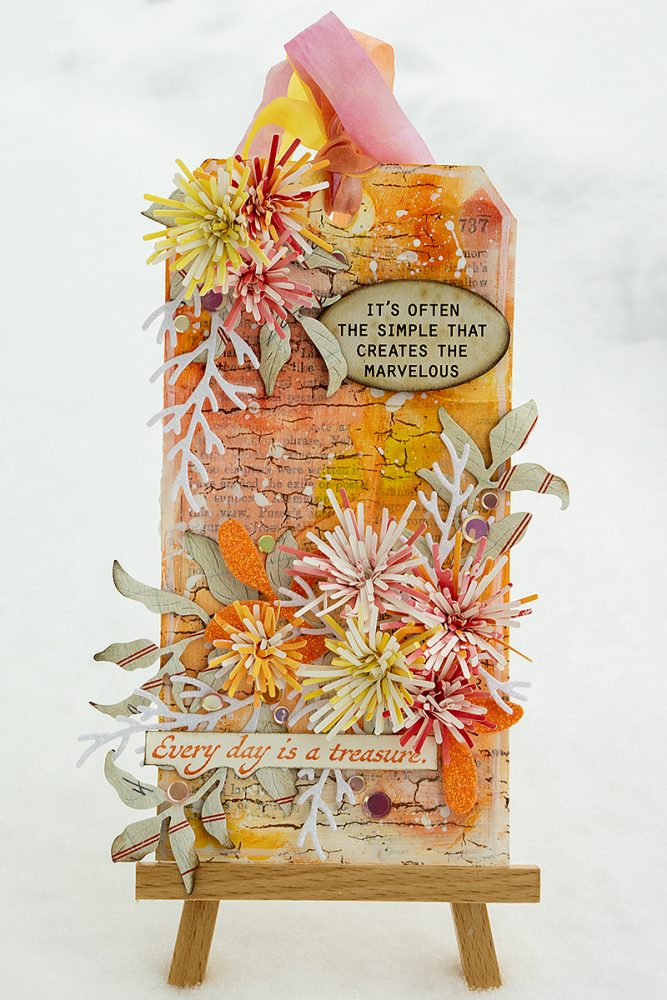
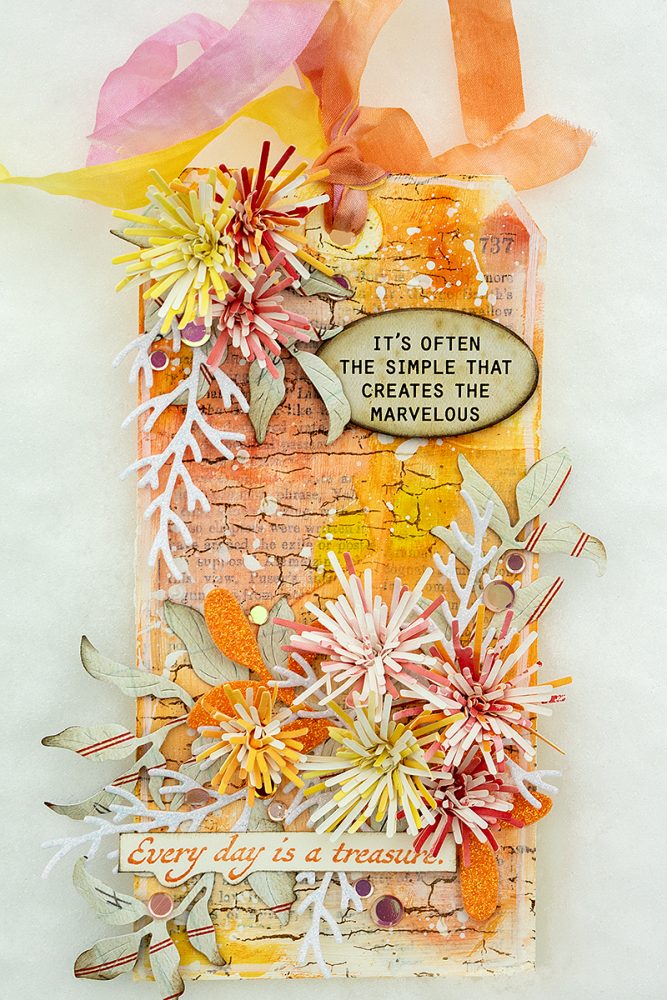
Hi friends! Happy Sunday! Please join me in welcoming back special guest Anna-Karin Evaldsson to our blog! I just love the way she took supplies that were designed for the Winter and Christmas season and made this warm and floral looking tag that is giving me all the good Spring and Summer vibes! Read on to learn more and enjoy!

Hi everyone! It is a new year and I hope it will be filled with creative projects and adventures. I am happy to be back here today with a new tutorial. I enjoy thinking of new ways to use my dies and for this tutorial I turned bottle brush trees into fringed flowers.

When I first saw the Simon Says Stamp Exclusive Large Bottle Brush Trees and Small Bottle Brush Trees, I thought they were great shapes which could also be used for other things than trees. The trees work great for fringed flowers. Fringed flowers are dimensional and lots of fun to make and even more so if you don’t have to hand-cut all the fringes.
The tag has a mixed media background, but you can also use patterned paper or a stamped and inked background.


- For a subtle background texture, glued pieces of old dictionary paper to the tag with Distress Matte Medium. Add a layer of medium on top of the paper too.
- When dry, add a thin layer of gesso, but don’t cover all the text.
- Paint the tag with Mustard Seed, Carved Pumpkin and Abandoned Coral Distress Paint. Mist with plenty of water to blend.
- Let dry and stamp with Simon Says Stamp Crackle Background using Potting Soil Archival Ink. Don’t stamp everywhere.
- Draw a border with a white paint pen and splatter white paint on the background.


- To color the papers for the flowers, smear Distress Ink in two shades on a non-stick craft sheet. Mist with water and press watercolor paper into the ink. Let dry and repeat until you are happy with the colors.
- Die cut the Large Bottle Brush Trees and Small Bottle Brush Trees from all the colors. I made mainly large flowers.
- Fold the trees in half as shown and glue them together along the fold with Simon Says Stamp craft glue. The trees shown on this photo haven’t been glued yet. Off-set the trees slightly when gluing. You can also mix tree die cuts of different color.
- Use a pair of tweezers and roll the trees up. Start with the top of the tree, which has shorter fringes. My pair of tweezers come from Tim Holtz Shaping Kit.


- Glue the trunks of the trees to finish the roll. Add glue over the whole base and let dry.
- When the glue is completely dry, shape the flowers.
- Leaves were die cut with Simon Says Stamp Tattered Leaves from Tim Holtz Christmas Backdrops paper. Many of the Christmas Backdrops papers can be used also for non-Christmas projects.


- I wanted a little bit of glimmer on the tag too and die cut branches and leaves from Simon Says Stamp Tangerine and White Glitter Cardstock using the Simon Says Stamp Berry Stems die set.
- I really like using the Simon Says Stamp Pawsitively Saturated inks to dye ribbons. Pull the May Arts Wrinkled Faux Silk Ribbon across the ink pad, mist lightly with water and crunch up in a paper towel.
- The main sentiment is a Tim Holtz Quote Chip Labels, lightly sanded and inked around the edges.
- The combination of old book paper, Distress Paint, stamping and splattering makes for an interesting looking background, useful for many types of projects.


- I used trees die cut from two different colors for some of the flowers, while others were made from two trees of the same color. You can also try double-sided paper for a different effect.
- Glue the leaves, flowers and some sequins to the tag.
- The second sentiment comes from Simon Says Stamp Mixed Labels and was stamped with Sherbet Pawsitively Saturated Ink.
- The tag has quite a lot of dimension.
I hope this tutorial inspired you to look at your dies in new ways and see what ideas you can come up with. Thank you so much for looking! Happy crafting! –Anna-Karin

SUPPLIES:
|
Thanks so much for stopping by, and thanks to Anna-Karin for being our guest!
Psst! Sale alert this weekend only!


WOW this is amazing. It looks like fireworks in July and is a fabulous way to celebrate our coming Spring.
absolutely gorgeous!!
Wow!!!! Soooo Creative!!! Gorgeous!!!!
Amazing!!! Thanks for sharing.
Interesting twist on the bottle brush trees. Very clever idea.
Wow!! So colourful and so very clever!! A feast for the eyes!! 🧡
This is amazing! I always love Anna’s step by step photos
Great idea, and I have those.