An ode to sunshine with Ashli Oliver
Hi there! Ashli Oliver here to share a fun twist on the classic “sunburst” paper piecing technique. I just love this look! You know the one- triangular shapes of paper arranged in a sunburst type fashion. I love the movement and graphic quality that this can give to any project. But, for our sunbursts today, I want to try adding some mixed media and incorporate some extra layering.
To begin, I have simply cut some scrap paper into irregular triangle shapes, and then trimmed down a bit of Bazzill Vellum into three 6×6 pieces.
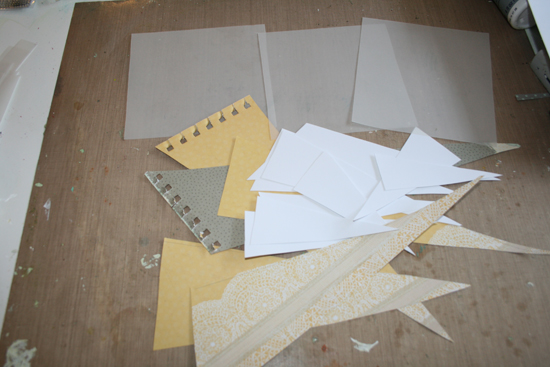
Those vellum squares will form the base of our sunburst embellishments. Then, I just played around with adhering the triangle shapes. One thing worth mentioning… I chose to use my Glue Arts adhesive. I find that liquid adhesives cause a great deal of buckling and warping on vellum. I want my vellum to stay flat at this point, so dry adhesive it is!
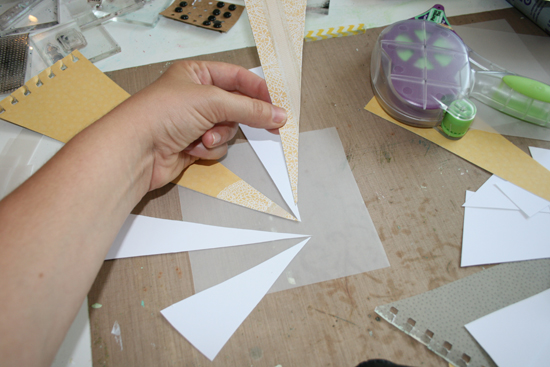
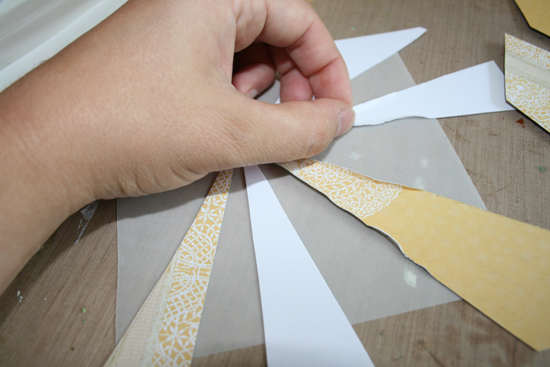
Once I had my little triangles where I wanted them, a little distress work with they ole’ fingernail adds some nice texture. Don’t want to use your fingernails? No problem! You might try a little bit of egde distressing, prior to adhering, with the Tim Holtz Tonic Craft Scissors. Simply rub one of the blades along the edge of your paper.
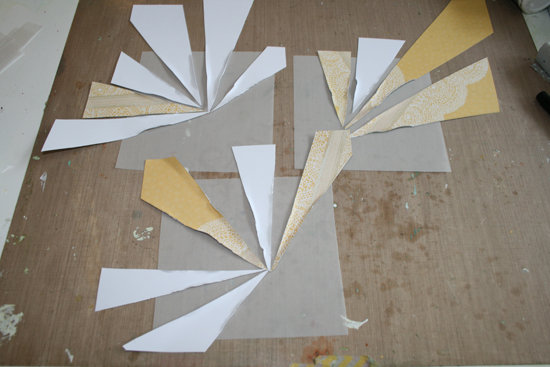
Repeat the above steps three times and then we end up with our little sunburst embellishments below:
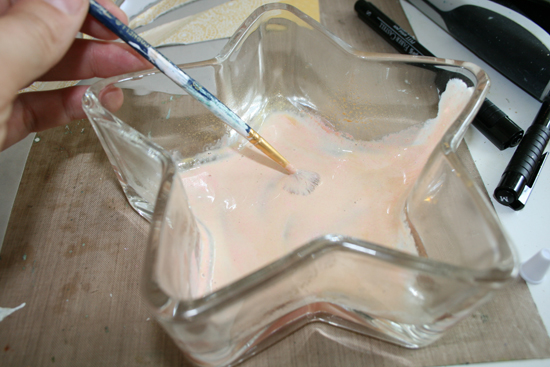
Now, here is where the real fun begins! Simply mix Darice Tacky Glue, Gold Lame Color Shine, Doodlebug Pink Glitter, and water until you have a thin and runny consistency:
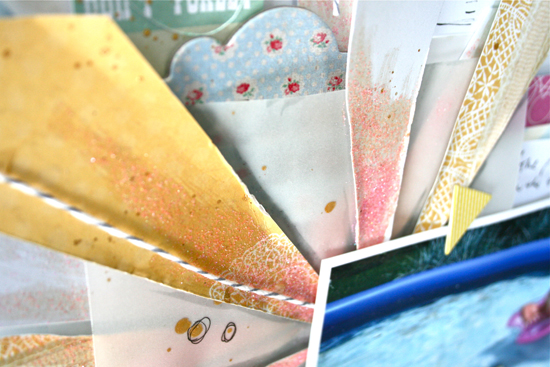
Then, just have fun painting it on to your sunbursts! To achieve the most dimension, try concentrating the glue mixture toward the center of your sunburst and blending outward:

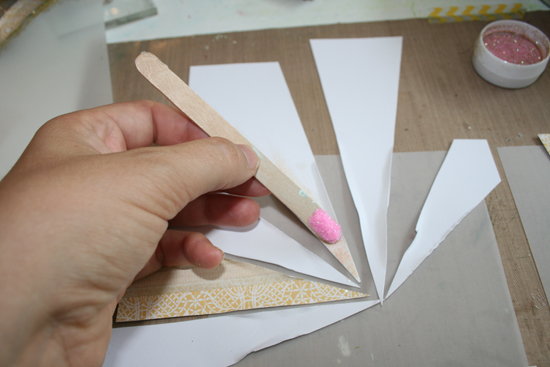
Once you have it all painted on, but before it has dried, add a bit more of that pink glitter to the top. I used a craft stick to help control my sprinklings:
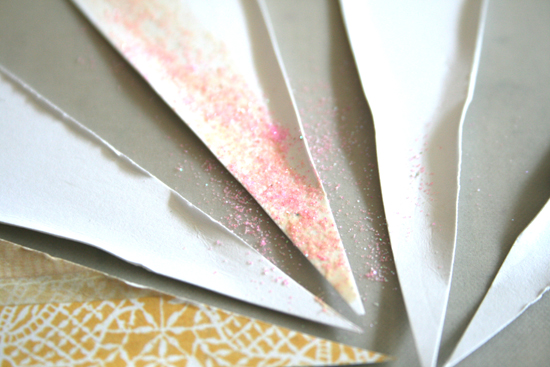
Like so.
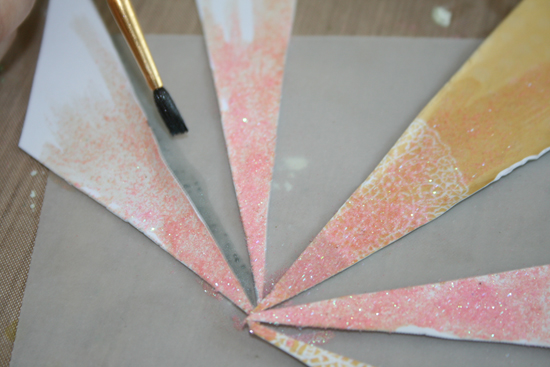
Once that dries, brush any excess off. Now for some more shading I simply dipped a paint brush into my Tinsel Color Shine and painted a very thin line at the edge of each triangle. This is a subtle addition, but adds just the perfect touch!
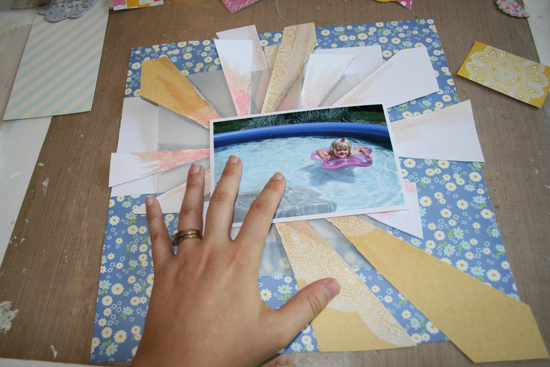
With all of my sunbursts dry, I layer them up with my background paper and my chosen photo. I love that the transparent quality of the vellum base allows for such great layering of the bursts!
Now to finish up my layout I added bits and pieces of Mint Julep, Mayberry, Heidi Swapp, Freckled Fawn, Pink Paislee, and Crate Paper to add special touches to my page.
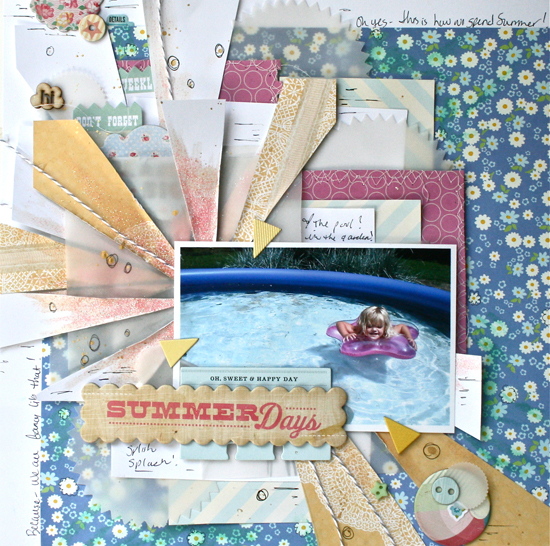
I also added a little Doodle Twine and Pen Lines for good measure.
A fun summery, sunshiney layout- complete with custom mixed media sunburst goodness!
I hope I have inspired you to try your hand at some mixed media, glittery, paper piecing fun! Be sure to link-up your sunshiney projects with us this week!

Thanks to Ashli for her ode to sunshine tutorial! She has me wanting to make some layered sunbursts for my next card or layout and really try out her way of doing glittered sunbursts. So much fun! I could see this being amazing on a mixed media canvas too.
Want to join in with some fun in the sun? Then join us in this week’s challenge! For the full rules, read the “challenge rules” posted in the side-bar here on our blog, and be sure to enter your challenge in the post below this one.
Challenge Badge

Spotlight Badge


Fabulous sparkly sunbursts, and I love the extra dimension from tweaking the edges – what a sensational layout, Ashli. Thanks for sharing all the details.
Alison x
This is so much fun!! Great layered layout Ashli. Such a great way to remember a beautiful sunny day :) – Mary Elizabeth
Your layout is wonderful Ashli, love how you created the fabulous sunburst and really loving the layer on layer look. Anne x
So refreshing and pretty, Ashli!
Love this look! It’s as if the glitter and shine come bursting from your focal point. Beautiful!
This is such a fun and fabulous layout, Ashli. Love the beautiful glitter effect. Thank you for the great inspiration. :)
Wow for all those layers. Fantatsic LO
Super gorgeous layout, Ashli! I just love the glitter you added to the sun rays!
*mwah*
Steph
Simon Says Stamp!