Doodling with Debby: Picture Book Christmas
Hi friends! Happy Tuesday! Thanks for popping by today! Please read on below to see how Debby Hughes made this absolutely adorable Christmas card! Be sure to watch the video and enjoy!

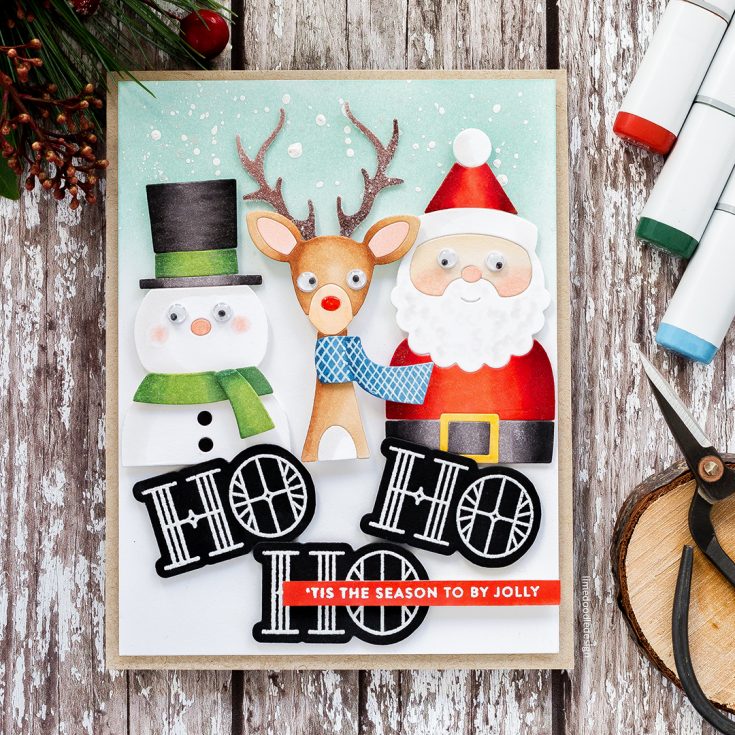
Hello, it’s Debby here today with my monthly video feature, Doodling With Debby! I love the look of no-line colouring – stamping an image in a pale ink and then colouring, so the original line is no longer visible. Well, I’ve called today’s technique no-line die cutting.

In the same way as the stamping technique, no-line die cutting results in a coloured image without any black lines and the Picture Book die series from Simon Says Stamp are perfect for this.
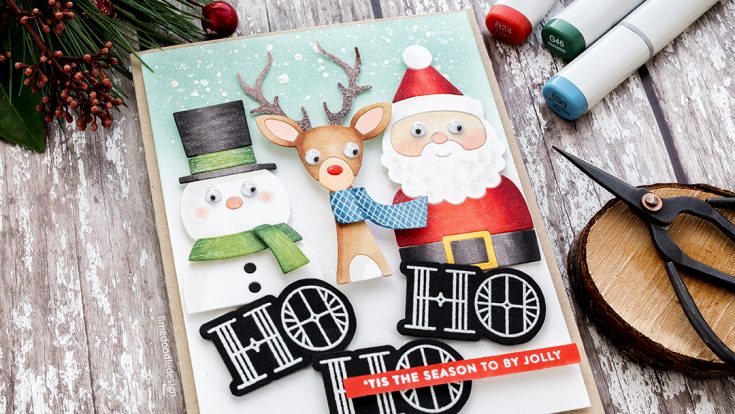
I die cut the Picture Book Snowman, Picture Book Deer and Picture Book Santa from Neenah Solar White card and then coloured with Copic Markers. I had great fun colouring these die cuts with simple shading to bring them to life.
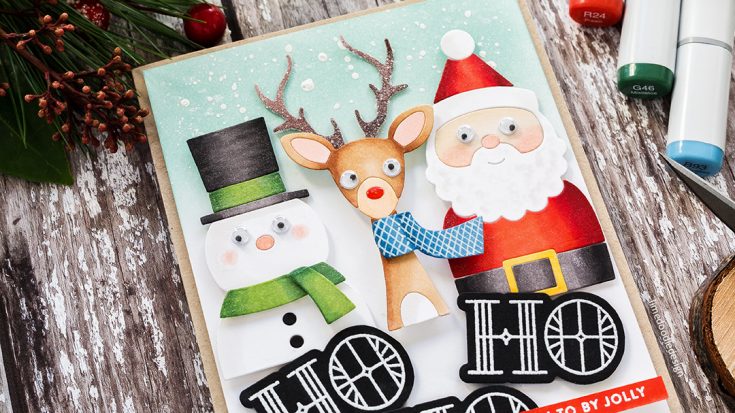
Once I’d coloured the pieces for each character, I glued them to a piece of white card and trimmed out before adding a pair of wiggle eyes. I rubbed Ranger Multi Medium Matte over Rudolph’s antlers and dunked them into a tub of Rock Candy Distress Glitter before adhering them to the back of the deer’s head with a glue dot. Also, I added Glossy Accents to Rudolph’s red nose. To dress up Santa and the snowman, I added Wink Of Stella glitter pen to their outfits.
I blended Lake Shores ink into the top of a panel of white card and splattered with perfect pearls solution and then white gouache before mounting the trio of characters with foam adhesive.
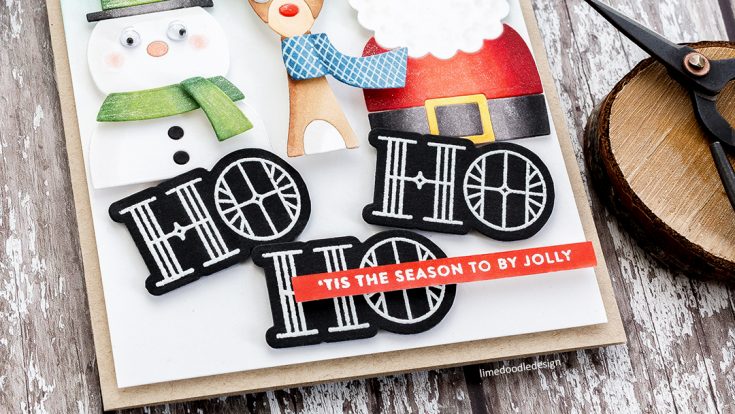
For the sentiment, I stamped, and white heat embossed the ‘Hope’ sentiment from the Stained Glass Greetings set three times and die cut with the matching die. I then trimmed out the ‘HO’ from the beginning of each die cut and mounted them below the three characters. I completed the sentiment by stamping a phrase from the Fa La La set in clear embossing ink on card coloured with a red marker and white heat embossed before trimming into a skinny banner.
I added the finished panel to a side folding Desert Storm card base.
Thank you for joining me today, and I’ll see you next time for Doodling With Debby!
Watch the VIDEO:
Watch below or in HD on YouTube.
SUPPLIES:
|


Thanks so much for stopping by today, and thanks to Debby for being our guest!

Blog Candy Alert!! Follow our blog via email and comment on this post for a chance to win a special blog candy!
Congrats! Blog Candy Winners!
From: Studio Monday with Nina-Marie: Lawn Fawn Pop Up Holiday Gift Card: Denise Bryant!
From: A Tim Holtz Winter Wonderland by Richele Christensen: Deborah Thomas!
From: Yippee for Yana: Christmas Lights in Blue and White: Neha Parab!
From: Masked Christmas Squad: Amy Cooley!
Please email [email protected] with the name of the blog you won from, the prize you won, and your address (if applicable), to redeem your prize(s)!


Sweet beautiful card. Those images are darling and love the whole layout. Awesome dies and stamps.
Those faces are adorable!
What a fun card!!1
I love everything about this card – the coloring, the background, the Ho Ho Ho! Beautiful!
Like the HO!HO!HO trio!
Your card is adorable. Love the coloring. Thanks for sharing…
How fun to make Santa, a deer and a snowman, especially with google eyes. Love it. Thanks for sharing.
Love this one! The Stained Glass sentiments are awesome & the deer is adorable,!
Love your fun and adorable card Debby. Thanks!
These are ADORABLE!!
Fantastic holiday card!!….super fun and festive!!
Definitely anlot of work to color all those pieces, but the end result was fantastic! Love this card Debby!
I am curious why the message says “by jolly” instead of “be jolly”?
I wondered the same thing!
Great cards!
Very cute card!
I love this cheery card!
Cheery cards – love those manic, fun googly eyes and the font on the HOHOHO
Love this adorably sweet card! The googly eyes really take this card to the next level!
The coloring and card today is just fabulous!!
Adorable card! Love the simple and sweet look of the figures.
OH my, how adorable! I love the google eyes! :-)
What a beautiful card and video!
Please note that the attached video is the wrong one. I would like to see the one of Debby’s creation!
The googly eyes are the best!!!
Beautiful and funny card!!!
Congrats to all the winners!!!
I love these picture book dies. They are so cute.
Such a great range of dies. Your colouring is stunning.
Supercute card, love all the different fun elements!
This is so adorable! Love it!
These characters are so perfect for the holidays!!! Love your beautiful card!!
I loved how you did this technique. It looked so cute when it was done. How ingenious to cut the hope die to read “ho, ho, ho”. You have a great imagination as I wouldn’t have thought of that. Another multi use for our dies. Thank you for sharing!
Great coloring on this cute card!
Oh my goodness !! Nobody could resist in front of such an adorable card !
Love the whimical yet detailed look of this card! Great fun!
This is so sweet!!
What an amazing job. Well worth the effort
Super fun card…
This scene is adorable.
Super cute card- love it!
That deer is so cute and I love the ho ho ho font. Hugz
Such a cute card! If that’s simple shading, I think I’m going to have to give up thinking I can colour!
This is so CUTE!!! I love those big eyes! Thanks for the video!
What a fab fun card! Beautiful colouring :)
Such a fun trio!
I always love what Debby creates. This one is so adorable.! Thank you for sharing!
Creative idea and it looks fab! I love that stained glass stamp set too!
Debby, this is absolutely phenomenal! A stellar job on this.
“BY” jolly, ha ha, this is fun !
Very cute. Thanks for sharing.
Linda D.
Absolutely adorable Debbie. Thank you for the inspiration. Great job. :-)