Throwback Thursday – Fabulous Projects You Might Have Missed!
Welcome to another edition of Throwback Thursday—a trip back in time! For each throwback, we’ll be spotlighting fantastic cards and projects using products from previous releases. The new stuff is always SO fun, but think about all of those great products you’ve collected and set aside. They are STILL AWESOME! And we want to inspire you with fantastic inspiration from our creative archives.
Soon, we’ll be releasing another batch of fresh and inspiring products (can’t wait!), but in the meantime, let’s take a look back at a collection that debuted last year. You might remember some pretty spectacular products from last year’s Best Days collection. Let’s take a look at some inspiring cards created with goodies from our Best Days release!
First up is this gorgeous project from Amanda Korotkova:
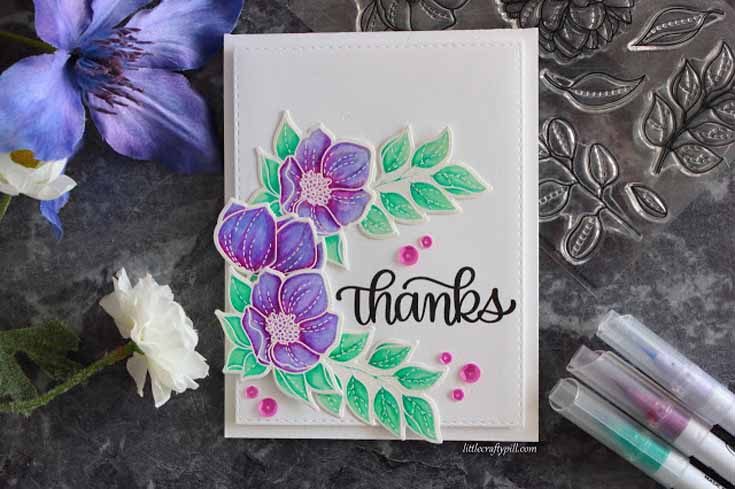
Amanda’s stunning design comes together with the gorgeous Even More Spring Flowers stamp set and dies from our Best Days release. She white heat embossed the flowers, colored them with Zig Clean Color Real Brush Markers, and then used the coordinating dies to cut out the beautiful flowers and leaves. The sentiment from the Big Thanks Words stamp set finishes her design perfectly. You can see Amanda’s original post HERE, and you can see how she created this glorious creation on YouTube HERE.
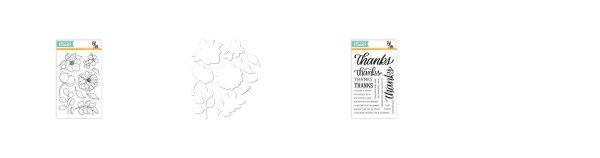
Amanda’s supplies
Next, let’s throw it back to this super cute design from Nichol Spohr:
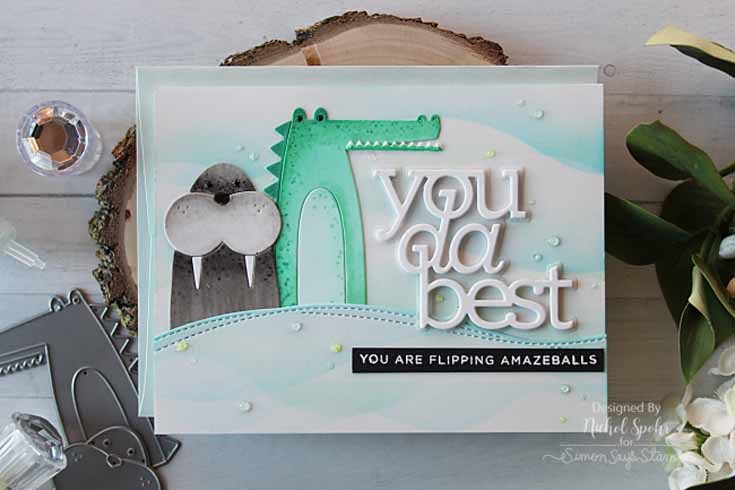
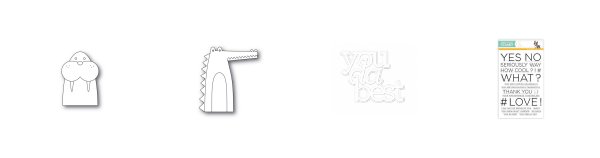
The Picture Book Walrus and Croc were released with our Best Days products, and Nichol used them both on this delightful design. The You Da Best die and sentiment from the Emphatic stamp set give this card a whole lot of whimsy! Nichol shows you how she created this adorable design HERE on YouTube. You can find her original blog post HERE.
Nichol’s supplies
And let’s not forget this beautiful project from Leigh Houston:
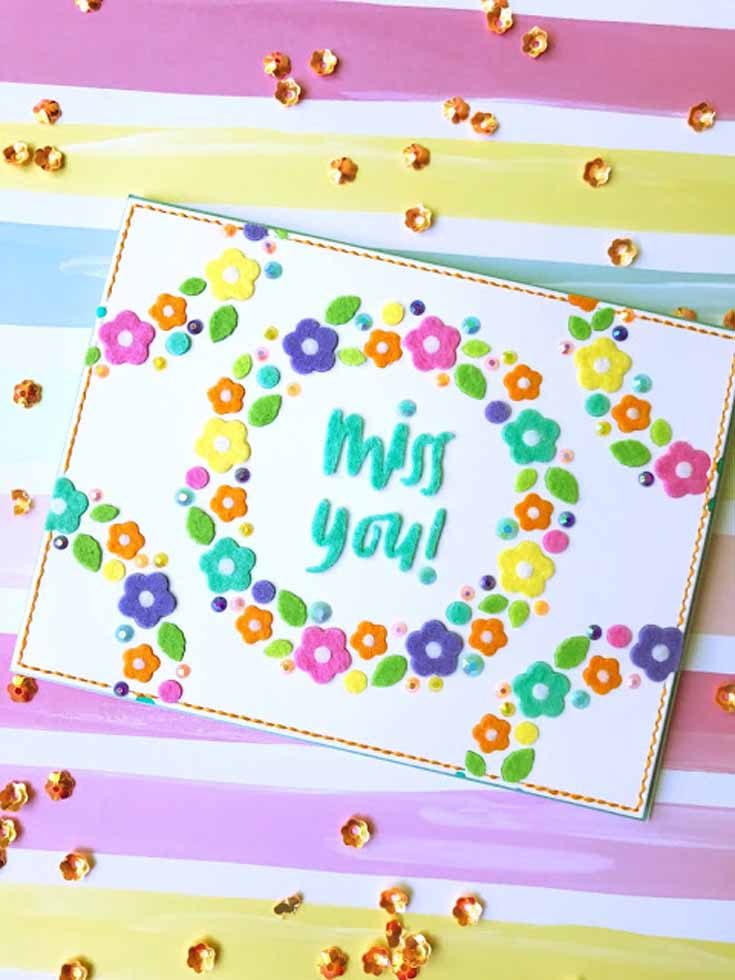
Leigh’s pretty design has me longing for spring with bright pops of color! She used the Blooming Circle die with saturated colors of felt. I love how she designed the card to have the die going off the edges. It really gives it a whole lot of energy! You can find Leigh’s original blog post HERE. You’ll love her smart tips for die cutting felt.
Leigh’s supplies

And finally this adorable baby card from Karen Janet Reategui:
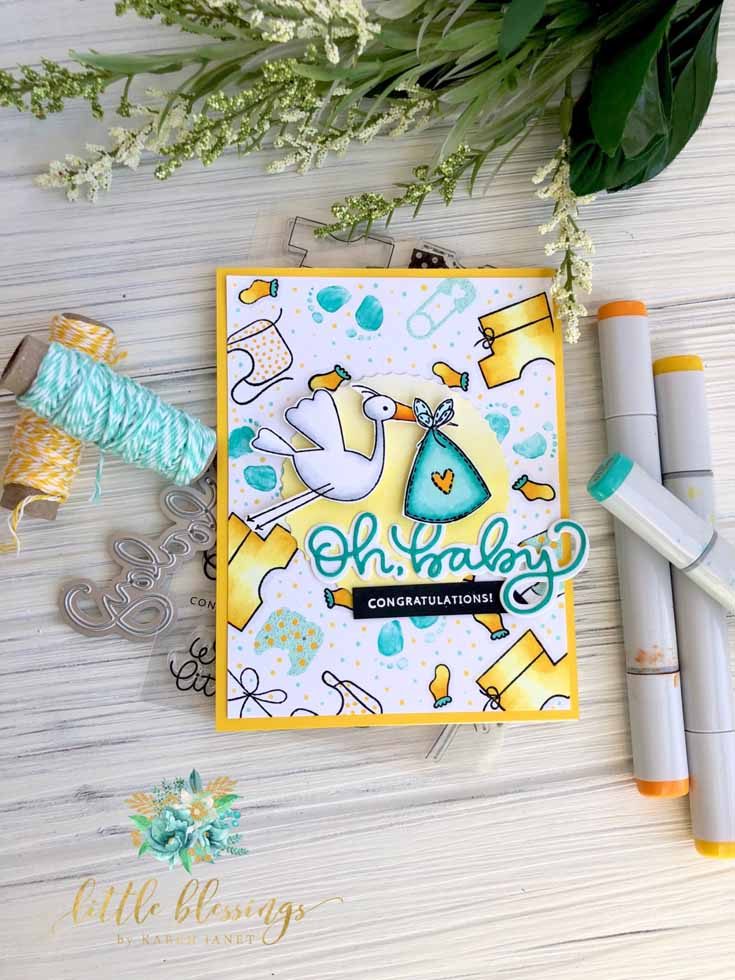
There’s nothing cuter than a baby card created with our Oh Baby stamp set and Oh Baby Words die. Karen Janet’s color choices are so sweet and happy in pretty blues and yellows. You can check out Karen Janet’s original blog post HERE.
Karen Janet’s supplies
Did you know that we have inspiration galleries on our website showcasing project ideas for all of our releases and card kits? It’s a veritable treasure-trove of terrific ideas just waiting to inspire you, and you are invited to share your projects, too! You can find all of the Simon release galleries HERE and galleries for our monthly card kits can be found HERE. Scroll through today, and maybe you’ll find one of YOUR projects linked there!
Thanks for throwing it back with us and checking out these cool projects from four talented ladies!
Doodling with Debby: Blended Distress Oxide Background
Hi friends! Happy Wednesday! Thanks so much for stopping by the blog today and thanks to the always inspiring Debby Hughes for being our guest in the latest edition of Doodling with Debby, a monthly blog series on our blog! Read on, watch the video, and enjoy!

Hi, it’s Debby here and today for my Doodling With Debby feature for Simon Says Stamp I’m being inspired by the fabulous Kristina Werner and her Distress Oxide

I started with the three
I use baby wipes to clean my glass mat of excess ink and prevent it from being blended into the wrong section, and I also use baby wipes to clean my brush when moving from darker to lighter colours. I rub the brush head over a baby wipe several times and then rub it over a dry tissue to remove any moisture and then I’m set to go again. If I’d left the remains of the black soot on the brush as I worked more Evergreen Bough into the transition then the Black Soot would likely have overpowered the Evergreen Bough but with the clean brush I was able to apply more of the Evergreen Bough to blend the transition and even the colour out as I wanted it to be. I repeated the cleaning process to remove the Evergreen Bough ink before turning to the Old Paper ink to work the colours over those transition areas. And once I’d finished giving a good coating of the Old Paper to the top of the panel, I was happy with the overall blending of colours from one to another.
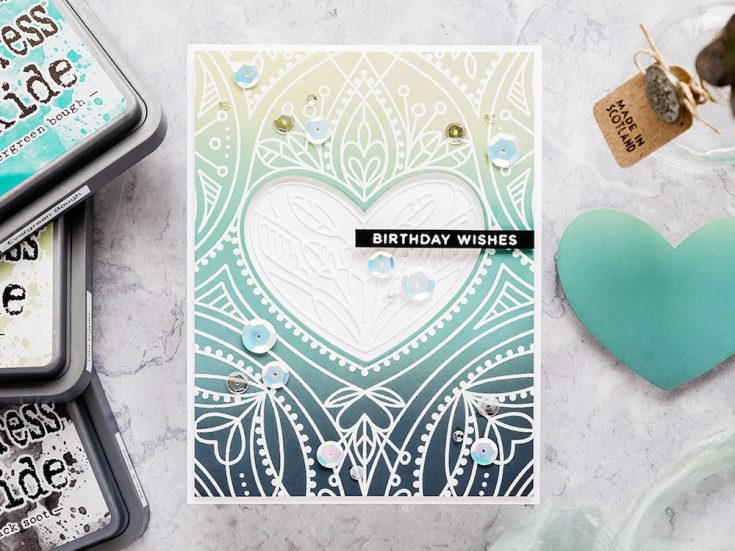
I planned on using the Center Cut Heart background stamp from Simon Says Stamp, and white heat embossing the design over the ink blended background. Having lined up the stamp on the panel in the Misti, I then made sure the panel was fully dry before stamping. The moisture from the Distress Oxides could easily cause embossing powder to stick everywhere, and so I dried the panel thoroughly with a heat tool before treating it with an anti-static powder bag. This will again help prevent embossing powder randomly sticking everywhere. I stamped the image in clear embossing ink from Simon Says Stamp; this is a clear sticky ink that the embossing powder will easily stick to. I made sure to press down firmly over the whole of the image to get a good impression. Having said that I didn’t actually use the whole of the image. The Center Cut Heart background stamp has a central heart area which can be removed, and I chose to stamp the image without the center heart as I have plans to die cut this area afterward. Having stamped the image, I sprinkled white embossing powder from Simon Says Stamp over the sticky ink and then heat set it with a pre-heated heat tool. I let the embossing powder cool and then trimmed the panel to be just slightly smaller than an A2 card base.
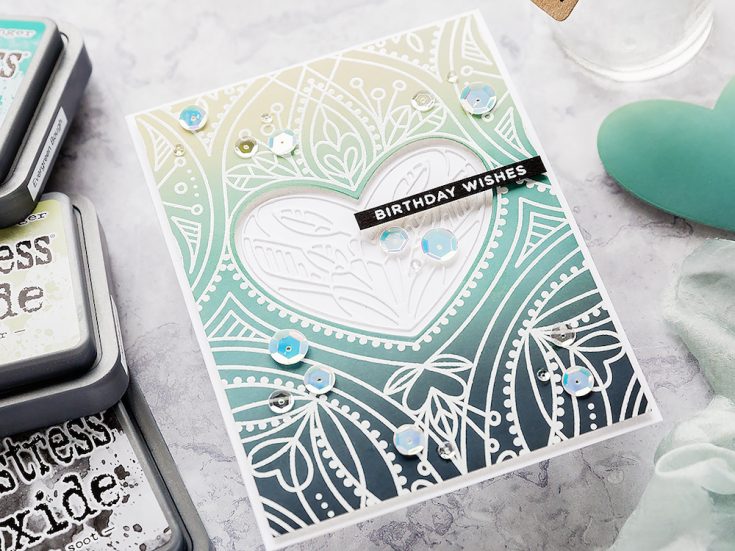
Now, let’s return to that center heart area. A recently released Deco Heart die coordinates with this stamp set. There are two dies in the set one which will cut out just the heart area and one which will cut out a matching decorative pattern. You could cut the pattern from the open area of the stamped design. However, I chose to cut the whole area out with one die and then die cut the decorative die from white card to add to the middle of the heart window. I added foam adhesive to the back of the ink-blended panel and mounted it onto a white A2 card cut and scored from Neenah Solar White card in the 110lb weight. I added little dots of Gina K Connect glue over the back of the decorative die cut and then dabbed any excess glue off on a scrap piece of card before adding it in the heart window. I love how on the white card base the white decorative die cut adds a lovely tone on tone detail and elegance.
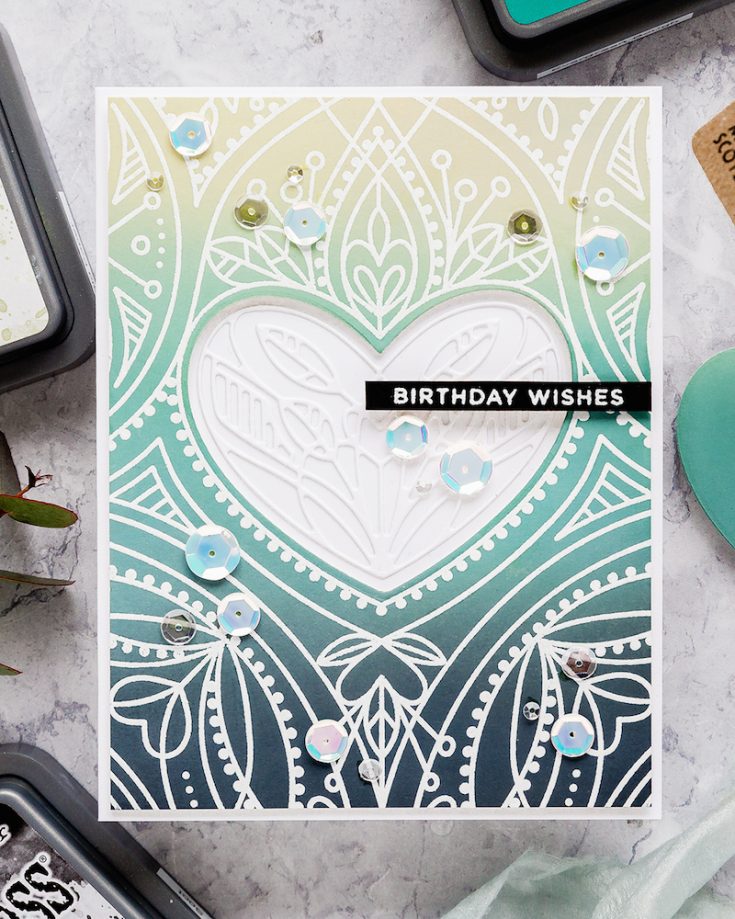
I am still in love with simple skinny strips for a sentiment banner, and so I chose the Simple Sentiments 02 set from CZ Design and Simon Says Stamp for the greeting. I often like to use a dark grey card for a sentiment strip, but with the Black Soot Distress Oxide ink in this blend, I felt that a black sentiment strip would work better. I treated a piece of Black card with an anti-static powder bag and then stamped the Birthday Wishes greeting in clear embossing ink before sprinkling with white embossing powder and heat setting. I trimmed the sentiment to a skinny banner with a scalpel and ruler and then added foam adhesive to the back and used a T-square ruler to ensure I added it on straight to the card.
I can’t finish a card without a little sparkle, and so I chose some opalescent sequins from the Butterfly Kisses sequin pack and a few clear sequins from the Girl’s Best Friend pack both from Simon Says Stamp and kept them in place with Gina K Connect Glue.Thanks for joining me today, and I’ll see you next time for Doodling With Debby.
Watch below or in HD on Youtube.
SUPPLIES
|


Thanks so much for stopping by, and thanks to Debby for being our guest!
Blog Candy Alert!! Follow our blog via email and comment on this post for a chance to win special blog candy!
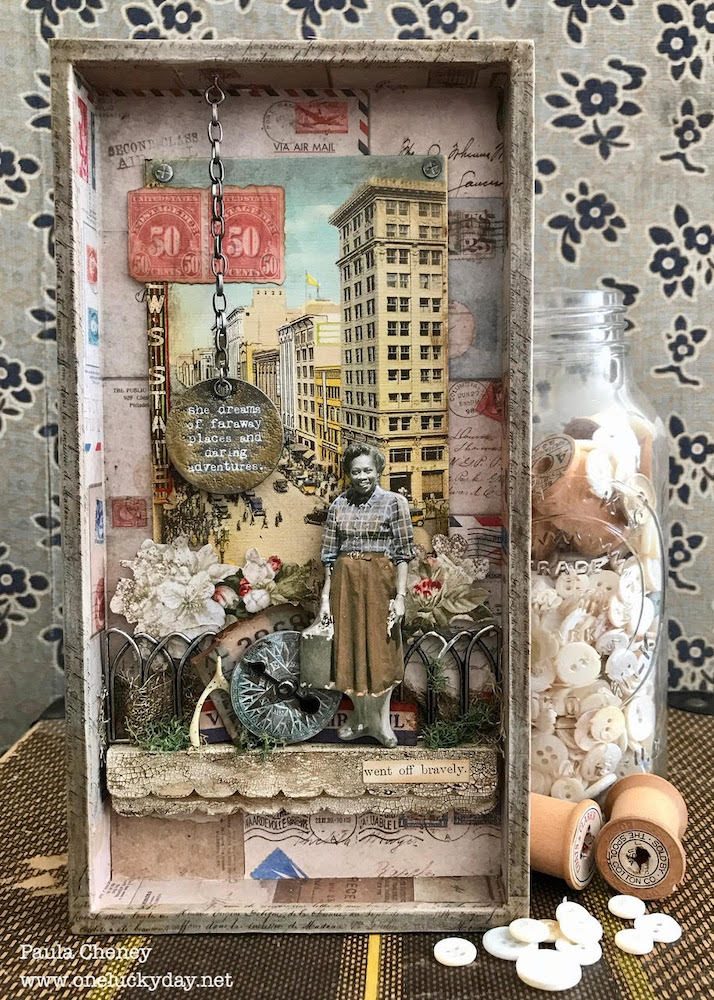
She Dreams of Adventure by Paula Cheney
Hi friends! Happy Tuesday! Please join me in welcoming extra special guest Paula Cheney to our blog today! She’s made a super fun project to share with us today! So sit down in a comfy chair, grab a yummy beverage, and read on to learn more!
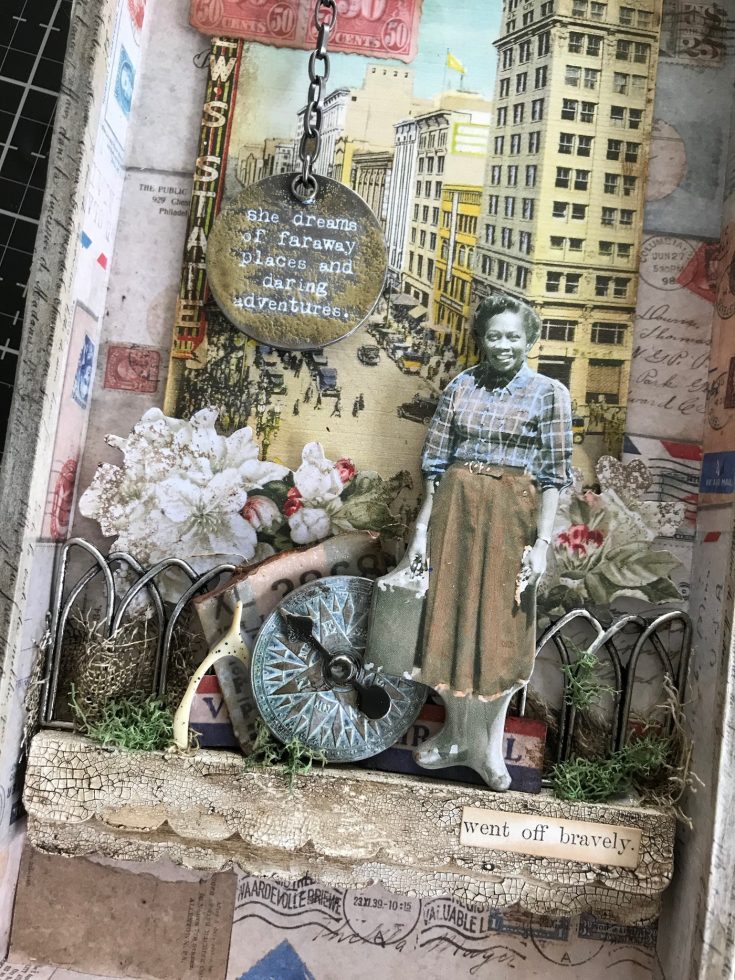
Hi friends I’m glad to be back at Simon Says Stamp sharing a project all about the spirit of adventure. This is the time of year when many people set goals and travel plans for the upcoming months. I hope you will catch the message of this project and begin a path to get out there and do something you have always dreamed about! Now follow along as I show you all the layers to create this project.
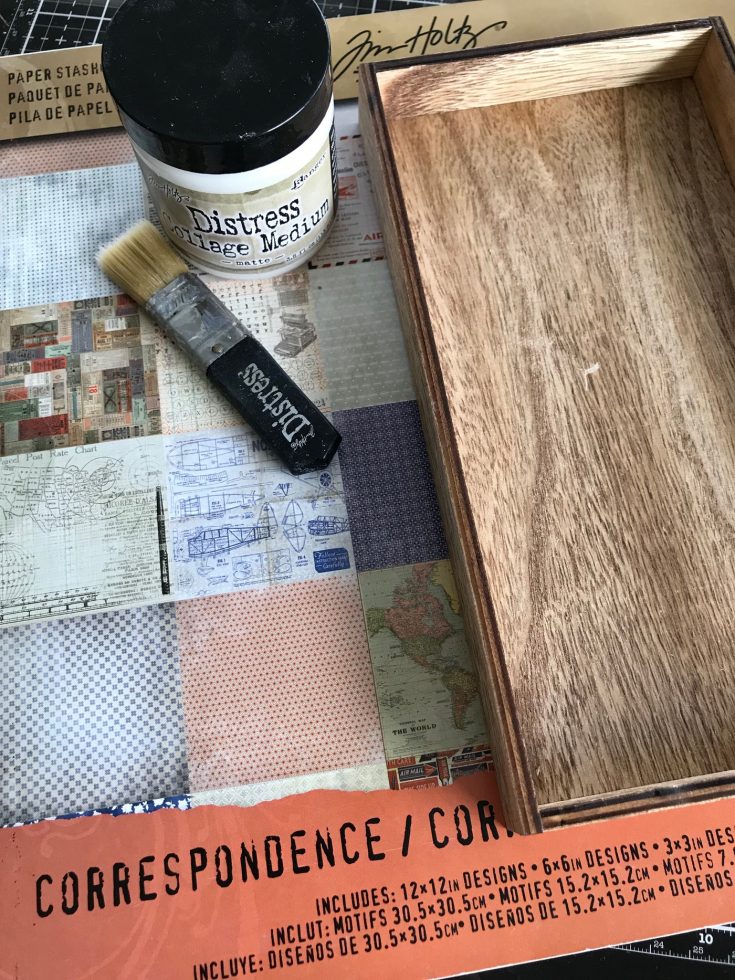
Gather supplies: Correspondence Paper Stash, small Vignette Tray, Collage Medium and Collage Brush.
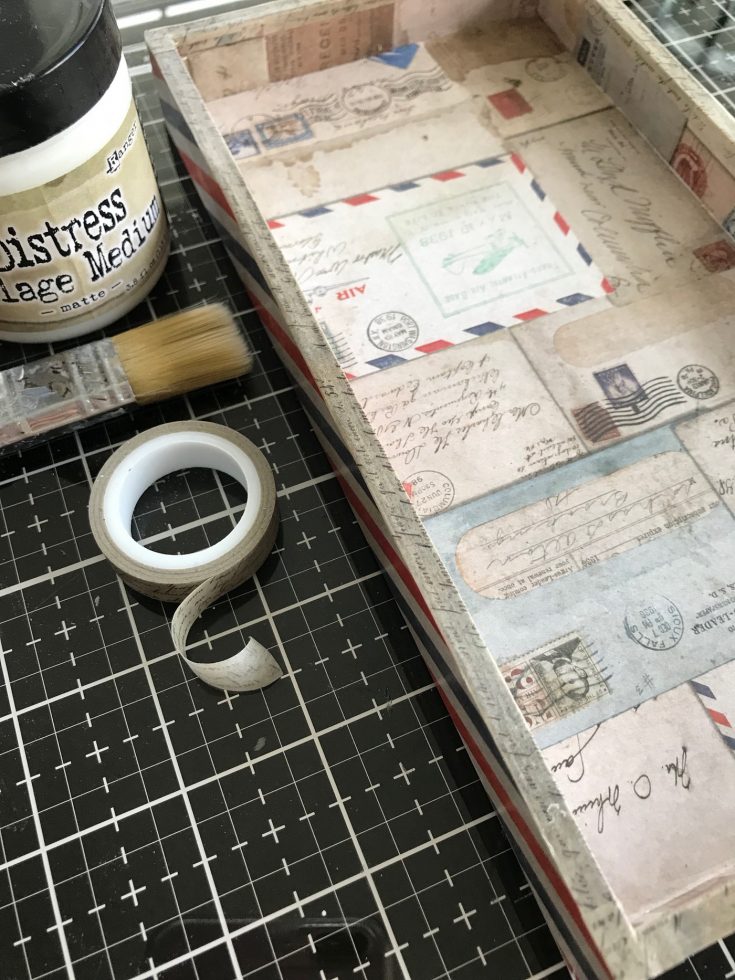
Cut paper to fit the Vignette Tray. I used envelope paper on the inside of the tray and the red and blue mail stripe on the outside. Collage Medium will work perfectly to adhere the paper to the wood. I also like to add a thin layer of Collage Medium over the surface to seal the paper. Once dry, add Design Tape to the edge of the tray. I like this one from the French pack because it has very small script that fits with our travel theme. You might need to add a bit of Collage Medium on the corners. Design Tape sticks to the wood tray but it does not like to stick to itself, so I added a bit of glue where the tape is layered at the corners.
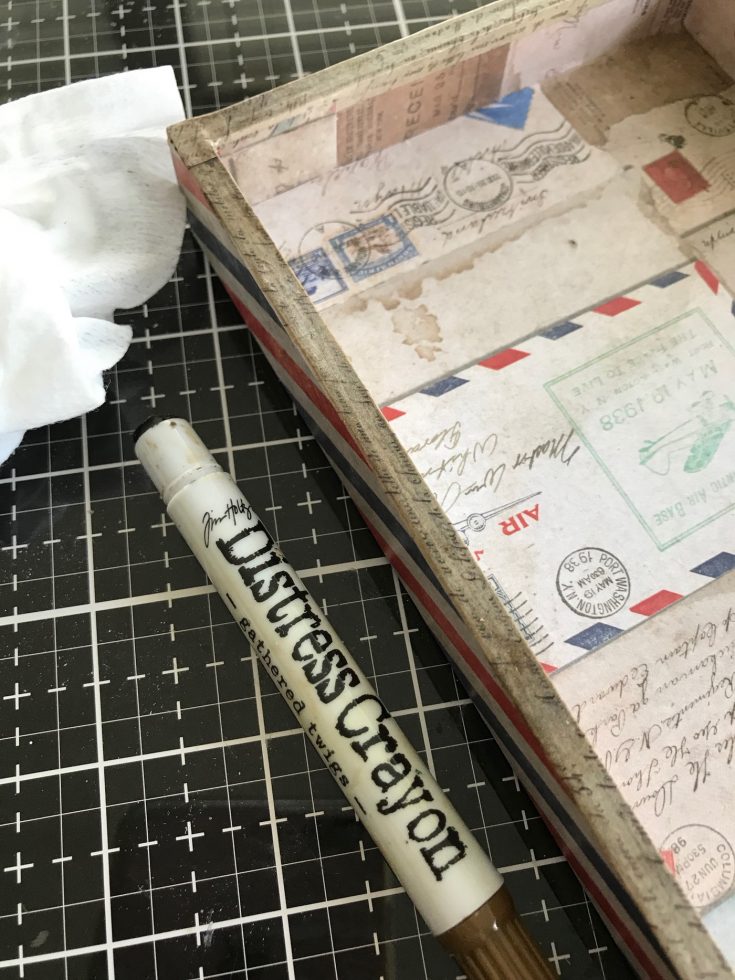
Scribble Gathered Twigs Distress Crayon over the Design Tape and rub with a damp finger to smudge. Set aside.
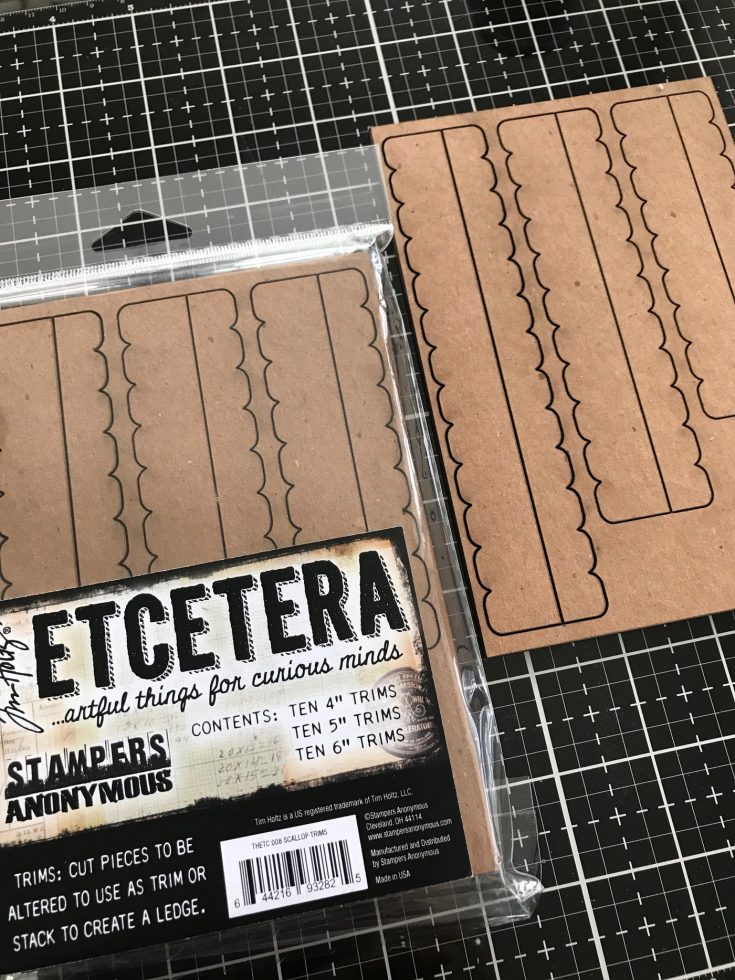
Did you know there are new trim packs from Stampers Anonymous? Each package comes with 4”, 5” and 6” trims in two different widths. They also come in three different styles – Scallop, Pinked, and Bracket.
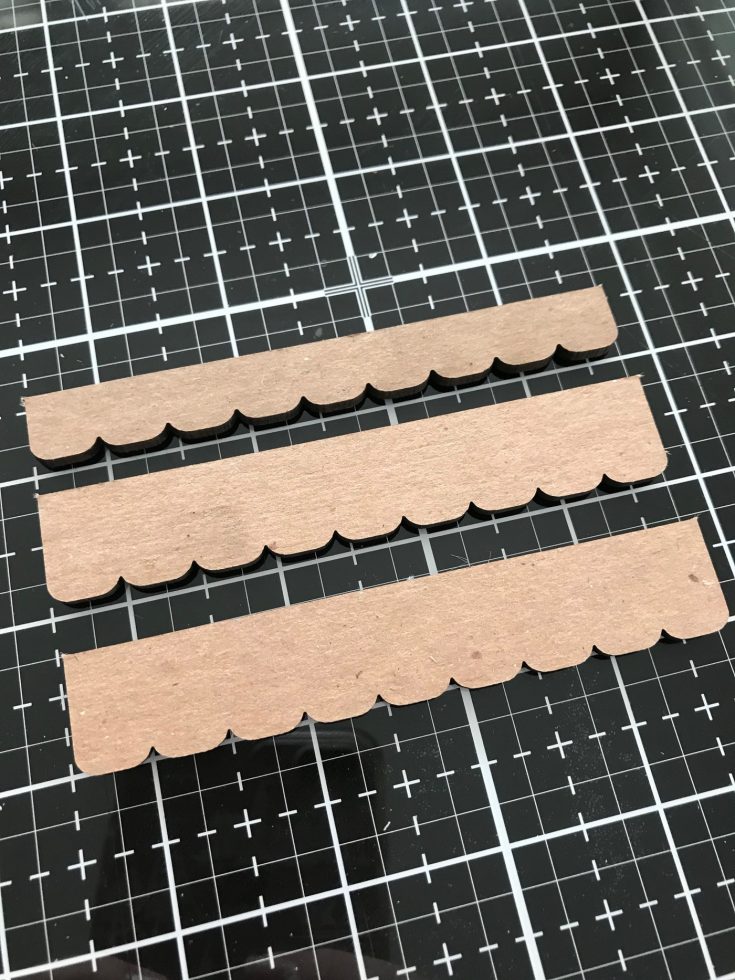
I am using three pieces of the scallop trim. Two that are the same size and one that is narrower.
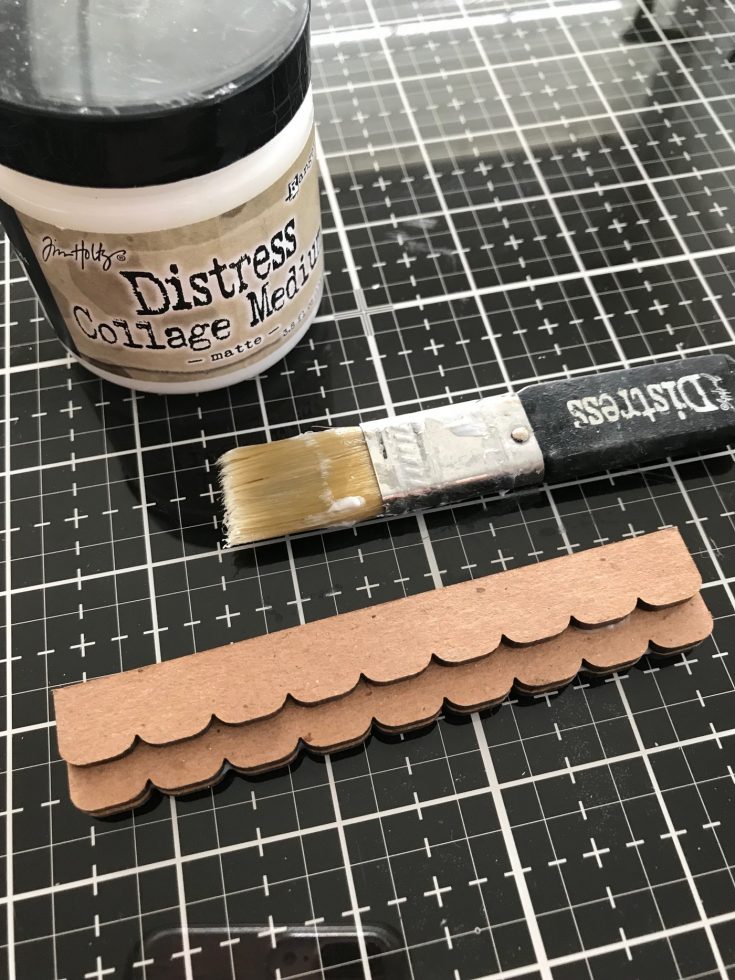
Use Collage Medium to glue the pieces together to create a small shelf.
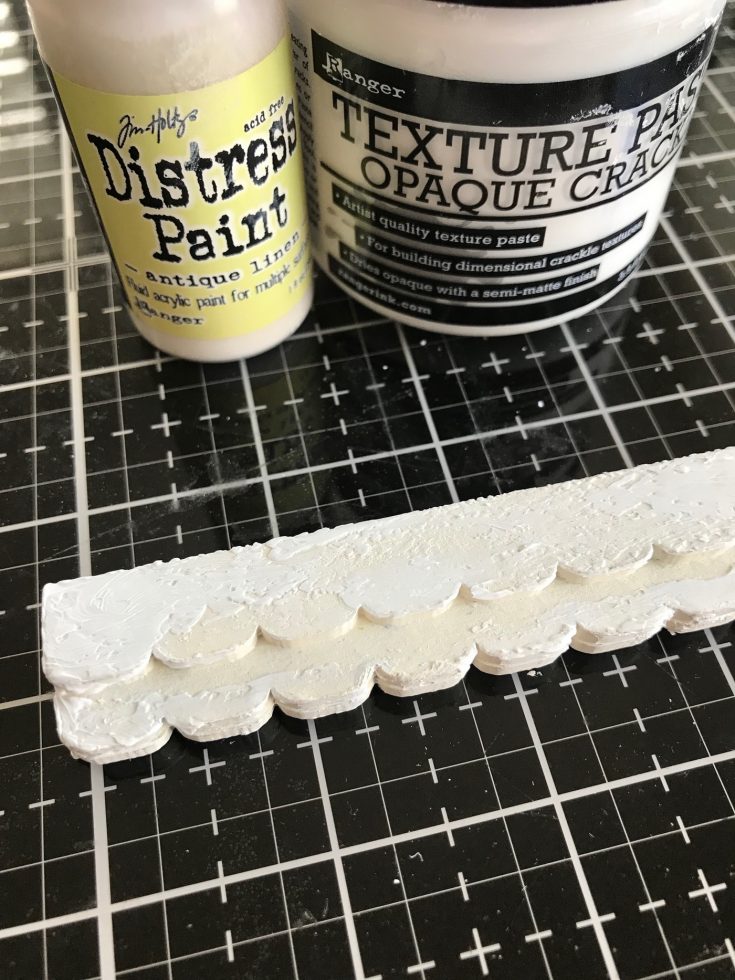
Paint the shelf with Antique Linen Distress Paint. Once dry, use your fingertip to smear Opaque Crackle Texture Paste over the surface. Ranger Opaque Crackle dries quickly and adheres to the surface like glue. I have never had an instance of flaking when I color the crackle after it is dry. In my opinion it is a vast improvement from the crackle paste we have all used in the past. Set it aside to dry for least 30 minutes before moving on to the next step.
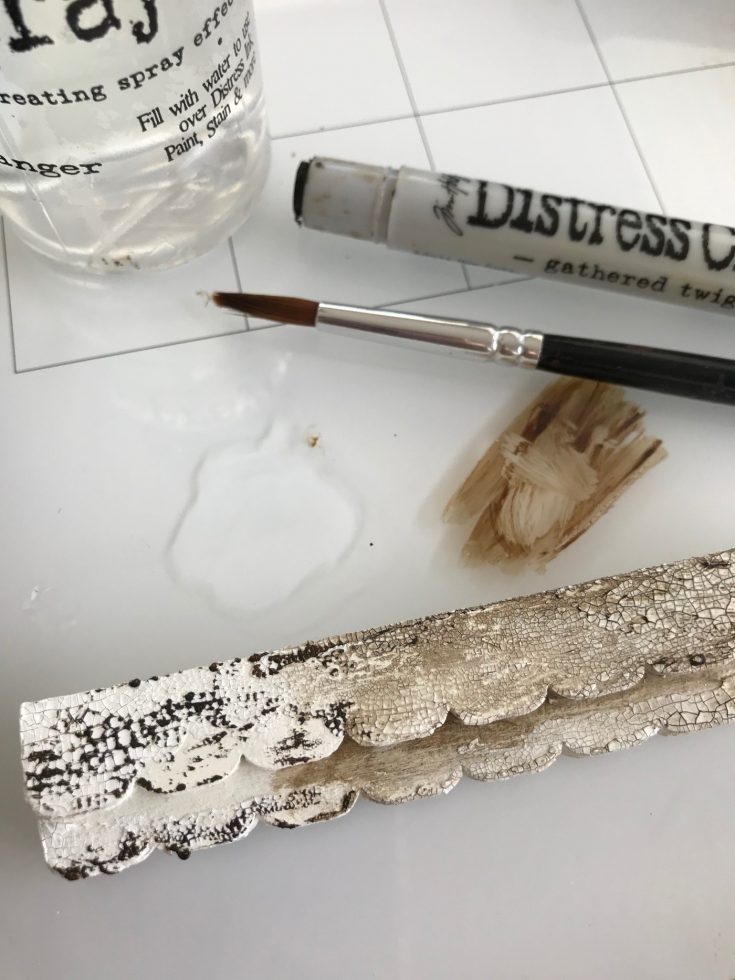
Scribble the crayon over the crackled surface. Dip your fingertip into water and rub over the crayon so that it flows in the all the cracks. Now because this shelf has a stair-step, I used a paint brush to pick up some crayon from my Glass Media Mat so I could work it into the scallops. If you get too much, just pounce with a wet wipe.
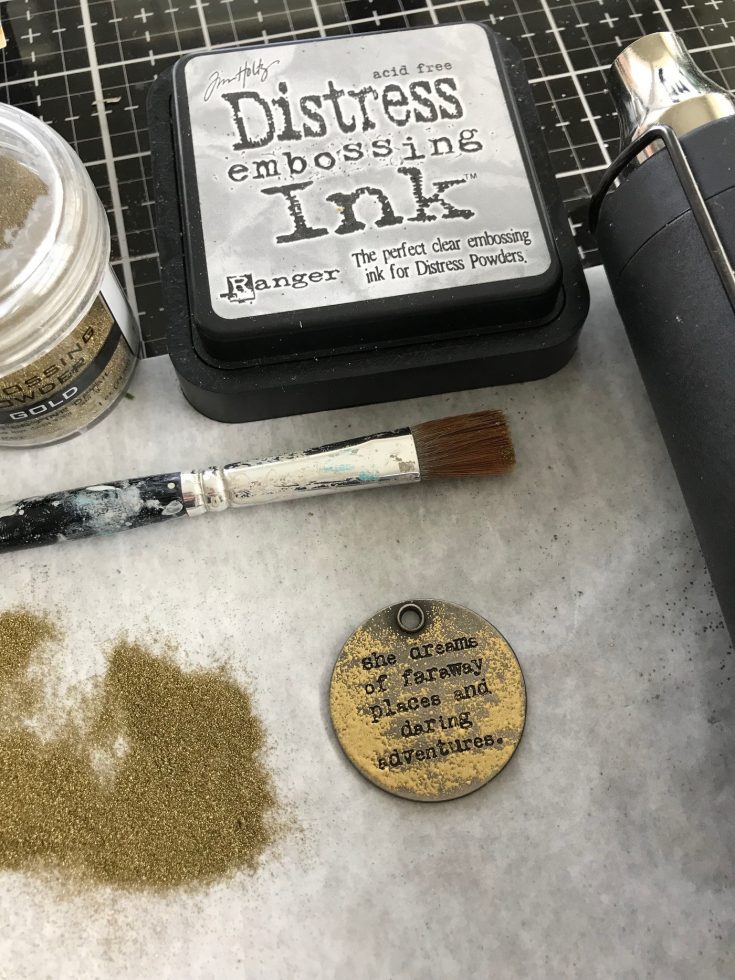
Pounce Distress Embossing Ink over the SURFACE of a Quote Token (try not to squish the pad into the recessed words). Place token onto a paper surface and pour Embossing Powder Super Fine Gold over the token. Tap the back of the token to knock off the excess powder. I used a soft brush to gently brush away powder that was covering the words. Use an embossing gun to melt the powder. Do not touch the token till cooled.
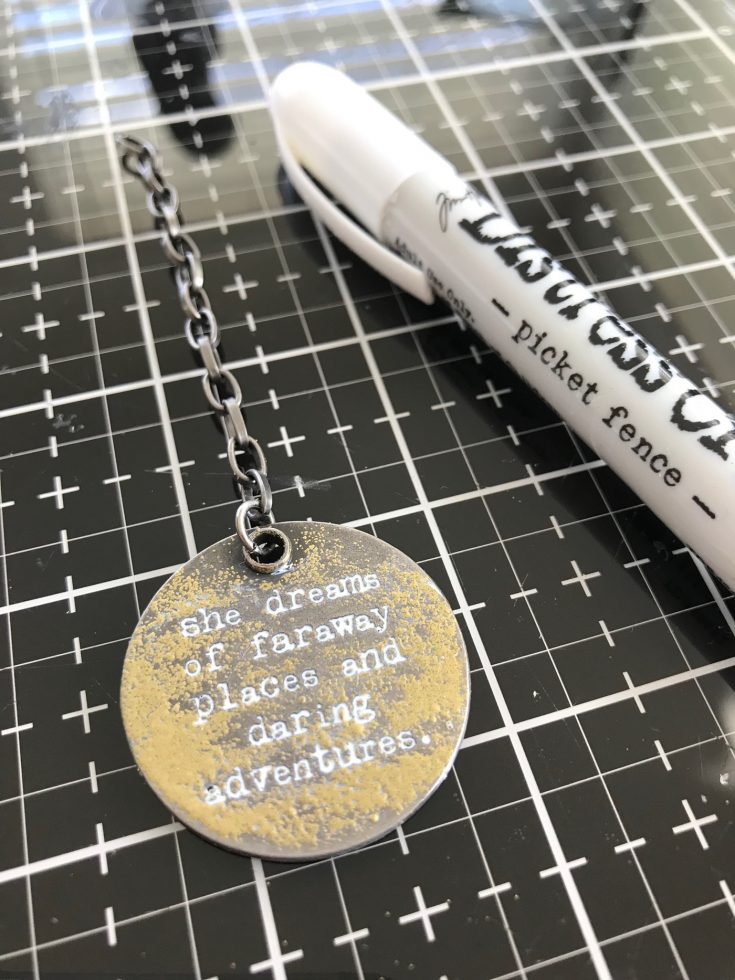
Use Picket Fence Distress Crayon to fill in the words of the token. Wipe away any excess with a wet wipe. Add jump ring and chain to the Quote Token.
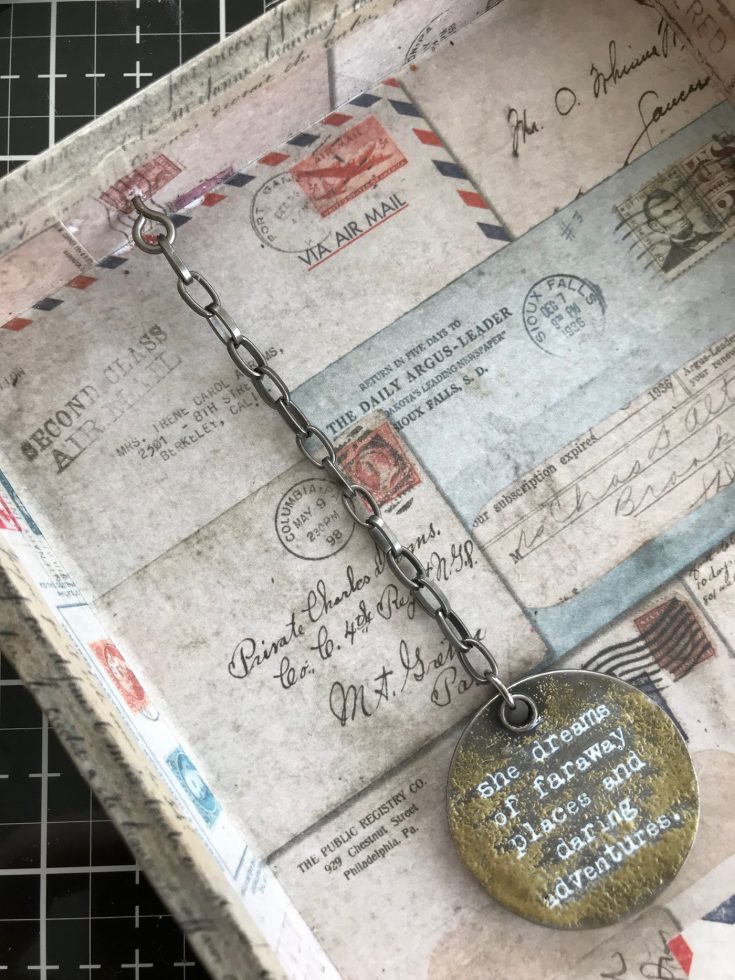
To hang the Quote Token, add a screw eye (from the Vignette Hardware pack) to the Vignette Tray. It’s easiest if you make a hole in the wood with an awl and then add the screw eye, twisting until secure.
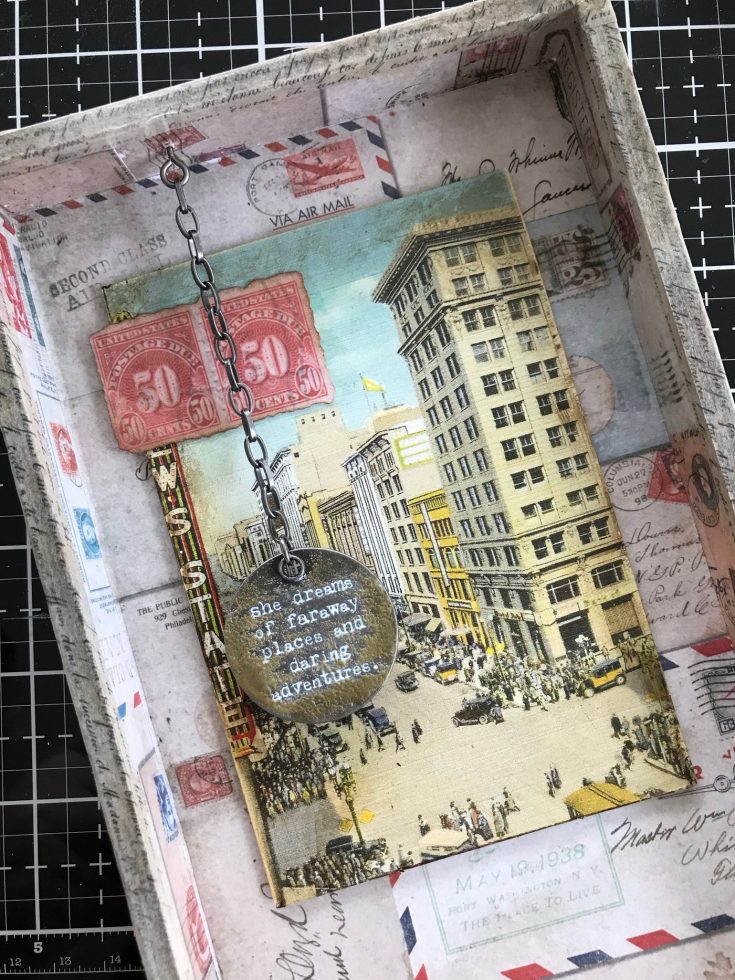
Add 3D foam squares to the back of postcard from the new Layers Remnants pack, centering in the top portion of the tray. Adhere two red stamps from the Keepsakes pack to the postcard behind the chain. I also added foam squares to the back of the Quote Token to keep it from swinging.
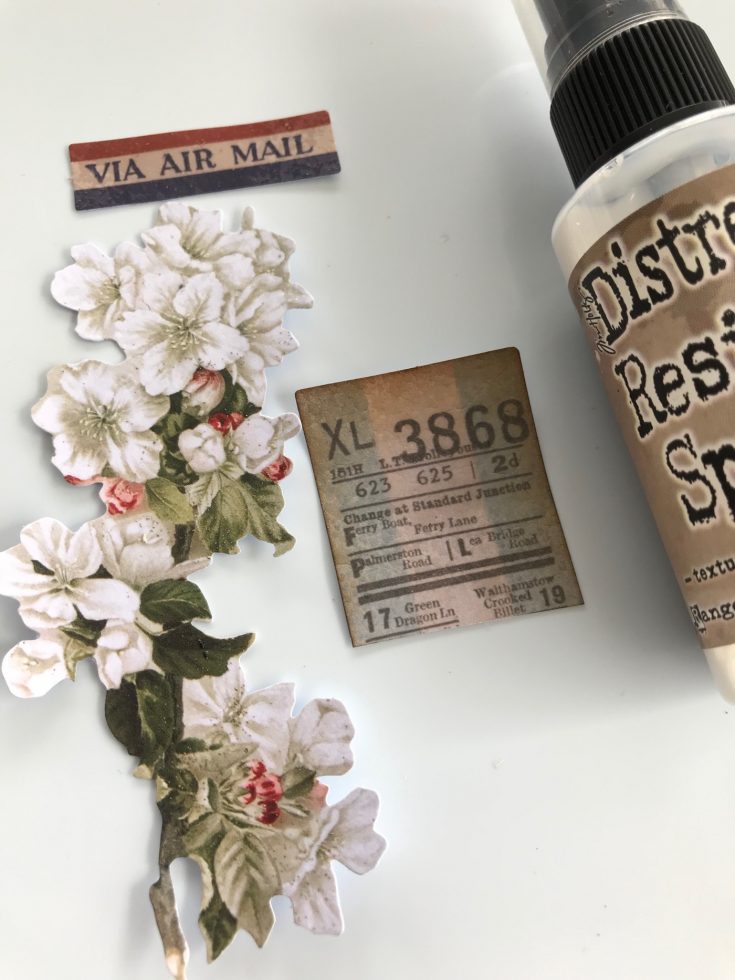
Spray a few pieces of ephemera from the Keepsakes pack with Distress Resist Spray. The Resist spray will coat the surface and leave a shiny finish once dry. NOTE: you will need to use a Splat Box when spraying Distress Resist Spray because it sticks to any surface!
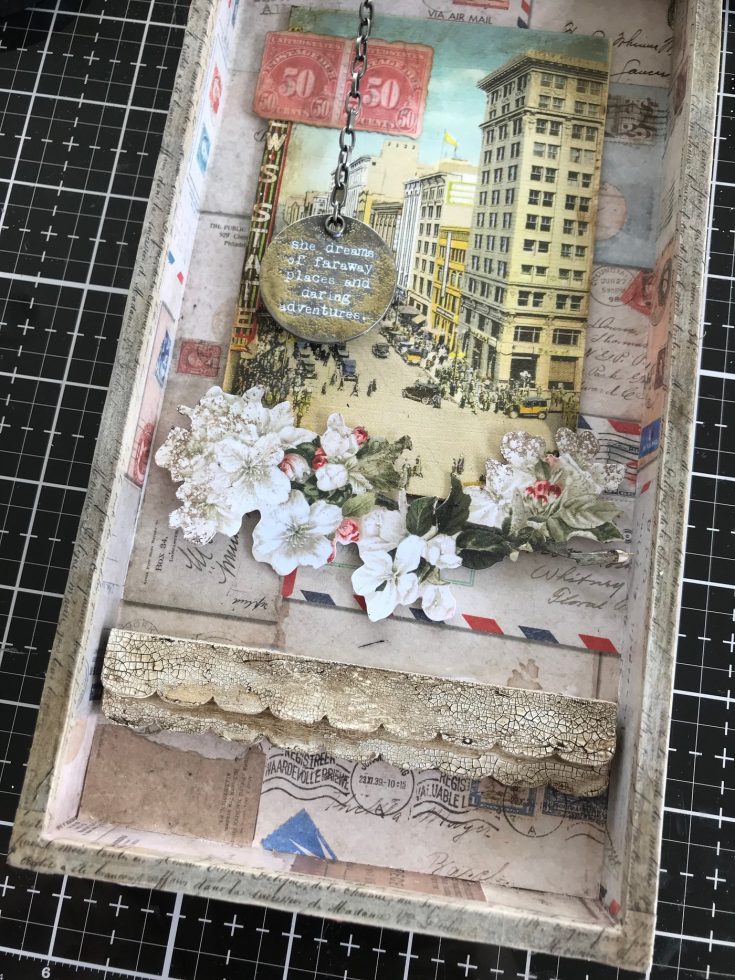
Adhere the shelf to the tray with 3D Foam Squares. Add the flower ephemera with thin 3D Foam Squares (they are 1/2 the thickness of the the standard 3D foam square).
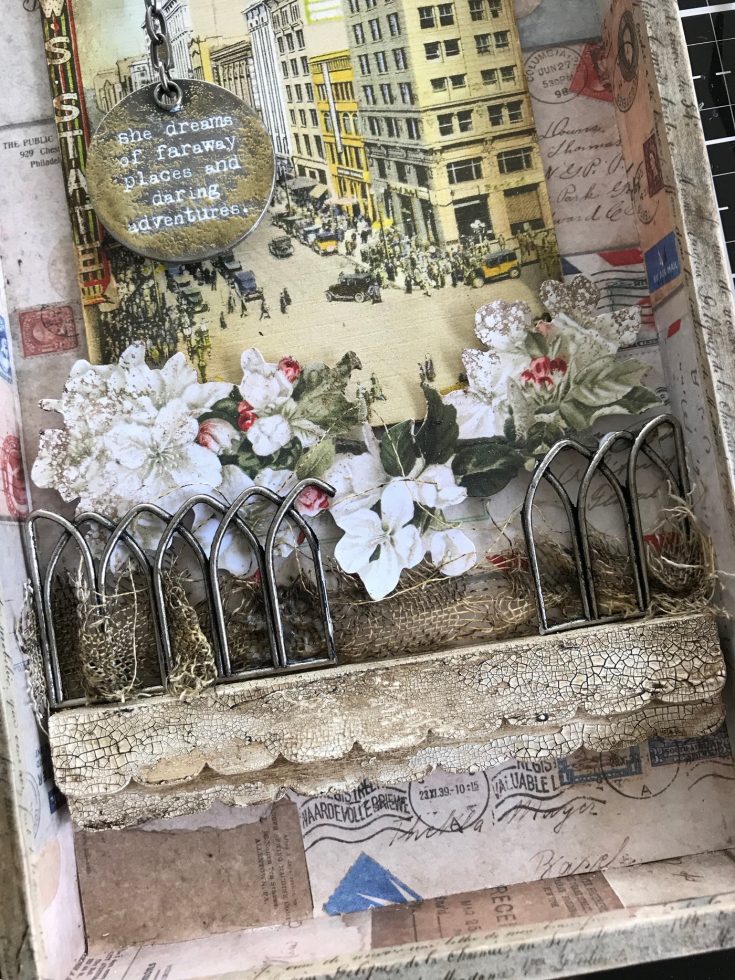
Bend a Metal Gate until it breaks. Weave dyed idea-ology Mummy Cloth (this was a Halloween product that I should have bought more of!) through the Metal Gate and glue into place. Make sure the ends of the gate are touching the sides of the tray, leaving a gap between the two pieces.
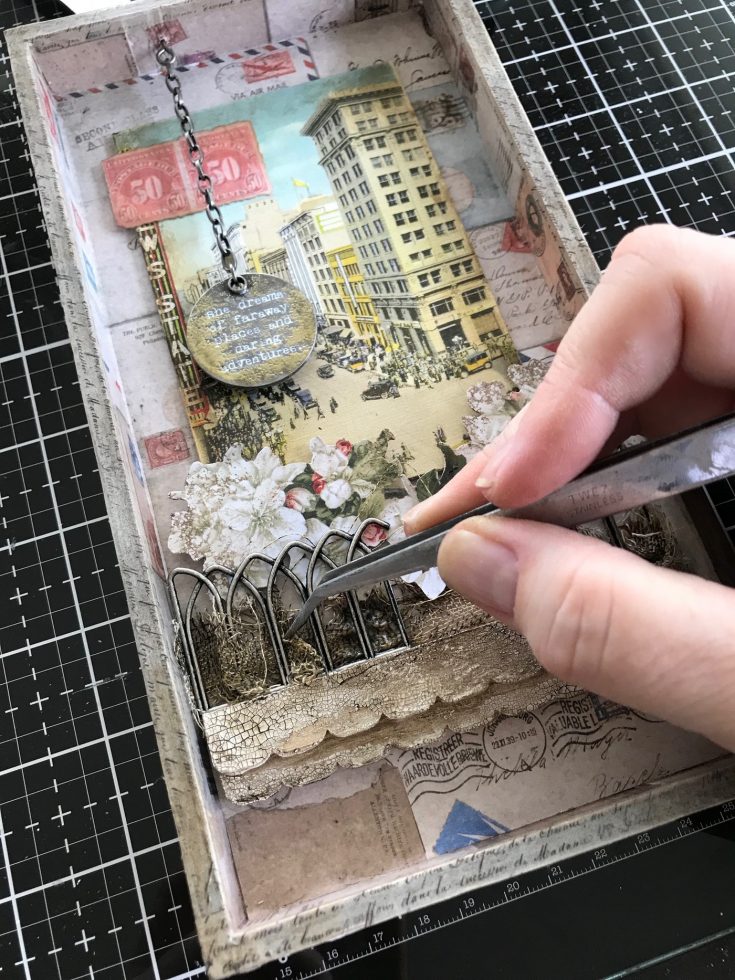
Use tweezers to manipulate the Mummy Cloth in and out of the gate. Add additional Collage Medium in small areas to keep it in place. Set aside to dry.
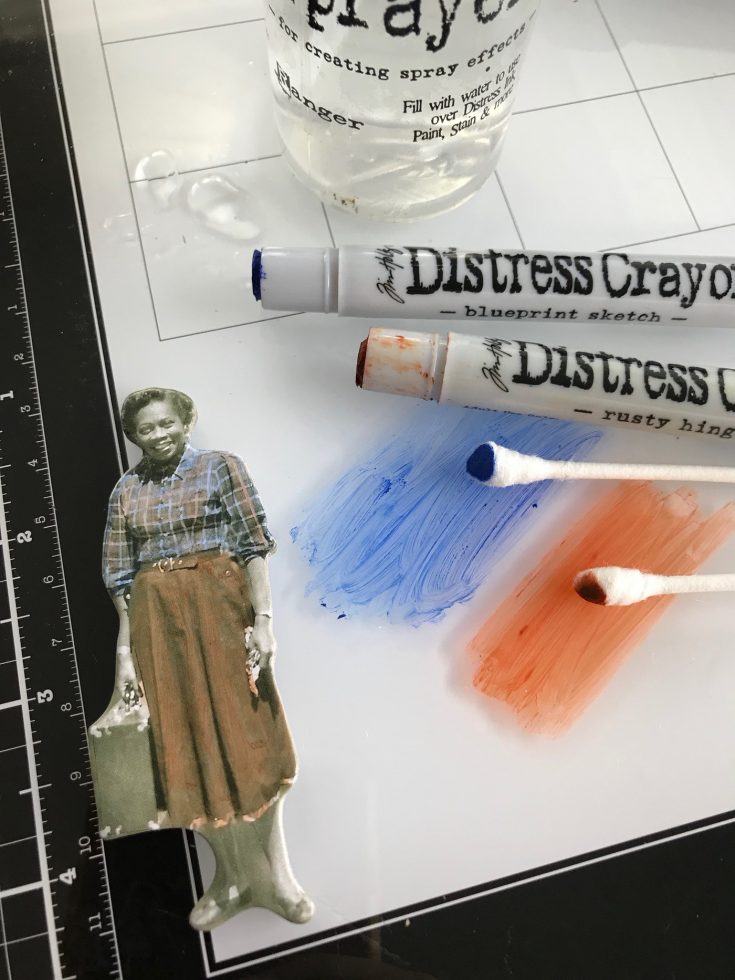
Color the clothes of a Baseboard Doll with Distress Crayons. The new Baseboard Dolls look like Paper Dolls but they are mounted on heavy chipboard so they do not bend. I like to scribble the crayons onto the Glass Media Mat, then pick it up with a damp (not wet) cotton swab. The crayon goes on easily and the color does not fade.
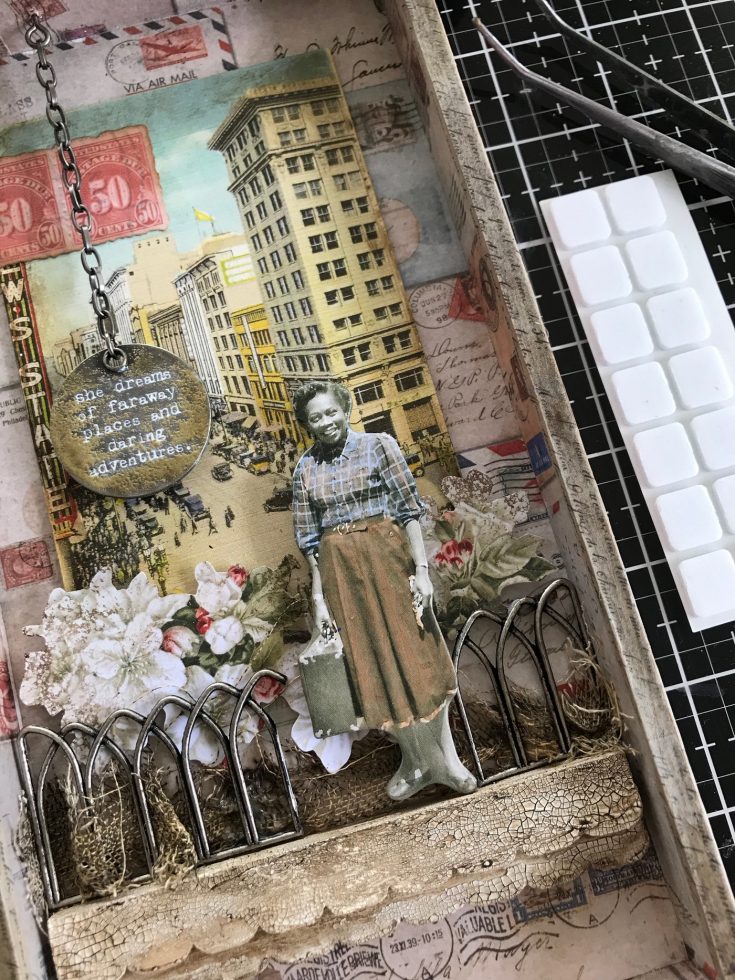
Use a double stack of 3D foam squares to add the Baseboard Doll to the scene where the gate is broken. She has her suitcase and she is ready to travel the world!
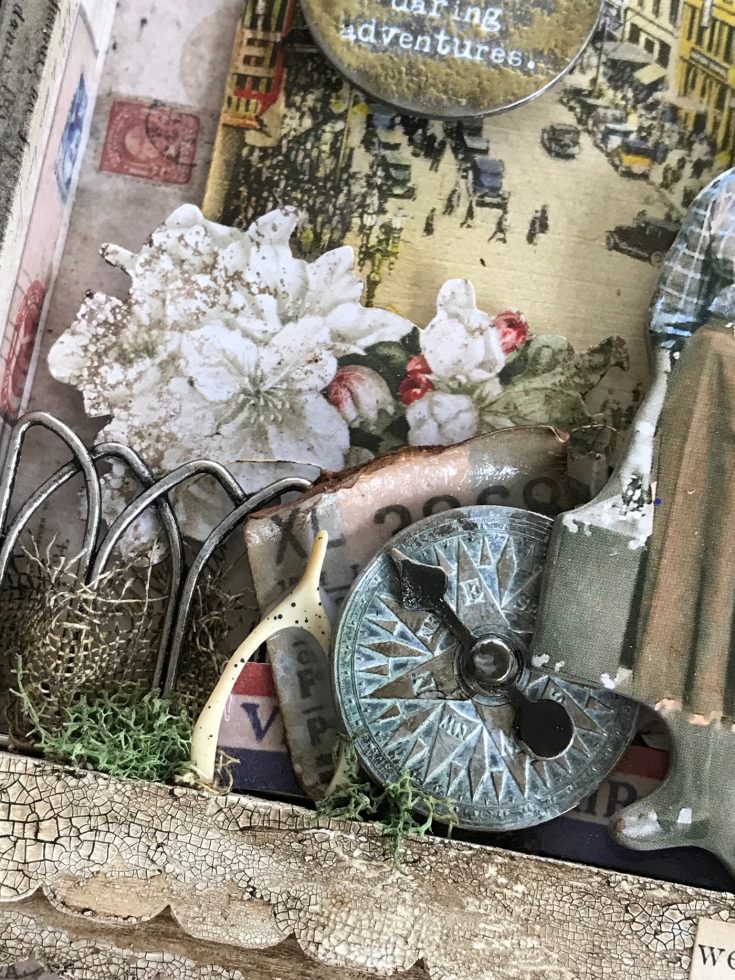
Add a Compass Coin with spinner to show her the way, a train ticket from the ephemera pack, and a wishbone. The wishbone is placed so all her wishes run out the bottom and into the universe!
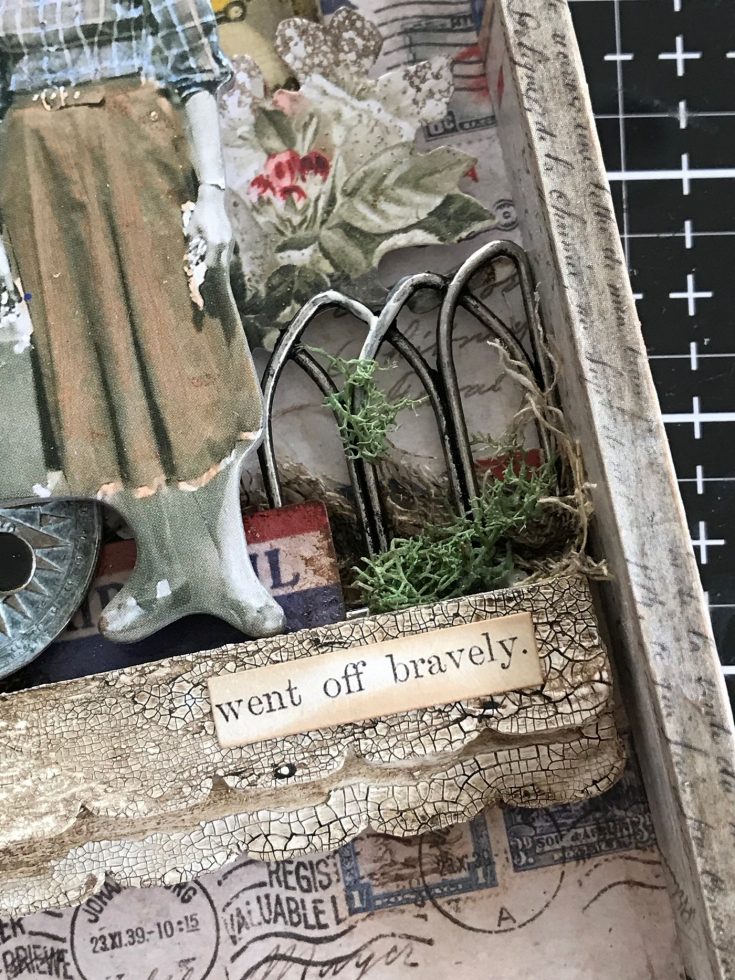
I added a sentiment from the Clipping stickers to the shelf because it was just the perfect words for the project. I am convinced you will always find the right words on one of the four sheets in the package!
I did add a bit of moss but not under her feet because there is no moss growing there…she’s on the move!
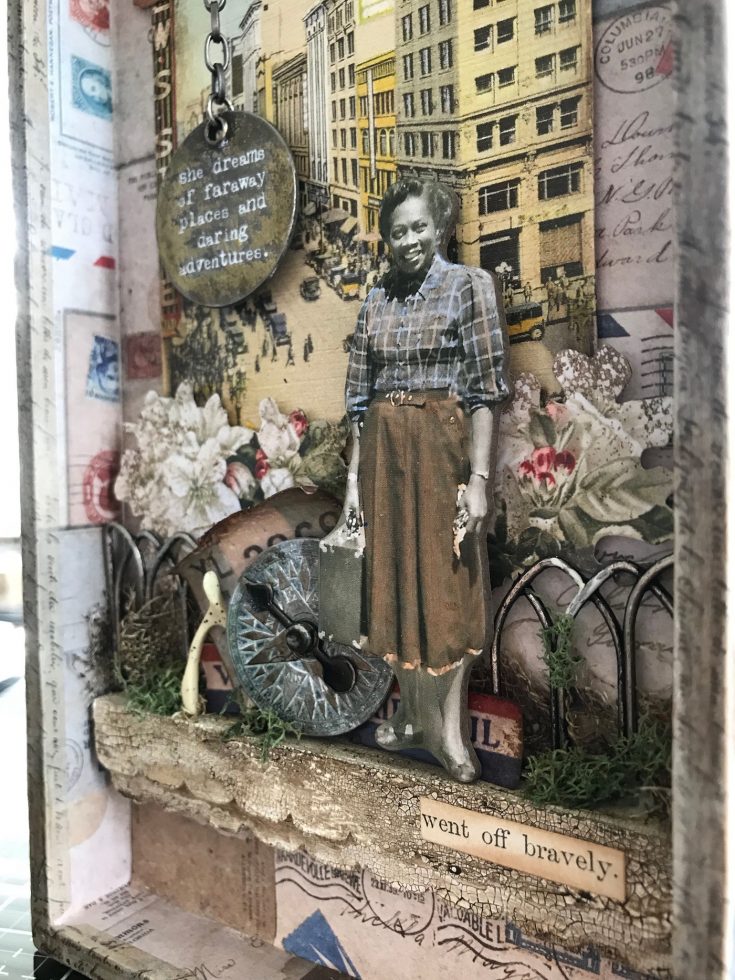
You can see more of the dimension at an angle (the secret is always foam squares).
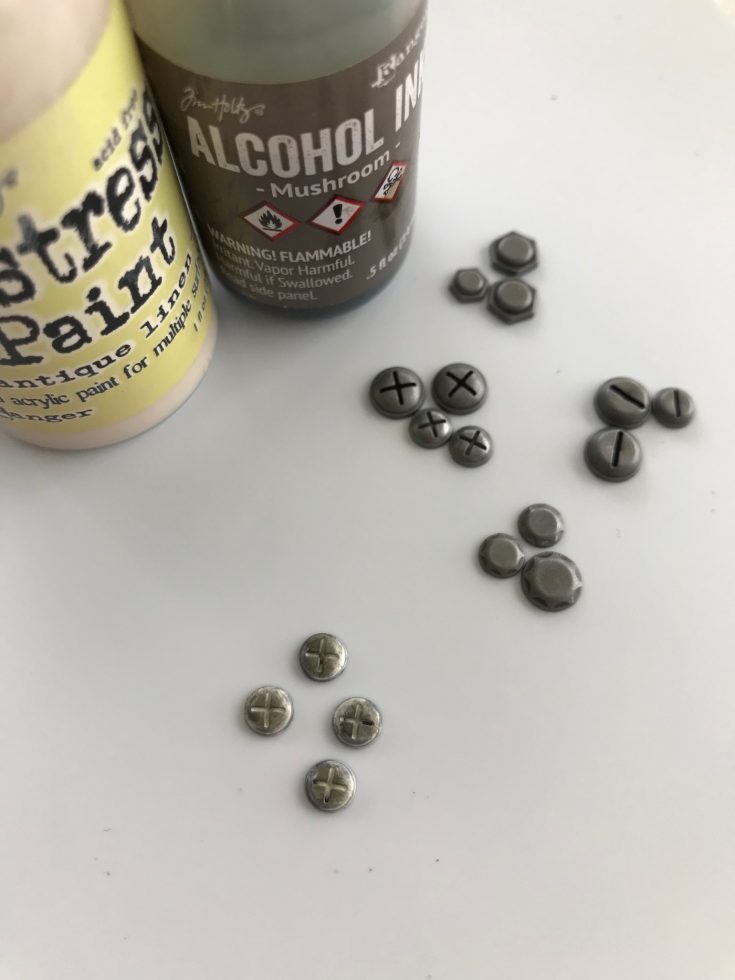
The last thing to ‘age’ is the new Hardware Heads. They come in two sizes and in four designs. And you might as well just buy a boatload now because you are going to need a lot of these. I tapped the top with a bit of Antique Linen Distress Paint and then once they were dry I pounced Mushroom Alcohol Ink over the top. Just one quick pounce was enough.
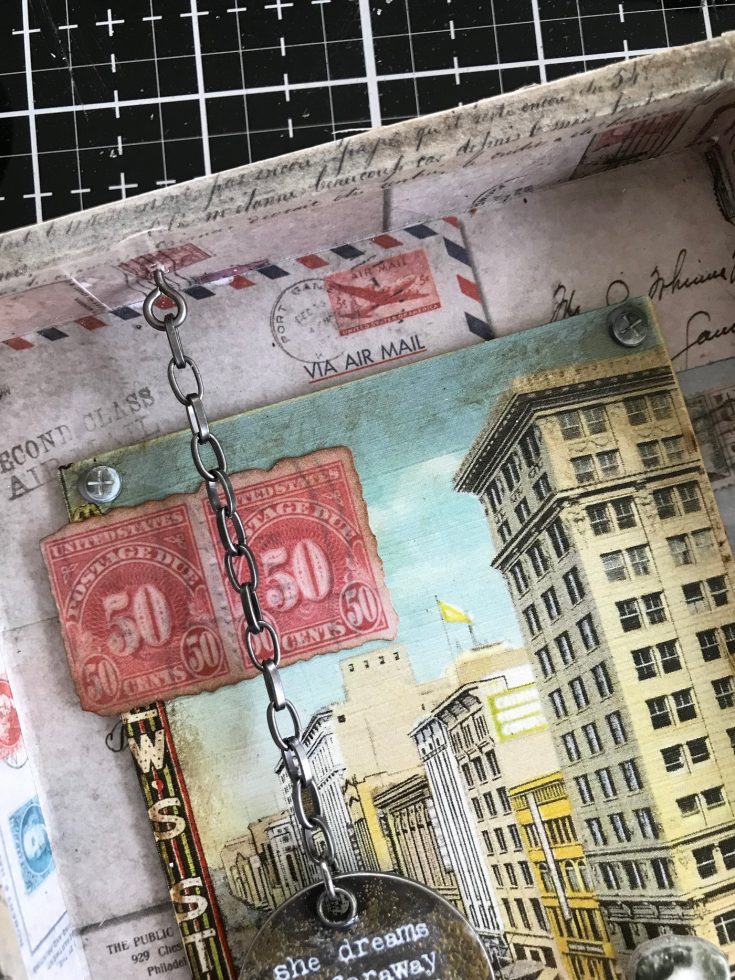
I added two Hardware Heads to the top of the postcard. No more brad legs to punch a hole and bend back..just glue these in place!
Thank you for following along today! I hope this project has inspired you to move forward with a long held dream and make it come to life.
Now carry on, paula
SUPPLIES:
|


Thanks so much for stopping by and thanks to Paula for being our special guest!

Blog Candy Alert!! Follow our blog via email and comment on this post for a chance to win special blog candy!


