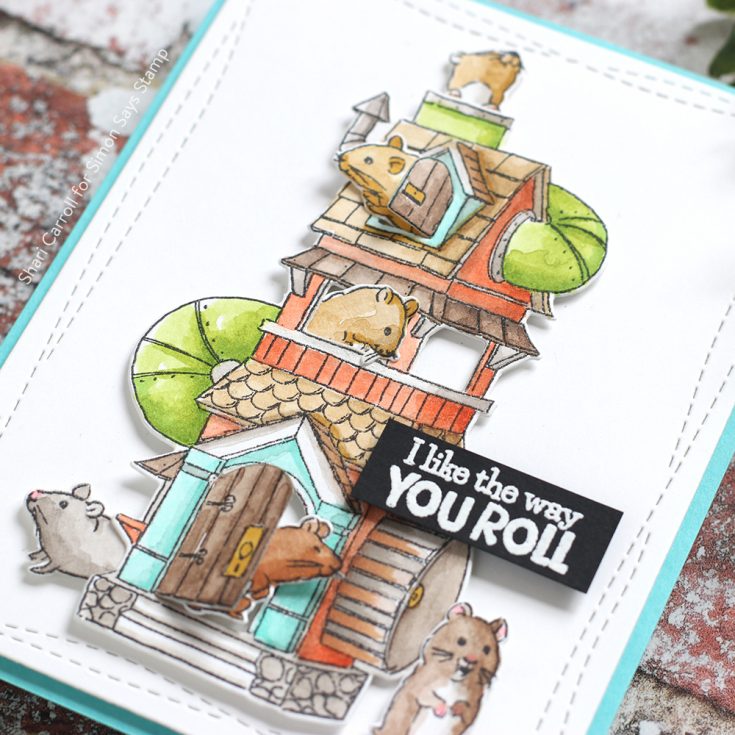
Funny Friday with Art Impressions: AI Hamster Wheel Cubbies
Oh dear… this stamp set brings back memories!!! I can’t even begin to tell you how many years I tortured my mom by having hamsters!! I had them, my sisters had them… it was mayhem!!
So, when I saw this Hamster Wheel Cubbies stamp and die set it was a must have!! I love how the coordinating die creates the doors, windows, and wheels for the cute little rascals to sneak in and out of!!
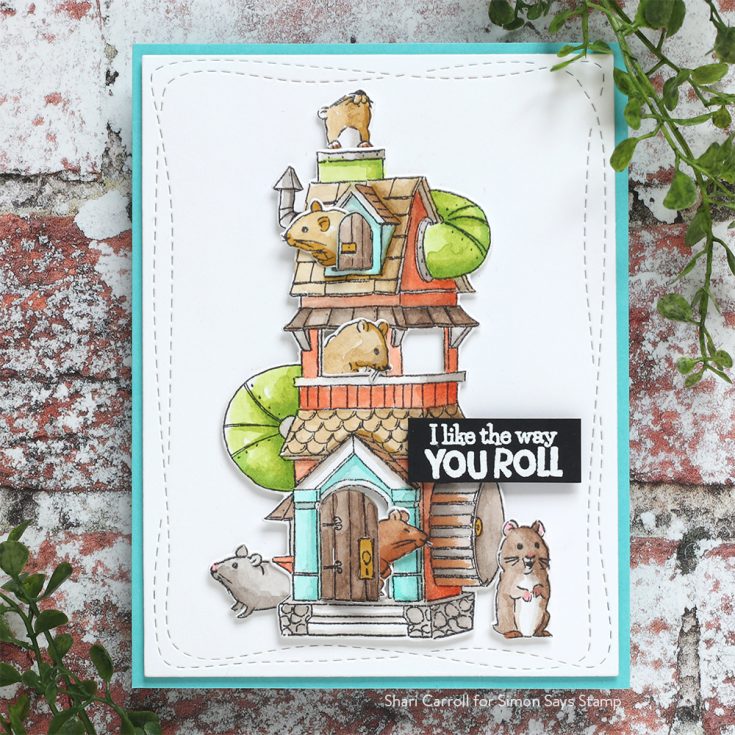
I started these images off by water coloring the main areas. I finished by adding extra shading with a couple of Copic markers. I like to mix the two mediums for deeper colors and additional blending.
Blog Candy Alert!! Follow our blog via email and comment on this post for a chance to win special blog candy!

Thanks for stopping by! I hope I’ve tickled your funny bone just a little! Happy Friday!!
|


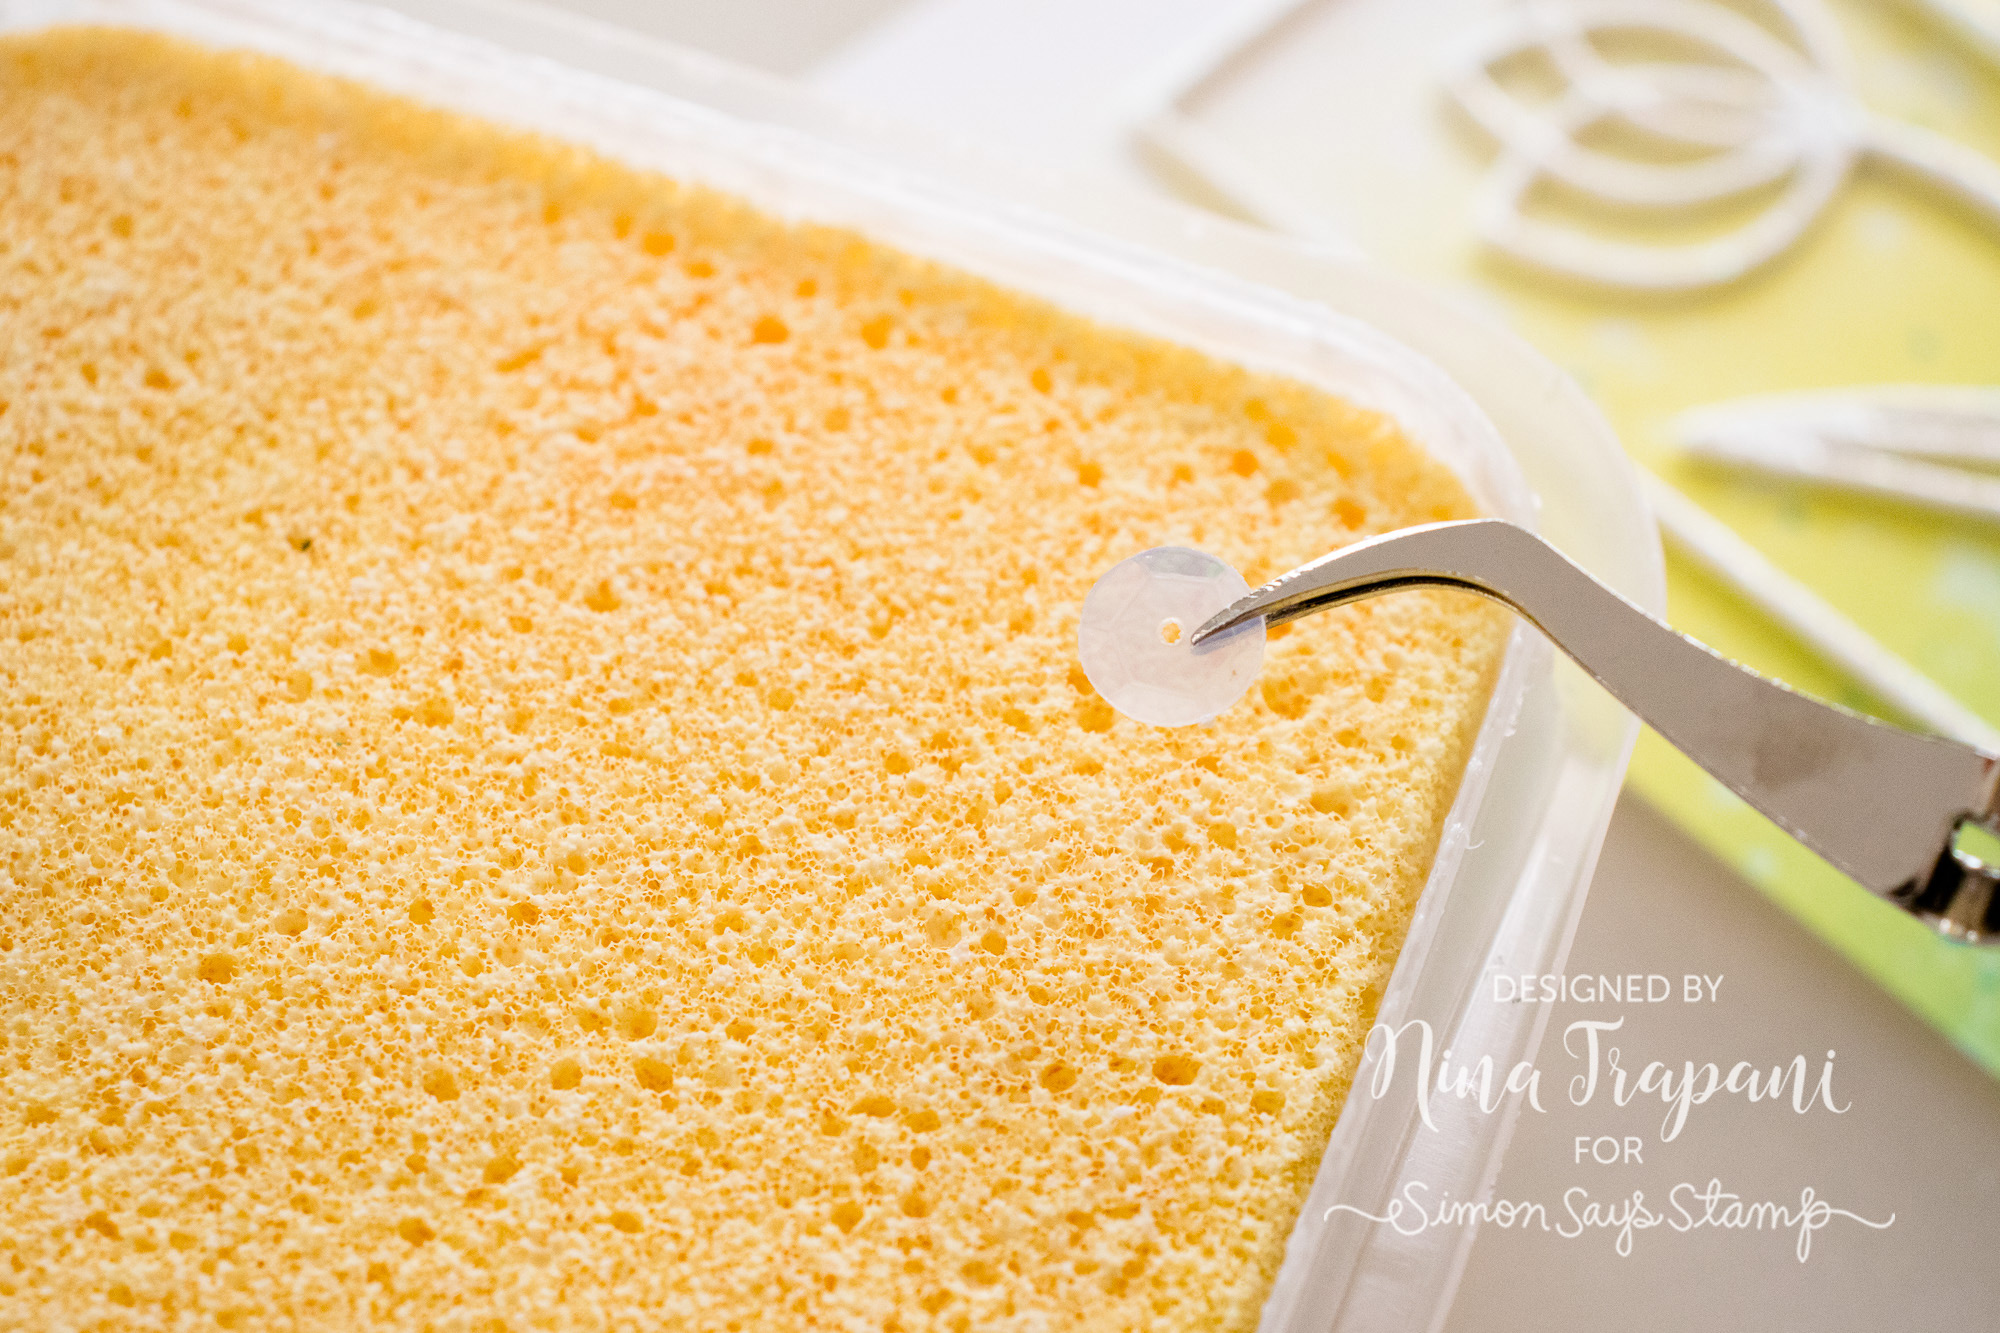
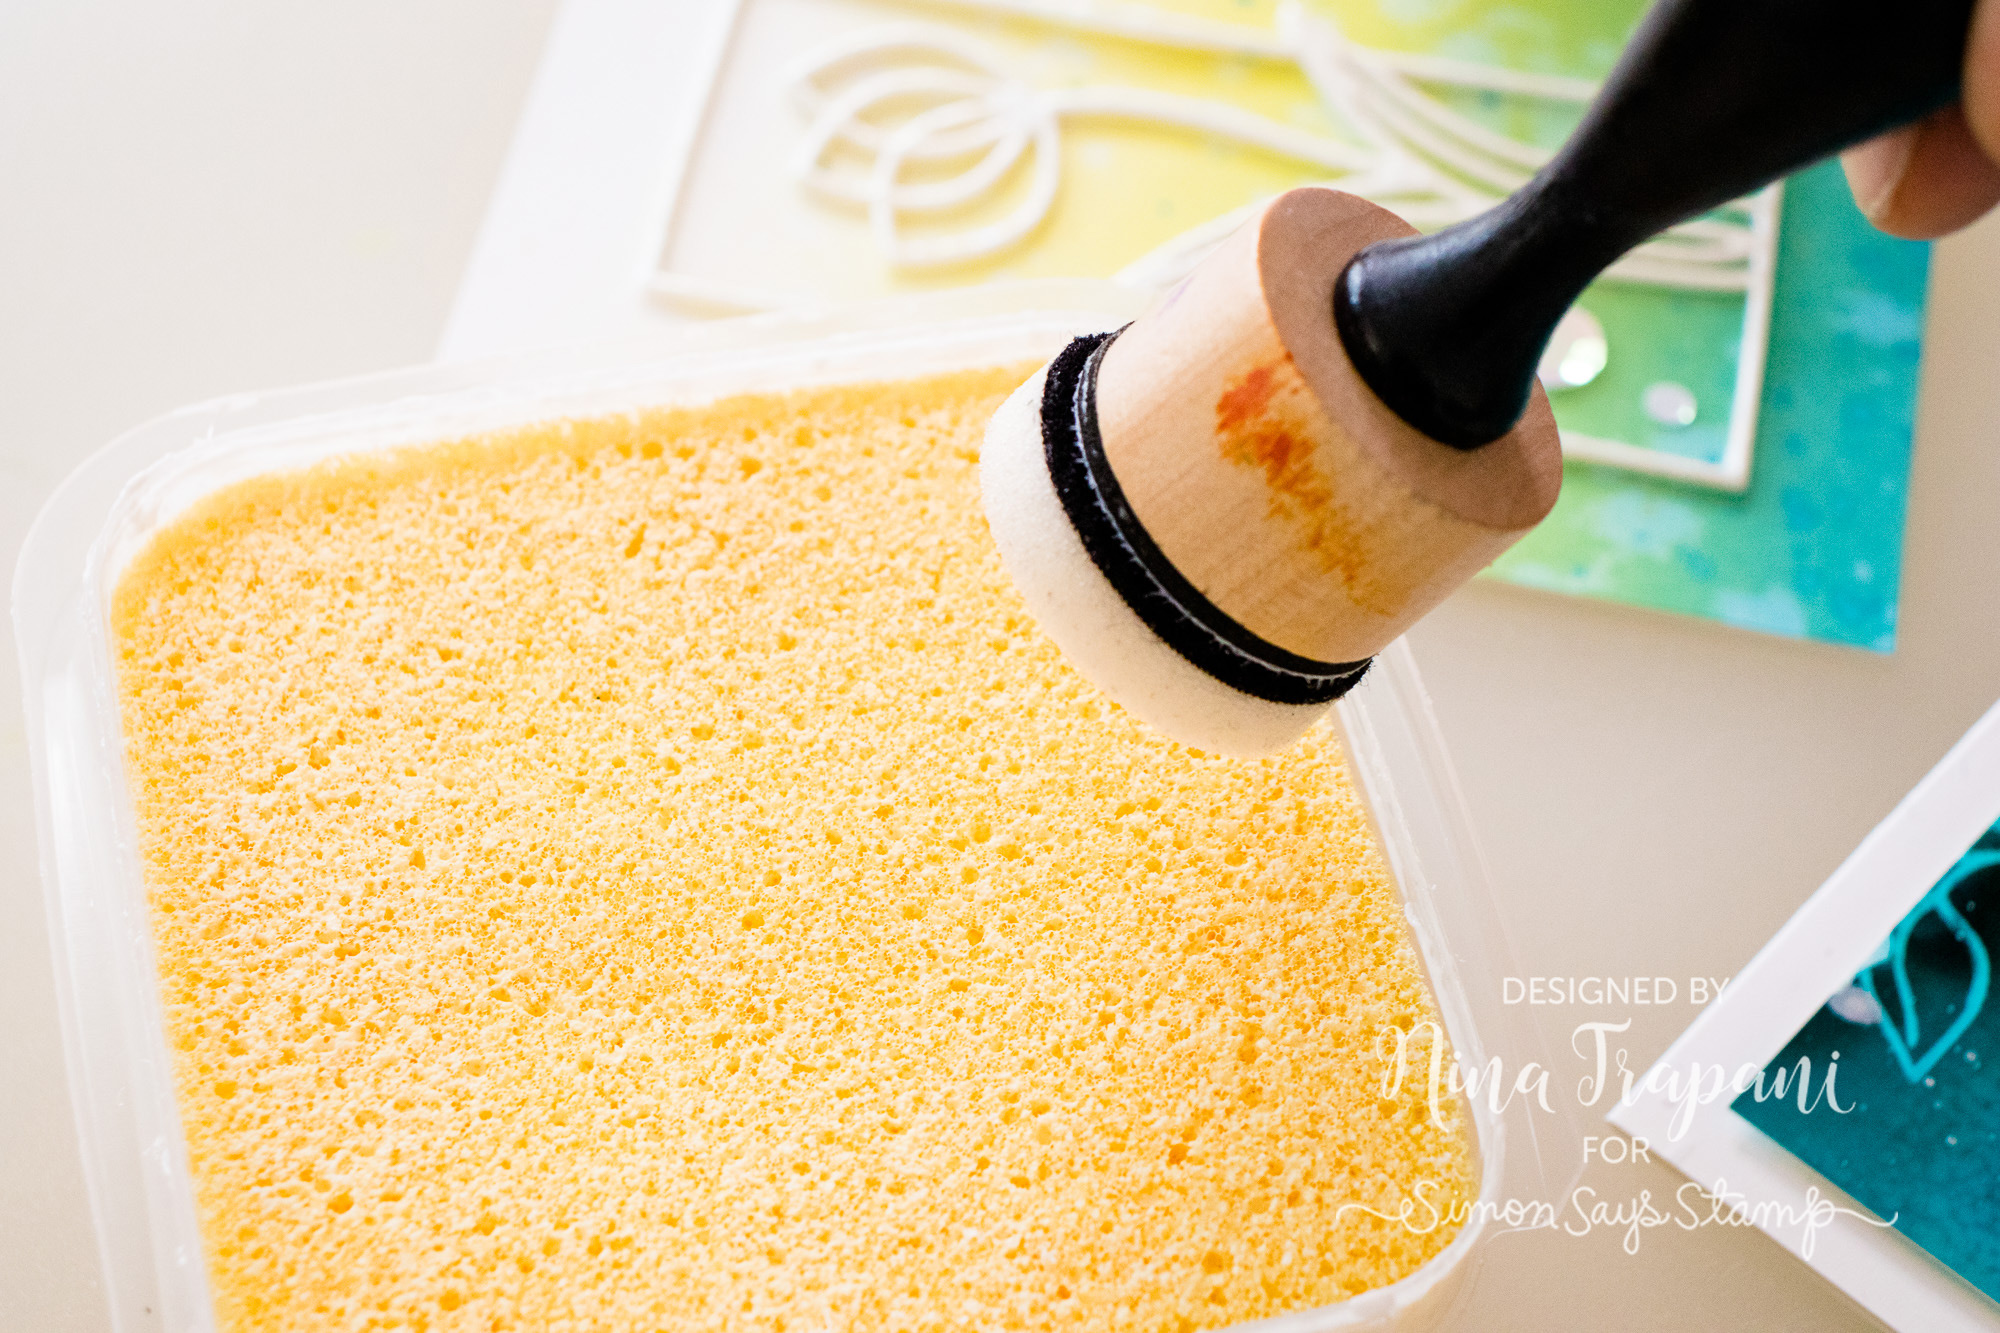
Quick Tip: Glue Sponge!

Hello friends! We’re always on the look-out for tools and supplies that will make crafting easier, more efficient and even cleaner!
Today we have a quick tip video for you, featuring a new adhesive tool that we think you will LOVE; the Glue Sponge! Check out the video below to learn how to use it and find out some helpful tips!
WATCH THE VIDEO
Here are some highlights you’ll find interesting!
- This clever little sponge, soaked in a permanent (but non-toxic!) adhesive.
- The glue is acid free, which means it won’t “yellow” your projects over time.
- Perfect for not just paper, but also items such as twine, cloth, thin plastics and wood, and even sequins!
- Dries clear (super helpful, especially for clear sequins!)

- A great solution for adhering delicate, die cut sentiments to your card projects!
- Use with an ink blending tool and sponge to apply glue to larger die cuts and papers.

You can find this awesome Glue Sponge over at our Simon Says Stamp store. We hope you’ll check this clever tool out; we have a feeling you will enjoy working with it as much as we have!
SUPPLIES
|


Blog Candy Alert!! Follow our blog via email and comment on this post for a chance to win special blog candy!
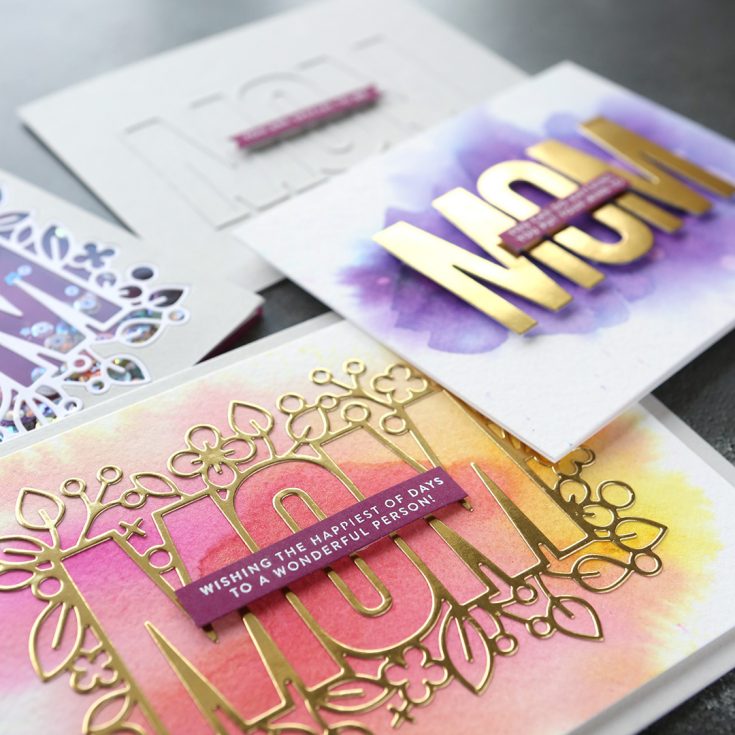
1 die, 4 ways – Outline Floral Mom
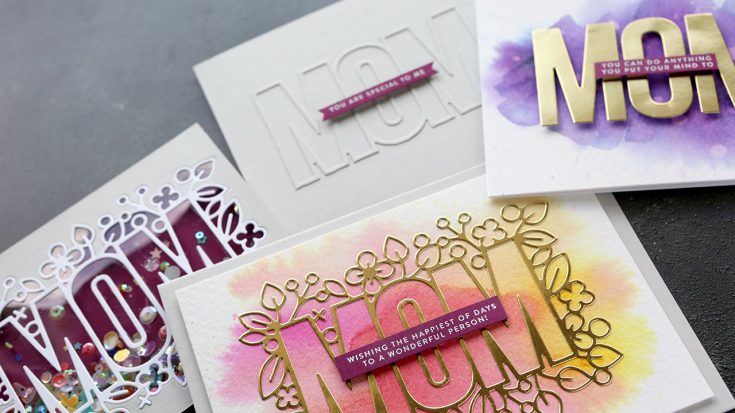
Hello, all! Kristina here! Today I have four card ideas for you featuring the Outline Floral Mom die. This die is fun to work with, especially because of it’s size! It’s perfectly sized for an A2 card.
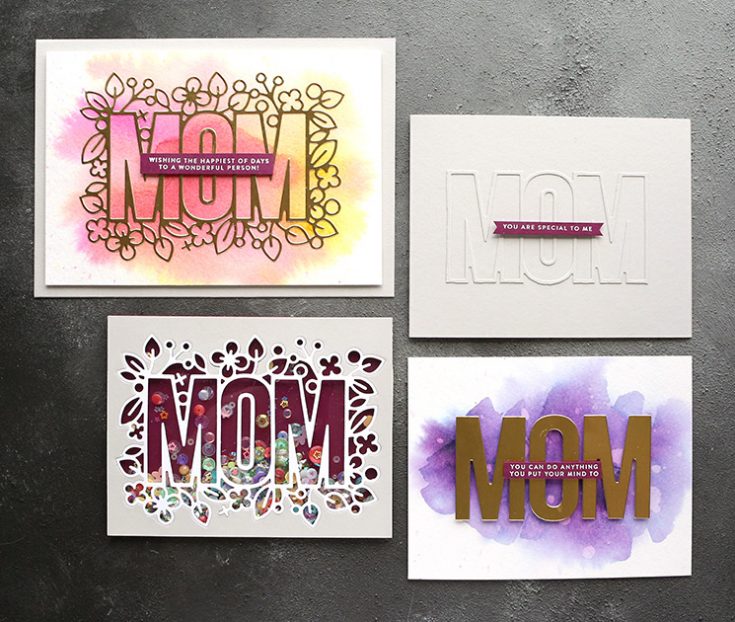
Gold Die Cut over Watercolor Background
For the first card, I used gold foil cardstock to cut the die. Then I created a watercolor background using two colors of Nuvo Shimmer Powder, Solar Flare and Cherry Bomb.
I adhered the watercolor background to a Fog card base and then stamped a greeting from Simon’s Tiny Words Encouragement stamp set on Hero Arts Hero Hues Premium Cardstock in Plum. I used a bit of foam tape to adhere the greeting to the card.
Inner Die Cut Pieces over Watercolor Background
Similar to the first card, I created a watercolorground using one color of Nuvo Shimmer Powder, Violet Brocade. Then I adhered the interior pieces from the gold foil die cutting. The greeting was stamped and adhered using foam tape once again.
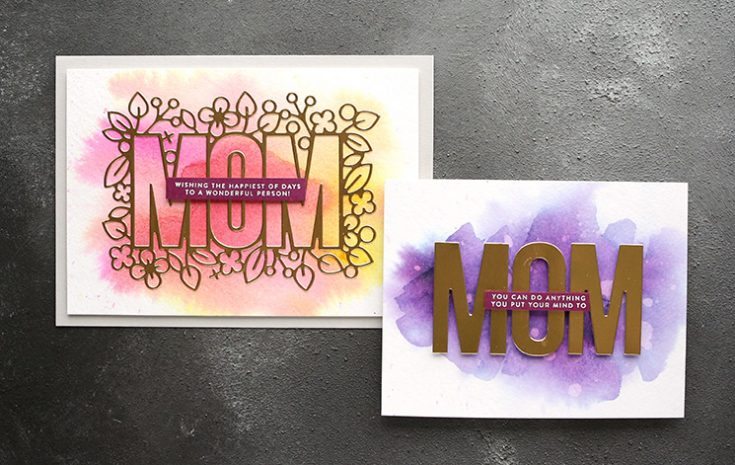
Die Cut Inlay Shaker Card
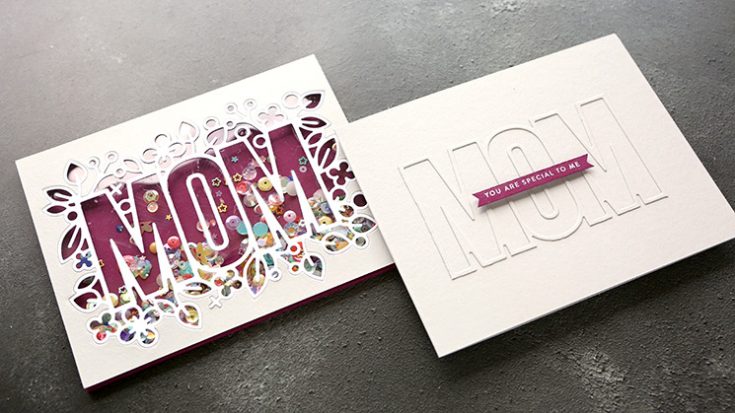
For my third card, I created a simple shaker card. First, I die cut the Outline Floral Mom die out of both white cardstock and Fog cardstock, making sure the die was positioned perfectly on the Fog cardstock since that position is what would be shown on the front of the card.
After the die cutting was complete, I adhered clear acetate to the back of the Fog cardstock piece. Then I turned it over so that it was face side up and inlaid or “puzzle-pieced” the white die cut onto the center area. This created the top area of the shaker card.
To create the dimensional area of the shaker card where the sequins will be, I applied a double layer of foam tape to the back side of the die cut panel (touching the acetate). Then I poured in the Paintbox sequins mix from Little Things by Lucy’s Cards (see many more sequins mixes HERE).
To close up the shaker area, I pressed a card base made out of the same Plum cardstock over the top. This traps the sequins inside and completes the shaker card.
Die “Surgery”
My fourth and final card is very clean and simple. Using the Fog die cut that I cut during the creation of the previous card, I cut off the floral elements using scissors. This left me with a clean and minimal die cut. I adhered it to a Fog card base.
To finish this clean and simple card, I adhered a stamped and embossed greeting from the Tiny Words Encouragement stamp set using thin foam adhesive from Darice.
And those are my cards for today! I hope this gives you some inspiration for using large dies. Thanks for stopping by!
|


