One Stamp, Five Ways: Daisy Bouquet
Hi friends! Happy Friday! Please join me in welcoming back the always awesome Suzy Plantamura in her monthly one stamp five ways feature! Read on for more information and enjoy!
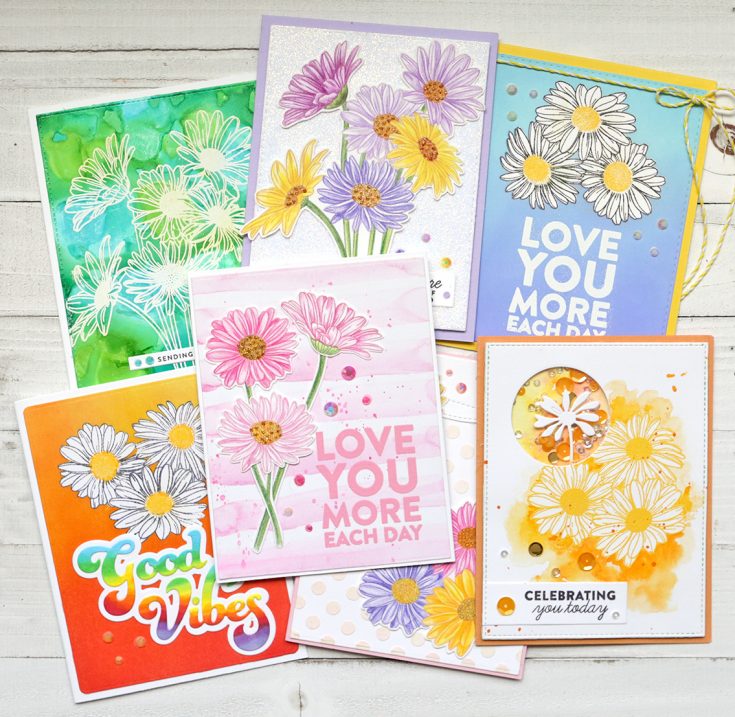
Hello, Simon Says Stamp friends! Today I have a “one stamp, five ways” post to share with you using the brand new Daisy Bouquet stamp set. But I should rename the post “one stamp, seven ways” as I got a little carried away with this one! This stamp set has so many possibilities and so many greetings it was hard to stop!
While I focused on the stamp set, I also tried to introduce a different technique with each card. I try to think “out of the box” when I do these posts which doesn’t mean I am always happy with all of my cards! This time I have a couple I’m not sure about, but we will let you be the judge!
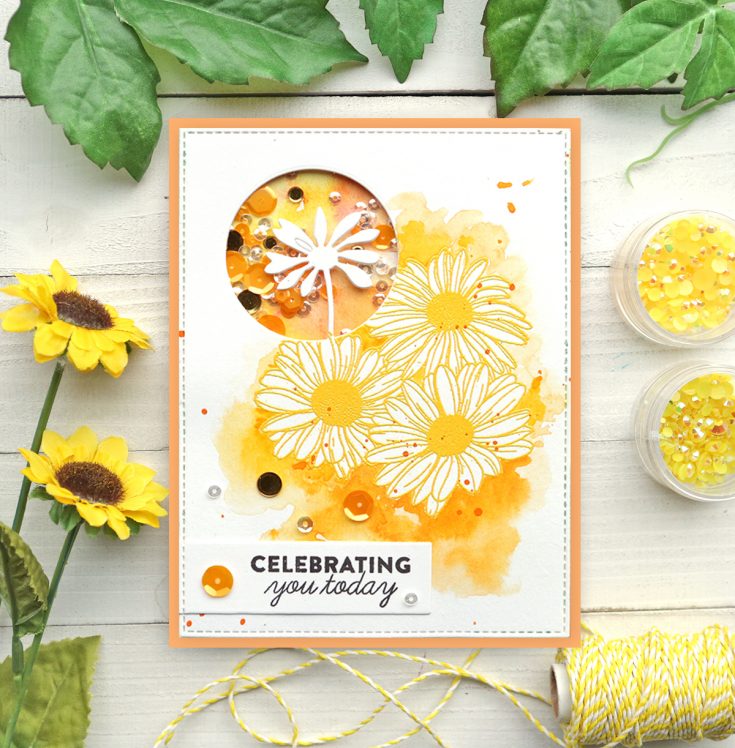
My first card uses a new wafer die also from the Celebrate You release called Peeking Daisy. I die-cut that from the top left side of this card using Ranger Watercolor Paper. I then stamped the daisy stamp just below the opening and embossed it with yellow embossing powder. I painted around the daisies with orange and yellow watercolor using a wet on wet technique. I wet the paper first where I wanted the paint to go and then dropped the color in so it moved outward without going all the way to the edges. I also flicked some watercolor on the background.
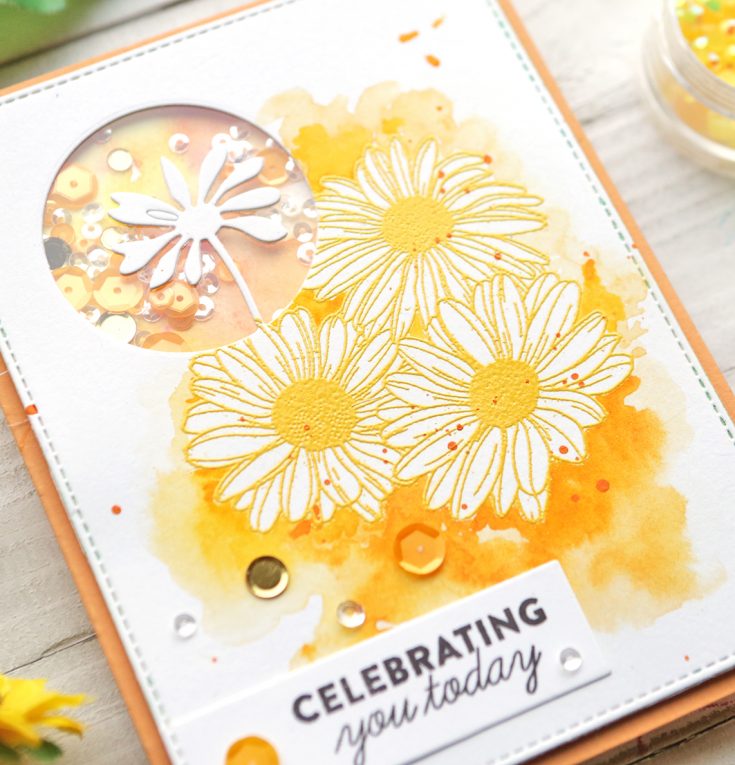
I then watercolored another small piece of paper and put it behind the opening. I used the new Fresh Cut sequin mix (I removed the greens) inside the shaker window. I stamped the sentiment on a banner from the Sentiment Label dies with black ink. I used some more of the Fresh Cut sequins around the greeting.
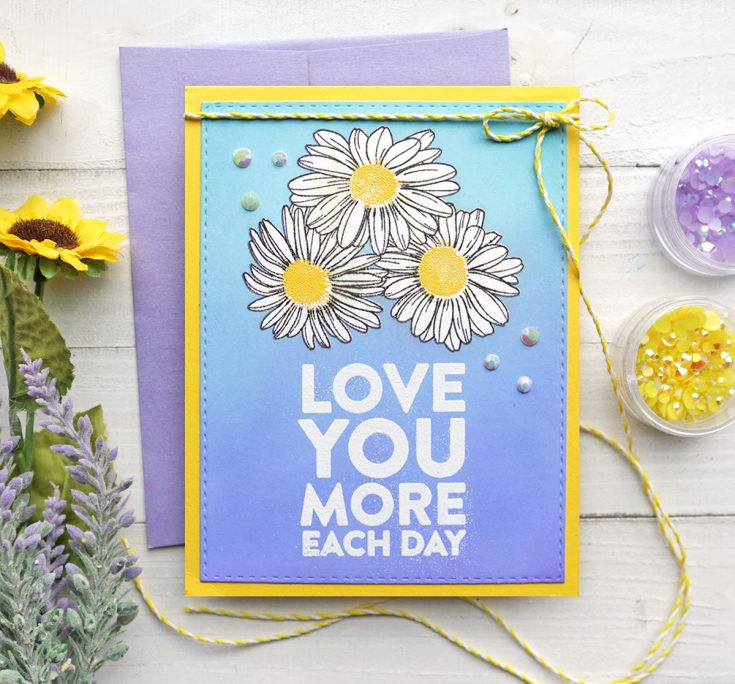
The technique I used on this card was time consuming, but I did have so much fun making it that I tried it twice! On my first one, I started by stamping the daisy stamp on masking paper and cutting it out. I attached the mask to the top front of a white card base. I applied Distress Oxide Inks in Tumbled Glass on the top and Shaded Lilac on the bottom mixing them in the middle. I removed the mask and cut the centers out of the flowers. I then reattached the mask right over where it was and the center over where they went. I removed the flower mask, but left the centers and stamped the flowers in black ink. I removed the centers and reattached the flower mask.I embossed the centers with yellow embossing powder. CRAZY, HUH?!?!?

I embossed the large sentiment on the bottom of the card with white embossing powder. I added some Pretty Pink Posh white jewels around the card and tied some Lawn Fawn Lemon Twine around the top of the card.
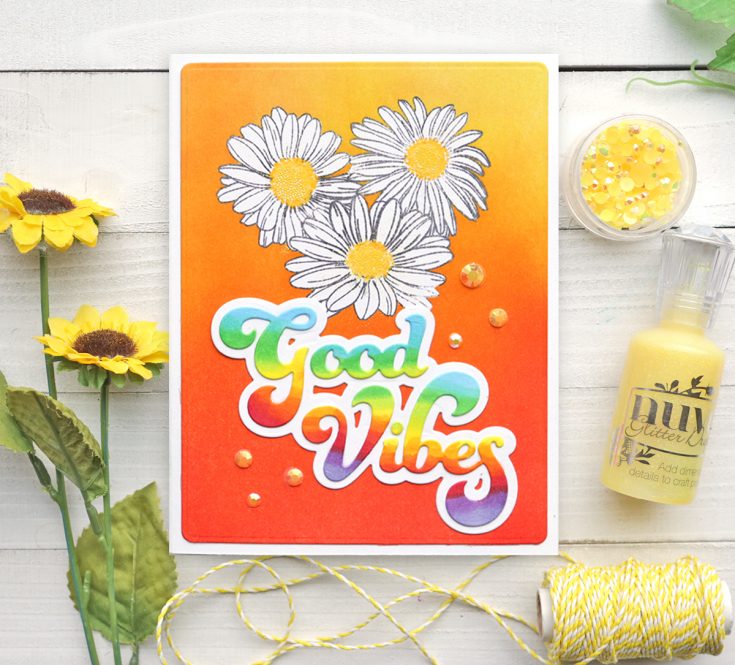
This was my second attempt at this (time consuming, but oh so worth it) technique. This time I used Distress Inks in Squeezed Lemonade, Mustard Seed, Carved Pumpkin, Abandoned Coral, and CandiedApple moving downward over the mask. On this one, my yellow embossed centers didn’t go all the way to the edges, so I used a color pencil to fill those areas in.
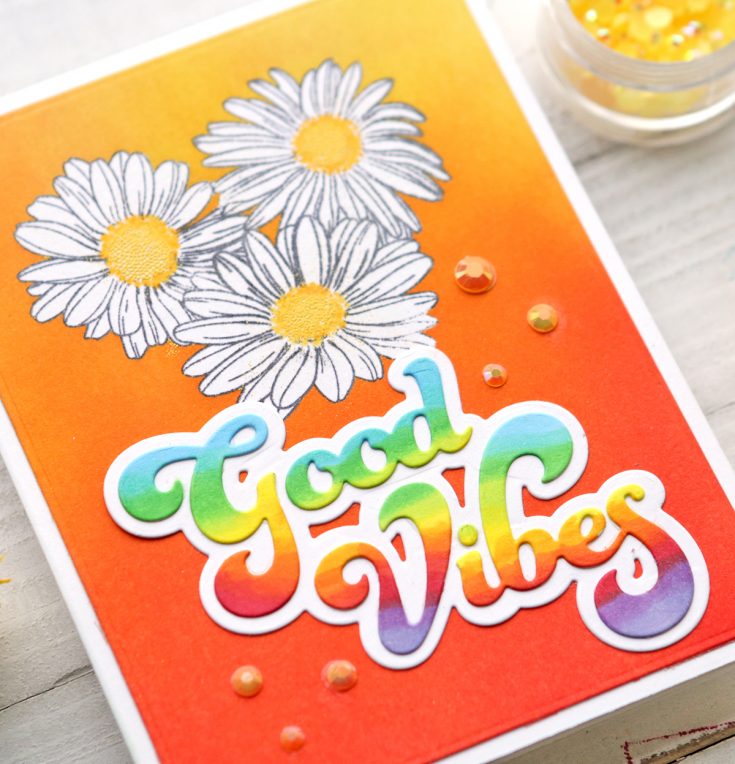
I used the SSS Good Vibes wafer die for the sentiment. I colored it with Copic markers in a rainbow. I attached that to the bottom of the card and added some PPP jewels in Marigold.
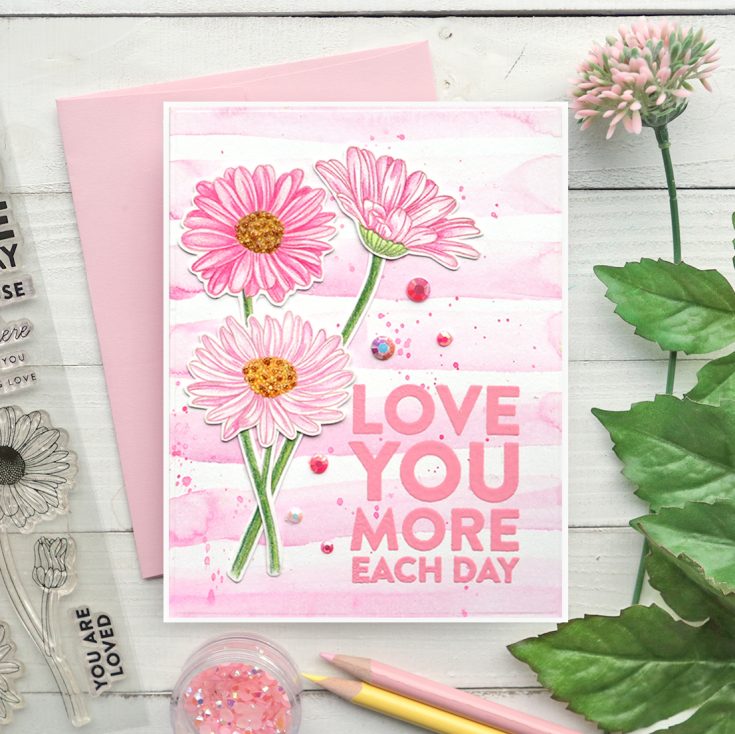
I painted watercolored lines on a piece of Ranger Watercolor Paper using a wet ½” flat paint brush and Daniel Smith Opera Pink watercolor. I then flicked some drops on with a small paintbrush. I embossed the large sentiment on the bottom of the card with Pink Peony embossing powder.
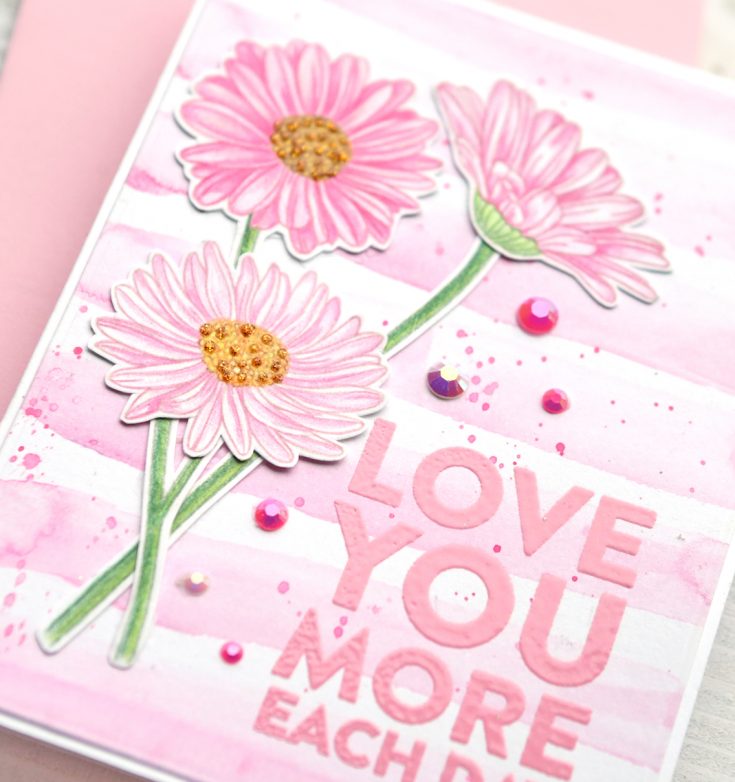
I stamped the daisy stamps on white cardstock with a light ink and colored them with colored pencils (for a no-line stamping look). I fussy cut them out and attached them to the front of the card. I attached one of the larger flowers over the small bud on the two stem flower. I used Golden Sunset Glitter Drops on the centers of the flowers. I added some jewels to finish the card from the PPP Valentine Mix.
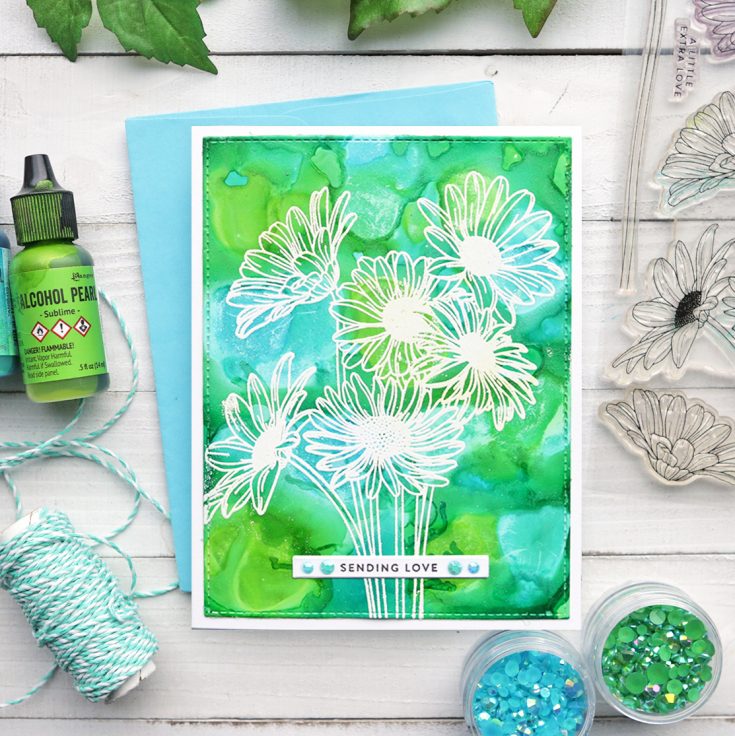
I don’t have a lot of experience using Alcohol Inks, but I received three in a recent SSS Card kit so I have been playing with them. I used the Tranquil and Sublime Pearl Inks for this card front. I also used A LOT of the blending solution. I covered the entire piece, blow drying it between coats of ink! At the end I dropped big drops of blending solution and big drops of alcohol inks over the card front so it had big spots.I might not know what I am doing, but I liked how it turned out for a novice!
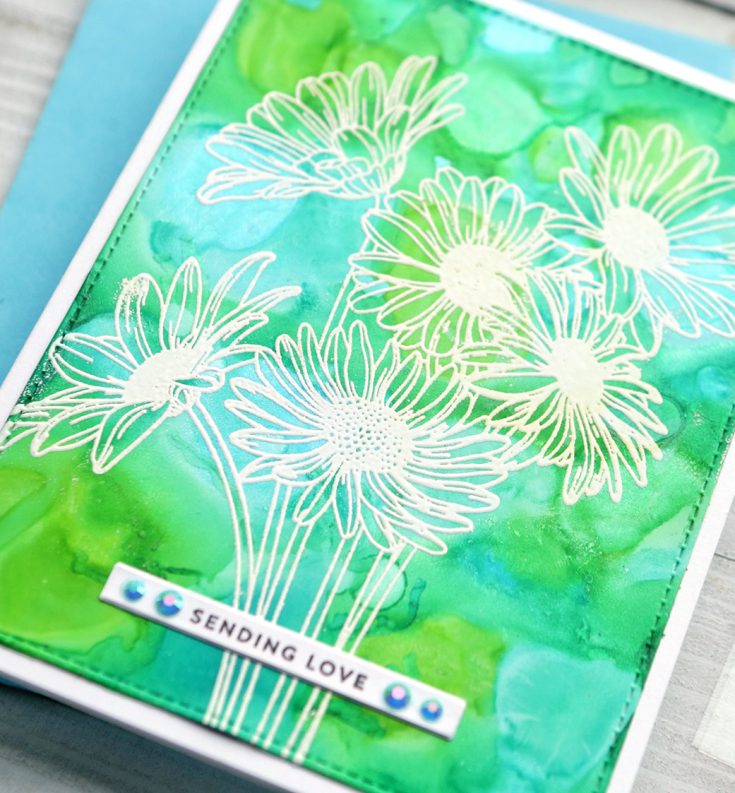
I stamped the large daisy stamp over the alcohol ink background using white embossing powder. I stamped a sentiment from the stamp set with black ink on a banner from the Sentiment Label dies. I added some PPP Caribbean Blue Jewels on each side of it.
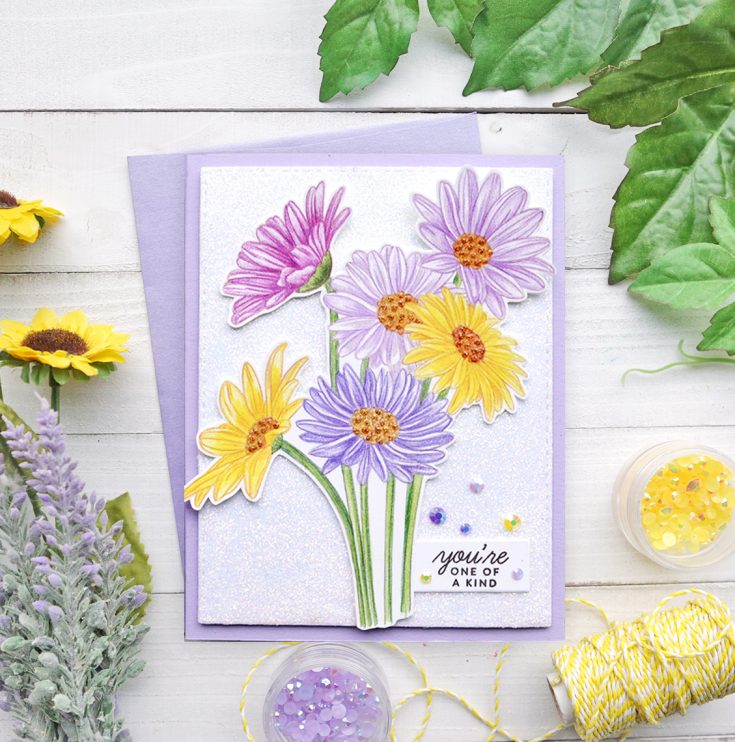
This was one of those cards where I tried anew technique and wasn’t that happy with it. I used a palette knife to rub Moonstone Glimmer Paste on a white cardstock rectangle. I applied it in as thin of a coat as I could. I thought this would be a new way to make glitter paper and to use some of my Glimmer Paste. And it did turn out VERY glimmery!
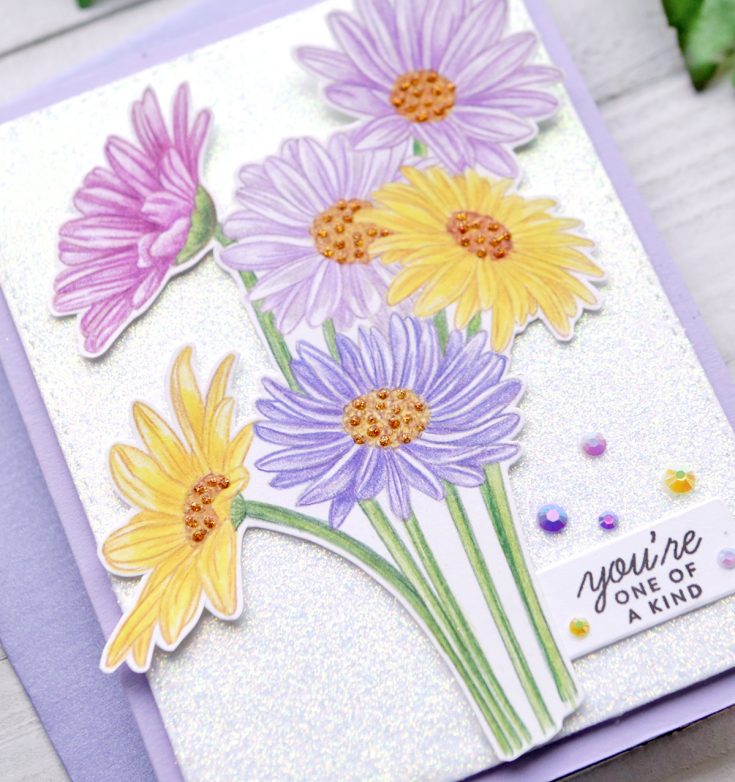
I stamped the daisies on white cardstock with light ink and colored them in with colored pencils. I cut them out and attached them to the front of my very glittery paper! I used some Golden Sunset Glitter Drops in the centers of the flowers. I stamped the sentiment with black ink on a SSS Sentiment Label die and tucked it under the flower stems. I added some PPP Amethyst, Pansy Purple, and Marigold jewels around the sentiment.
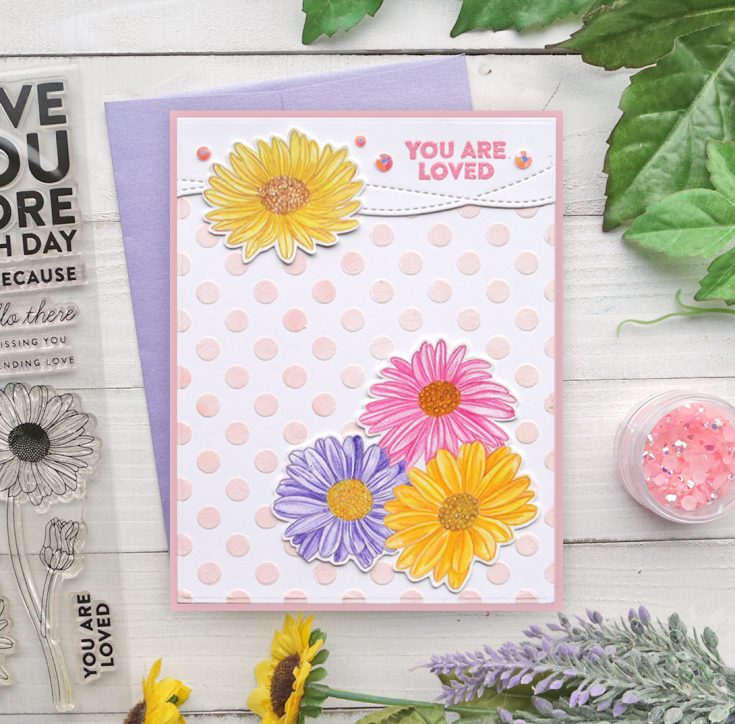
I started this card with a SSS Medium DotsStencil and Texture Paste. I added some Spun Sugar Distress Ink to the TexturePaste to make it a soft pink color. I attached the stencil to the top of apiece of white cardstock and rubbed the texture paste over the stencil. I removed it carefully and let the Texture Paste dry. I used the SSS Drifting StitchesBorder die for the top piece.

I stamped the flowers on white cardstock with light ink and then colored them all in with colored pencils. I cut them out and attached them to the card front. I stamped the sentiment with Pink Peony embossing powder. I added some PPP Blush jewels to the sides of the sentiment.
That’s it! I would love to hear which techniques you think are worth the effort and which ones you think flopped –haha (seriously though). I love trying new things on my cards – sometimes with the stamp itself and sometimes with the backgrounds. I hope my experimenting has motivated you to get out your supplies and play and inspired you to use your stamps in more ways! Thanks for visiting today friends! Suzy
SUPPLIES:
|


Thanks so much for stopping by and thanks to Suzy for being our guest!

Blog Candy Alert!! Follow our blog via email and comment on this post for a chance to win special blog candy!
Throwback Thursday – Fabulous Projects You Might Have Missed!
Welcome to another edition of Throwback Thursday—a trip back in time! For each throwback, we’ll be spotlighting fantastic cards and projects using products from previous releases. The new stuff is always SO fun, but think about all of those great products you’ve collected and set aside. They are STILL AWESOME! And we want to inspire you with fantastic inspiration from our creative archives.
Recently we debuted our fabulous Celebrate You collection, but let’s take a look back at a collection that made its appearance last year. You might remember some pretty spectacular products from our Sending Sunshine collection. Let’s take a look at some inspiring cards created with goodies from this inspiring release from 2018!
First up is this gorgeous project from Yana Smakula:
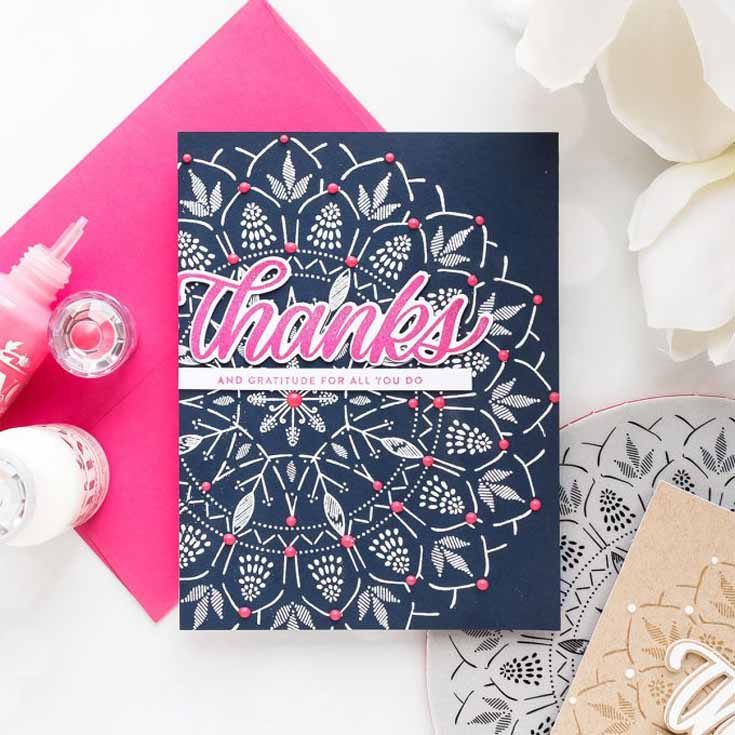
Yana’s navy beauty features the Bohemian Lace background stamp. We love how she accented points of the stamp with Nuvo Drops in Carnation Pink. Want to know how Yana created this beauty? You can watch her in action on YouTube HERE. You can see Yana’s original post HERE.
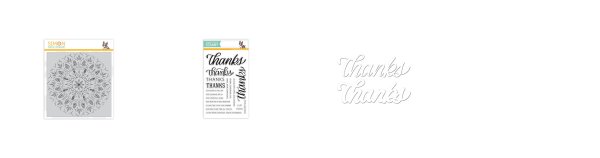
Yana’s supplies
Next, let’s throw it back to this pretty design from Amanda Korotkova:
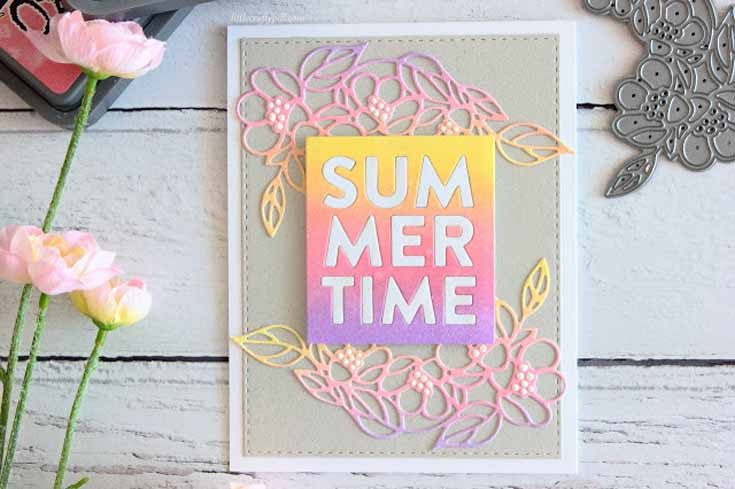
This gorgeous design has us longing for summer! Amanda created this pretty card using two dies from the Sending Sunshine release—Summertime and Flower Cluster. If you love this design, you can check out a tutorial by Amanda on YouTube HERE. You can find Amanda’s original blog post HERE.
Amanda’s supplies

And let’s not forget this simple yet wonderful design from Cathy Zielske:
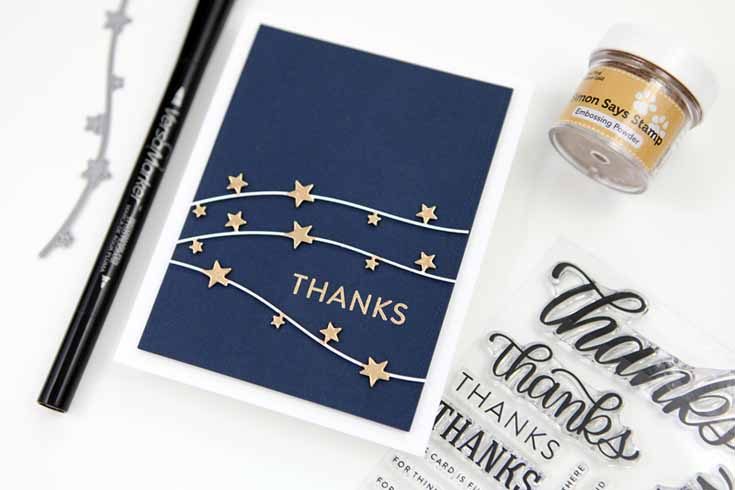
The festive Star Stream die shimmers in gold against a deep navy background on this graphic design by Cathy. We love how she used three sections of the Star Stream and placed her sentiment between the second and third line of stars. Magnificent design! You can find Cathy’s original blog post HERE. In addition, Cathy shared how she created this card in a video that you can see HERE.
Cathy’s supplies

And finally this fun card from Lisa Addesa:
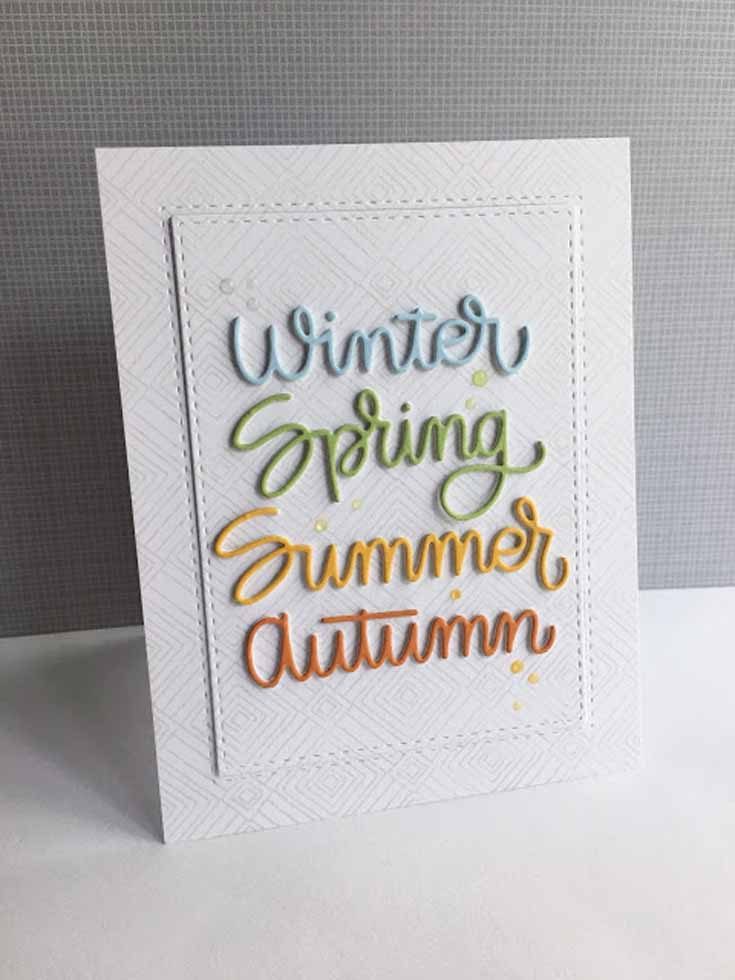
Lisa started with a subtle background that she stamped in gray using the Deco Diamonds background stamp which was a part of the Sending Sunshine release. She then die cut all four of the Four Seasons dies in colors that worked well for each season. You can check out Lisa’s original blog post HERE and see the sentiment inside the card that uses the Four Seasons Sayings stamp set.
Lisa’s supplies

Did you know that we have inspiration galleries on our website showcasing project ideas for all of our releases and card kits? It’s a veritable treasure-trove of terrific ideas just waiting to inspire you, and you are invited to share your projects, too! You can find all of the Simon release galleries HERE and galleries for our monthly card kits can be found HERE. Scroll through today, and maybe you’ll find one of YOUR projects linked there!
Thanks for throwing it back with us and checking out these cool projects from four talented ladies!
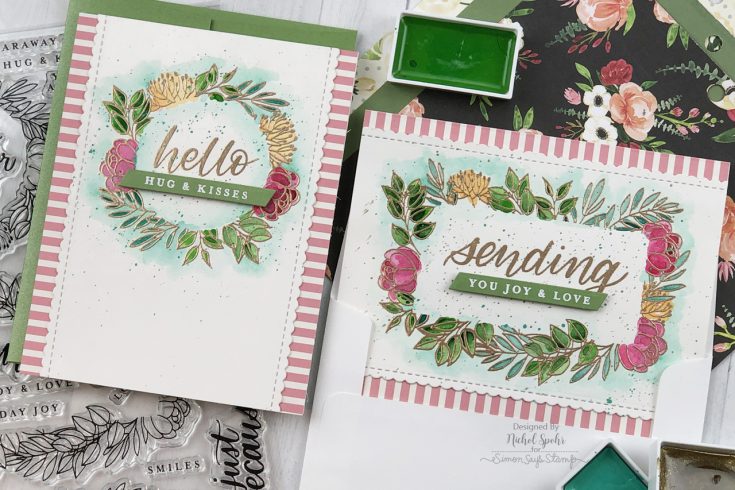
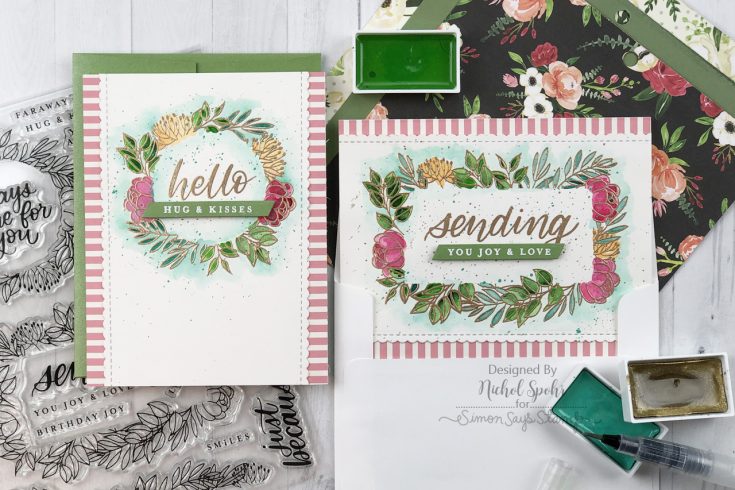
Soft & Pretty Leafy Frames
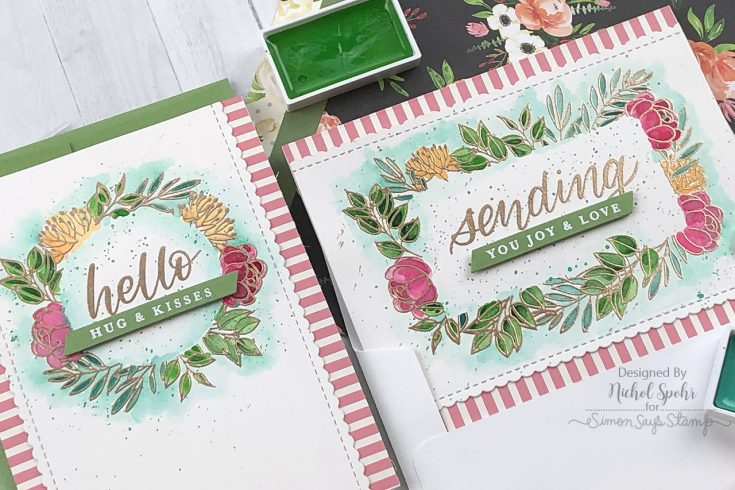
Hi friends! Happy Wednesday! Check out this gorgeous and fresh inspiration by Nichol Spohr using our new June 2019 Leafy Frames card kit! To complete the looks, Nichol heat embossed with our Antique Gold Embossing Powder and Gansai Tambi Kuretake watercolors and finished it off with our Scallop Stitches die for a special finishing touch!
For all the details, be sure to watch the video and enjoy!
SUPPLIES:
|


Thanks so much for stopping by and thanks to Nichol for being our guest!

Blog Candy Alert!! Follow our blog via email and comment on this post for a chance to win special blog candy!


