Yippee for Yana: Background Stamping with Thankful Flowers
Hi friends! Happy Tuesday! I’m so thrilled to welcome back special guest Yana Smakula to our blog for the bi-monthly installment of Yippee for Yana! I instantly smiled when I saw this bright & happy card, and hope you will to! Read on and be sure to watch the video for all the details!

Hi everyone, this is Yana Smakula, welcome back for another Yippee For Yana video! It’s been a long time since I did any pattern or background stamping using non background stamps; and since pattern stamping is one of my favorite ways to make backgrounds for my handmade cards I challenged myself to find a floral stamp I like and use it to create a pretty background for card.

I picked the floral cluster from the Thankful Flowers stamp set. I pulled out my MISTI stamping tool, Simon’s Intense Black ink and Neenah Solar White 80 lb cardstock and stamped my heart out. It only took 4 impressions to cover the panel for an A2 card and I made sure to rotate the floral cluster so that my stamping didn’t look identical. I would like to make this card again, but use a gray ink pad instead of black for stamping the flower outline, or perhaps even do some heat embossing in gold or like gold color for a softer look.
Having stamped the background I picked several colors, I settled on a color combo, and from there I picked my Copic markers to do the coloring. I started by coloring the leaves for the panel. I used YG01, YG03, G94 and G99 markers to color the leaves. Next, I used R20, R22 and R22 markers to color some of the flowers red; Y35, Y13 and Y11 markers to color some flowers yellow; RV34, RV11 and RV00 to color some flowers pink; and finally the last flower was colored using violets, BV11, BV00 and BV000.
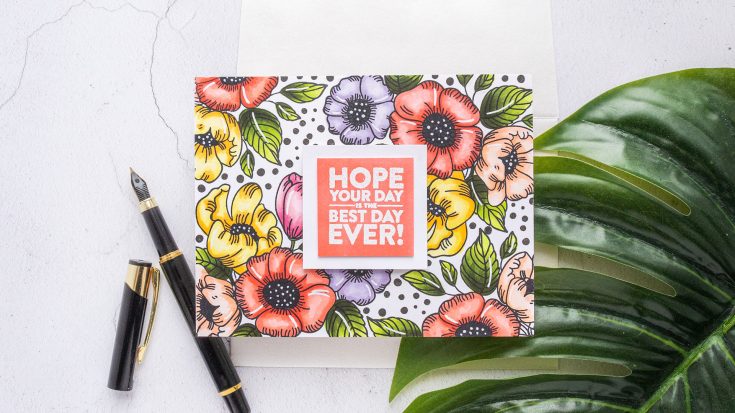
The flower centers were colored using a C9 marker to look almost black. I wish i had picked a lighter color, maybe a C7 marker or a C5, I think that would have looked a bit better.
The stamp set, the Thankful Flowers includes small dot clusters and so I used those dots to fill in the gaps in between the images. I stamped them in black ink and I used Versafine Onyx Black for this.
To create a sentiment I used an R22 marker and colored a piece of white cardstock to create a custom color paper. Next, I waited for the paper to dry and then heat embossed a simple sentiment that reads “Hope Your Day is the Best Day Ever” in white embossing powder; the sentiment comes from the Birthday Word Mix 1 set from Simon Says Stamp.

I cut the sentiment out using my paper trimmer and adhered 3 pieces of scrap cardstock to the back of the panel to create dimension. I wanted to add some dimension, but I didn’t want to use foam adhesive squares as that would have added too much dimension, so I added just a little bit to dimension by adhering 3 panels of cardstock. Then I used foam adhesive to adhere the sentiment panel to the card.
I also used a white pen and added white dot details to the flower center and added highlights to some of the flower petals.
I hope you like this card idea!
Have fun stamping!
SUPPLIES:
|


Thanks so much for stopping by, and thanks to Yana for being our guest!
Studio Monday with Nina-Marie: Foiling with New Spellbinders

Hello, it’s Nina-Marie Trapani here with you for a brand new, Studio Monday tutorial!
Today I am featuring some hot foil stamping with some of the newest Glimmer Plates from Spellbinders. I love mixing foil plate sets together for a totally custom effect, which is what I did here on this card!
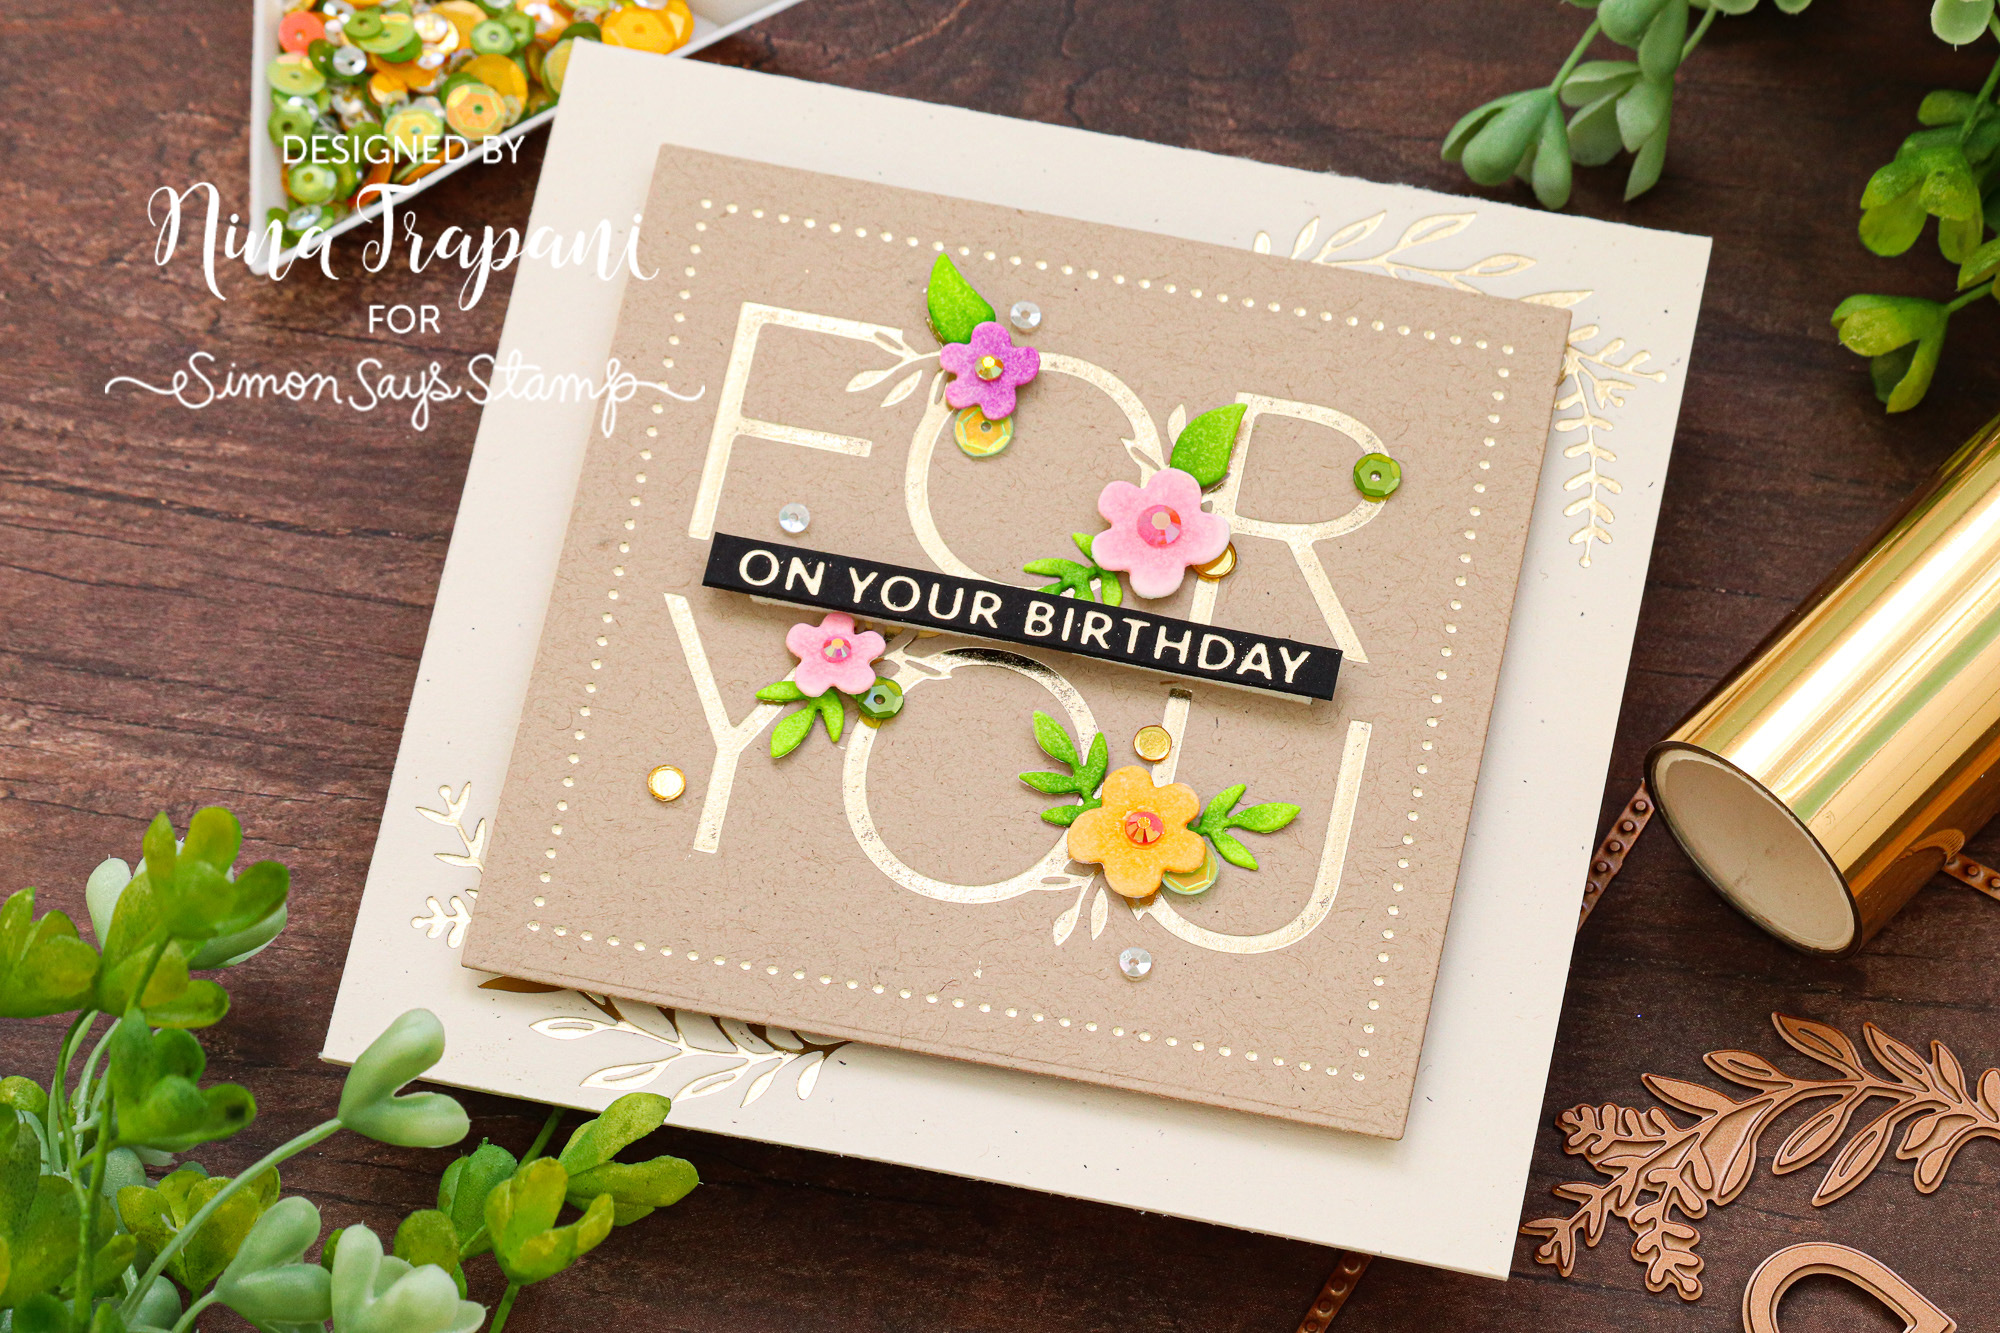
On my card I used the Especially For You plate and dies, paired with the Geometric Floral and Essential Squares plates and dies. Everything is foiled with Polished Brass Glimmer Foil.
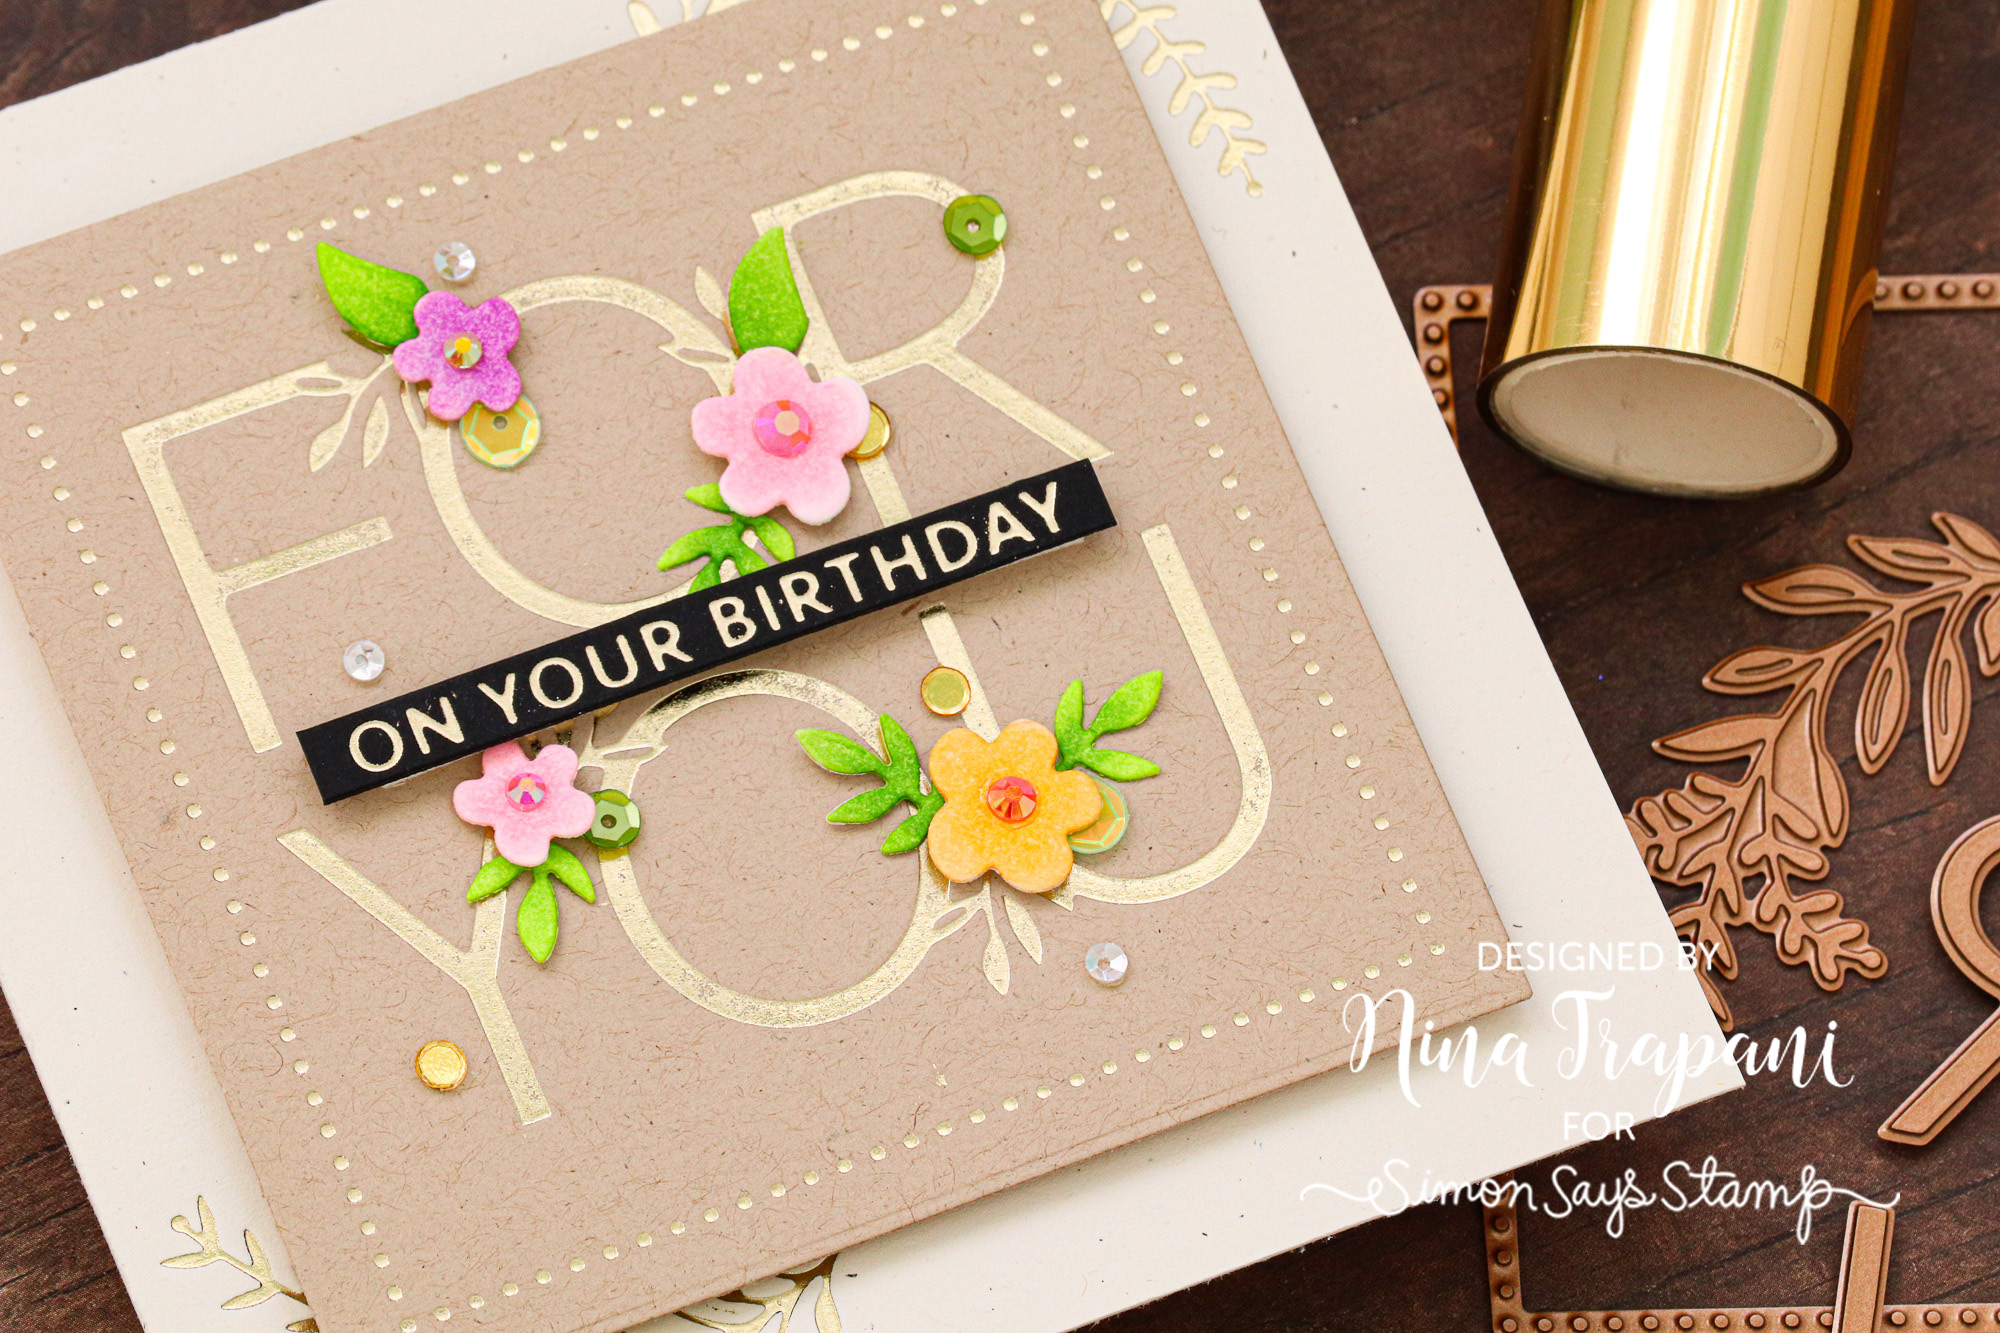
There are cute florals included in the Especially for You set, which I cut from white cardstock and colored with Copics. This method of cutting and coloring let me add shading to the simple flowers and leaves.
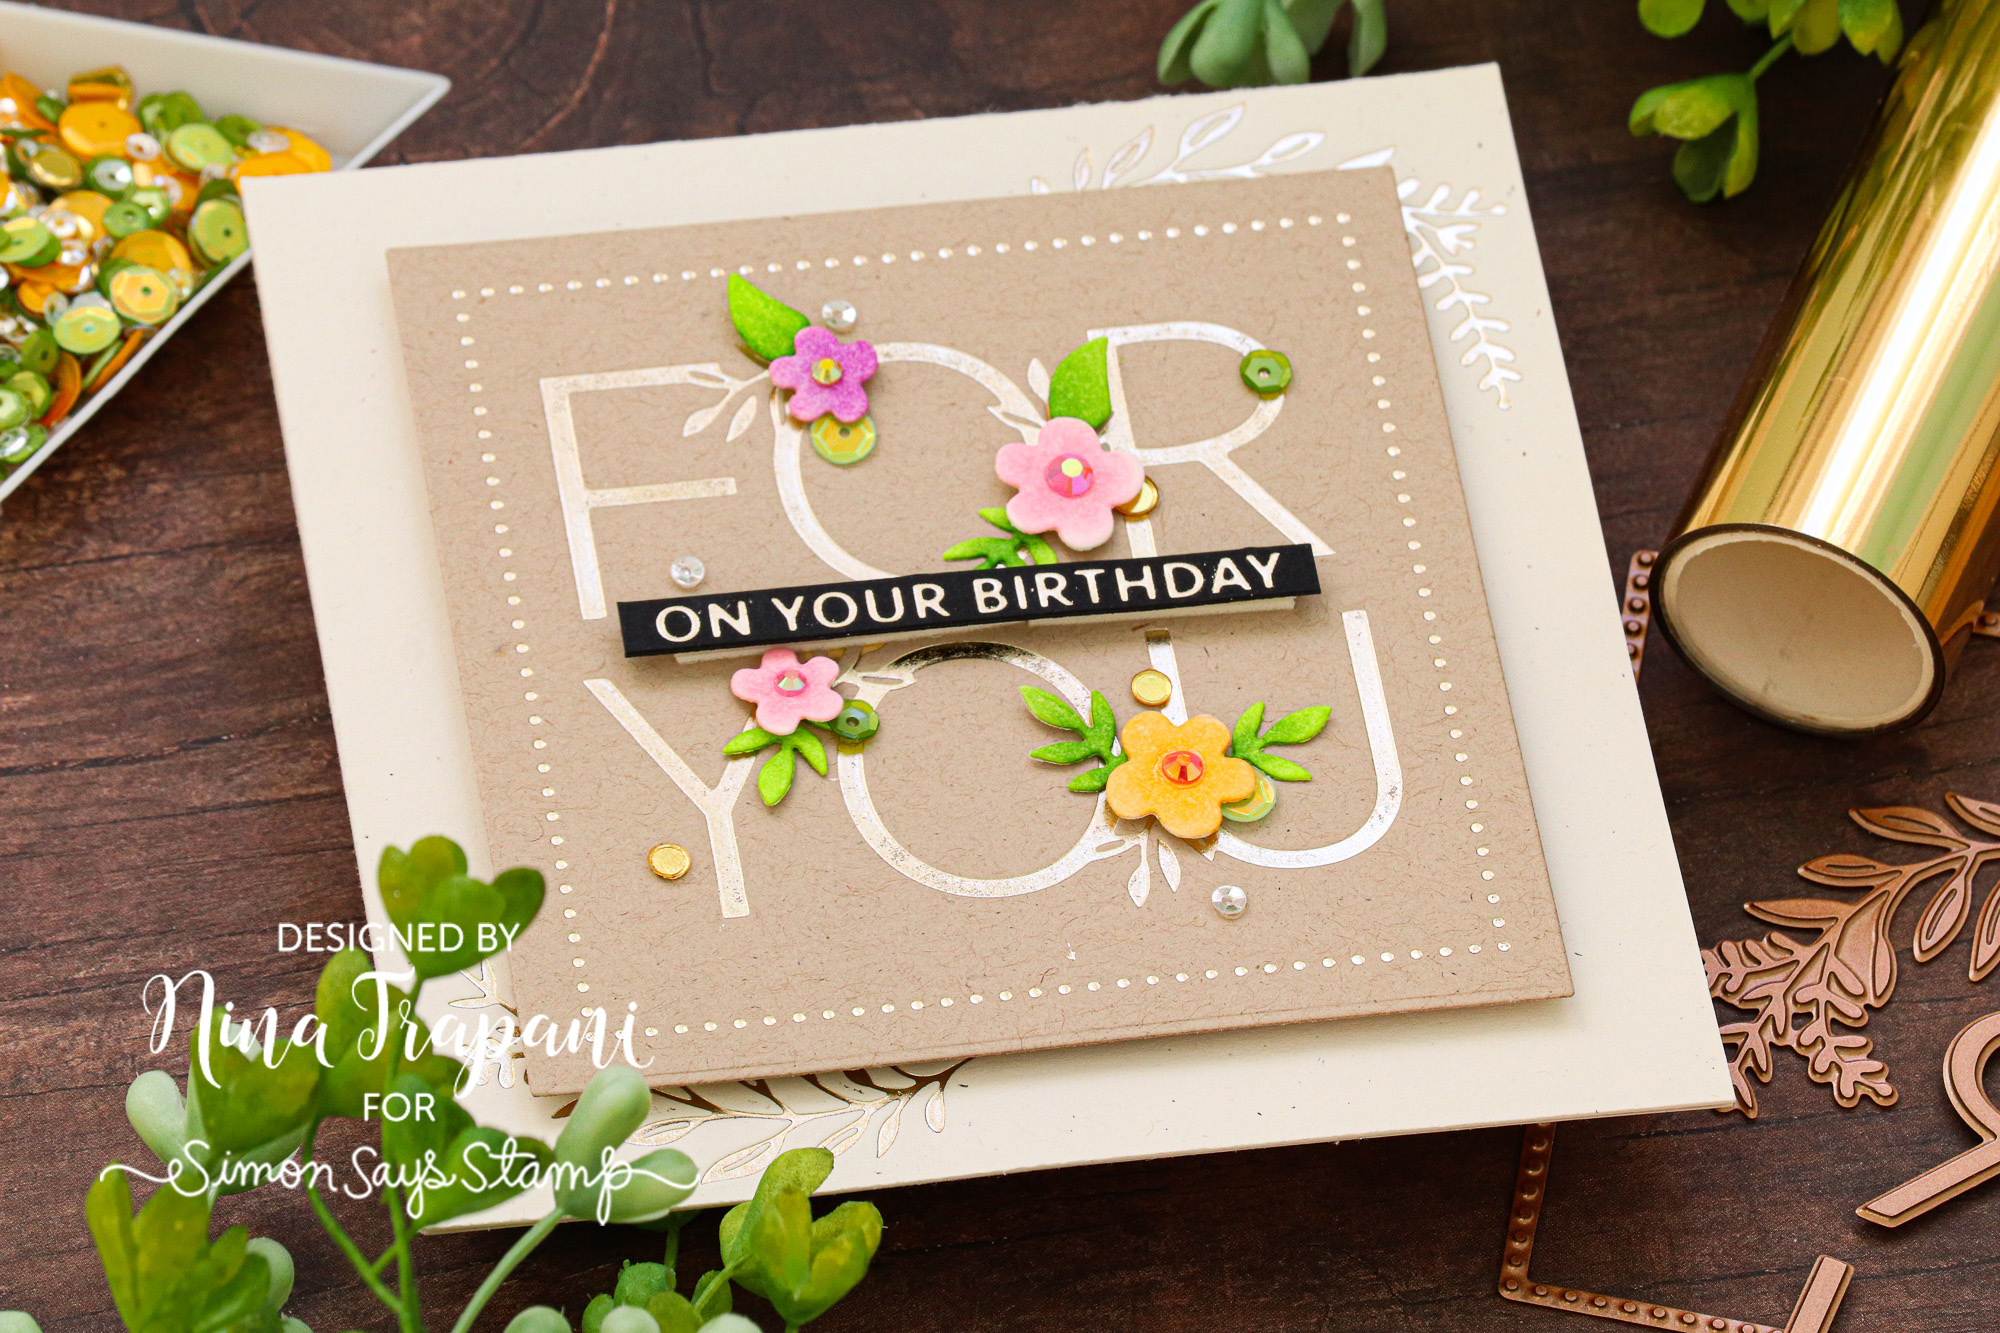
There are sequins and gems added to the florals for additional sparkle. I love how the gold foil paired so perfectly with the Neenah Desert Storm cardstock; this gives the card a soft, elegant feel.
Hope today’s card inspires you to create with these new foil plates from Spellbinders! AND that you will try the “mix and match” effect that I did – it’s a really great way to stretch your plates and dies!
SUPPLIES
|


Kindness Tag
Hi friends! Happy Sunday! Please join me in welcoming back special guest Anna-Karin Evaldsson with this gorgeous Mixed Media tag project with the strong and true message that Kindness, really can change the world! Read on for more information and enjoy!
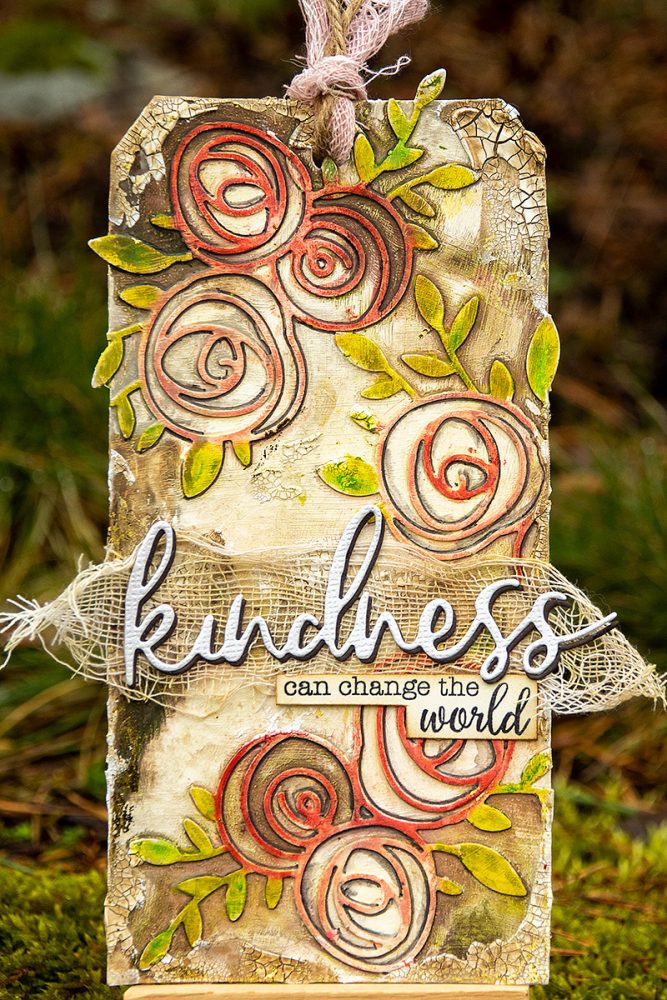
Hi everyone! March has arrived and spring is around the corner. I particularly enjoy the longer days and I am looking forward to all the shades of green that appear in spring. I am happy to be here today with a fun mixed media tutorial. I made a tag, but the techniques work just as well for cardmaking or art journaling. If you see the finished result of a mixed media project, it might look complicated, but if you just follow the steps, you will see that it is not difficult at all. It is also very forgiving in the sense that mistakes are either easy to hide or can become a part of the design.
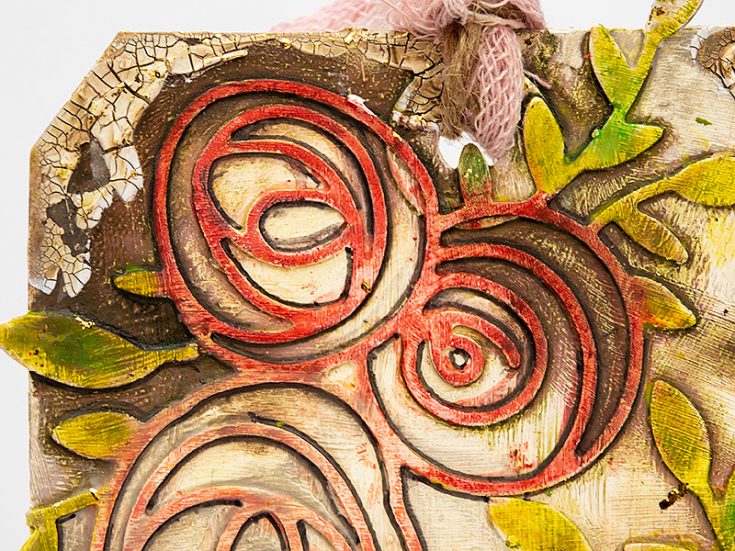
I love to make die cuts a part of the background, by almost baking them into the background. If you touch the tag it doesn’t seem as if the die cuts have been glued onto the background, but more like they were there from the start. This works with almost any type of die and is very effective with detailed dies, such as the Rose Scribble Trio by Memory Box that I used here.
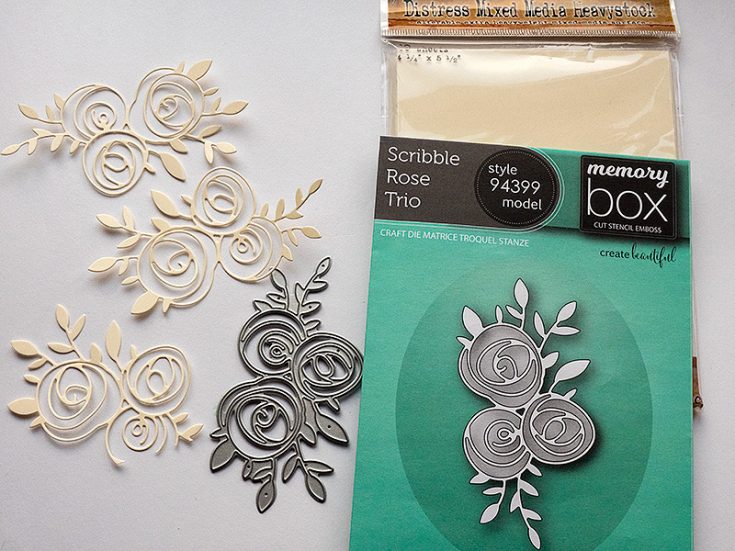
Start by die cutting the Rose Scribble Trio three times from Heavystock cardstock. My third die cut isn’t complete since I was only planning to use a part of it.
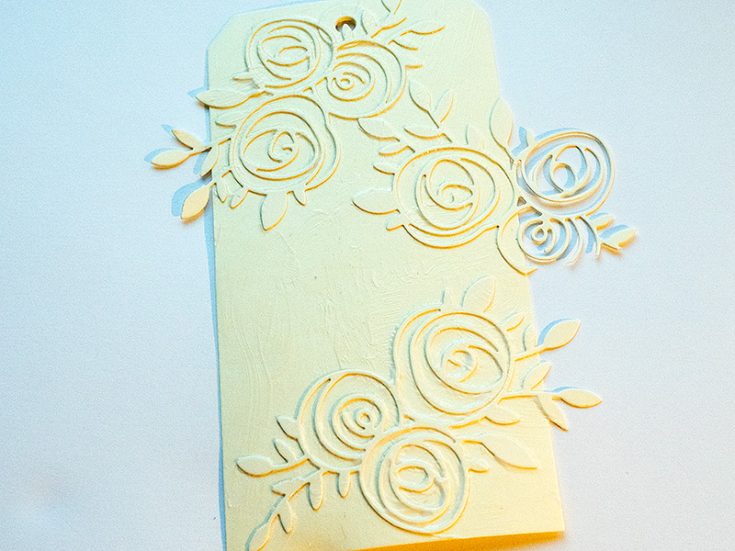
Glue the die cuts to the background with Distress Matte Medium and add another layer of medium on top. Let dry.
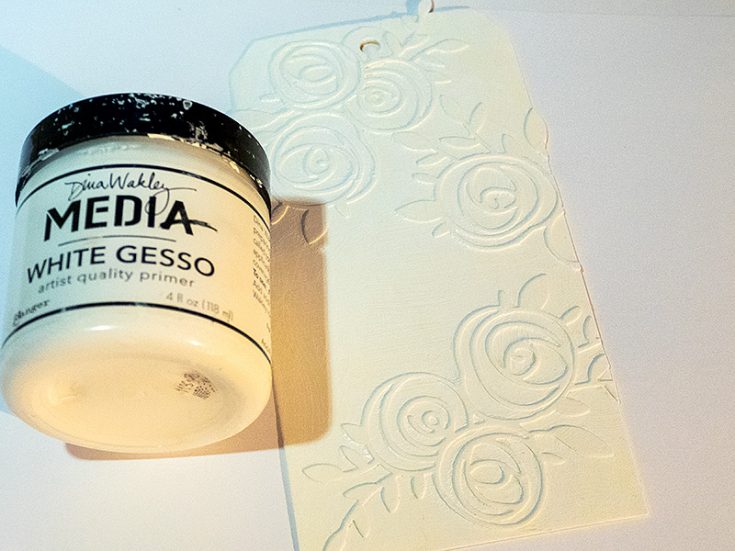
Coat everything with a layer of gesso.
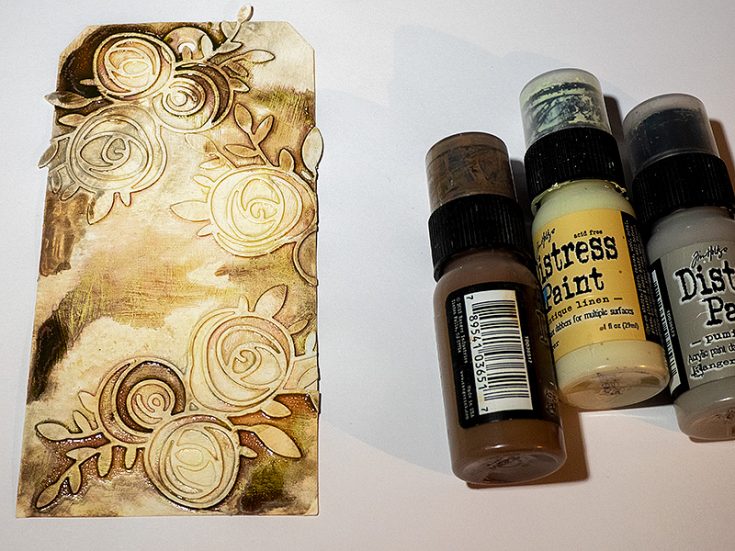
When the gesso is dry, paint the background with Distress Paint. I used Antique Linen, Pumice Stone and Walnut Stain. Water down the paint first and then mist more water on the tag, so that the colors blend and run. Let dry – it takes a little while because of all the water.
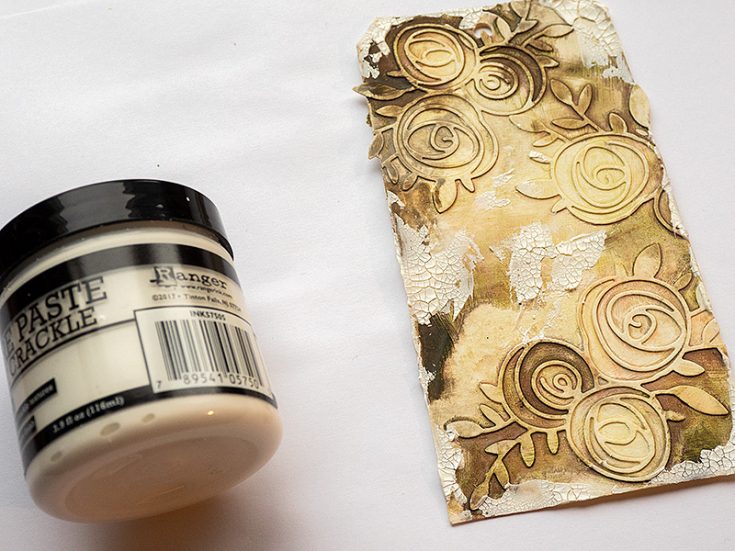
Apply a little Opaque Crackle Texture Paste to the corners and edges with a palette knife. Crackles form as the paste dries.
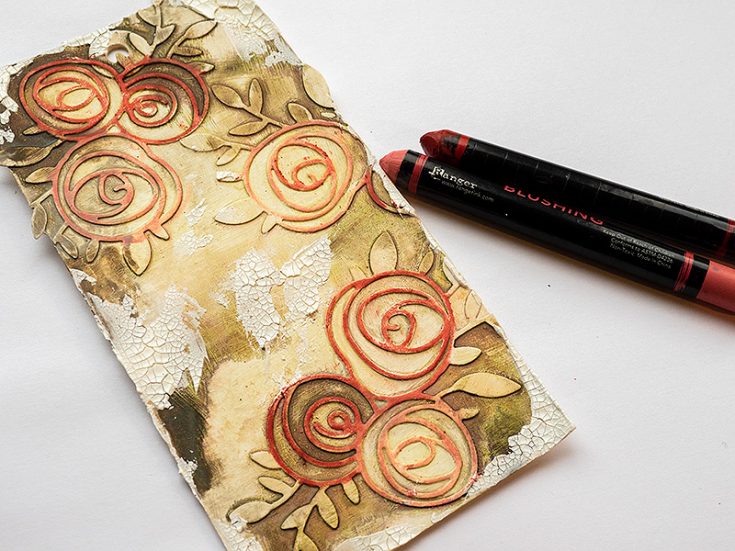
You can color the roses with different media. I used Dina Wakley’s Scribble Sticks. Rub the stick over the roses, using a shade of pink and a shade of red.
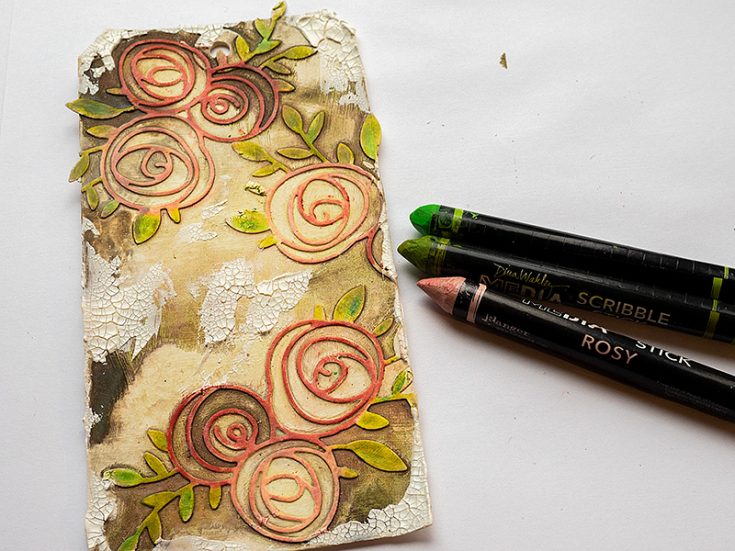
Continue with the leaves, using two shades of green.
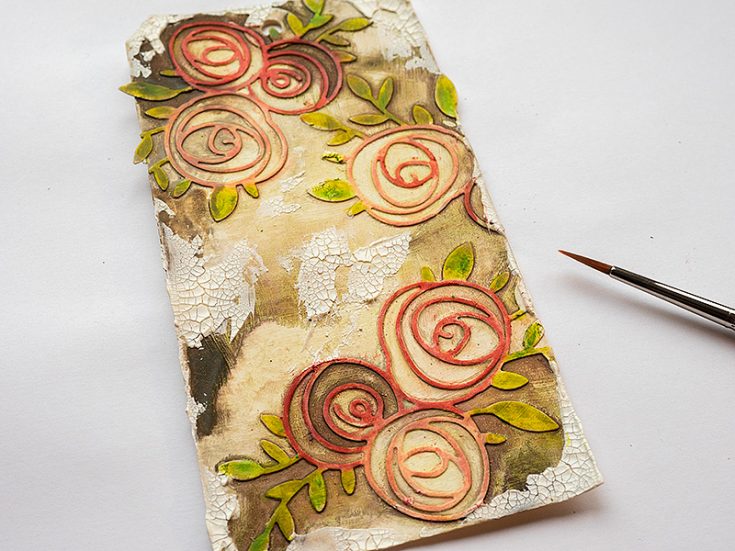
Blend the colors with a paint brush and water. You don’t see a big difference, but it makes the colors a little brighter.
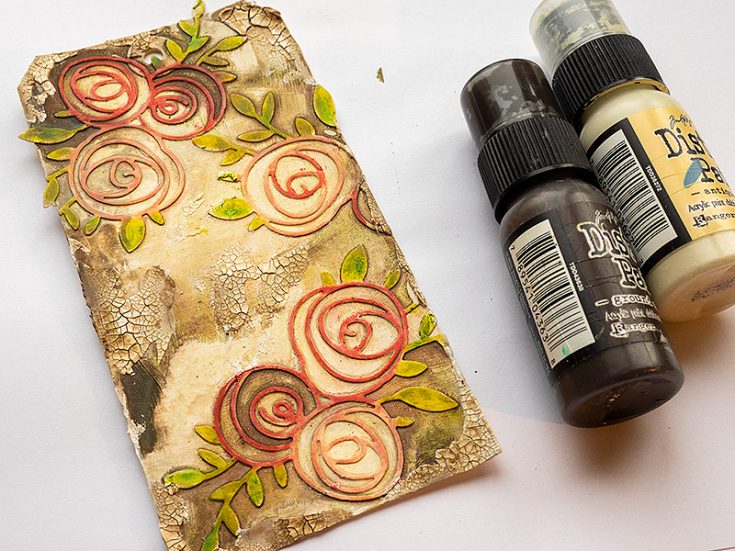
Paint the crackle areas with watered down Antique Linen and Ground Espresso. Let dry.
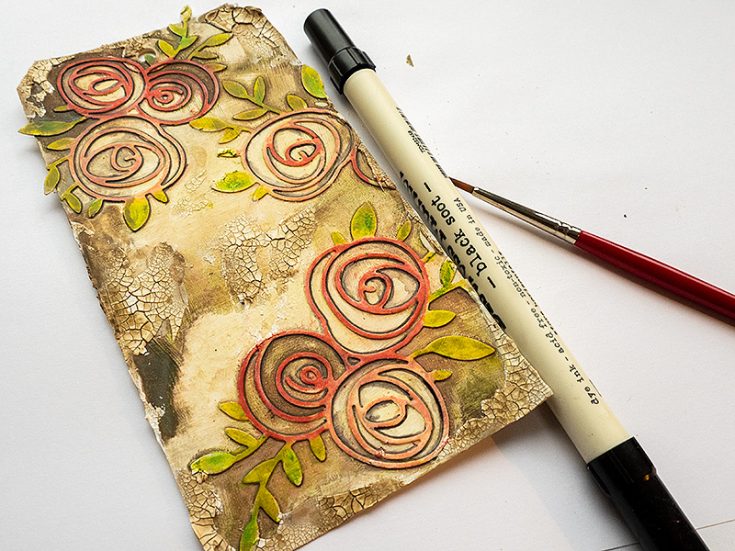
Add shading to the flowers with a Black Soot Marker and use a paint brush with just a little water to blend out the lines.
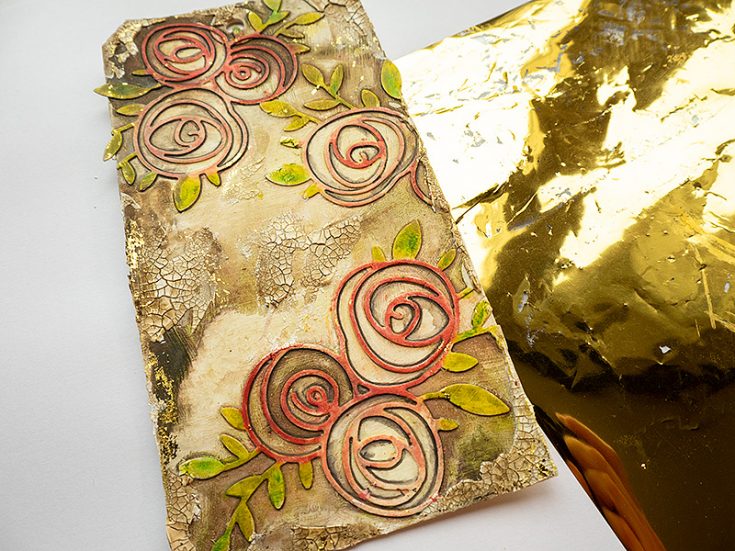
As a final touch I decided to add some gold foil. Apply a glue stick here and there and then rub the foil on top. It is best to work in one area at a time.
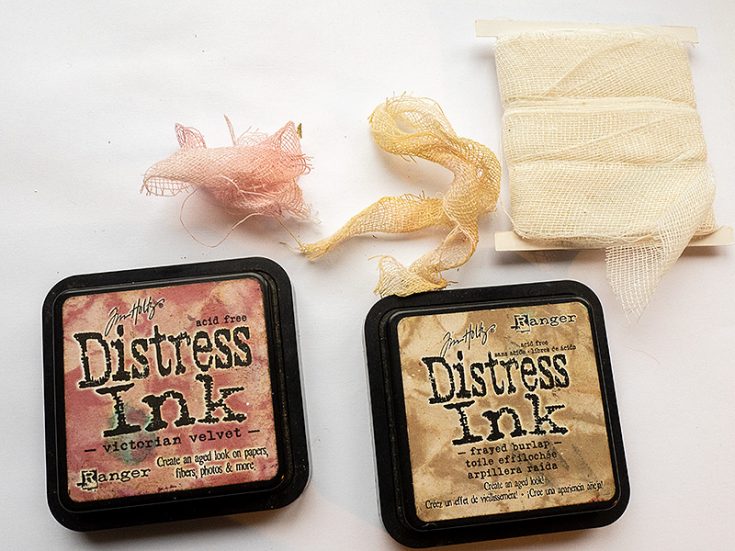
I dyed some mummy cloth with Distress Ink. Press the cloth onto the ink pad and then mist with water.
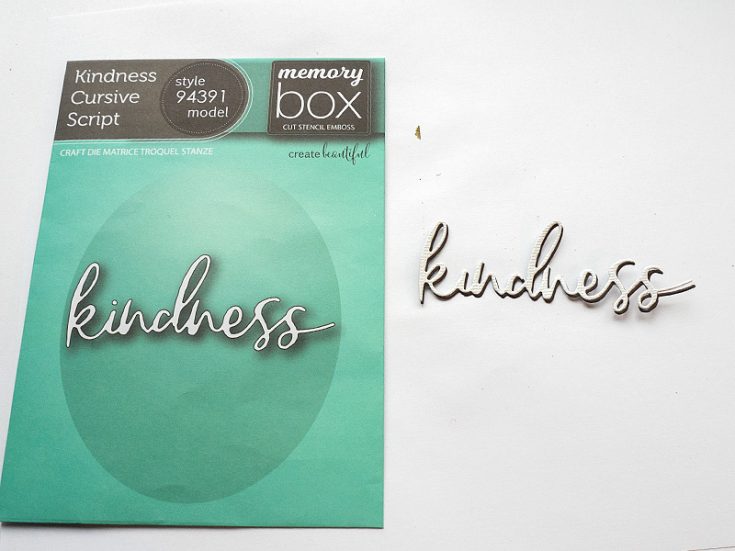
Die cut the Memory Box Kindness Cursive Script from Simon Says Stamp White Diamond Glimmery cardstock and from brown cardstock and layer on top of each other.
Here you can see the color and shading a little better.
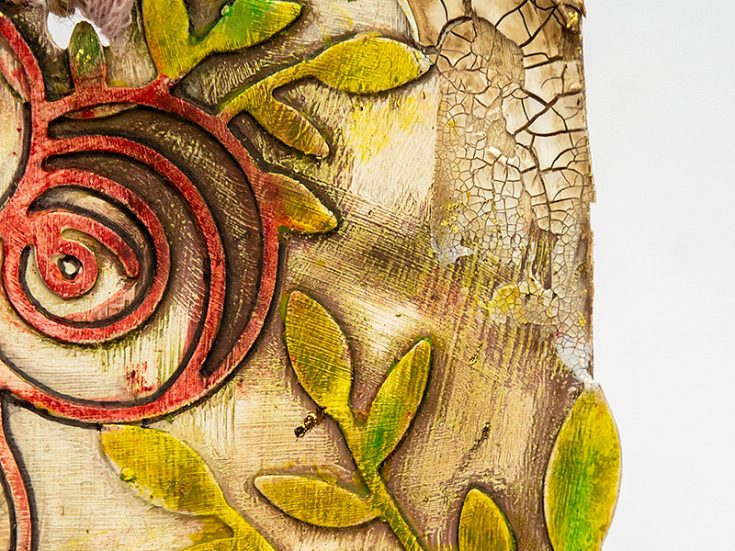
The paint brush texture from the matte medium and the gesso shows through both the paint and the Scribble Sticks.
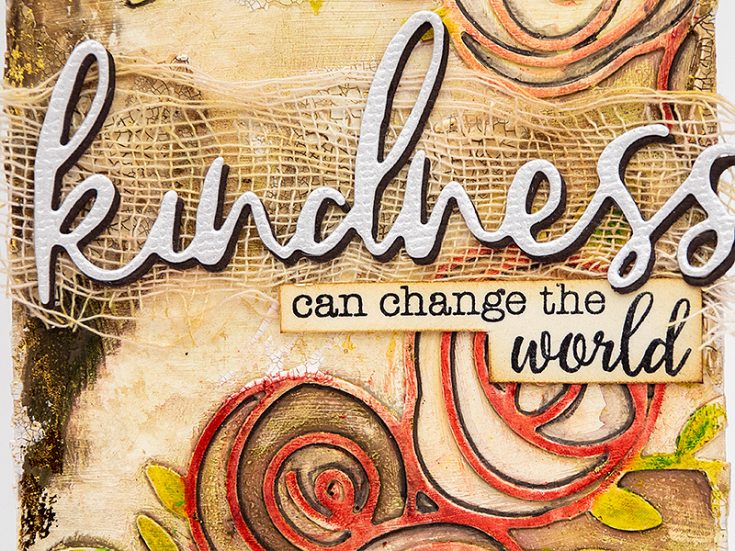
Layer a piece of mummy cloth under the title to make it stand out better. I also used just a part of a sentiment stamp from the SSS Uplifting Thoughts set.
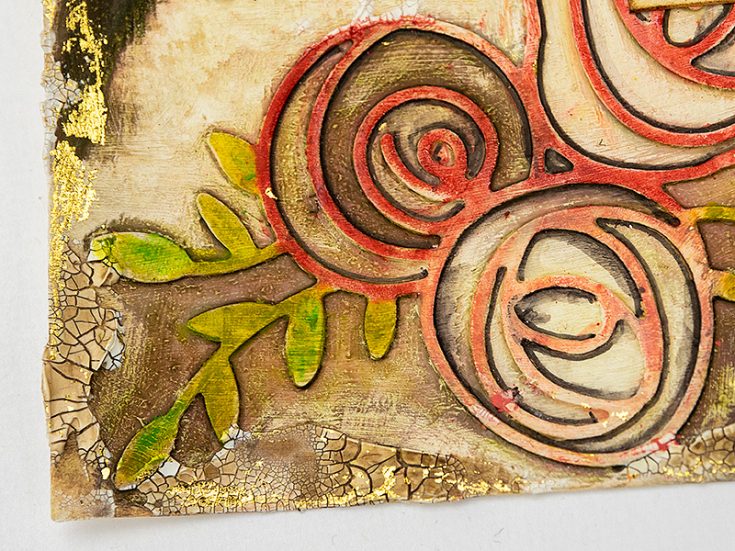
Here you can see the fold foil better, just a little makes a big difference and adds interest.
I hope this tutorial inspired you to use your dies in new ways and to play around with different media.
Thank you so much for looking! Happy crafting! -Anna-Karin
SUPPLIES:
|


Thanks so much for stopping by today, and thanks to Anna-Karin for being our guest!


