Studio Monday with Nina-Marie Reprise: 5 Ways to Use Freezer Paper
 Hi everyone! Have you ever utilized freezer paper in your crafting projects? Originally meant for storing food in the freezer (hence the name!), this versatile tool has since become a staple tool within the crafting industry. If you are a quilter, odds are you’ve used it for transferring patterns onto fabric. :) Additionally, freezer paper can be helpful to papercrafters too! I have used it in the past for various techniques and today we are going to look at 5 of my favorite ways to use freezer paper.
Favorite Freezer Paper Tip #1: Protecting Your Work Surface
 If you are a crafter that loves to get messy with like me, the benefits of having your surface covered with freezer paper are endless. Freezer paper has both a coated and uncoated surface, depending on which side you have it flipped to. When you have the freezer paper with the coated-side up, you instantly have a non-stick surface covering your work table (similar to a craft sheet). Any medium can be applied onto the freezer paper and most easily wipe off; this means you can reuse the sheet over and over and over… you get the idea! ;) Even liquid adhesives can be easily wiped off.
Favorite Freezer Paper Tip #2: Perfect with Alcohol Inks
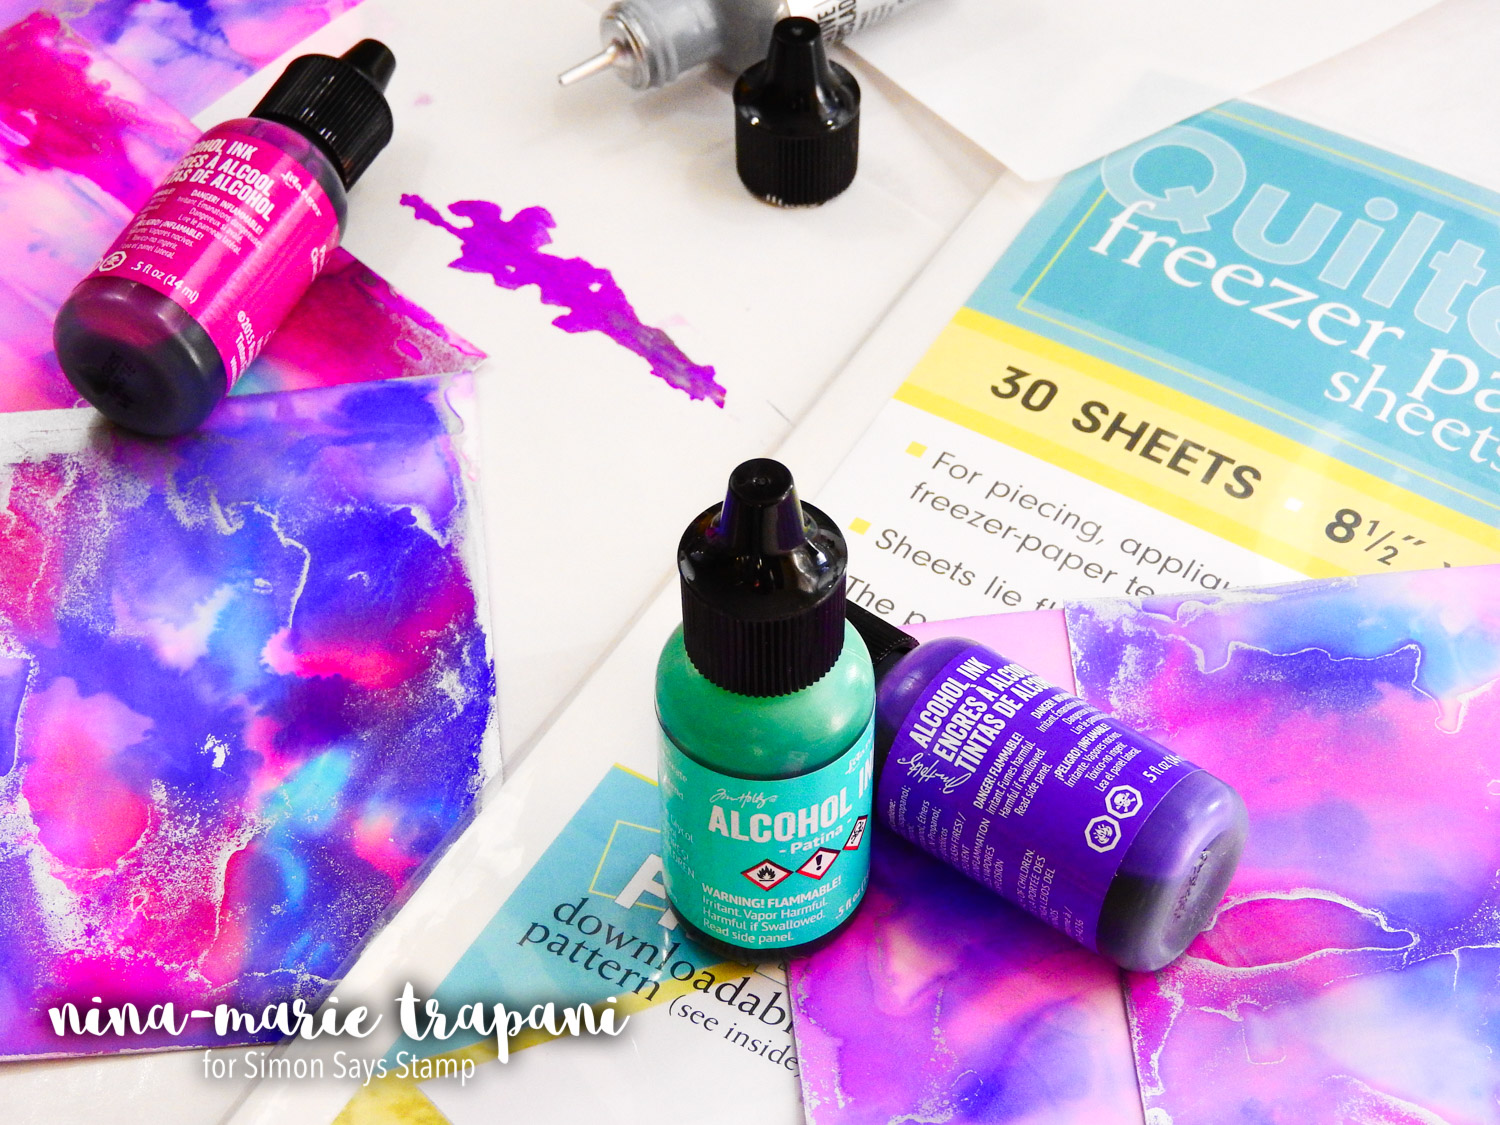 I’m sure most of you have seen that alcohol inks are all the rage at the moment; freezer paper is a great surface to work with alcohol inks on. It is especially fun to do alcohol ink smooshing on too! The slick surface of the paper allows the alcohol inks to be reactivated and re-smooshed almost limitlessly. They also clean up easily on the freezer paper; or you can simply throw the sheet of freezer paper out when you are done with the inks, making clean up a breeze.
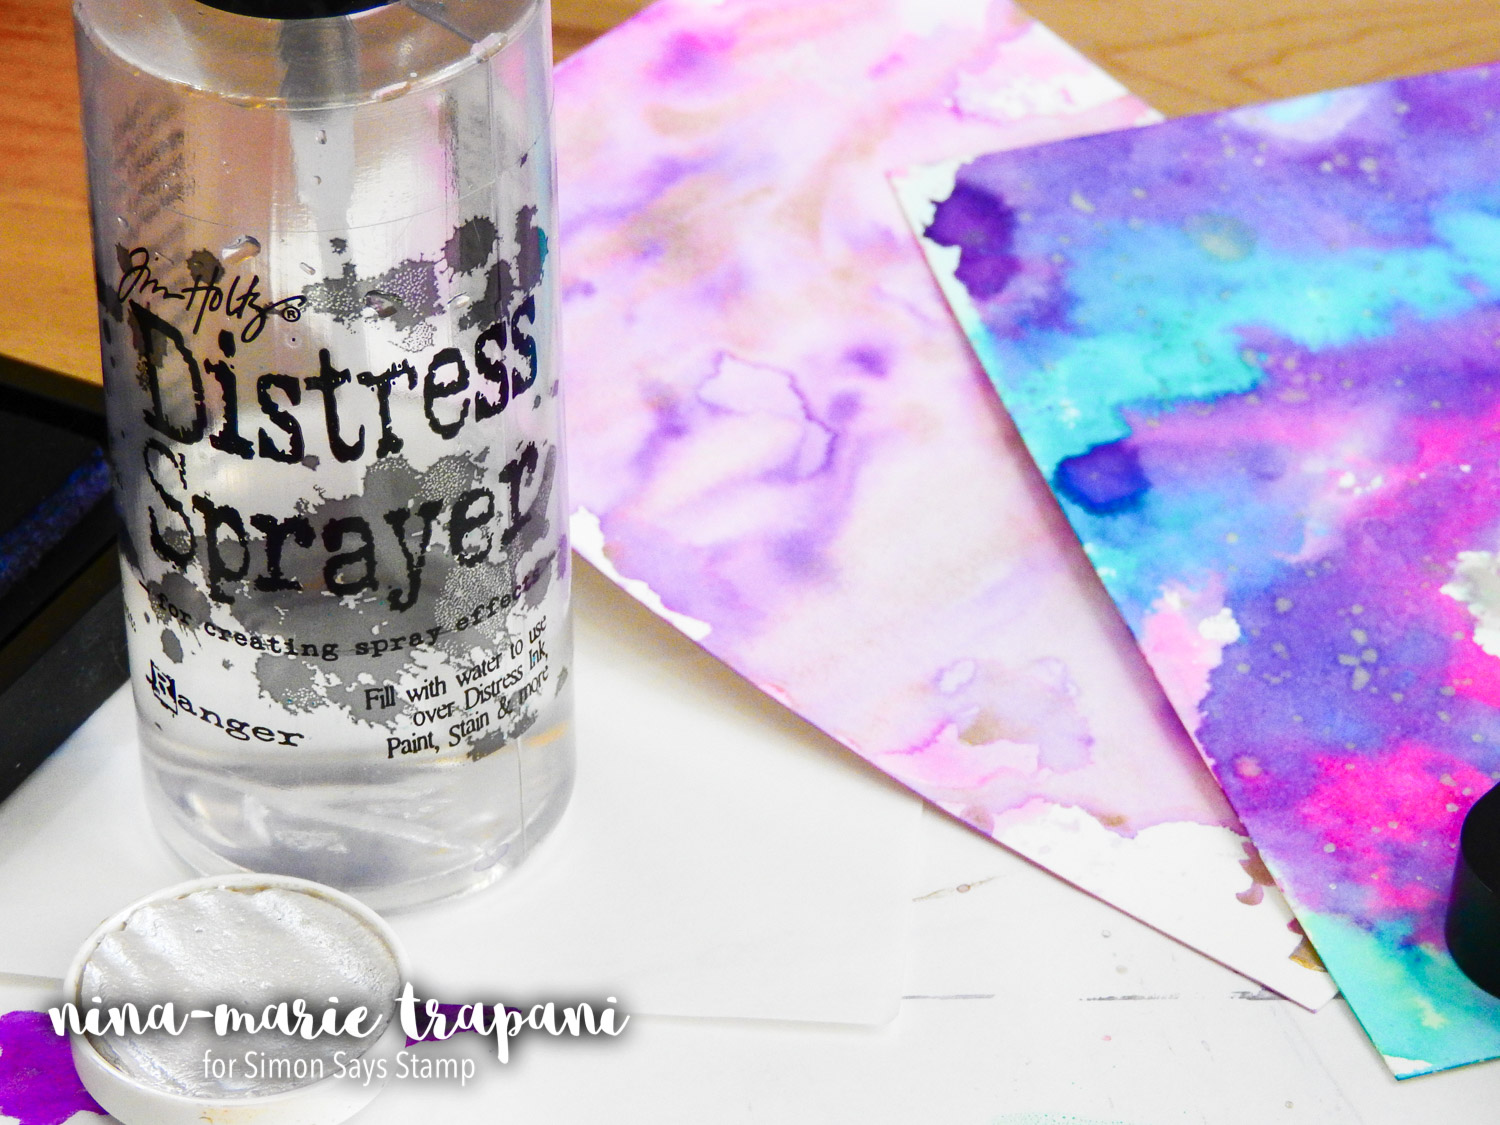
Favorite Freezer Paper Tip #3: Distress Ink Smooshing
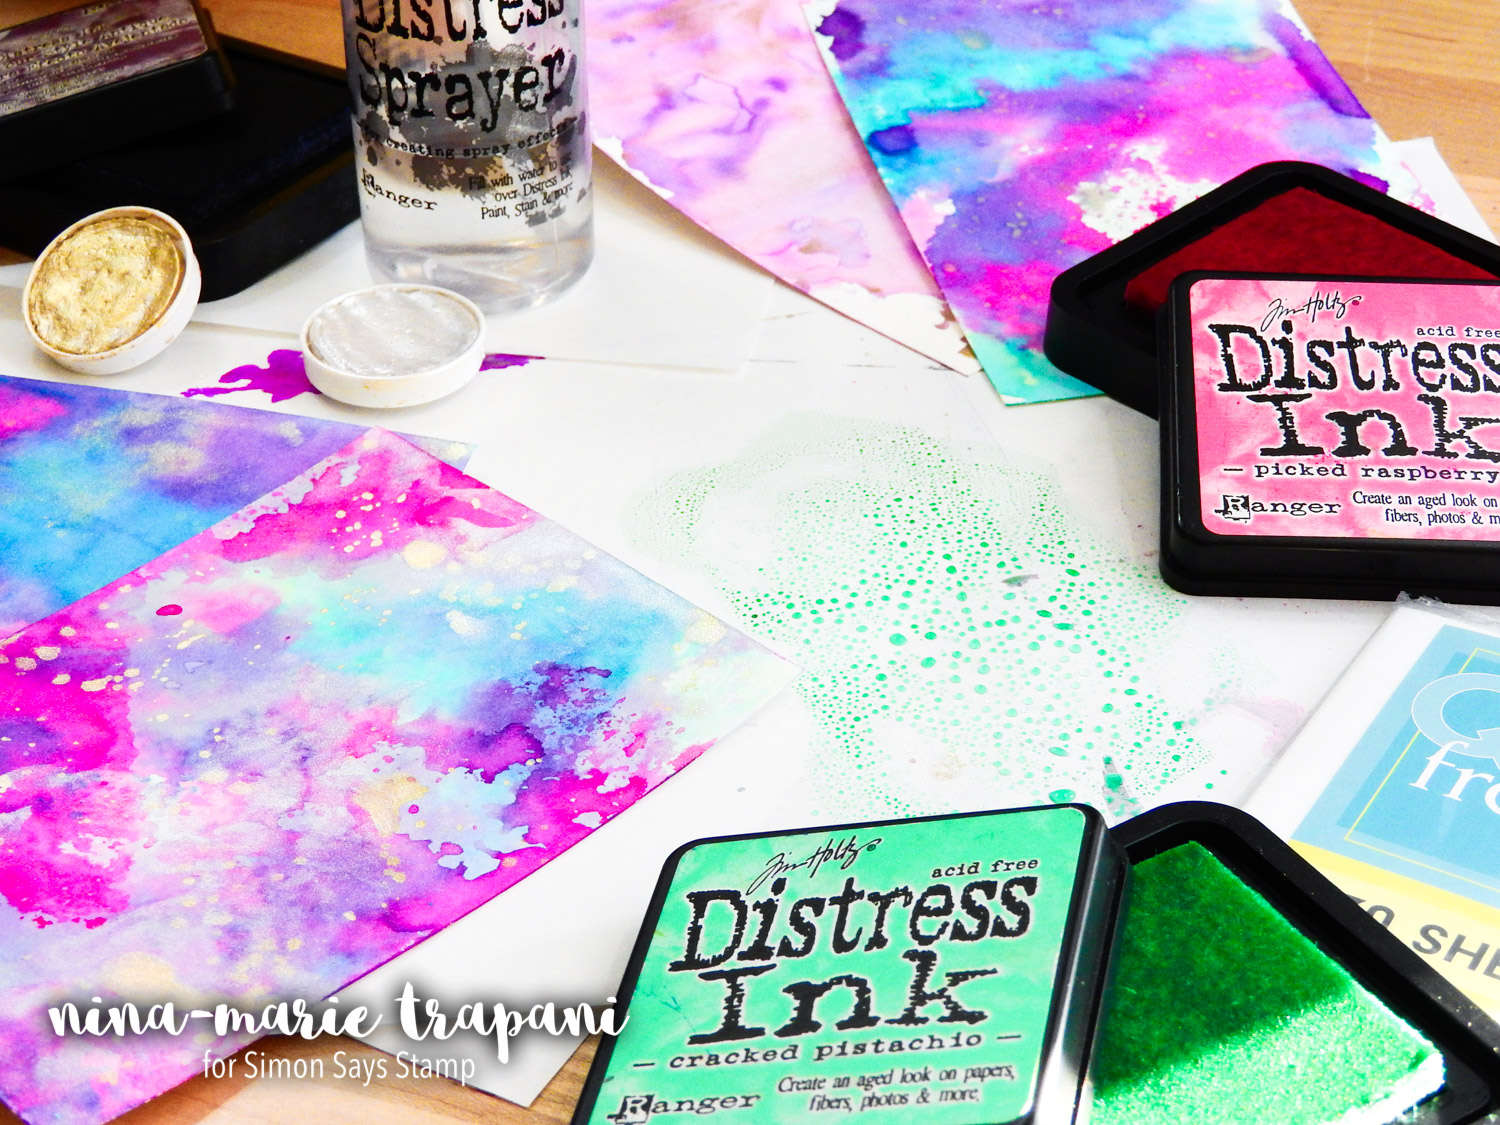 Speaking of smooshing, Distress Ink smooshing is equally as fun and easy with freezer paper! In the same way that alcohol inks can be reactivated, the coated surface allows Distress Inks to be reactivated also. You can make stunning backgrounds and textures with the ink smooshing! And because the Distress Inks are a water-based medium, they wipe away effortlessly, again letting you reuse the freezer paper over again!
Favorite Freezer Paper Tip #4: Using as a Watercolor Palette
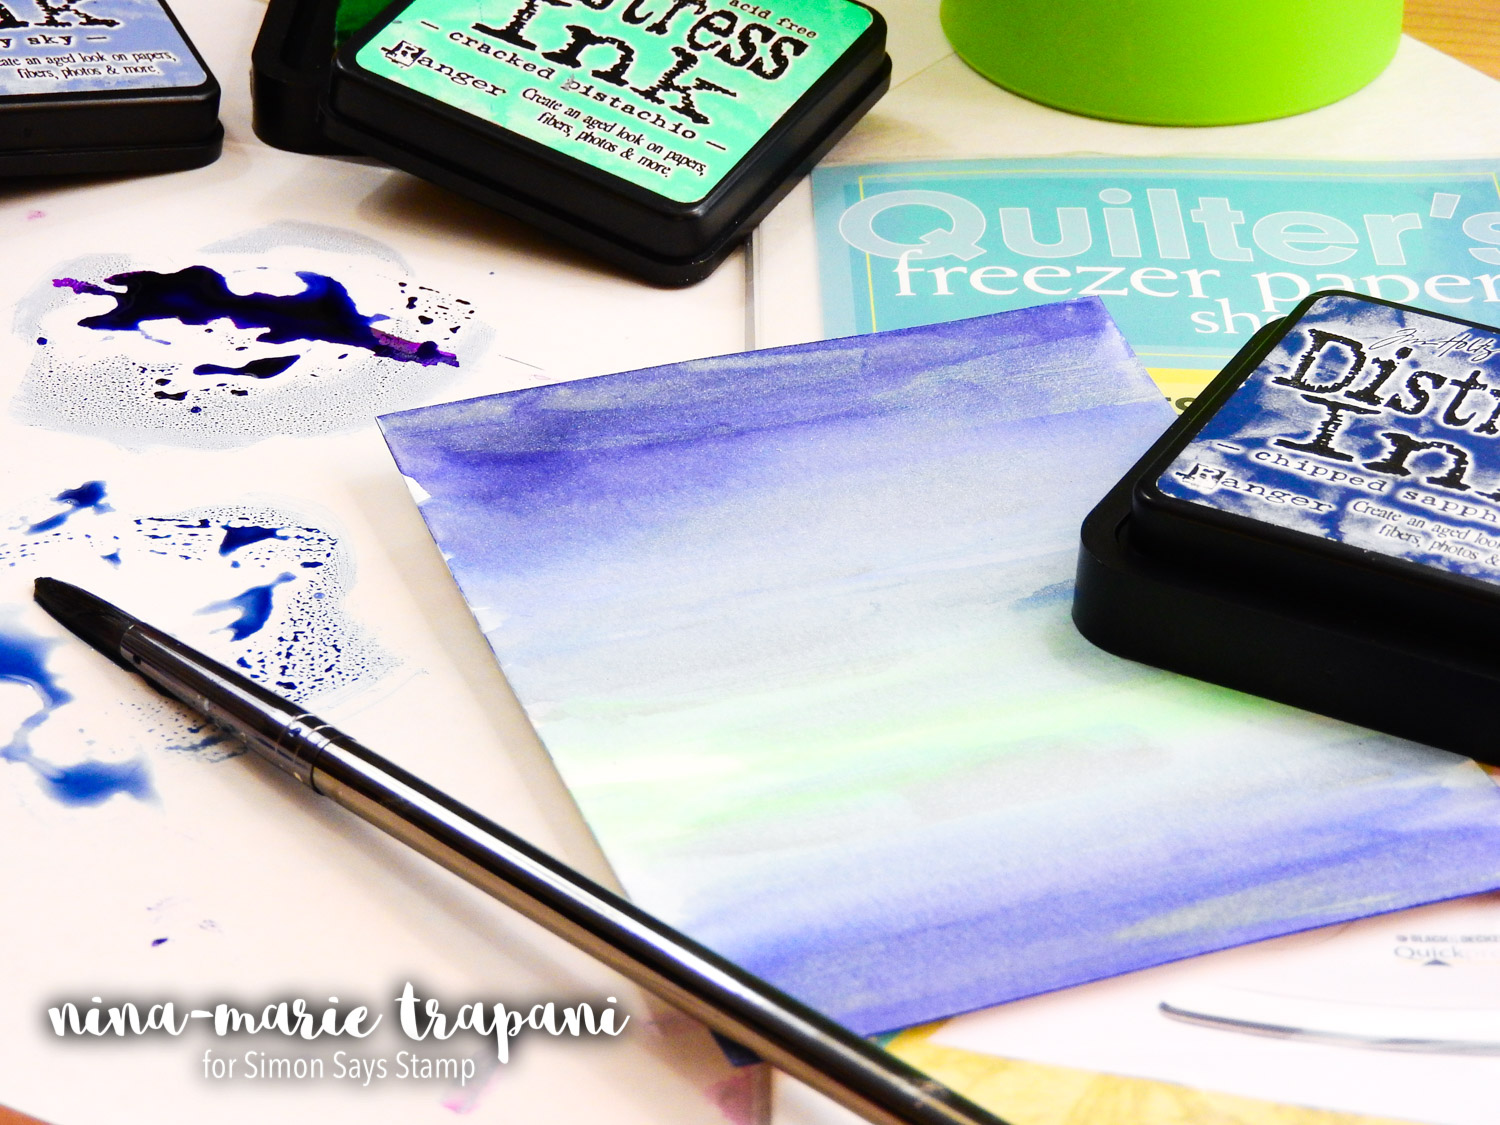 If watercolor is your thing, freezer paper could be a very useful tool for you, especially if you like to place your watercolors on a palette. Watercoloring on freezer paper not only protects your work surface underneath, but you also have a “palette” to work from too! One of my favorite reasons for using freezer paper as a palette is the fact that it is white, allowing me to see the colors in their true form.
Favorite Freezer Paper Tip #5: Perfect for Masking and Stenciling
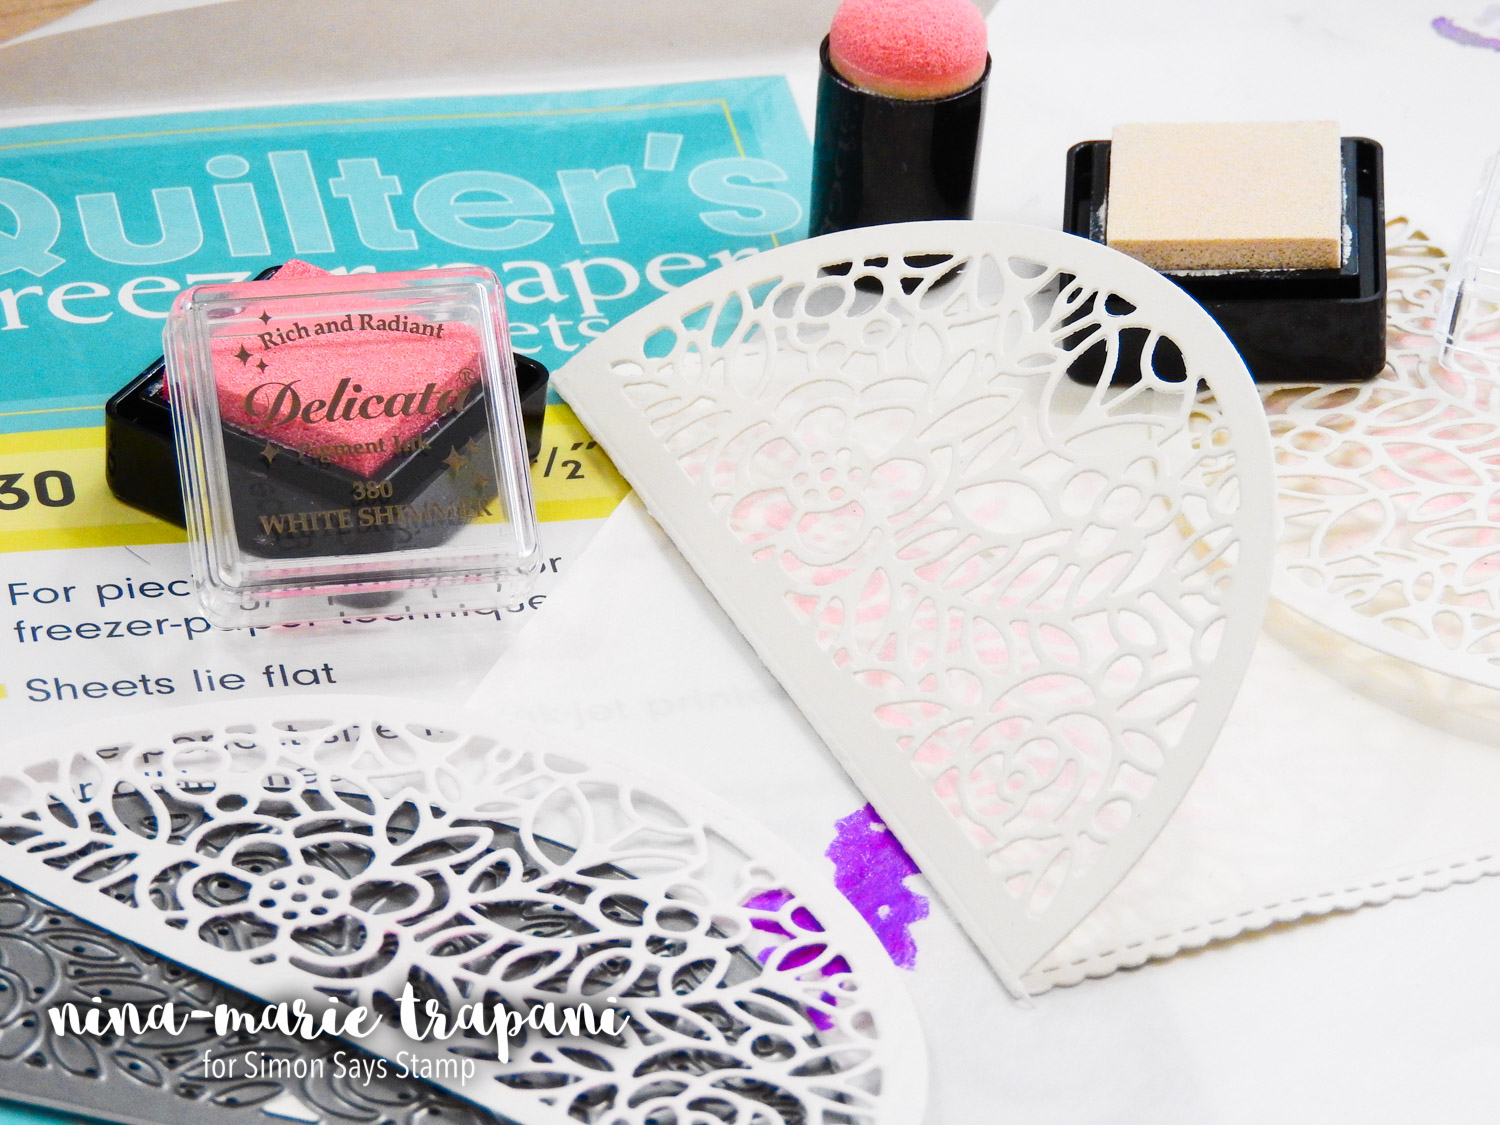
Do you like to create stencils with your dies, but find that your “stencils” wear out quickly? Freezer paper is a perfect remedy to that situation! Again, we’ve got that awesome, slick surface to use to our advantage. I adhere the uncoated side of the freezer paper to a sheet of printer paper (making the paper a bit more sturdy) and then cut the entire piece with my die of choice. Once cut, I am left with a non-stick “stencil” that has multiple benefits to a paper version: 1. it will resist the ink applied over it, 2. you can wipe it clean with a damp cloth when finished, and 3. it can be used over and over again! 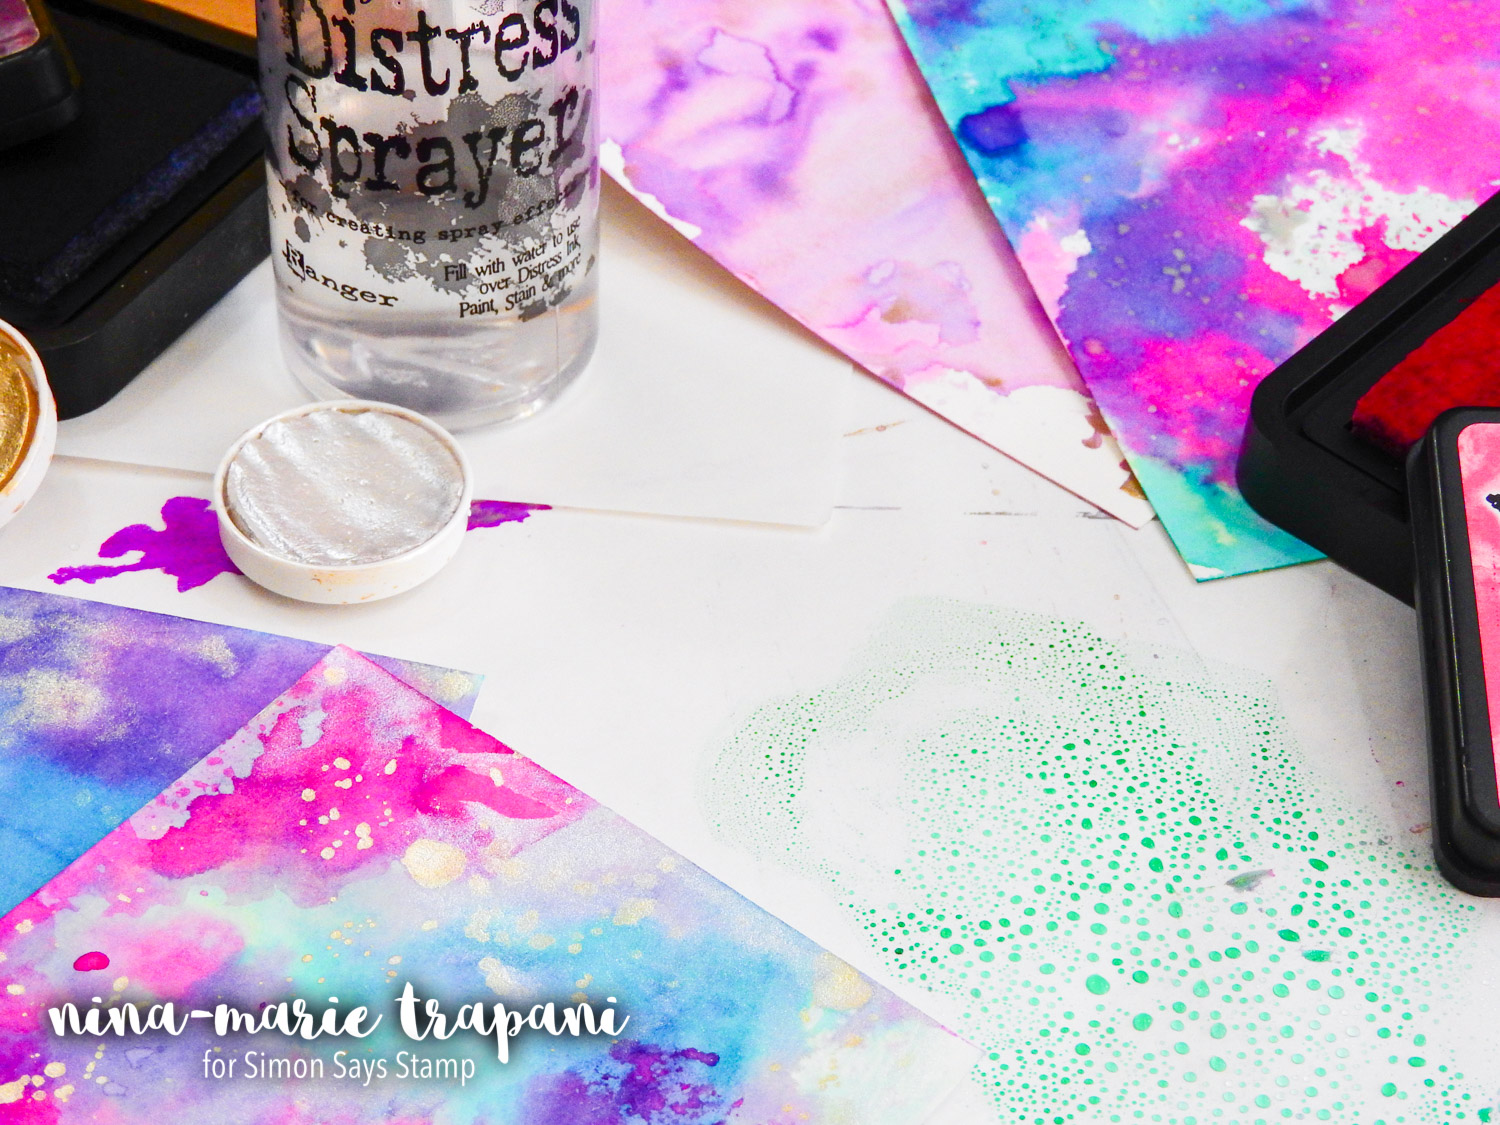 I encourage you to check out the video below to see all these ideas demonstrated. I think you will find that freezer paper could be a very versatile tool in your crafty projects too! As a side note: all of the designs and techniques you’ll see during the video will be featured in upcoming videos on my personal blog for Simon, along with finished cards! Today’s tutorial was about the freezer paper itself; so stay tuned! You’ll see those tutorials coming up later this month! Thank you so much for visiting with me today; don’t forget to subscribe to our blog and YouTube channel, as we post crafty inspiration for you daily! See you soon!
WATCH THE VIDEO
SUPPLIES
|


Thanks so much for stopping by!
Mixed Media with Shari Carroll: Limited Edition

Welcome, everyone, and happy Sunday! I’ve made another framed piece for my house, this time, something clean and simple with soft tones of blue.
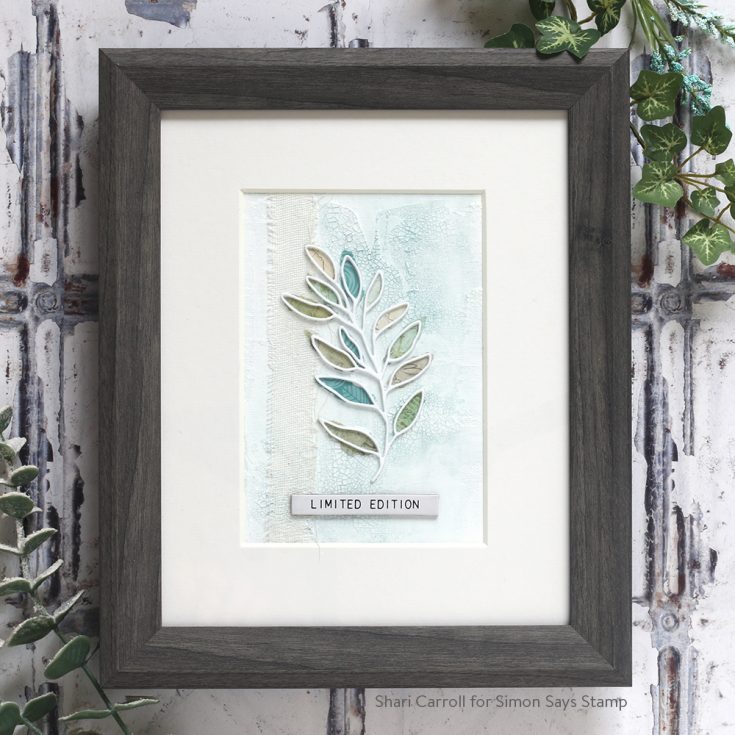
I’m all about texture so I started out with a Dina Wakely Canvas board and cut it down to the size I wanted. I added swipes of Gesso and Tim Holtz Crackle paste. This gave me canvas cloth, smooth, and crackle.
I watered down some Speckled Egg Distress paint to highlight the crackle and get into the texture of the canvas.
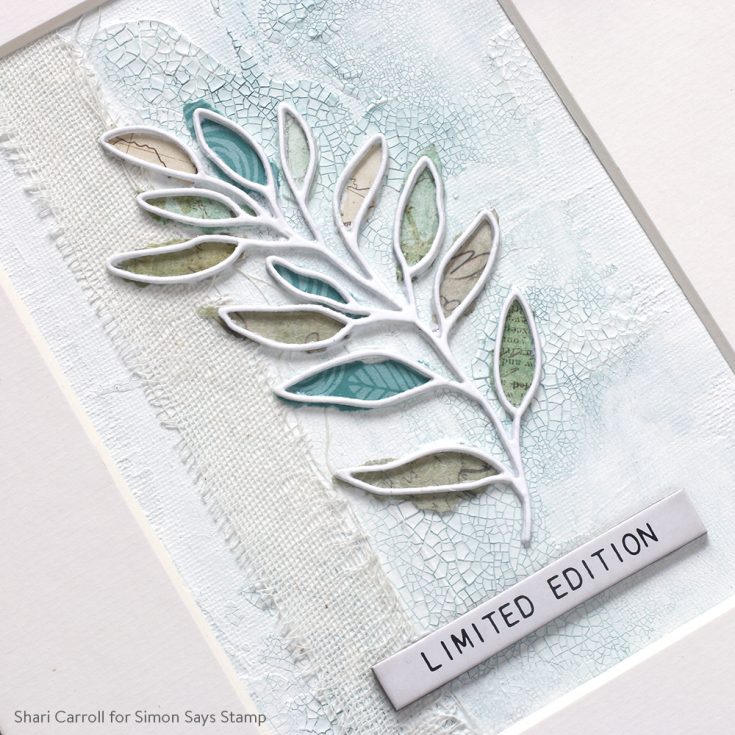
I die-cut the Leafy Branch 4 times and stacked them up. Then I used torn paper to add to the back of the stack. I put a strip of Mummy Cloth on the canvas and glued the branch in place. I put the canvas in an 8×10″ frame with a 5×7″ mat board.
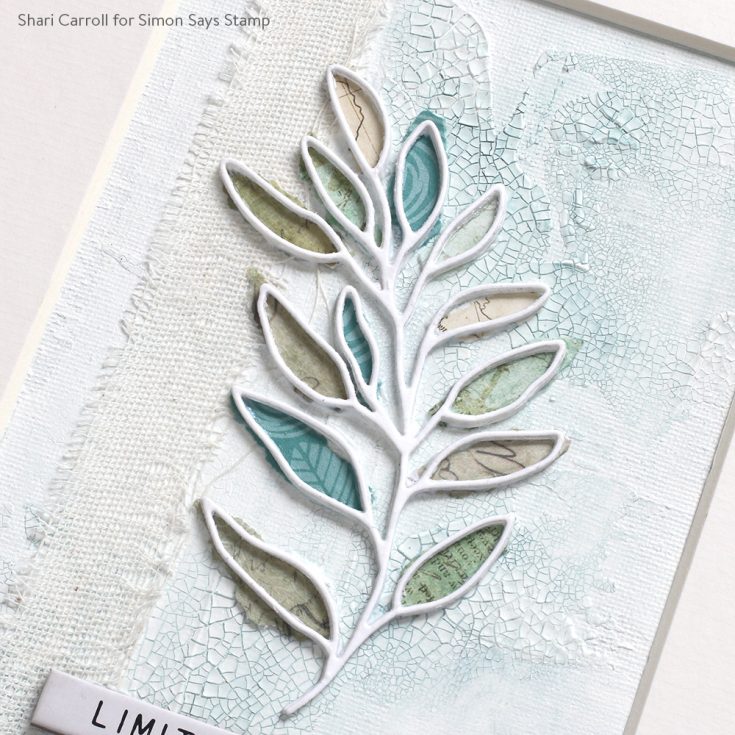
I hope I’ve sparked some inspiration for you to create something for your home. Enjoy!
SUPPLIES:
|


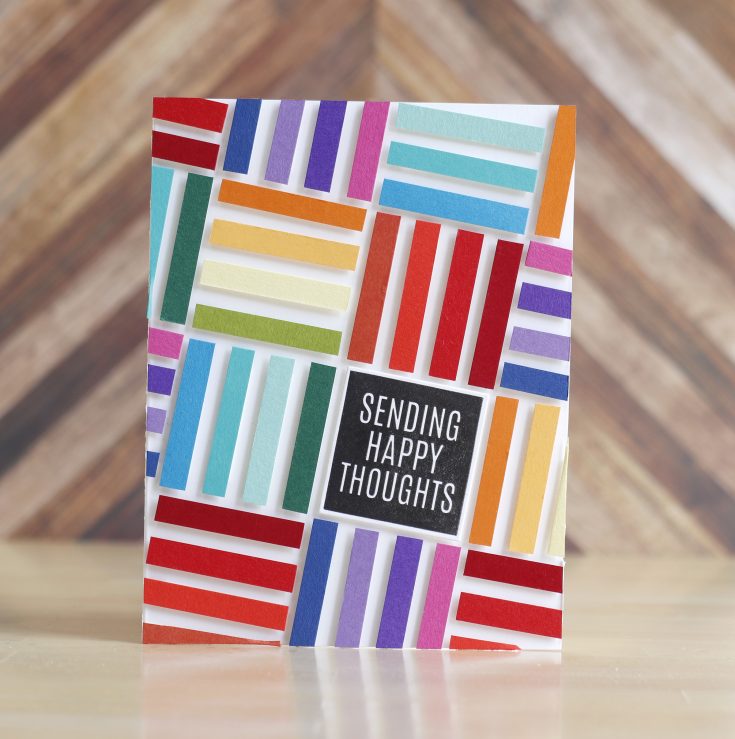
Amore Laurafadora: Sending Happy Thoughts

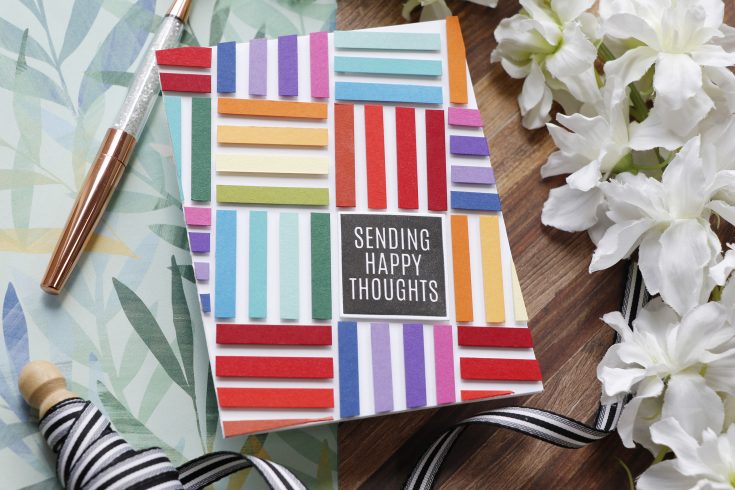
Hi friends! Happy Saturday! Please join me in welcoming back special guest Laura Bassen with her bi-monthly Amore Laurafadora series on our blog! She is using a plethora of Simon Says Stamp cardstock as well as the Just Because Word Mix 2 stamp and die set to make this fun and vibrant card! be sure to watch the video for more info and enjoy!
WATCH THE VIDEO:
SUPPLIES:
|


Thanks so much for stopping by, and thanks to Laura for being our guest!


