Crafty Friends: It’s time to MAKE MERRY!
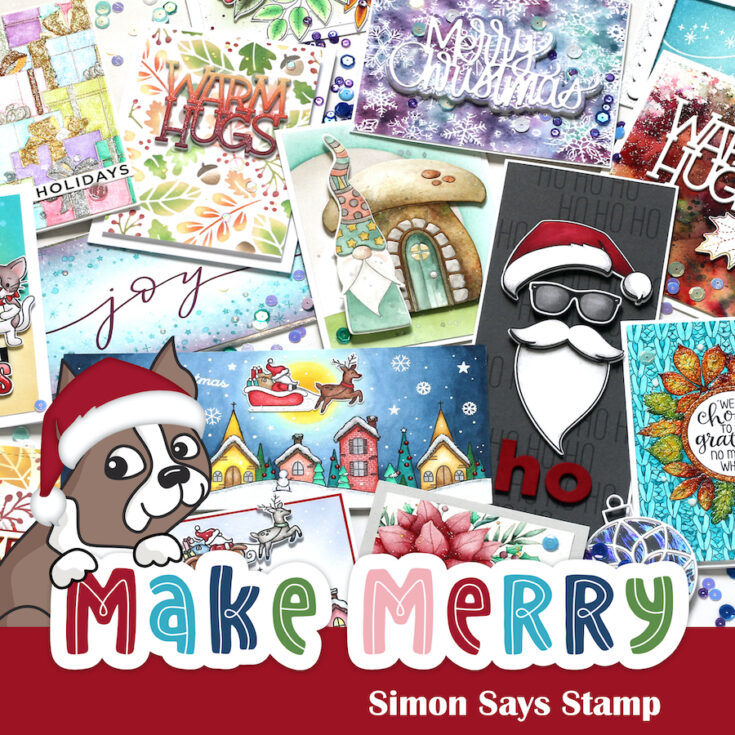
Well, friends, the holiday season has come around again — time sure does fly! 2020 has reminded us to be thankful for the good in life and look for joy. This is what inspired our latest collection, Make Merry!
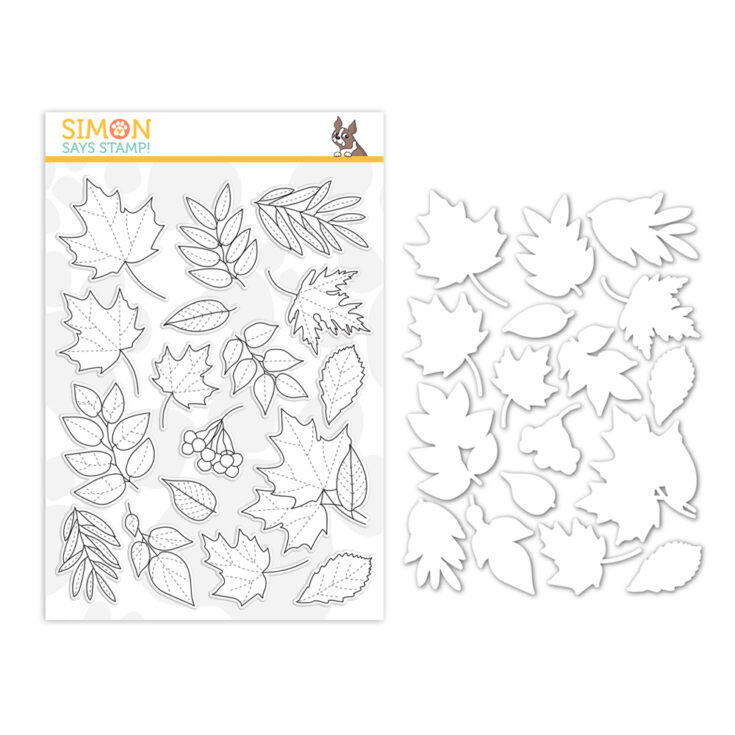
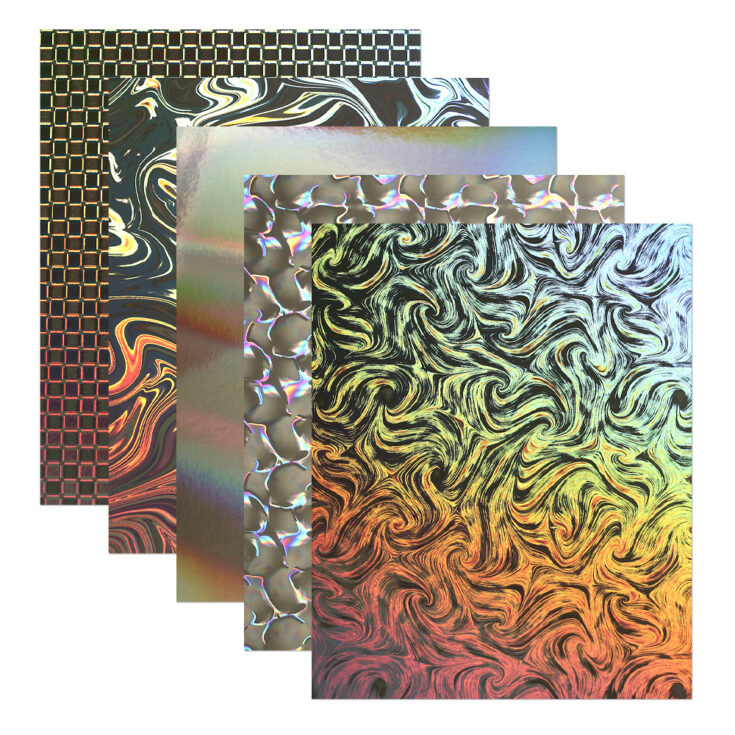
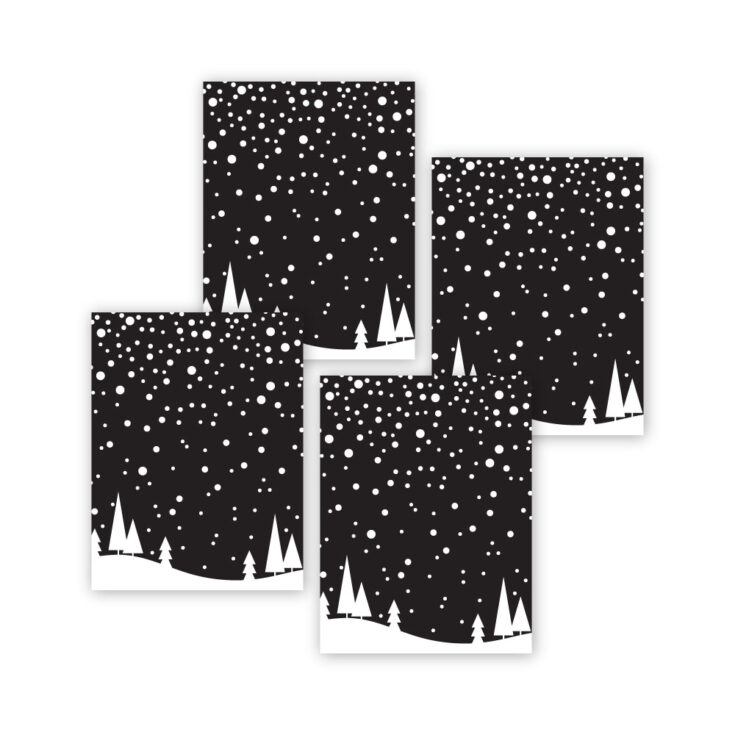
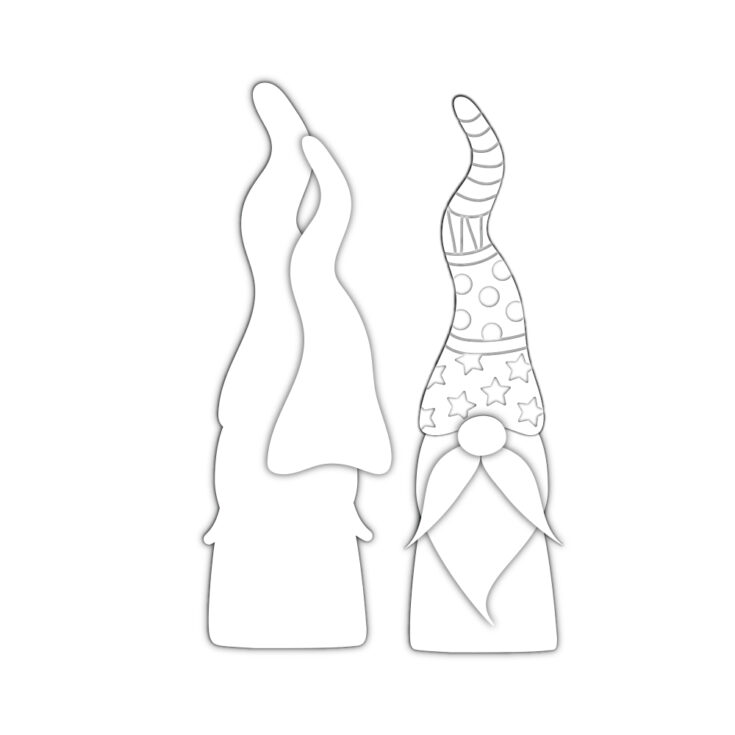
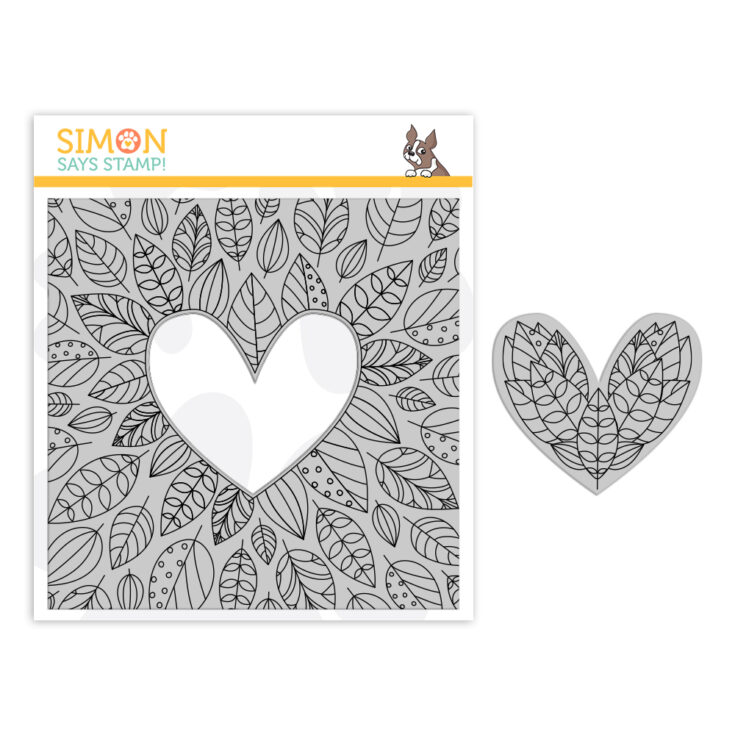
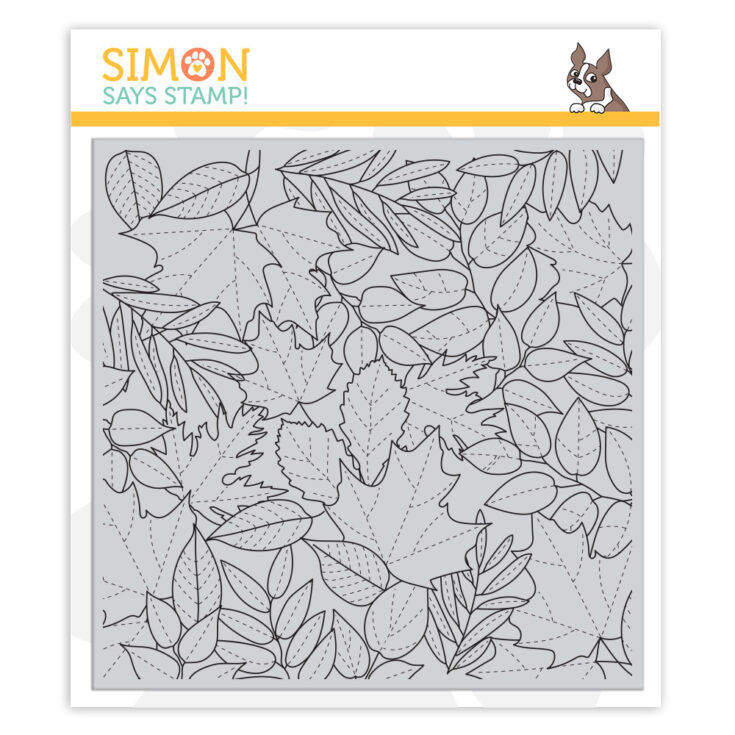
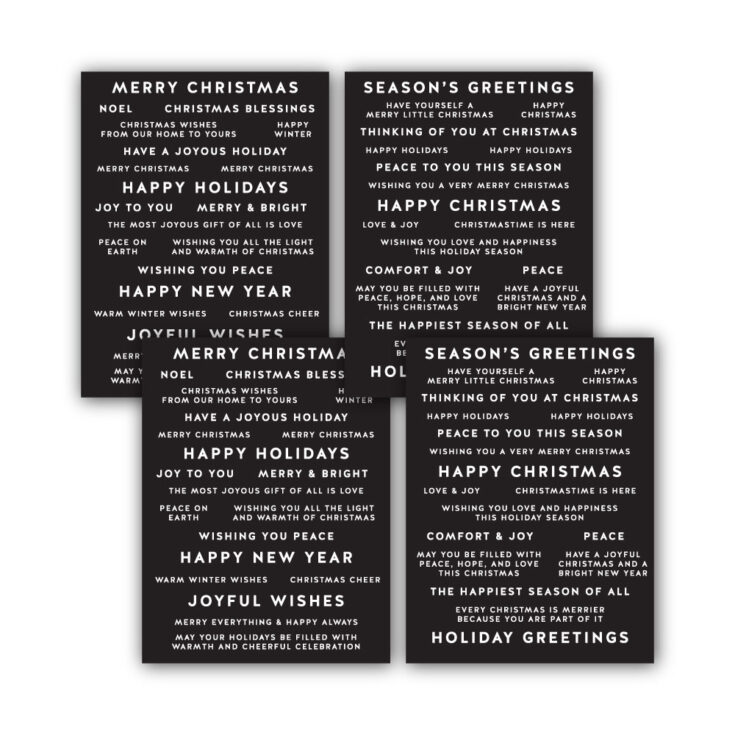
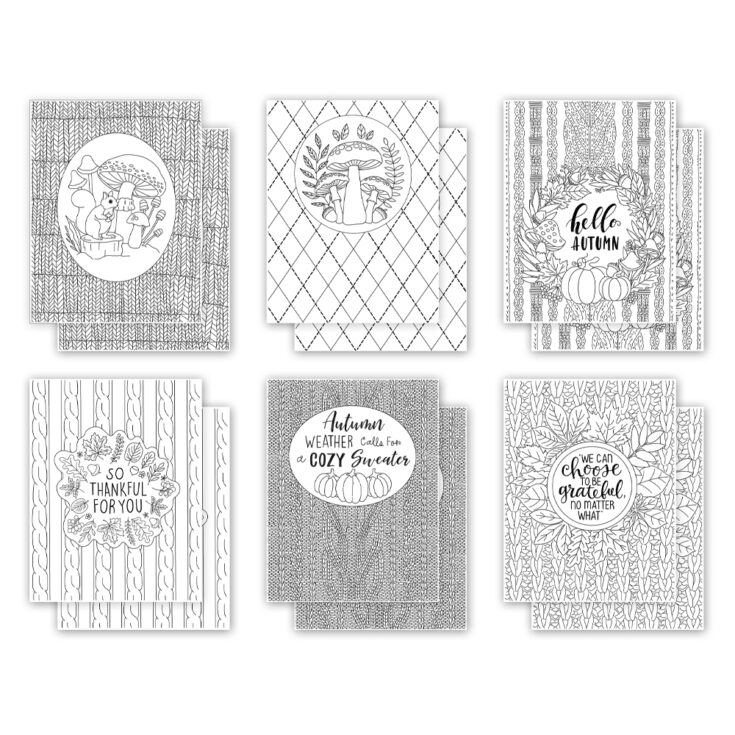
The collection has something for everyone! Are you a colorist? Check out the new Sweater Weather watercolor cards from Suzy Plantamura! Looking for a great way to make bold sentiments in short order? The Christmas Sentiment Strip pack might be just the thing! Stop and enjoy Autumn’s splendor with our Autumn Leaves stamp and die set. Give a home to a new gnome, or add a little extra sparkle with the Night Sky or Frosted Mint sequin packs!
We hope this collection can help you do just what its namesake boasts, Make Merry. :)
For even MORE information and an up-close look at the full collection, check out our video below:
(or watch the video on our Youtube channel)


STAY TUNED… coming tomorrow and Saturday we have LOTS of inspiration using this new release! See you there!
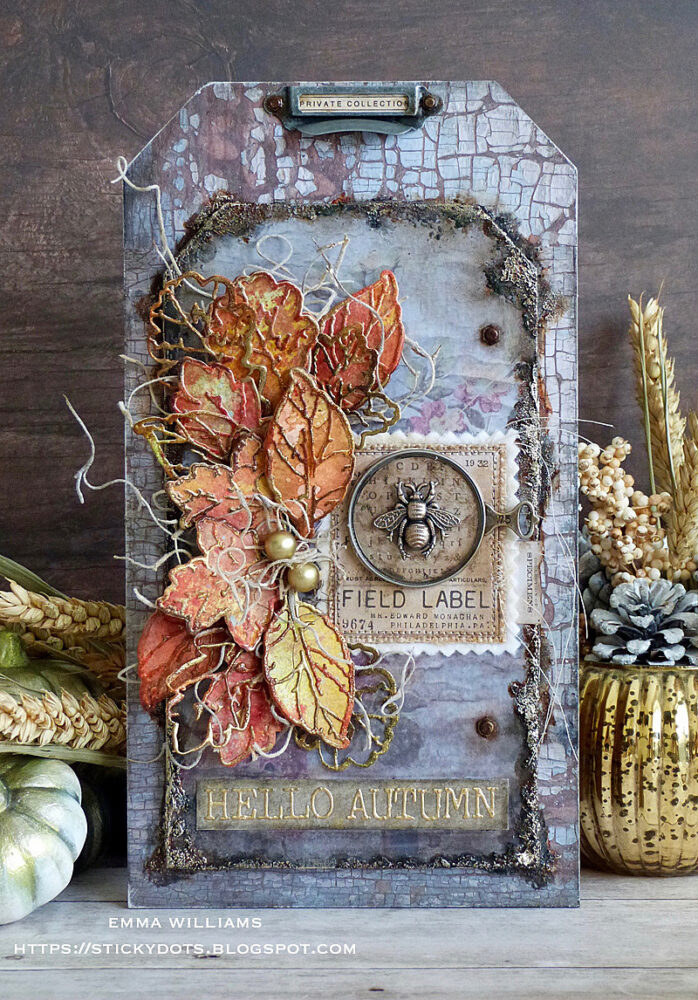
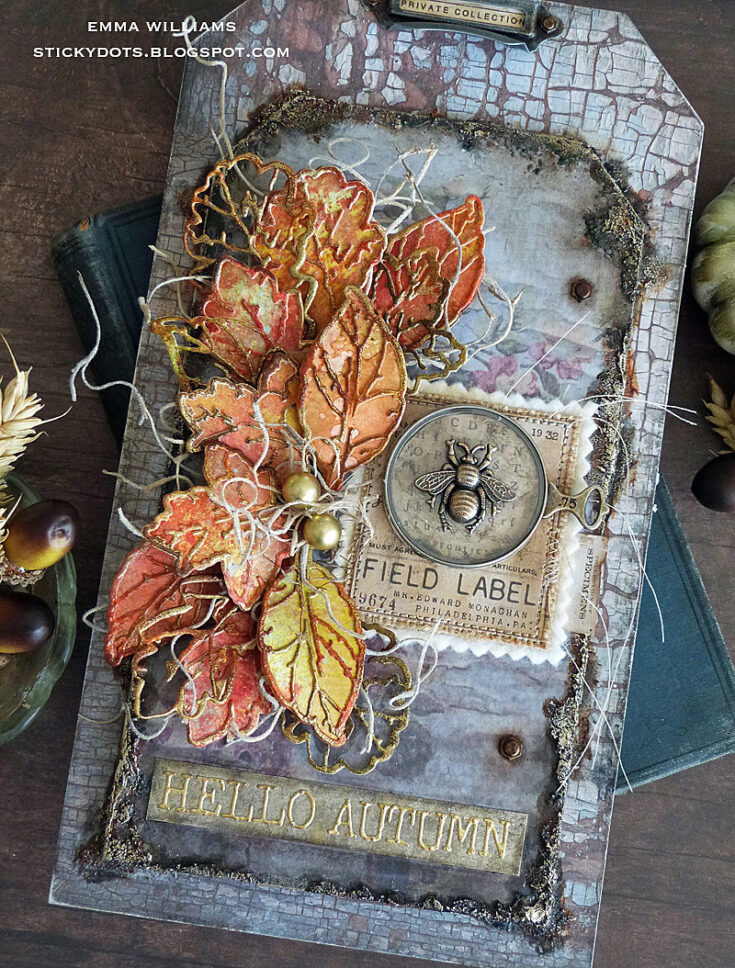
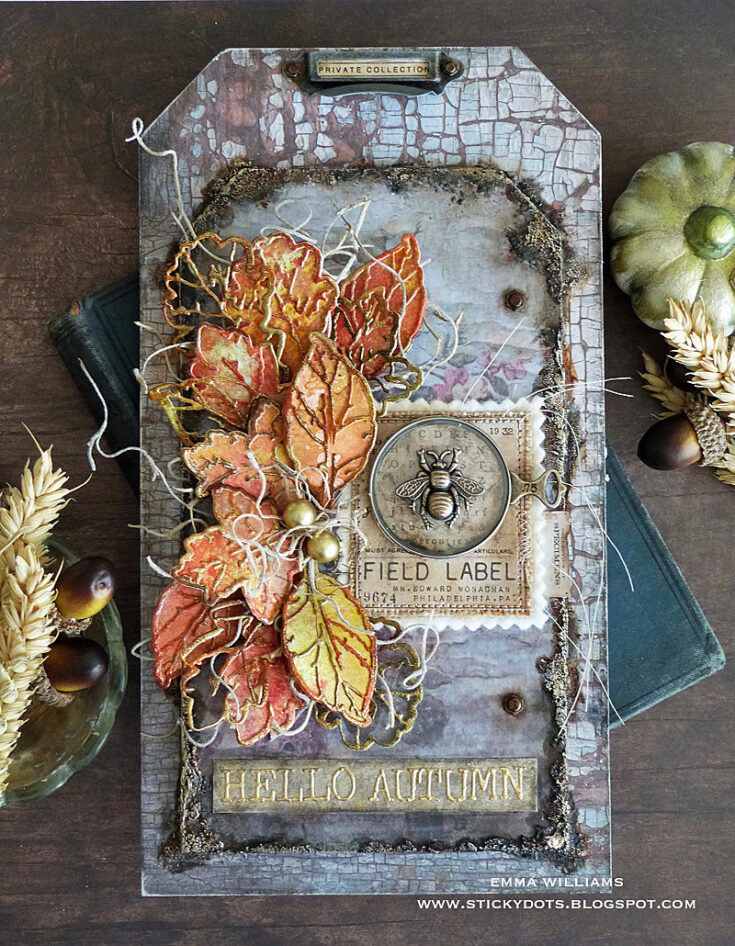
Hello Autumn Home Decor Tag
Hi friends! Happy Wednesday and thanks to much for stopping by today! If you tuned into Tim Holtz’s Sizzix Chapter 4 Facebook Live last week, you caught a sneak of this AMAZING project by Emma Williams, and we are thrilled to feature the tutorial on our blog! Be sure to read on to learn more and enjoy!
Hi everyone, it’s Emma here and I’m thrilled to be back on the Simon Says Stamp blog to share my latest project with you all!
If you watched Tim Holtz’s recent Facebook Live, then some of you might recognize this piece as it was a project that I created especially for the live, using the beautiful Leaf Print Thinlits die set from the brand new Sizzix Chapter 4 release and I’m so happy that I get to share it with everyone today as this piece is perfect for displaying in your home to celebrate the start of Autumn!
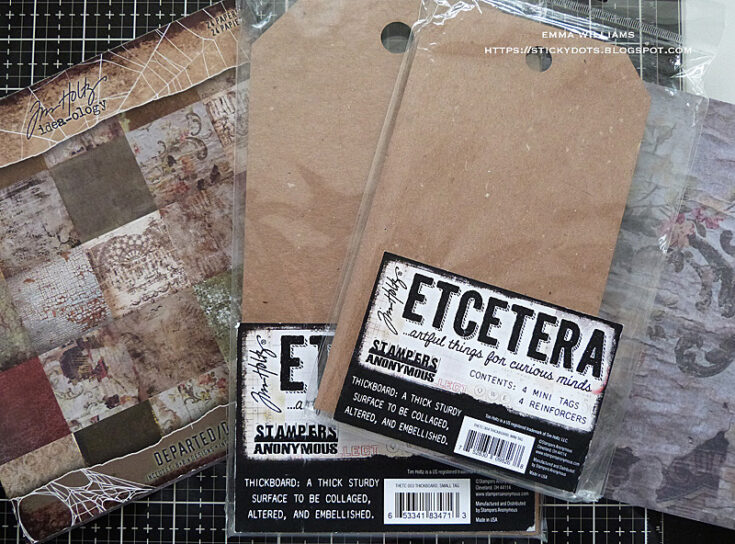
So, let’s get started and I began by covering two Etcetera Tags, the small and mini size, using two coordinating papers from the Tim Holtz Departed Paper Stash. Because the 8” x 8” papers aren’t quite long enough in length to cover the small sized tag, I cut a second panel and matched the design of the paper, ensuring you can’t see the join along the top section of the tag. Adhere the papers to each of the tags, using the Distress Collage Brush to apply Matte Collage Medium. Trim away any excess paper from the sides of each tag and then using a fine grade sandpaper, sand away any rough edges around the edges of the tag. Apply a coat of the medium over the top of the tags to seal the papers.
Adhere the mini sized tag onto the small tag with more of the Matte Collage Medium and once the tag is securely in place, I added some texture around the edges of the smaller tag. For this I used Distress Translucent Grit Paste by Tim Holtz, and using a palette knife I applied the paste around the edge of the entire tag using a palette knife. I applied the paste thicker and chunkier in some areas than others to create pockets of texture.
Put the tags to one side so that the paste can dry ~ I usually leave mine overnight to ensure it’s rock hard.
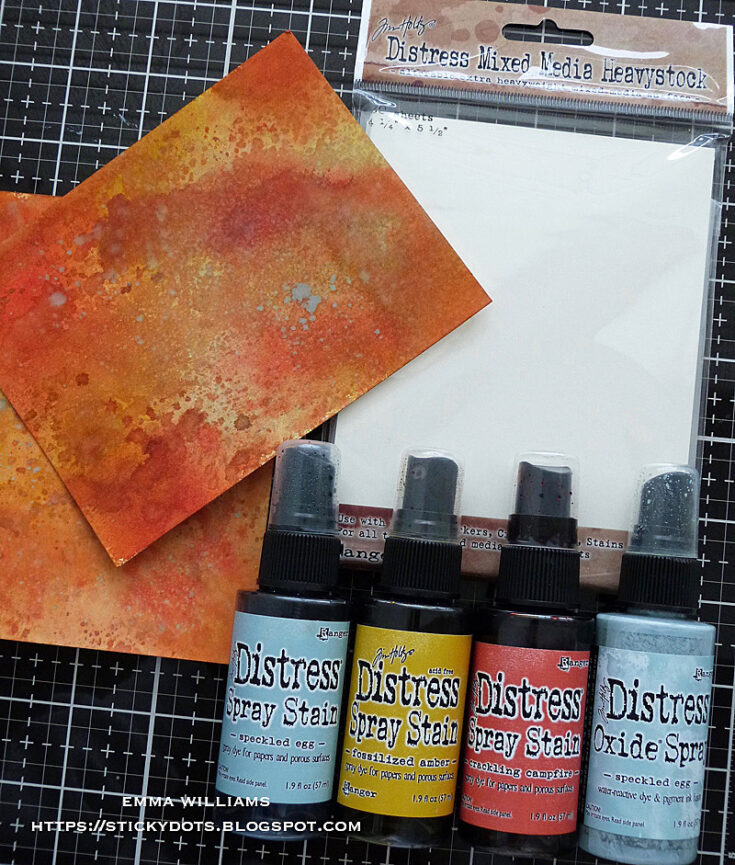
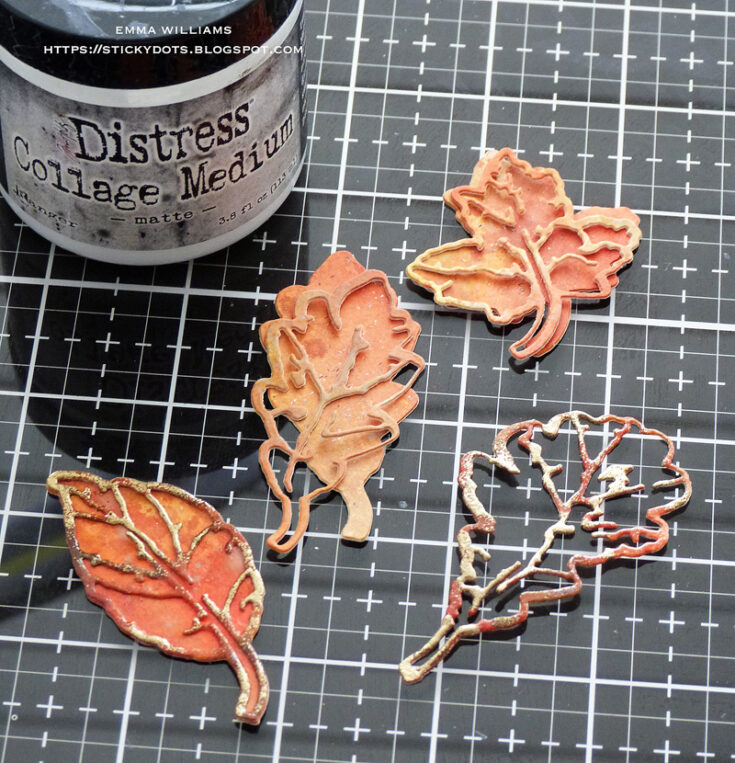
At this point, I started creating my leaves. I lightly spritzed pieces of Mixed Media Heavystock with a light misting of water and coloured the card panels with a combination of Crackling Campfire, Speckled Egg and Fossilized Amber Distress Spray Stains. I then spritzed another layer of water over the top, allowing the colours to blend together before heat drying the inked card. Once it was dry, I then lightly spritzed Speckled Egg Distress Oxide Spray over the inked surface, just allowing drips to fall onto the card.
When the coloured card is thoroughly dry, I took the Leaf Print die to die cut a selection of leaves ~ I used approximately 15 leaves for this piece.

The clever thing about this die set is that you can cut the leaves in a variety of ways and I chose to cut some leaves to be used as solid pieces…
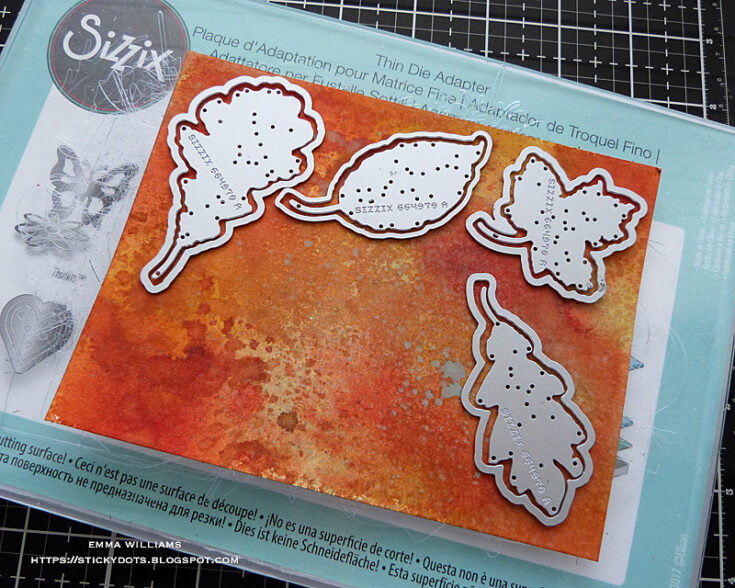
…and also cut a selection using the detailed die, together with the solid outline die and I will use these die cuts in two separate ways ~ some will be adhered over the top of the solid leaf die cuts, shown in step 9 and some will be left as they are, to create skeleton leaves.

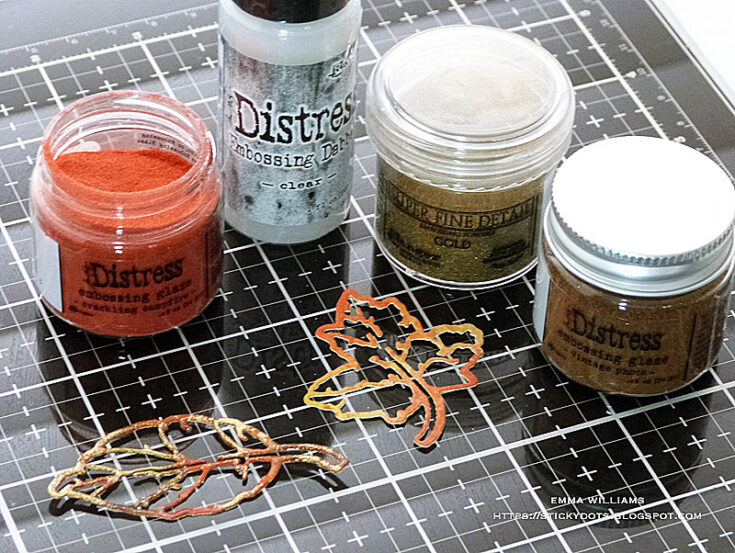
Once you have a selection of all the leaves you need, placing the solid leaves to one side, I took the outline die cuts and embossed these using a combination of Crackling Campfire and Vintage Photo Distress Embossing Glaze and Gold Embossing Powder. To apply these powders, I first used the embossing dabber directly onto the die cut leaf and then using one Embossing Glaze at a time, sprinkle the powder over the top. Tap away the excess powder and heat emboss until glossy and molten. To add gold highlights to each leaf, I applied the dabber to the embossed surface of the leaf, but made sure not to apply too much and not over the entire surface ~ you only want highlights. Sprinkle gold embossing powder over the top, tap away the excess and heat emboss.
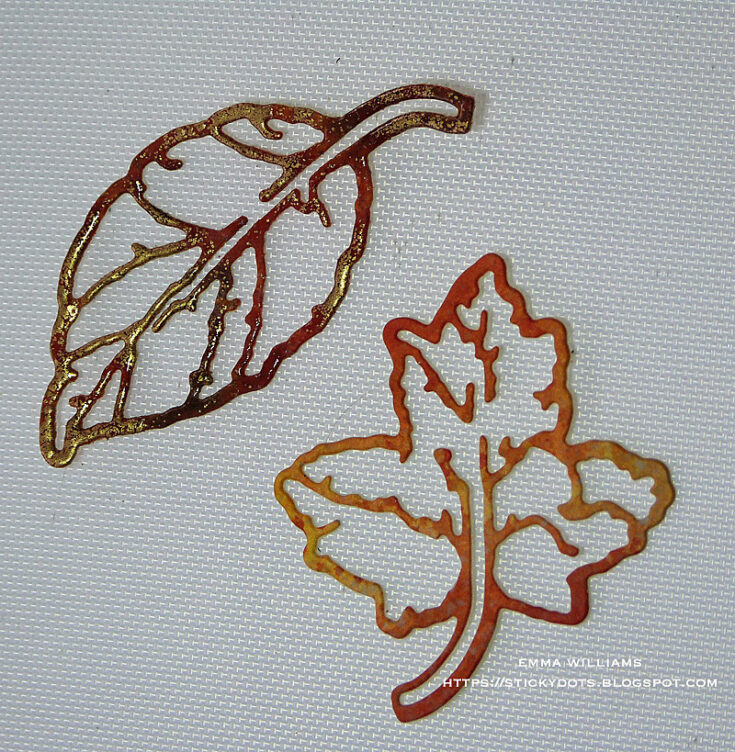
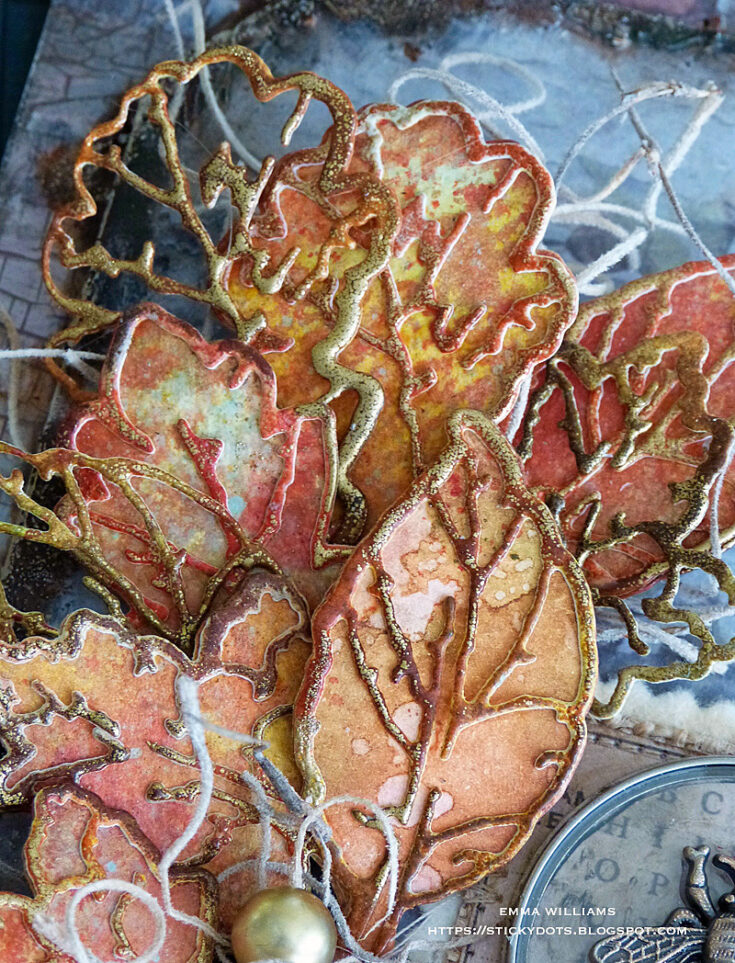
Leaving a few of the embossed leaves to one side, I then used the remaining ones to add texture to the solid die cut leaves. I overlaid and attached each of them using Matte Collage Medium.
You can see from this close up photo how the embossing adds amazing texture to the die cuts and makes the leaves almost glow.
I now have all of my leaves ready and moving back to the layered tag, I wanted to add some colour to the textured paste around the edge of the mini tag and using a fine detail paint brush, painted over the top of the paste using Black Soot Distress Paint. When adding paint layers you do need to dry each layer between applications as you don’t want it to become muddy in appearance so at this stage, you can either be patient and wait for the paint to dry or if you’re like me, too impatient to wait, you can gently heat dry the painted area being careful not to apply to much heat as you don’t want the paste to bubble or melt.
To build up the layers of colour I then added some Rusty Hinge, Ground Espresso and Antiqued Bronze Distress Paints, applying each paint separately. Once I was happy with the colour, and the painted areas were dry ~ I applied a light coverage of Metallic Distress Crayons over the paste , using my fingertip to blend the metallic crayon over the bumpy, crusty surface.
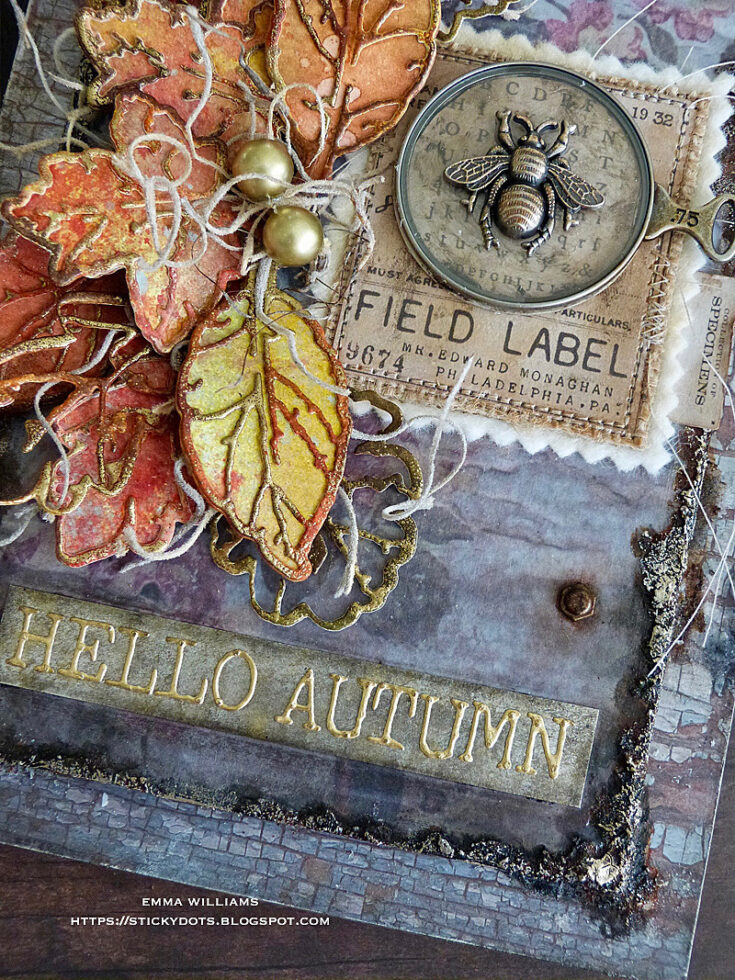
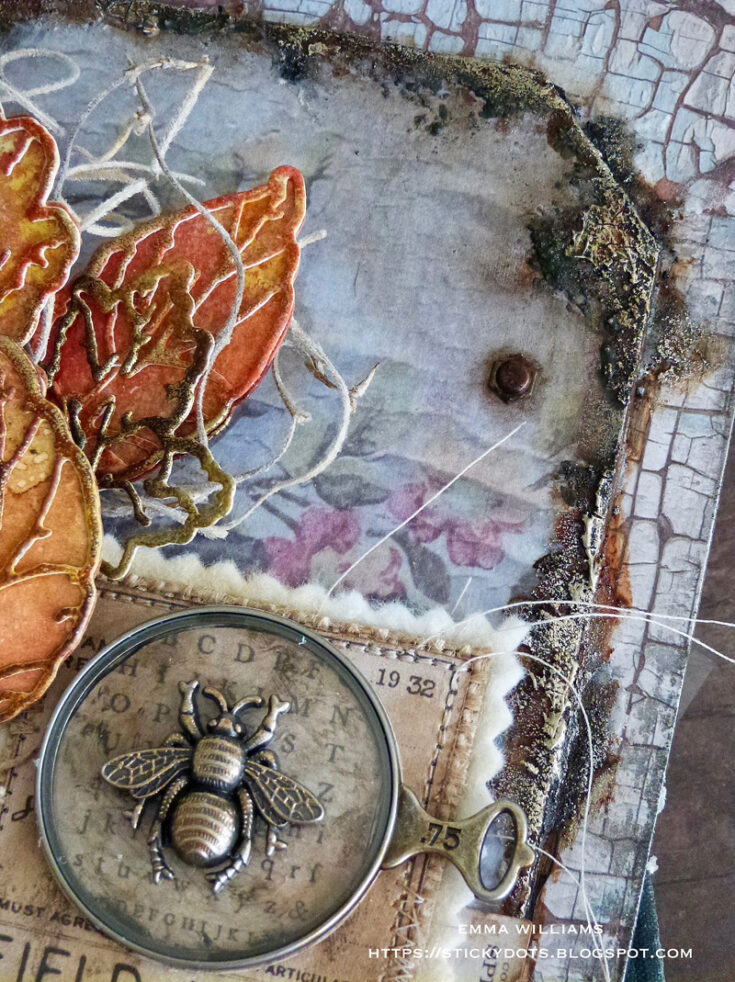
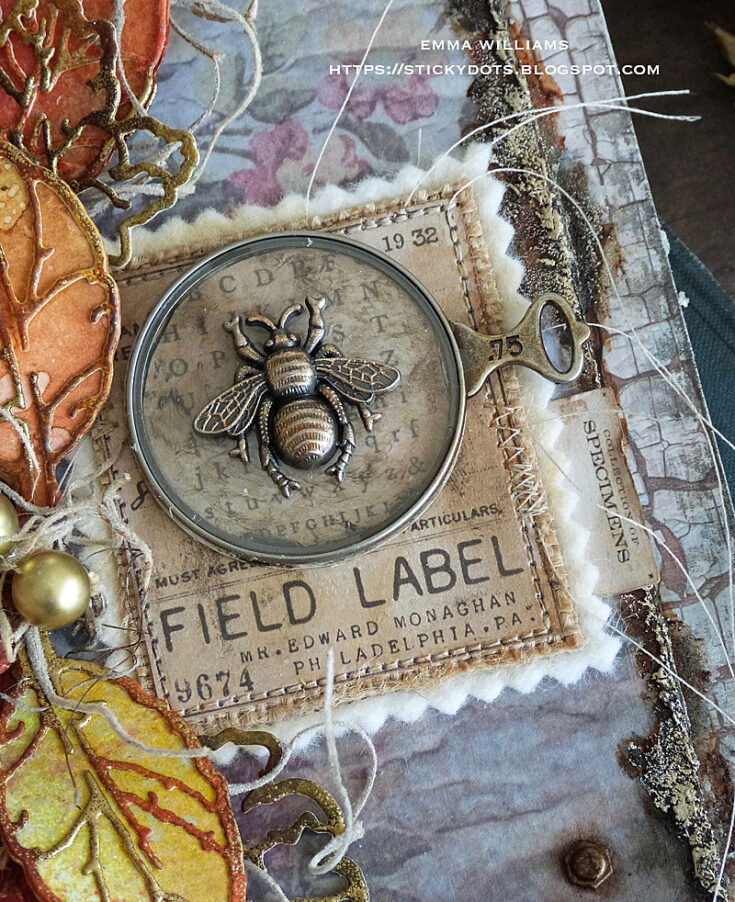
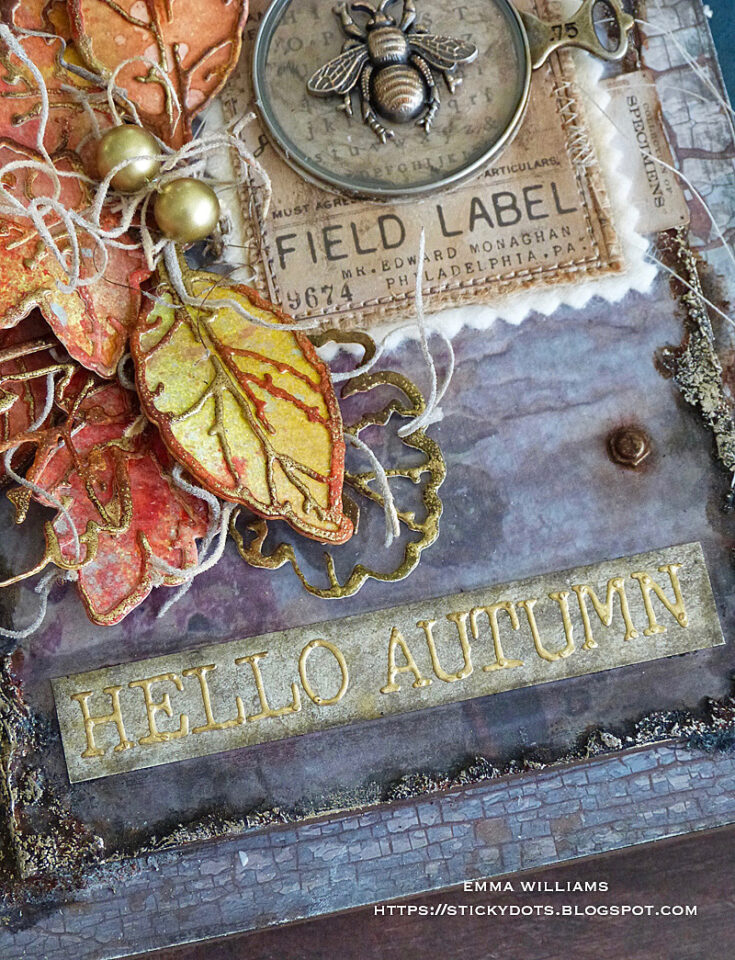
To create the label on the right hand side, I used a Field Notes Ephemera piece and machine stitched the label to a piece of felt that I cut with my pinking shears.
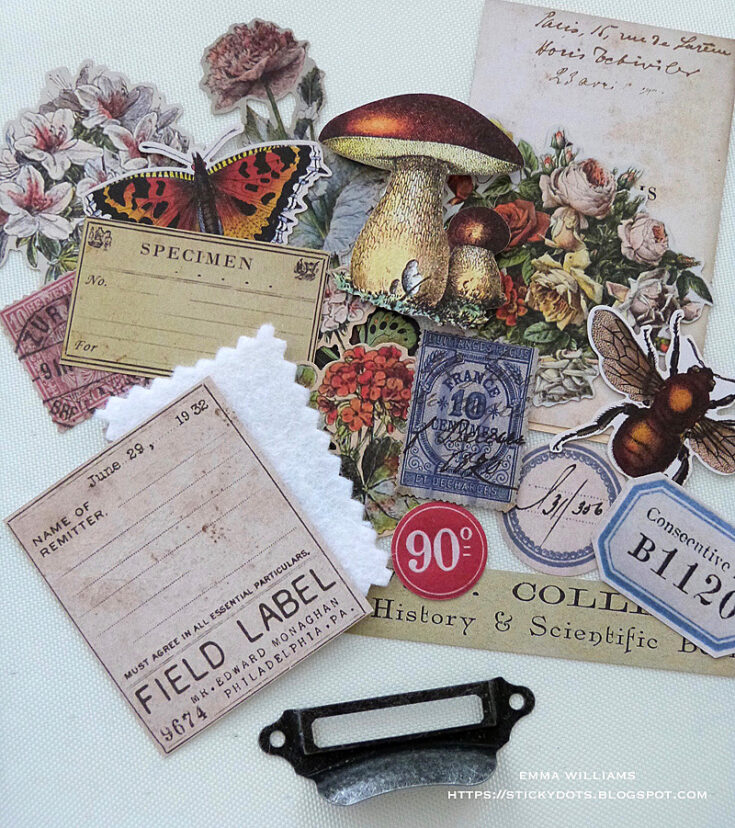
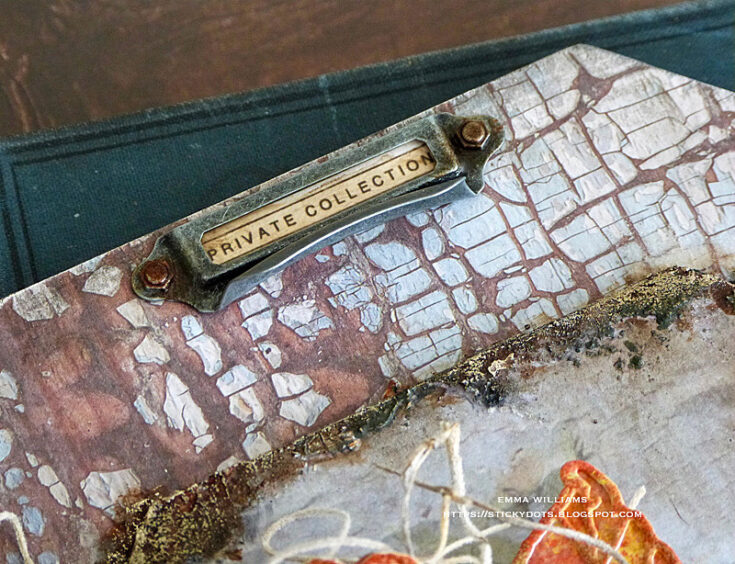
I also used a second Ephemera Piece which I placed behind an idea-ology drawer pull piece taken from the Hardware Pulls. I attached this to the top of my larger tag and added a Hardware Head to either side.
I used Matte Collage Medium to adhere the layered field label directly onto the tag and then attached an Optical Lens idea-ology piece.
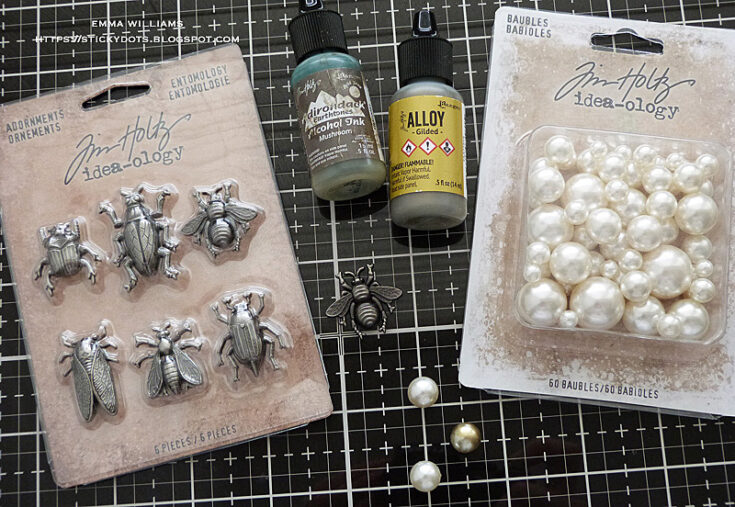
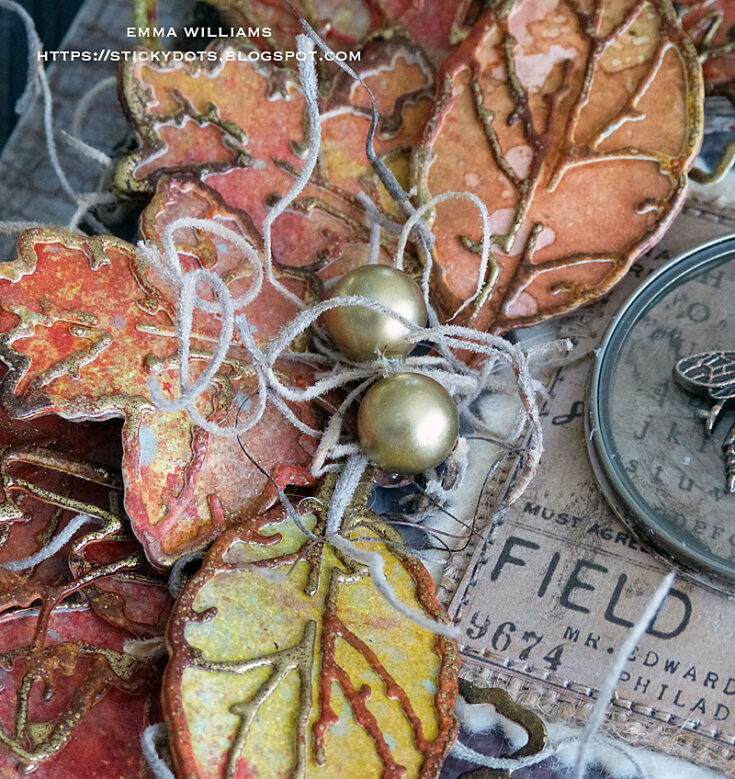
Using the bee from the Entomology Adornments set, I coloured the metal piece using an Alcohol Ink Applicator Tool to apply a combination of Mushroom Alcohol Ink and Gilded Alloy Alcohol Ink to the surface of the metal. I also inked a couple of Bauble Findings with the same inks.
Attach the bee to over the top of the Optical Lens.
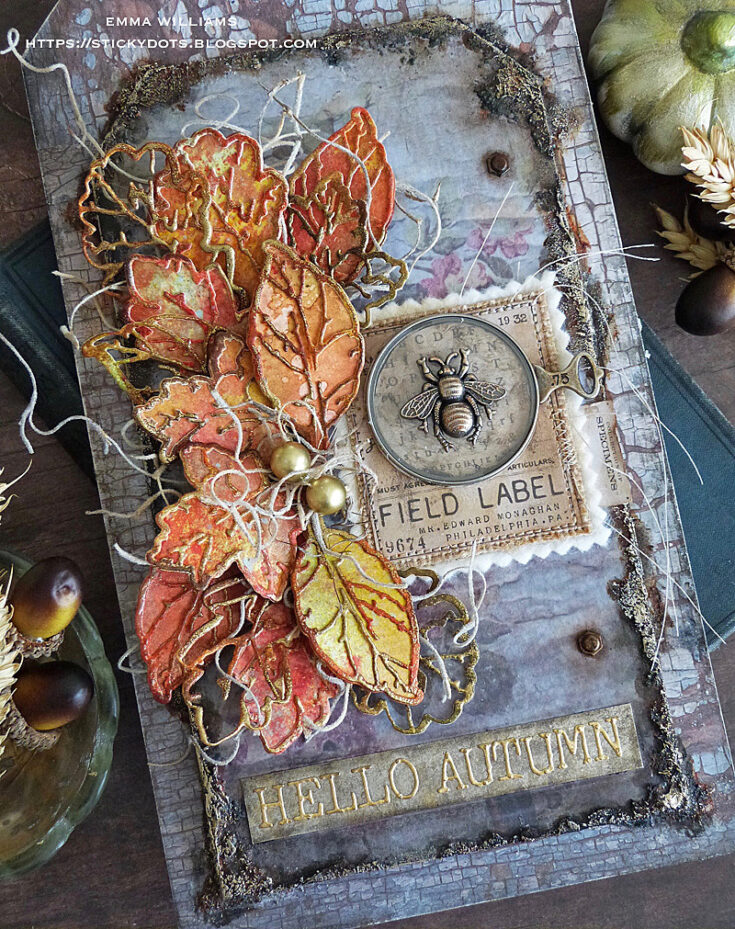
I arranged the leaves down the left hand side of the tag, shaping them to create dimension and also adding and tucking in small bunches of Spanish Moss that I have in my stash, placing it in-between the layers.
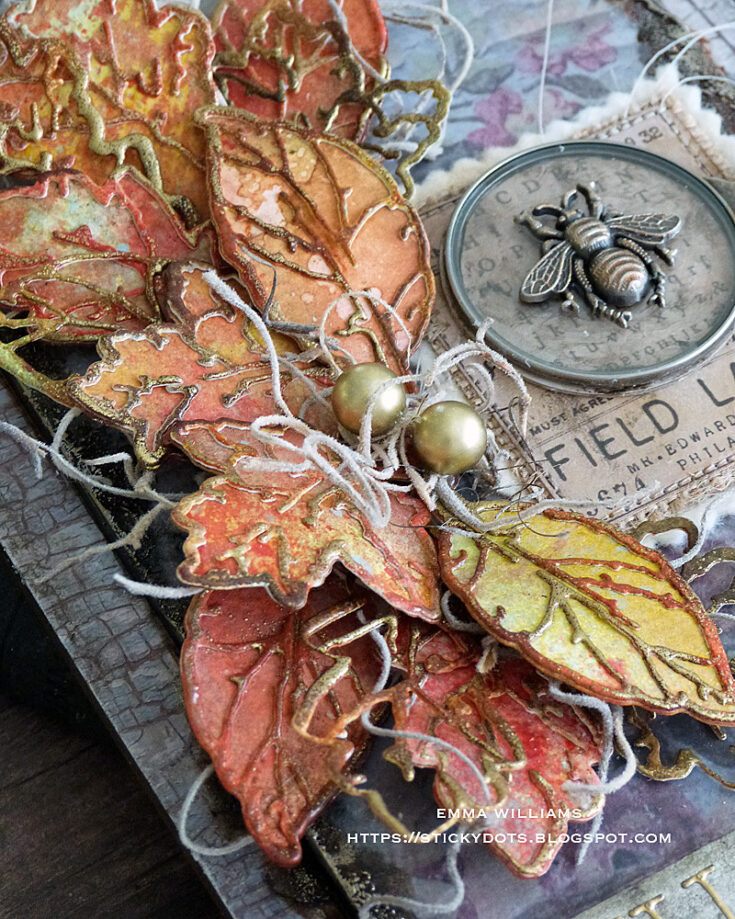
Attach the leaves with a hot glue gun, nestling them around the layered label and optical lens.
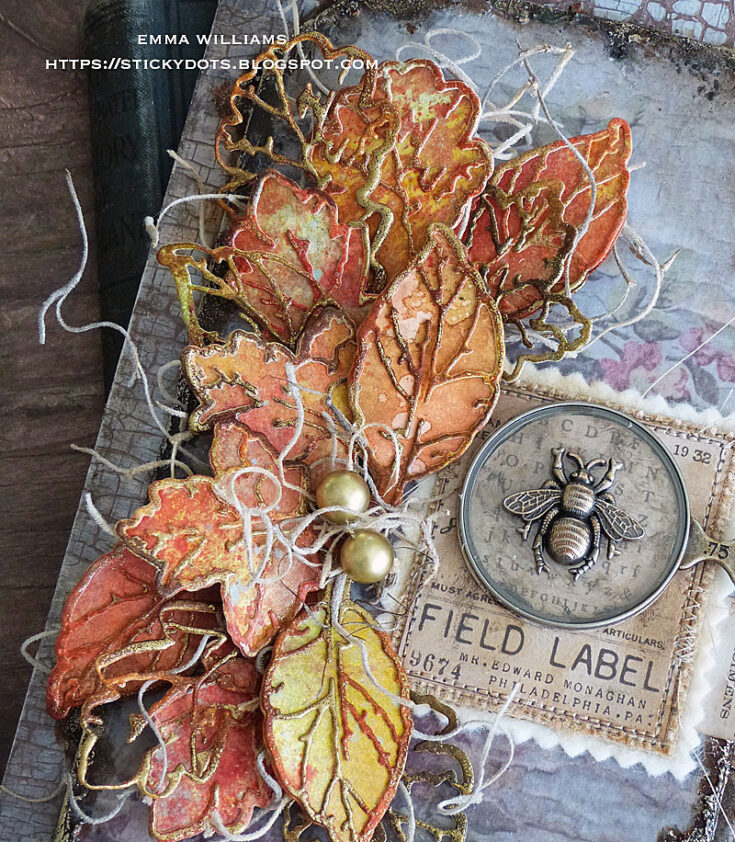
Add the two gold baubles in the centre of the arrangement.
To create the Hello Autumn banner, I cut a strip of silver metallic kraft stash and using a paint brush dipped into Black Soot Distress Paint, I lightly added the paint to the surface of the card strip. Wipe away the excess with a soft cloth before die cutting the lettering using the Alphanumeric Tiny Type Upper Thinlits Die Set from gold metallic kraft stash.
Adhere each of the letters to the silver banner strip before attaching the banner to the tag.
To complete the tag, I added two Hardware Heads to the right hand side, both of which I altered with Rust Alcohol Ink.
…and that finishing touch completes my autumnal home decor piece.
Thank you so much for stopping by today and I hope you love this project as much as I loved creating it. It’s been so much fun taking you through the creative process of this autumnal tag and I hope I’ve shown you some tricks and techniques that will inspire you with some ideas of your own. See you again soon…Emma x
SUPPLIES:
|


Thanks so much for stopping by, and thanks to Emma for being our guest!
Yippee for Yana: Slimline Scene Builder 3 Ways

Hi friends! Happy Tuesday and welcome back to our bi-monthly Yippee for Yana blog series with Yana Smakula! Read on and be sure to watch the video for more information! Enjoy!
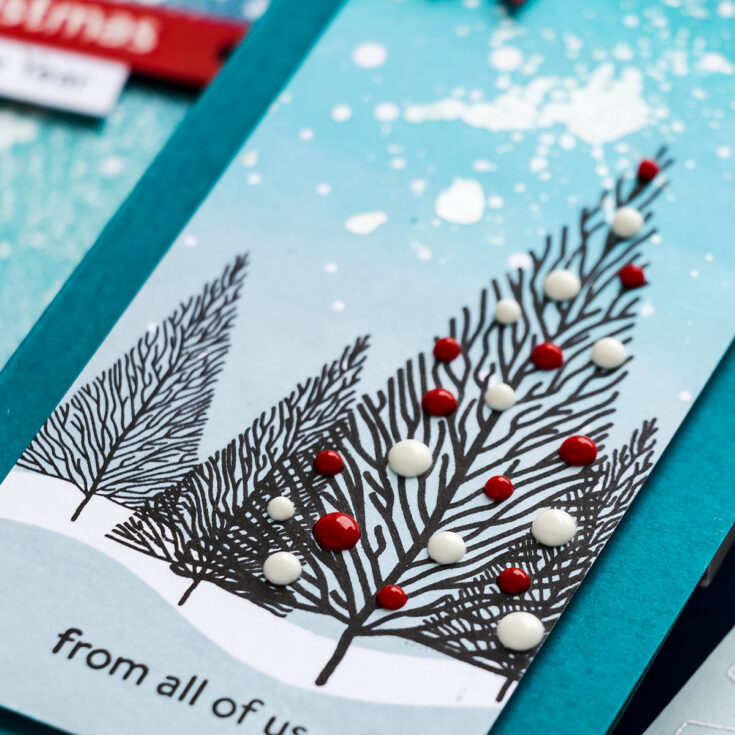
Hi everyone, this is Yana Smakula, welcome back for another Yippee For Yana video! Today I am playing with the Slimline Builder stamp set, which is designed, of course, to make slimline cards. But, I’ll show you 2 additional ways to use it to make regular, traditional size A2 projects. And of course, a slimline card!
This stamp set is simply gorgeous. I particularly love the huge solid piece to make the sky. It is beautiful. The bottom ground piece is separate to make it easier for you to stamp these in different colors of ink. You also have 2 tree stamps, ornaments for both trees, or snow, if that’s how you’d like to use it, and of course, beautiful sentiments.
We will start with a slimline card. I got my MISTI stamping tool set up, and I will say that you do need to use a stamping tool such as MISTI or similar for best results. My first card is heavily inspired by Debby Hughes, I love everything that Debby makes, and her work often inspires me, I’m sure many of you feel the same way.
The colors of ink I picked for my card, and all of my cards today, are Cloudy Sky, Audrey Blue, High Dive, and Deep Sea from Simon. The plan is to do ombre stamping but without the use of ombre ink pads. The idea is to ink up the background with all 4 colors of ink progressing from the lightest color at the bottom, to the darkest color at the top.
It is a really beautiful background that can be used with a variety of images, not just the images in this stamp set, I think it would make a fabulous background for all the winter and Christmas critters out there or other scene building images. The dots can also represent the stars and thus allow this background to be used for Summer camping cards or similar.
Next, I added sparkle and shine to the background using a shimmer spray. My favorite one is from Hero Arts – White Iridescent Shimmer Spray. With the shimmer in place, I stamped the trees using VersaFine Onyx Black.
This stamp set comes with another layer for the trees – a layer to create ornaments or snow over the tree. I stamped mine over the large tree in white pigment ink. My idea was to add Nuvo Drops in Red and White over the tree and I just needed this stamped layer for placement purposes.
Next, I used my paper trimmer and trimmed the background so that I didn’t have any white border around my stamping – just a pretty background panel.
I also cut a layer of fun foam to be able to adhere it behind the panel and onto the card. I first planned to use a white card base, but later changed my mind and used a dark teal card base for this card, I made it using Hero Arts Adriatic Cardstock.
Next, I die-cut a banner from Simon’s Schoolhouse Red cardstock using a banner die from Spellbinders, it is from one of the Spellbinders Glimmer Sentiment sets. I treated the panel with anti-static powder, inked the stamp with clear embossing ink, and stamped onto the banner. I added white embossing powder onto the sentiment and heat set it with my heat tool to melt the powder in place. I used foam adhesive squares and foam mounted the sentiment onto my card.
I also stamped a little “From all of us” sentiment at the bottom of the card, again using that same Versafine Onyx Black ink. Having nearly finished the card, I mean having adhered everything in place, I used Nuvo Drops in white and red, these colors are Gloss White and Gloss Red Berry, I added dimensional dots over the white stamped circles on my tree. I had to wait to adhere everything down before I could add the Nuvo drops, as I didn’t want to accidentally smear the wet drops while still assembling the card. I alternated red and white dots on the card.
A2 Card Ideas with Slimline Products
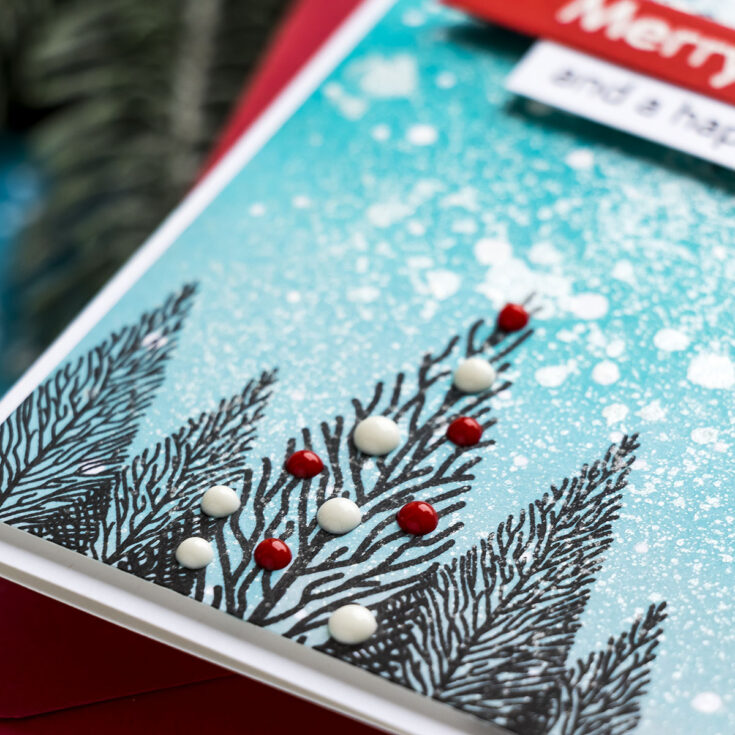
The next 2 cards I have for you are the traditional A2 size. I wanted to try and see if I could use the Slimline products for traditional size cards. I stamped just a part of this background, the top part, twice to fill the entire panel. I used the same colors of ink to stamp the background. Having stamped one background, I’ve repositioned the stamp on the panel so that it continued the background to the left – to fill the entire panel of the card. This ended up looking almost perfect, with a slightly visible seam between the two impressions. To fix that and hide the seam, I gave this background a generous spritzing of the same shimmer spray. And that worked like a charm! You couldn’t really see the seam at all, maybe just a tiny bit at the bottom, but I planned to add stamped trees in that section and that hid it completely.
Speaking of the trees, for this card I wanted to stamp just the treetops to make it look like you are seeing just the top of the forest. Again, I used both the small and large tree and the same VersaFine Onyx Black ink and stamped the images filling the bottom edge of the panel.

I added Merry Christmas and A Happy New Year sentiment on this card. I foam mounted both onto the background. The background was trimmed to 4 by 5 1/4” and was foam mounted onto the card. I also added Nuvo drops in white and red onto the tree as I did on my slimline card.
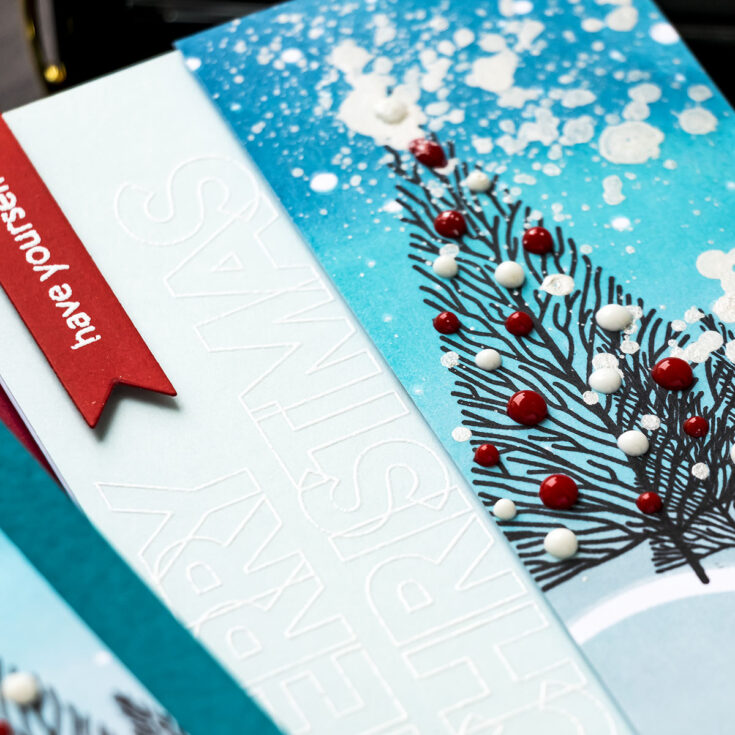
My last card for today features a sentiment from another stamp set from Simon, the Slimline Greetings! Oh my goodness, these are incredible! They, of course, are meant for slimline cards, but I’m using the Merry Christmas sentiment on a traditional size A2 card today. I’ve detail white embossed the sentiment on a panel of Hero Arts Arctic cardstock.
I have also stamped a smaller size panel using the Slimline Scene Builder stamp set and my idea was to foam mount the panel onto the background. I did that using foam adhesive, I also added Nuvo Drops in Red and white as I did on the other 2 cards, I sprayed the background with that same shimmer spray and added a red banner with a white heat embossed “have yourself a” so that the entire sentiment reads – have yourself a Merry Christmas.
That’s it from me for today! Have fun stamping!
WATCH THE VIDEO:
SUPPLIES:
|


Thanks so much for stopping by, and thanks to Yana for being our guest!


