Doodling with Debby: Watercolored Winter Scene

Hi friends! Happy Sunday, and welcome back to another delightful edition of our Doodling with Debby monthly blog feature with Debby Hughes! Be sure to watch the video for more information and enjoy!
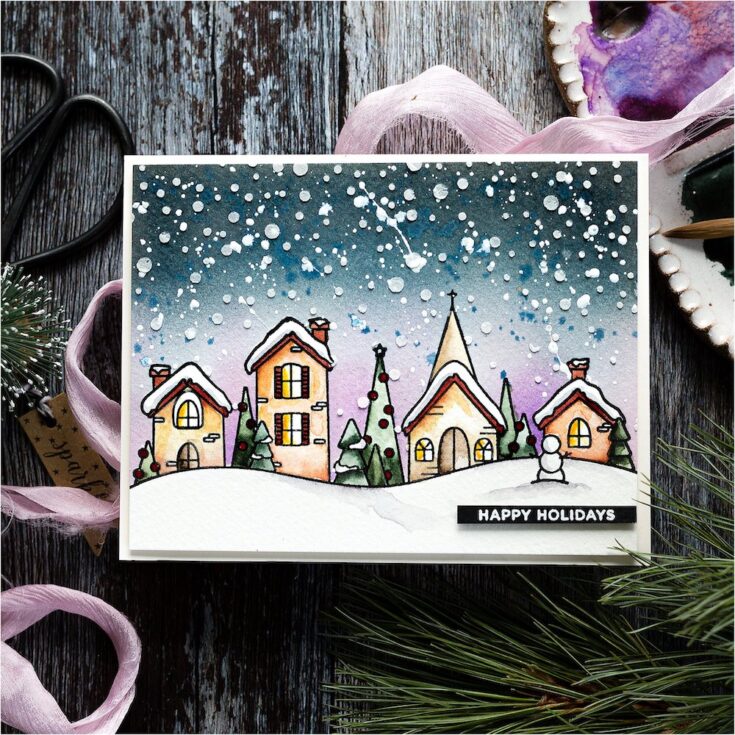
Hello, Debby Hughes here. In today’s video, I’ll be creating a little winter scene with watercolouring and ink blending using the Santa’s Sleigh Ride Slider set.
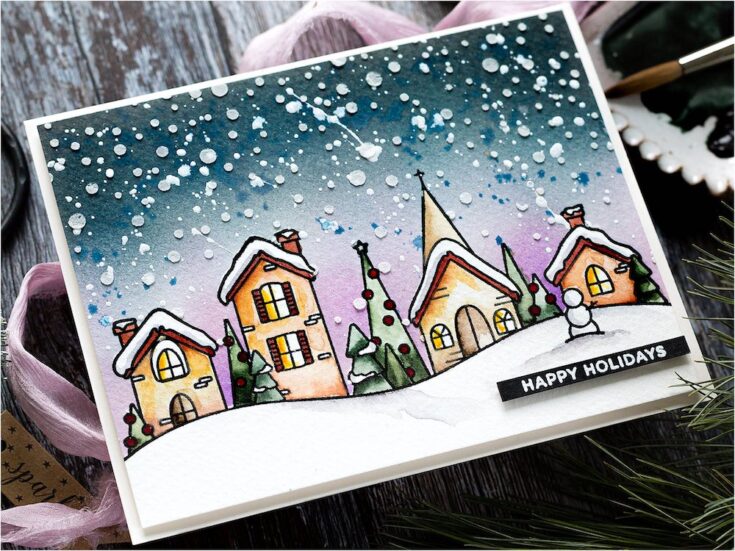
This is a card of two parts, a busy ink blended sky with a calm watercolored scene underneath.
I use this method of writing a step-by-step instruction on my blog and thought you’d like it here too, although the video goes into things in more detail:
- Stamp the winter scene from the Santa’s Sleigh Ride Slider set in Versafine Clair Nocturne ink.
- Stamp the scene again on Simon Says Stamp masking paper, trim out and lay over the one on the watercolored card.
- Blend Distress Inks over the sky – Spun Sugar, Wilted Violet, Weathered Wood, Hickory Smoke, Stormy Sky and Black Soot.
- Splatter the sky with white gouache and leftover paint.
- Swipe Wendy Vecchi White Embossing Paste through the Large Falling Snow stencil.
- Lift the mask and watercolour the winter scene. I used Daniel Smith paints.
- Trim the watercolored panel to fit an Ivory A2 card base and attach with foam adhesive.
- Stamp a greeting from the CZ Design Good Cheer set in Versamark Ink on Black card and white heat emboss.
- Trim the sentiment to a skinny banner and add with foam adhesive.

Well, that’s me for this month. I hope you enjoyed this tutorial. Thanks for joining me and I hope to see you next time for Doodling With Debby.
WATCH THE VIDEO:
Watch below or in HD on YouTube.
SUPPLIES:
|


Thanks so much for stopping by, and to Debby for being our special guest!
November 2020 Card Kit Inspiration with Kristina Werner
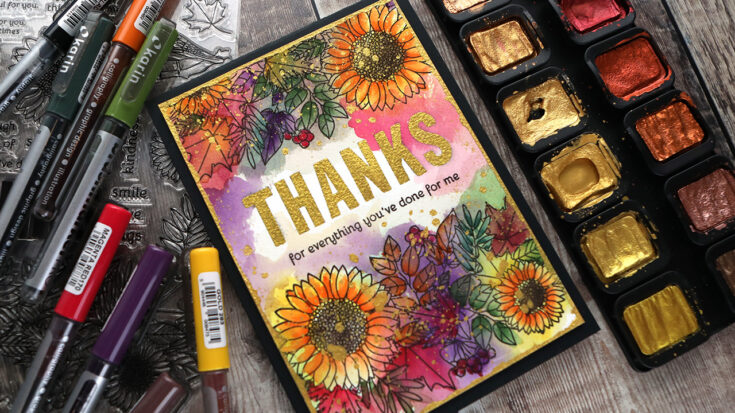
Hi all! Kristina here! I have some more card kit inspiration for you today, this time with the stamp set from the November 2020 Card Kit! The Big Thanks Autumn stamps have a large sunflower and leaves images that as just begging to be painted!
I first stamped my greeting on the some 5×7 watercolor paper in waterproof black ink. Then I stamped the large image twice–once above the greeting area and once below. Then I got to painting!
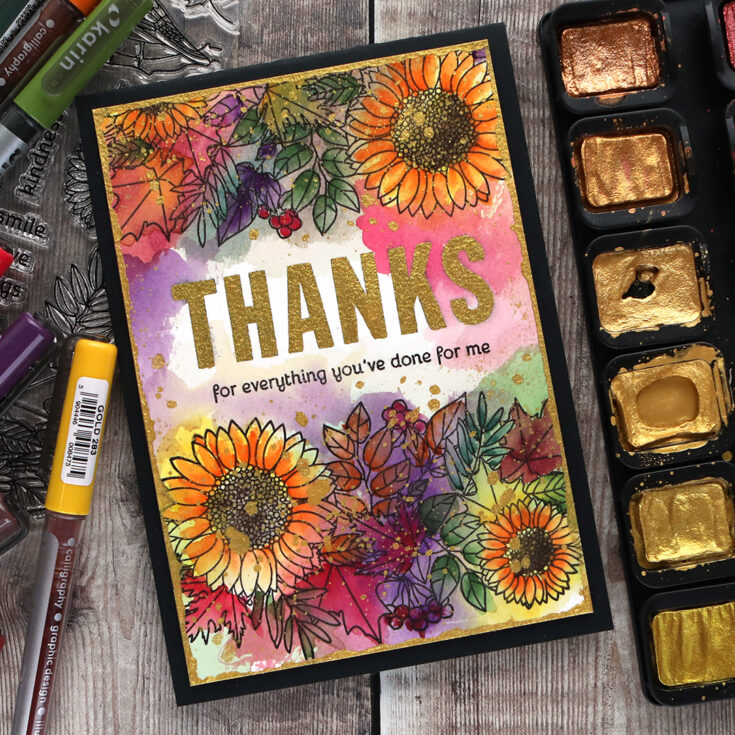
Karin Brushmarker PRO markers are fun to work with and have beautiful color. I used the markers to paint both image areas.
For some shimmer, I splattered on one of the gold shades in the FineTec Pearlescent Watercolors 24 set. And because I wanted even more gold shimmer, I painted the edges of my watercolor panel, as well as over the large Thanks greeting.
Thanks for stopping by today! You can get the Big Thanks Autumn stamp set separately or as part of the November 2020 Card Kit. You can also subscribe to receive this kit and future kits.
Supplies
|


Funny Friday with Art Impressions: Feast Mode
Welcome everyone to our latest edition of Funny Friday! Each month we showcase a new Art Impressions stamp set to make you smile. Today I’m using the adorable Feast Mode set. This set is bringing in Autumn with fun animals and sentiments.
The images in this set are the perfect size to fit onto a die-cut tag, so I went for it!

I’ve made two examples since they are so easy to create. I watercolored the images loosely for an imperfect look (this takes the creative pressure off). I start with washed-out color and add deeper shades as I go.
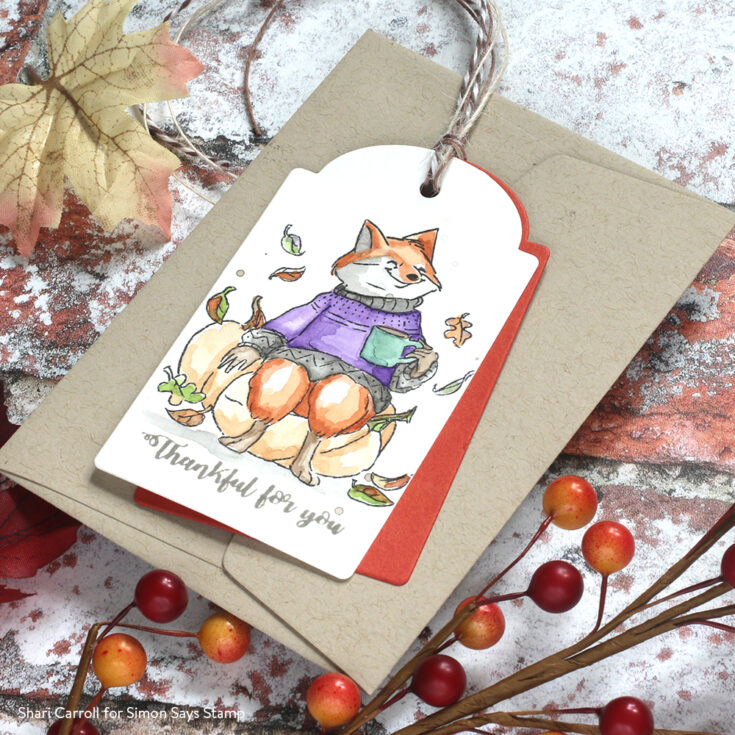
Once I had my tags colored, dried, and stamped with a greeting, I added an additional tag behind using a die-cut from color cardstock.
Tags are a great way to quickly express gratitude or a funny message. They can accompany a gift card or gift bag, and these fit into our 4 Bar Kraft envelopes for mailing!!
SUPPLIES:
|


