Yippee for Yana: Slimline Card with Non-Slimline Products

Hi friends! Happy Wednesday! Welcome to the latest edition of Yippee for Yana! Our bi-monthly blog series with the always inventive and talented Yana Smakula! Be sure to watch the video for more information and enjoy!
Hi everyone, this is Yana Smakula, welcome back for another Yippee For Yana video! Today, once again, similar to my previous video, I’m creating a Slimline card using non-slimline products. Last time I did the opposite – I used the slimline products on A2 cards, do watch that video if you haven’t already. Any ideas about what you’d like the next video to be? Let me know in the comments below!
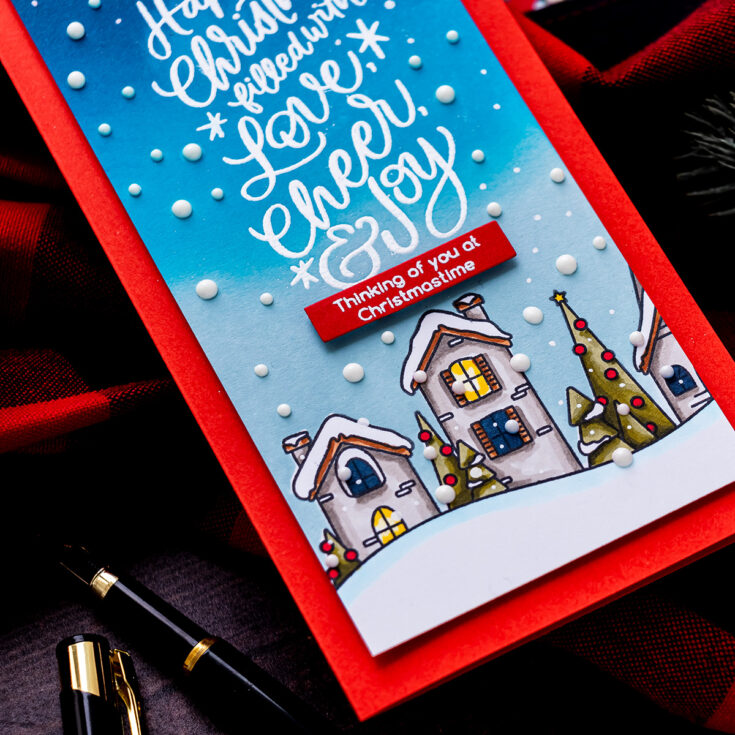
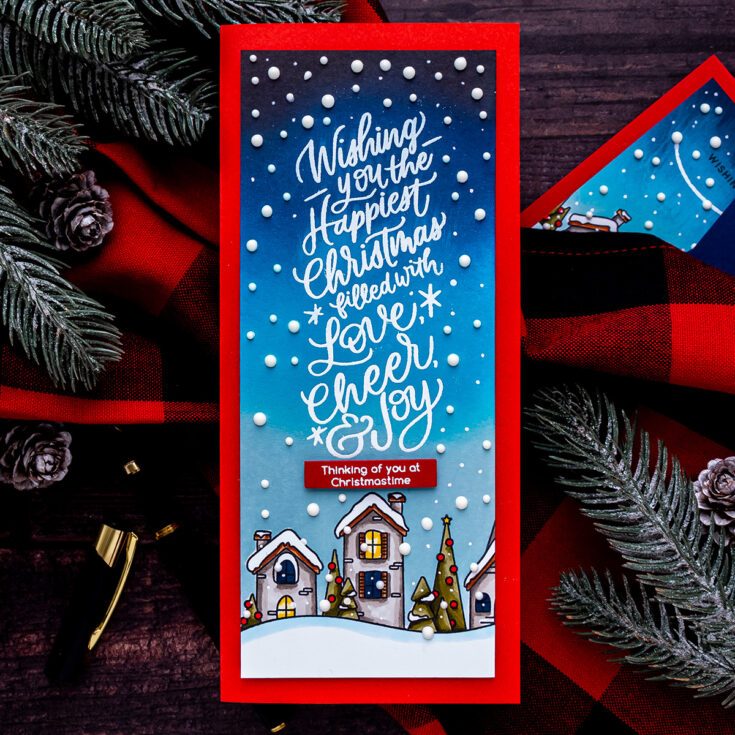
So what products are we going to be using? I have two clear stamp sets from Simon – a newer set with a darling Christmas village called Santa’s Sleigh Ride Slider. You can use this stamp set to make interactive slider cards and have your Santa ride above the village, but I’m just going to use the village stamp, and in fact, I’ll only use a portion of this stamp.

Next, I have an oldie but goodie stamp set – this is Holiday Greetings Mix 1 set. This stamp set is from last year, it has lots of fabulous sentiments for Holiday cards, some of which are just perfect for slimline cards! They are tall and skinny and even that peaceful sentiment can work on a landscape slimline card.
If you don’t have these exact stamps, go through your stash, look for similar design products, look for a Christmas village and look for a tall skinny sentiment to make this card.
Follow these instructions step by step to re-create this card:

- Stamp village image using Memento Tuxedo Black ink onto a panel of white cardstock that measures 3 1/4 x 7 3/4”. Use a MISTI stamp positioner or similar tool.
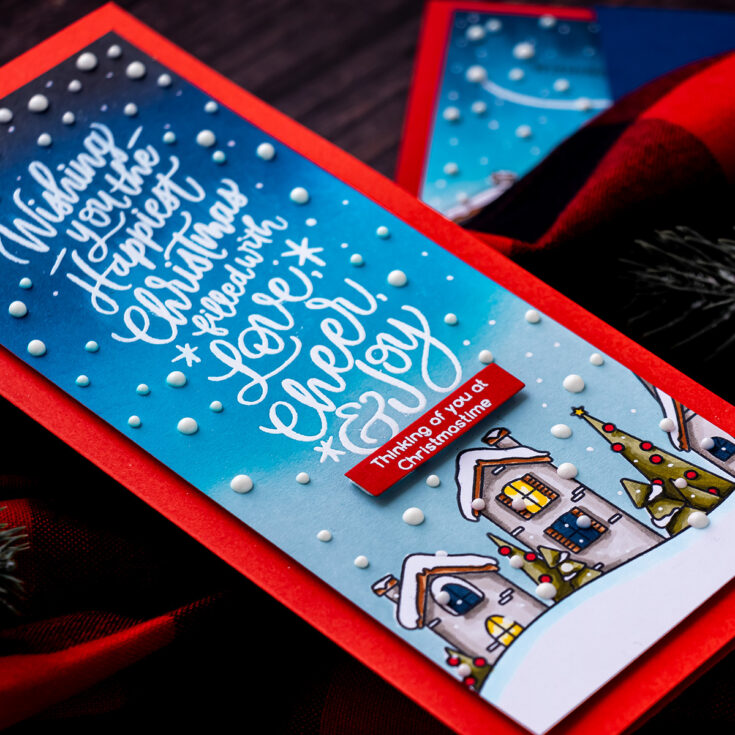
- Heat emboss the sentiment in white embossing powder above the village.
- Add color to the panel using Copic markers and ink blending.
- Color the Christmas village scene using Copic markers: YG93, YG95, and YG99 to color the trees; R27 to color the ornaments on the trees; W5, W3, and W1 to color the buildings; E33, and E37 to color the roofs; Y11 and Y15 markers to color the lit windows; B99 to color the dark windows; B000 to color the snow.
- Create a mask using masking paper and mask the colored village.
- Ink blend the sky using various inks in blue. I used the following colors going from the bottom up: Speckled Egg Distress, Mermaid Lagoon Distress Oxide, Hero Arts Navy, Simon Says Stamp Intense Black.
- Clean up the white embossing using Ultra Clean Stamp Cleaning solution and a clean ink blending sponge.
- Create a slimline card base using red cardstock. Foam mount panel onto the card.
- Heat emboss a sub sentiment for this card using detail white embossing powder. Cut the sentiment out and foam mount onto the card above the village and below the sentiment.
- Add “falling snow” using Nuvo Drops in Gloss White and 3 different pens to make 3 different size dots on the background – Storytime paint pen from Jane Davenport and Sakura White pen.
That’s it from me for today! I hope you’ve found this video useful. If you make a card inspired by this video, we’d love it if you shared your project and tagged us on social media – we always enjoy seeing what you make!
Have fun stamping!
WATCH THE VIDEO:
SUPPLIES:
|


Thanks so much for stopping by, and thanks to Yana for being our guest!
Crafty with Caly: Honey Bee Stamps Darling Dahlias

Hi friends! Welcome to another edition of Crafty with Caly! Our bi-monthly blog feature with the fabulous Caly Person! Read on and enjoy!
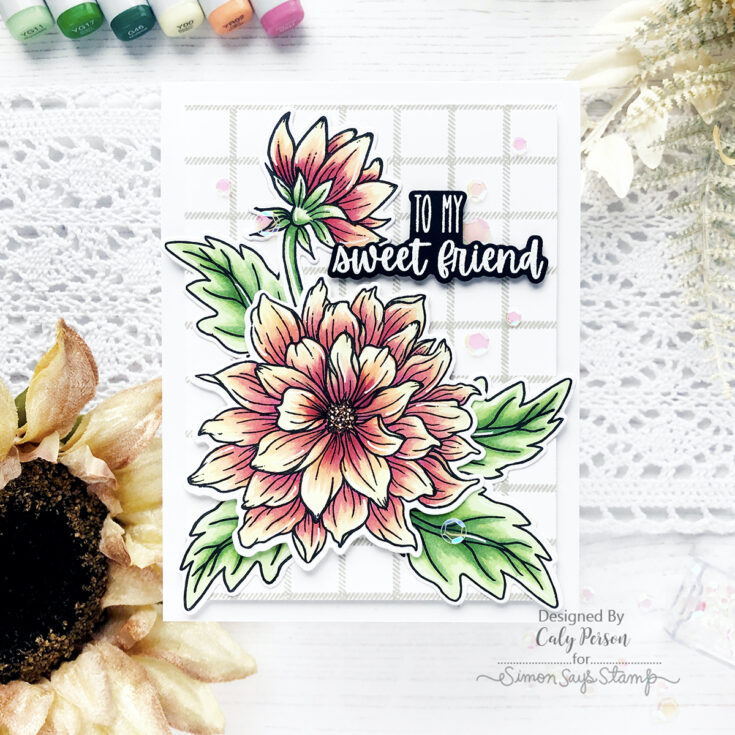
Hello, Friends! Thanks for joining me today for a Honey Bee Stamps card! I’m using a new set, Darling Dahlias by my friend Emily Midgett – her floral sketches are beautiful and I’m so happy to see them as stamps and to be able to color and create with you!
I use 3 simple Copic markers to color these petals for a tri-color blend on the flowers and leaves.
Flowers: Y00, YR02, R85
Leaves: YG11, YG17, G46
Check out the video to see how it’s done!
WATCH THE VIDEO:
The background is stamped with Stone ink using the Honey Bee Stamps Farmhouse Background – I love that it is a clear stamp!
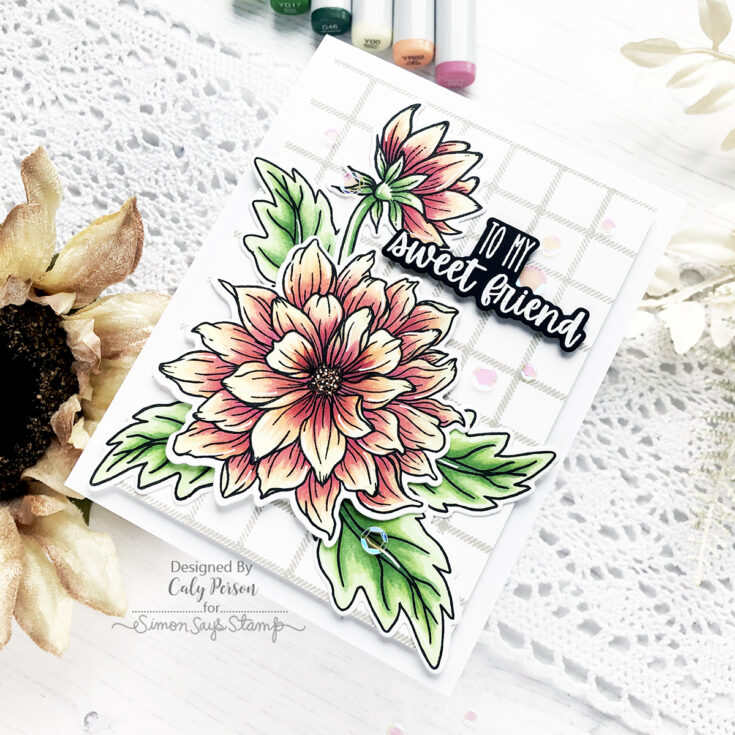
Once my images are laid out, I adhered the large bloom with foam adhesive and then glued the foliage in position underneath to arrange my images.
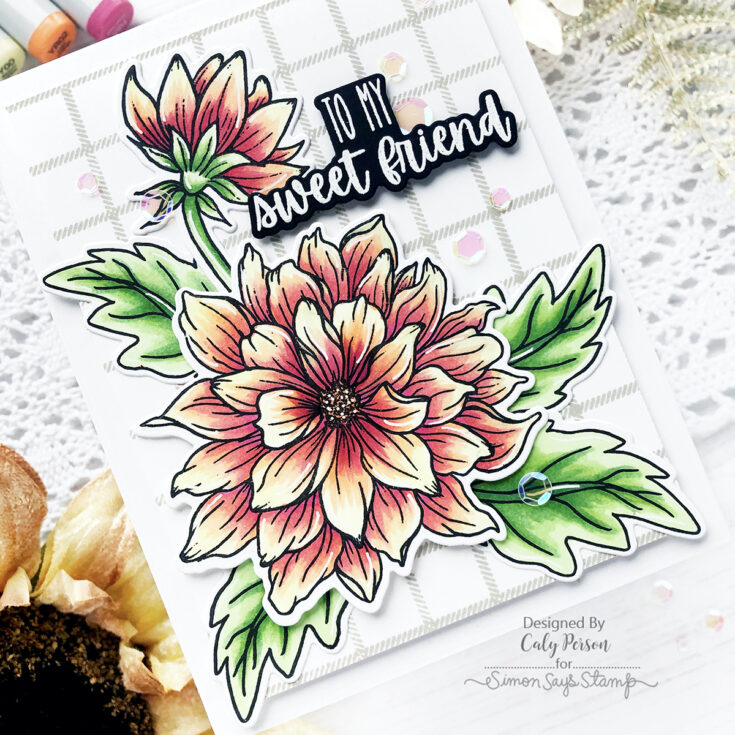
The sentiment is embossed in white and is die-cut with a coordinating die-cut from the set (I LOVE this!). To finish, I attached some iridescent sequins and attached it to a card base with foam adhesive for lots of dimension.
I hope you enjoyed this card! Thanks so much for spending some time with me today! ~Caly
SUPPLIES:
|


Thanks so much for stopping by, and thanks to Caly for being our guest!
25 Days of Christmas Tags 2020
Hi everyone! It’s Shari here with a special tag as part of the 25 Days of Christmas Tags event on the “In My Creative Opinion Blog“.
I love making tags and most of all, It’s very rewarding when I put different elements together to create something pretty and useful.
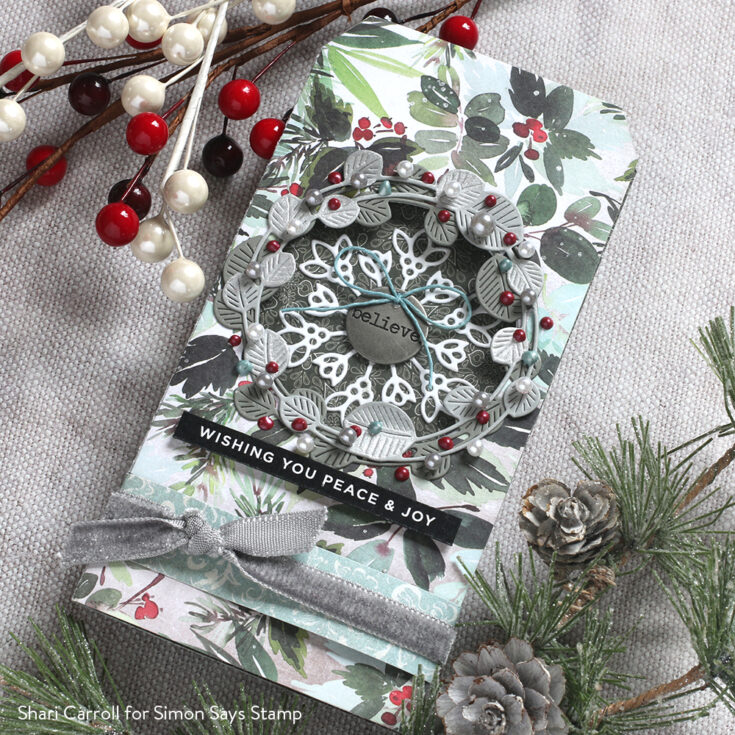
Rather than making a straight-up tag, I decided to construct a tag shaped booklet with a window on the front. The first page features a snowflake peeking through the window. There is plenty of room inside to write personal messages and greetings inside.
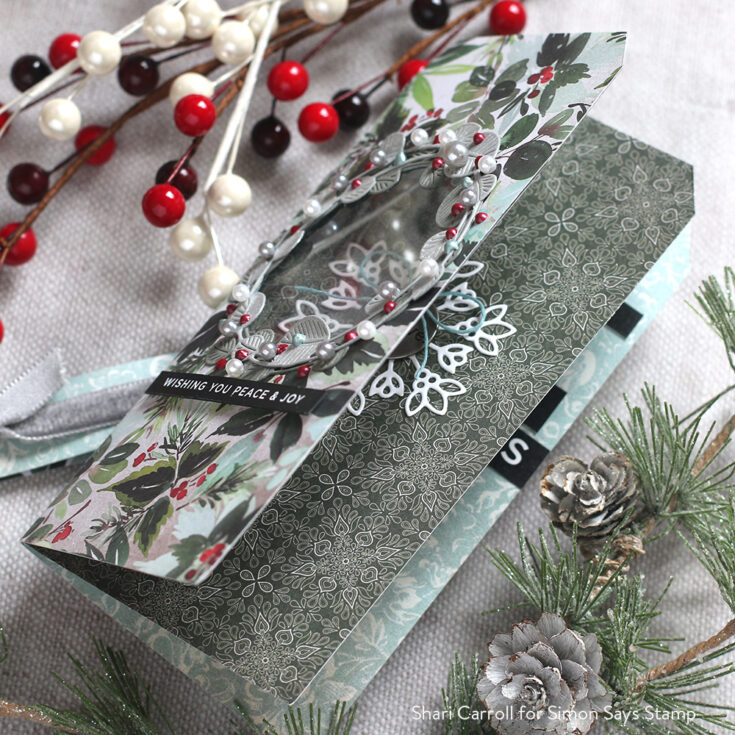
This can be a gift for someone special at Christmas to include a wallet size photo or even a gift card. I hope I’ve given you the inspiration to pull out your supplies and make something special this holiday season.
SUPPLIES:
|


