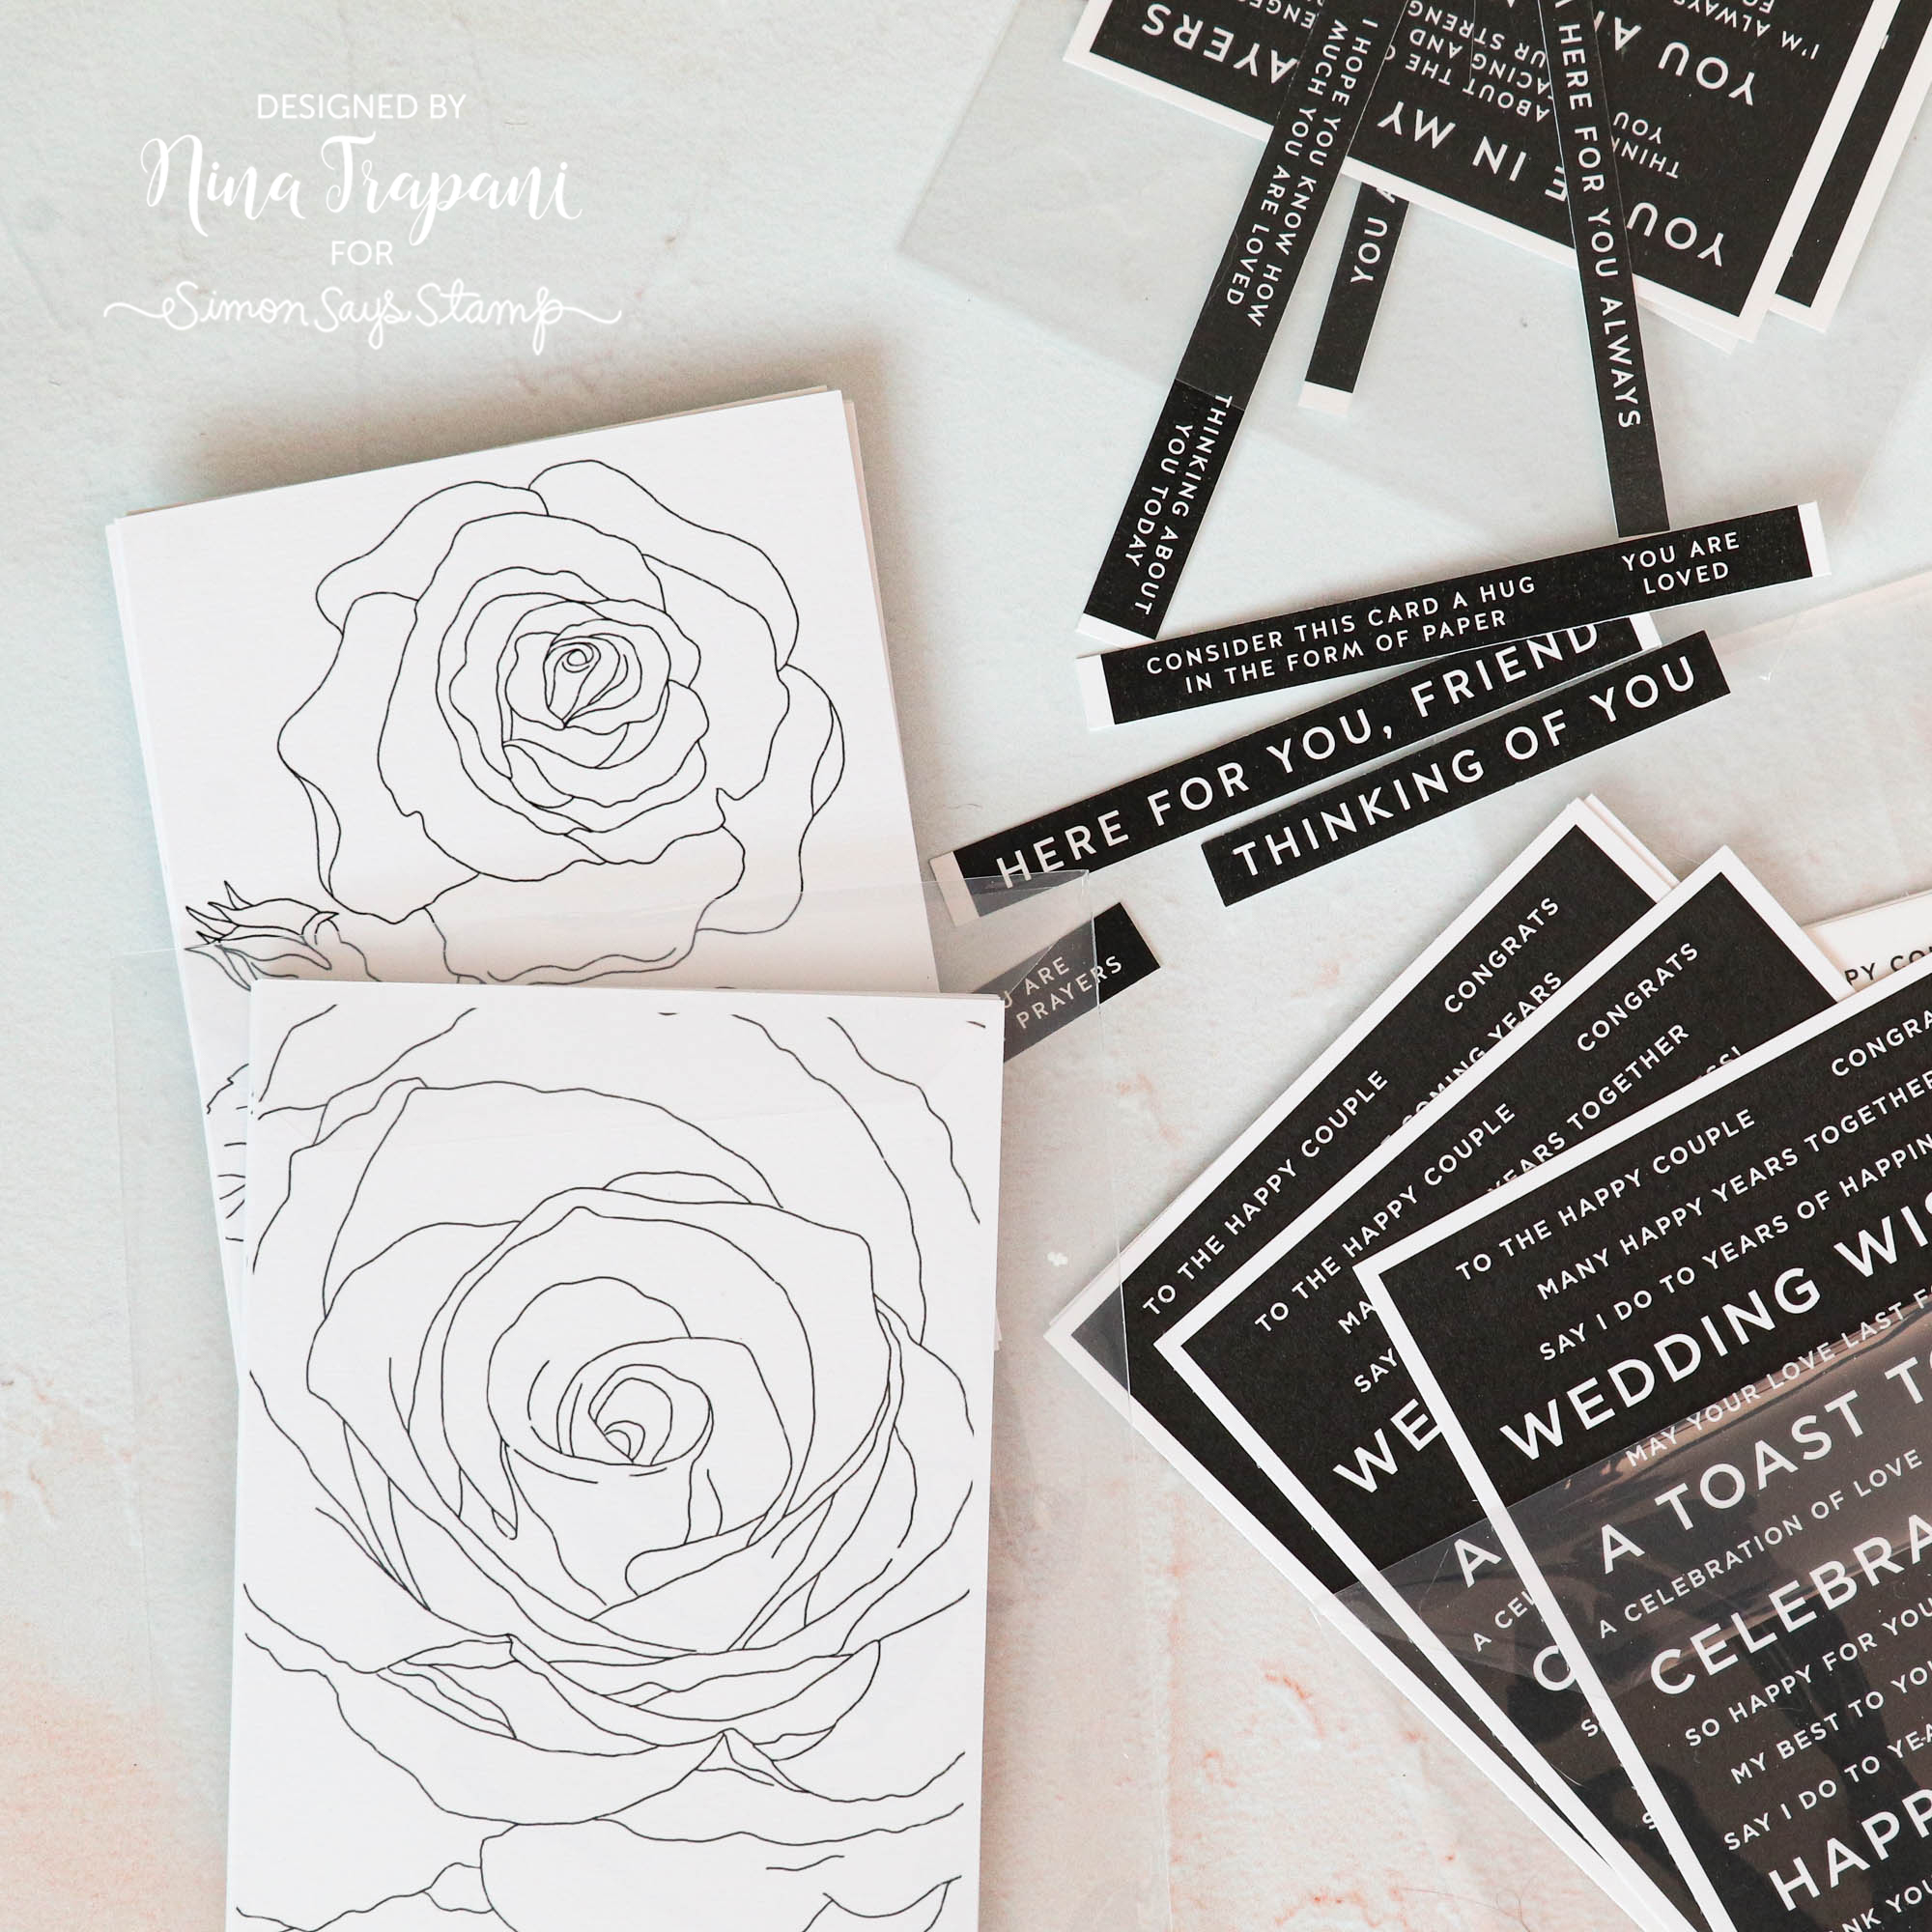
Did You Know? January 2021 Edition

Hello crafters, it’s Nina-Marie Trapani here with you! Today I have a new edition of our popular Did You Know series!
If it’s your first time seeing this feature, each month we bring you fun facts, creative tips and even crafty hacks about your favorite supplies and brands; you can then use these awesome tips that you learn in your next crafting projects! Are you ready to learn some fun tricks? Keep on reading!
Multi-Size Rainbow Blending Brushes
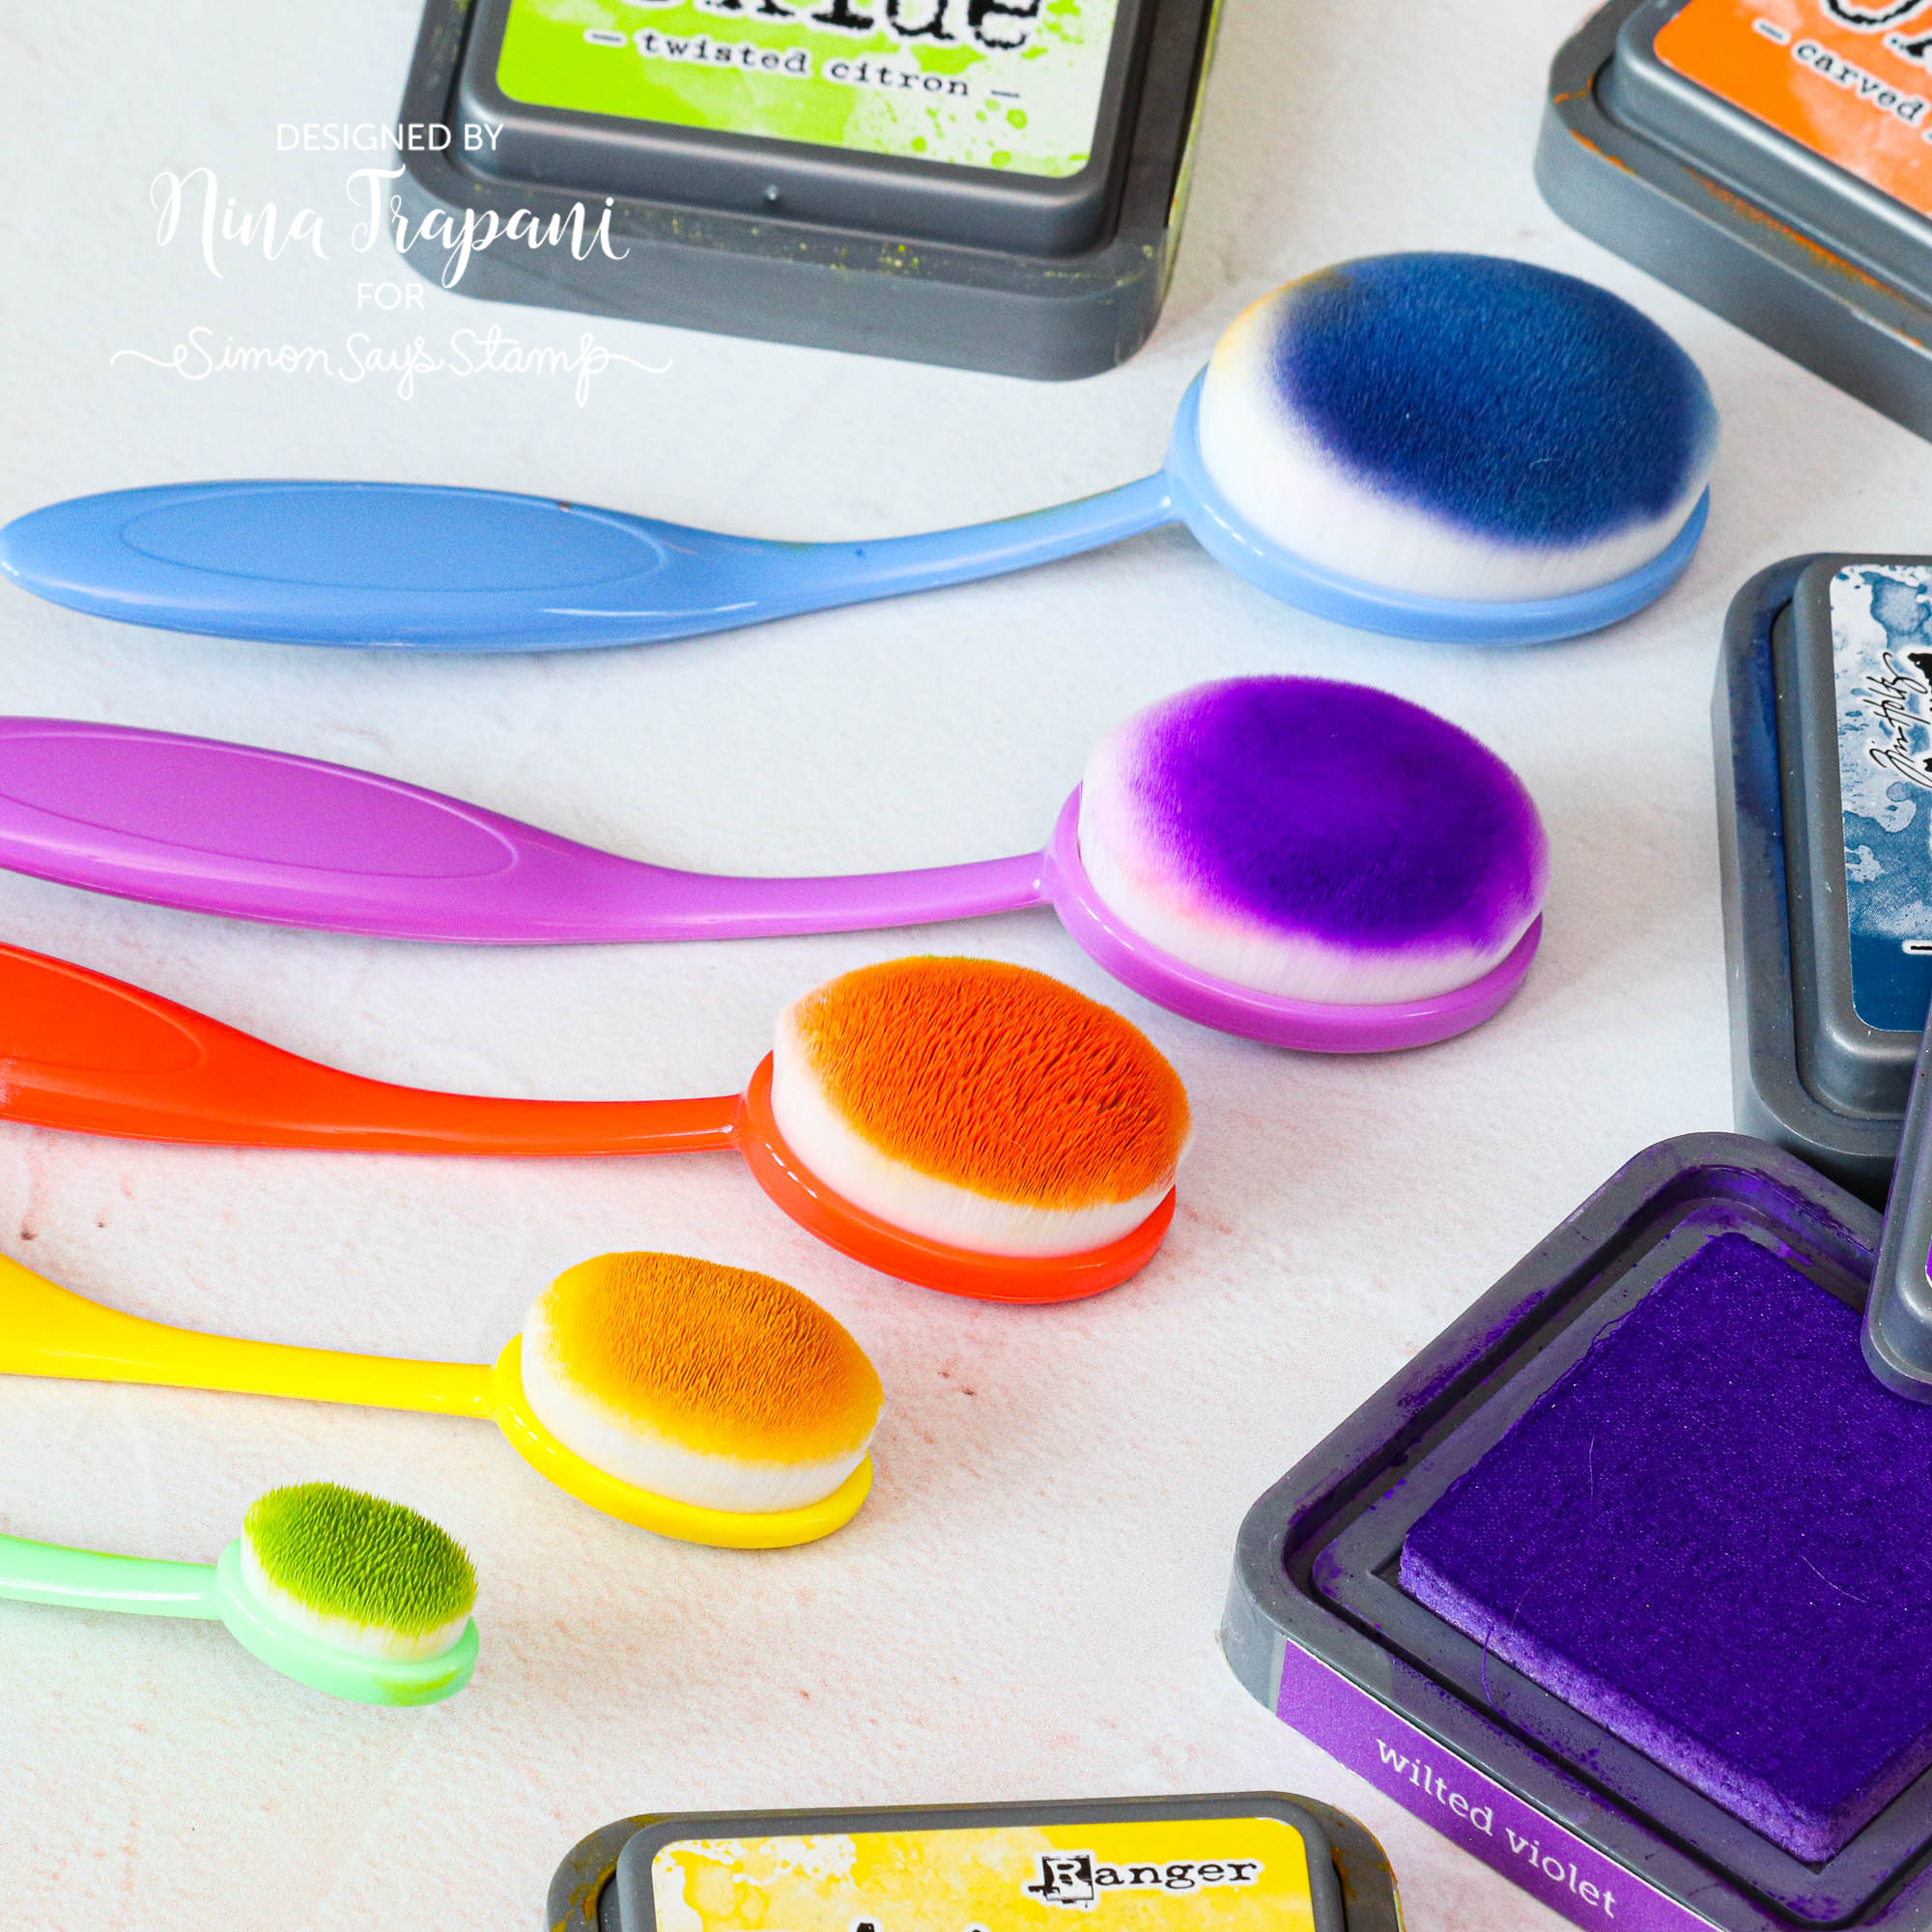
No matter what size project you’re creating, our Simon Says Stamp Multi-Size Rainbow Blending Brush packs contain a variety of brush sizes to fit the surface you’re working on. The larger brushes are great for covering large areas and the super-tiny size is handy for getting into those small nooks and crannies! I especially love using the small brushes when I am blending multiple colors through a stencil, as it gives me a lot more control.
Simon Exclusive Masking Stencils
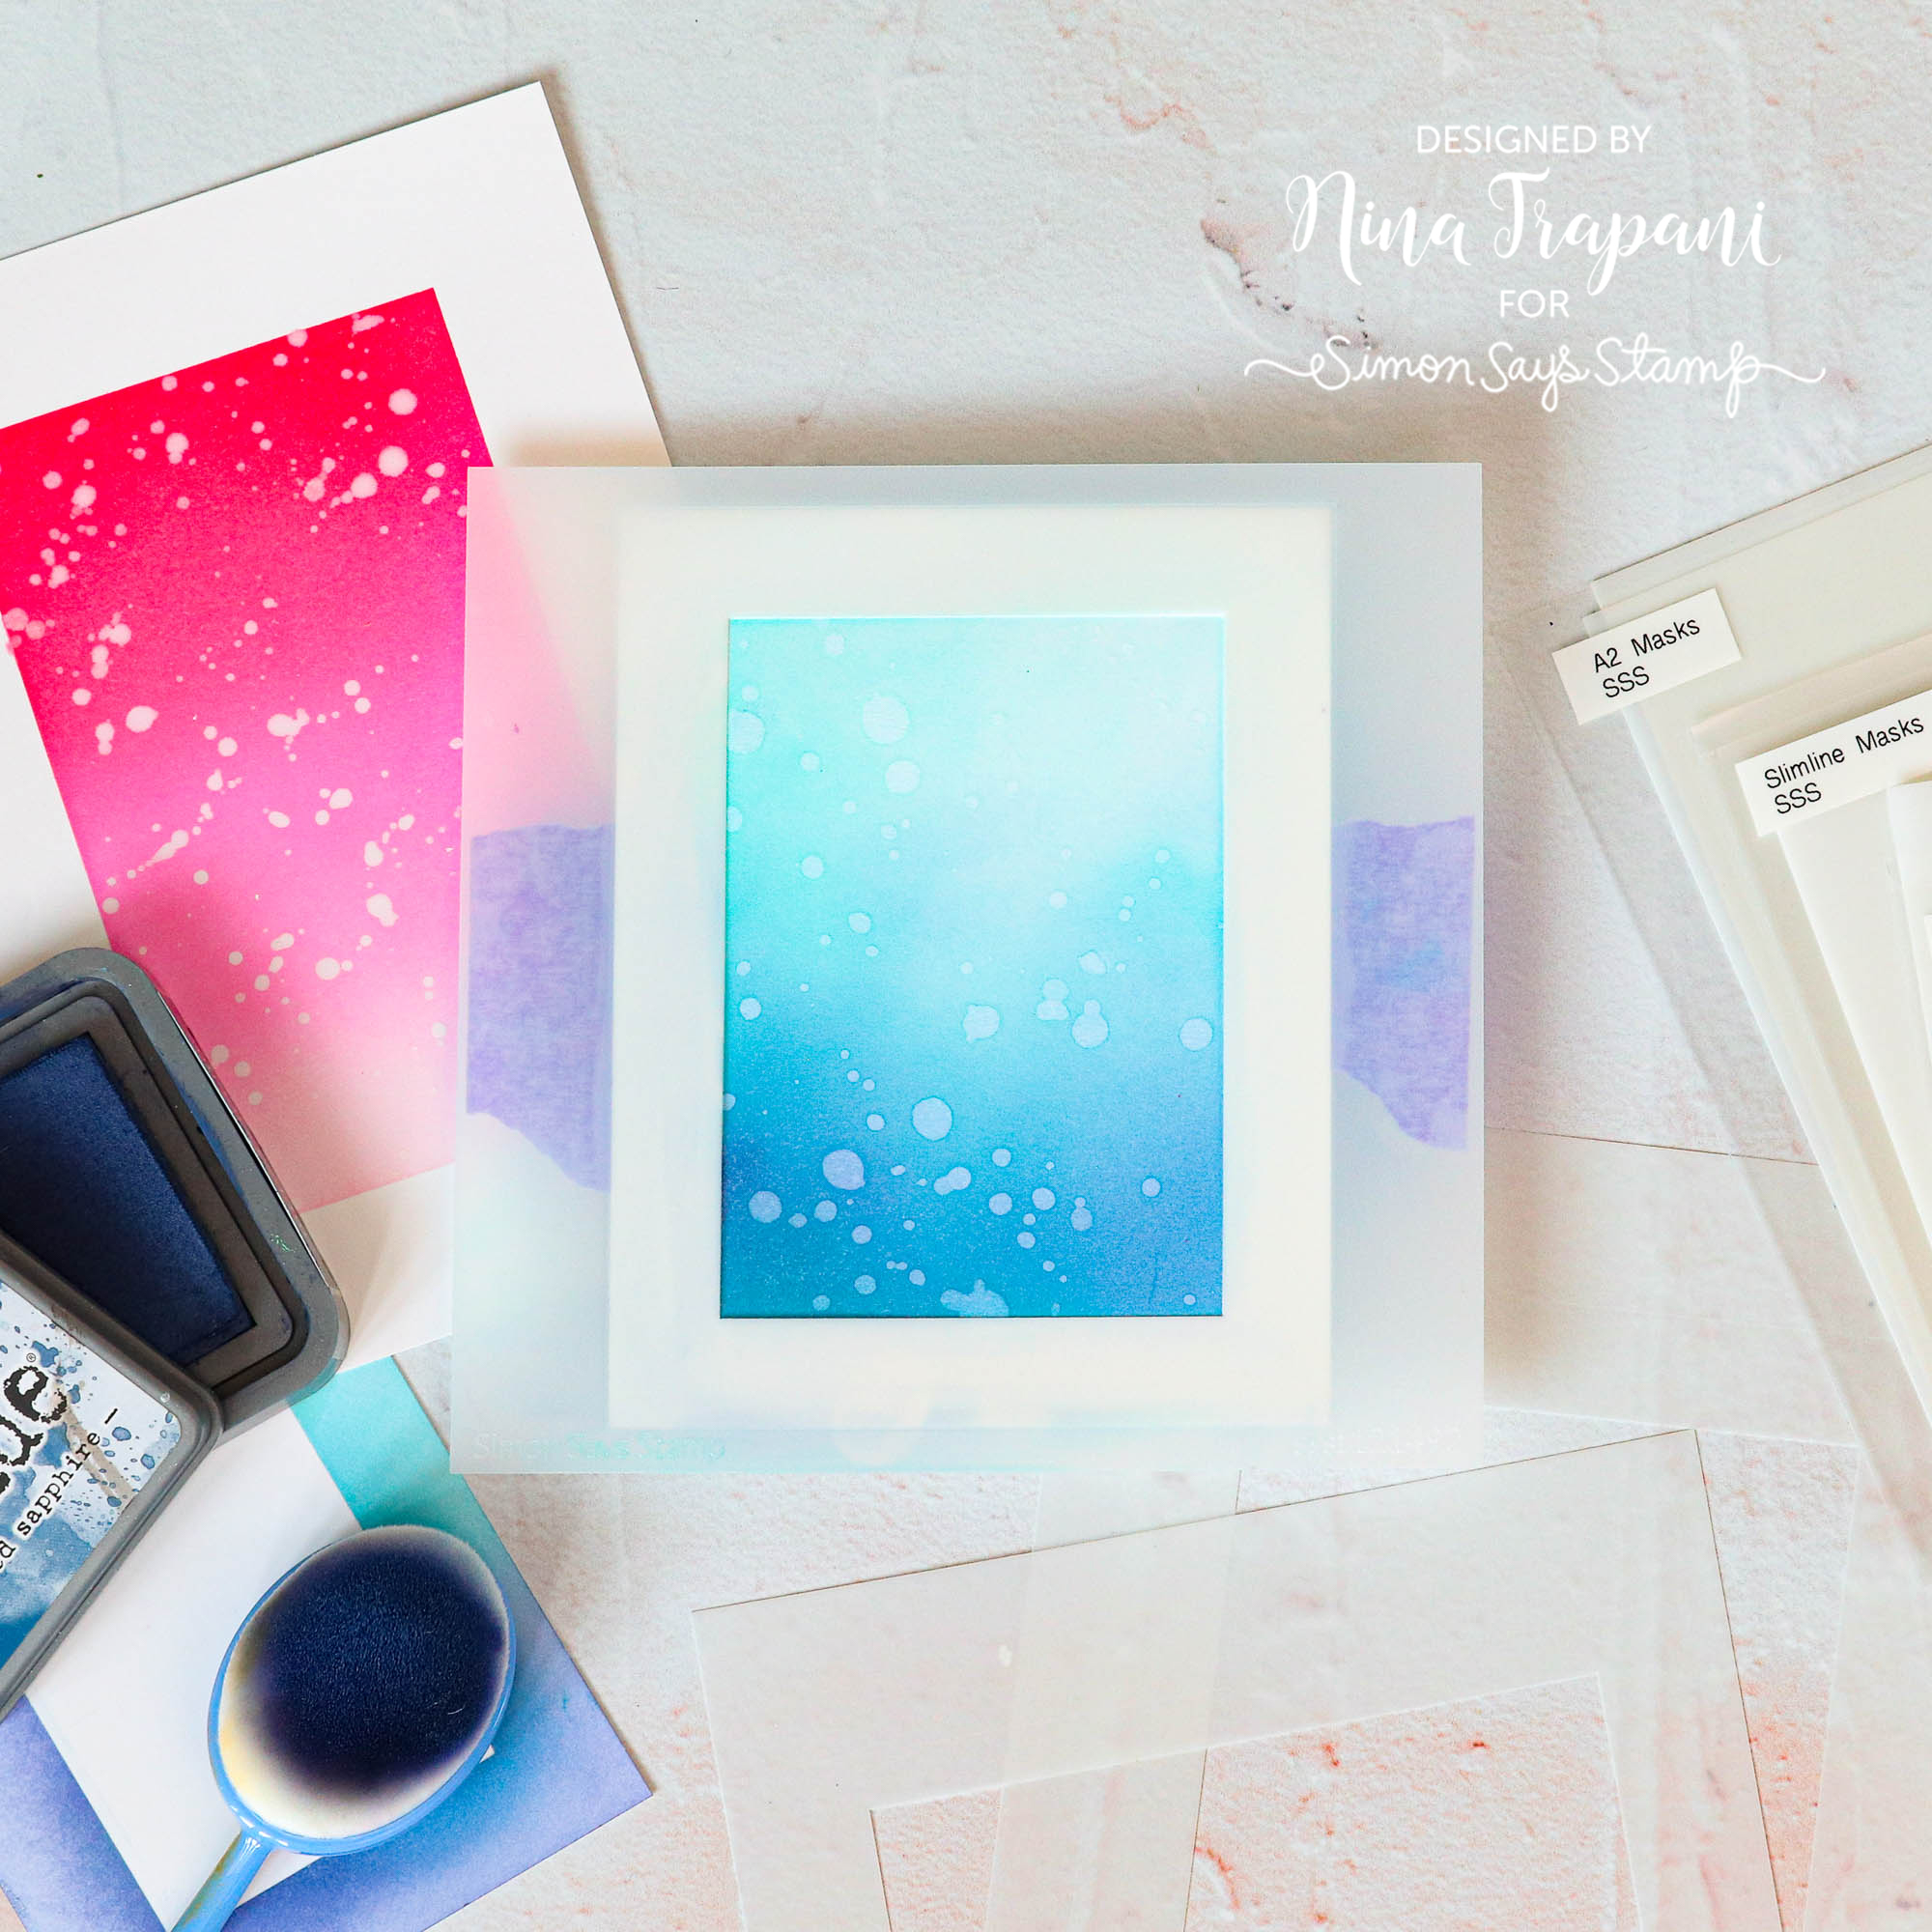
With our Simon exclusive masking stencils, you can create perfectly nested, masked areas on your project – and they require hardly any tape! We have a series of masking stencils available in A2, A7, Slimline, and Circle sizes. The masks lay over your project and can be held down with either a little bit of tape or by spraying them with Pixie Spray. The frame masks also have corresponding negatives that can be used on their own for masking around the edges, or used with the frame masks for two-tone blending techniques! So much versatility for these handy little sets!
Tim Holtz Picket Fence Distress Spray Stain
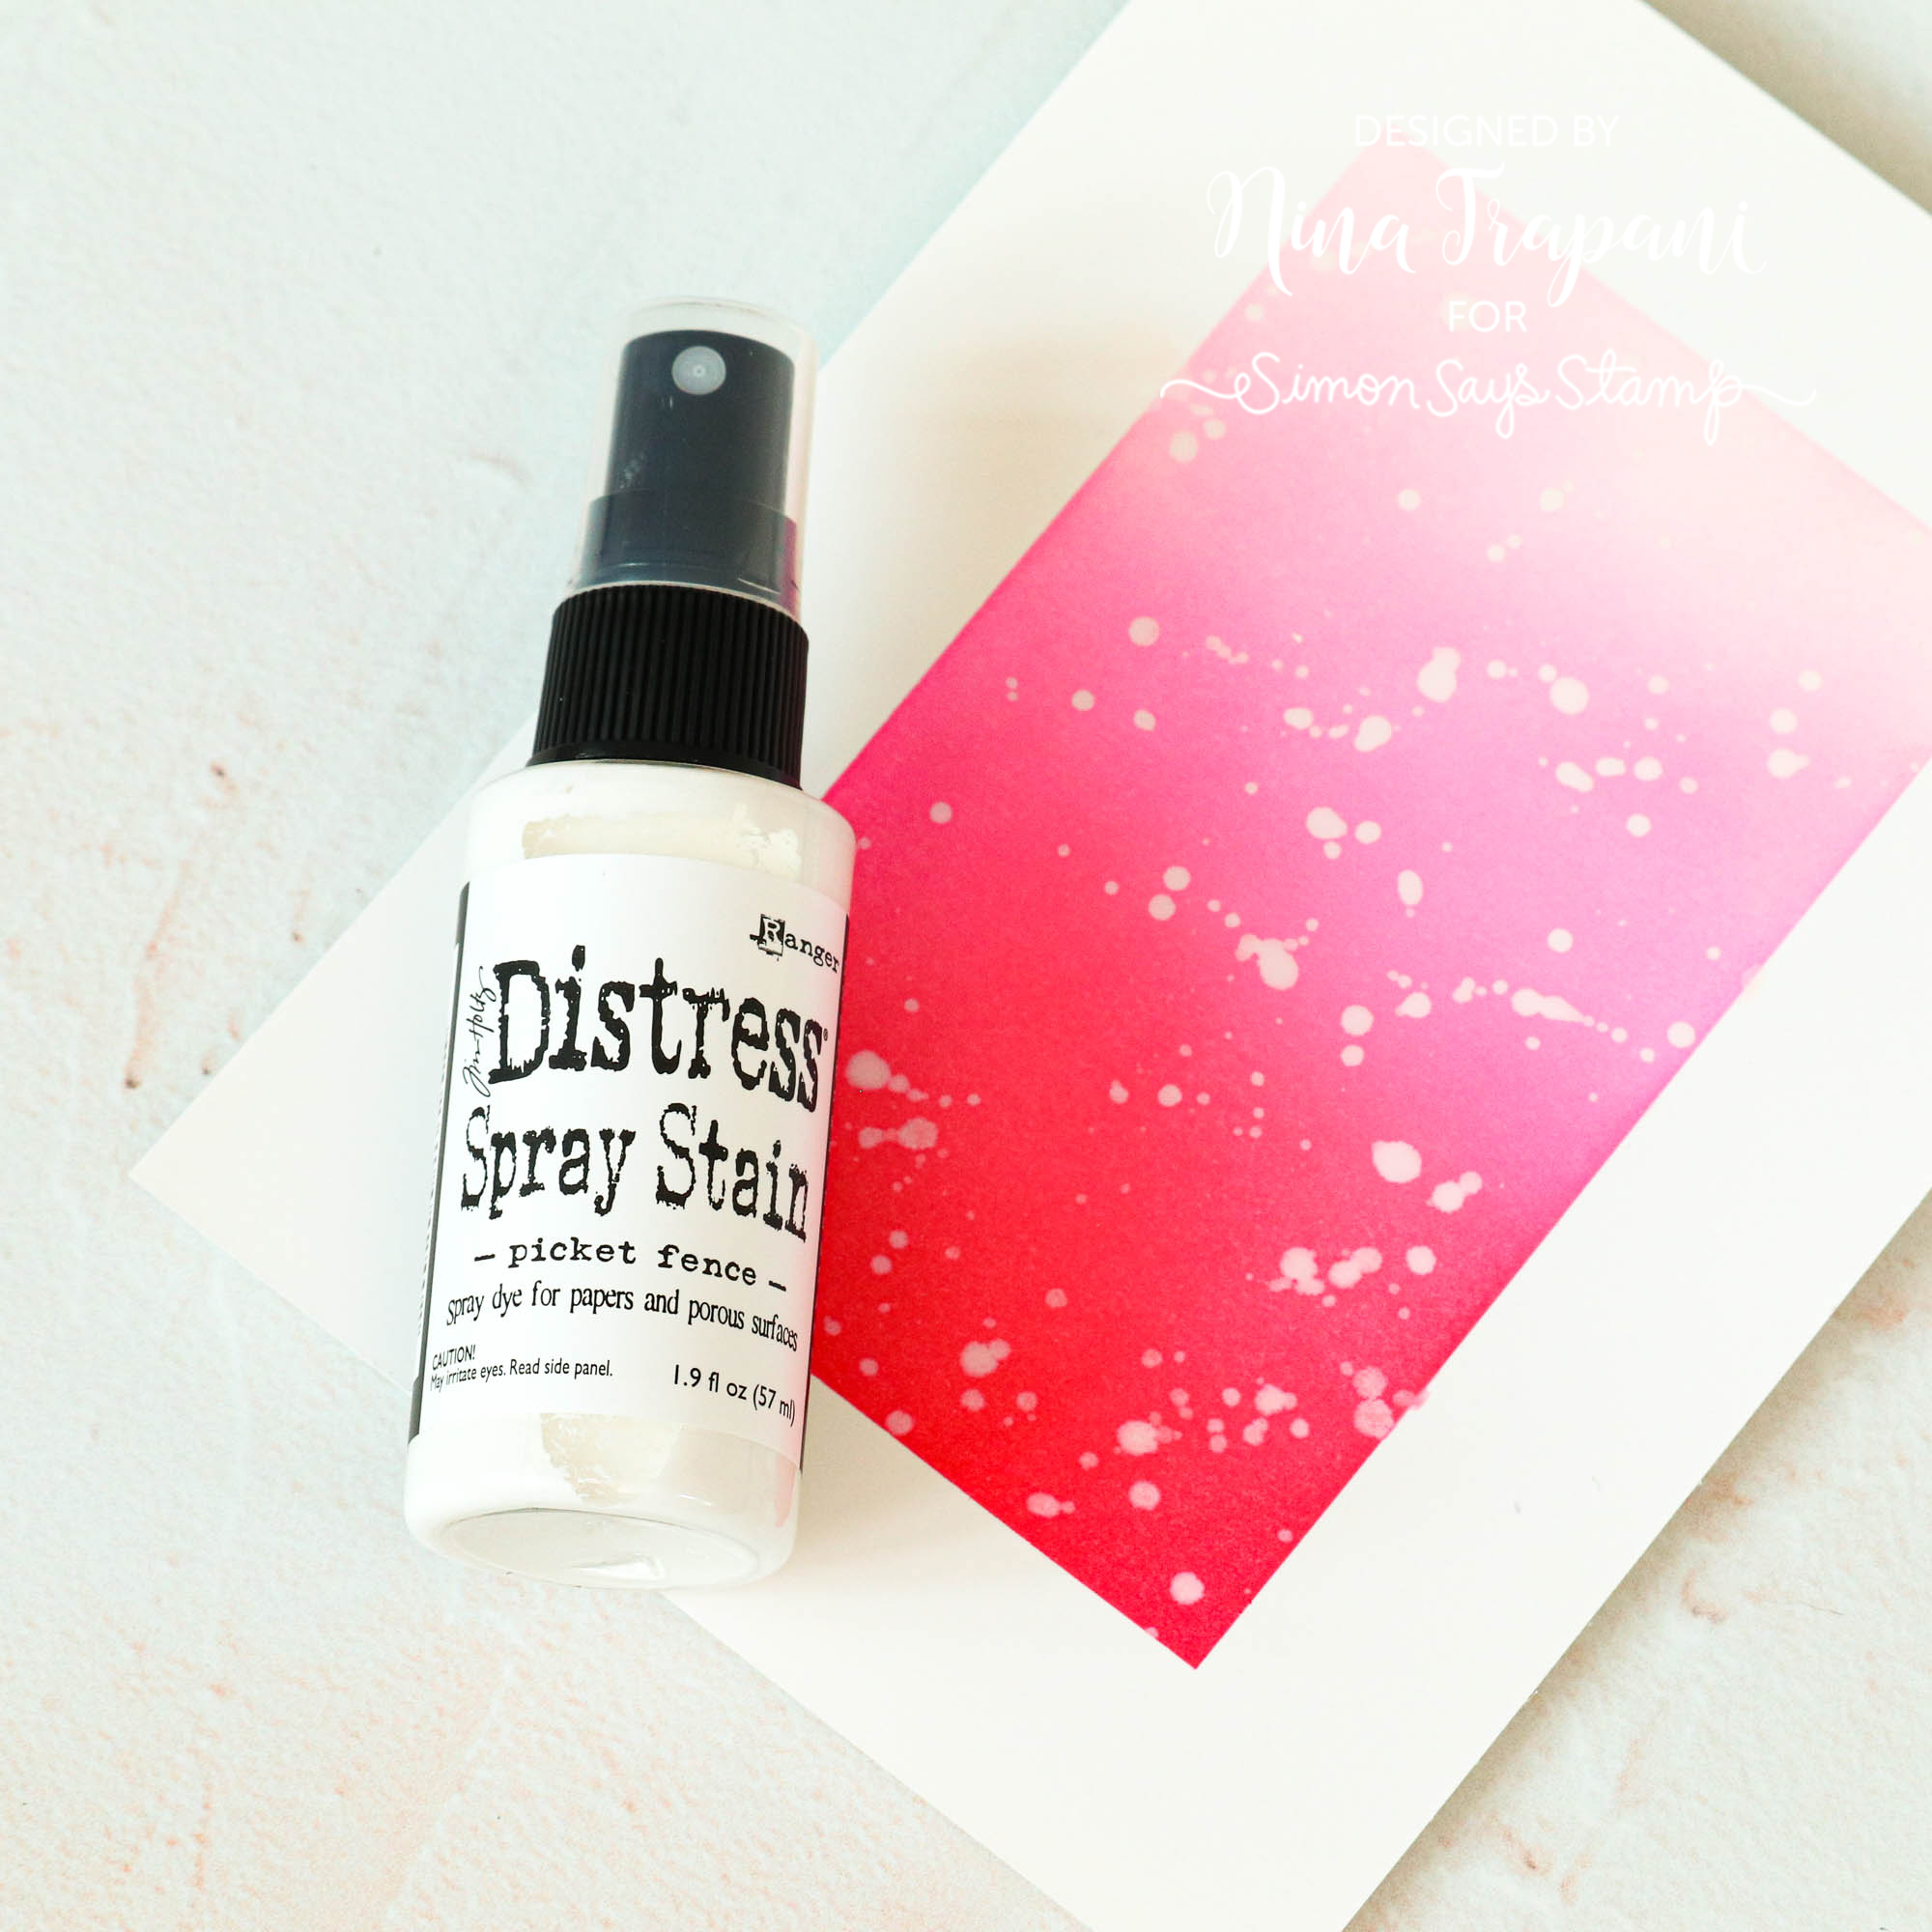
Splatter effects always add amazing texture and depth to card projects. Did you know that the Tim Holtz Picket Fence Distress Spray Stain is a great product for white splatter! It provides a beautiful, opaque effect (be sure to shake well beforehand for best results!) and dries fairly quickly.
Simon Exclusive Slimline Envelope die
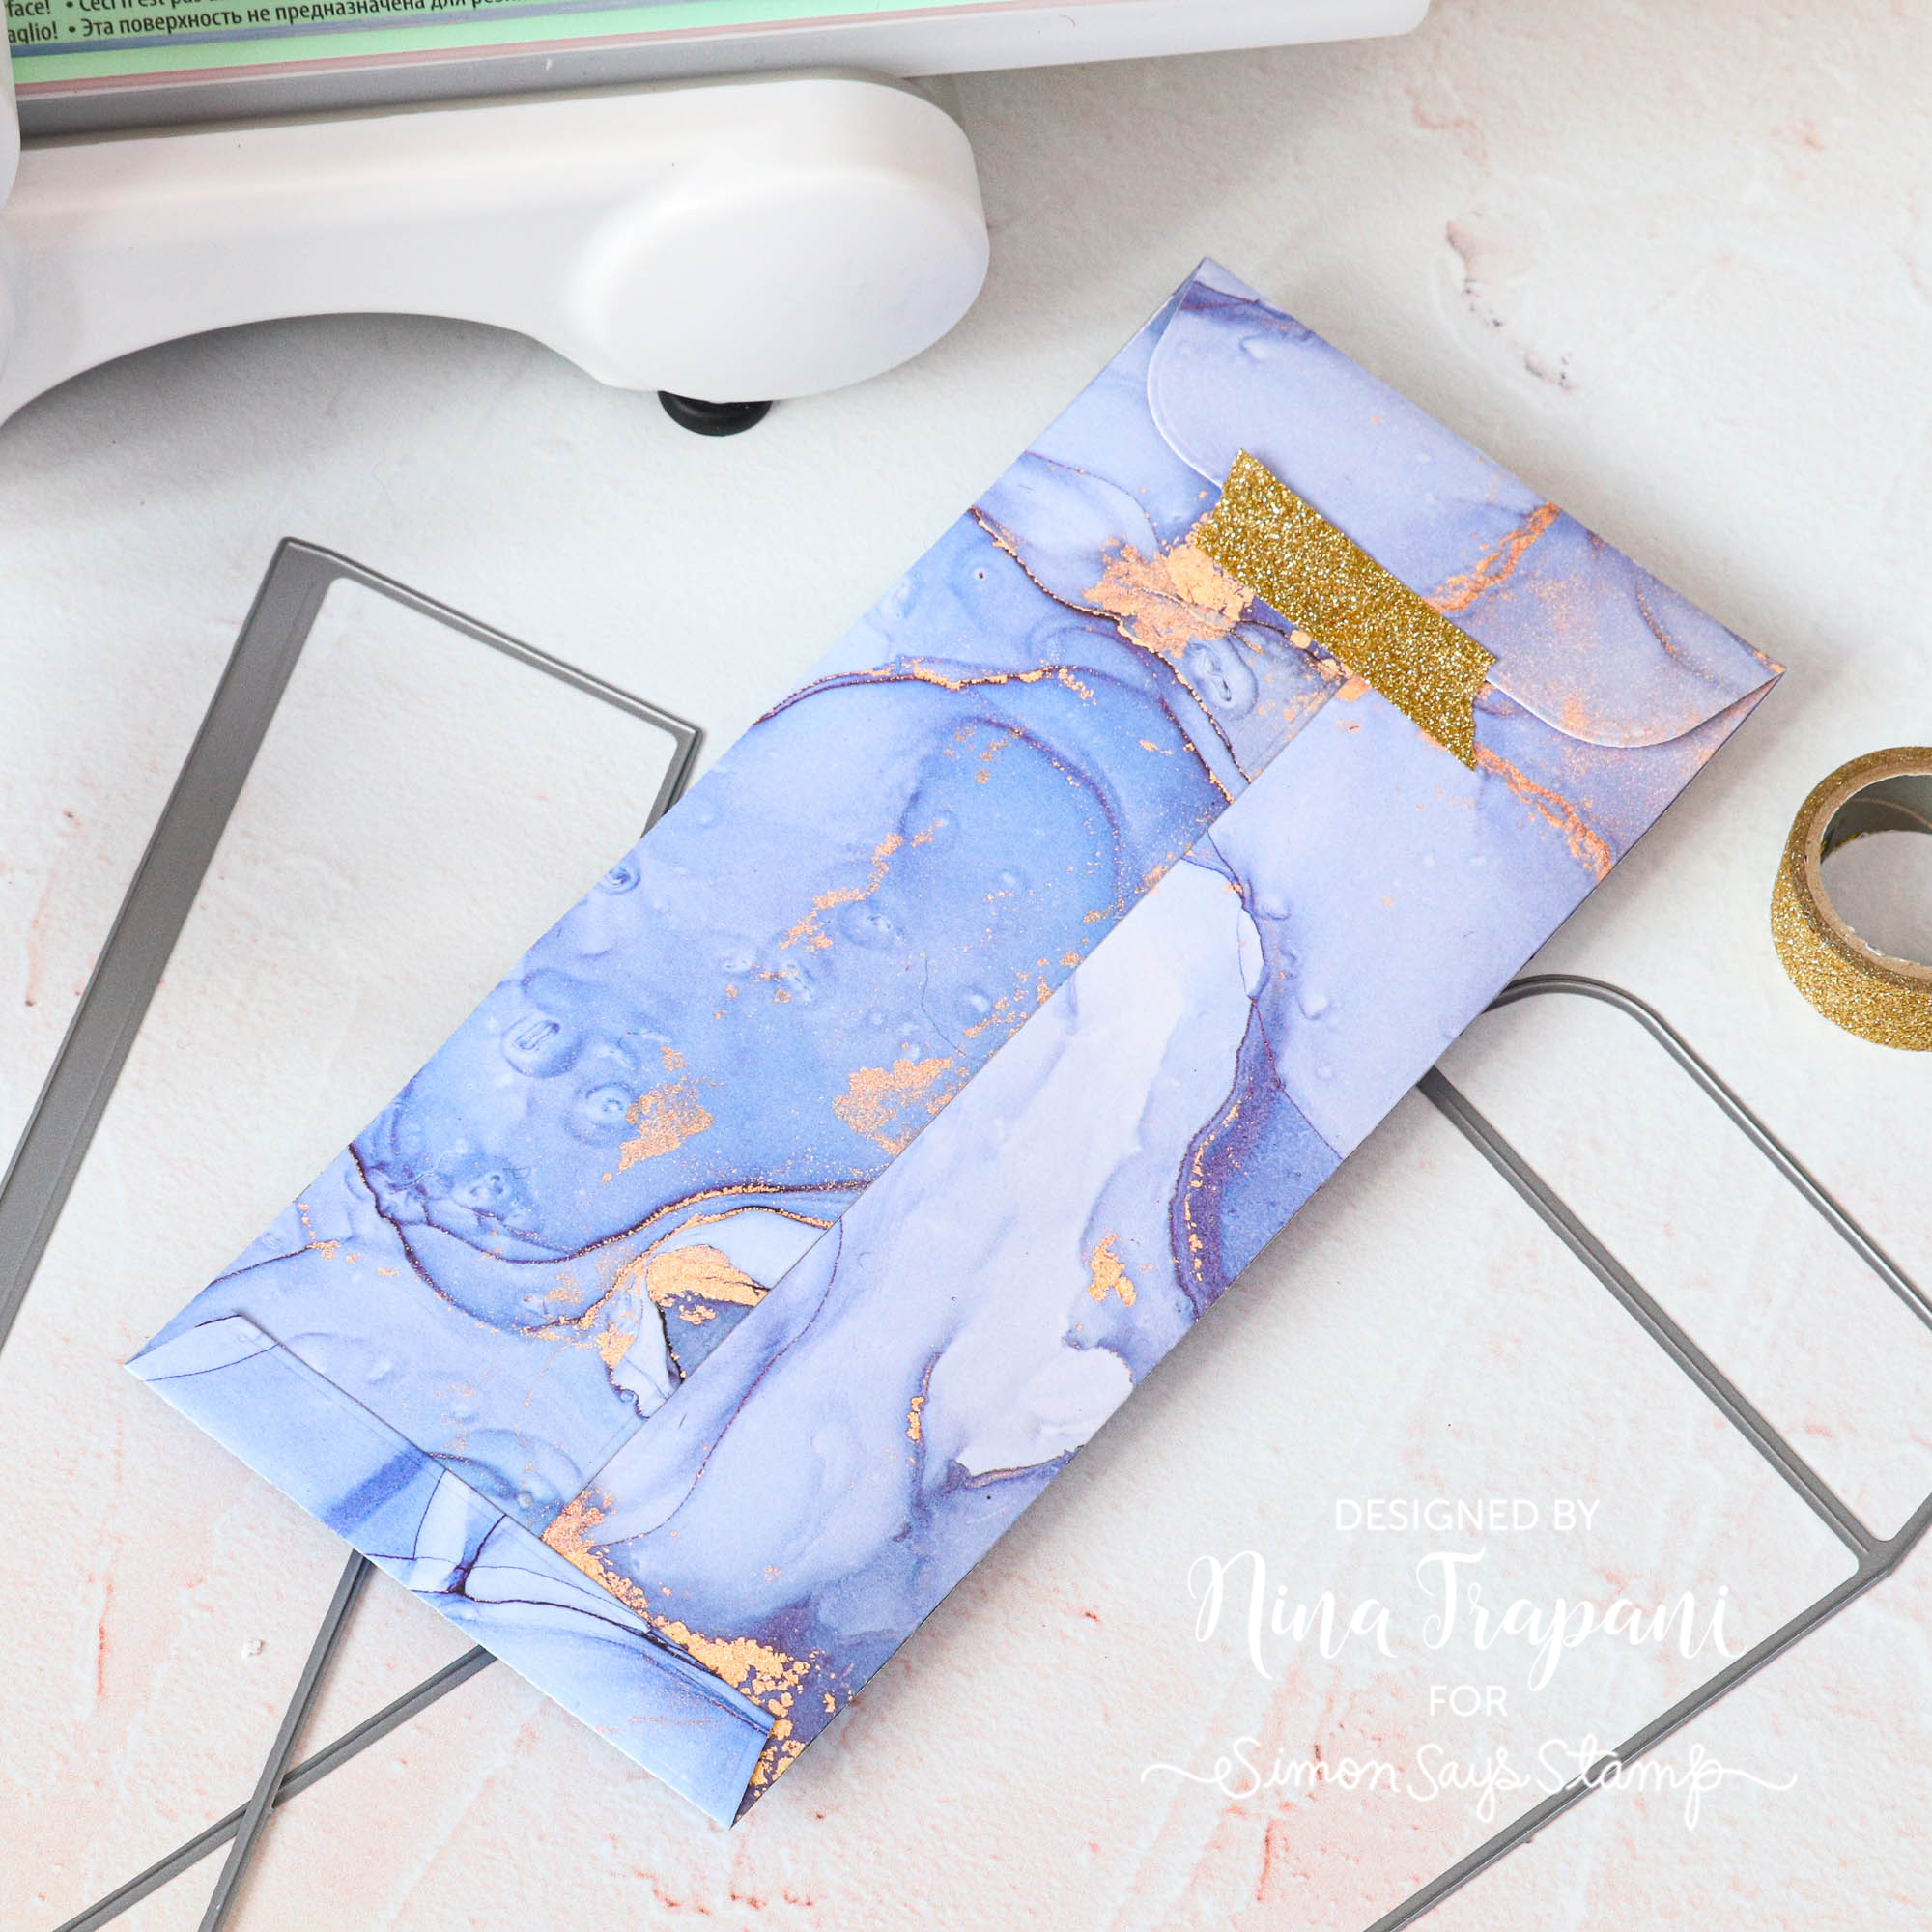
Custom envelopes are such a great way to package a handmade card! Have you seen our latest exclusive die, the Slimline Envelope? Our other A2, 4 Bar and 4 Bar Square Flap dies we were so popular, we brought you this slimline size for those long, gorgeous cards you’ve been working on. The die comes with the body and a flap; you’ll cut the flap twice for a beautiful handmade envelope that will be able to go through the mail without any issue!
Simon Exclusive Stamp Storage Pockets
Did you know that our Simon exclusive stamp storage pockets have great use for items other than stamps and dies? I love using them to store our exclusive Watercolor Cards and Sentiment Strip sets – this allows me to keep each pack organized so that I know exactly what I have and from what collection a card or sentiment came from!
I hope these tips have helped you learn a few tricks for your upcoming crafting projects… Thanks for tuning in today and spending some time with me!
SUPPLIES
|


Amore Laurafadora: Slimline Scene Builder

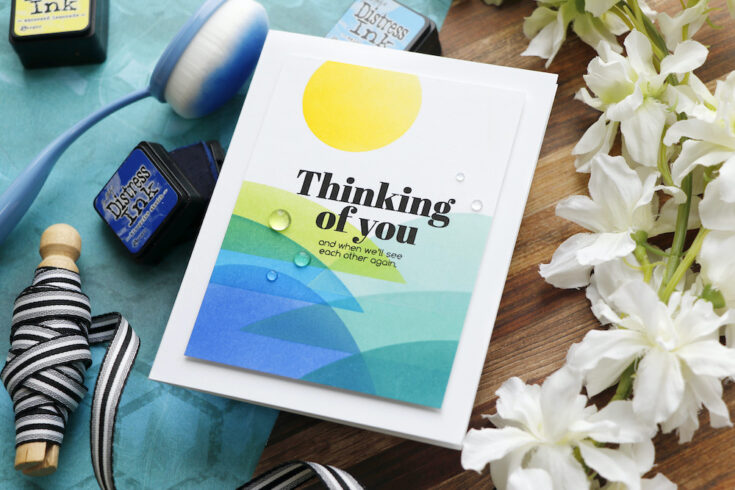
Hi friends!! TGIF! Welcome to the latest edition of Amore Laurafadora, our bi-monthly blog series with Laura Bassen! Today she’s spotlighting our new Slimline Scene Builder stencil coupled with our Greetings Mix 2 stamp set for a great sentiment to send a card now! Be sure to watch the video for more info! Enjoy!

WATCH THE VIDEO:
SUPPLIES:
|


Thanks so much for stopping by, and thanks to Laura for being our guest!
Yippee for Yana: Pun Intended Greeting Cards
Hi friends! Happy Thursday! Welcome to the first edition of Yippee for Yana for 2021! Keep scrolling and be sure to watch the video to see how Yana made 5 gorgeous clean and simple cards! Enjoy!

Hi everyone, this is Yana Smakula, welcome back for another Yippee For Yana video! The cards I have for you today are all extremely simple to make, and each offers some sort of wordplay. These are fun and quirky to give to your loved one, your partner, or even your close friend.
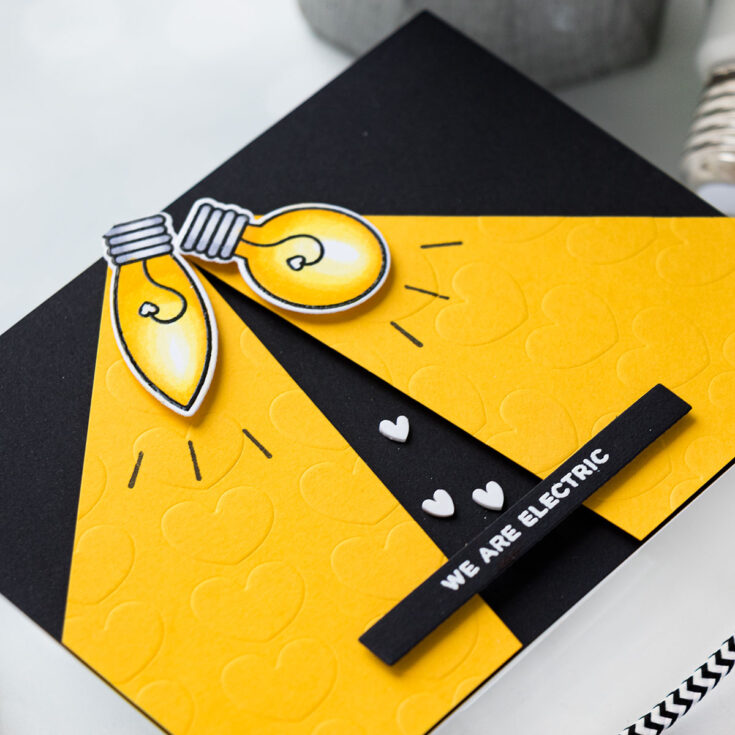
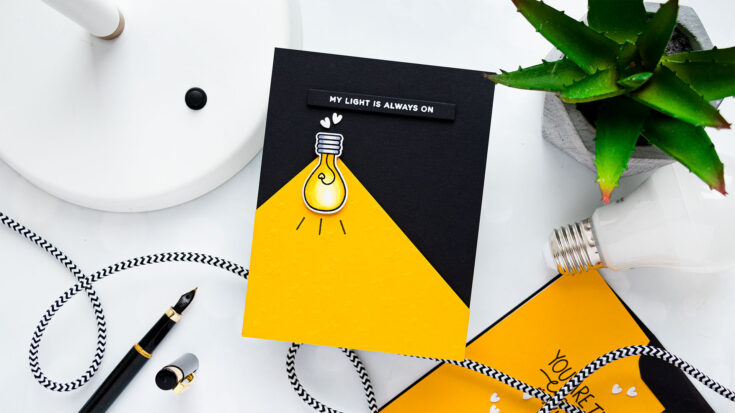
The star of the show for today’s projects is this awesome Light Me Up stamp set from Cathy Zielske for Simon Says Stamp. This stamp set has loads of wordplay sentiments, such as – You Light Me Up, You Are the Light of My Life, Love You Watts and Watts, My Light is Always On, We Are Electric, and more! It also has several images of light bulbs in different shapes. There are additional other images in this set, but we will just be using the light bulbs for the cards I have in mind today.
This stamp set has coordinating dies available, they are sold separately, and I encourage you to pick up the dies as well – they not only cut the images but also the sentiments from this set. Of course, if you have a similar set in your stash – do take it out and play! I urge you to join me and create several punny greeting cards.
In addition to this stamp set, we will also need black cardstock, to symbolize darkness, yellow cardstock to symbolize light, some Copic marker friendly ink, to do our stamping, and a handful of Copic markers to color the light bulbs for our cards.
These cards can’t get any simpler. Begin by stamping the images of the light bulbs on white cardstock in Memento Tuxedo Black ink and do simple coloring.
I used several gray and several yellow markers. I used C5, C3, and C1 gray markers, these are cool grays and they work really well for coloring nonliving things gray. Like this metal part of the light but. Next, color the light bulbs yellow. For this, I used 4 markers – Y11, Y13, Y15, and Y35.
Use your coordinating dies and cut the light bulbs out. With the main element ready, we can build the other elements for our cards. Use black and yellow cardstock, white heat emboss sentiments, and white plastic hearts to pull these cards together.
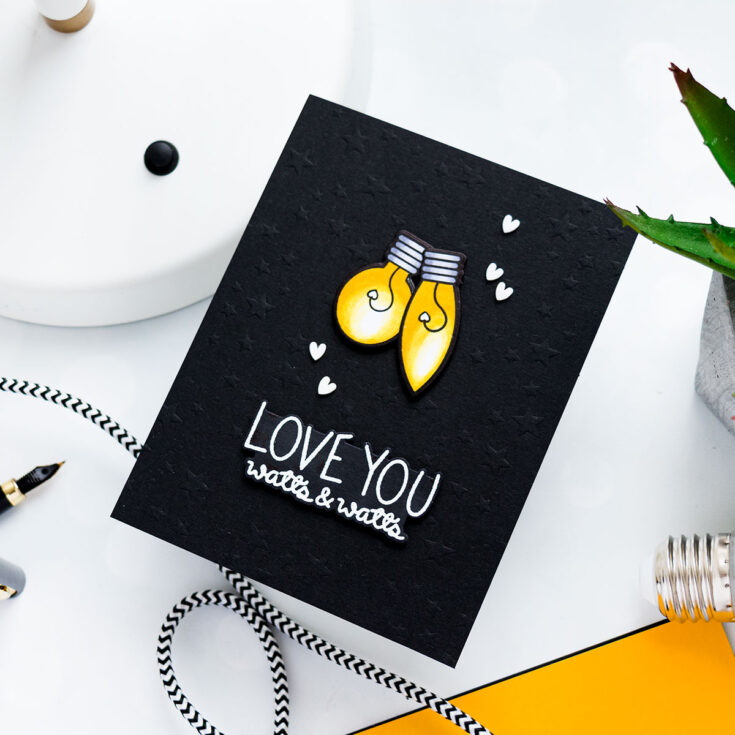
Love You Watts & Watts card:
- Dry emboss 4 ¼ x 5 ½ black cardstock panel using Scattered Stars stencil. Adhere panel to A2 white card base.
- Color the white border around the lightbulbs black using a black marker. Foam mount onto the card.
- White heat emboss “Love You Watts & Watts” sentiment. Cut out with coordinating die. Foam mount to the card.
- Embellish card with white plastic hearts.
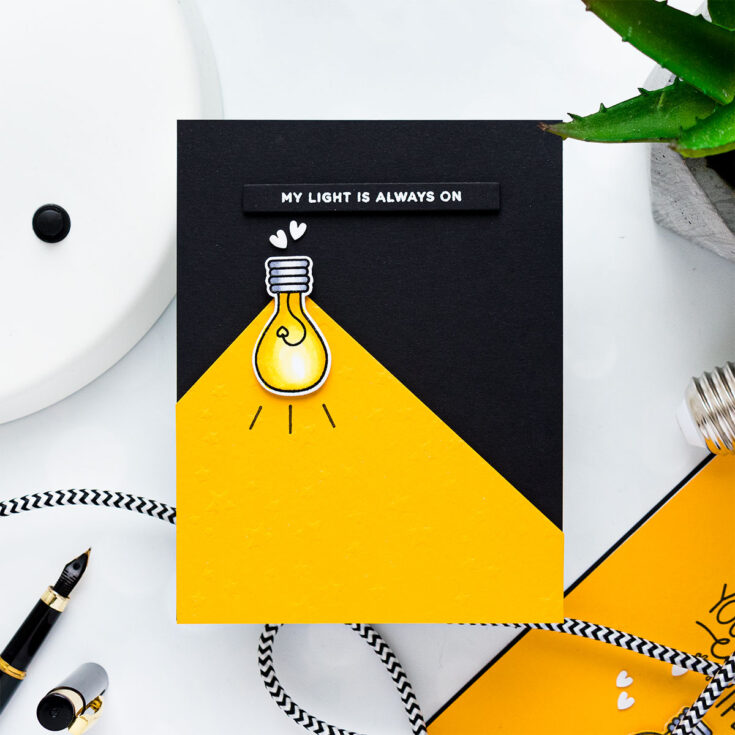
My Light is Always On Card
- Cut black cardstock panel to 4 ¼ x 5 ½”. Adhere to A2 white card base.
- Cut yellow cardstock at an angle. Dry emboss using Scattered Stars stencil. Foam mount onto the card.
- Foam mount light bulb. Stamp black lines under the light bulb.
- White heat emboss “My Light is Always On” sentiment. Cut out using a strip die. Foam mount to the card.
- Embellish card with white plastic hearts.
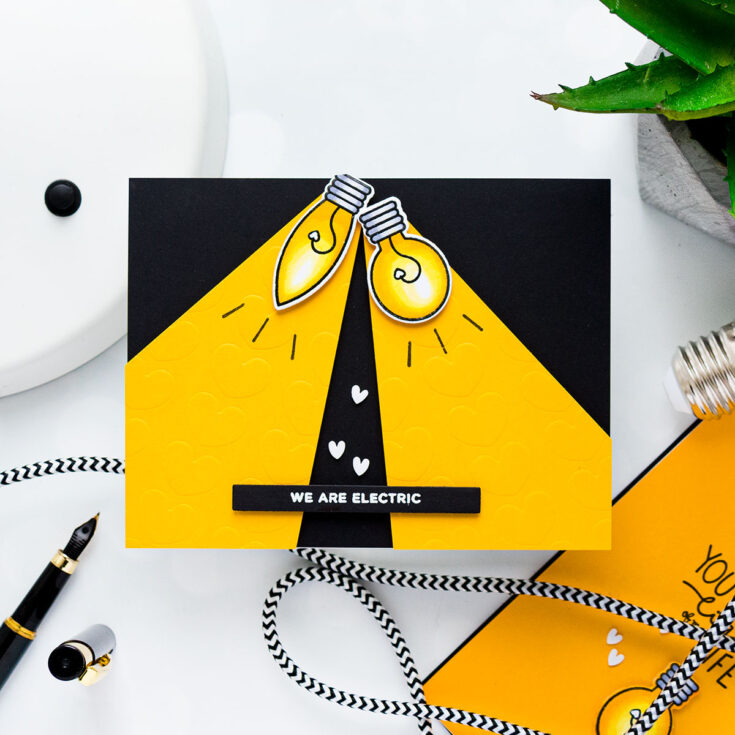
We Are Electric Card
- Cut black cardstock panel to 4 ¼ x 5 ½”. Adhere to A2 white card base.
- Cut 2 yellow cardstock panels at an angle. Dry emboss using Layering Hearts stencil. Foam mount onto the card.
- Foam mount light bulbs. Stamp black lines under the light bulbs.
- White heat emboss “We Are Electric” sentiment. Cut out using a strip die. Foam mount to the card.
- Embellish card with white plastic hearts.
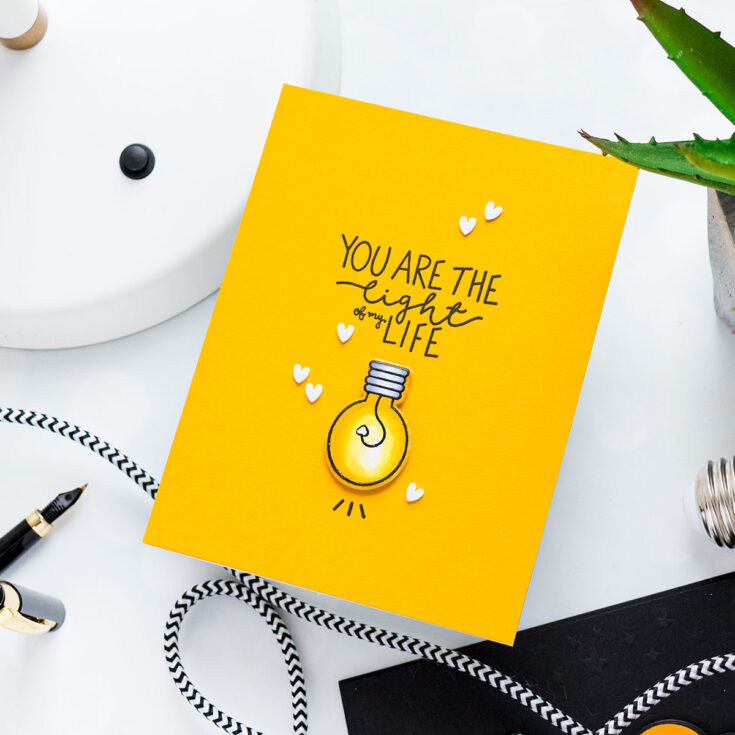
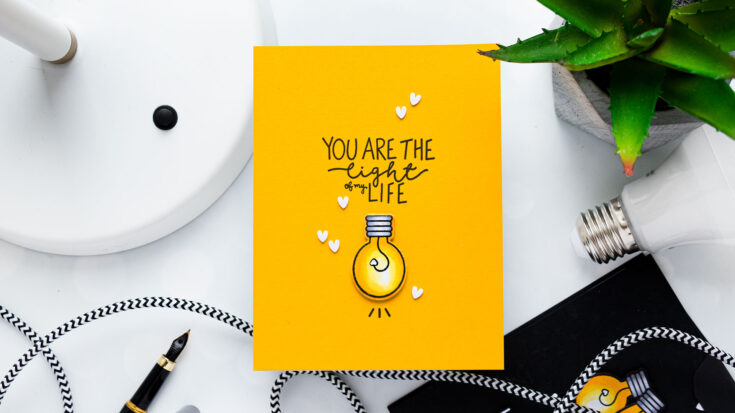
You Are The Light of my Life Card
- Stamp sentiment, lightbulb, and lines in VersaFine Onyx Black ink onto yellow panel cut to 4 ¼ x 5 ½”. Adhere panel to A2 white card base.
- Foam mount light bulb onto the card.
- Embellish card with white plastic hearts.
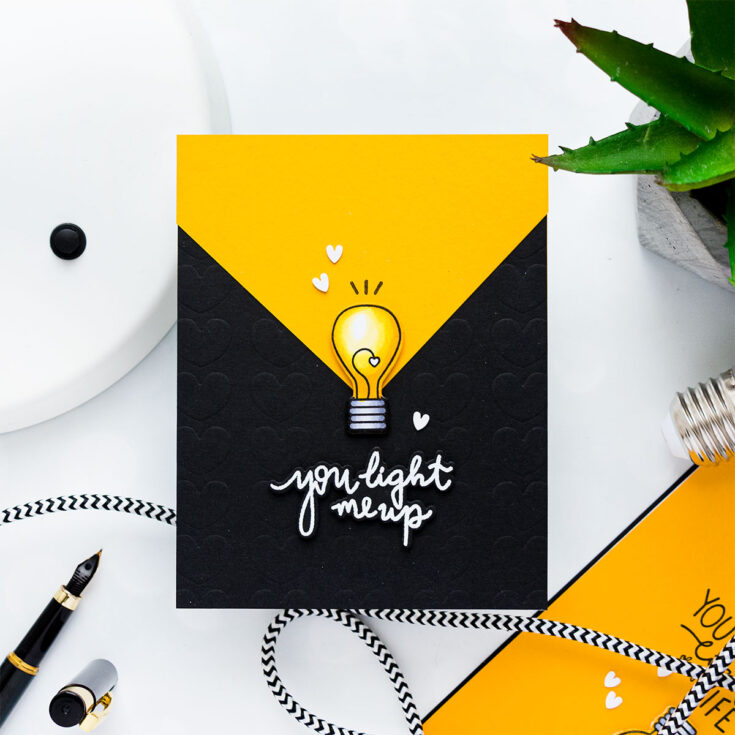
You Light Me Up Card
- Cut black cardstock panel to 4 ¼ x 5 ½”. Dry emboss using Layering Hearts stencil. Adhere to A2 white card base.
- Cut yellow cardstock panel at an angle. Adhere to the card.
- Foam mount light bulb. Color white border using yellow and black marker to match the background. Stamp black lines above the light bulb.
- White heat emboss “You Light Me Up” sentiment. Cut out using a strip die. Foam mount to the card.
- Embellish card with white plastic hearts.
Have fun stamping!
WATCH THE VIDEO:
SUPPLIES:
|


Thanks so much for stopping by, and thanks to Yana for being our guest!


