January 2021 Card Kit Inspiration with Kristina Werner (One-Layer Cards)
Hello, all! Kristina Werner here. :)
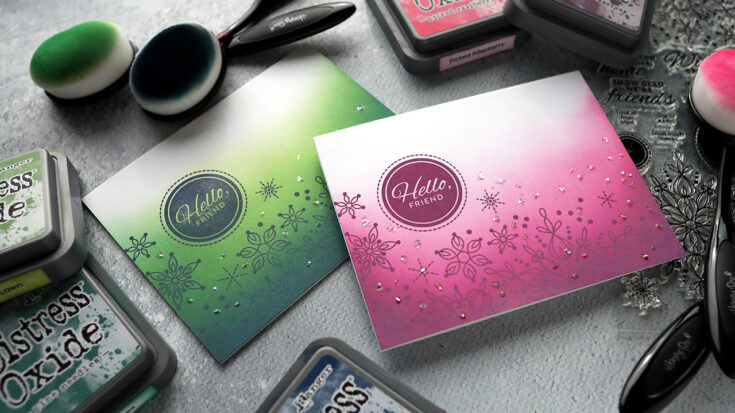
Today I have some one-layer card inspiration using supplies included in the January 2021 Card Kit! The Snowflake Season stamp set is perfect for some stamping over inked backgrounds!

I first created two ink blended backgrounds using Distress Oxide inks. I used Picked Raspberry and Seedless Preserves on one, and Mowed Lawn, Pine Needles, and Chipped Sapphire on the other.
I then stamped the images from the Snowflake Season stamp set over the blending. I stamped the large border image, the “Hello, friend” circle greeting, and some smaller individual snowflakes.
To finish off the card, I added small dots of the glue included in the kit, and sprinkled a bit of Unicorn Glitter on top.
I hope you enjoy today’s cards! You can pick up the January 2021 Card Kit HERE, or subscribe to receive this kit and future kits HERE.
Supplies
|


Art Journaling with Shari Carroll: 2021 Send Help!
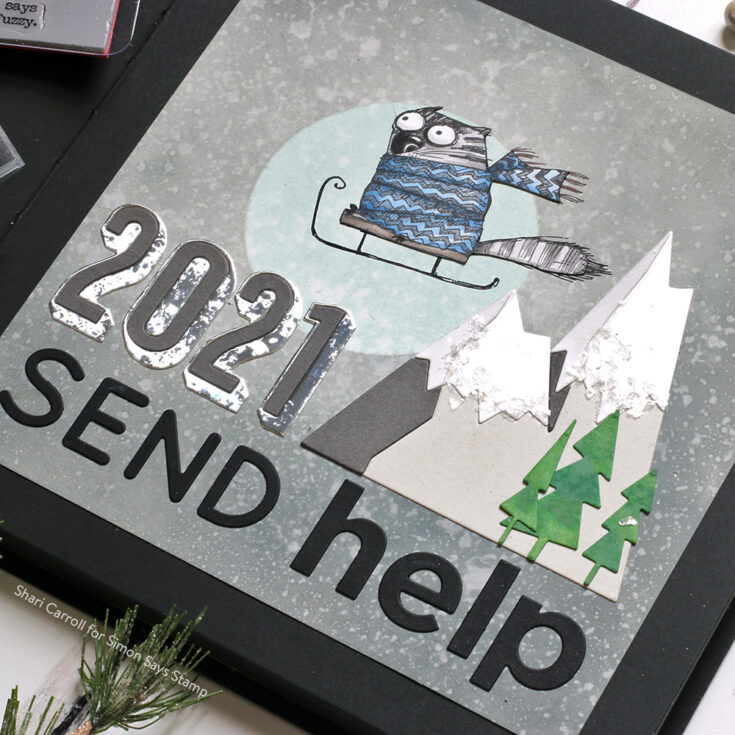
Welcome everyone! It’s Shari here with an art journal page inspired by Tim Holtz Snarky Cats and the thought that 2021 could send some help!!
I’ve been wanting to play with the Snarky cats with the mountains for sometime and thought this was a great way to end the year for my art journal feature.
My cat appears to be taking flight from the mountain tops with an undetermined look on his face as I’m sure most of us feel we’re “out of control” of our lives for this year 2020. But have no fear… a sparkly new 2021 is almost here!
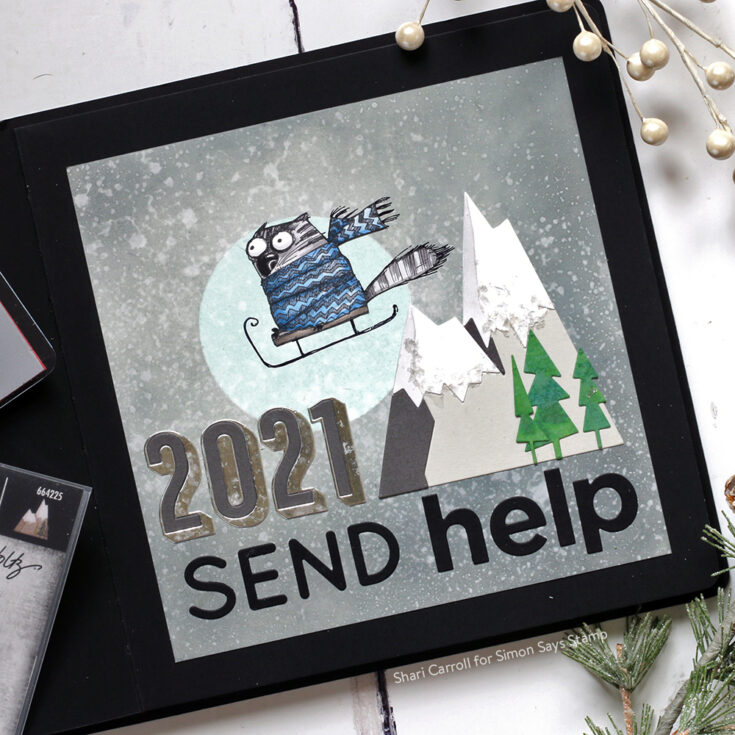
I’ve used Ranger Specialty stamping paper for the background, it allows the inks to slide across the surface for easy blending. I’ve stamped the cat onto the background and also onto a separate piece of cardstock to color and mount on top. This way, I preserve all the hairs and small details.
I’ve filmed the process for you in the video below. ENJOY!!!
SUPPLIES:
|


Doodling with Debby: Watercoloring A Glass Jar
Hi friends! Please join me in welcoming special guest Debby Hughes as our monthly guest on our Doodling with Debby blog series! Read on and enjoy!

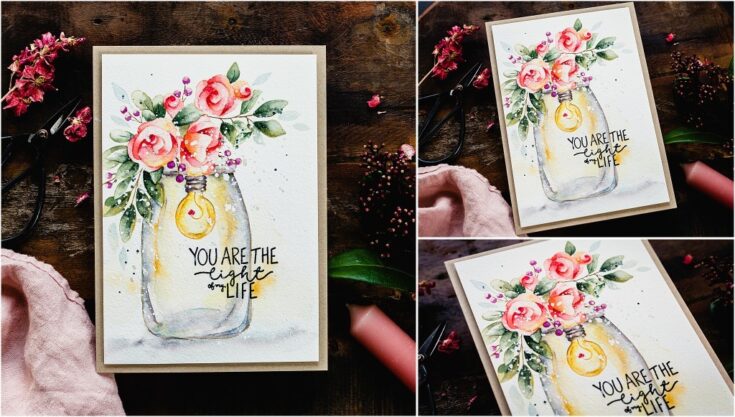
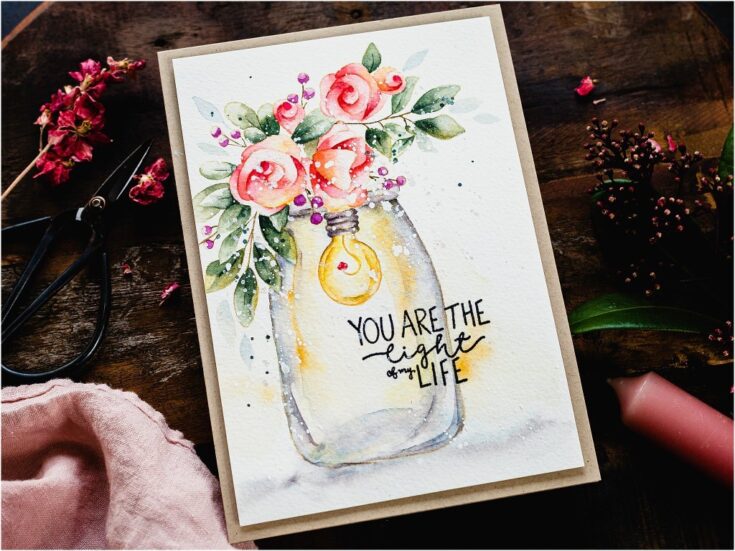
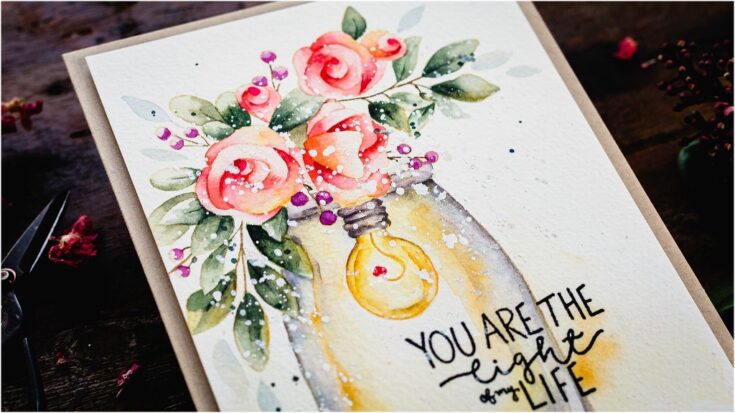
Hello, it’s Debby here and today for my Doodling With Debby series I’m using a couple of the new sets from the Love You Release from Simon Says Stamp and with a glass jar and glass light bulb to colour, I’ll be chatting about how to approach watercolouring glass.
It isn’t that often that I paint glass and certainly not for quite some time. I don’t profess to be an expert on watercolouring glass, far from it, but I thought you find it interesting seeing in the video my process and how I slowly worked out a method for painting glass.
STEP BY STEP HOW TO
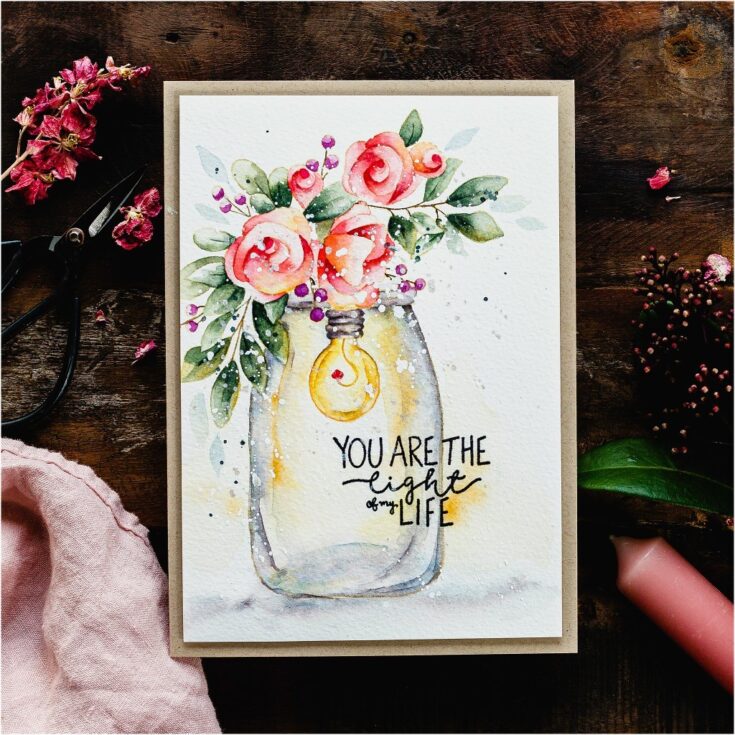
- On a piece of Fabriano Extra-White Cold-Pressed watercolour card, stamp the flower bouquet from the You Have My Heart set in Antique Linen Distress Ink.
- Follow up with the jar and light bulb from the Light Me Up set by selectively inking the images so that they don’t stamp over the flowers. Alternatively, mask the flowers so that you don’t have to worry about where the other elements stamp.
- Tape the watercolour card to a firm surface such as a craft mat, board etc. which will stop it warping when adding lots of water.
- Paint with watercolours – I used Daniel Smith paints. Keep in mind the colours and reflections in glass objects.
- Extend the flower image by painting leaves in a light tone so that they appear to be behind the main focal point.
- Stamp a greeting from the Light Me Up set in Versafine Clair Nocturne ink so that it overlaps the side of the jar.
- Splatter with Perfect Pearls, white gouache and left-over paint.
- Trim the watercolored piece to be just smaller than a 5 x 7 card.
- Foam mount to a card base cut and scored from Neenah Desert Storm card in the sturdy 100lb weight.
Well, that’s me for this month. I hope you enjoyed this tutorial, you’ll find the video below. Thanks for joining me and I hope to see you next time for Doodling With Debby.
WATCH THE VIDEO:
SUPPLIES:
|


Thanks so much for stopping by, and thanks to Debby for being our guest!


