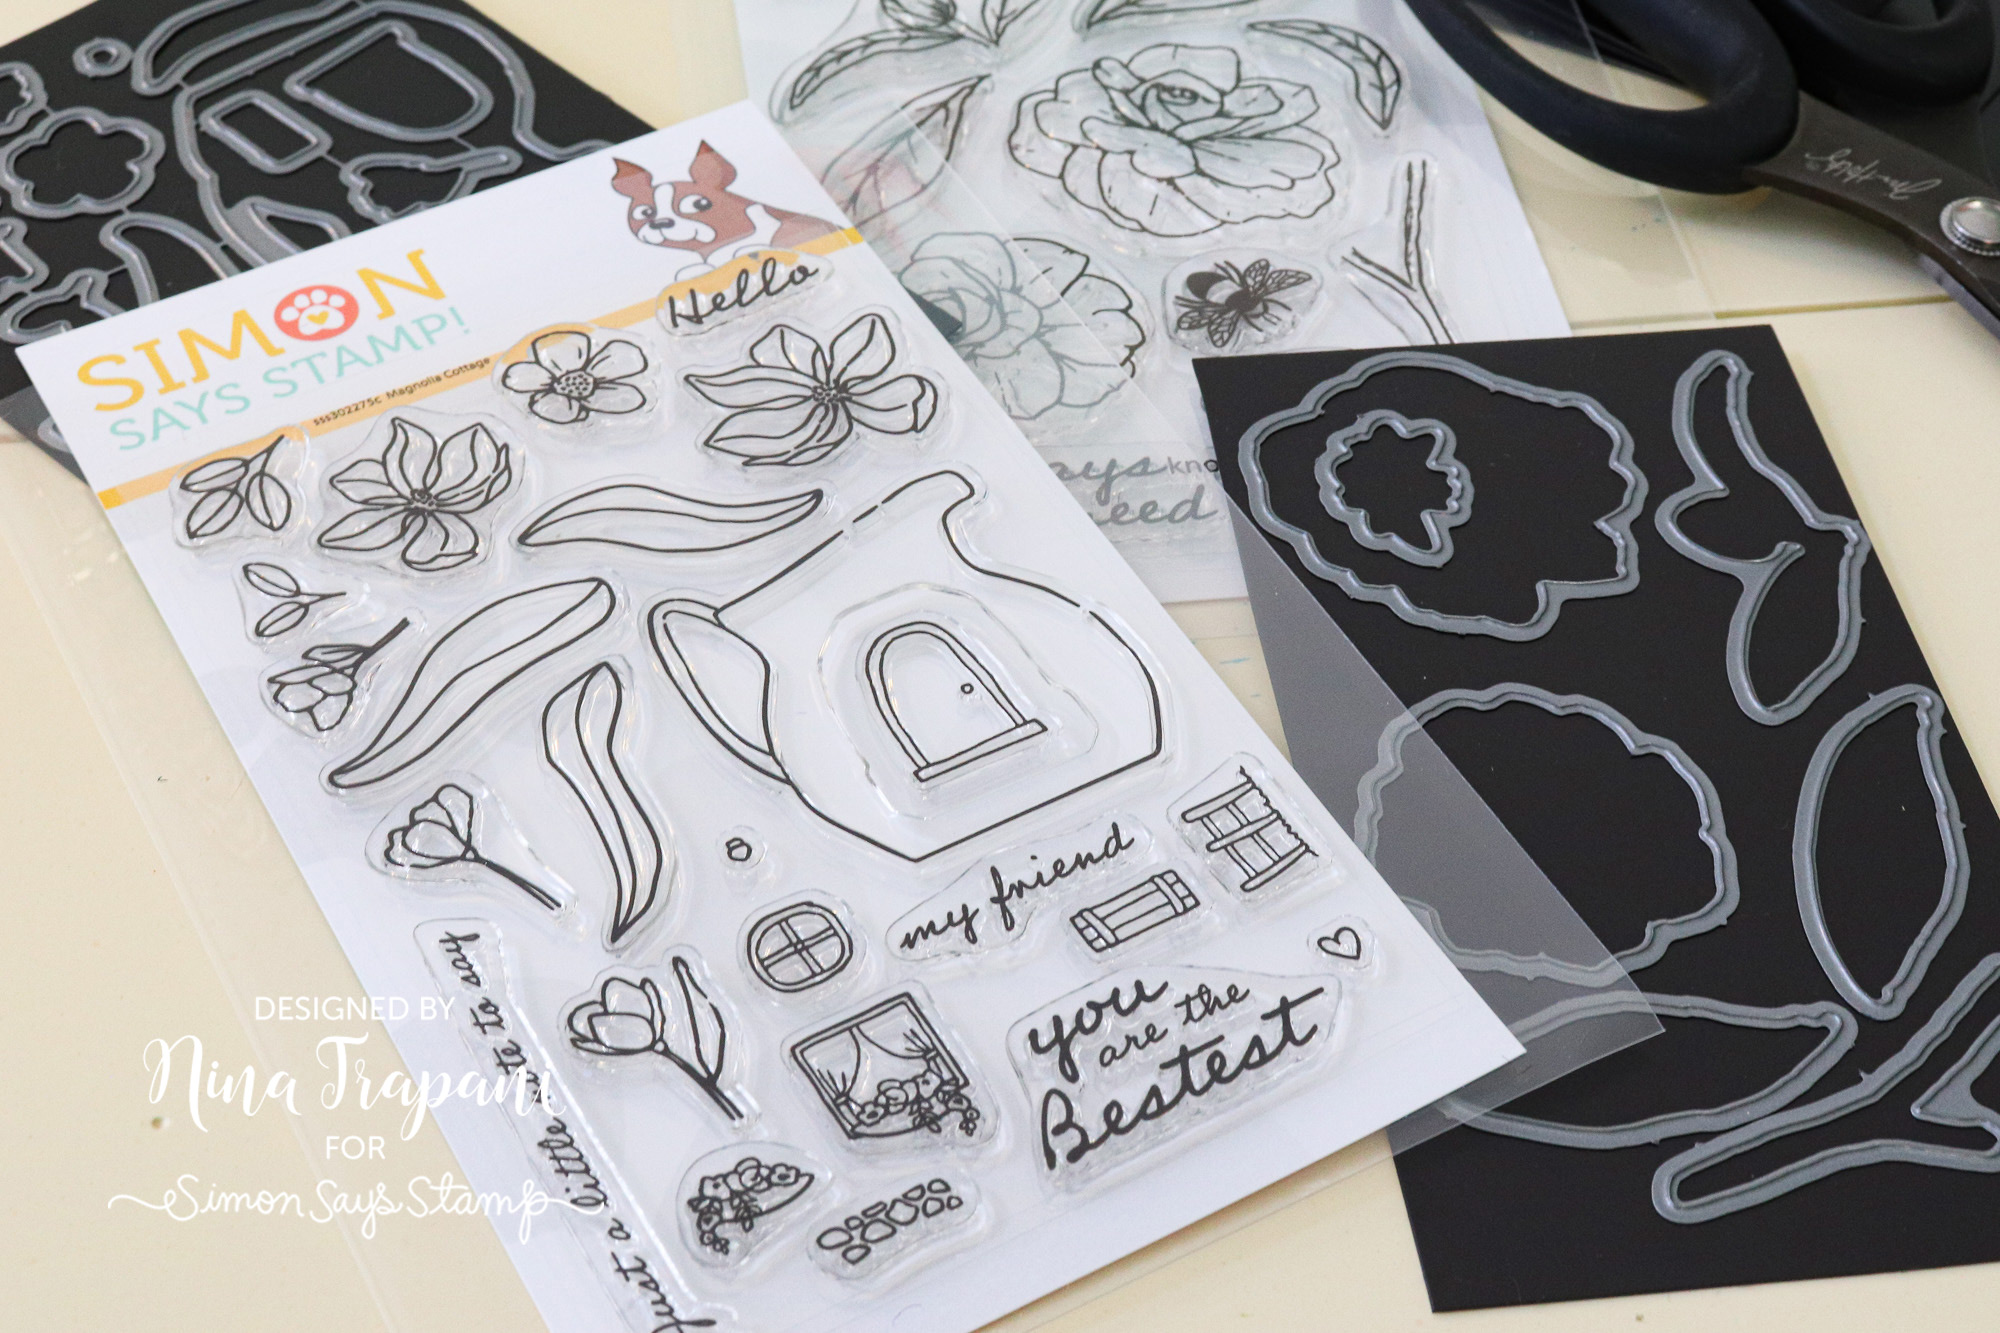
Snarky Cats Mini Slimline Valentine
Hi friends! Happy Tuesday! Please join me in welcoming back special guest Cheiron Brandon to our blog today sharing these sweet and sassy Snarky Cat Valentines! Read on and enjoy!
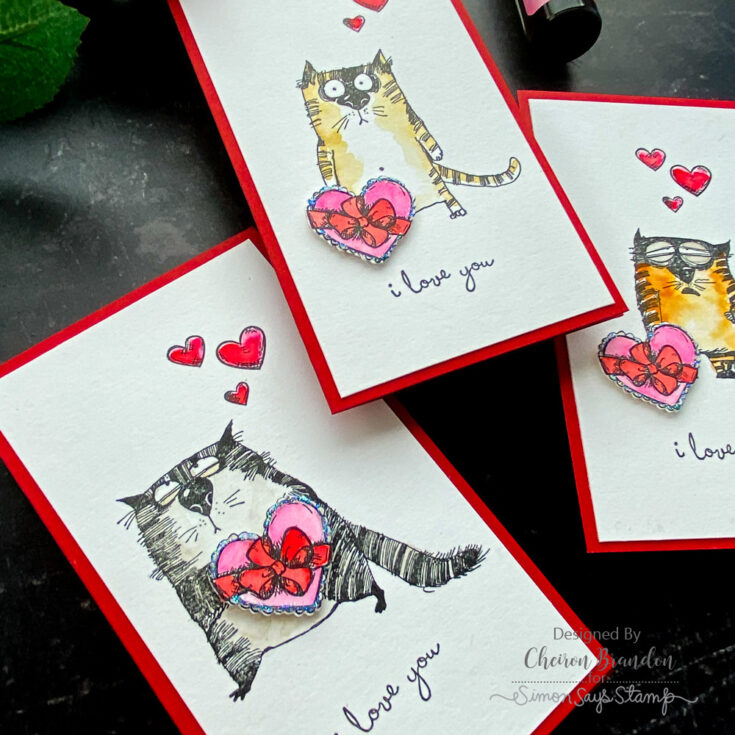
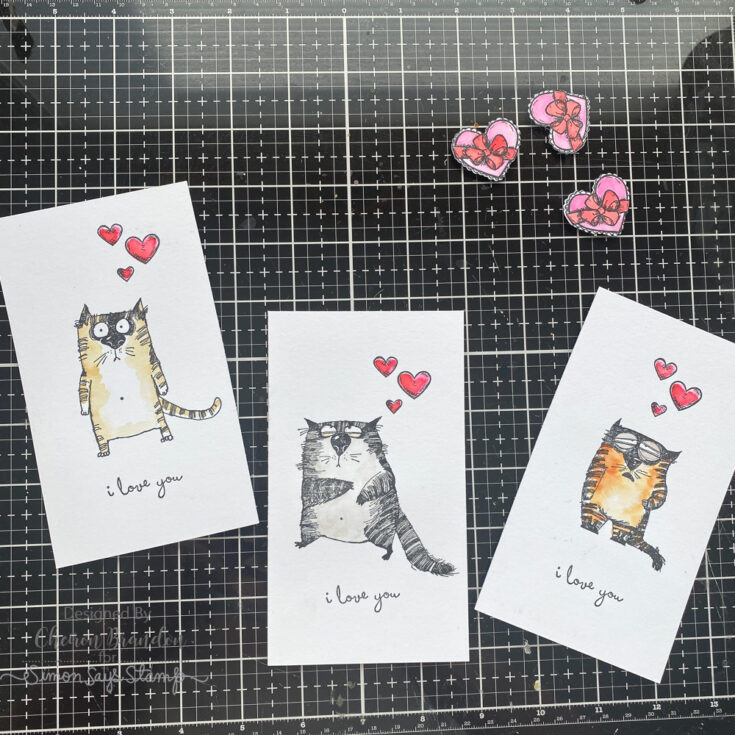
Hi there crafty friends, it’s Cheiron here with an idea for some quick Valentine cards using the Tim Holtz Snarky Cat stamps. I combined these favorite stamps with some older favorite stamps sets – Crazy Talk and Crazy Things. These sets work perfectly together and I thought they would be great for some Mini Slimline Valentines. These Snarky Cats each have their own personalities and I think they all have different feelings about sharing their candy!
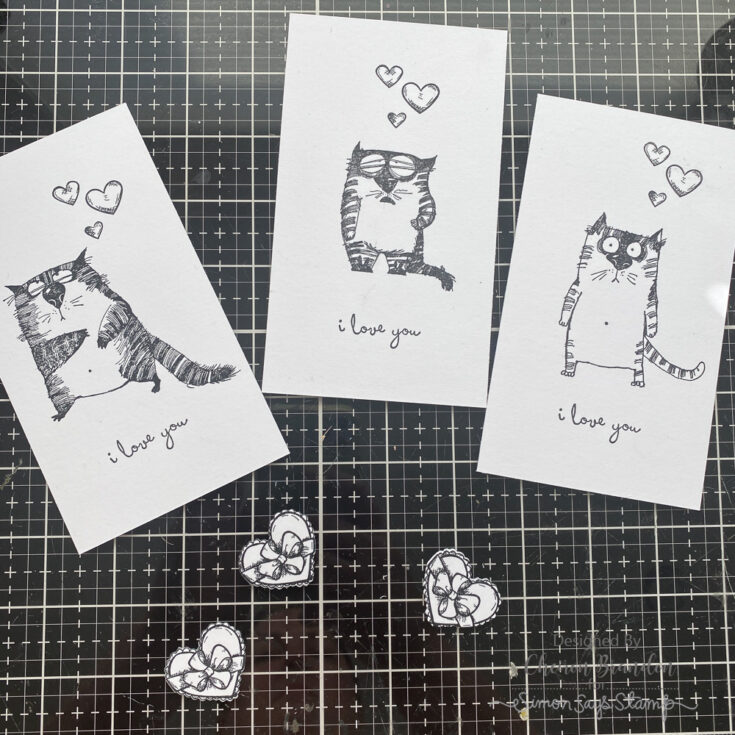
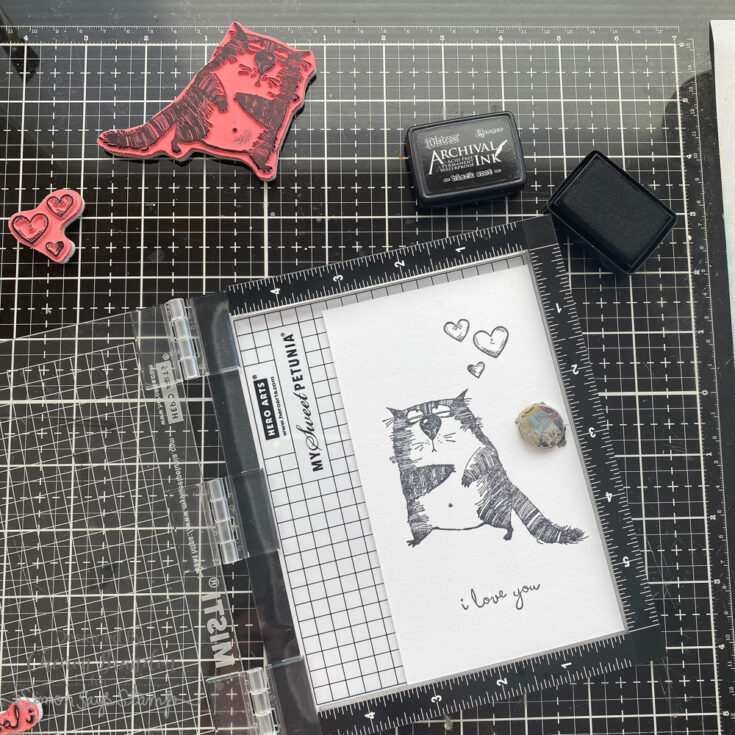
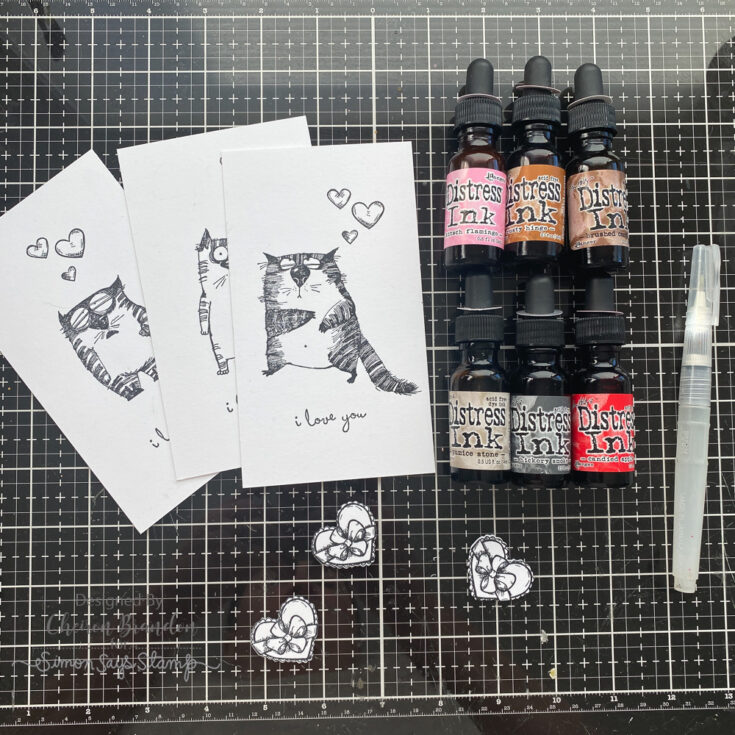
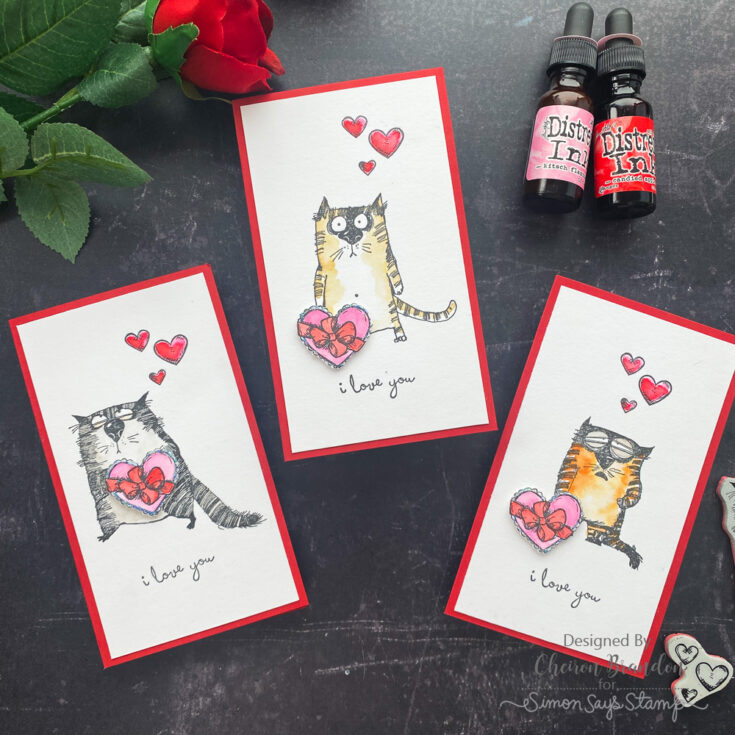
To begin, I stamped out all my images (hearts, cat, sentiment) onto 3 – 3 1/4 x 5 3/4 Distress Watercolor panels using Archival Black Soot Ink. You will want to use a waterproof ink for this, since we will be watercoloring in these images . I also stamped the Heart Gift Box from the Crazy Things stamps onto a separate piece of watercolor cardstock and cut them out. I colored in the images using a Detailer Water Brush and Distress Ink Reinkers in Kitsch Flamingo, Candied Apple, Rusty Hinge, Brushed Corduroy, Pumice Stone, Hickory Smoke. I put the tiniest dot of each Distress Ink reinker onto my glass mat and used the water brush to pick up the color and loosely color the images in.
I mounted each panel to a 3 1/2 x 6 card cut from Simon Says Lipstick Red Cardstock. To finish my cards, I added the Heart Gift Box with a piece of foam tape to give it some dimension and added a bit of Stardust stickles to the “lace” part of the box to give it some sparkle and shine. Hope you enjoyed this idea for creating quick and easy Valentine cards, I will use any holiday as an excuse to use the Snarky Cat stamps.
SUPPLIES:
|


Thanks so much for stopping by, and thanks to Cheiron for being our guest!
Studio Monday with Nina-Marie: Craft Room Organization!

Hello crafty friends, it’s Nina-Marie Trapani here today with a few organizational ideas to share! I am always looking for ways to better organize my craft supplies and these products have been a helpful addition to my studio – so much so, that I want to share them with you!
Scor-Pal Stacker
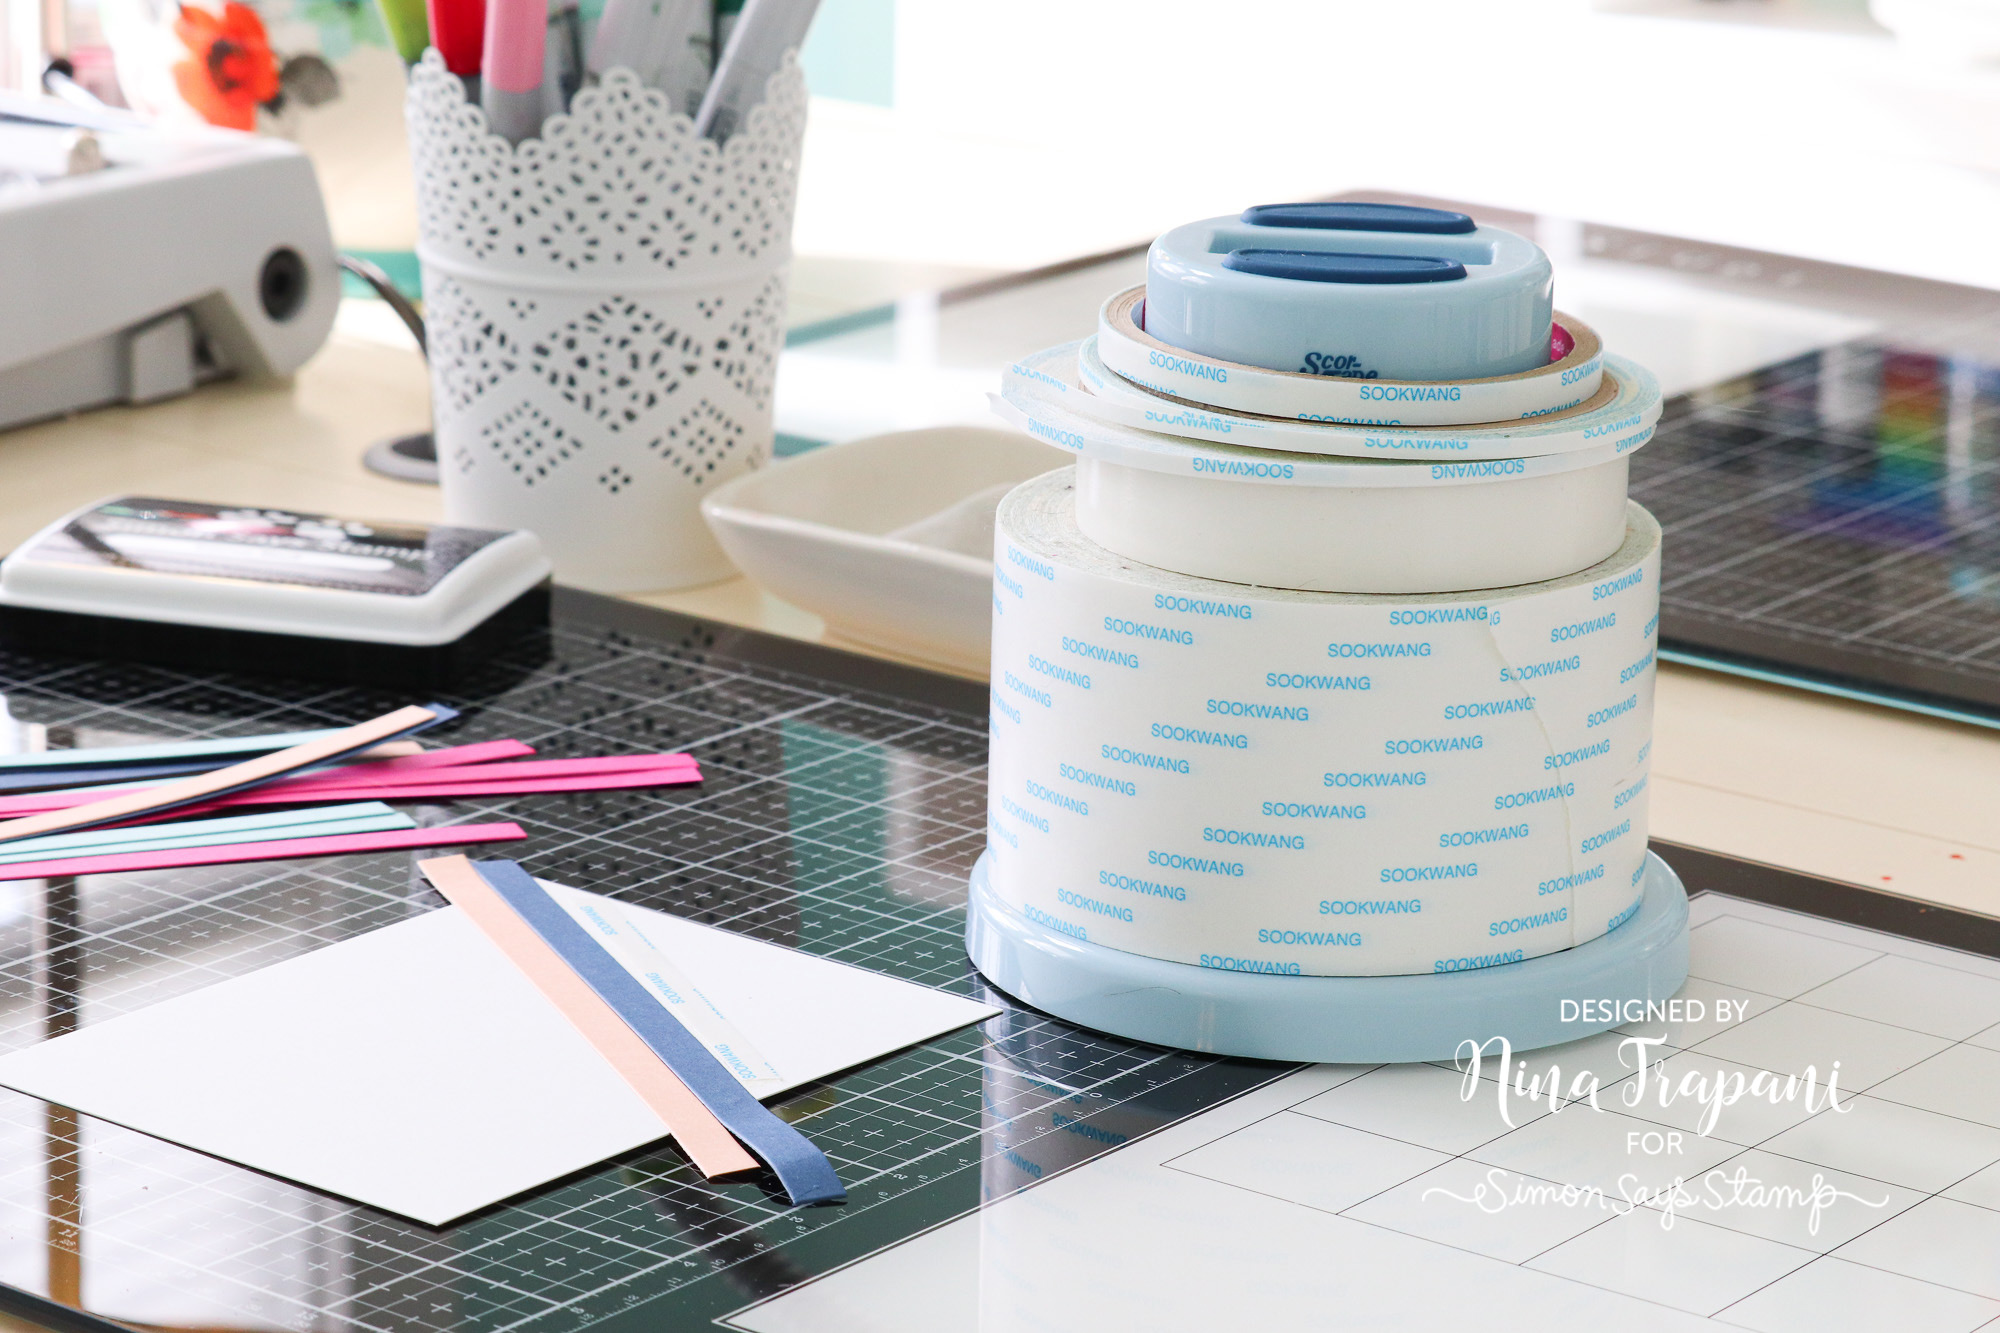
I have really enjoyed the addition of my Scor-Pal Stacker to my craft space as a way to corral all my Scor Tapes! This tool can hold many rolls of tape and allows the tape to be easily used right off the stack!
Round Organizer
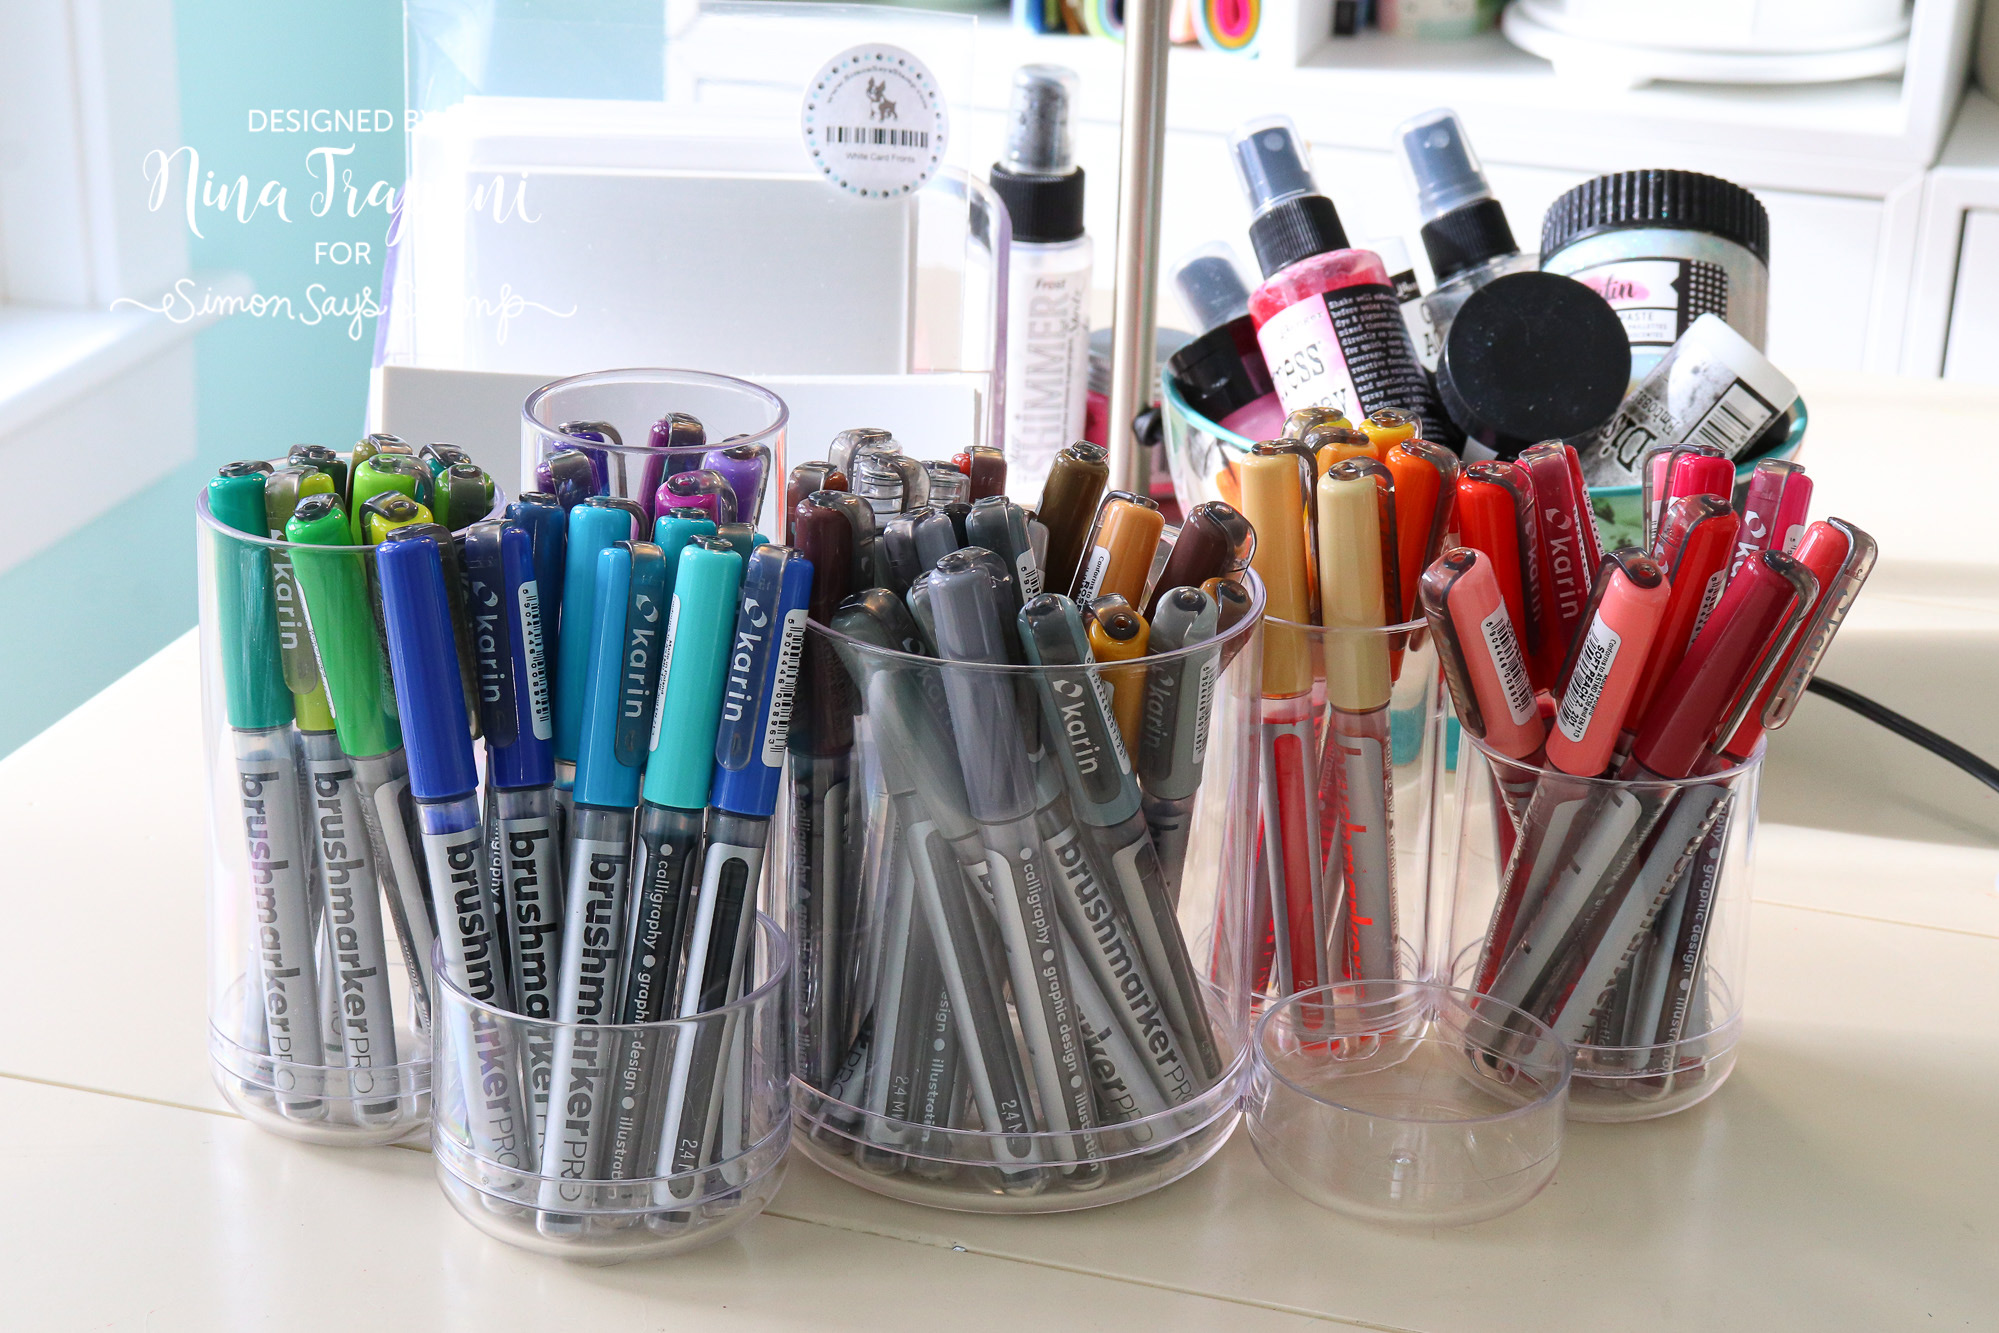
I’m a visual person and I like to be able to see all the colors of my different mediums. So I’ve been looking for a pretty but compact way to organize my Karin markers. When I discovered this acrylic Round Organizer, I was thrilled! It holds my entire set of 60 Karin markers, with room to add. I can also separate the colors out by groups, which makes finding the right color that much easier for me. If you don’t have Karin markers, you could also fill this with markers, pencils, brushes, pens, tools and so much more!
Magnet Sheets
Dies can be tricky to organize, but a couple of my favorite ways to store dies are to stick them to magnet sheets! You can cut magnet sheets to fit in storage sleeves to contain either store stand alone or coordinating dies! If I am putting a coordinating die set onto a magnet sheet, I like to slip it into the storage sleeve with the stamp set it goes with.
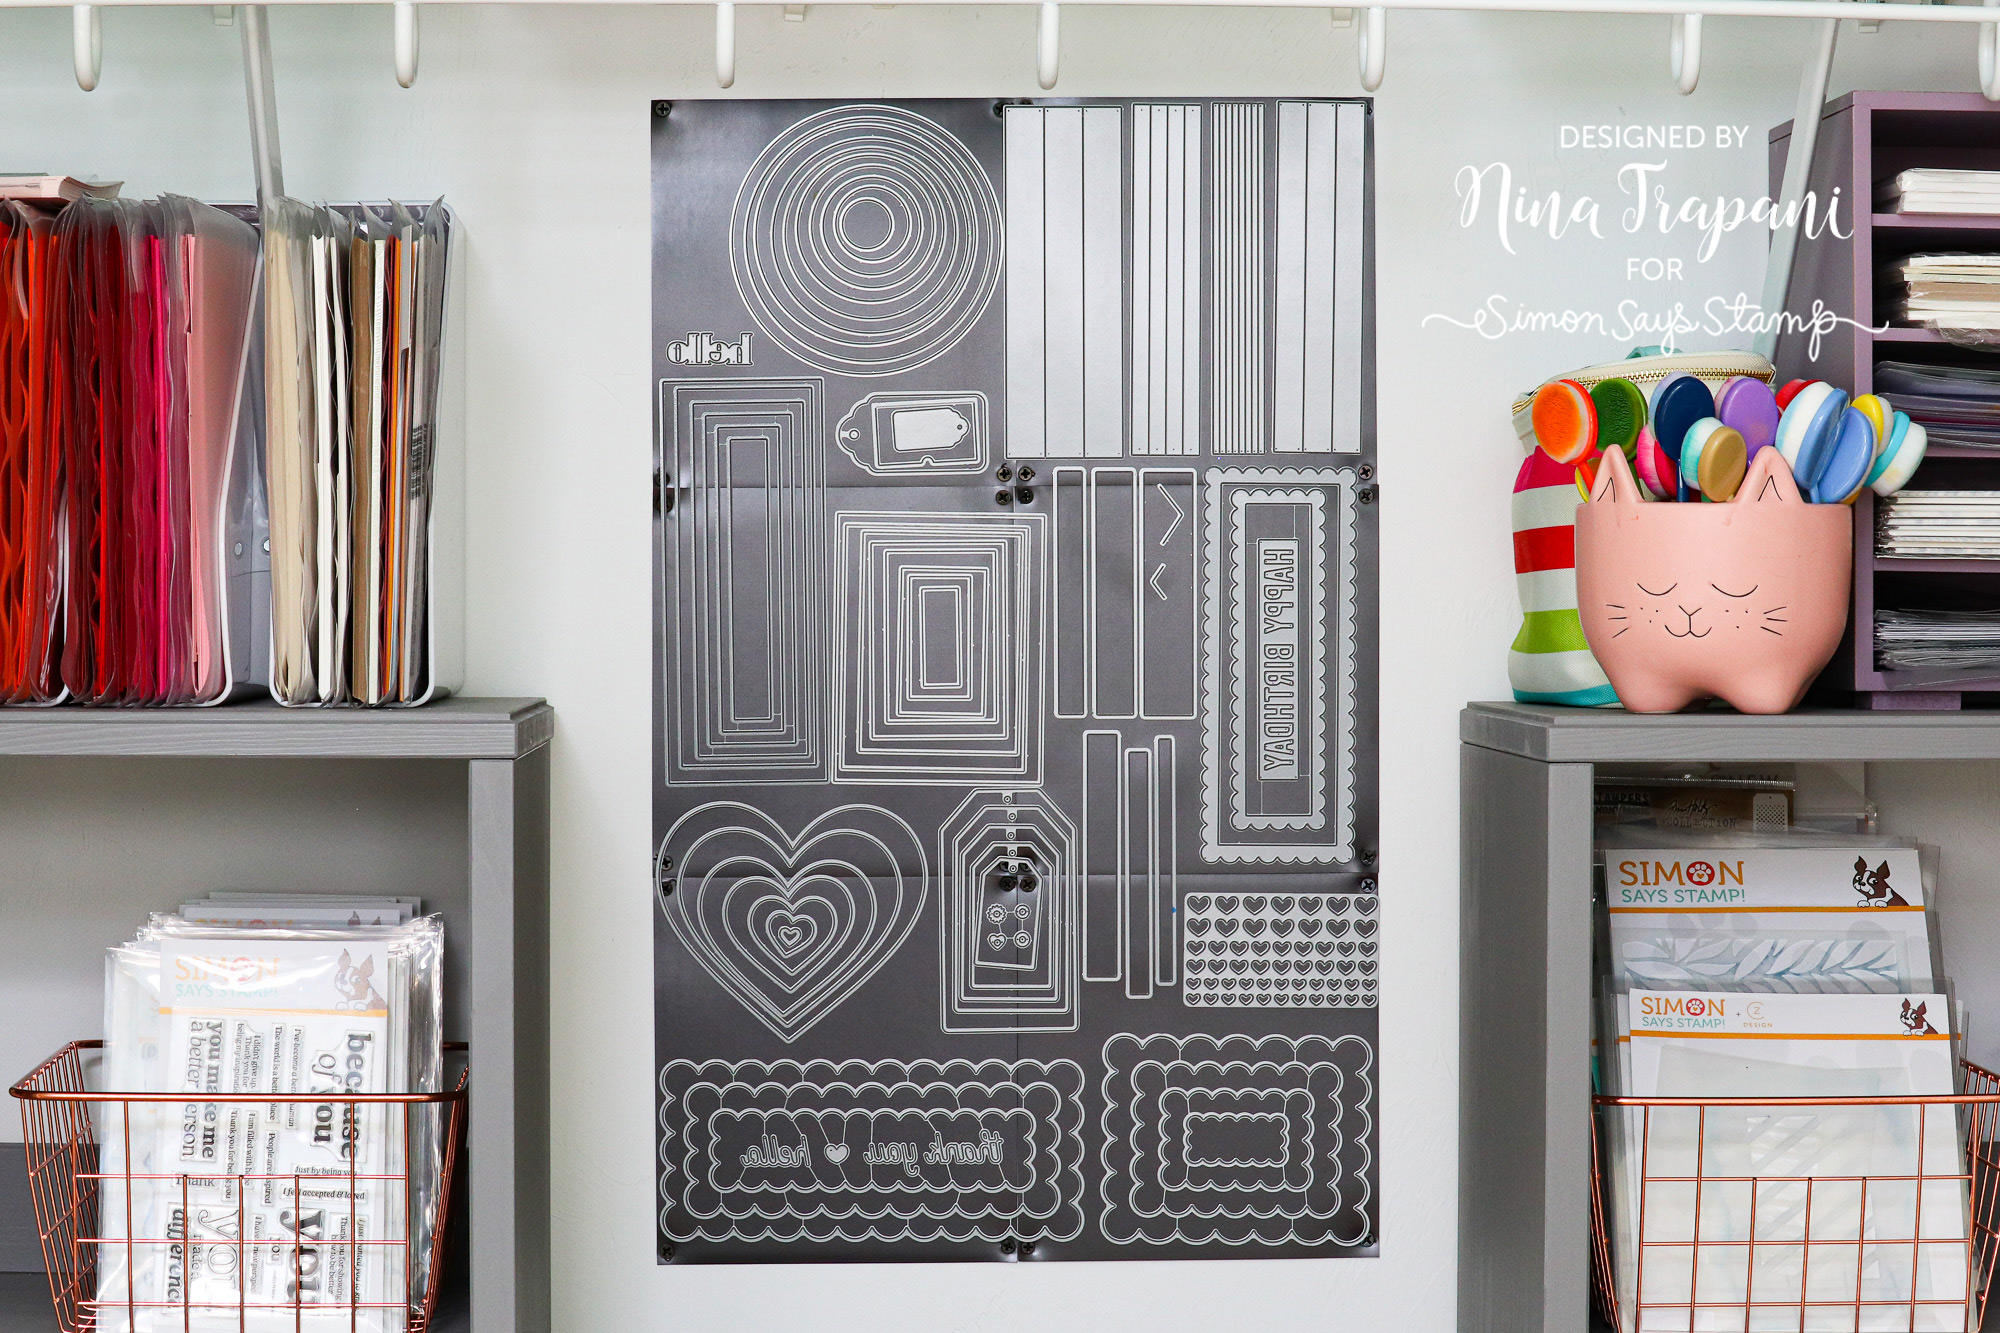
I’ve also recently installed a magnetic wall system inside my closet! This DIY project was inspired by my good friends and Simon teammates, Susan R. and Beth Opel’s craft room. Susan posted a photo of a repurposed door she and Beth have covered with dies. I don’t have the space for something that large, but I had been trying to come up with a way that I could keep my most used dies close at hand. All it took were these magnet sheets, a few black screws and some careful measuring to install this handy, magnetic wall storage in my closet! This has been up for a couple weeks now and I’ve been so happy to have these dies so easily accessible!
Divided Organizer & Storage Sleeves
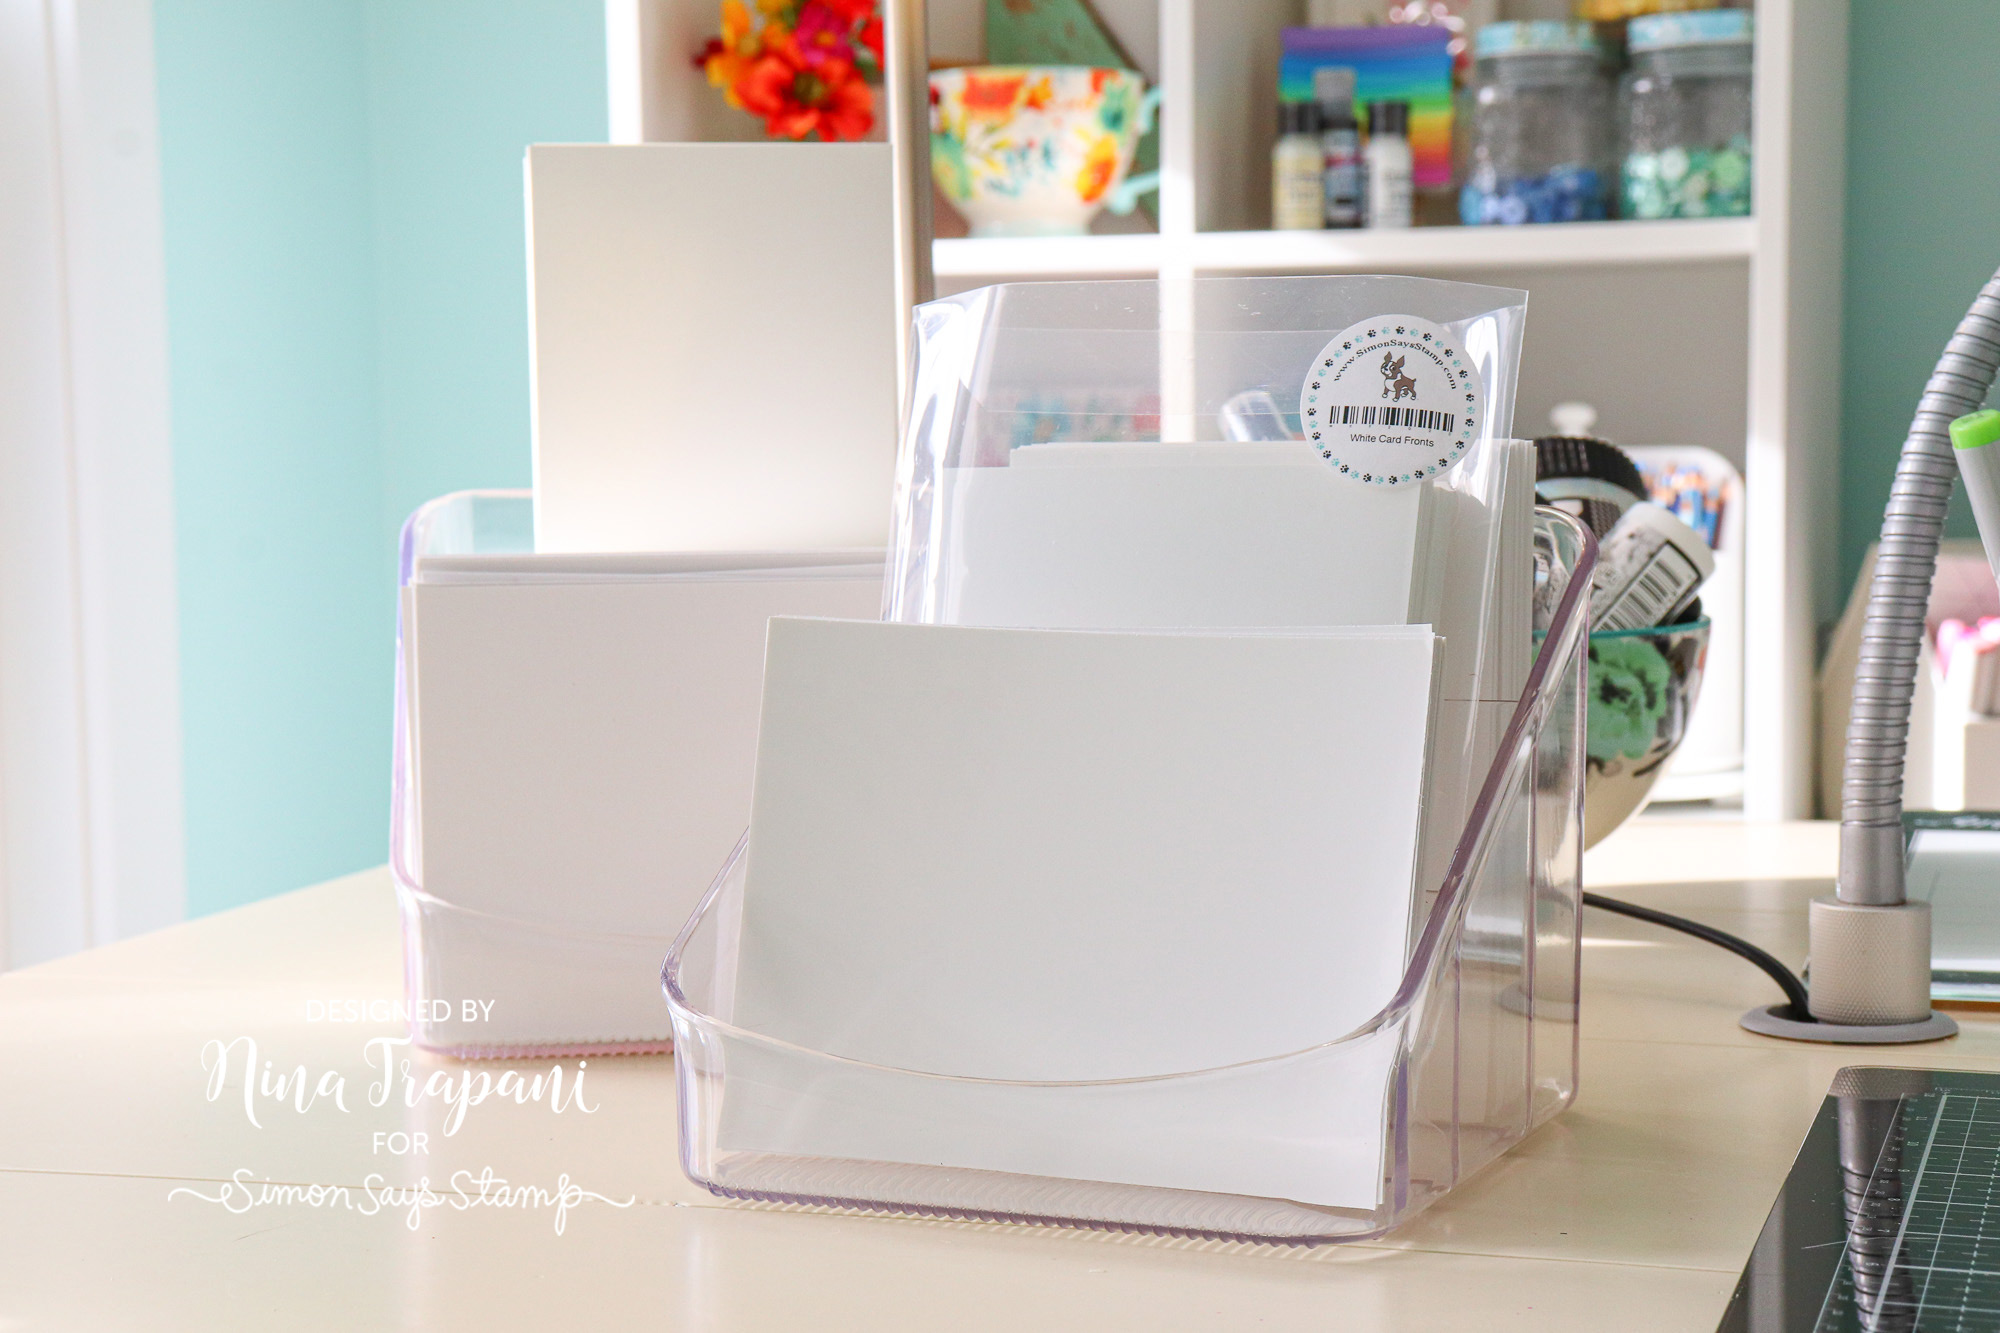
I like to keep pre-cut card fronts, card bases and other most used cardstocks handy so that I don’t have to stop and cut something down while I’m in the middle of creating. I discovered that these organizers are perfect for not only holding all my different pre-cut papers, but they keep them sorted by type because of the handy dividers! Each container has three sections, which means I can store three different types of cardstocks in a single bin. You’ll also notice that some of the cardstocks are in storage sleeves – I find that stamp storage pockets are a great protector for keeping my cardstock clean and safe from inky messes!
WATCH THE VIDEO:
SUPPLIES
|


Yippee for Yana: Angled Ink Blending

Happy Sunday, friends! Please join me in welcoming back special guest Yana Smakula in the latest edition of Yippee for Yana on our blog! Read on and be sure to watch the video for more information! Enjoy!

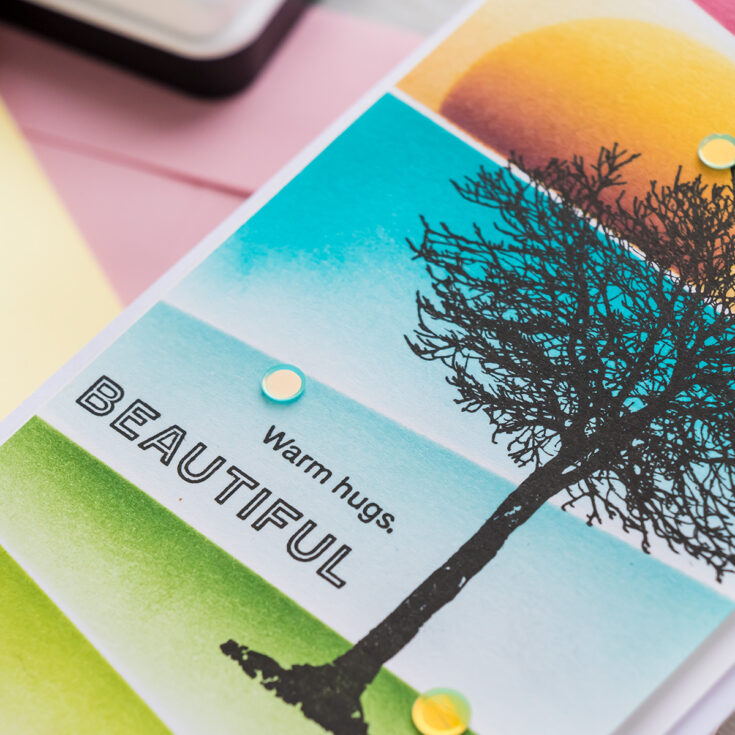
Hi everyone, this is Yana Smakula, welcome back for another Yippee For Yana video! Today I have a colorful ink blend card featuring what I call angled ink blending to create a bold and colorful background and some simple silhouette stamping.
I wanted to create a colorful background for a black stamped tree silhouette, so I pulled out several stencils from Simon Says Stamp and ink blended a colorful abstract background. Instead of evenly blending each section, I applied the ink using just the edge of my ink blending tool coming in very heavily where the edge of the stencil meets the paper and gradually fading into white.
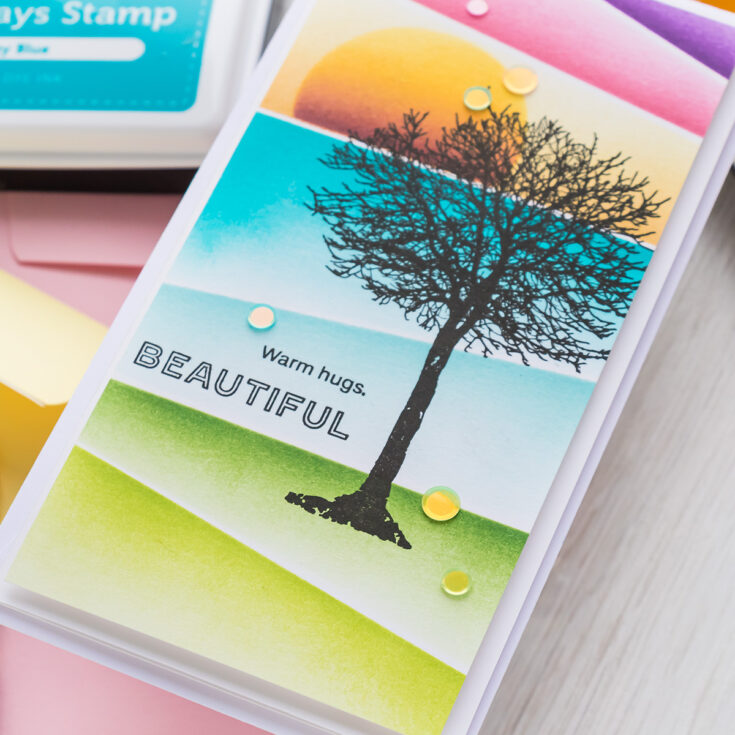
I pre-planned my card background and divided it into 3 sections – a sky, with 3 subsections (ink blended with Deep Purple, Hollyhock, and Duckling), an ocean, with 2 subsections (ink blended with Audrey Blue and Maliblue), and land, with 2 subsections (ink blended with Green Leaf and Jellybean).
With the ink blending done, I stamped the tree from the All Seasons Tree stamp set and a sentiment in black ink and trimmed my panel to 3 x 6” and foam mounted onto a 3 ¼ x 6 ¼” white card base to fit inside the new mini slimline size envelope.
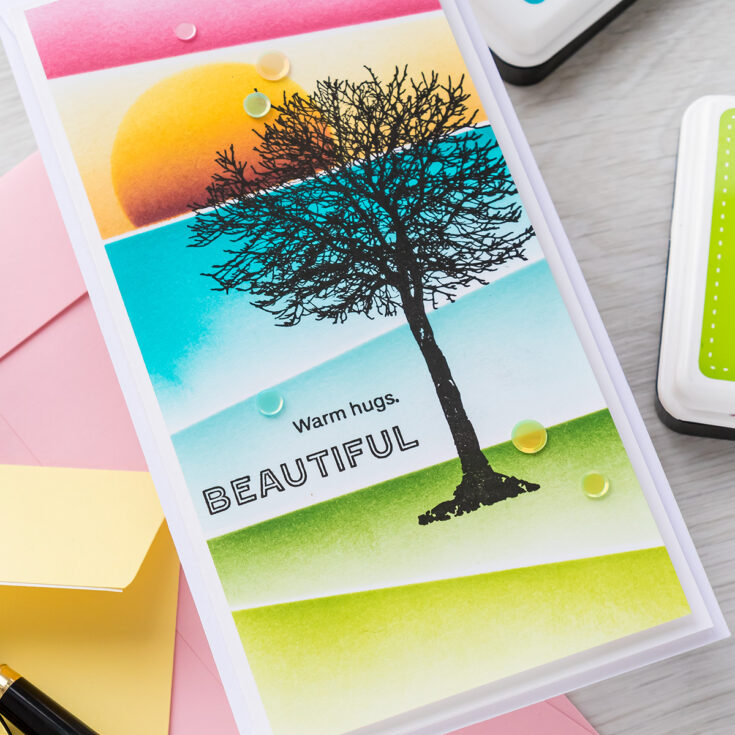
Finally, I embellished my card with sequins from the Strawberry Shortcake mix – it contains not only purple and pink sequins but also pale green, blue, and yellow, perfectly complementing the colors used to create a background for my card.
I hope you enjoyed this video and will give this idea a try! Have fun stamping.
WATCH THE VIDEO:
SUPPLIES:
|


Thanks so much for stopping by, and thanks to Yana for being our guest!


