EZ with CZ: Simple Color behind a Die Cut

Hi friends! Happy Thursday! Welcome to the latest in our monthly blog series with Cathy Zielske, EZ with CZ! Read on, and be sure to watch the video for all the details! Enjoy!
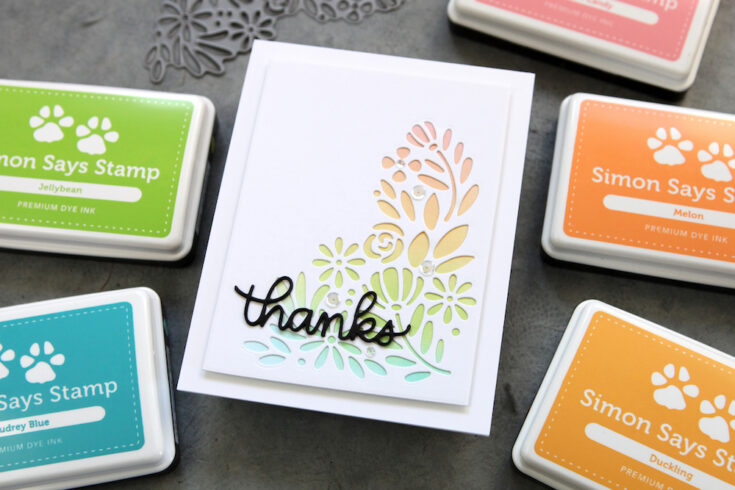
Hi everyone! It’s Cathy Z. here, back with another installment of EZ with CZ! Today, we’ll take a gorgeous but intricate die cut and add color the easy way: by ink blending a quick panel to pop behind it!
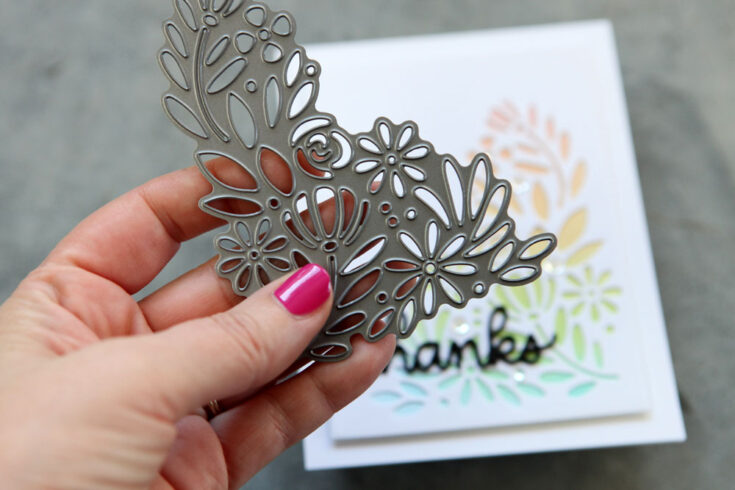
I love the Spring Blooms Corner die, but I didn’t want to spend the time paper piecing in card stock for color. My easy solution? Quick ink blending on a separate panel.
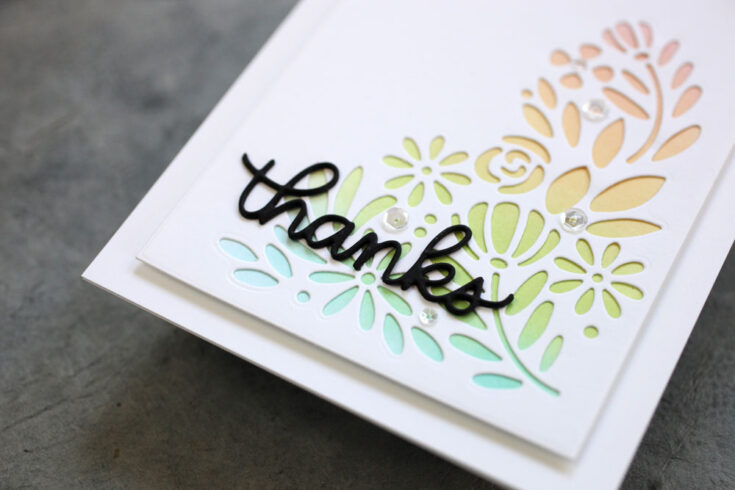
This created such a pretty, soft background and I topped it with one of the Small Script Trio greetings.
Here is my video showing you how I created this card project:
WATCH THE VIDEO:
Thanks so much for stopping by! See you next time!
SUPPLIES:
|


Thanks so much for stopping by, and thanks to Cathy for being our special guest!
Amore Laurafadora: Mix & Match Circles

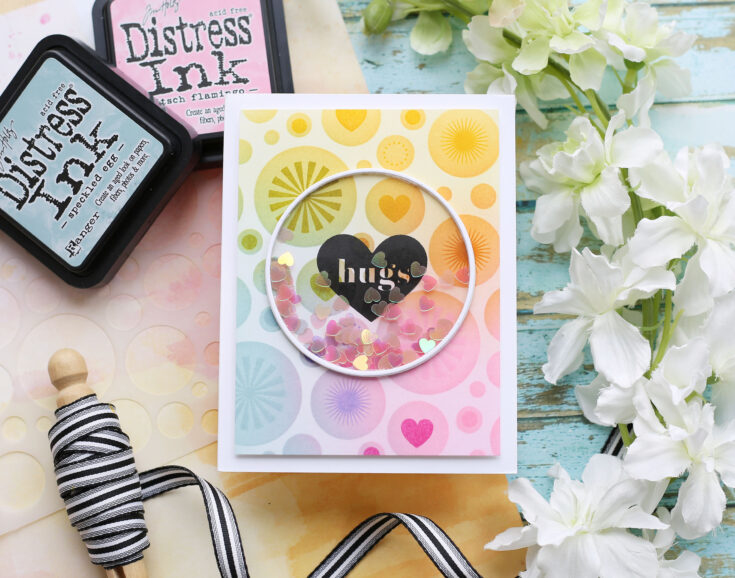
Hi friends! Happy Wednesday! I hope you’re having a wonderful week so far! It is my pleasure to welcome back special bi-monthly guest Laura Bassen in our latest edition of Amore Laurafadora! Who doesn’t love a shaker card?? Want even more to love? She’s showcasing the new Mix & Match Circle stencil and stamps, topped off with a punch of love with the super cute hugs heart stamp that can be found in our Greeting Mix 2 stamp set! Be sure to watch the video for all the details, and enjoy!
WATCH THE VIDEO:
SUPPLIES:
|


Thanks so much for stopping by and thanks to Laura for being our guest!
Yippee for Yana: Foiled Birthday Cards

Hi friends! Happy Tuesday and welcome to the latest edition of our bi-monthly card series with Yana Smakula; Yippee for Yana! Read on to learn more about this gorgeous duo of Birthday cards and enjoy!
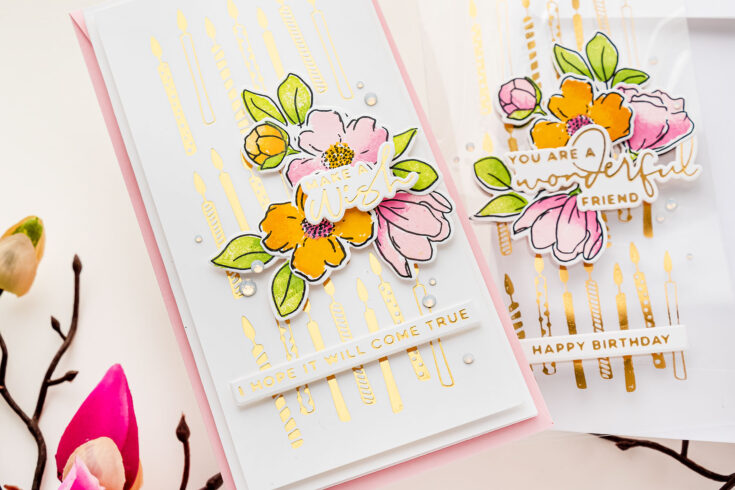
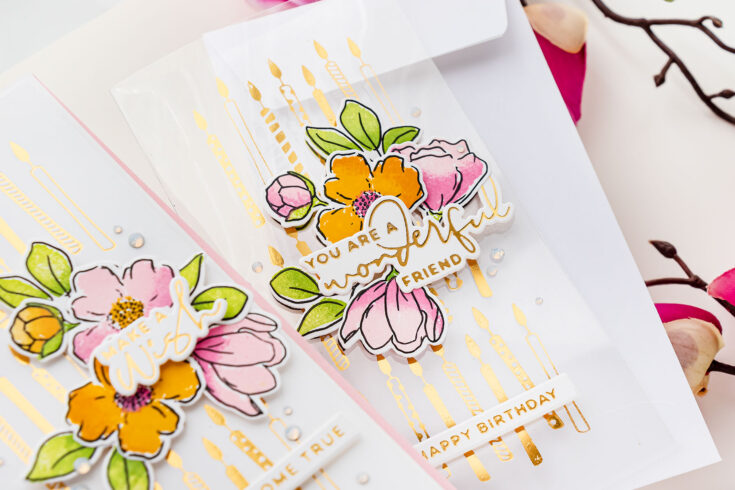
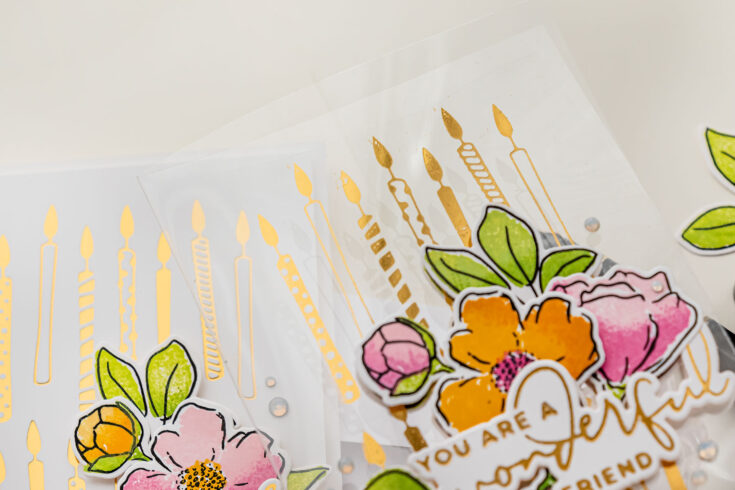
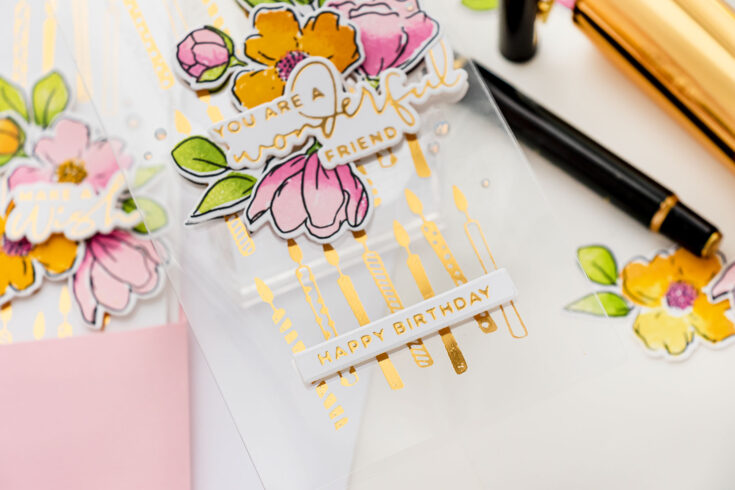
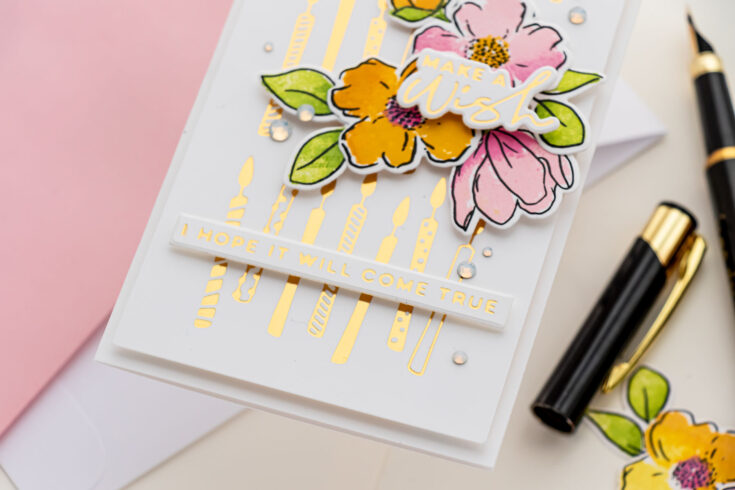
Hi everyone, this is Yana Smakula, welcome back for another Yippee For Yana video! Today I have 2 mini slimline foiled birthday cards to share – one showcases foiling on acetate and another card, with an identical design, features foiling on a specific type of cardstock to get the best, most smooth, and ideal foiled results!
We are going to start by foiling on acetate. It is crucial to pick the right kind of acetate, the one that is resistant to heat. If you’ve ever done heat embossing on acetate, you know that the acetate, unlike paper, can warp and even melt from the heat applied using the heat tool when melting embossing powder. When you want to hot foil on your acetate, you also need to pick the right kind of acetate for the job, the kind of acetate that can withstand the heat from the Glimmer Hot Foil System and remain perfectly flat afterward. Simon Says Stamp has the Hot Off The Press Heat Resistant acetate in the store for you to try this technique with. Or you can try using any other heat-resistant acetate you might already have in your stash.
I started to work on my clear card by creating a card base from a sheet of heat-resistant acetate. I was making a mini slimline card, so the card base size I made was 3 1/4 x 6 1/4”. I used my scoring tool and board to score a sheet of acetate at 3 1/4”, I folded it and creased the scoreline and next used my paper trimmer to trim the card base to size. I am quite into the mini slimline trend these days, hence why I picked this particular card size.
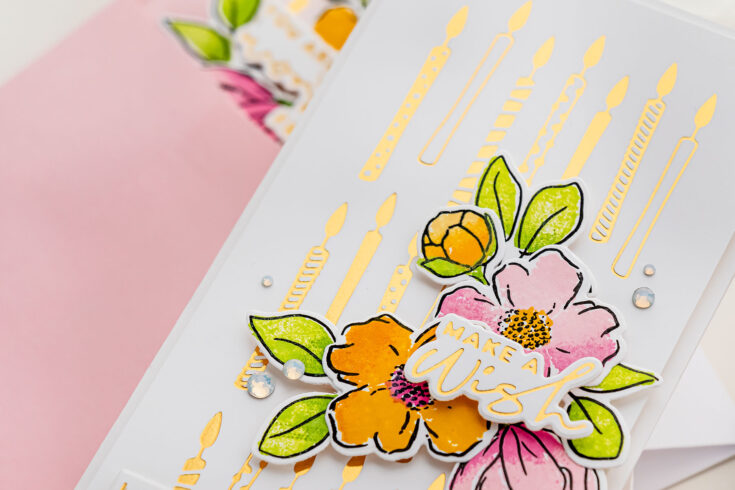
To create my Birthday cards I used a new glimmer plate from Spellbinders, this is a Birthday Candle background plate from my latest Blooming Birthday collection and I foiled it in the center of my clear card base (and in the center of 3 x 6” white cardstock panel when making an identical, but a cardstock-based card).
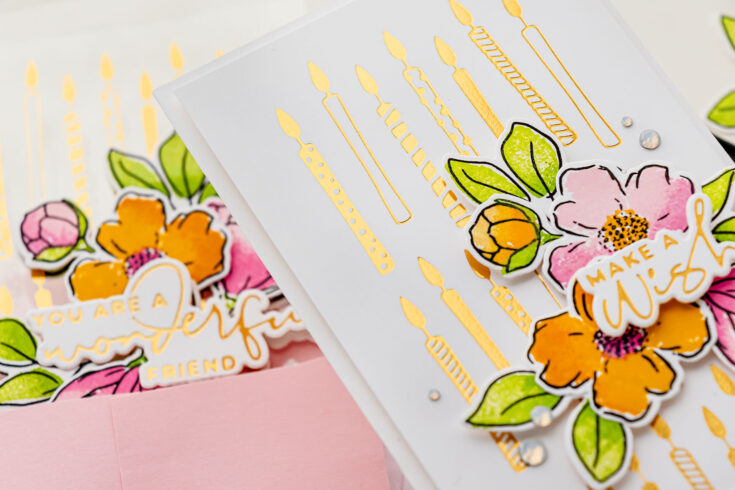
This background plate was designed as a half background to create a full card background for an A2 card. If you were to make an A2 card, one that measures 4 1/4 x 5 1/2”, you would foil this background twice and it would give you a full card background. The mini slimline card has a slightly different proportion, and I have found that you can use this background plate to foil a partial background that fits nearly perfectly on the mini slimline card. It is quite a coincidence, but when I foil this background you’ll see how perfectly well it fits on this card side.

The rest of the foiling was done on cardstock. I have found Simon Says Stamp 130lb and 120lb cardstock to give me the best, most smooth, and perfect results when foiling, regardless of the foil color or glimmer plate I use. I used this paper to foil another candle background and sentiments for both of my cards.
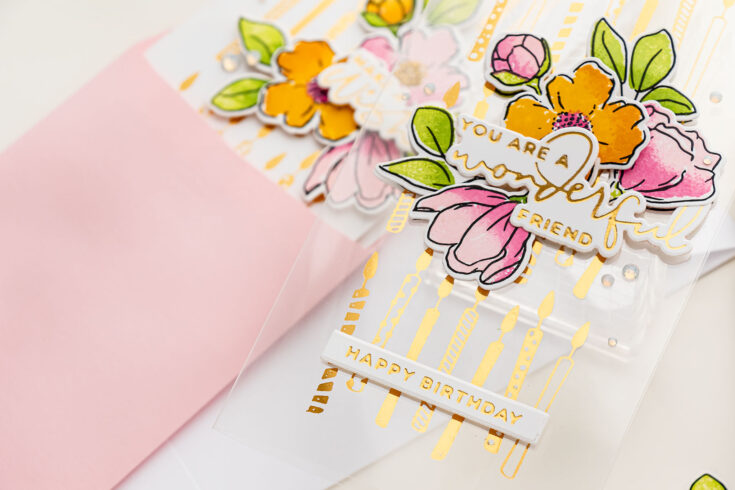
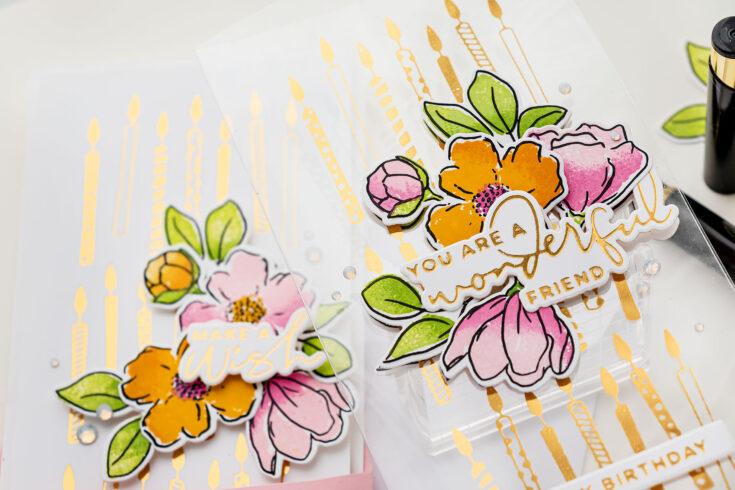
Next, I wanted to add florals, because who doesn’t like to receive flowers on their birthday? I love Simon’s new Blooming Meadow stamp set and so I stamped several flowers and leaves from this set using a combination of Distress Oxide and Simon’s Dye Inks. The outlines were stamped and black, I also used coordinating dies to cut the images out.
Having created all the elements for my cards, I put the project together using foam adhesive. Lastly, I embellished my cards using Spellbinders gems. Have fun stamping!
WATCH THE VIDEO:
SUPPLIES:
|


Thanks so much for stopping by, and thanks to Yana for being our guest!


