Hello Friend Cafe Colorize Card
Hi friends! Happy Saturday! Please join us in welcoming special guest Cheiron Brandon as she shares this fun and colorful card! Read on to learn more and enjoy!
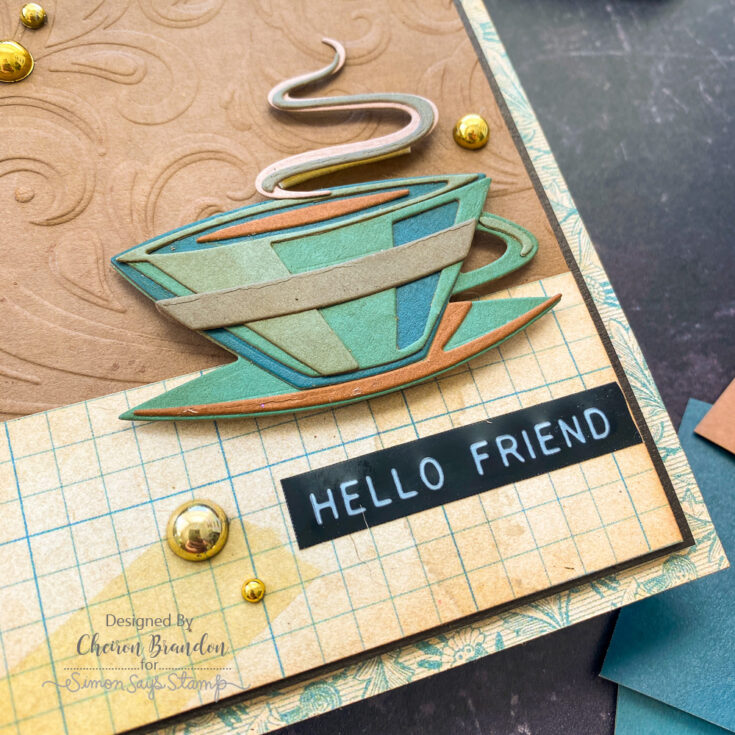
Hi there crafty friends, it’s Cheiron here and I have a sweet little card for you today combining the Tim Holtz Sizzix Cafe Colorize die and tons of fun new Idea-ology papers. This card is simple to make and the Colorize Tea cup makes the perfect embellishment.
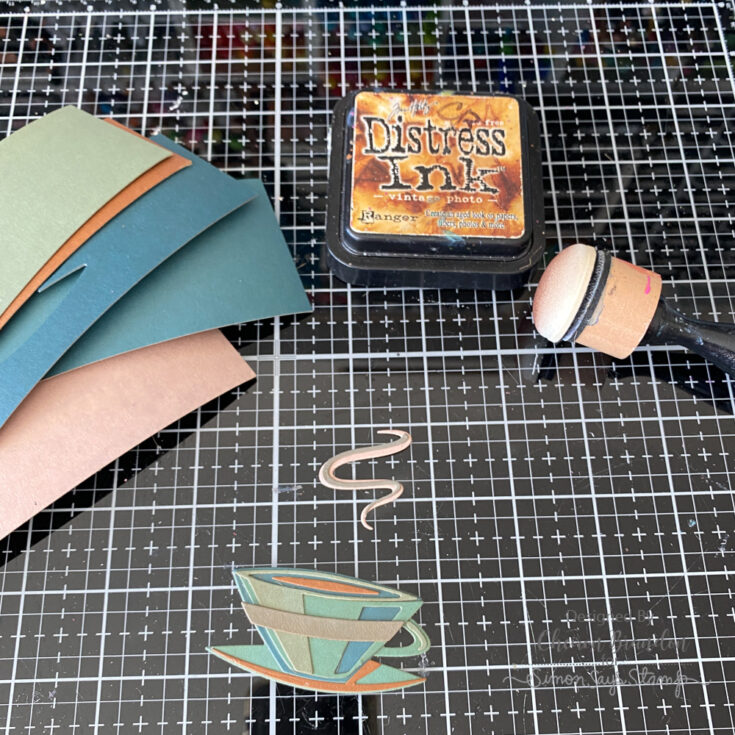
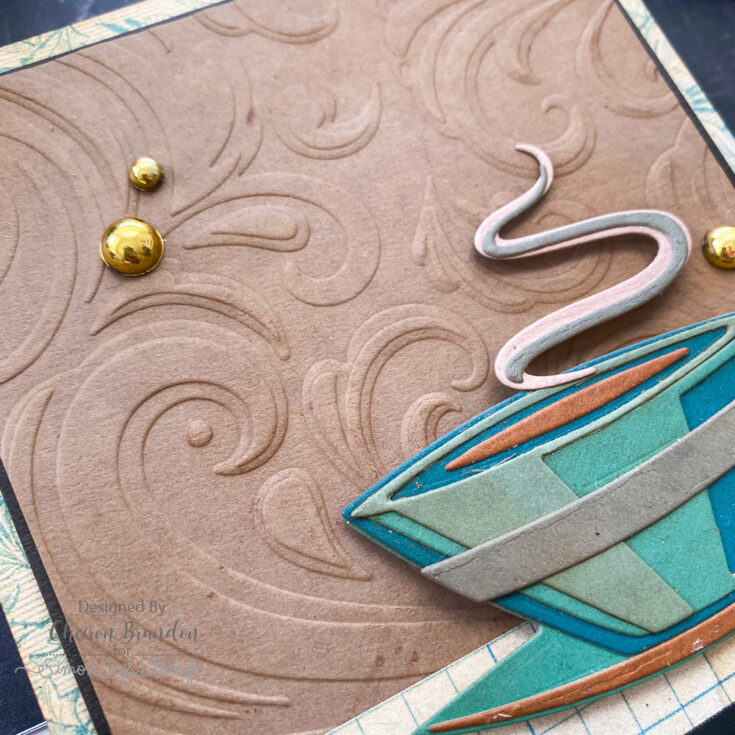
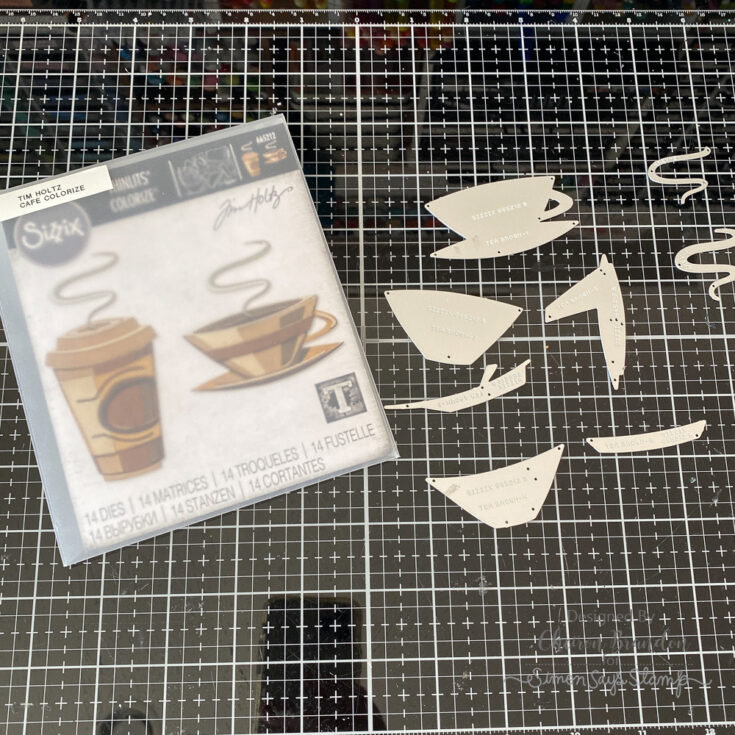
First, we will cut and assemble the Colorize die. I used some of the brand new Idea-ology Kraft Stock to cut my shapes. This kraft stock comes in 3 color packs (Cool, Warm and Neutral) and has a nice smooth finish. I used the Cool and Neutral to create my card. I took out all the dies for the little tea cup and you will see they are engraved and say Tea 1 -Brown, Tea 2-Brown, etc. Instead of browns, I selected a bunch of different hues of blue to create my cup . For the steam, you will need hues of grey, but go with what you have. I inked the edges of all the pieces with Vintage Photo Distress Ink before I assembled them.

Once the cup, was assembled, I created a background using a piece of brown Kraft Stock that I had embossed with the Swirls embossing folder and inked with Vintage Photo Distress Ink. I added some of the paper from the Backdrops Volume 2 pack to the bottom of my swirls piece to ground the cup, and added the cup with foam tape to give it dimension. I placed the swirls panel on a thin mat of black, then foam taped the panel onto a floral panel which is also from the Backdrops Volume 2 (all inked on the edges with Vintage Photo).
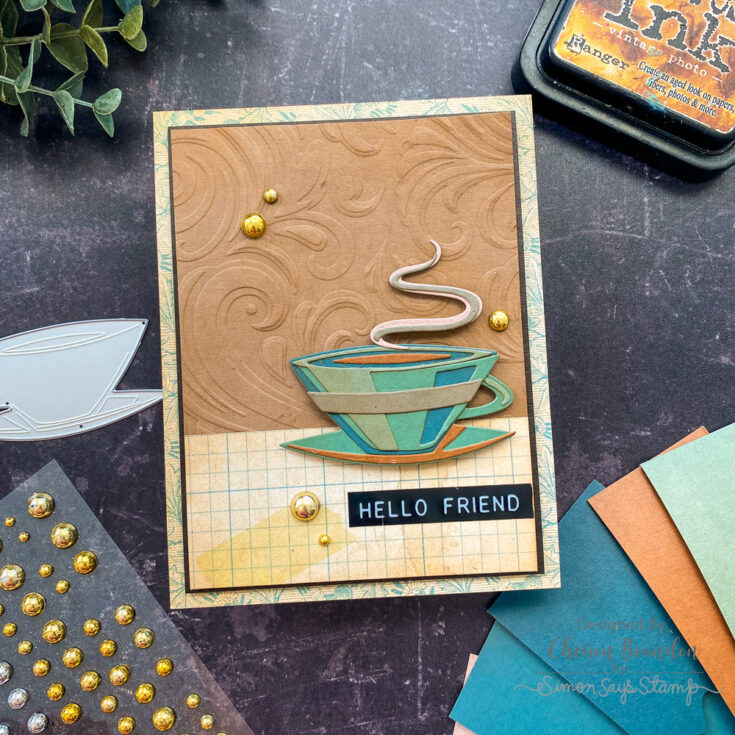
To complete the card, I added an Idea-ology sentiment Label Sticker and some Metallic Droplets. I hope you enjoyed this little tutorial and a closer look at incorporating these beautiful Kraft Stocks into your projects.
SUPPLIES:
|


Thanks so much for stopping by, and thanks to Cheiron for being our guest!
Funny Friday with Art Impressions: Pop-Up Bunny
Welcome everyone, It’s Shari here! I have another edition of our Funny Friday series with Art Impressions that I hope will tickle your funny bone.
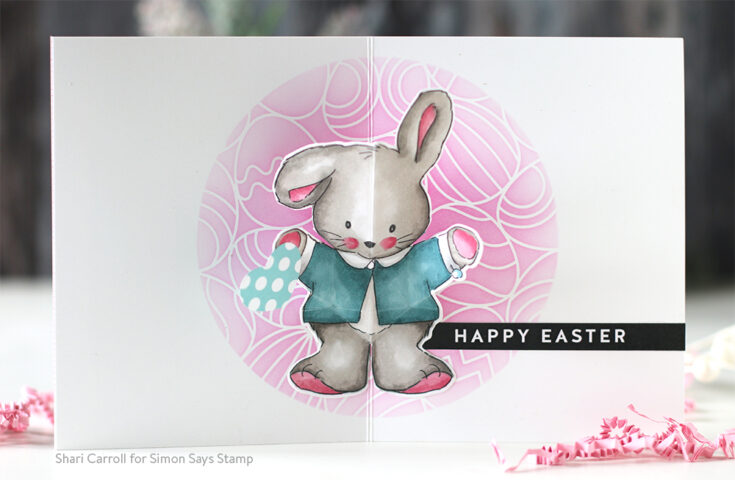
I’m featuring the Bunny Pop-Up stamp and die set for my card today along with some Simon Says Stamp Easter Sentiment Strips and stencil. These pop-ups are so fun to make where the surprise happens when the card is opened.
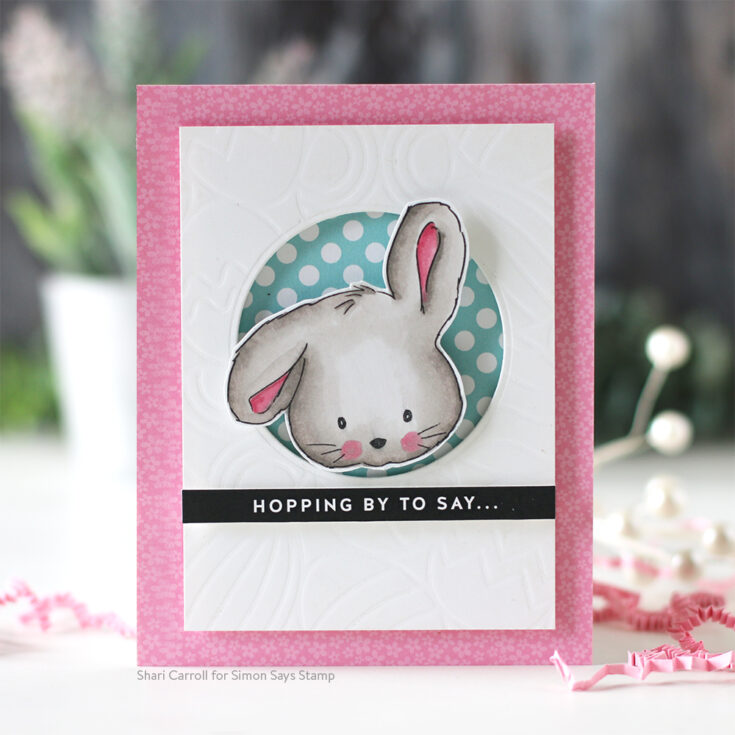
I’ve stamped the bunny head and placed it in a circle on a panel for the front of the card. I debossed the Egg Hunt stencil into the panel by using the Sixxiz Emboss and Impression pad.
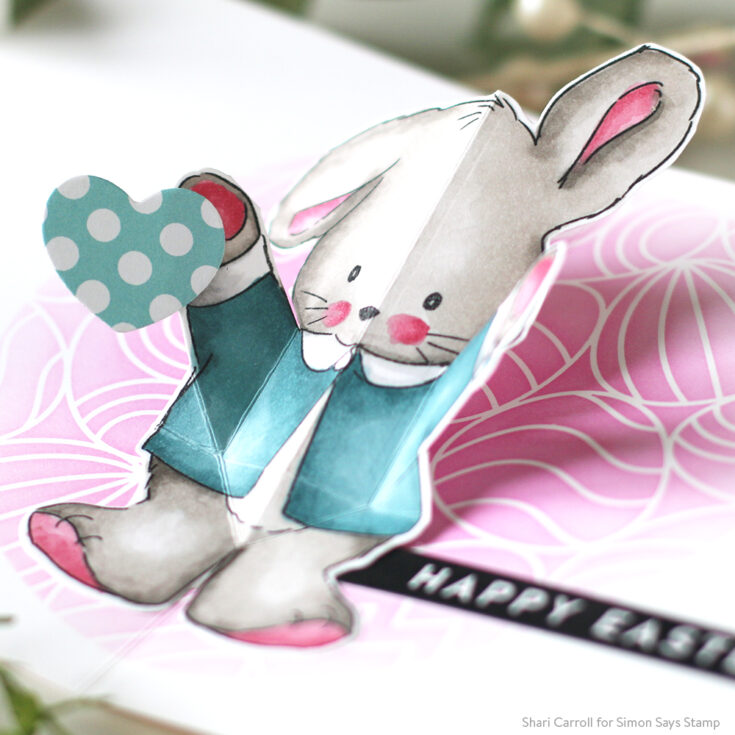
The inside bunny is stamped onto 80lb cardstock and die cut with the coordinating die which has score lines built-in for easy folding. A thinner paper is my preference so the Pop-Up piece creases easily and folds flat when the card is closed.
I have filmed the process in the video below, I hope you enjoy!
SUPPLIES:
|


EZ with CZ: Simple Color behind a Die Cut

Hi friends! Happy Thursday! Welcome to the latest in our monthly blog series with Cathy Zielske, EZ with CZ! Read on, and be sure to watch the video for all the details! Enjoy!
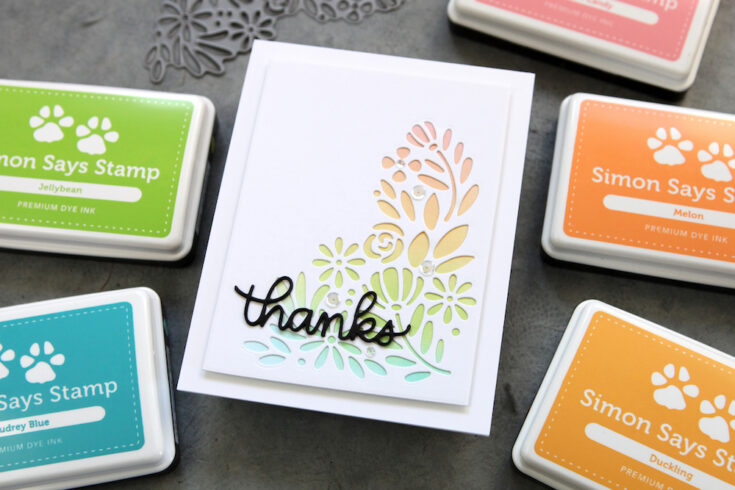
Hi everyone! It’s Cathy Z. here, back with another installment of EZ with CZ! Today, we’ll take a gorgeous but intricate die cut and add color the easy way: by ink blending a quick panel to pop behind it!
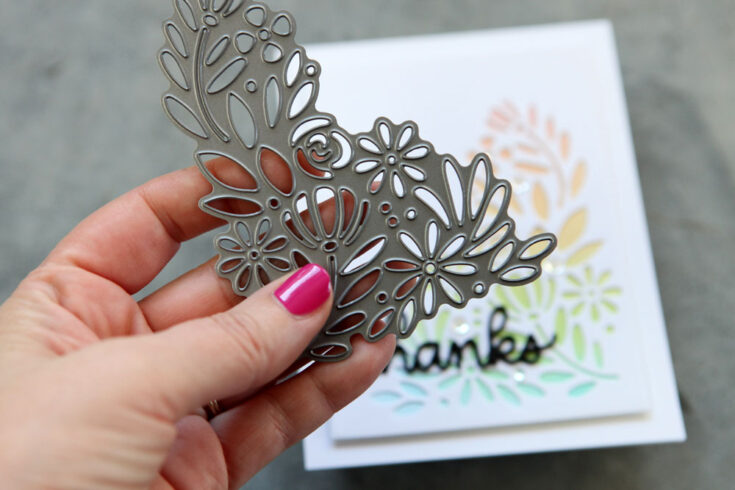
I love the Spring Blooms Corner die, but I didn’t want to spend the time paper piecing in card stock for color. My easy solution? Quick ink blending on a separate panel.
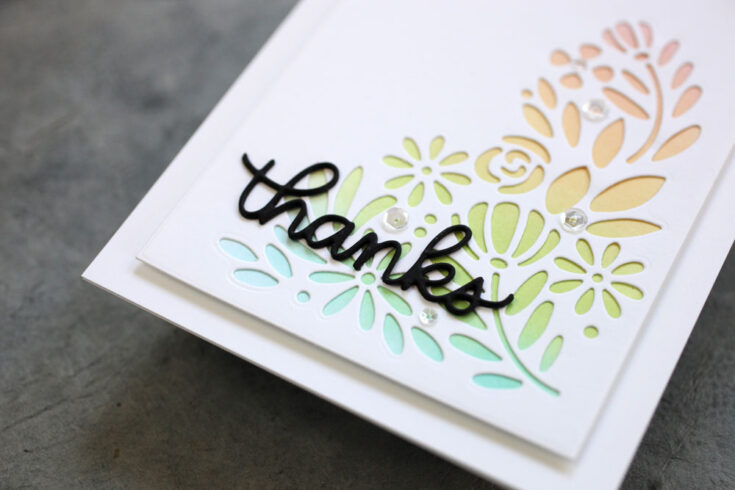
This created such a pretty, soft background and I topped it with one of the Small Script Trio greetings.
Here is my video showing you how I created this card project:
WATCH THE VIDEO:
Thanks so much for stopping by! See you next time!
SUPPLIES:
|


Thanks so much for stopping by, and thanks to Cathy for being our special guest!


