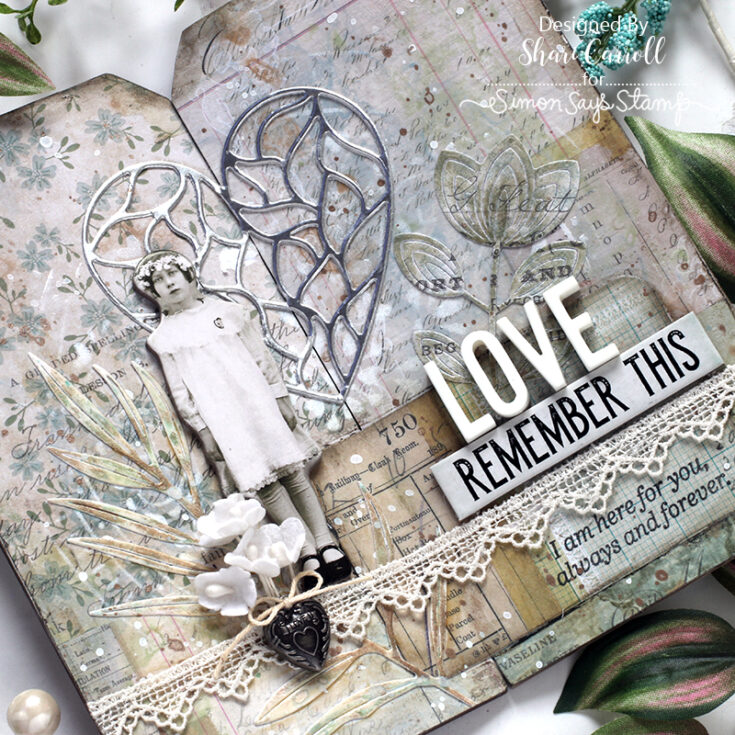
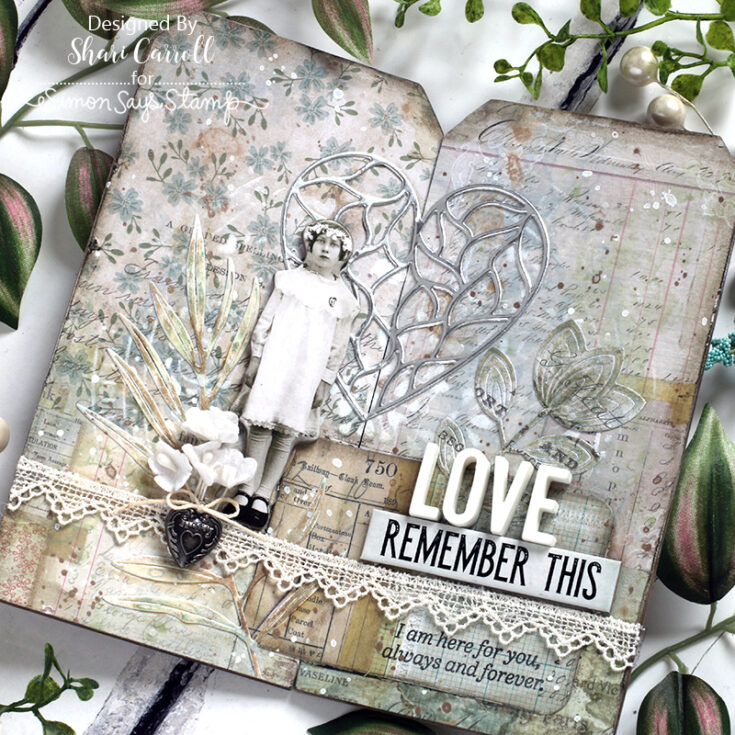
Welcome crafty friends! It’s Shari here with a mixed media project that I’ve created using the Tim Holtz Chipboard tags. I’ve made it so it can be folded to stand on its own. The Stylized Heart die cut acts as a hinge plus it adds a nice backdrop to the sweet Paper Doll.
I played around without any worries until I came up with something that was visually pleasing to me. I tried a few new inking techniques and also reverted back to some that I’m most comfortable with.
I’ve filmed the entire process which I hope you will enjoy!
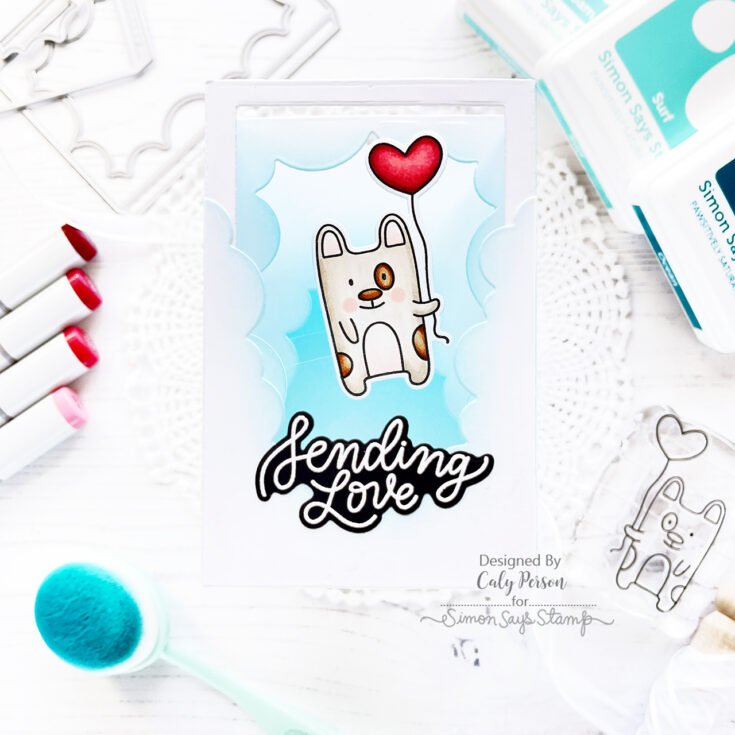
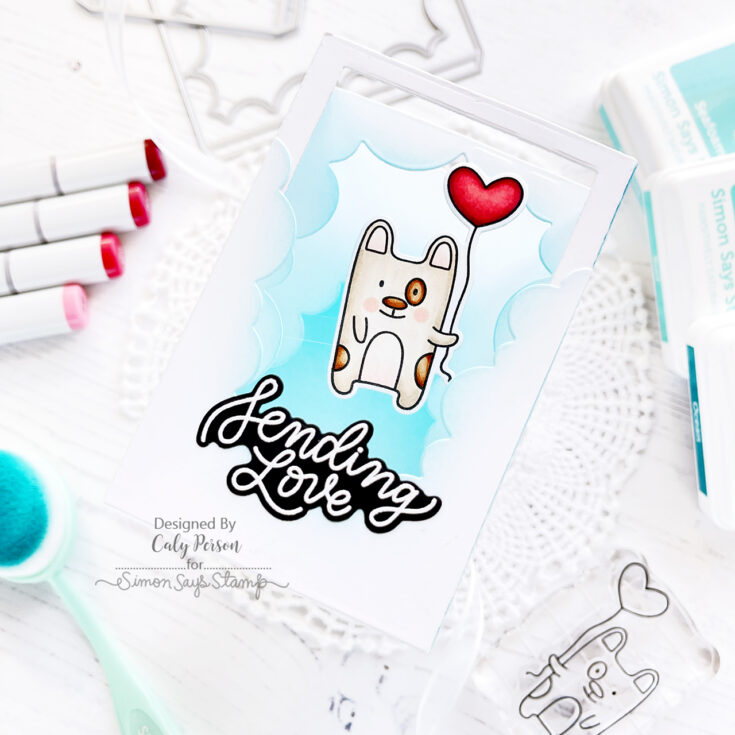
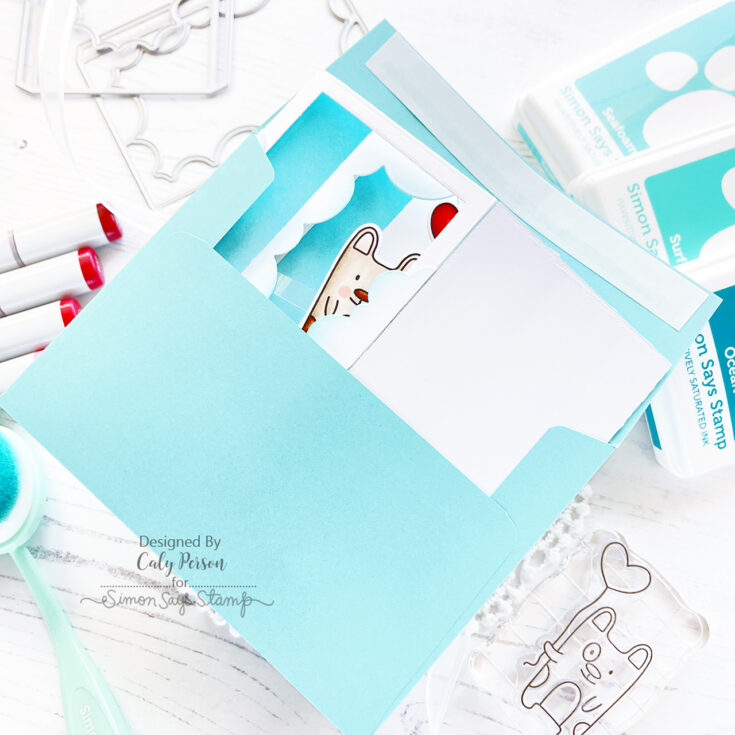
Hi friends! Happy Saturday! Welcome to the latest edition of Crafty with Caly with the amazing Caly Person! Isn’t this Box card too cute? Keep on reading and be sure to watch the video to learn more!!
Hello friends! I have a fun, but simple card to share today using a few new products from the And Back Again release! I used an image from theLove Day set and made it the star image of a box card using the Basic Box Card Clouds set of dies.
The Basic Box Card dies are simple and very easy to put together. All you need for this fun collapsible box is strong double sided Tape. I used the 1/8” Red Tape from Simon Says Stamp. I made a video and you can watch it below.
Before adhering my box together, I ink-blended all the interior walls with Pawsitively Saturdated Inks in Seafoam, Surf, and Ocean. I also ink-blended the tops of the Basic Box Card Clouds die-cut pieces with the residual ink on my blending brush.
Once the box was constructed, I simply used two pieces of acetate to reinforce the image so that it looked like the Love Daypuppy is floating. I finished then by attaching an embossed sentiment.
The best part about this box card is that it can be displayed or folded flat inside an A2-sized envelope for mailing! I hope you enjoyed this project and that it gives you fun ideas for your future projects. Thanks for joining me today! ~Caly
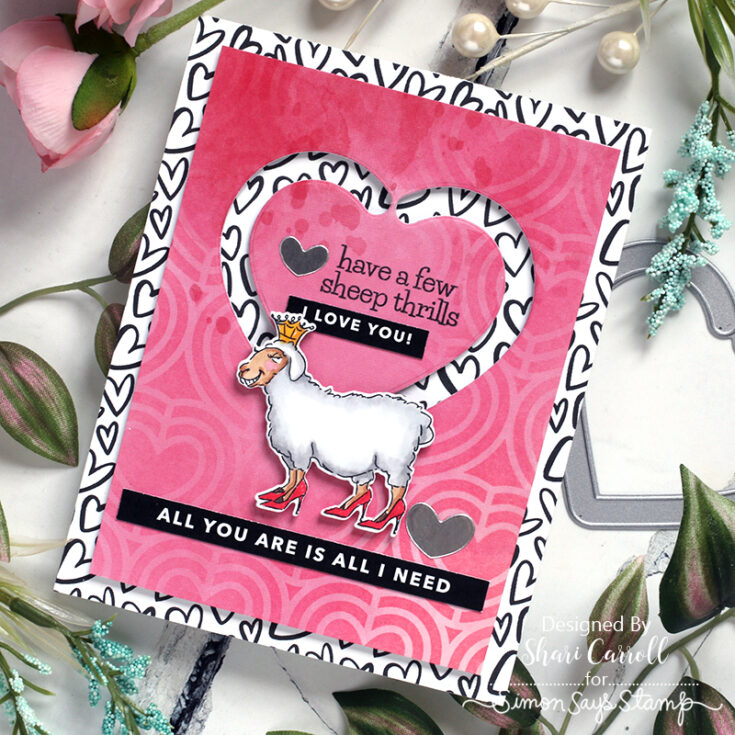
Hello there, friends! It’s Shari Carroll here with another installment of our popular Funny Friday series featuring Art Impressions’ products!
When choosing the stamps to work with for today’s card, I spied this hilarious Ewe wearing high heels with a silly grin and knew right away that this was the Sheep stamp set for me.
In business since 2002, Simon Says Stamp is striving to offer you the best online selection of stamps, altered art, scrapbooking, mixed media, card making and paper crafting products in the world. We stock over 100,000 quality items in our warehouse so that we can offer you quick service and one stop shopping at a great price!