Framed with Kindness: An Encouragement Card Full of Texture
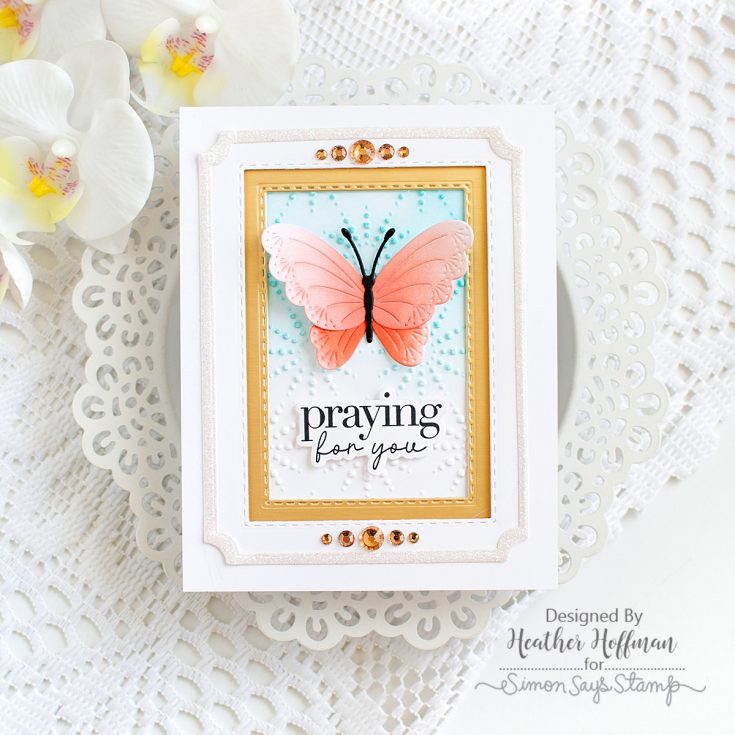
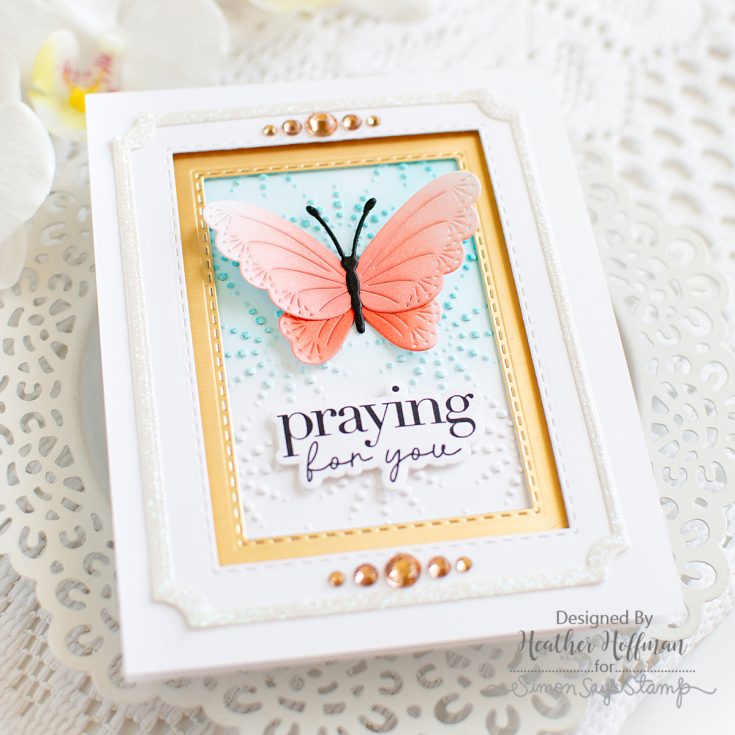
Hi friends! Heather Hoffman here today with a bright and airy card featuring lots of die cutting and building up layers and textures that frame up the lovely butterfly and sentiment on this card!
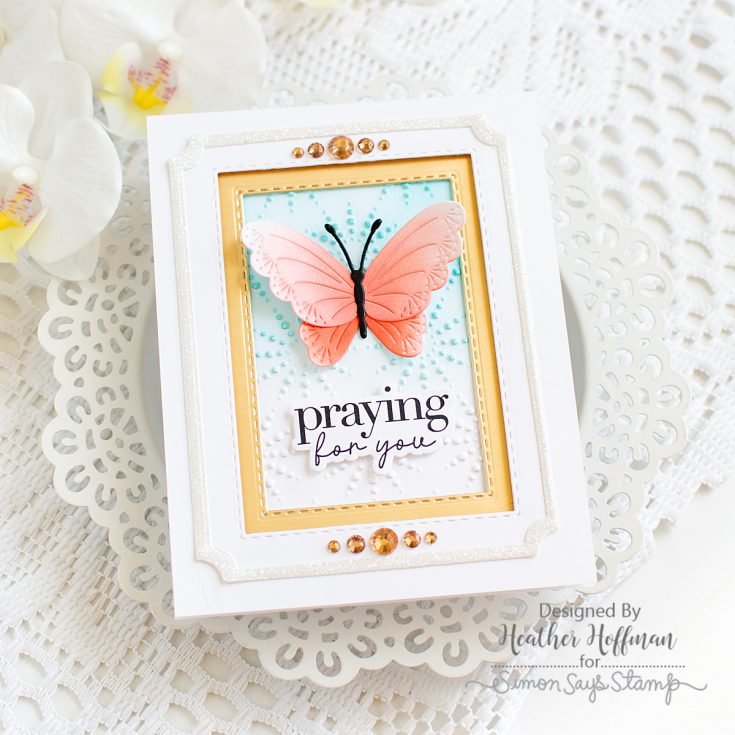
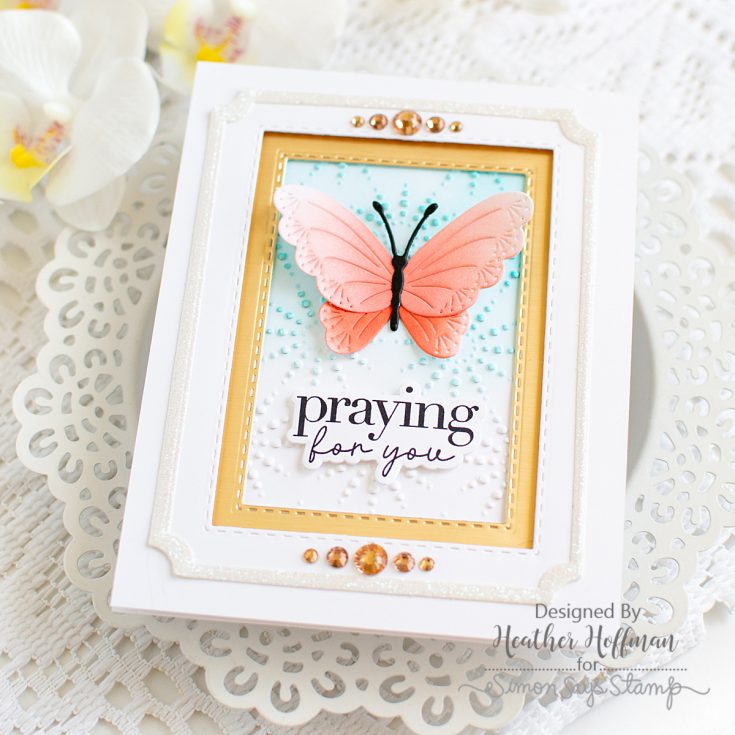
The new Dewpierce Butterfly is so stunning – I love all the texture on it! I die cut it from white cardstock, and ink blended Blush ink on the larger top portion, and Pucker ink on the lower portion, holding it in place on my Craft Tacky Mat. I cut the center from Black cardstock, and assembled it all together, then set it aside to dry while I worked on the rest of the card.

To frame everything up, I started off with Nested Stitched Rectangles, and die cut a window from an A2 panel of white cardstock, then cut a slightly smaller window from Honey Gold cardstock to layer behind, adhering with foam adhesive. Behind the frame, I used the fun Dotty Circles embossing folder on white cardstock, then ink blended from the top down with Surf ink, allowing it to fade to white somewhere around the middle. I added the frame over that with more foam adhesive to make sure I had lots of dimension, then used liquid glue to adhere a White Glitter frame created with two sizes of the recently released A2 Notched Rectangles die.
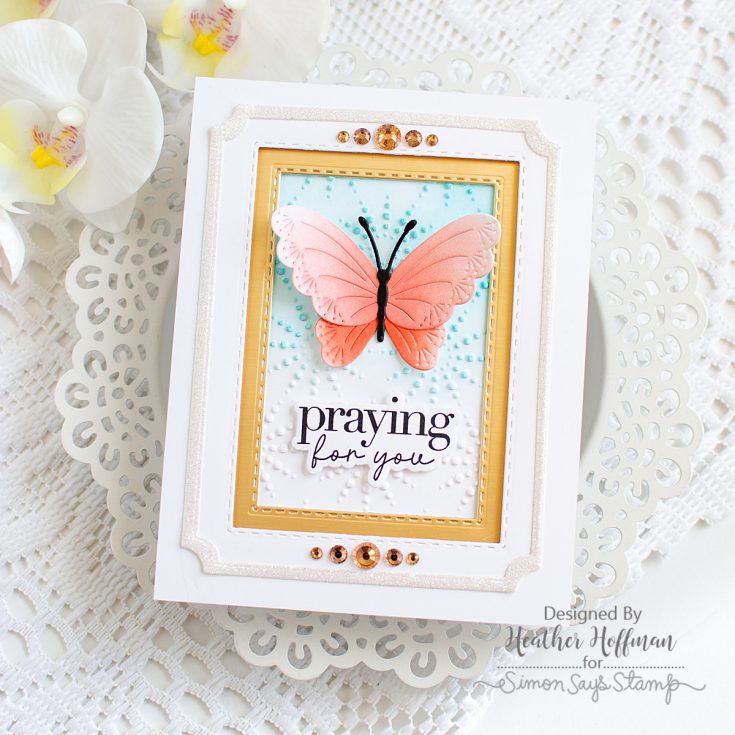
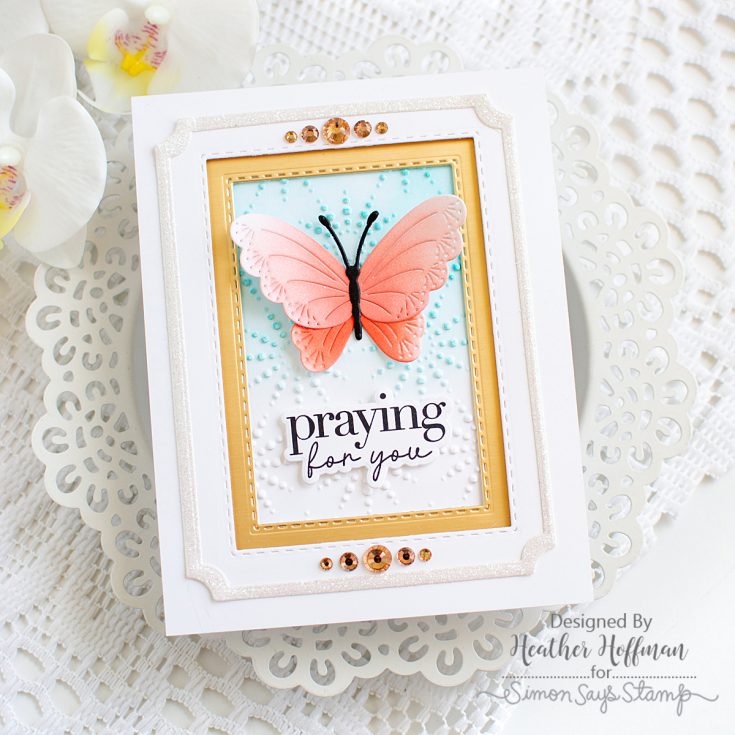
By this time, the butterfly was ready to go, so I adhered it just in the center with liquid glue, leaving the wings to float free for lots of extra dimension! I chose a sentiment from Inside Greetings 1 (which now has coordinating dies that recently released – yay!), and stamped and adhered that with foam adhesive under the butterfly.

Finally, I spent time playing with different arrangements with my Dazzling Peachy gems, but finally settled on a couple simple rows of them on the top and bottom of the frame. I felt like that added the perfect touch of elegance to finish this card off!
What is your favorite way to frame up a card? Die cutting, ink blending, or maybe stamping? Drop your favorite ways in the comments – I’d love to hear!
SUPPLIES:
|


Thanks so much for stopping by!
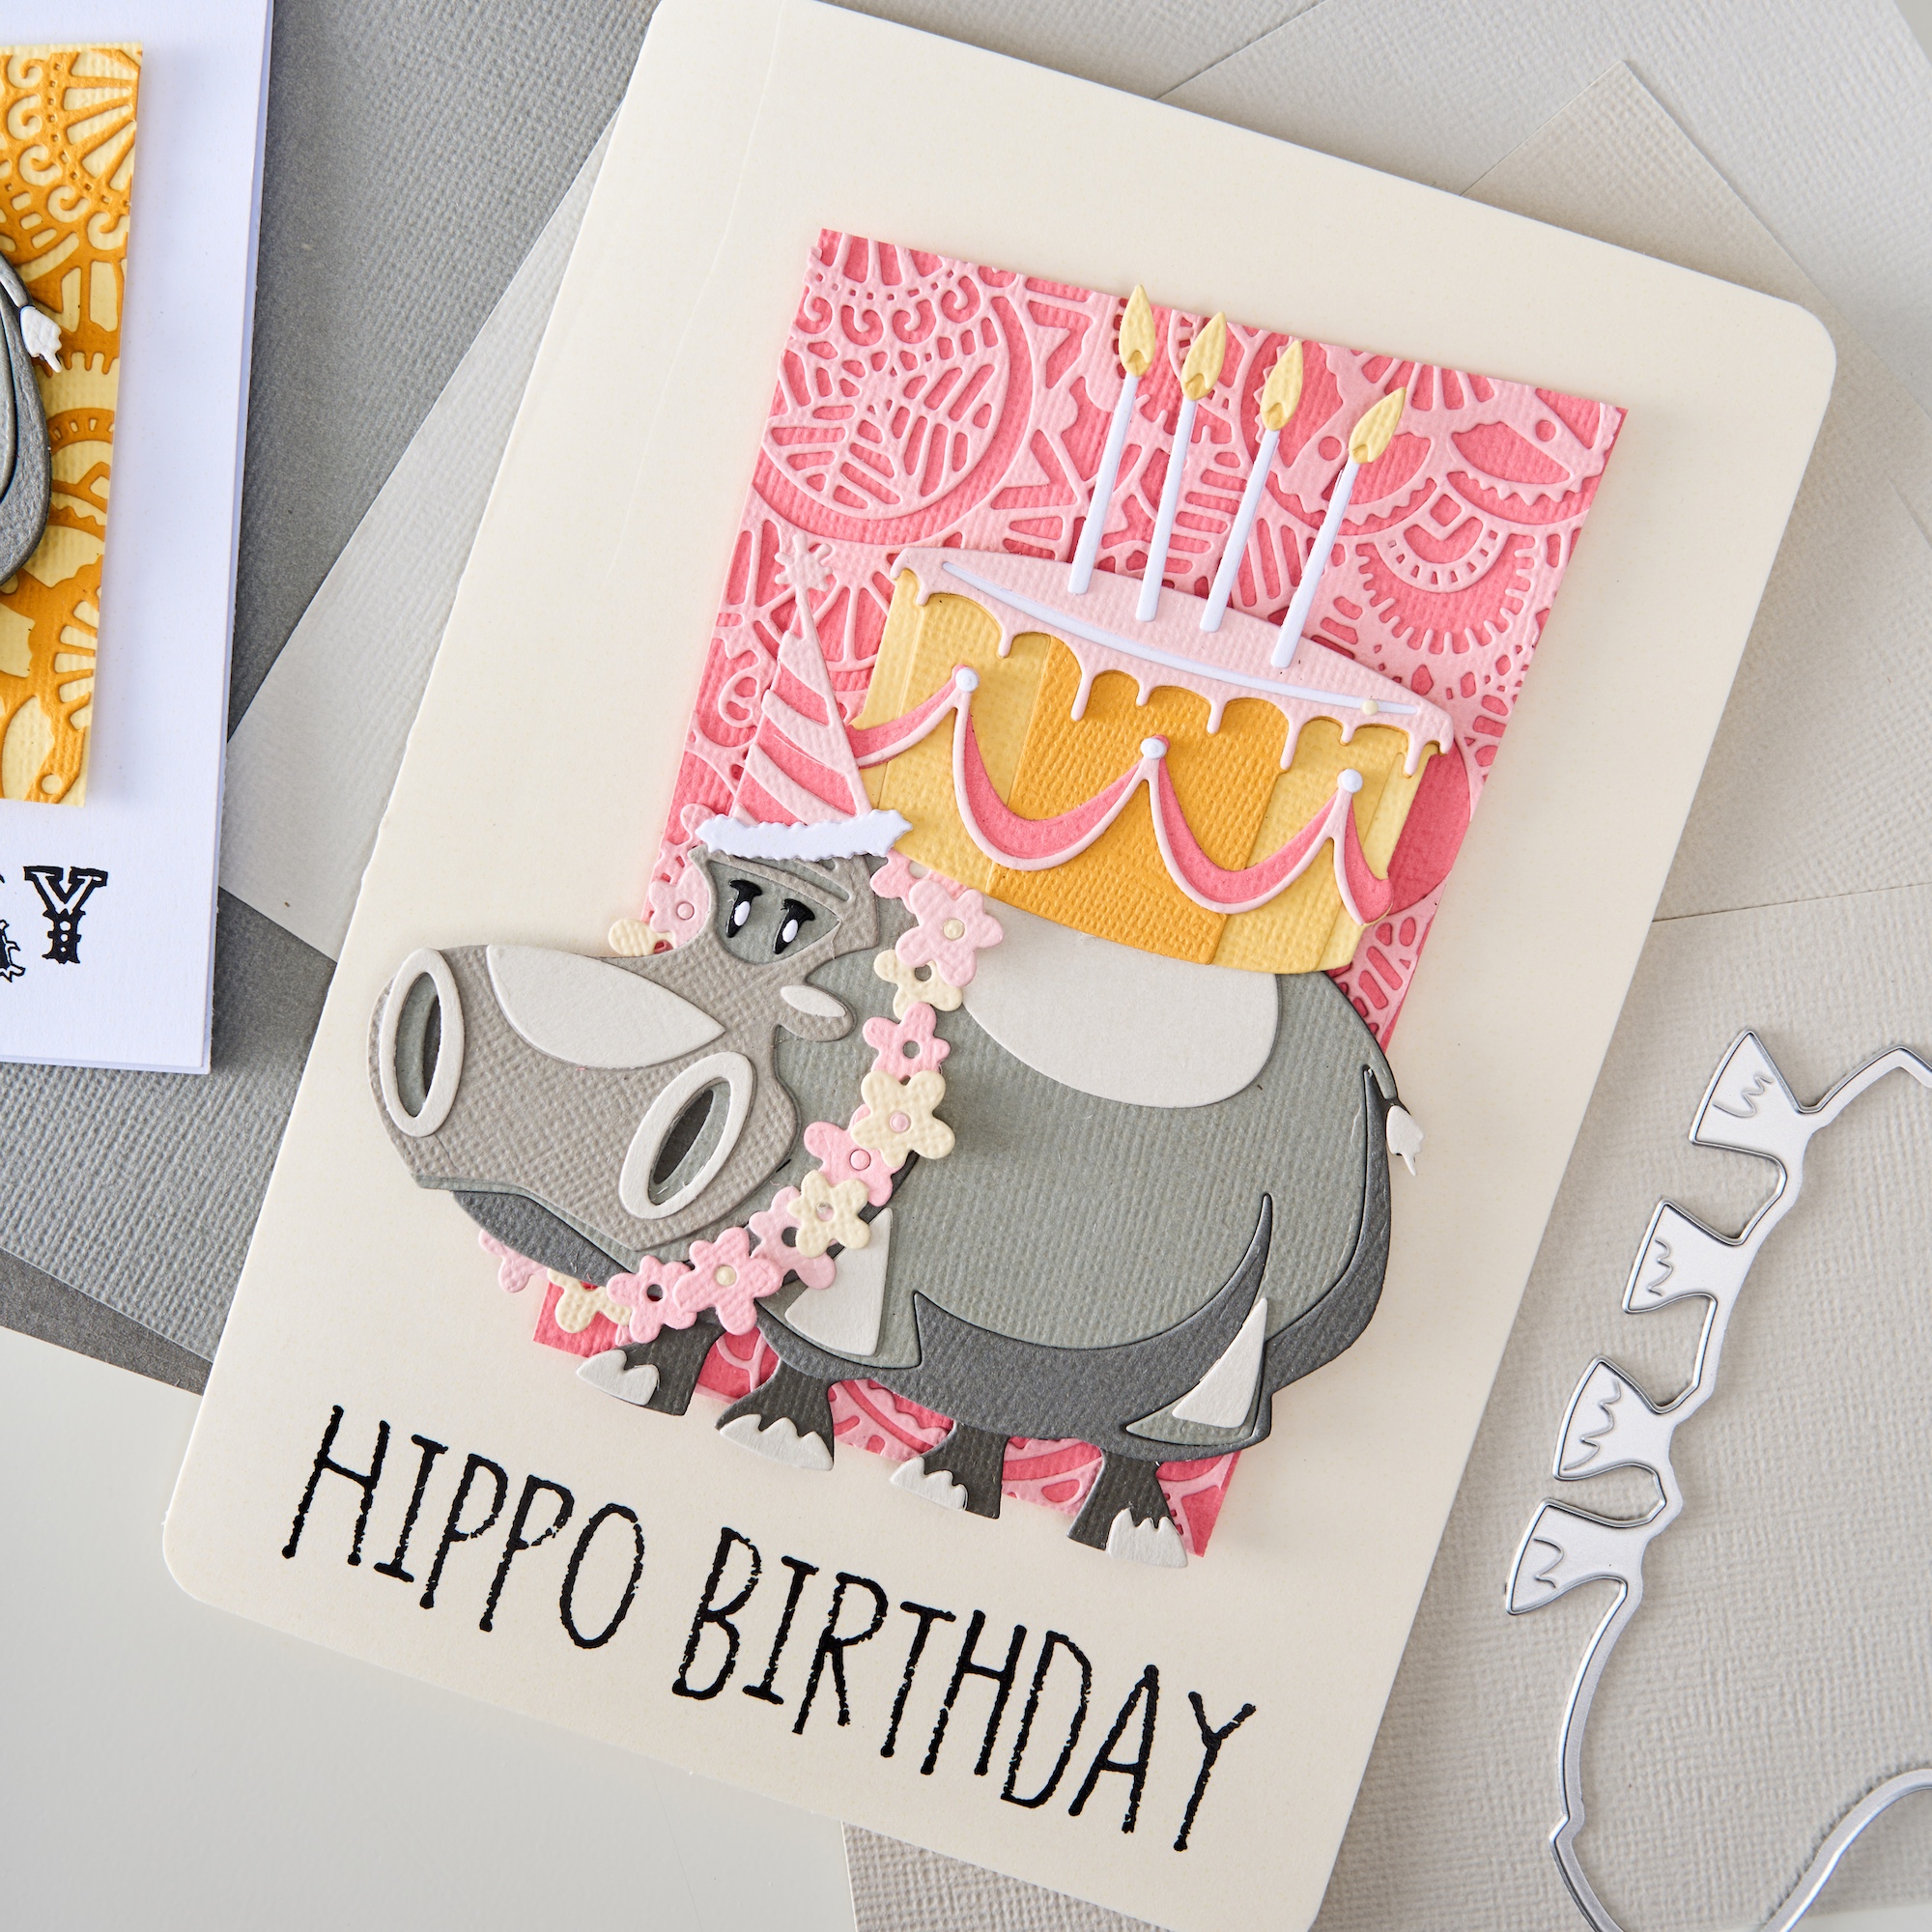
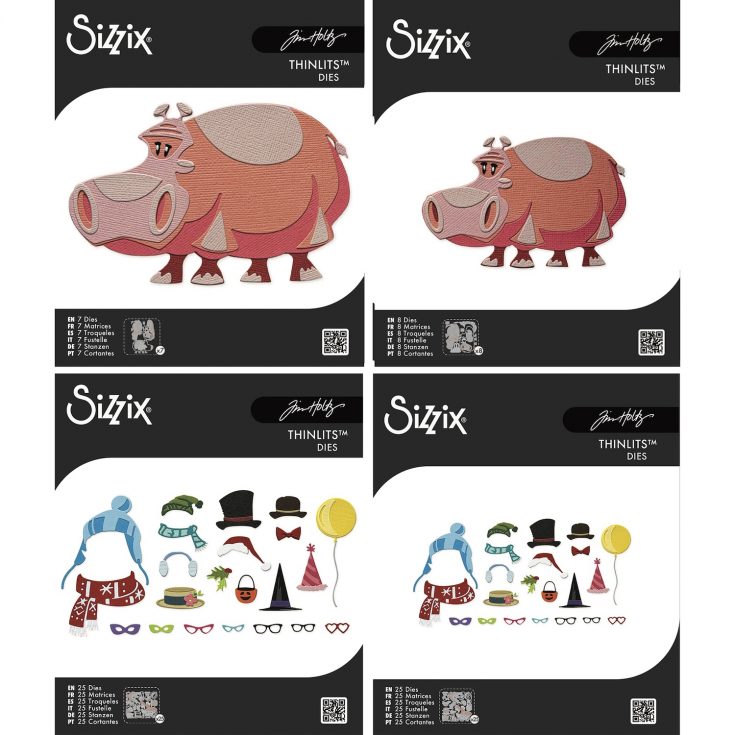
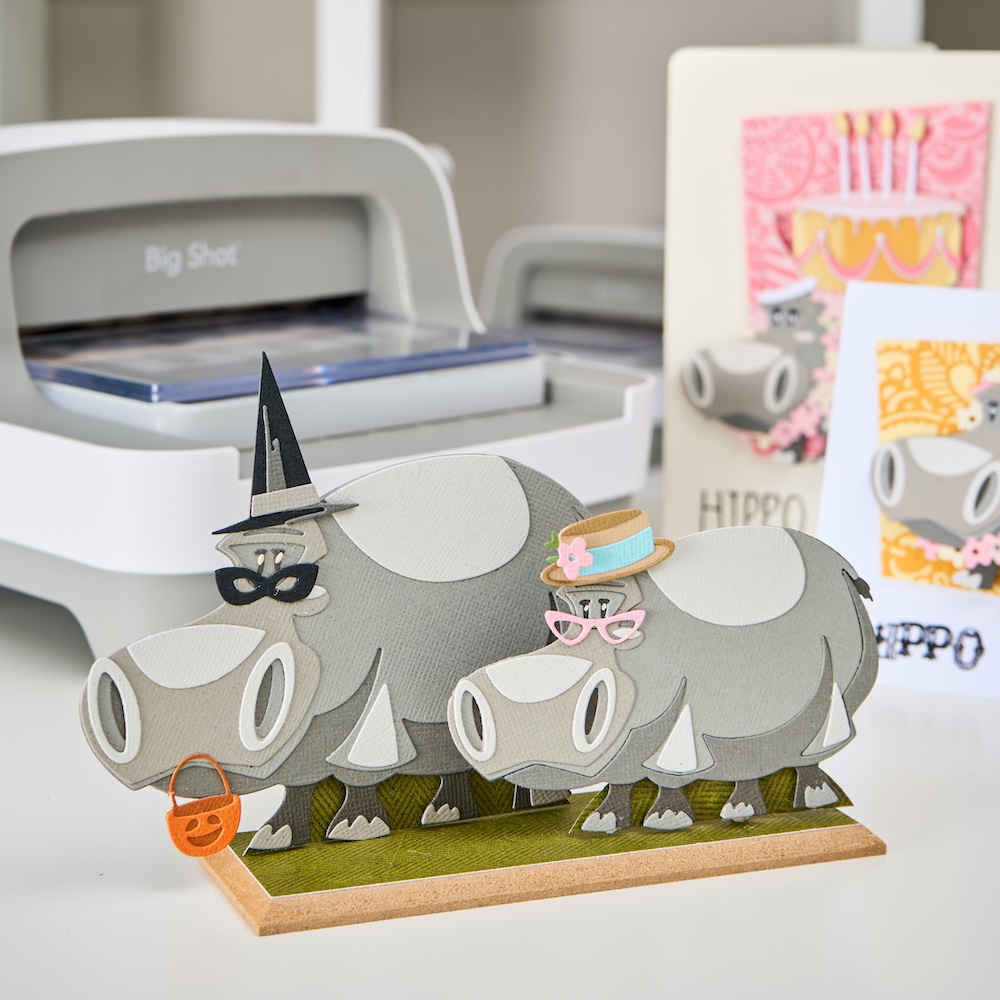
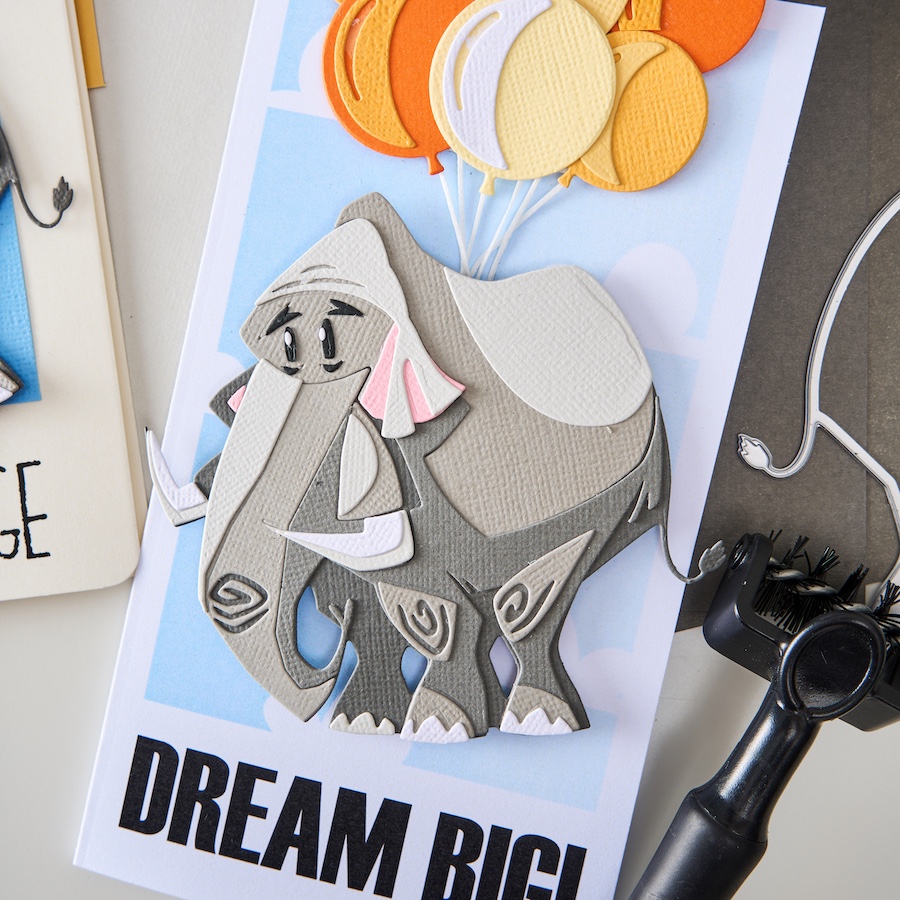
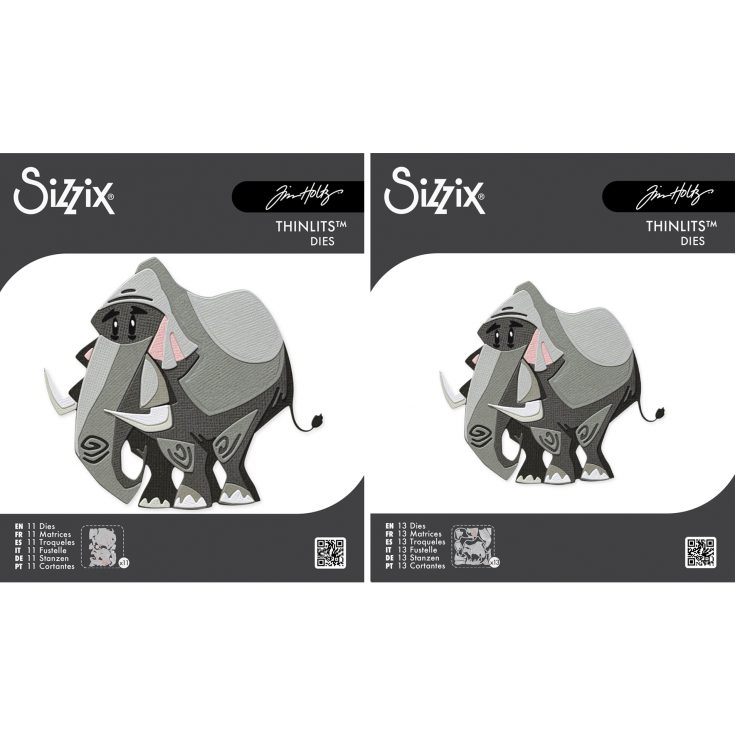
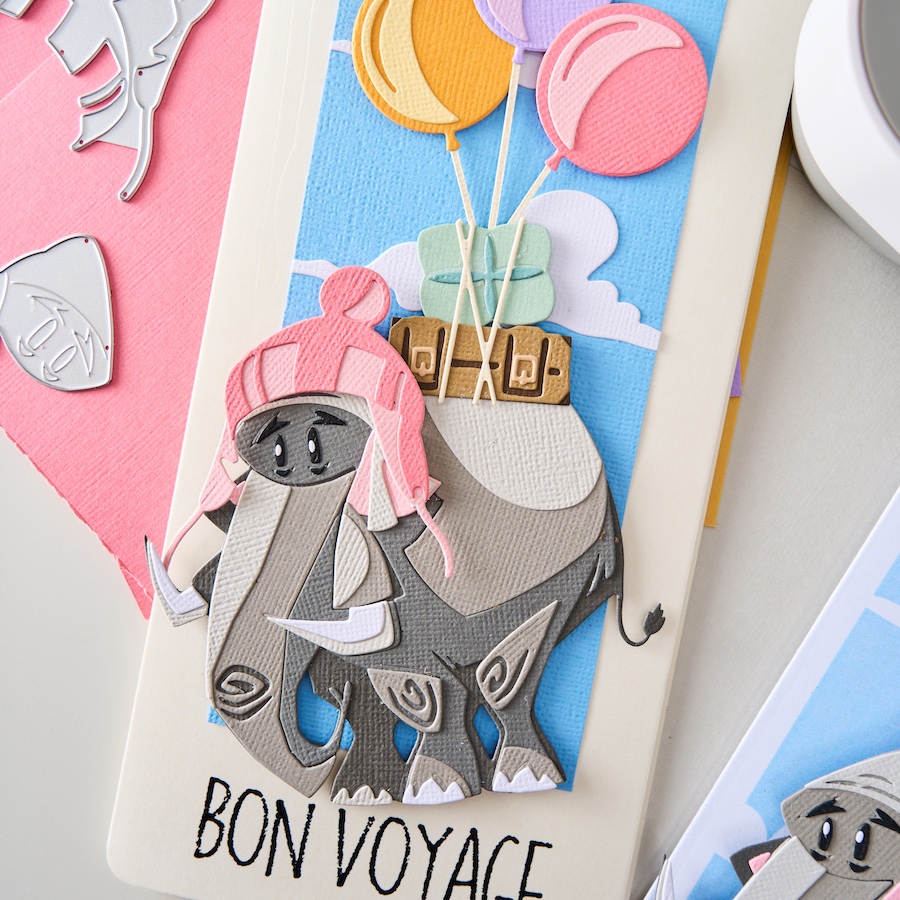
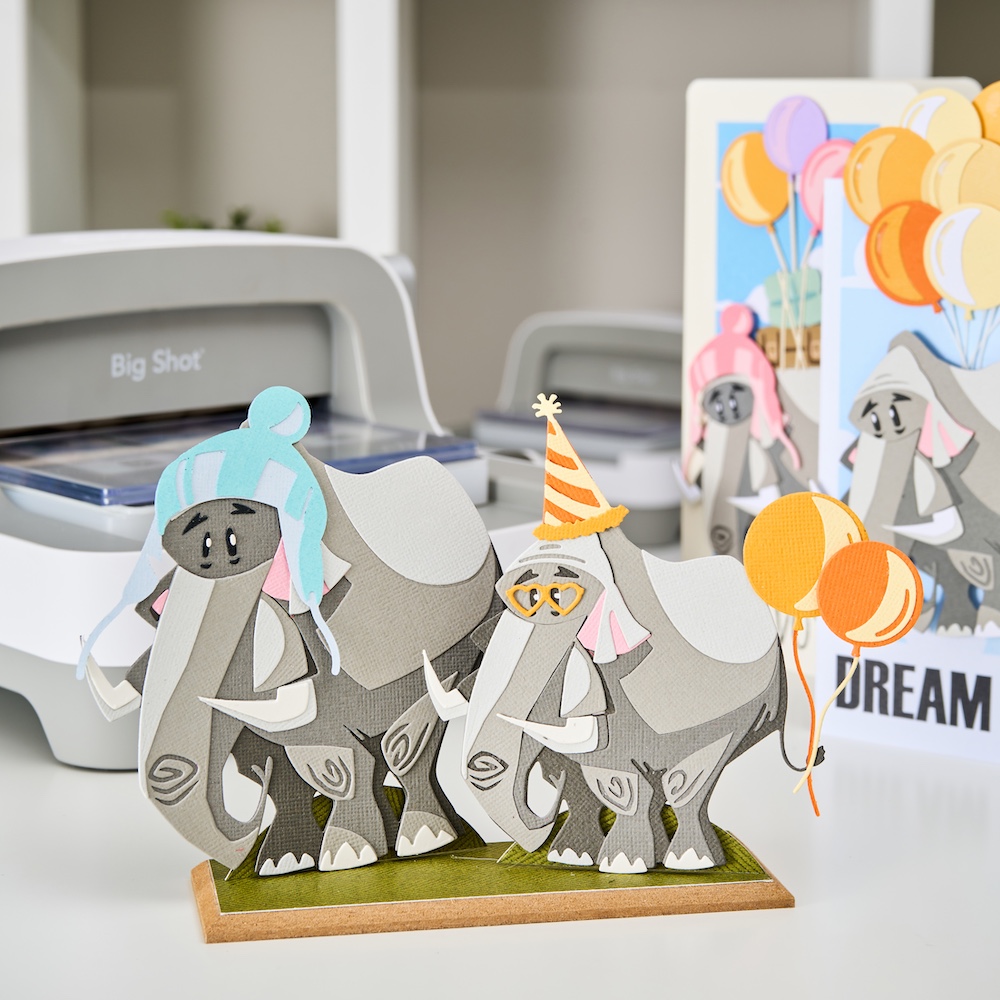
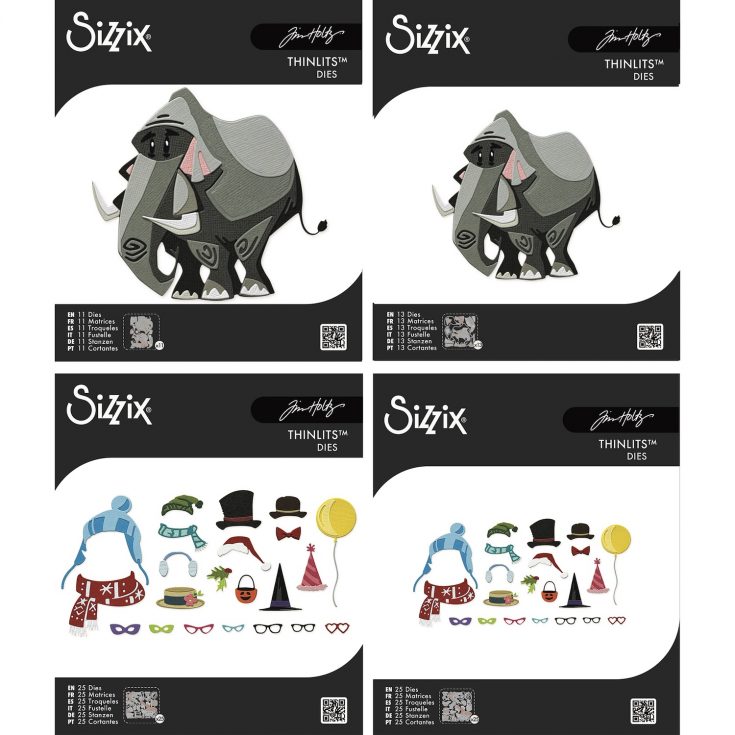
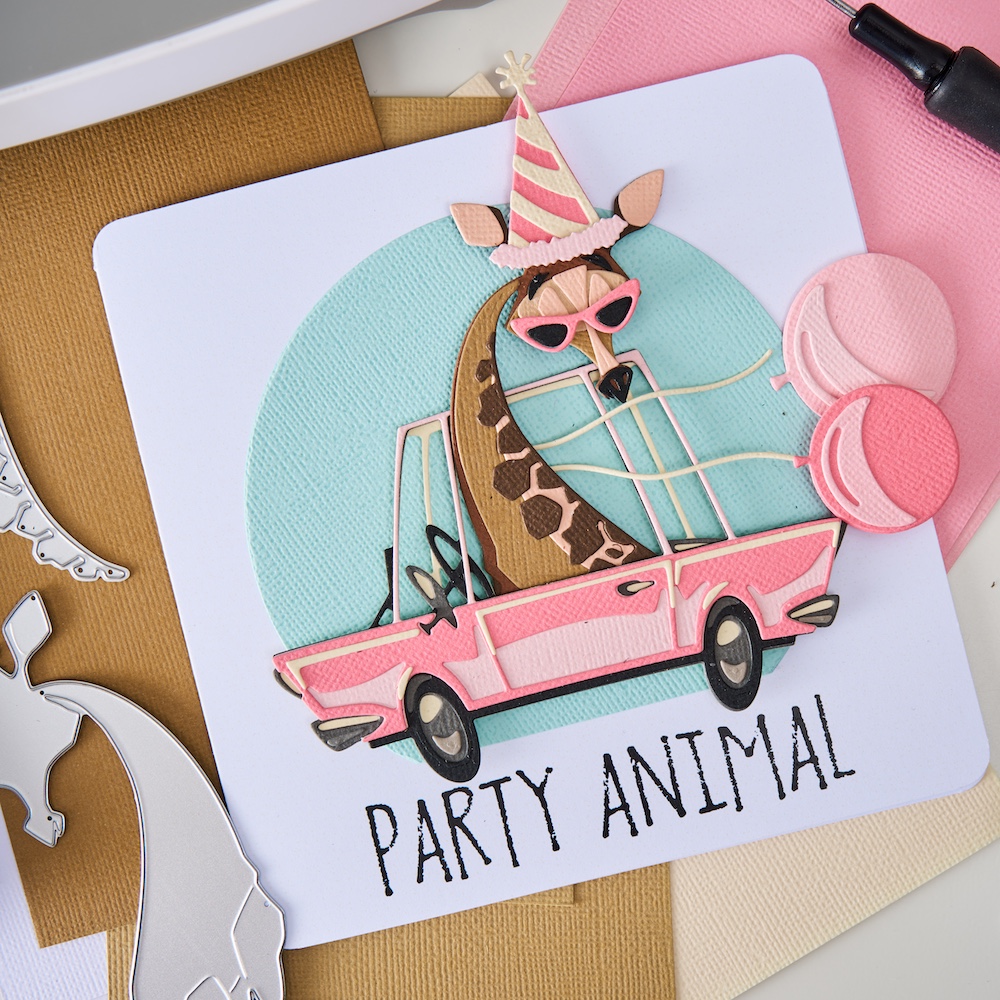
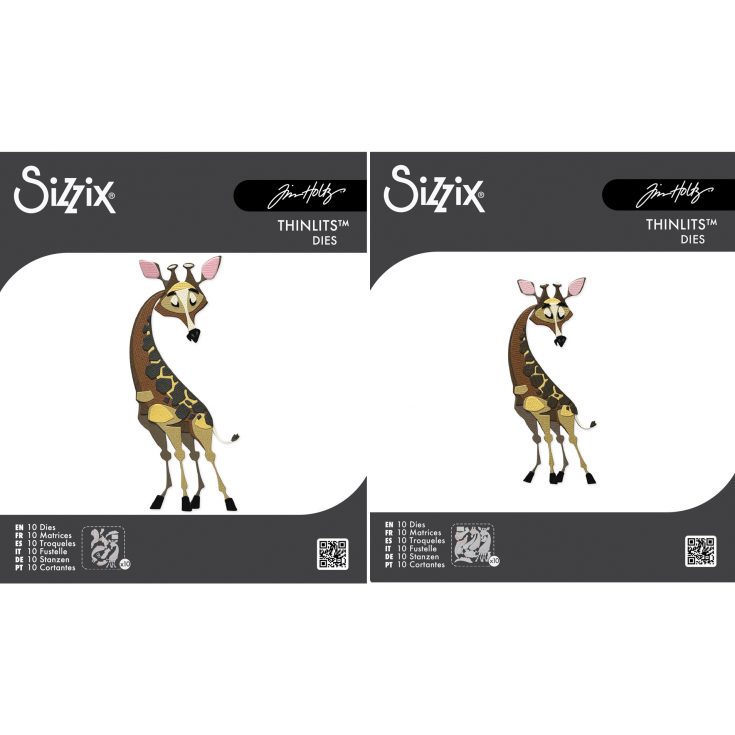
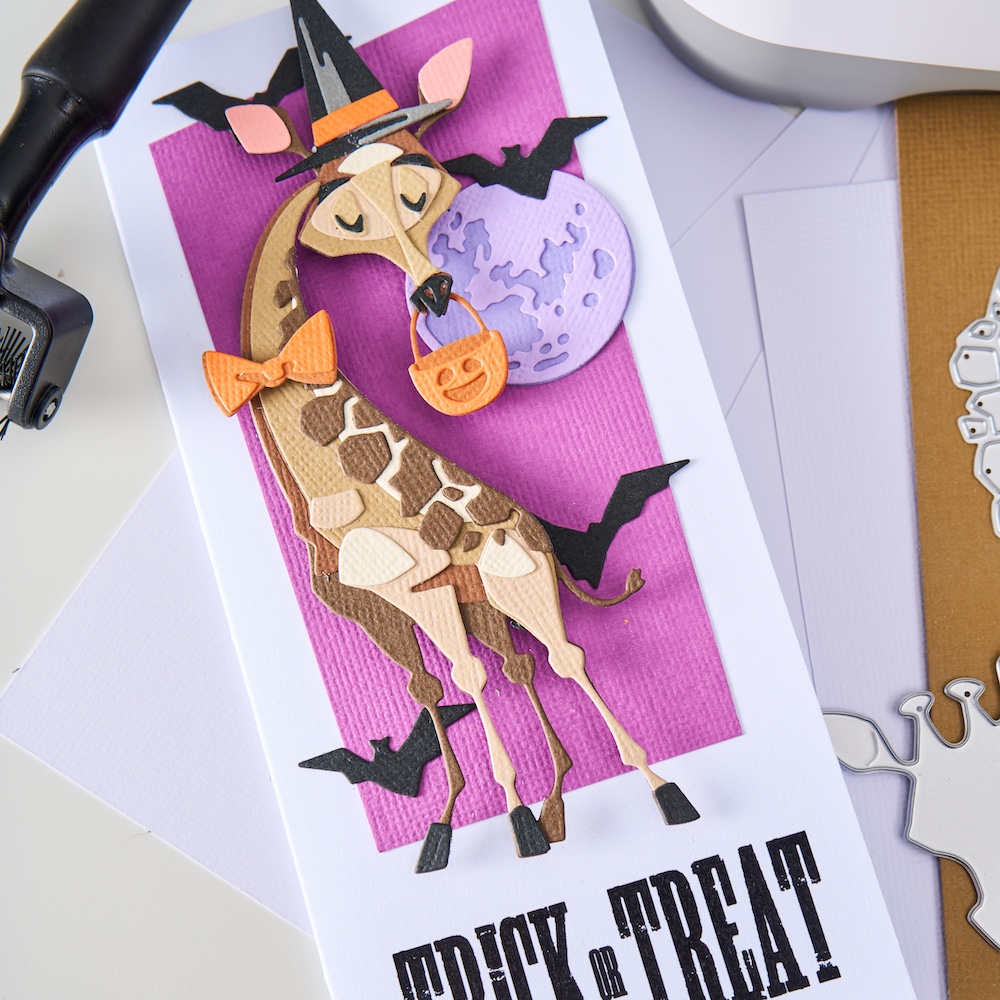
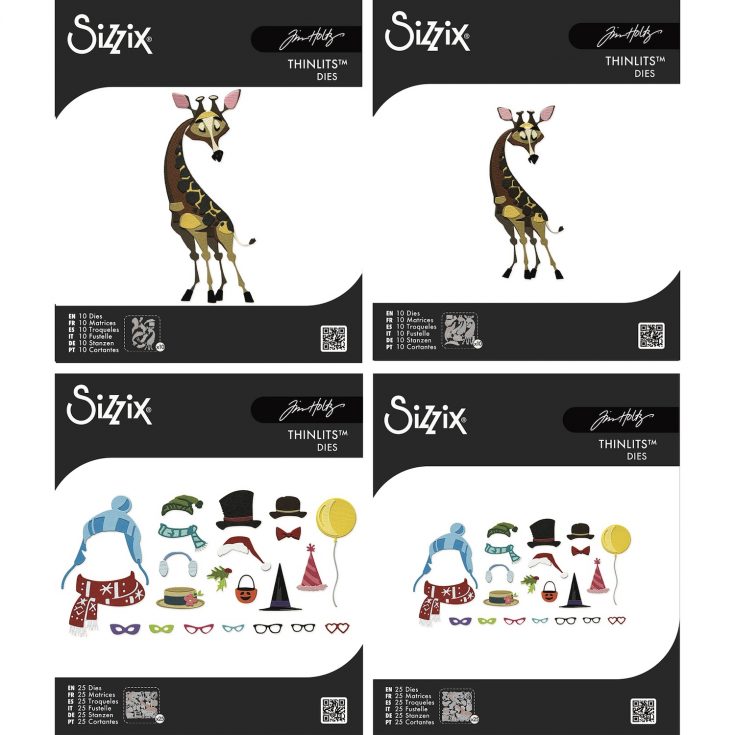
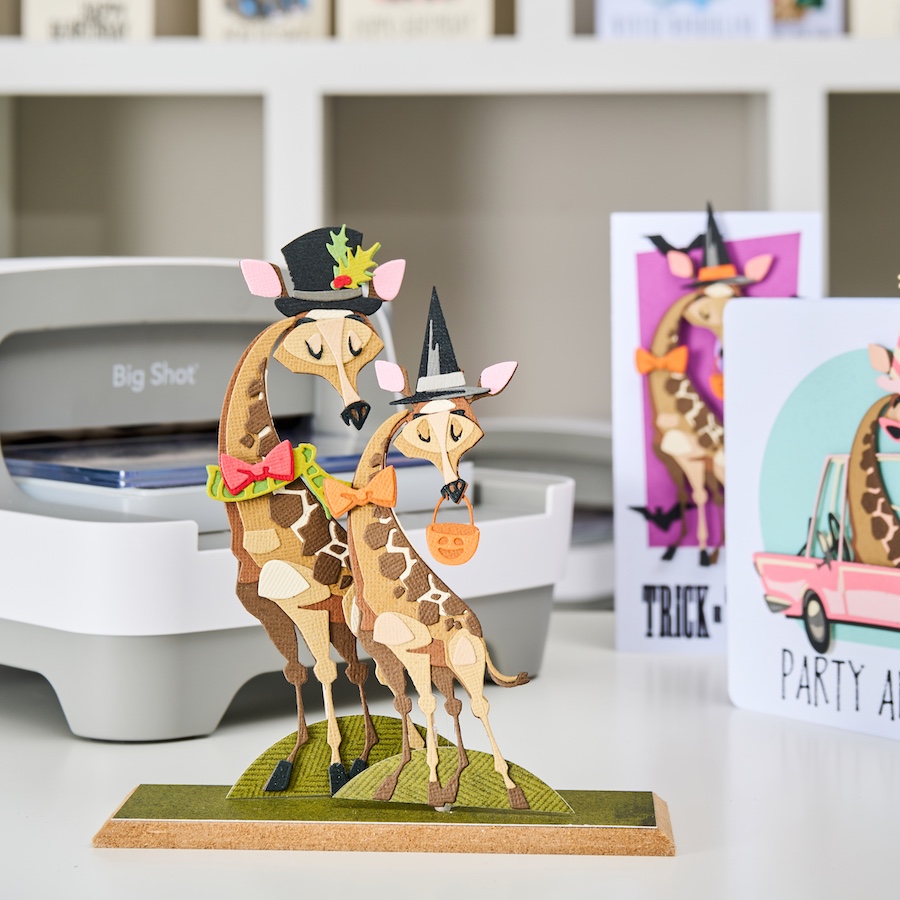
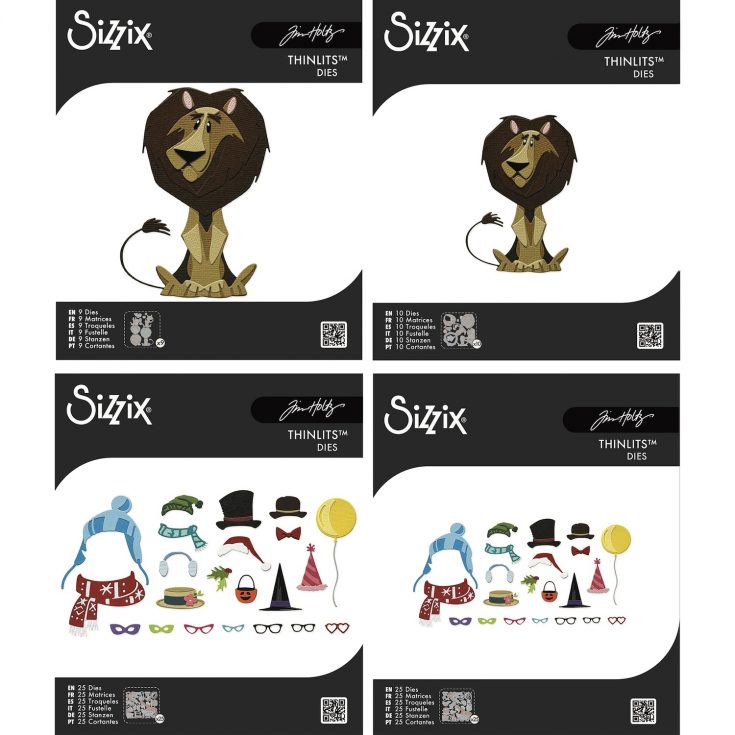
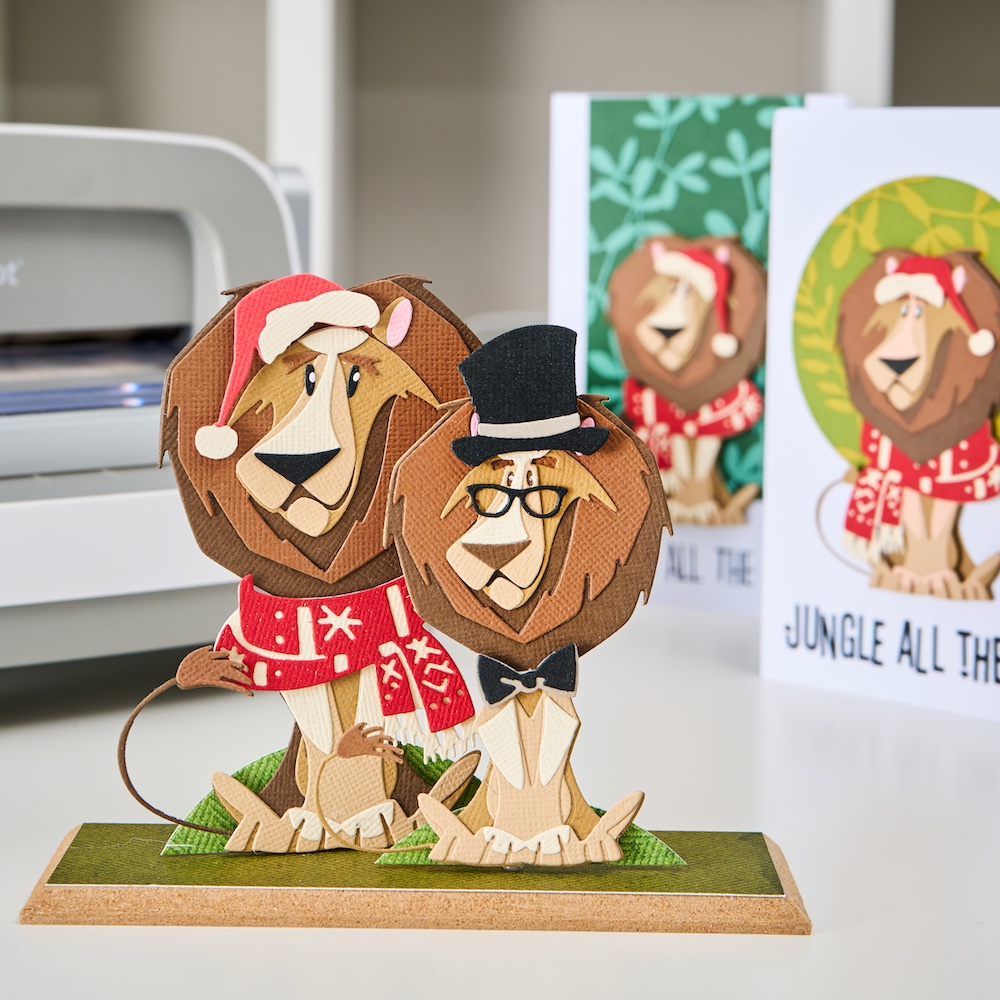
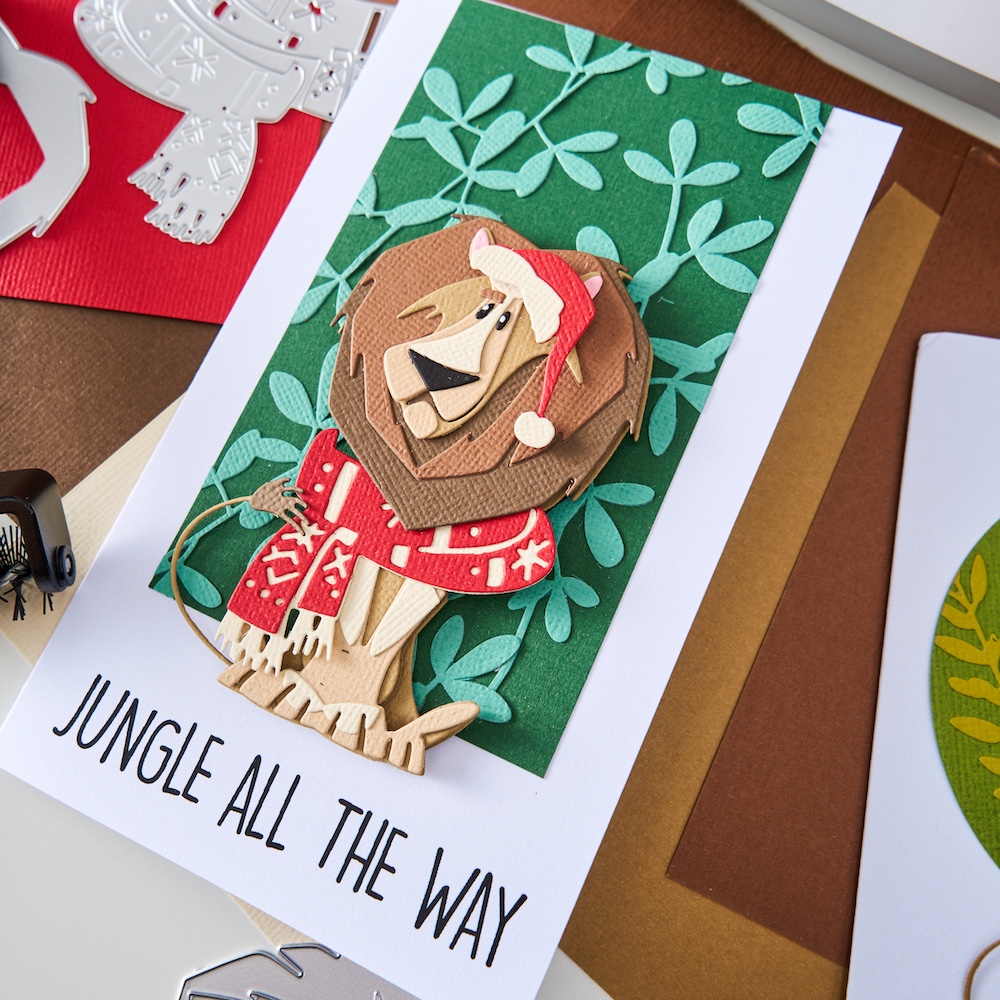
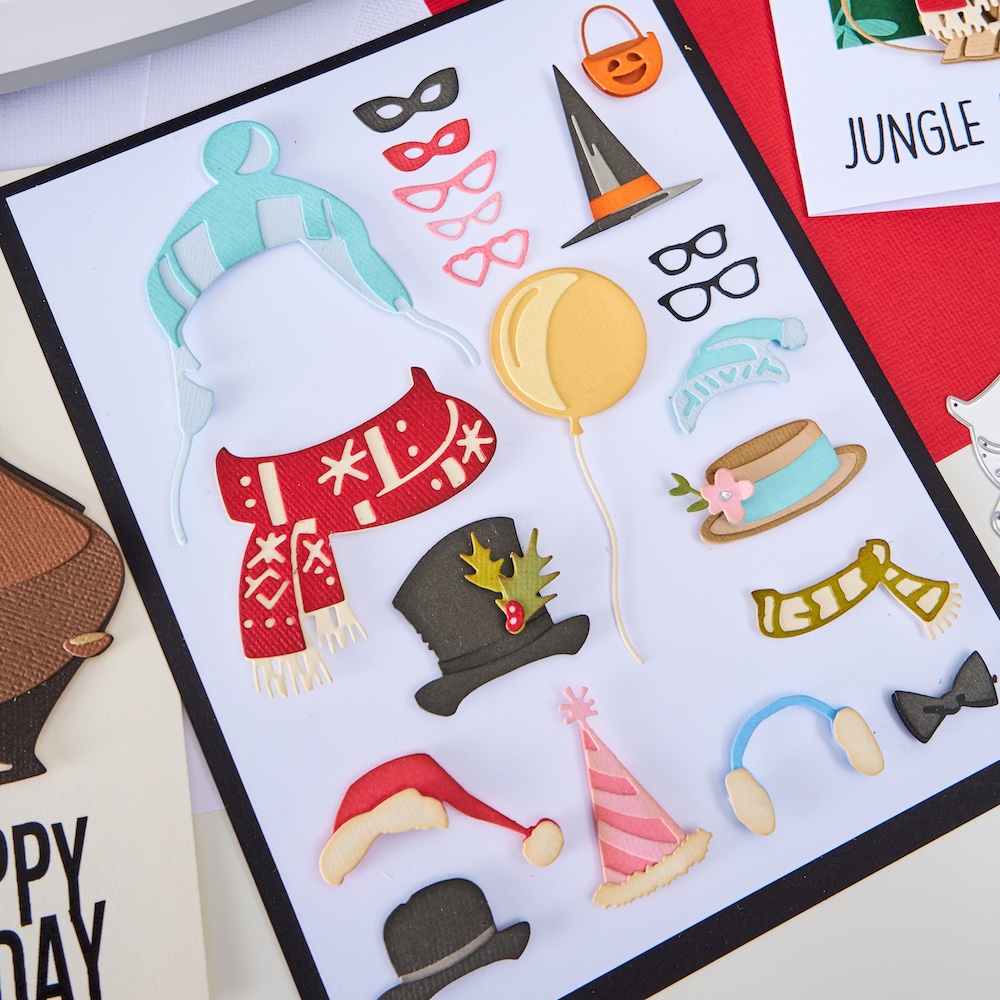
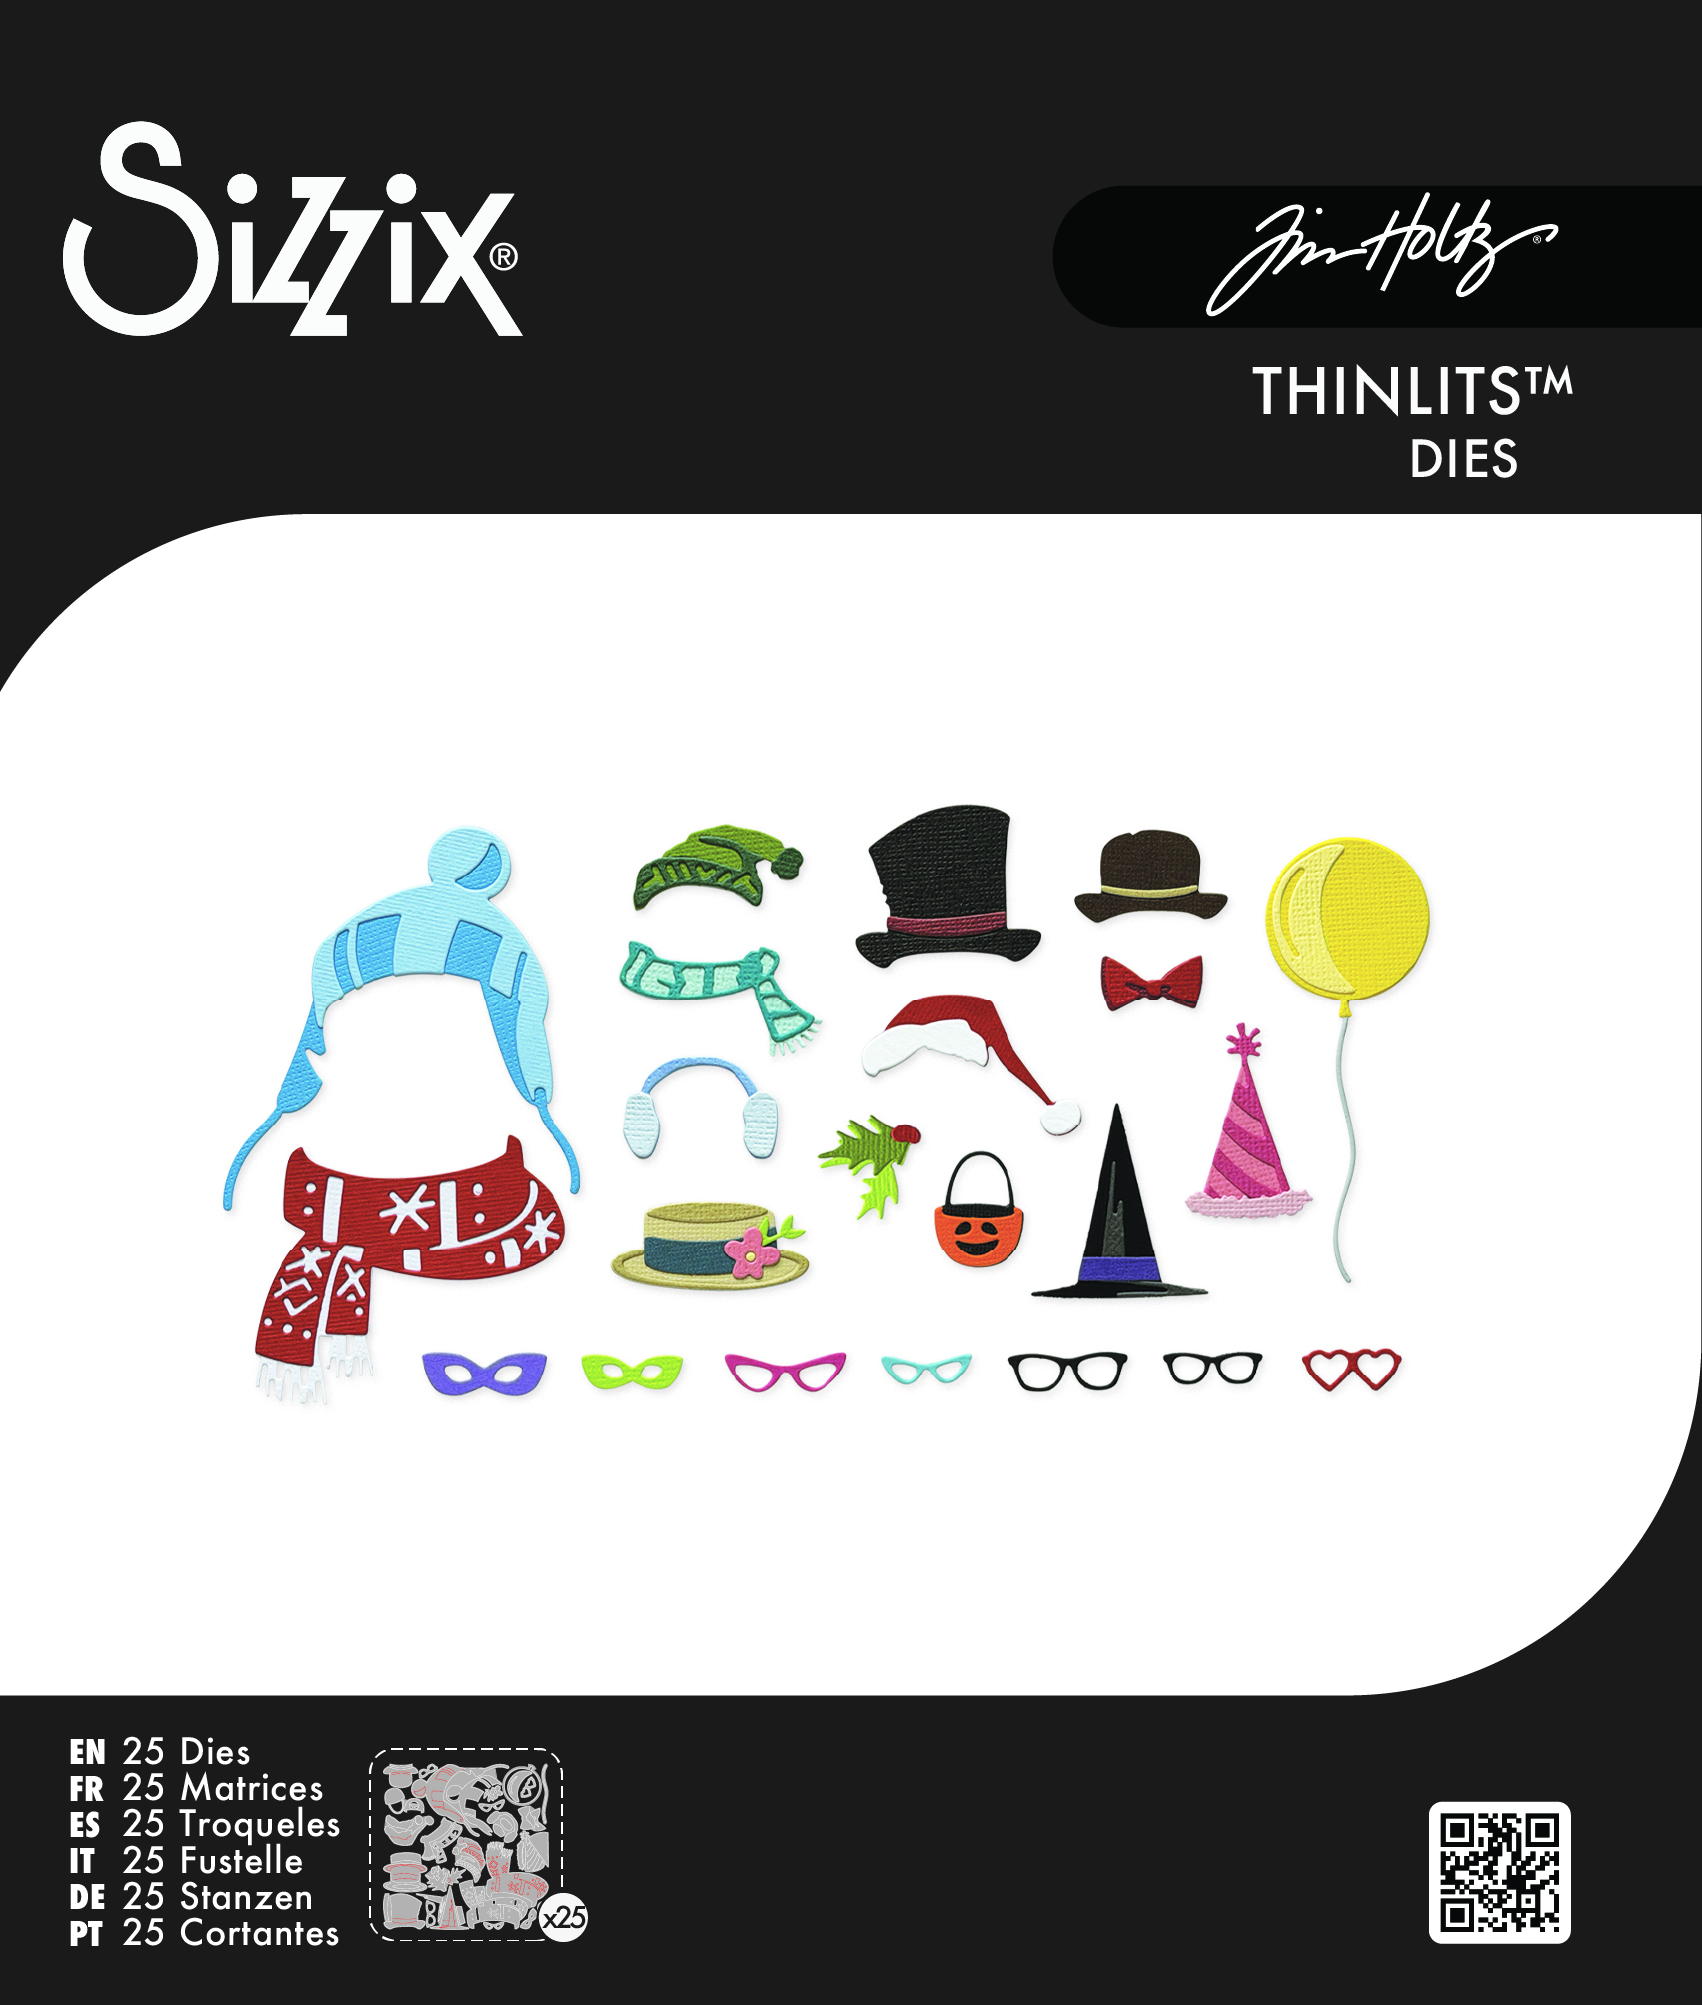
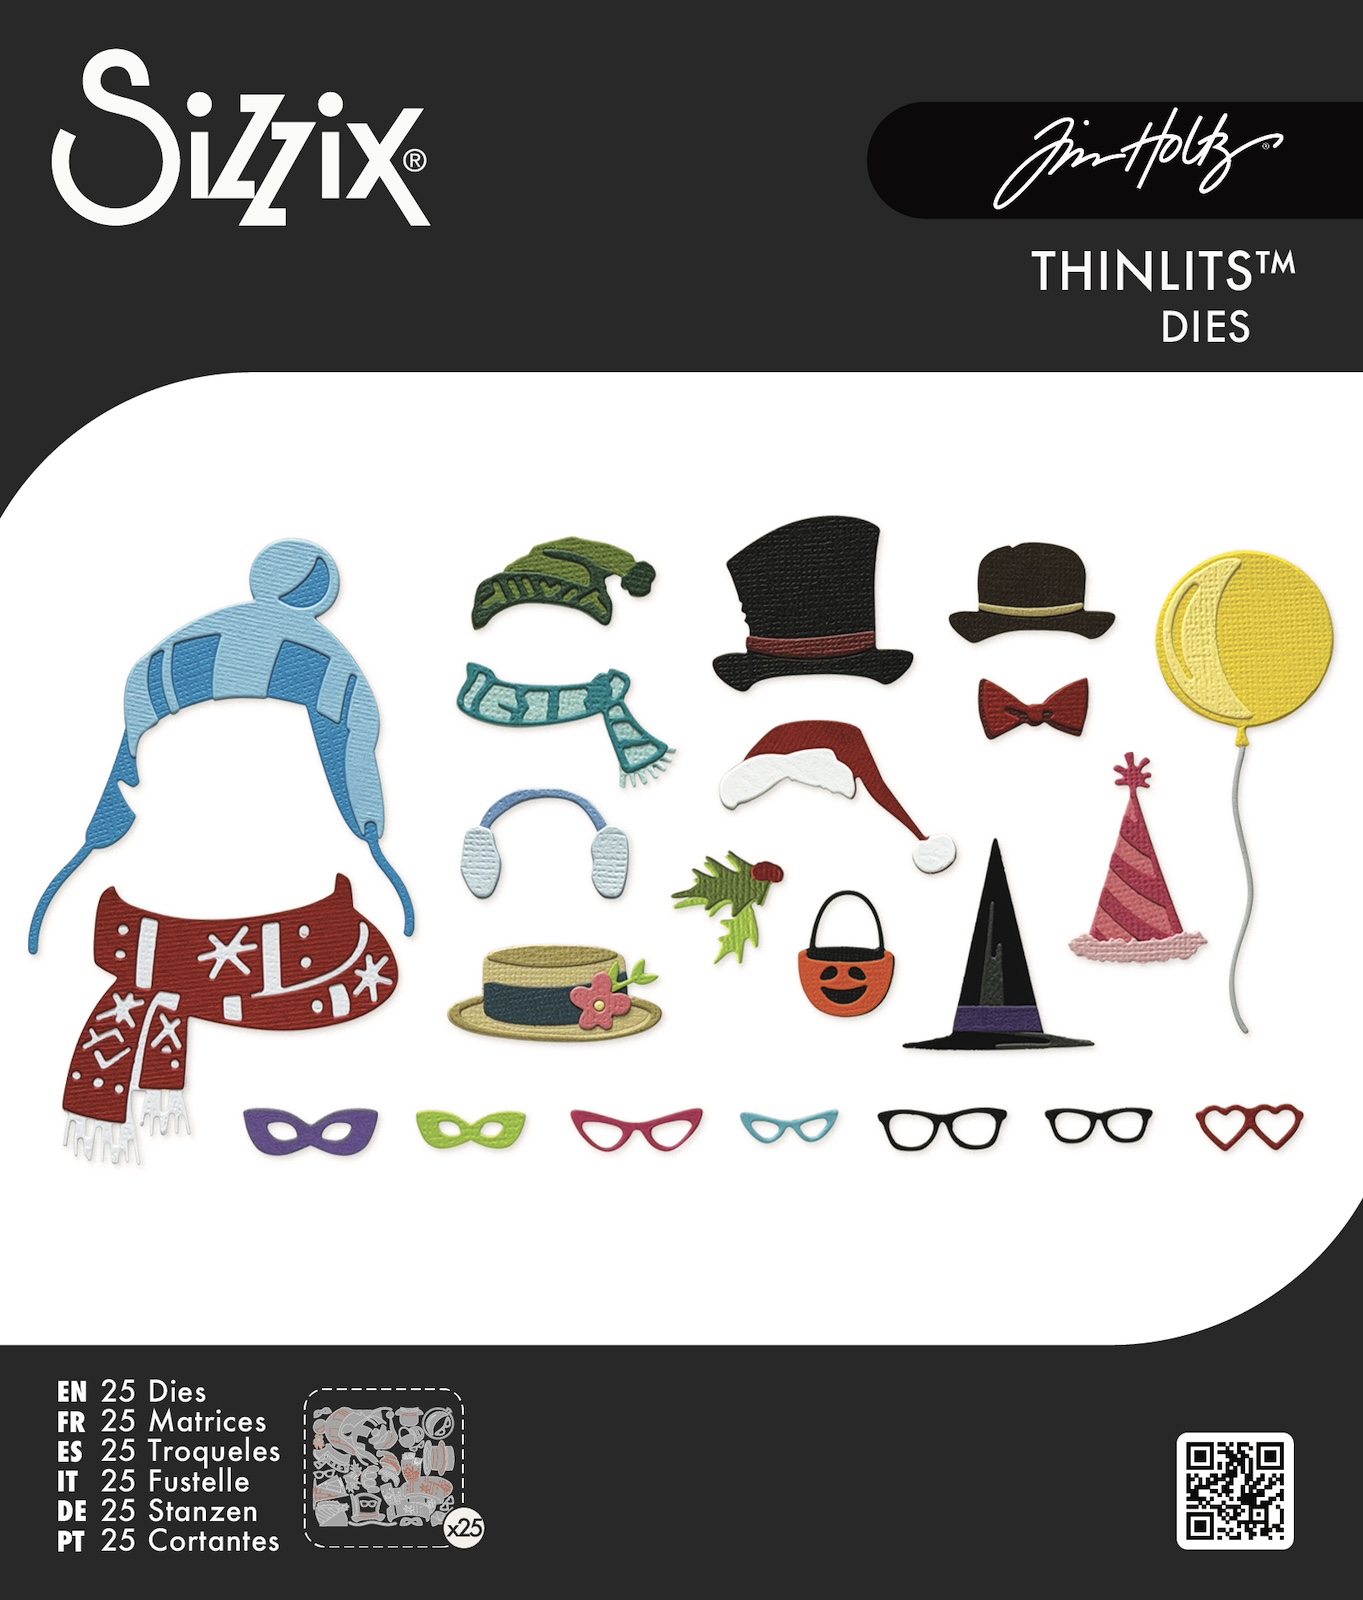
Returning Colorize™ Classics + New Minis from Tim Holtz Sizzix!
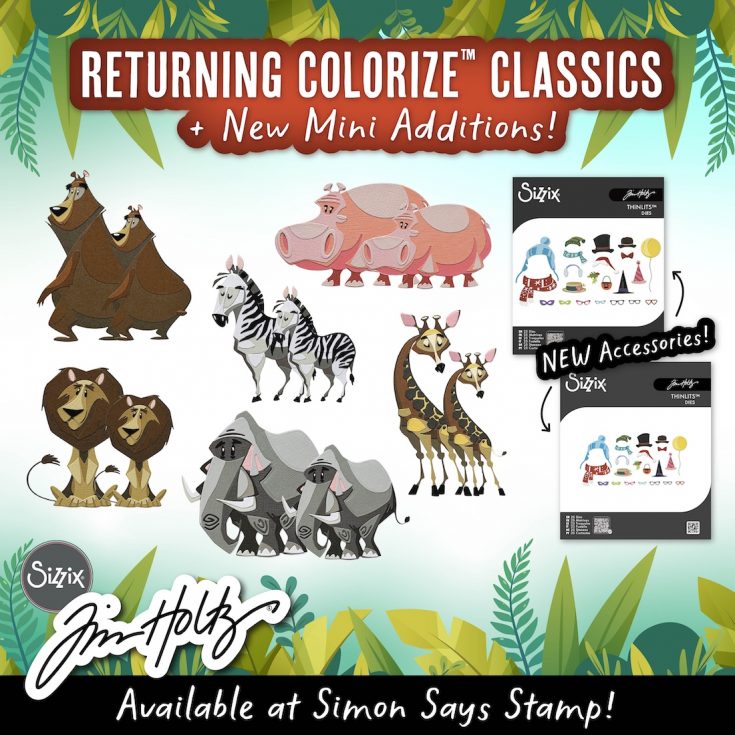
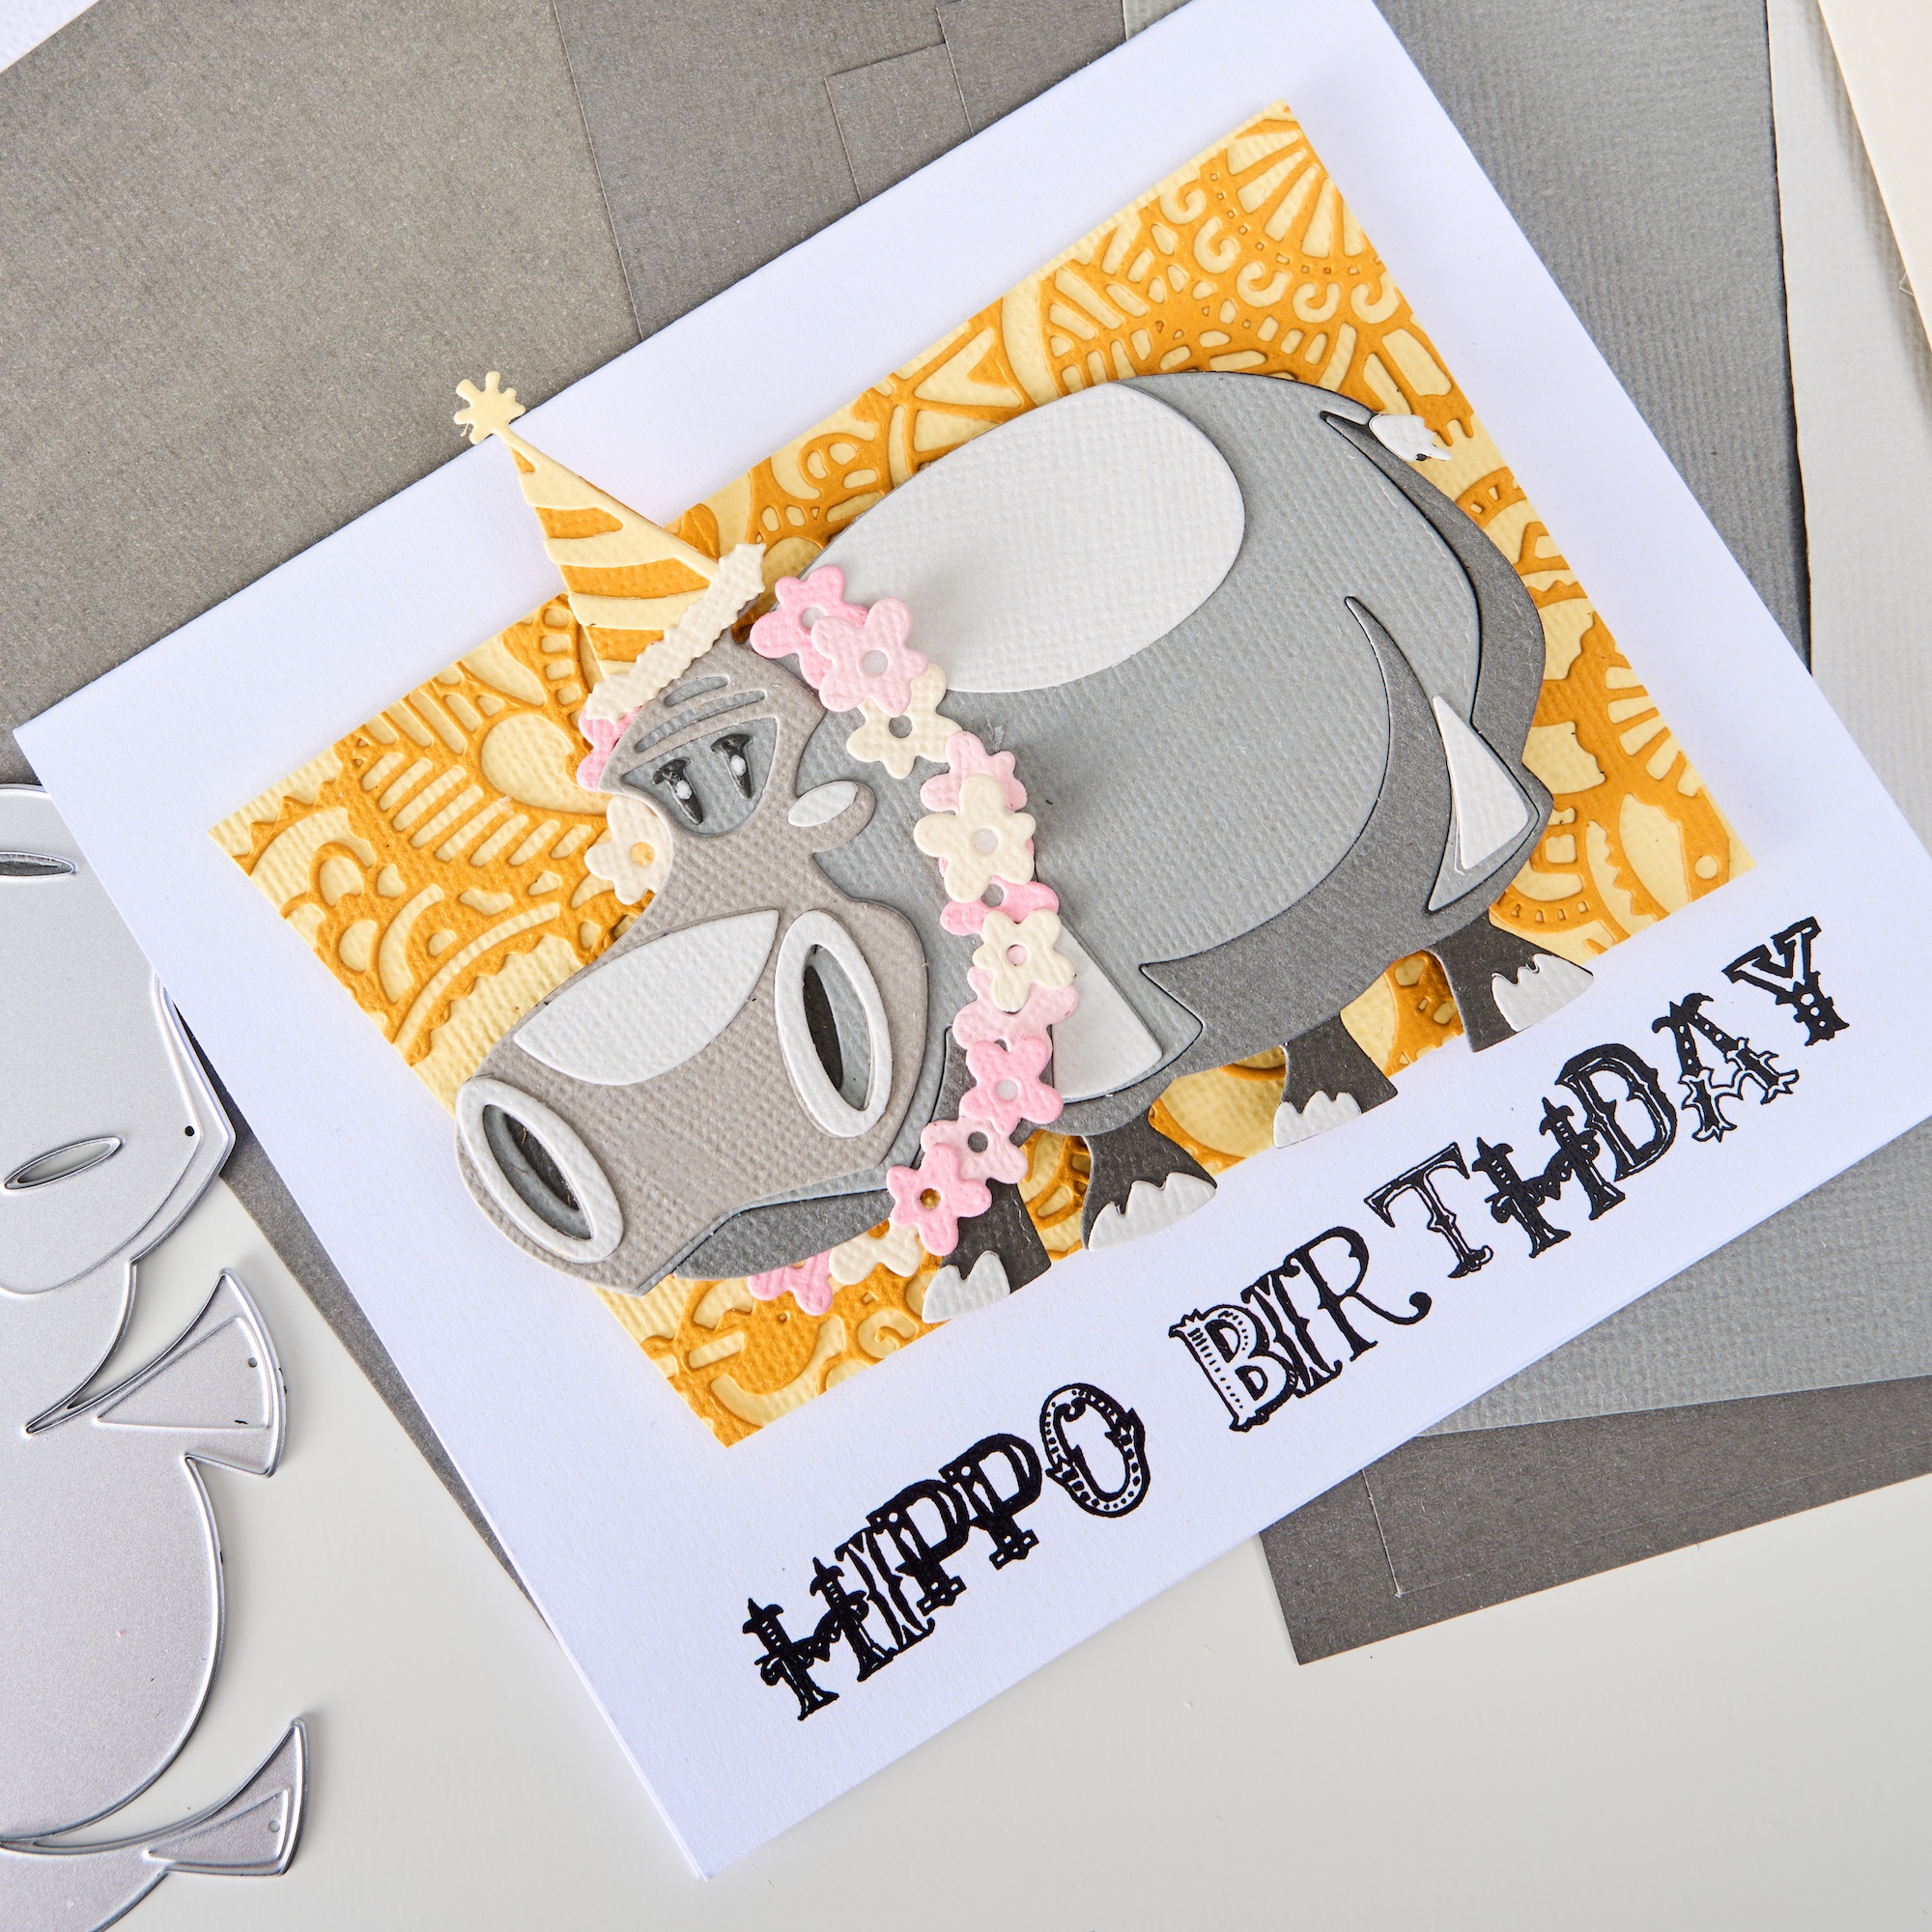
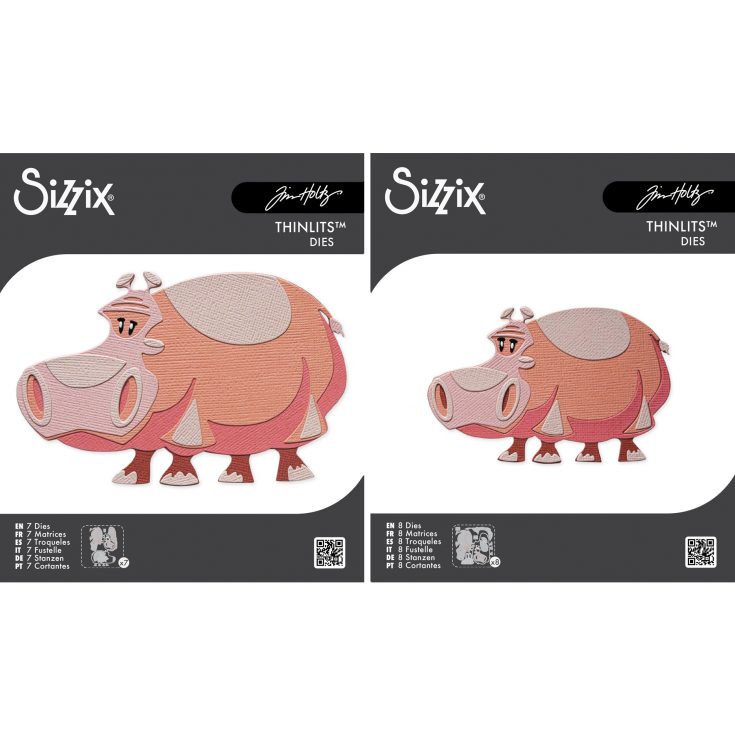
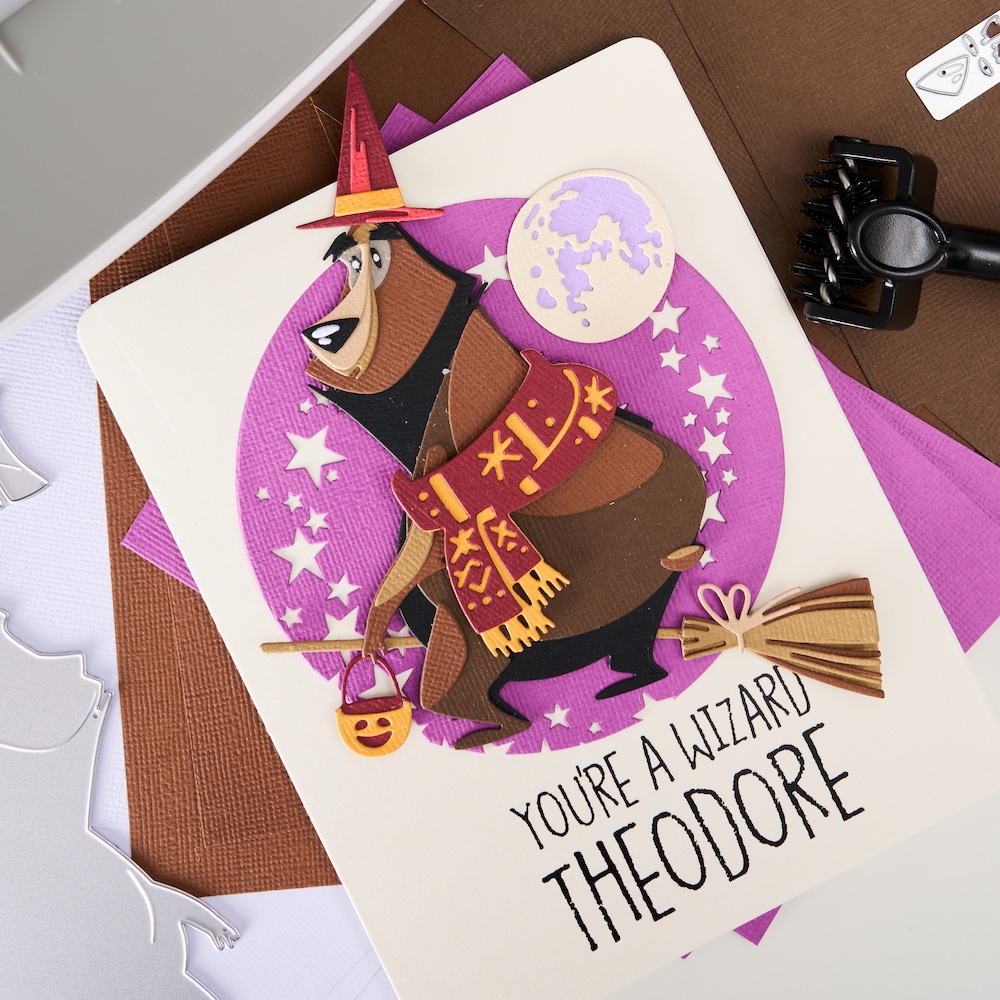
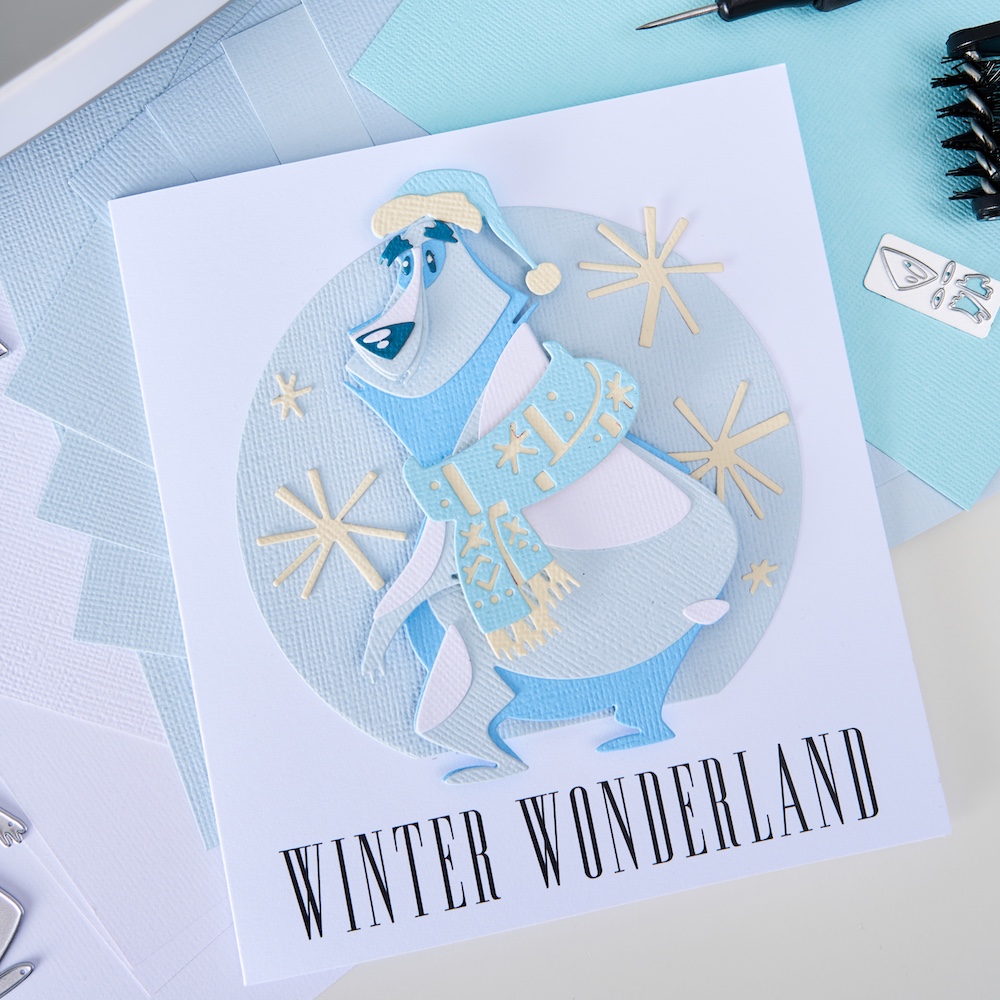
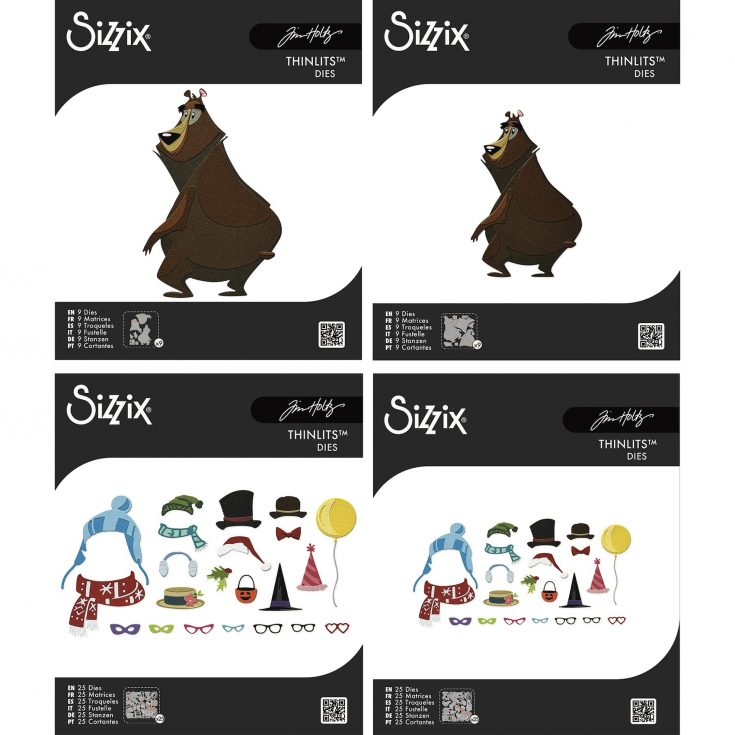
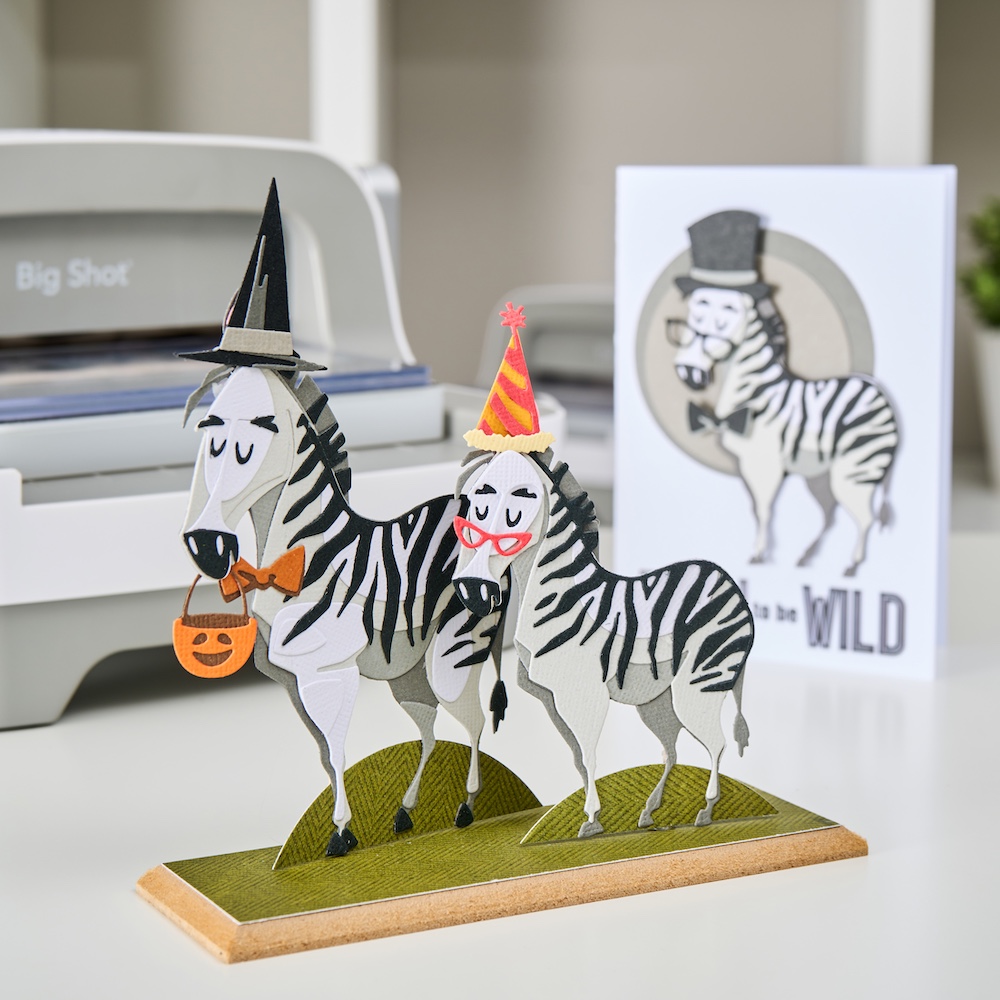
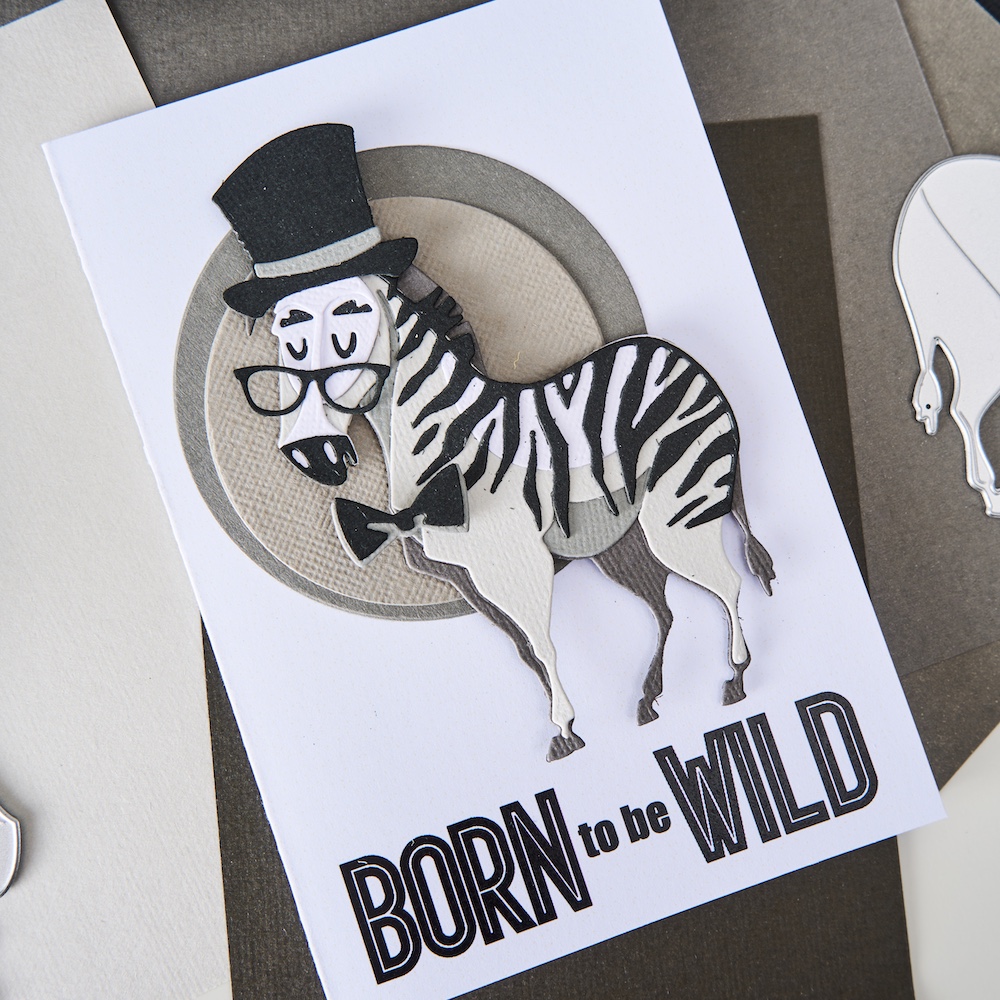
Let the party begin! Tim Holtz and Sizzix are bringing back beloved Colorize™ animal classics in the original sizes you know and love—PLUS adorable NEW mini versions! Say hello again to Bernice the hippo, Clarence the elephant, Gertrude the giraffe, Harrison the lion, Theodore the bear, and Winifred the zebra!
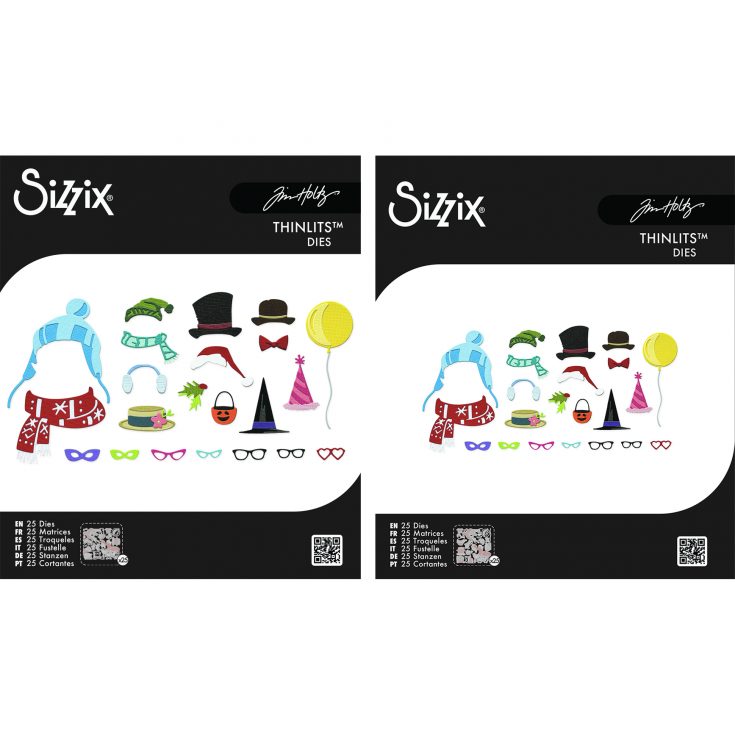
And the fun doesn’t stop there… the playful accessory sets are now available in BOTH sizes too! Get ready for the cutest crafty party ever!

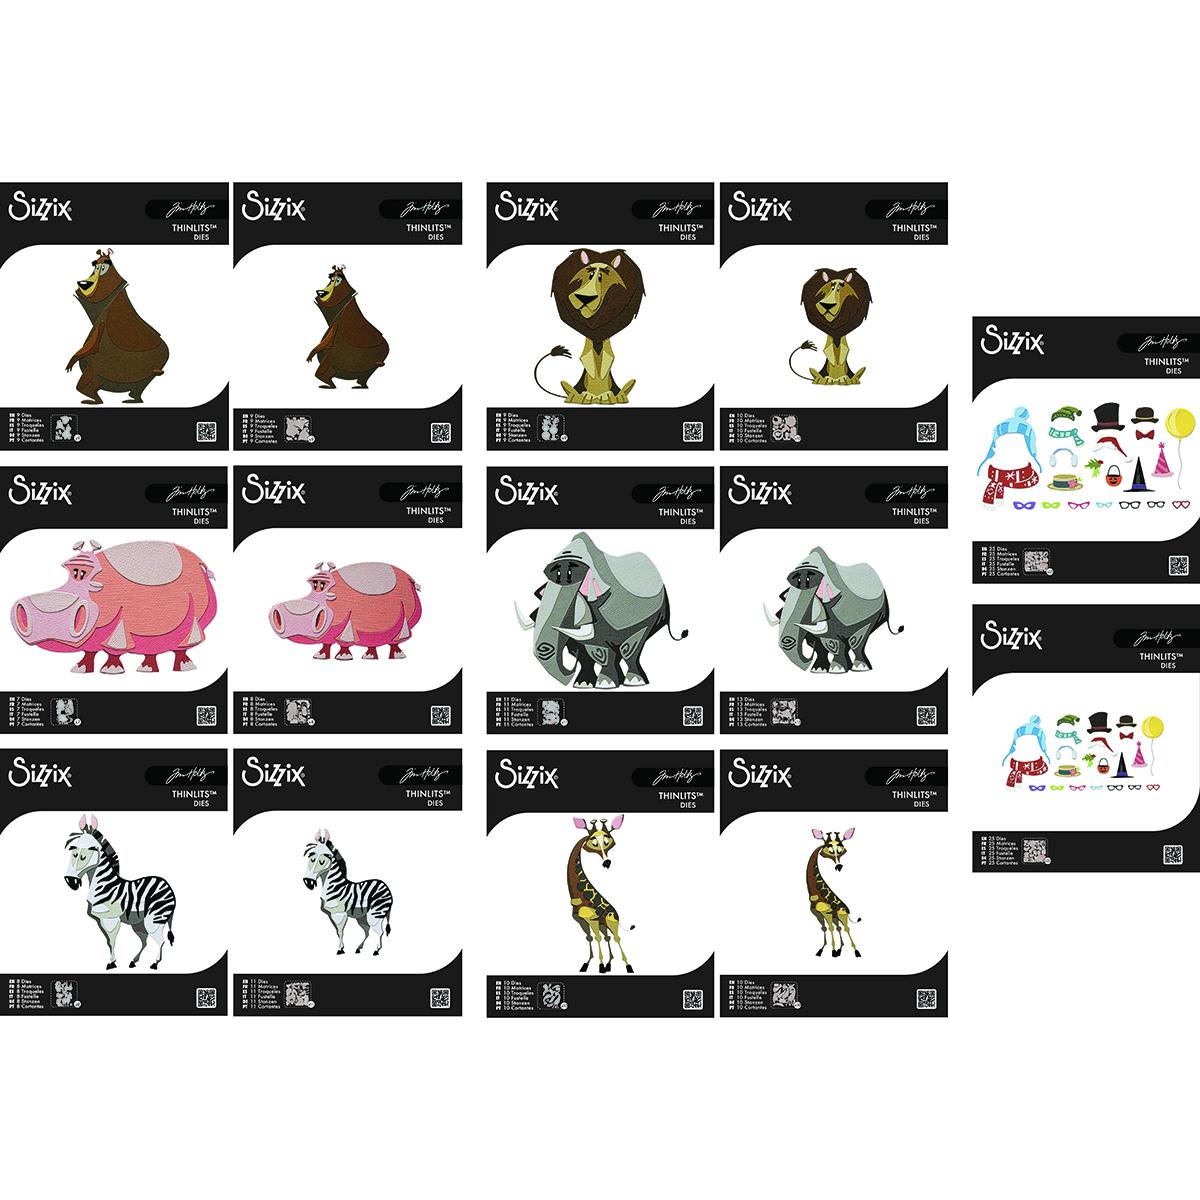
Shop Bernice:
Shop Clarence:
Shop Gertrude:
Shop Harrison:

Shop Theodore:


Shop Winifred:
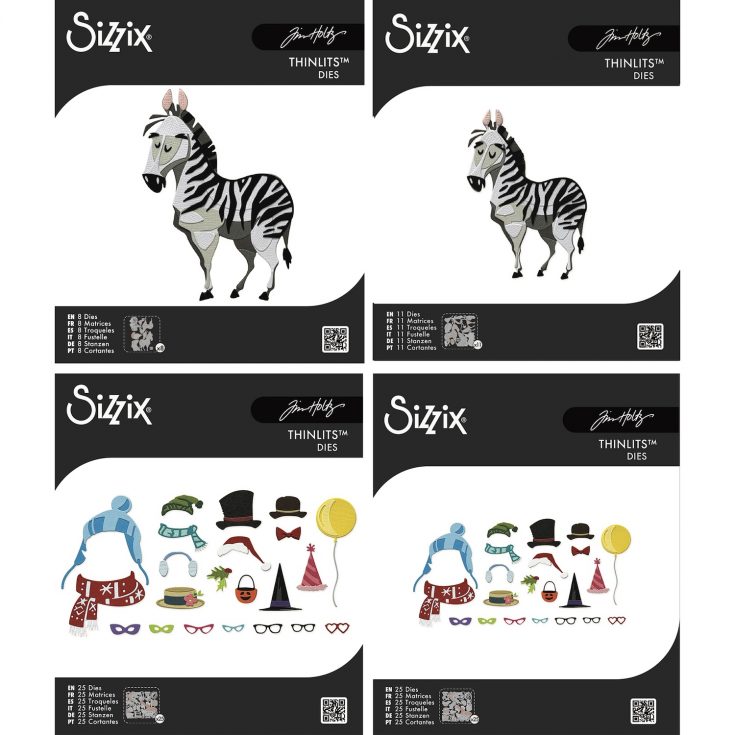
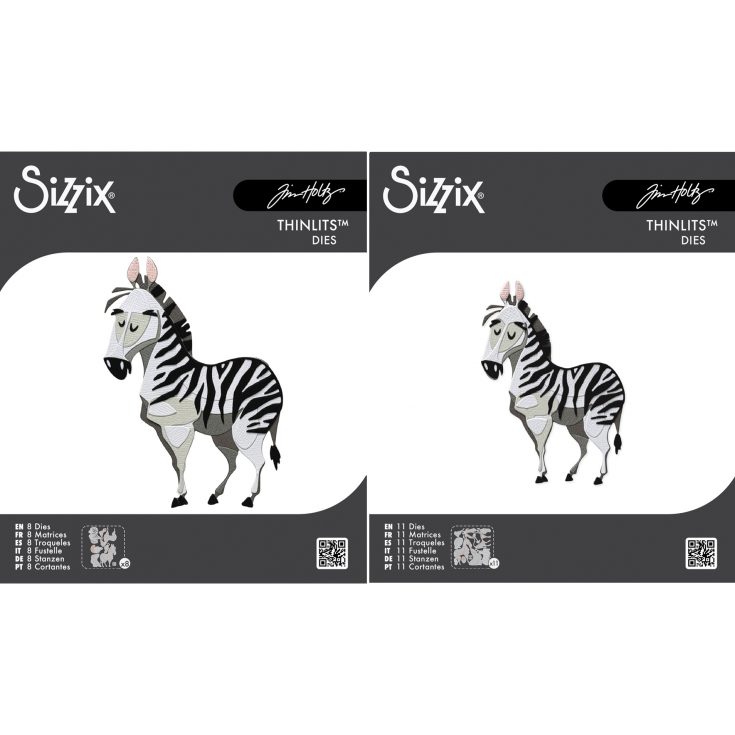
Shop Accessories:
One Stamp, Five Ways: Blooms of Encouragement

Hi friend! Please join me in welcoming back special monthly guest Suzy Plantamura with a BONUS fun rendition of “One Stamp, Five Ways” featuring our BRAND NEW just-released Blooms of Encouragement set! Read on and learn more! Enjoy!
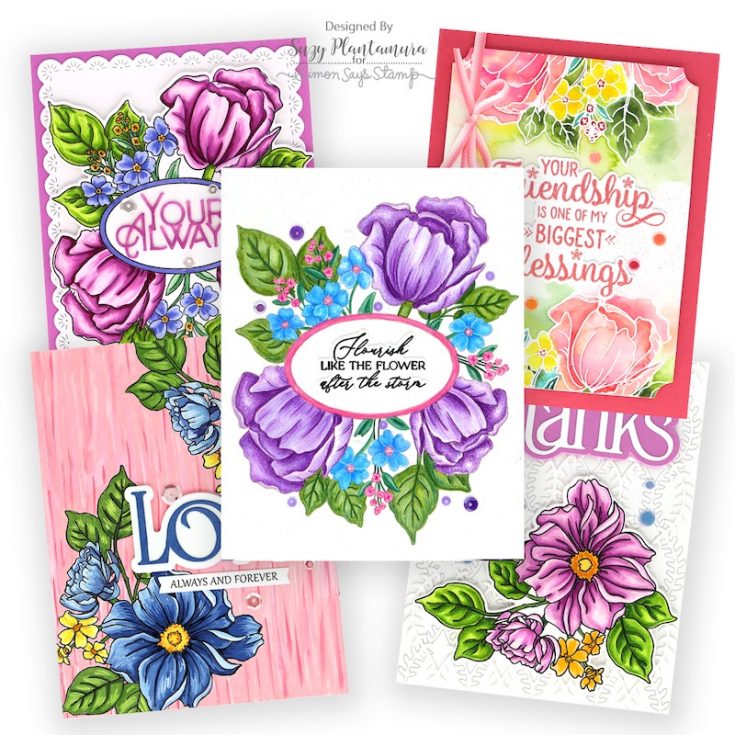
My yard is currently in full bloom of all my favorite flowers! When I saw the Blooms of Encouragement Stamp Set from the Always There release it reminded me of some of my favorite flowers in my yard. I couldn’t wait to color these stamps which I did with four different coloring mediums. I hope my “one stamp, five ways” post today inspires you to use your stamps in more ways.
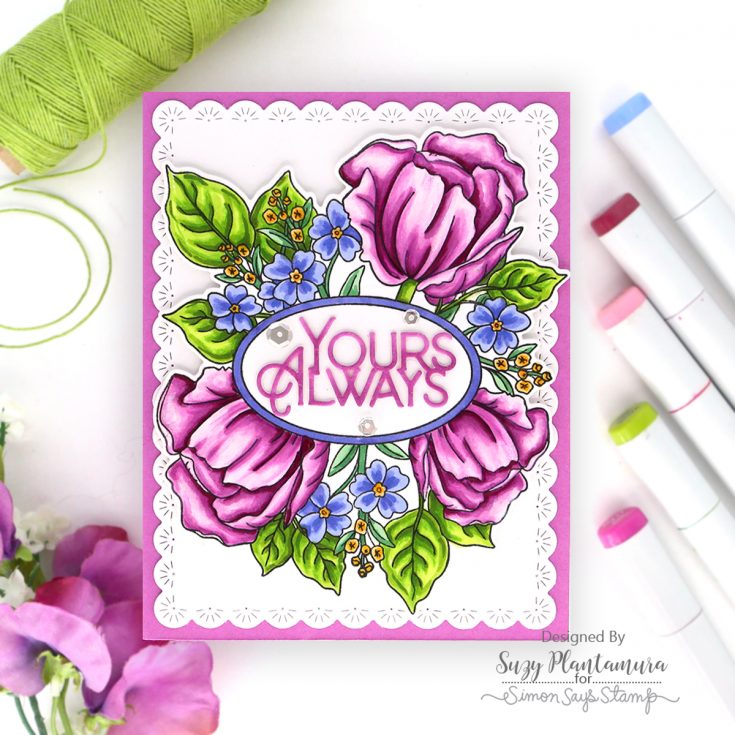
My first card was made with the larger of the two floral groupings in the Blooms of Encouragement stamp set. I stamped it with black ink and colored it with Copic Markers. I die-cut it out with the matching dies.
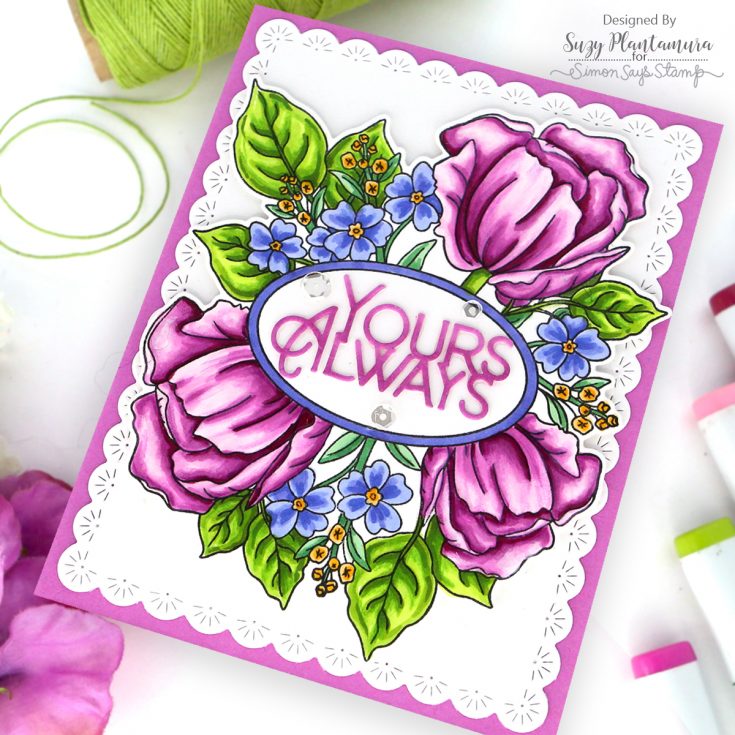
I die-cut one of the new Sparkler Scalloped Frame Dies using white cardstock and mounted it on an orchid card base. I attached the stamped image with foam tape behind it to the background. I die-cut the Yours Always Die and colored it with Copics to match the flowers. I glued that inside the circle. I added some Moonshine Embellishment Mix around the sentiment.
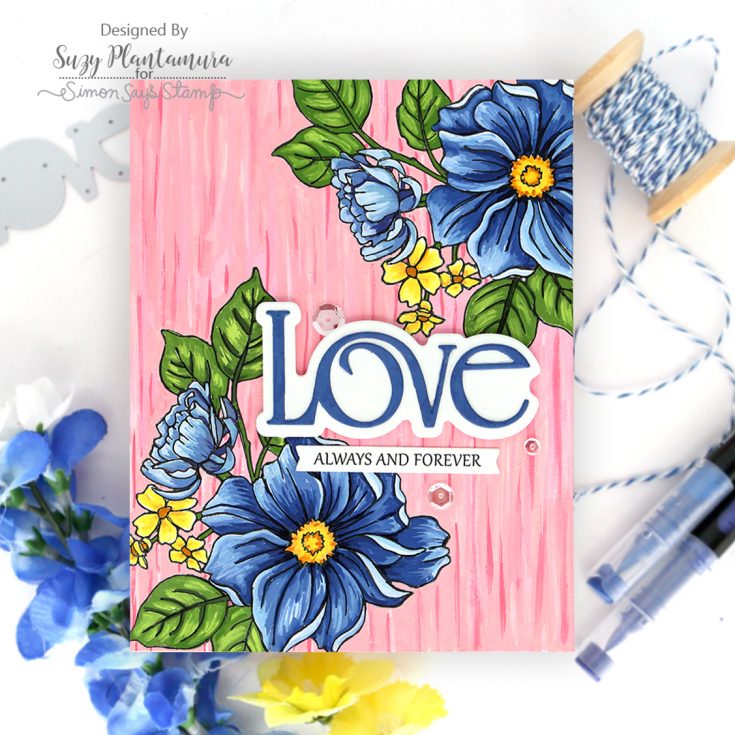
I stamped the stamp with the smaller floral grouping with black ink on both corners of a piece of A2 sized white cardstock. I colored this one-layer card with my new Acrylic Markers I’m in love with! They are so fun to color backgrounds with. I worked in small areas painting with a pale pink first and then little strips of a darker pink and white. While they were still wet, I’d use my finger to smear them together.
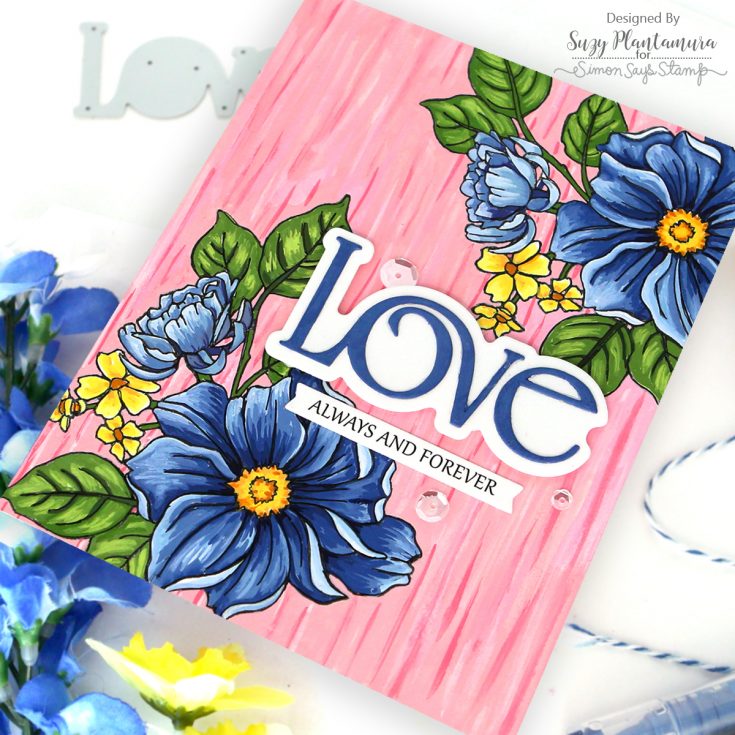
I used the Timeless Love Die for the sentiment die-cut from white cardstock. I colored the letters with a blue acrylic marker and glued them over the white background. I attached that to the center of the card with foam tape behind it. I die-cut the Traditional Wedding EZ Strips with the EZ Strips Banner Dies. I glued one of the small ones below the Love Die and added some sparkling clear sequins around the greeting.
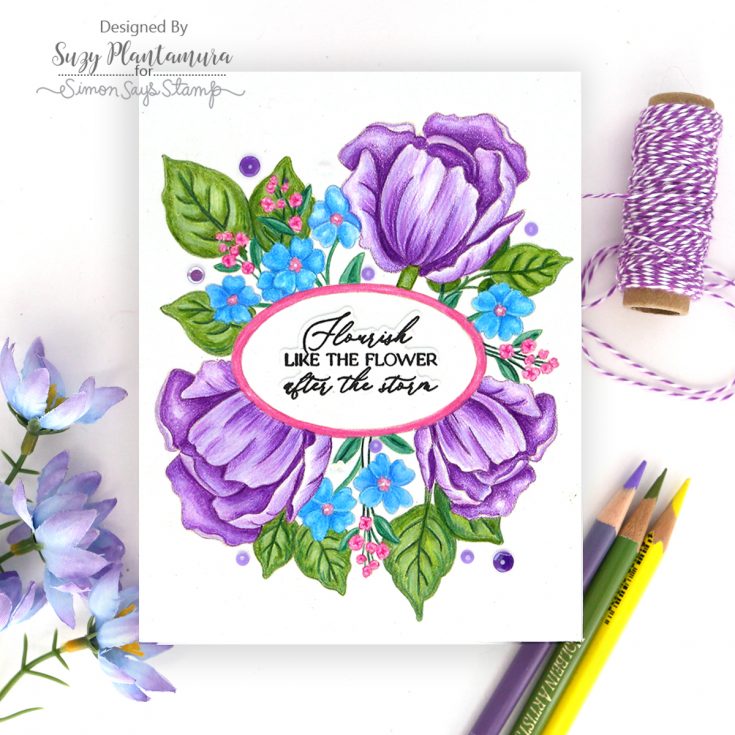
I stamped the larger floral stamp on the center of white cardstock using Latte PSInk. I colored it in this time with colored pencils. I love how soft the image looks colored with pencils but it does take longer than other coloring methods!
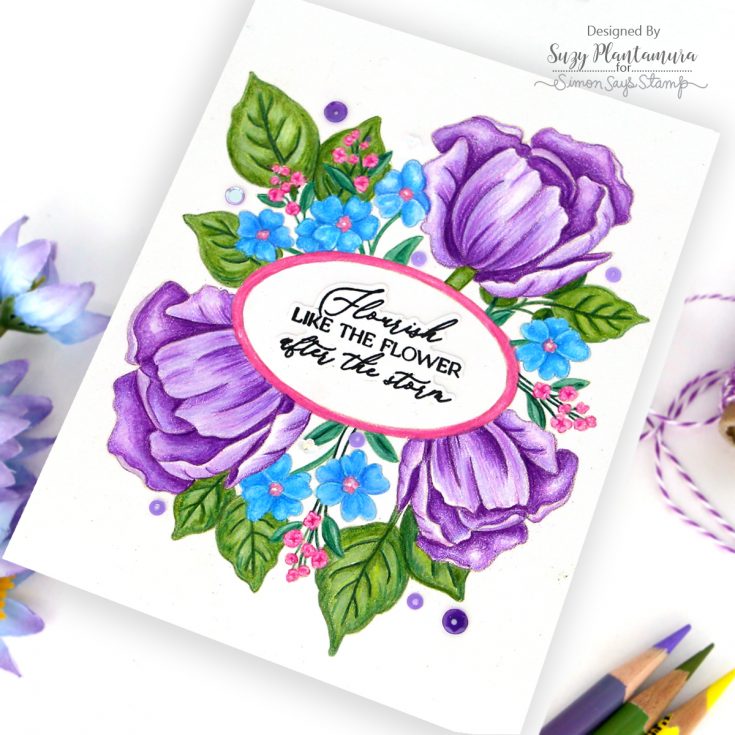
I stamped a sentiment from the stamp set with black ink and die-cut it out. I glued that to the center of the oval. I added some purple and small white flower sequins around the flowers. If you don’t have the dies, this is an easy one-layer card design as I could have stamped the sentiment right on the background.
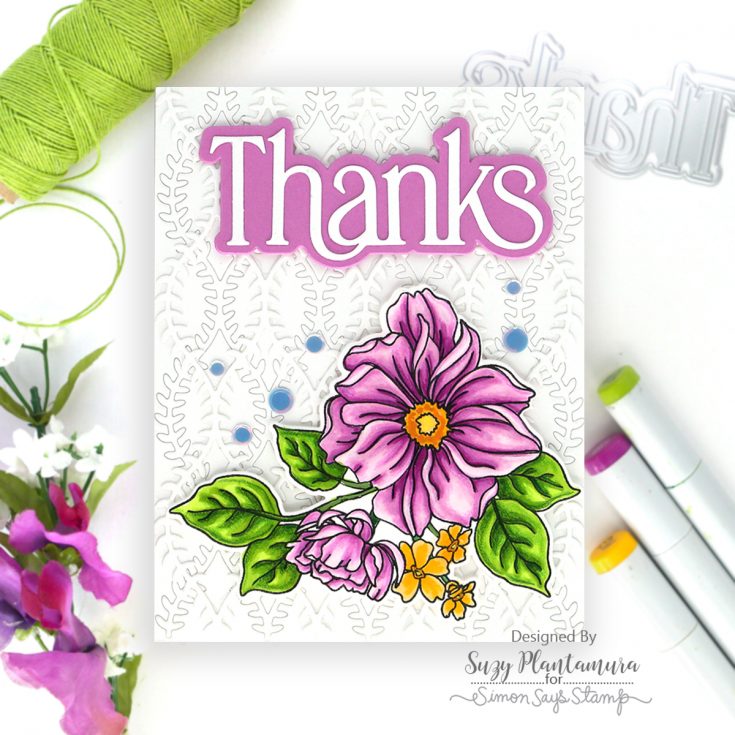
I made this card when I made the first card to send in for the SSS banners for this release. I stamped both flower groupings with black ink and colored them in with Copics in the same color. I made the background by die-cutting the new Willowweave Plate Die two times out of white cardstock. I glued one of them to a white card base without punching the design out, so it was all one piece. I punched the second one out and glued it over the first flipped upside down so the weave is in-between the first one’s weave design.
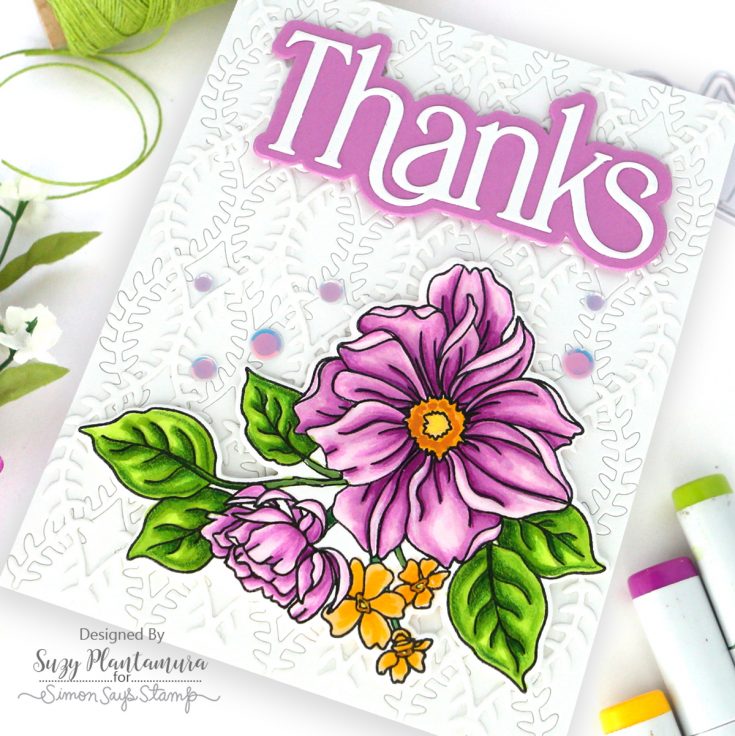
I die-cut the new Timeless Thanks Die from orchid cardstock and white cardstock and glued the white letters over the orchid background. I attached it to the top of the card with foam tape behind it and the flower grouping to the bottom of the card with foam tape behind it. I added some of the new Moonflower Embellishment Mix around the background which matched in real life…

I stamped the larger floral stamp on the top and bottom of a piece of A2 sized Tim Holtz Watercolor Paper with clear ink and embossed with white embossing powder. I used one side of the stamp just above the frame area on the top and the other side of the stamp on the bottom. I painted them in with Karin Brushmarker adding some color around the flowers as well. I die-cut this piece out with one of the A2 Notched Rectangle Dies.
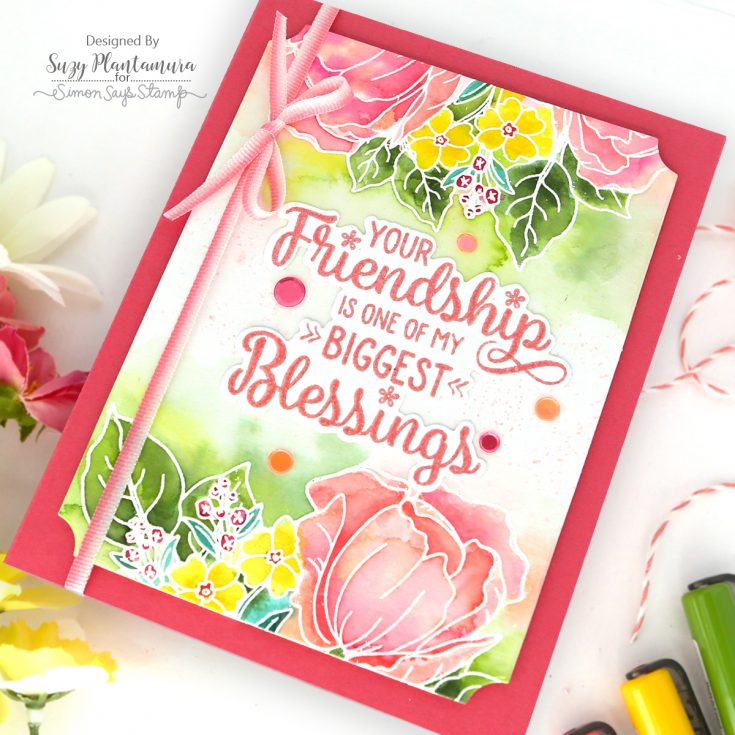
I attached this to a coral card base using foam tape behind it. I embossed a greeting from the Frankly, My Dear stamp with Tim Holtz Abandoned Coral Embossing Glaze and die-cut it out. I glued that to the center of the flowers. I used some of the Summer Sunset Embellishment Mix around the sentiment.
I think I’ve covered every color of flower in my yard with these cards (although I don’t have any navy flowers anywhere!). I love that this Blooms of Encouragement stamp set can be used in so many ways with different coloring mediums and each card looks unique. It comes with lots of sentiments I didn’t have a chance to use but also works well with larger sentiments from your stash or from the new release. Thank you for visiting the SSS blog today! -Suzy
SUPPLIES:
|


Thanks so much for stopping by, and thanks to Suzy for being our guest!
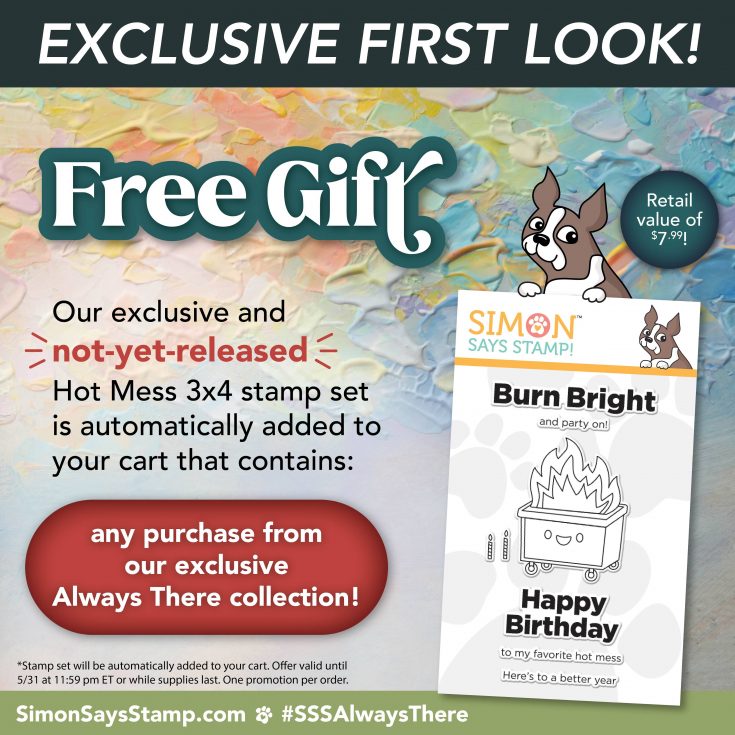
Last call for this awesome free gift!