Yippee for Yana: Masculine Valentine’s Day Card

Merry Christmas Eve, friends! Read on to learn more about this STUNNING project by Yana!

Hello, crafters, this is Yana Smakula for Simon Says Stamp! Welcome back for another Yippee For Yana video! In this video, I have a masculine Valentine’s Day card to share created using new goodies from Simon.
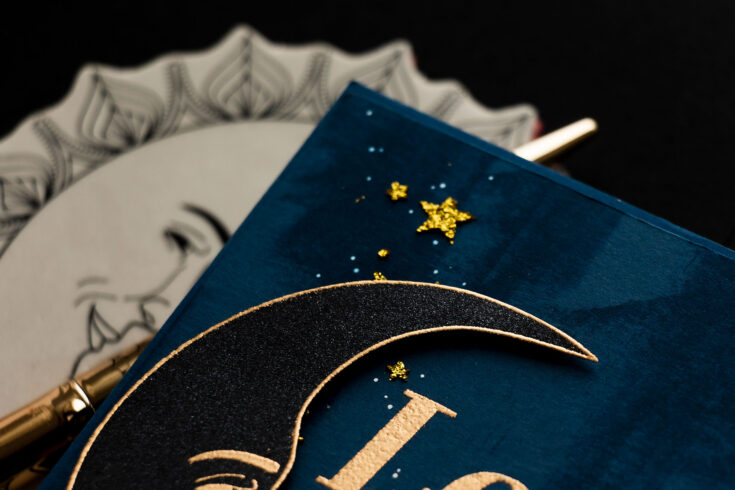
I started by heat embossing the sentiment in Brass embossing powder on the Soft Navy cardstock panel and I embossed it closer to the right leaving room for the moon on the left.
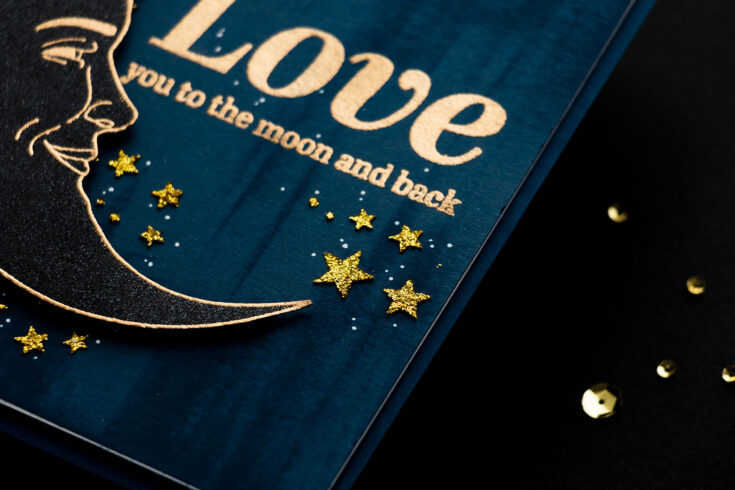
Next, I embossed the moon in the same Brass embossing powder on Black cardstock.
I used black pearlescent paper for my original card, but in my video I’m showing how you can use regular black cardstock if you don’t have the pearl paper in your stash. The black pearl paper has been discontinued, I just have little scraps in my stash, so I thought it would be best to show you how to achieve the faux pearl look using regular black cardstock.
To give my moon some shine I sprayed the paper with a Brushed Pewter spray from Ranger and set the moon panel aside to dry.
With the moon panel drying I went back to the sentiment panel. I wanted this panel to have color variation and even some texture, well, faux texture. I did that with the help of an ink pad and direct to paper technique using Royal ink pad from Simon.
Where there’s a moon, you always have stars. I added a couple of stars onto the background using a Scattered Stars stencil and glitter gel in Citrine. The blue abstract background signifies a night sky here. We’ve added abstract strokes to the background to create variations in color in our night sky and now we just need to add some stars. The glitter gel will need a couple of minutes to dry, so make sure to set your background aside. It doesn’t take long, 10 minutes should be more than enough unless you’ve applied a very thick layer of gel.
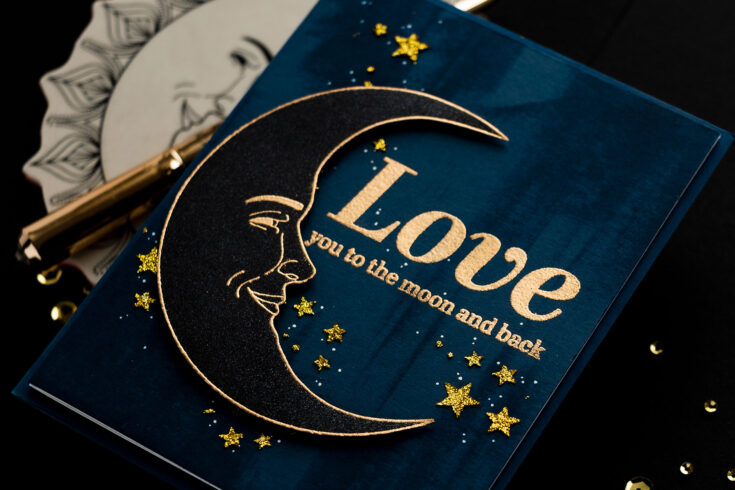
Once the moon is completely dry you can cut it out for the card. I cut mine right up to the edge – as close to the gold embossing as possible, but not cutting into the heat embossing. This image is fairly easy to cut out, especially if you leave out the trim. I also cut a similar shape from black fun foam and used that to flatten + pop the moon up on the card.
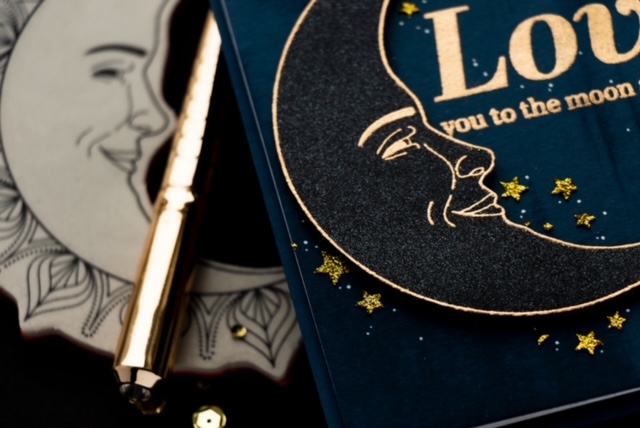
Next, I used bearly art glue and adhered the moon onto the fun foam piece and onto the background and adhered the background onto A2 white card base. Lastly I added white dot detail – I scatter the dots between the stars and also between the letters of the sentiment connecting the two star clusters. Have fun crafting!
WATCH THE VIDEO:
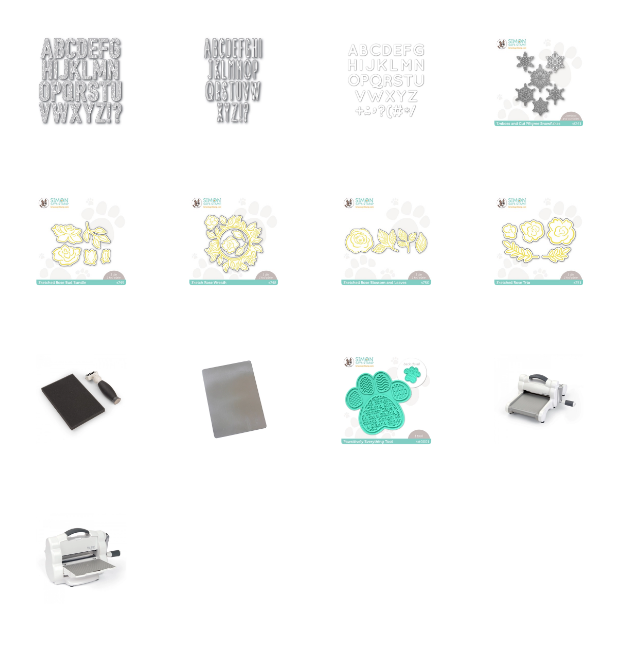
SUPPLIES:
|


Thanks so much for stopping by, and thanks to Yana for being our guest!
Amore Laurafadora: Wreath of Love

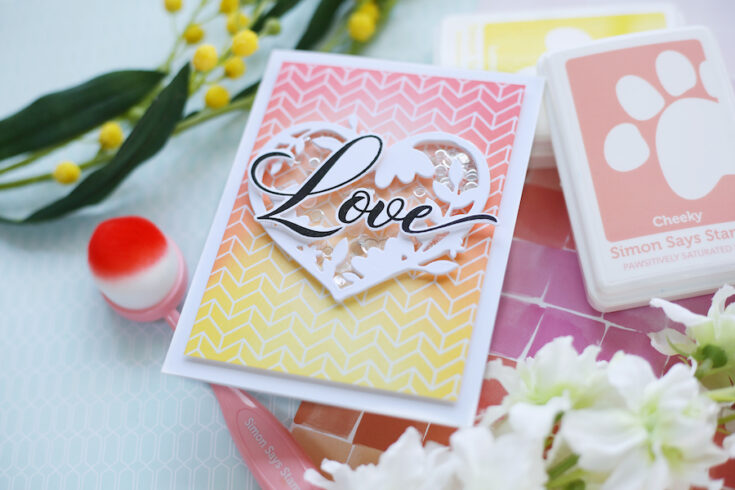
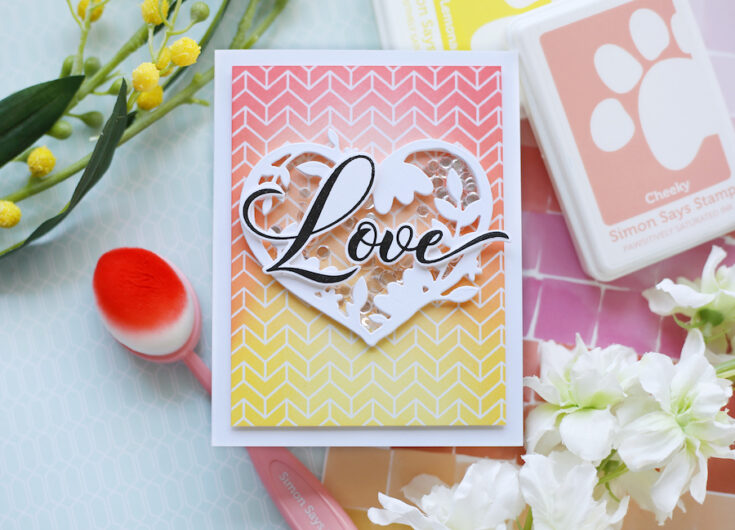
Hi friends! Happy Thursday and Merry Christmas Eve Eve! Hehe! ;) We have a bright and beautiful Love card by the one and only Laura Bassen in the latest edition of our bi-monthly Amore Laurafadora blog series that would be a great card for Valentine’s Day OR any time! She’s showcasing our brand new Chevron Pattern cling stamp, Wreath of love die, and So Much Love Stamp and die set! Be sure to watch the video for all the details! Enjoy!
WATCH THE VIDEO:
SUPPLIES:
|


Thanks so much for stopping by, and thanks to Laura for being our guest!

Did You Know? DieCember® 2021 Edition

Hello crafters, it’s Shari Carroll here with you! Today I have a new edition of our popular Did You Know series!
If it’s your first time seeing this feature, each month we bring you fun facts, creative tips, and even crafty hacks about your favorite supplies and brands; you can then use these awesome tips that you learn in your next crafting projects! Are you ready to learn some fun tricks? Keep on reading!
To celebrate DieCember®, where we feature die-cutting the entire month of December, I thought it would be fitting to share with you die-cutting tips and tricks.
ALPHABET DIES
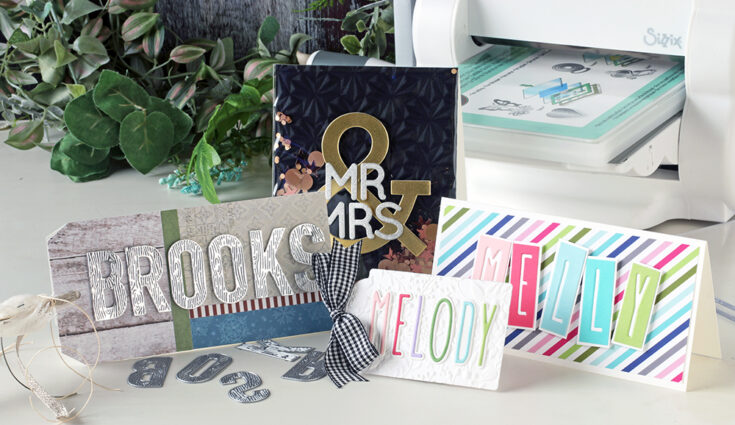
One way to personalize a card is to add a name. Alphabet dies allow that option. There are many sizes, fonts, sets with multiples, and even textures.
A couple of my favorites are the Wooden Alpha by Memory Box that embosses a woodgrain pattern into the paper while die-cutting. These are perfect for masculine cards. Another is the Simon Says Stamp Rounded Alphabet which is a clean, bold, and classic set of all caps.
TIP: Don’t forget to use your reverse die cuttings to create colorful blocks with letters.
DOUBLE-DUTY DIES: EMBOSS AND CUT
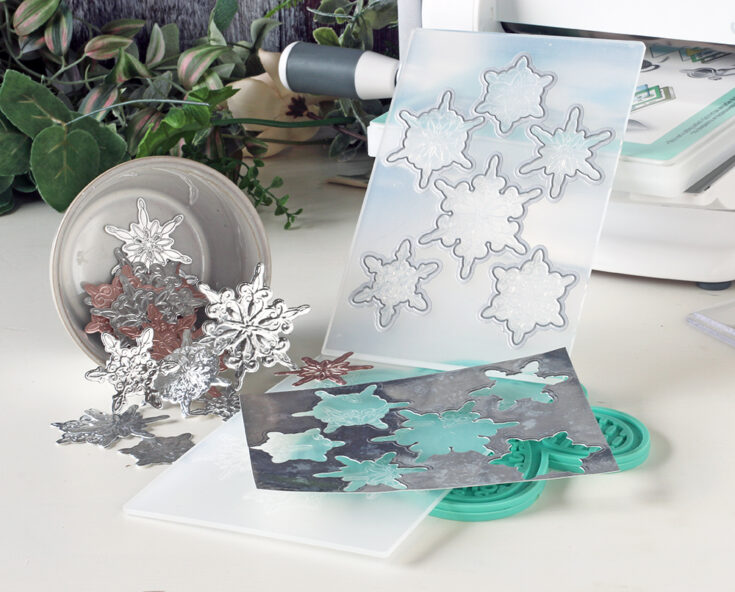
In our DieCember® release, we introduced two types of dual-purpose dies. We have the emboss and cut Filigree Snowflakes. This is a folder that creates deeply etched snowflake designs while die-cutting around each snowflake individually at the same time.
TIP: These snowflakes are beautiful with metallic and holographic cardstock!
DOUBLE-DUTY DIES: FOIL AND CUT
Another new double-duty die style is our Hot Foil and Die sets. They are designed to foil all the images at once, then die cut them using the coordinating die all at once. This is super handy so you don’t have to match up individual dies!
TIP: Did you know you can use the Simon Says Stamp Pawsitively Everything Tool to rest your hot plates on after foiling?
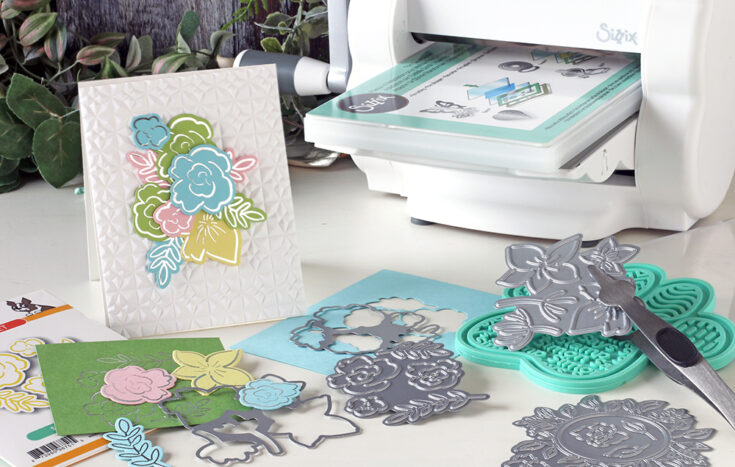
TOOLS FOR INTRICATE DIES
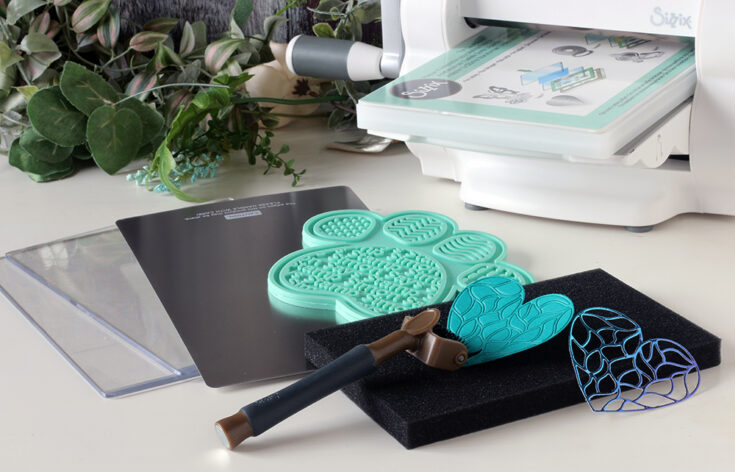
There are a couple of tools that can help you have greater success with your detailed and intricate dies. First is a metal shim or adapter that you can add to your die-cutting “sandwich”. The thin metal plate builds the sandwich up to create a slightly thicker stack so the die can get into the detailed areas of your paper.
Another handy tool to remove the tiny pieces of paper from your die cuts or dies is the Sizzix Magnetic Die Brush kit. You simply run the brush over the die-cut using the mat to create pressure and all those little pieces come right out.
I hope these tips have helped you learn a few tricks for your upcoming crafting projects and building your toolbox. Thanks for tuning in today and spending some time with me!