Crafty with Caly: Coloring with Karin DecoBrush Pigment Markers

Hi friends! Happy Friday and welcome to the latest edition of Crafty with Caly with special guest Caly Person! She has some great tips and tricks to get beautiful results with Karin DecoBrush Pigment Markers! Read on and enjoy!
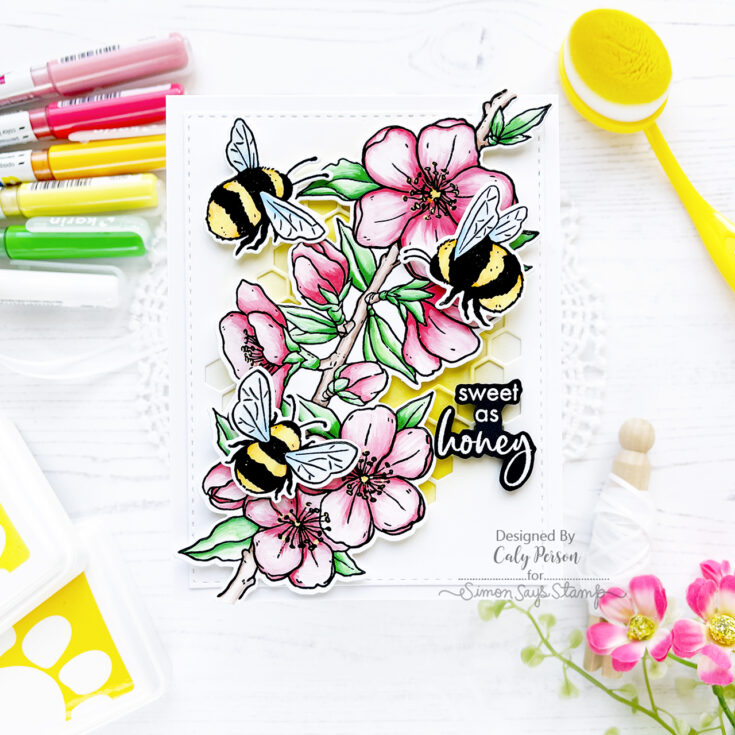
Hello! I’m so excited to share today’s card with you. It uses images from two stamp sets from Hero Arts and was voted a favorite of all the My Monthly Hero Kits from 2021. Originally an exclusive 6” x 8” set as a part of the January 2021 kit, its contents are now brought back for purchase as individual sets. I love the chubby bees from the new Sweet as Honey and Beelieve sets!
I have never colored stamped images with Karin DecoBrush Pigment Markers before and decided I would try them out on today’s card. They are opaque paint markers and are versatile on a variety of surfaces. For my card today, I stamped the images over Tim Holtz Distress White Heavystock paper using a hybrid black ink. I didn’t stamp the best impression because I knew I would restamp later for a more crisp impression – so make sure you keep your stamps in your stamp positioning tool if you want to try this technique.
WATCH THE VIDEO:
The coloring is not perfect. While the colors do somewhat blend, it is not perfect and that’s what makes these Pigment markers unique – you have to embrace the organic brush strokes from the pigment. Once I got over the fact that it wasn’t going to blend flawlessly like Copics or watercolors do, I relaxed with the coloring of my images. Once the pigment dries, you can layer colors and that’s what I did with the yellow stamen flecks.
Karin DecoBrush Pigment Markers used: White, Grass, Poppy, Pastel Red, Pastel Blue, Pastel Yellow, Gold, Cinnamon
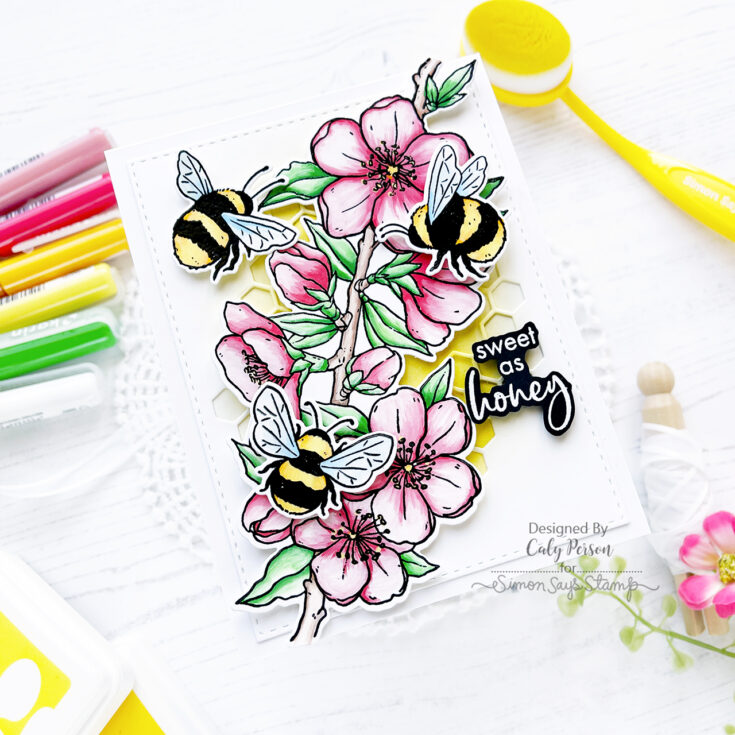
After I was done painting/coloring, I placed my panel back into my MISTI and re-stamped the image using a black pigment ink to get a crisp impression and to hide the muted stamped lines from the pigment markers. I also embossed it with clear embossing powder to give it more texture.
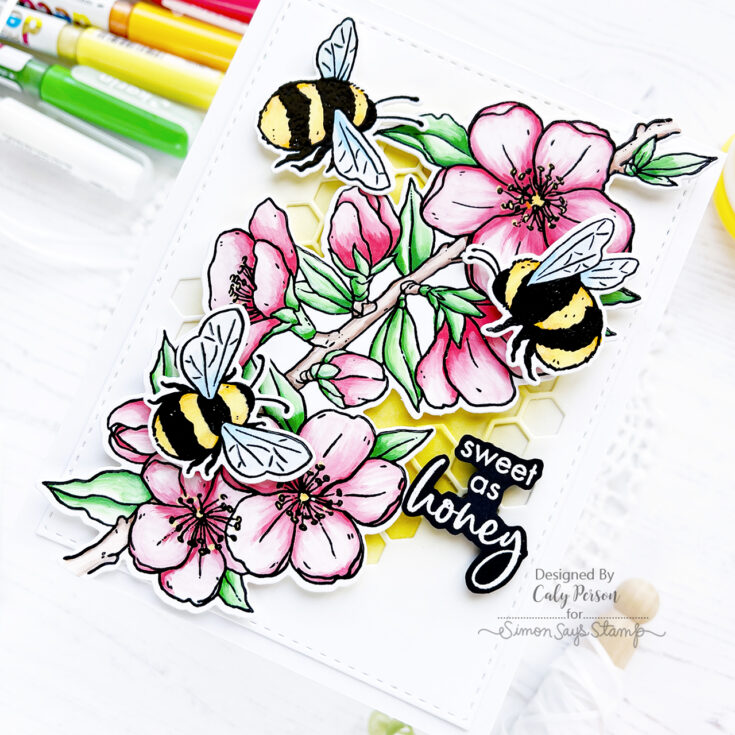
For the background, I ink-blended some yellow ink and die-cut the Honeycomb die into a card panel to create a textured background for my flower stem. I attached my images with foam adhesive for dimension and finished with an embossed sentiment from the Sweet as Honey set.
I hope you liked this card! The Karin DecoBrush Pigment Markers are so unique and is a medium I need to remember to use more! Thanks so much for visiting today! ~Caly
SUPPLIES:
|


Thanks so much for stopping by, and thanks to Caly for being our guest!


The National Craft Month Celebration CONTINUES with a sitewide SALE!
Happy Friday, friends! The celebration of National Craft Month continues with a special (and very rare!) sitewide sale going on this weekend ONLY! With code CRAFTMORE at checkout, enjoy 15% off your purchase! Shop early for the best selection, and enjoy!
Creating a Tone-on-Tone Background with Diecuts with Kristina Werner
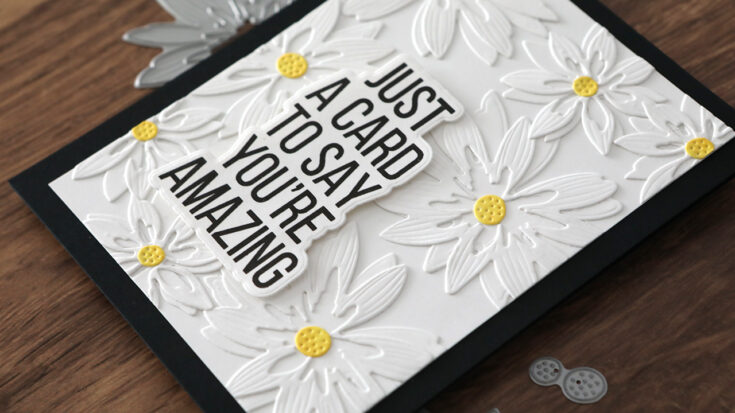
Hi all! Kristina here. Today I have a fun tone-on-tone card for you. I used the Dreamy Daisy Layers dies to create a textured background.
I started by die cutting all the dies in the set four times out of white cardstock. Then I assembled the petal pieces on white cardstock and adhered them using a liquid glue.
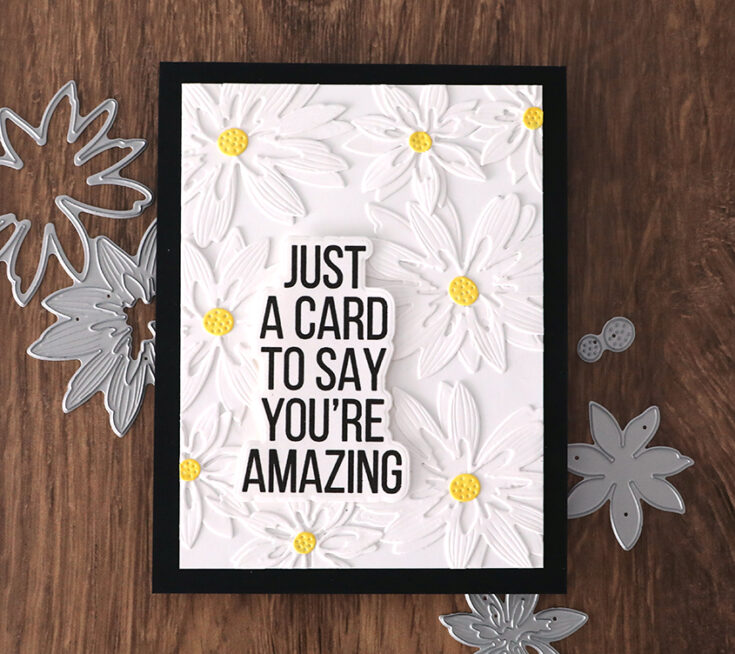
For the center of the flowers, I used Sunbeam ink and a blending brush to color them yellow. Then I adhered them to the center of the flowers.
To finish off the card, I used the XL Greetings 2 stamp set to stamp a greeting and die cut it using the coordinating dies.
Thanks for stopping by!
Supplies
|


