Make a Tiny Matchbook Card! Funny Friday with Art Impressions
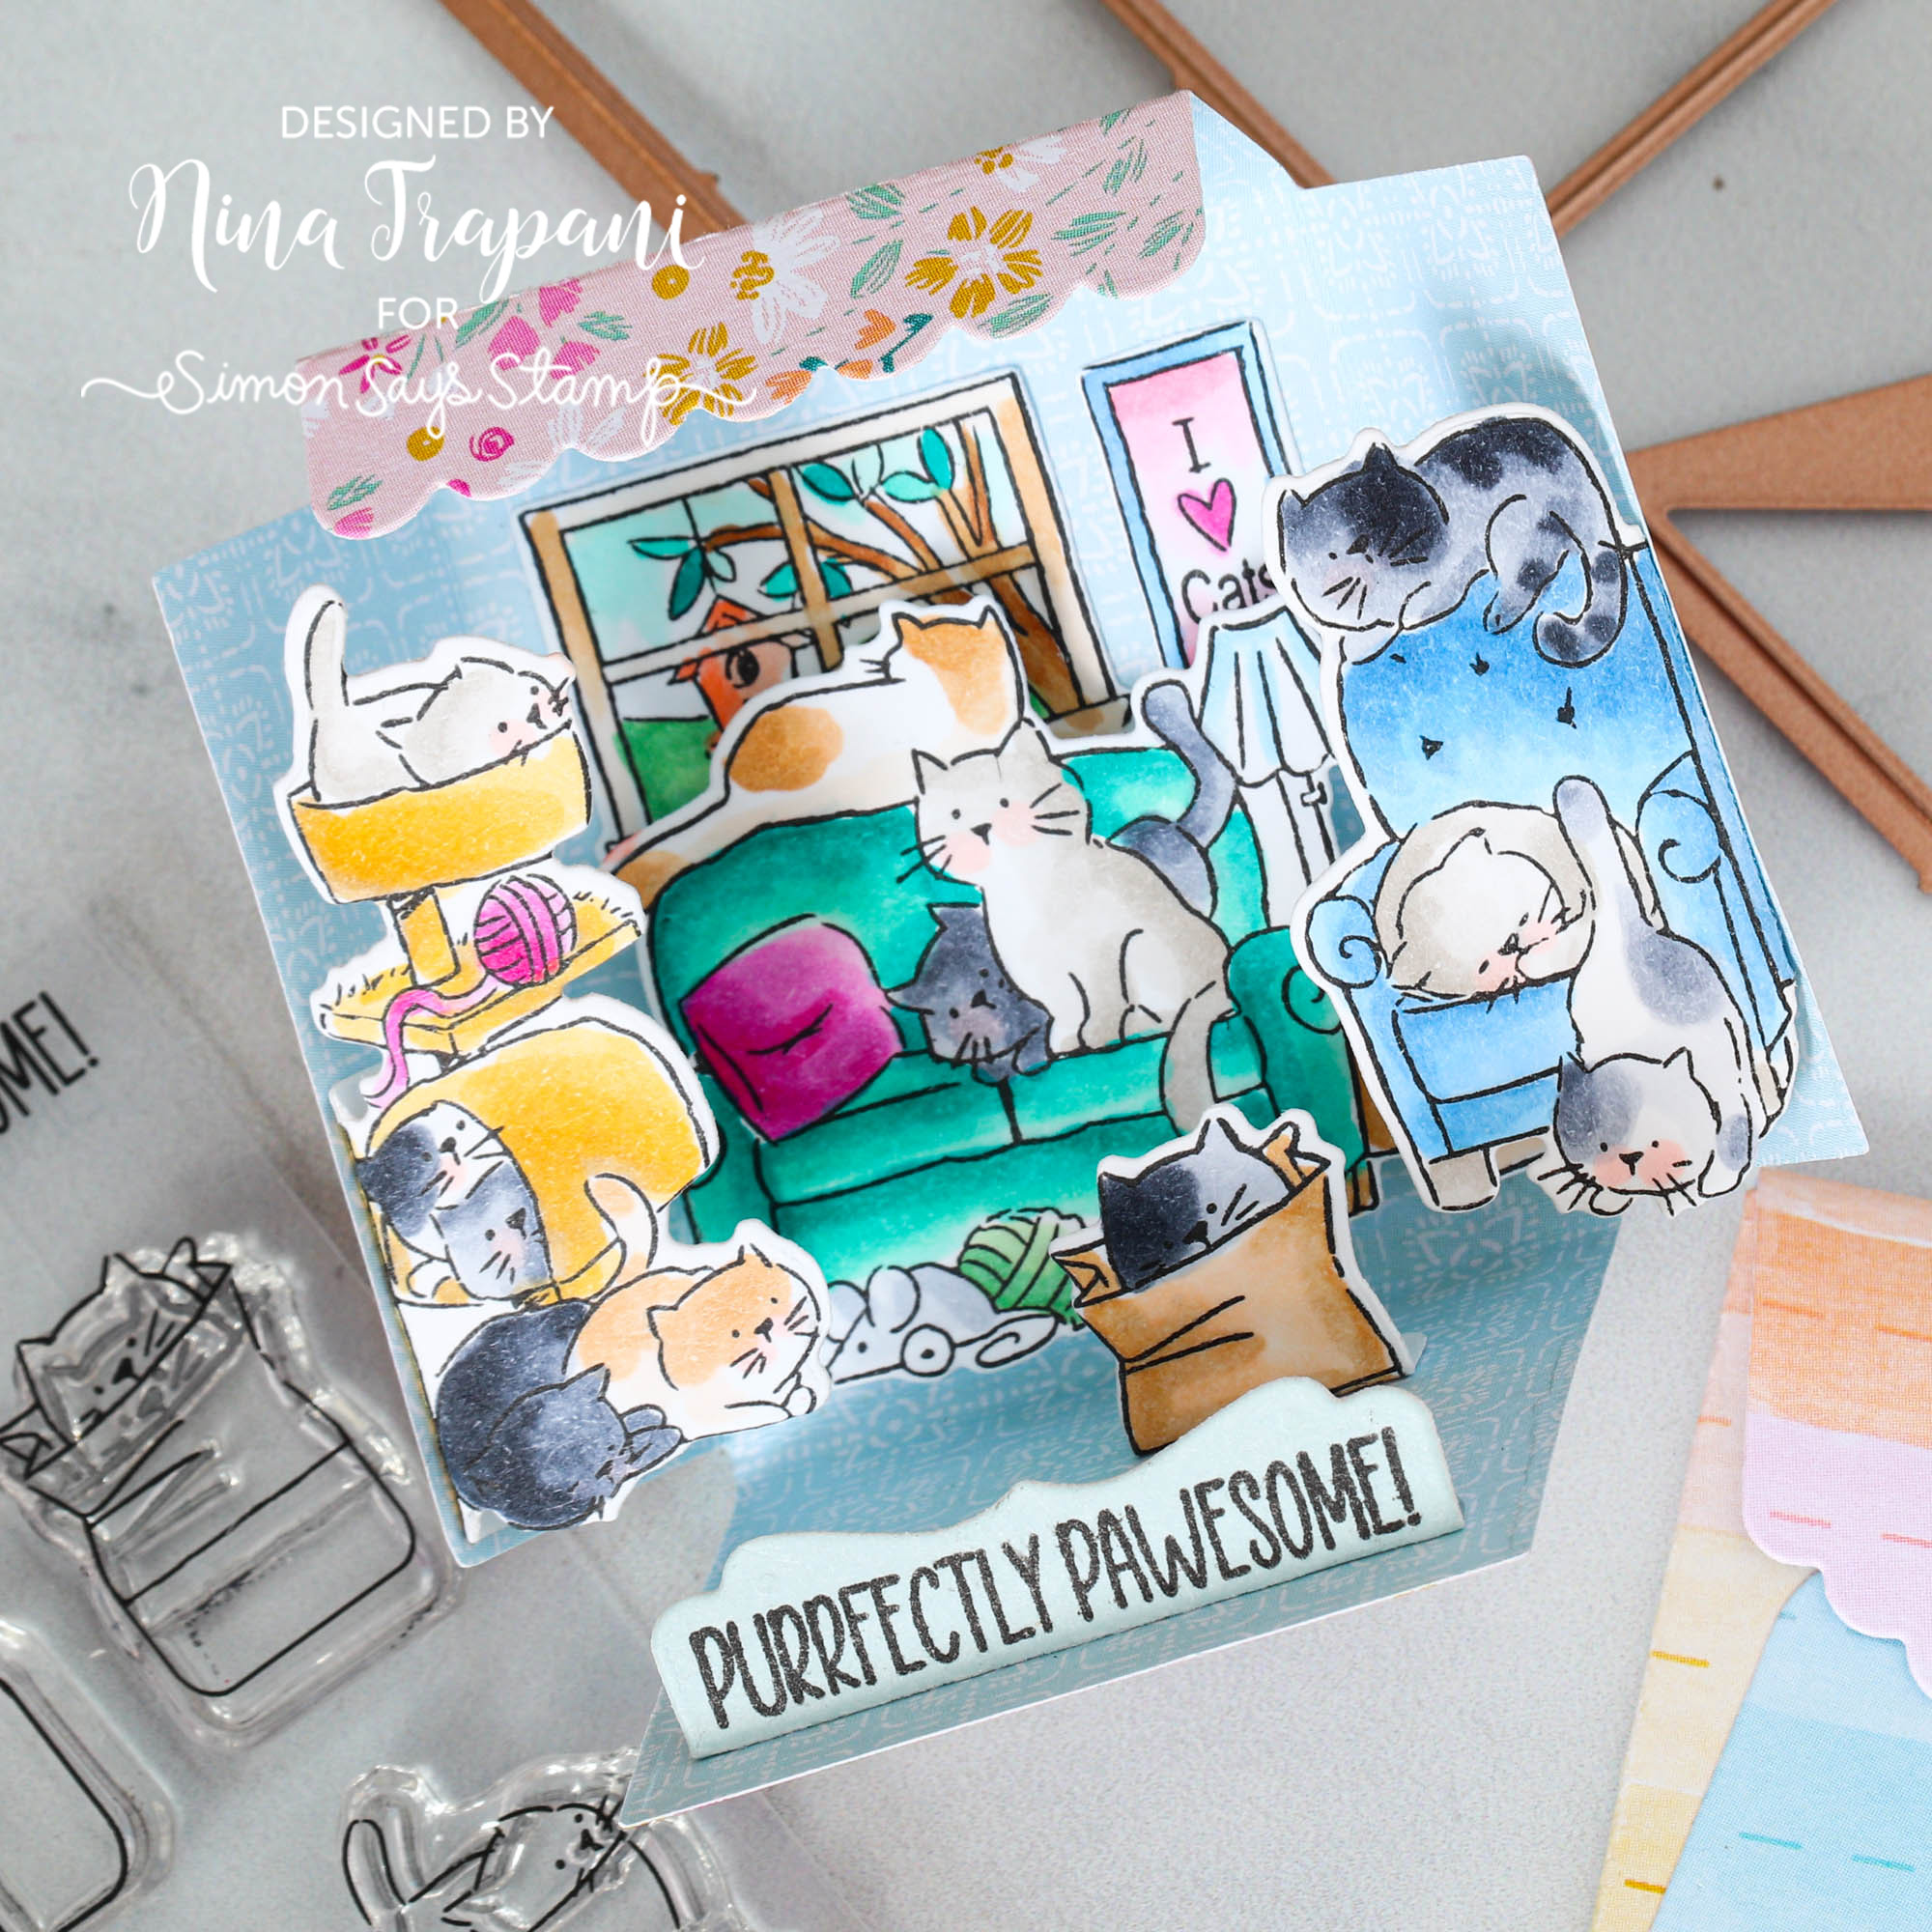
Hey there friends, it’s Nina-Marie Trapani here with a VERY cute card project using Art Impressions’ Matchbook series! I created this tiny scene using their Matchbook Cats add-on set, which coordinates with the popular Matchbook die set.
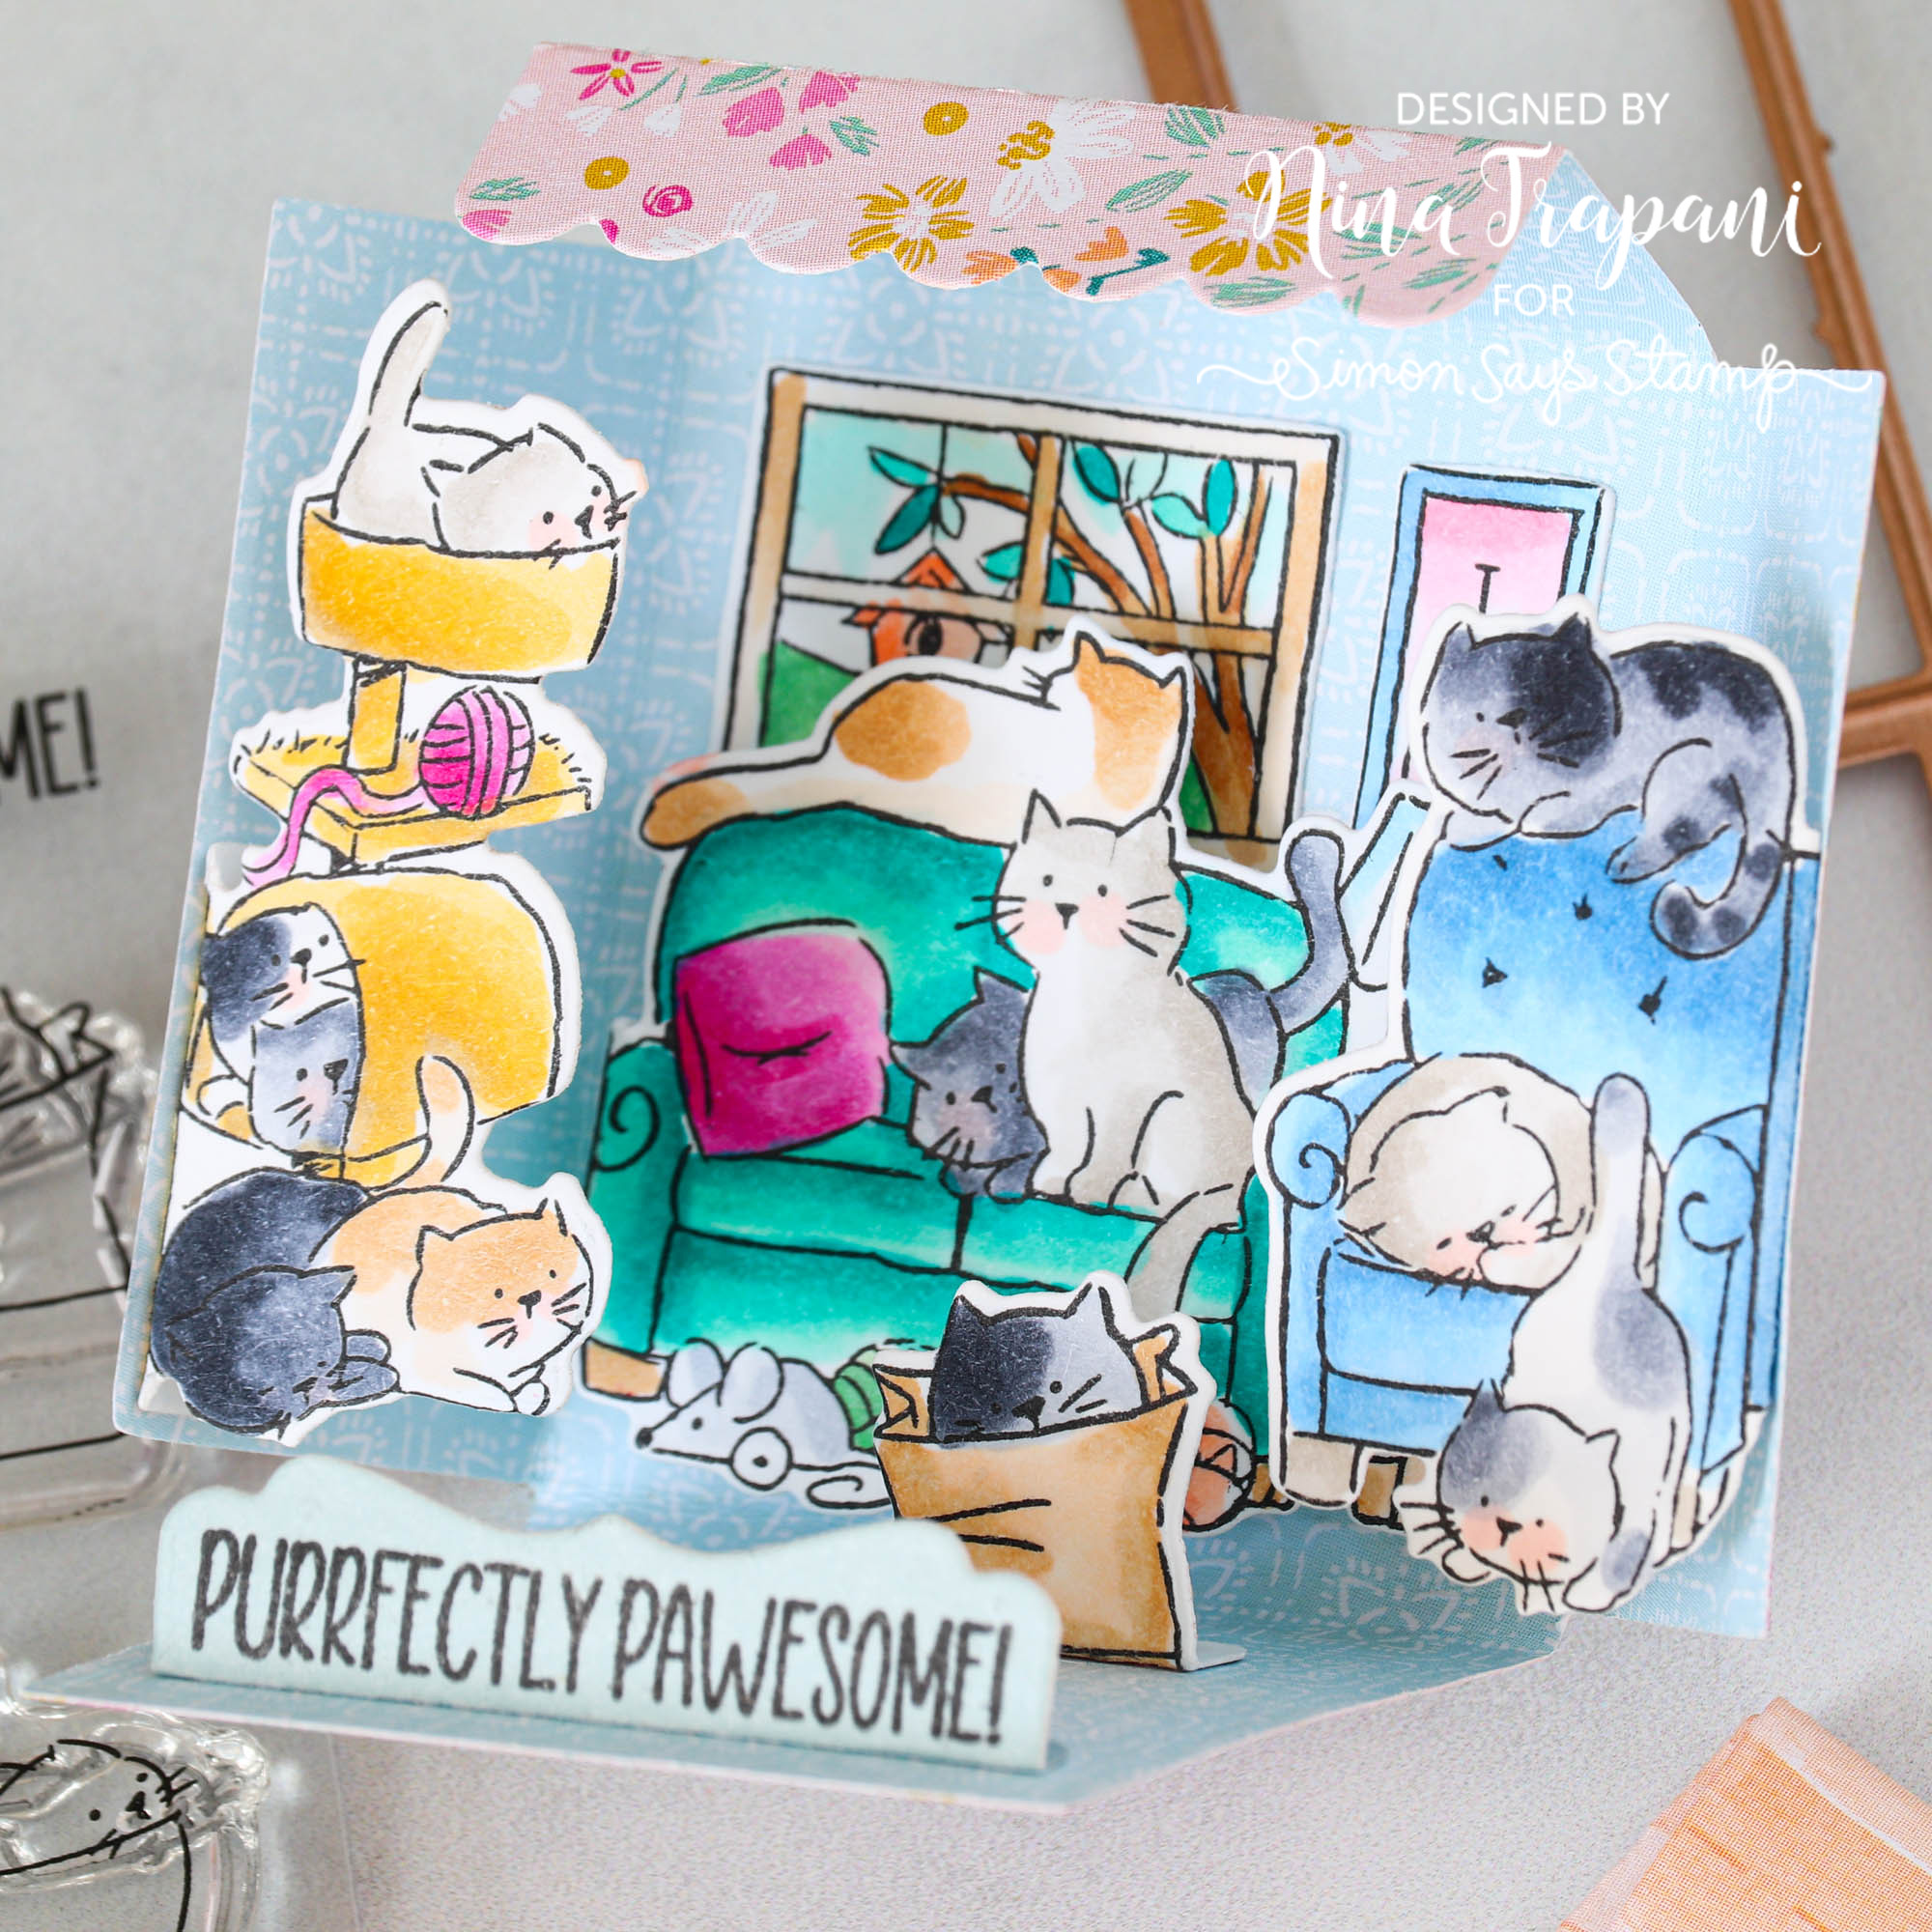
The darling cats in this set make this scene the cutest thing ever—you have to see it come together! Watch the video below for all the details!

WATCH THE VIDEO

SUPPLIES

Art Impressions Matchbook Cats Clear…
[ SSS ]
Art Impressions MATCHBOOK TEMPLATE…
[ SSS ]
Art Impressions MATCHBOOK ENVELOPE…
[ SSS ]
PinkFresh Studio SPRING VIBES 6 x 6…
[ SSS ]
Simon Says Stamp TEAR RIFIC TAPE 1/8…
[ SSS ]
Simon Says Stamp SMALL TEFLON BONE…
[ SSS ]
Simon Says Stamp MAGNETIC GLASS MAT…
[ SSS ]
Copic Sketch Marker BG11 MOON WHITE
[ SSS ]
Copic Sketch Marker BG13 MINT GREEN
[ SSS ]
Copic Sketch Marker BG49 DUCK BLUE
[ SSS ]
Copic Sketch Marker YG41 PALE COBALT…
[ SSS ]
Copic Sketch Marker YG45 COBALT GREEN…
[ SSS ]
Copic Sketch Marker E50 EGG SHELL…
[ SSS ]
Copic Sketch Marker E51 MILKY WHITE…
[ SSS ]
Copic Sketch Marker E53 RAW SILK Cream
[ SSS ]
Copic Sketch Marker YR0000 PALE CHIFFON
[ SSS ]
Copic Sketch Marker YR00 POWDER PINK…
[ SSS ]
Copic Sketch Marker YR02 LIGHT ORANGE…
[ SSS ]
Copic Sketch Marker RV63 BEGONIA Pink…
[ SSS ]
Copic Sketch Marker RV66 RASPBERRY…
[ SSS ]
Copic Sketch Marker RV17 DEEP MAGENTA
[ SSS ]
Copic Sketch Marker RV00 WATER LILY Pink
[ SSS ]
Copic Sketch Marker RV10 PALE PINK…
[ SSS ]
Copic Sketch Marker RV23 PURE PINK
[ SSS ]
Copic Sketch MARKER B32 PALE BLUE
[ SSS ]
Copic Sketch Marker Y21 BUTTERCUP…
[ SSS ]
Copic Sketch Marker Y26 MUSTARD Dark…
[ SSS ]
Copic Sketch Marker Y28 LIONET GOLD…
[ SSS ]
Copic Sketch MARKER C0 COOL GRAY NO. 0
[ SSS ]
Copic Sketch MARKER C6 COOL GRAY NO. 6
[ SSS ]
Copic Sketch MARKER C3 COOL GRAY Grey
[ SSS ]
Copic Sketch MARKER C8 COOL GRAY NO. 8
[ SSS ]
Copic Sketch Marker W00 Warm Gray Grey
[ SSS ]
Copic Sketch Marker W2 WARM GRAY NO.2…
[ SSS ]

Colorful Stamping & Inking with Minimal Supplies with Kristina Werner
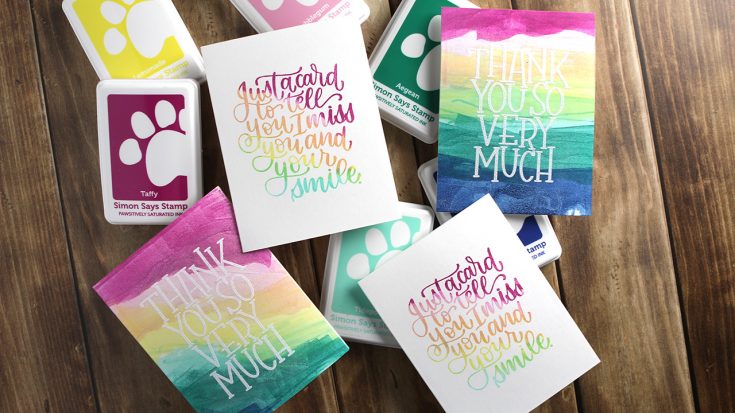
Hi all! Kristina here. Today I have two inky techniques to share with you that result in colorful backgrounds and greetings!

The multicolor stamping technique looks awesome with larger greeting stamps, so I used the XL Greetings stamp set to stamp the greeting directly with all the inks. Then I used a Gel Press and a similar technique of applying the ink colors to create a colorful background.
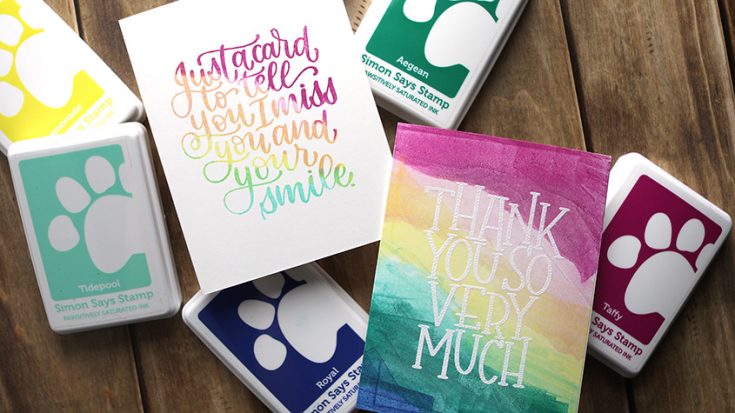
The colors of ink I used:
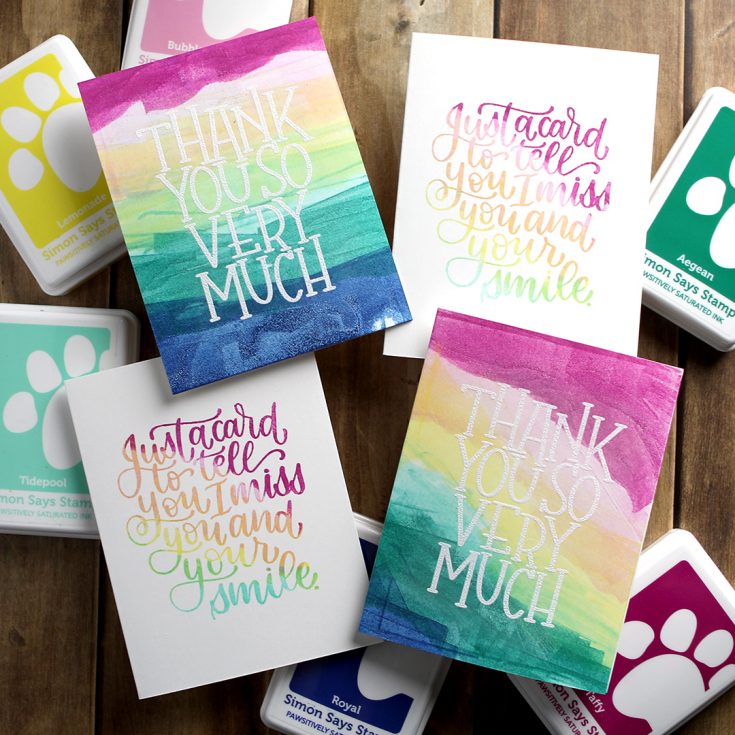
In total, these four cards took me about 30 minutes to create! Super fast and easy!

Thanks for stopping by! Have a creative day! :)

Supplies

Simon Says Clear Stamps XL GREETINGS…
[ SSS ]
Simon Says Stamp Pawsitively…
[ SSS ]
Simon Says Stamp Pawsitively…
[ SSS ]
Simon Says Stamp Pawsitively…
[ SSS ]
Simon Says Stamp Pawsitively…
[ SSS ]
Simon Says Stamp Pawsitively…
[ SSS ]
Simon Says Stamp Pawsitively…
[ SSS ]
MISTI BLACK PRECISION STAMPER VERSION…
[ SSS ]
Neenah Classic Crest Ultra Thick 110…
[ SSS ]
Gel Press 5 x 7 REUSABLE GEL PRINTING…
[ SSS ]
WOW DUAL SPEED HEAT TOOL WZHT-USA
[ SSS ]
Simon Says Stamp Brush Powder Tool…
[ SSS ]
Simon Says Stamp Pigment Ink Pad…
[ SSS ]
Brutus Monroe ALABASTER Ultra Fine…
[ SSS ]

Creative Card Making! Send a SWEET Just Because Card: Crafty with Caly
Hi friends! Welcome to the latest edition of our bi-monthly blog series, Crafty with Caly, with the fabulous Caly Person! Read on and be sure to watch the video for all of the details on this fresh and fruity geometric card! Enjoy!
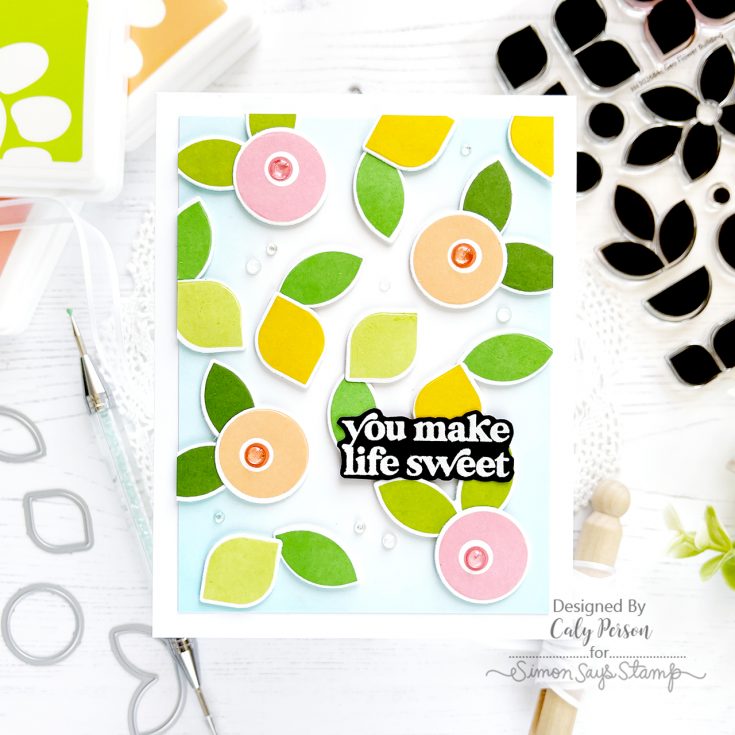
Hi there, friends! It’s Caly with you today and I’m creating a fruity card today using the Geo Flower Building set.  This set is a solid stamp set with lots of different shapes for flower-building, but you can create even more with it.

I recently finished two lemon quilts (one all yellow and one more colorful) and it inspired me to create this card.  I wanted to make a card full of citrus fruits – grapefruit, oranges, lemons and limes. 

WATCH THE VIDEO:

To create my card, I simply stamped the different geo shapes in a variety of fruit-like colors and foliage to go with them.  After stamping, I die-cut all of my images over a piece of cardstock that I ink-blended with Surf Ink.
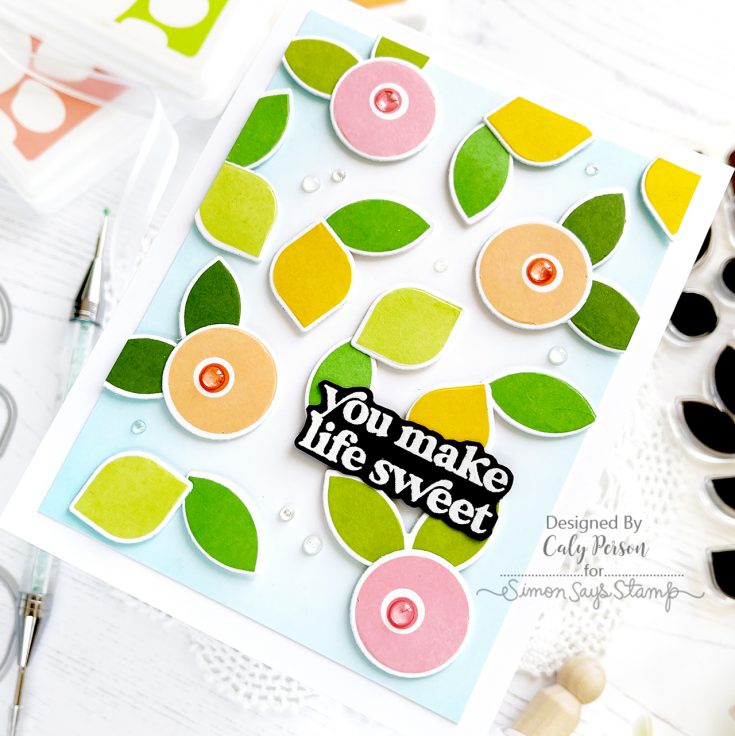
After completing a layout, I used Glad Press ‘N Seal to pick up all the images to attach 3D foam squares to the back.  Then I picked up the Press ‘N Seal to lay all the images over the ink-blended panel again to stick them in place for some dimension on each image.
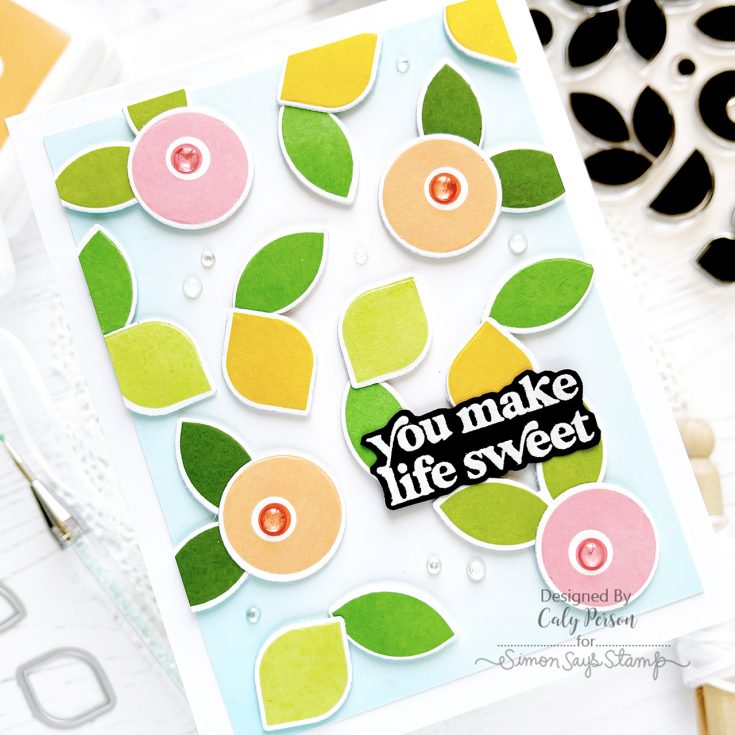
To finish my card, I attached an embossed sentiment from the You Shine stamp set.  I also embellished my card with some clear dew drops/enamel stickers.

I hope you like it and that it gives you some ideas for how to use this set in new ways! Thanks for visiting today!  ~Caly

SUPPLIES:

Simon Says Stamps and Dies Geo Flower…
[ SSS ]
Simon Says Clear Stamps YOU SHINE…
[ SSS ]
Simon Says Stamp Pawsitively…
[ SSS ]
Simon Says Stamp Pawsitively…
[ SSS ]
Simon Says Stamp Pawsitively…
[ SSS ]
Simon Says Stamp Pawsitively…
[ SSS ]
Simon Says Stamp Pawsitively…
[ SSS ]
Simon Says Stamp Pawsitively…
[ SSS ]
Simon Says Stamp Pawsitively…
[ SSS ]
Simon Says Stamp Pawsitively…
[ SSS ]
Simon Says Stamp Pawsitively…
[ SSS ]
Simon Says Stamp Pawsitively…
[ SSS ]
Simon Says Stamp FINE DETAIL SCISSORS…
[ SSS ]
Simon Says Stamp Pawsitively Everyday…
[ SSS ]
Simon Says Stamp REVERSE TWEEZERS st0106
[ SSS ]
Simon Says Stamp 3D FOAM SQUARES…
[ SSS ]
Simon Says Stamp PAWSITIVELY…
[ SSS ]
Simon Says Stamp XL PRECISION CRAFT…
[ SSS ]
Gina K Designs FINE TIP BOTTLES Set…
[ SSS ]
Honey Bee SHIMMER AND SHINE Enamel…
[ SSS ]
MINI MISTI PRECISION STAMPER 6×7…
[ SSS ]
Tim Holtz Tonic GUILLOTINE COMFORT…
[ SSS ]
Hammermill WHITE 100 LB SMOOTH…
[ SSS ]
Glad PRESS’N SEAL Multipupose Sealing…
[ SSS ]

Thanks so much for stopping by, and thanks to Caly for being our guest!

We use cookies to give you the best online experience. By agreeing, you accept the use of cookies in accordance with our cookie policy.