Easy Peasy CAS Birthday Card: EZ with CZ

Hi friends! Please join me in welcoming back our special guest Cathy Zielske in the latest edition of our monthly edition of EZ with CZ! Read on and be sure to watch the video for all the details! Enjoy!
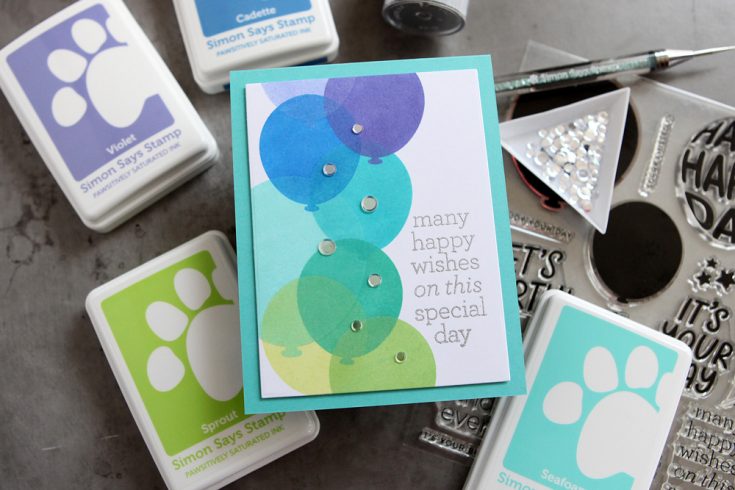
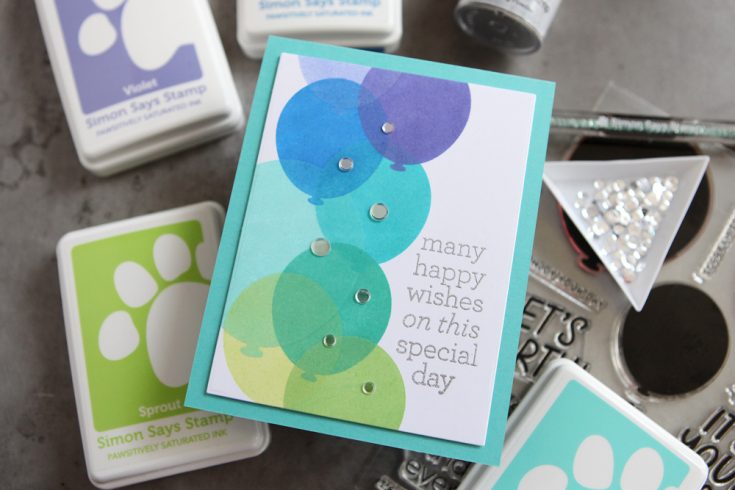
Hello everyone! It’s Cathy Zielske, back with another installment of EZ with CZ. Today I’m using just a few stamps to create a fun balloon background for a birthday card showcasing the Balloon Greetings stamp set. This is a really easy way to take a simple shapes stamp, overlap as you go, and keep your colors to one side of the rainbow.
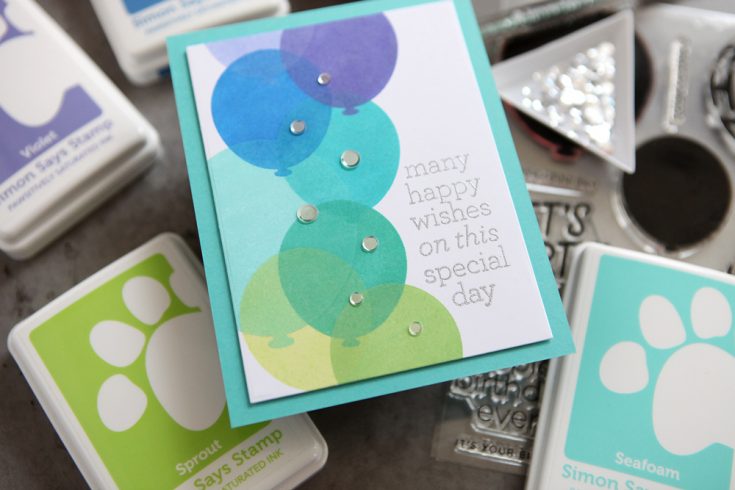
I’m choosing cool analogous colors for my project today. Analogous colors simply sit next to one another on the color wheel and you can work in rainbow order. In this card I am using Seafoam, Surf, Cadette, Violet, Tropic, Sprout, and Celery! Depending on how many times you stamp an image, dye inks appear a little translucent when they overlap, which is a really cool look.
You can change up the look of a design like this just by going with different colors. This would look really fun by choosing warmer colors, too! Here is my tutorial showing you how I created this card:
WATCH THE VIDEO:
Thanks so much for stopping by and I will see you back here with another simple card project next month!
SUPPLIES:
|


Thanks so much for stopping by, and thanks to Cathy for being our guest!!
National Scrapbook Day 2023 GIVEAWAY!
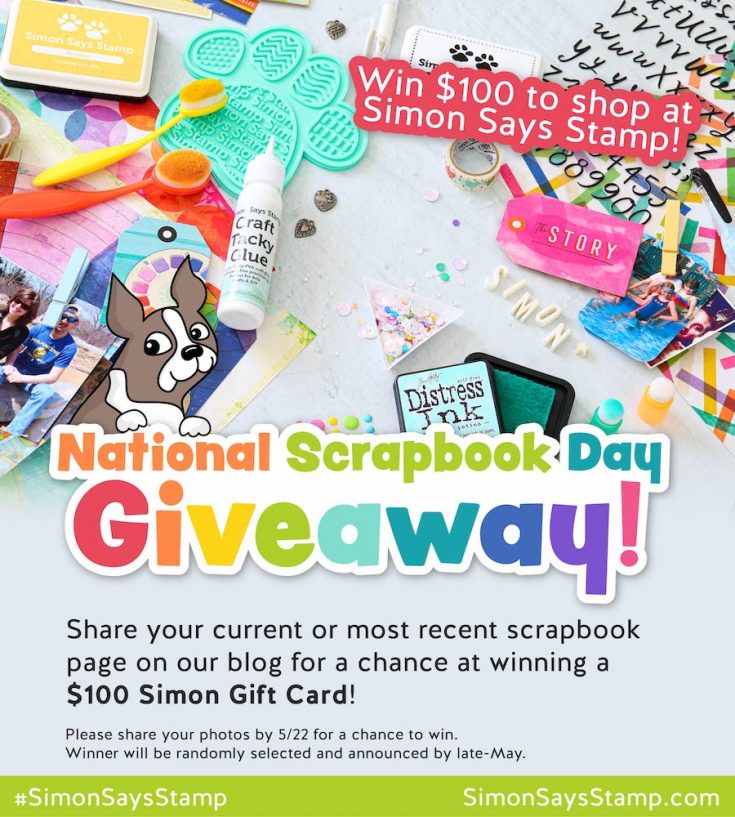
Hello, talented scrapbookers! We are celebrating the love of scrapbooking and memory keeping with a BIG giveaway!
Would you like to WIN a Simon Gift Card? You’re in luck! We’re giving away ONE $100 Simon Gift Card to a randomly selected winner! How do you win you ask? It’s easy! Just share a photo of your currently in-progress or most recent scrapbook page in our link-up below for a chance to win!
Projects must be linked by May 22 at 11:59 PM EDT to qualify for the giveaway. One randomly selected winner will be chosen and announced shortly thereafter.
Happy National Scrapbooking Day!
Make a Tiny Matchbook Card! Funny Friday with Art Impressions
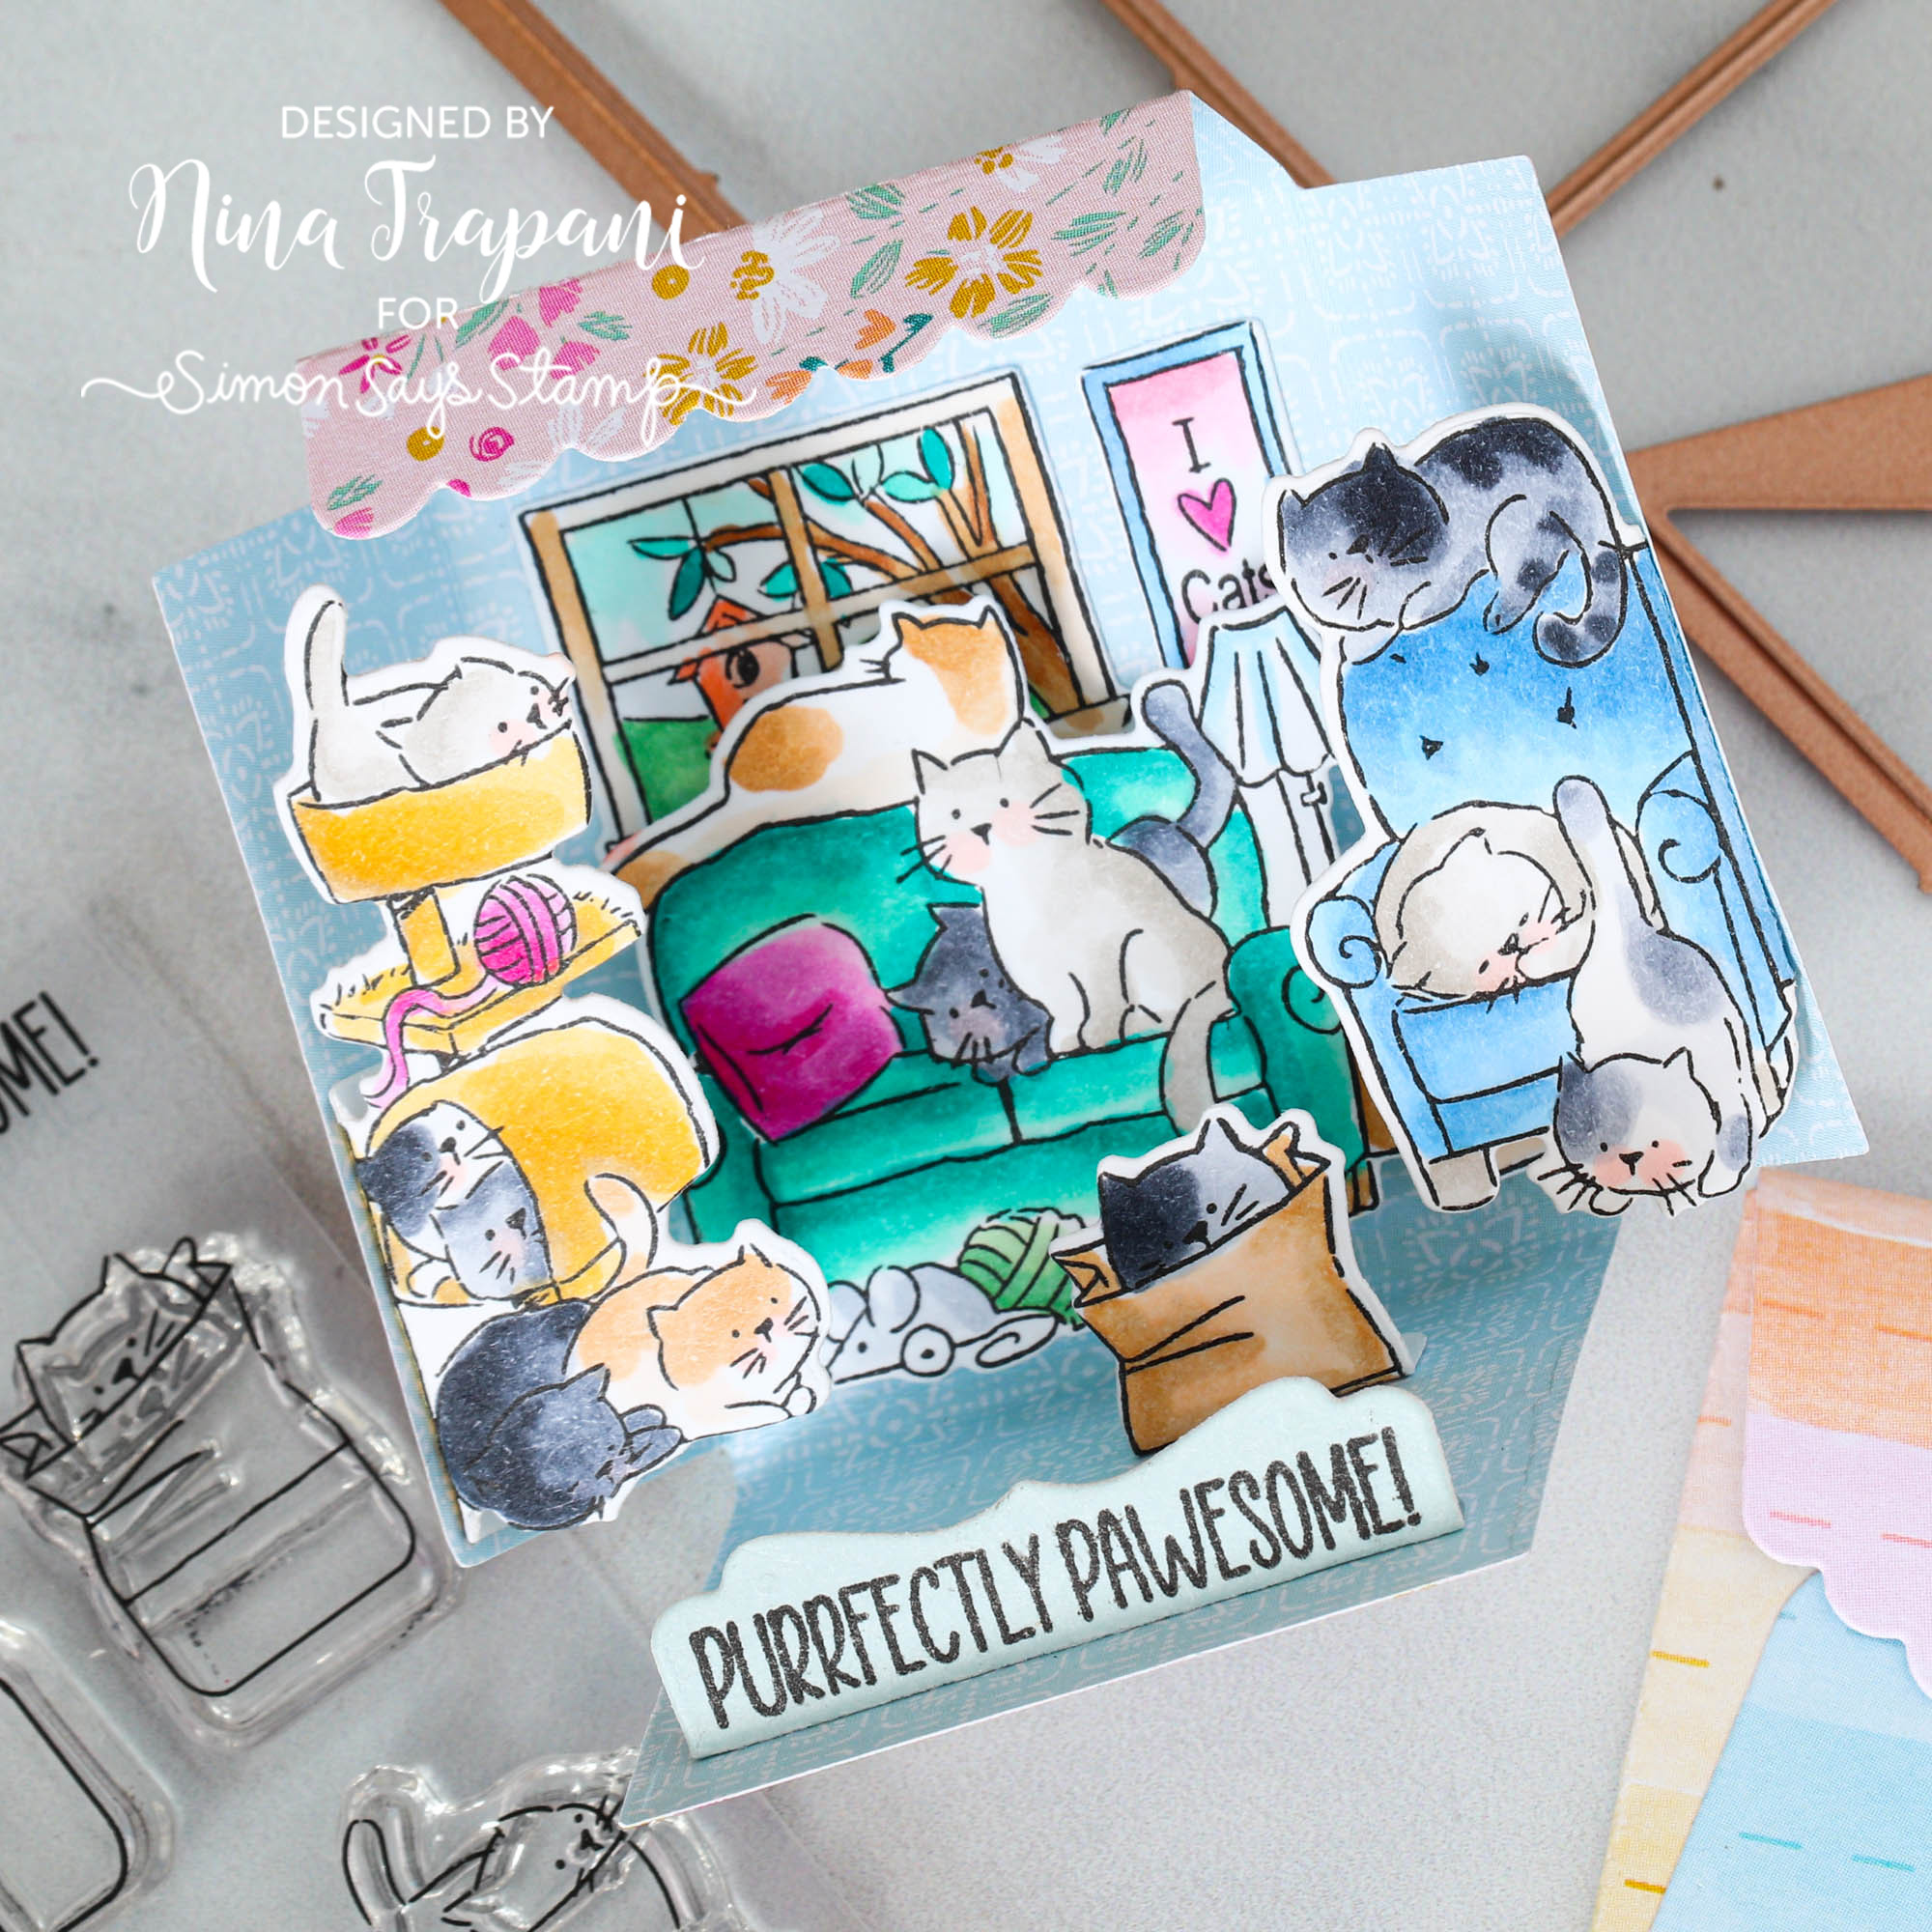
Hey there friends, it’s Nina-Marie Trapani here with a VERY cute card project using Art Impressions’ Matchbook series! I created this tiny scene using their Matchbook Cats add-on set, which coordinates with the popular Matchbook die set.
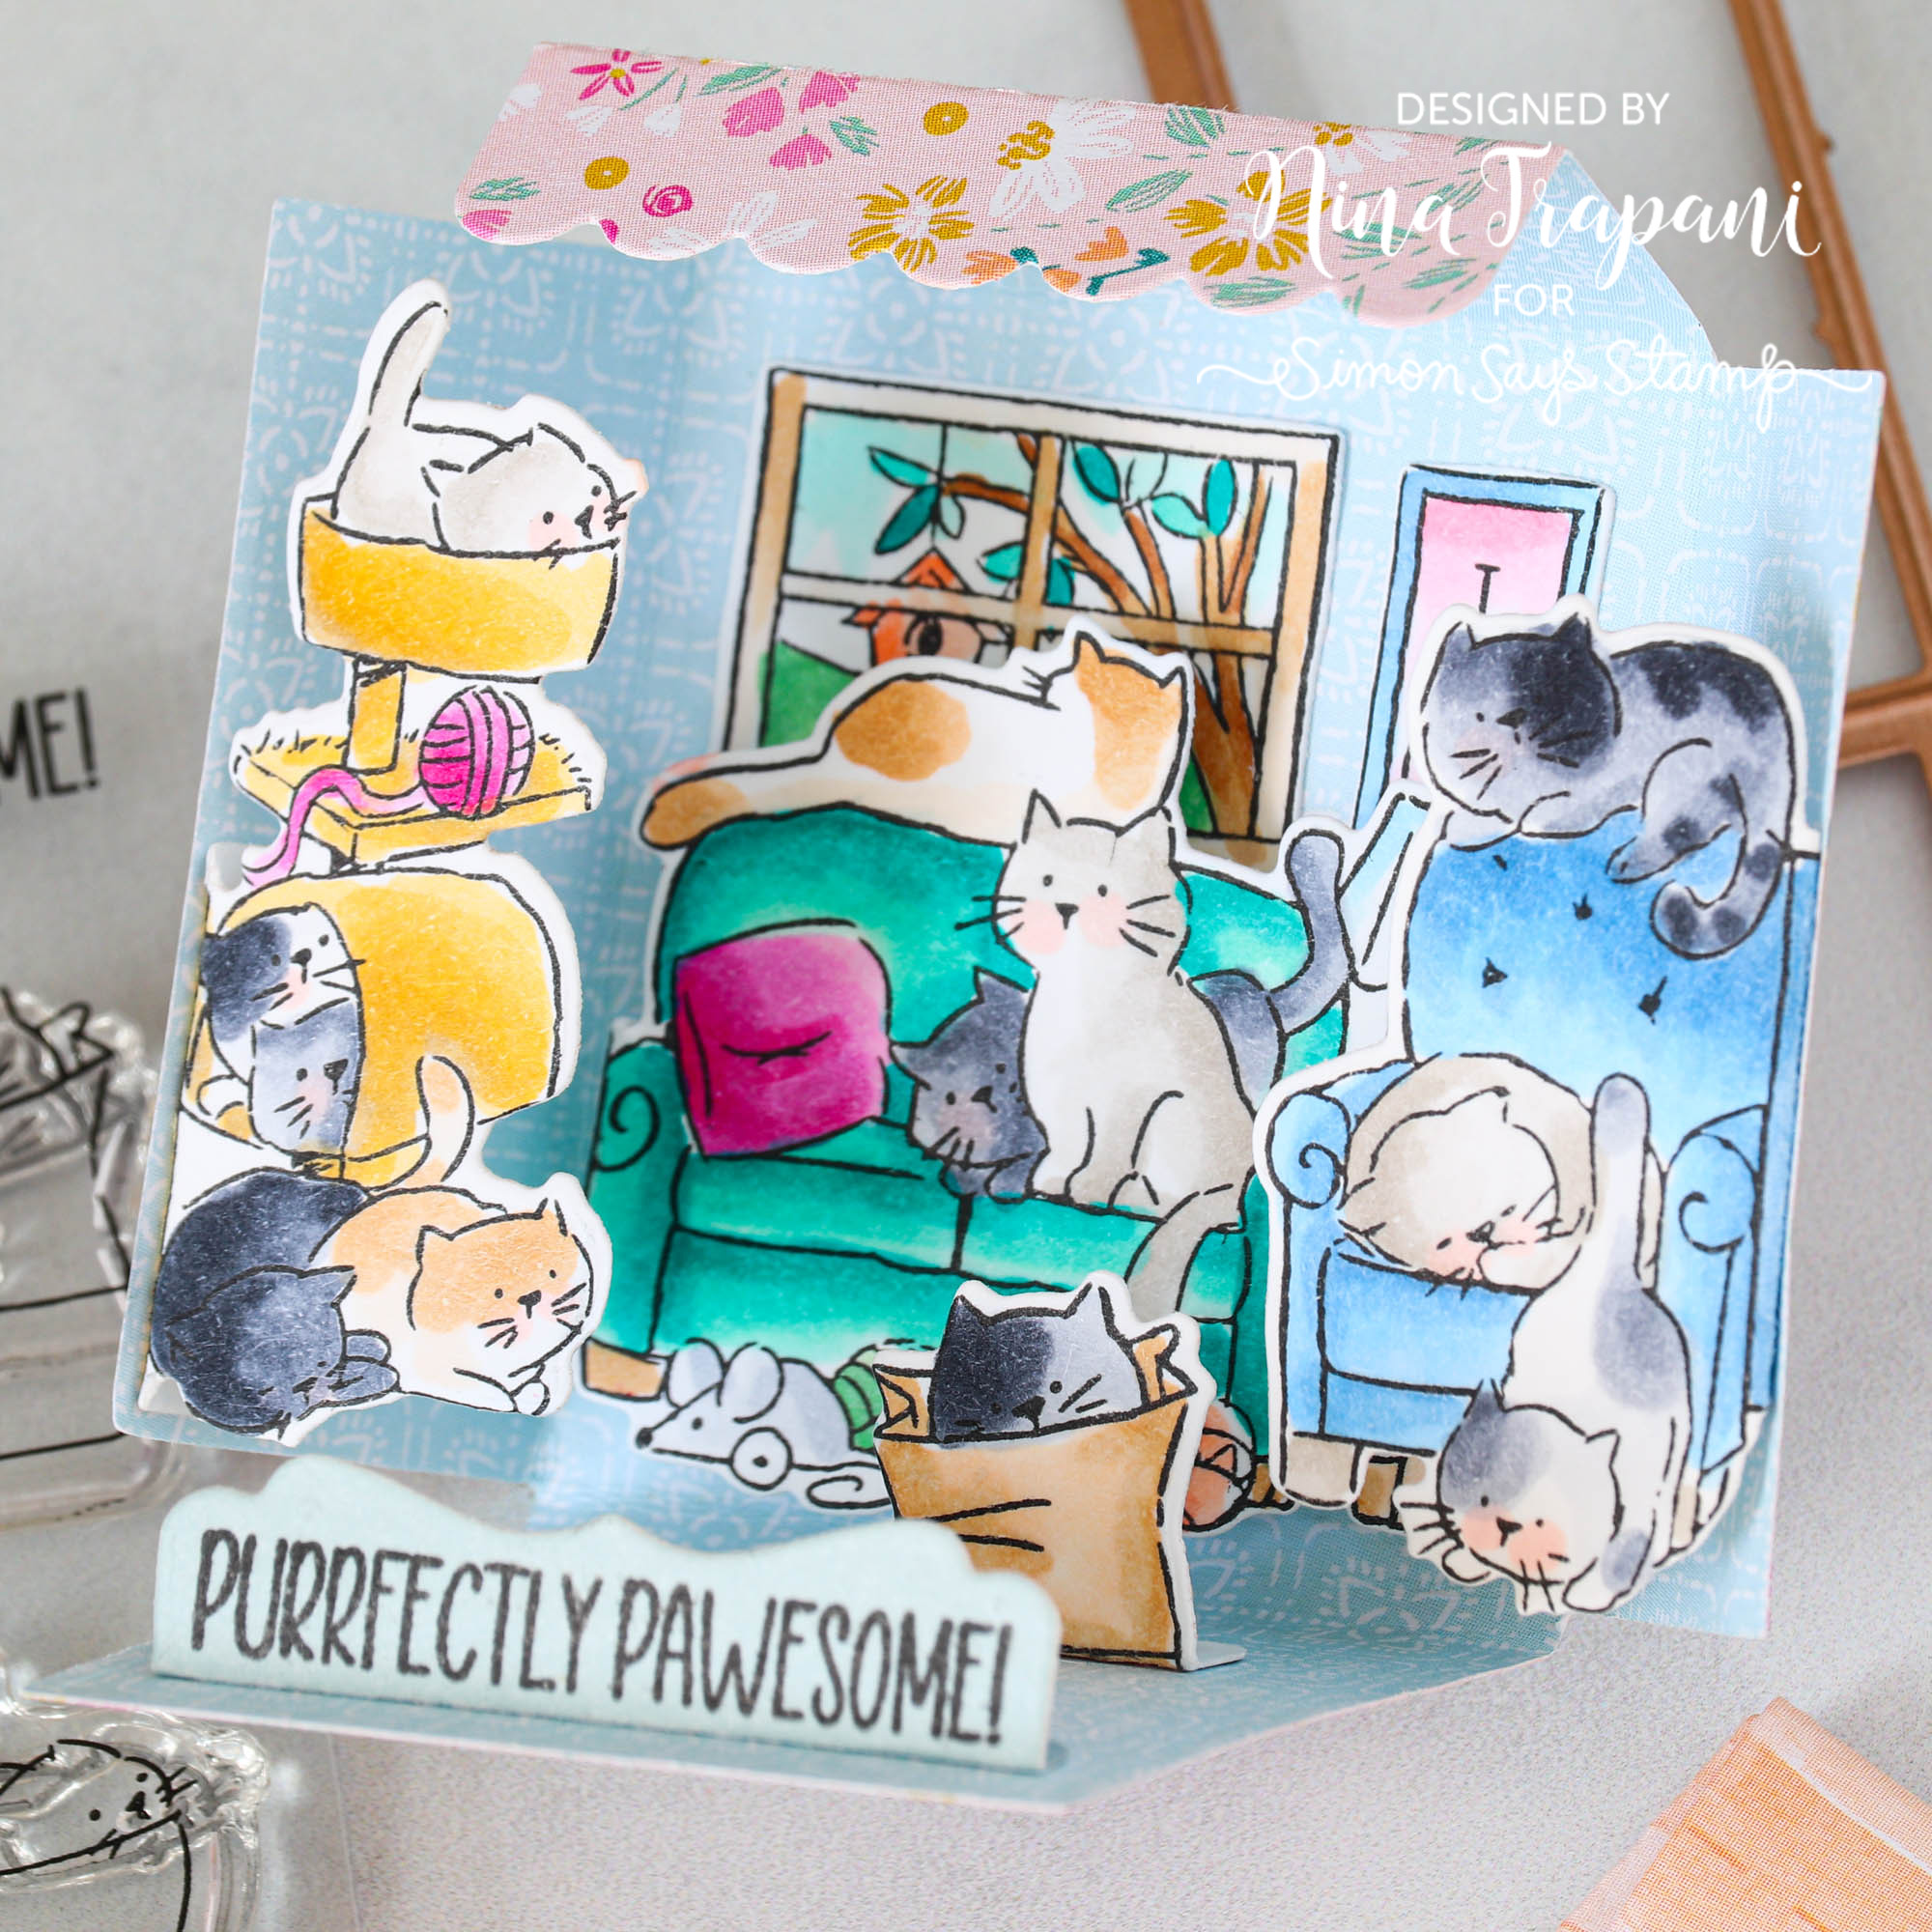
The darling cats in this set make this scene the cutest thing ever—you have to see it come together! Watch the video below for all the details!
WATCH THE VIDEO
SUPPLIES
|


