Direct to Paper Abstract Birthday Cards: Yippee for Yana

Hi friends! Please join me in welcoming the oh-so-talented and amazing Yana Smakula! (Please note; our dear friend Yana is Ukrainian, to show support to our brothers and sisters in Ukraine, please see Yana’s post HERE.)
Hello, crafters, this is Yana Smakula for Simon Says Stamp! Welcome back for another Yippee For Yana video!
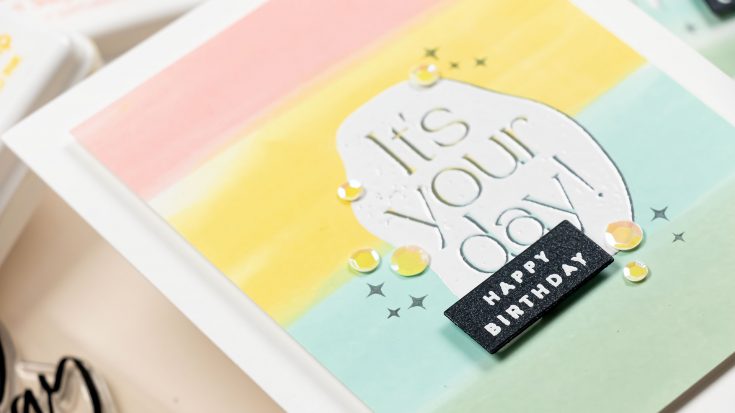
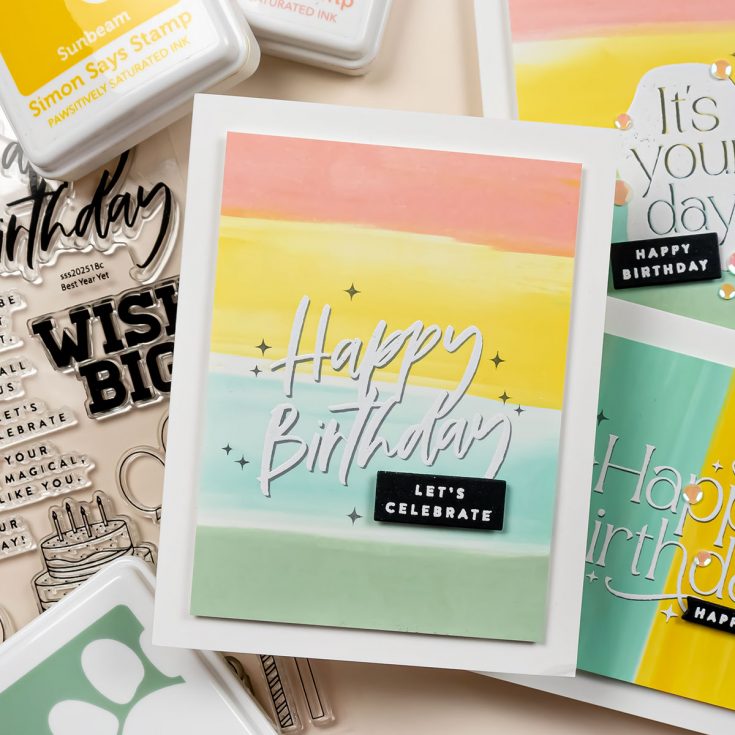
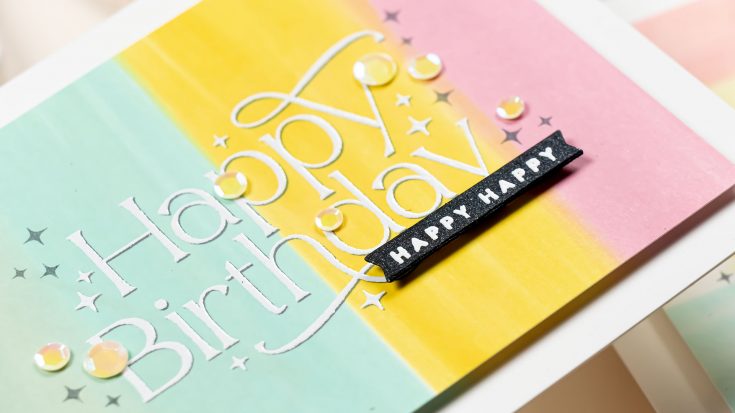
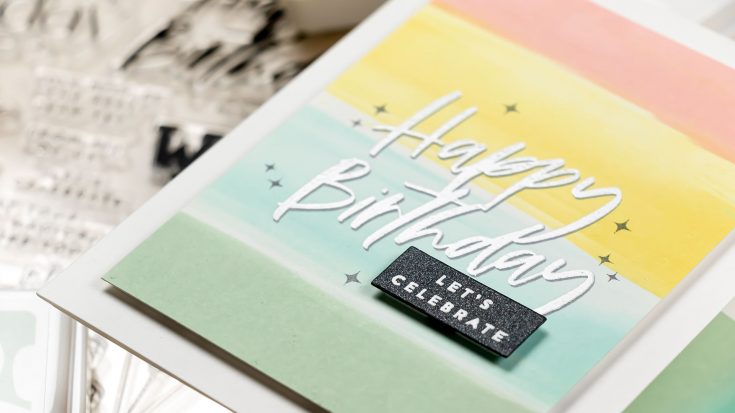
In this video, I’m making colorful abstract background Birthday cards with Simon’s Pawsitively Saturated Inks and Best Year Yet stamp set.
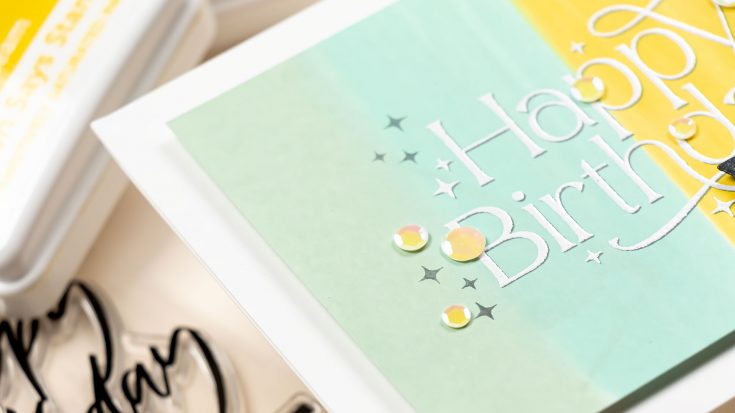
I picked several ink colors to make my backgrounds: Guava, Citrine, Tidepool, and Aspen and Cheeky, Sunbeam, Seafoam, and Aspen. You can do this technique with any color combination you like, I picked bright and cheerful colors as I was making birthday cards.
I used Simon Says Stamp 130lb cardstock for these. It is my go-to paper for anything stamping-related or Copic marker related. This paper is super smooth and that makes it perfect for this technique, but that doesn’t mean you can’t try this on another type of paper, you just want to make sure you aren’t using something with texture. The smoother, the better.
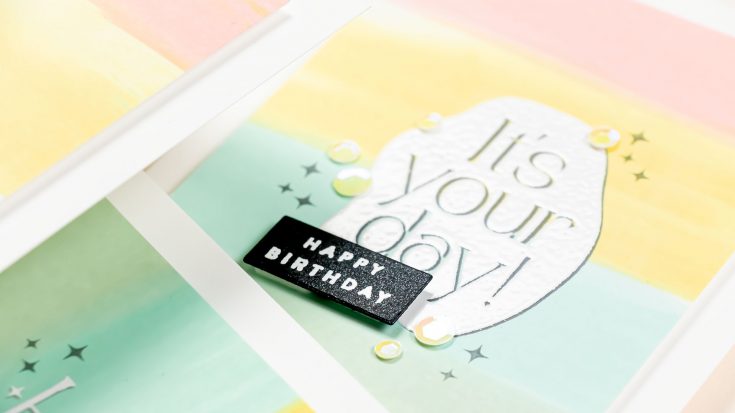
The idea is to use direct to paper application method and simply gently glide your ink across the paper to transfer the ink. Start with a very light hand, don’t press too hard, the harder you press – the more ink will come out, I prefer to go in very light and increase the pressure by just a little bit as I go. Applying ink in this way gives you uneven ink coverage, you get sections that are darker, sections that are lighter, and some might even be without ink at all and that makes it all very unique.
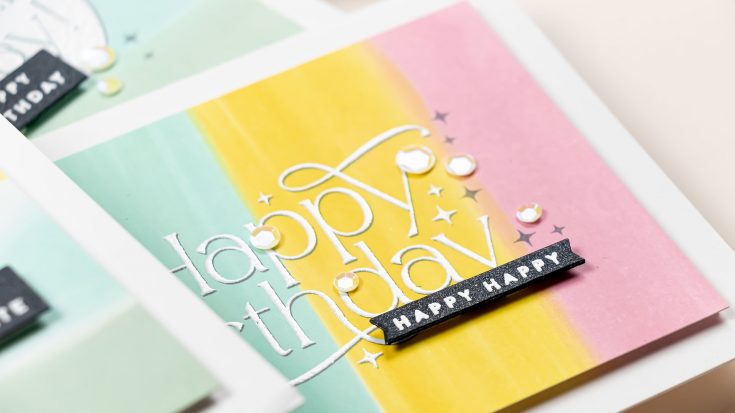
With the backgrounds created I moved on to the stamping. I wanted to create a shadow for the sentiment in gray ink and have the sentiment itself be heat embossed in white. I first stamped the sentiments in gray, using the Simon Says Stamp Charcoal ink and, having waited for the ink to dry, I heat embossed the same sentiment on top offsetting it slightly in white detail ink.
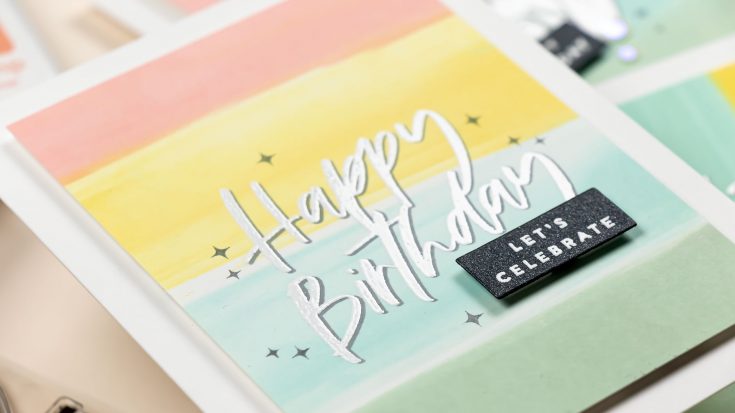
I trimmed each paned to 3 1/2 x 4 3/4″ and I used a layer of white fun to foam mount the panels onto A2 card bases. I also foam-mounted additional sentiment rectangles and next, I used the same gray ink to stamp some additional stars onto the background. I also added sequins to some of the cards to add just a little bit of sparkle! Have fun stamping!
WATCH THE VIDEO:
SUPPLIES:
|


Thanks so much for stopping by, and thanks again to Yana for being our guest!
Ways to support Ukraine:
If you are looking for ways to support Ukraine, we encourage you to visit this page on Yana’s blog:

Mixed Media Window Shaker Card!
Hi friends! Happy Sunday! It’s always SO delightful to welcome back special guest Anna-Karin Evaldsson on our blog! Check out this gorgeous Mixed Media Window shaker card she created and read on for all the details! Enjoy!
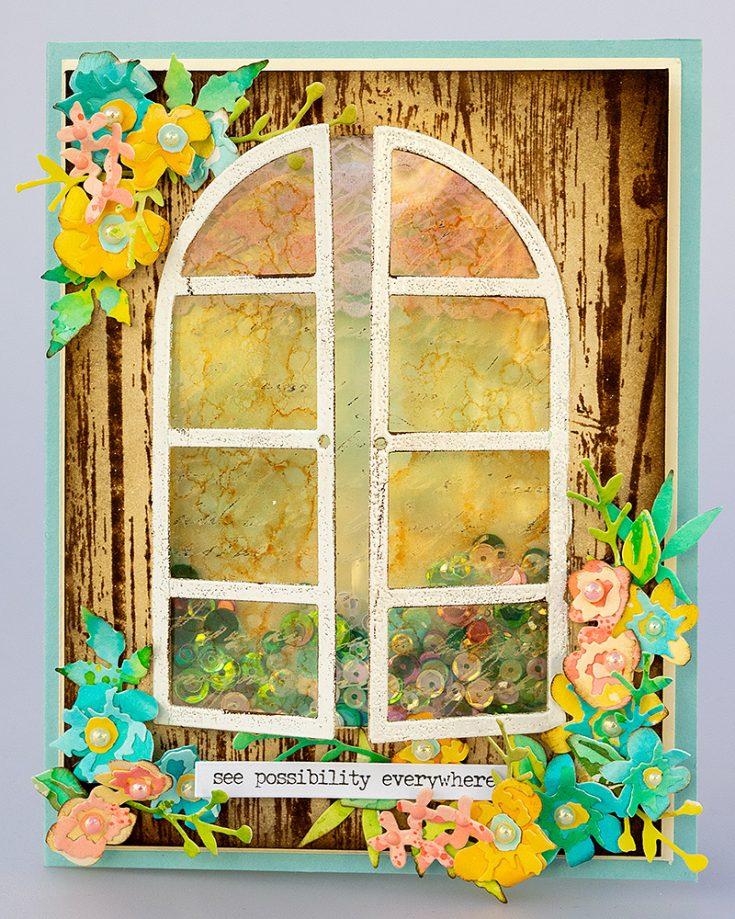
Hi everyone! I am happy to be back here today on the blog with a fun shaker card tutorial. May is such a beautiful month and it inspired me to make a floral card. I like to stamp on or color the acetate that I use for shakers and on for this card I did both, creating a layered and textured shaker effect.
The windows of the shaker are ajar and you can open them more to see the shaker part better. There are three layers of acetate, with sequins sandwiched in between the bottom two. The first layer of acetate is the window ‘glass’. The flowers were die cut from scrap papers using Tim Holtz Brushstroke Flowers Mini dies.
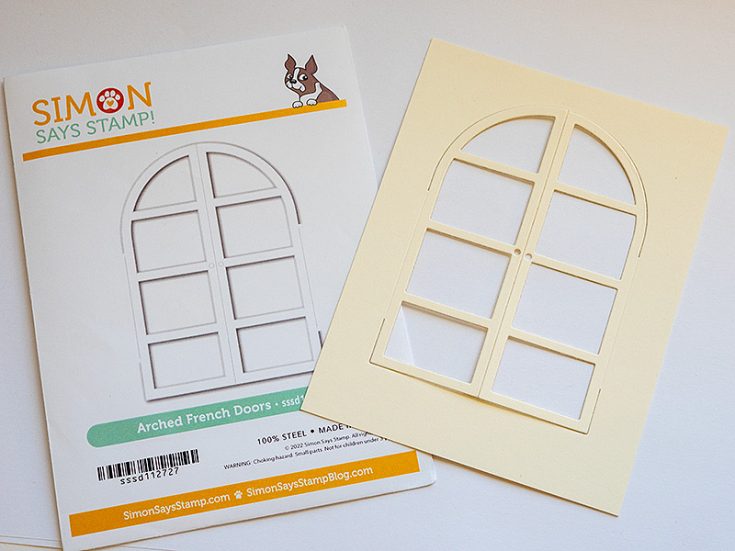
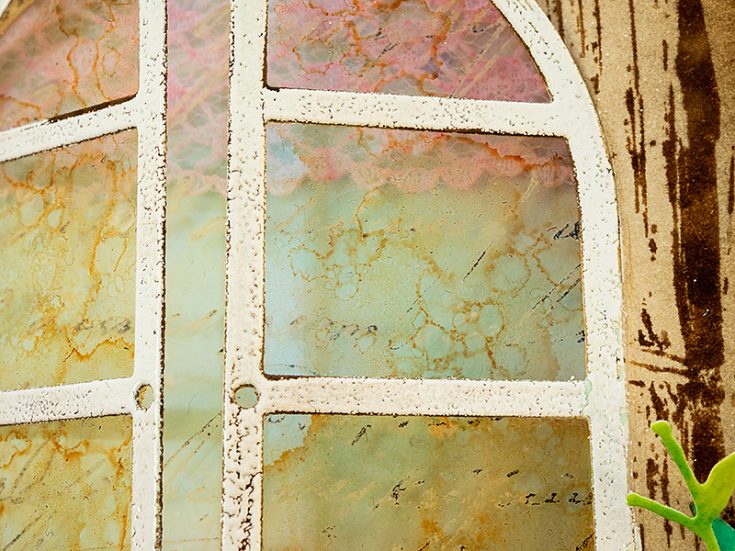
Die cut the Simon Says Stamp Arched French Doors from Ranger Heavystock paper.
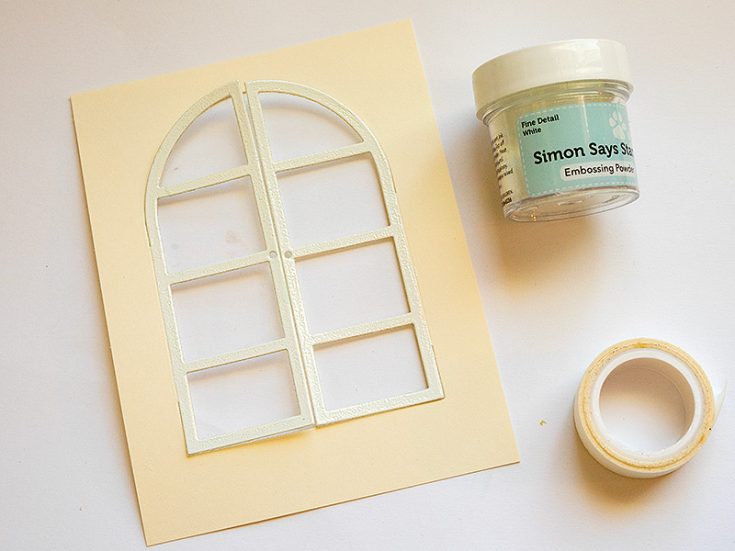
Apply Very Very Low Tack tape along the edge of the windows. Apply an embossing pen along the window frame and emboss with Simon Says Stamp white embossing powder.
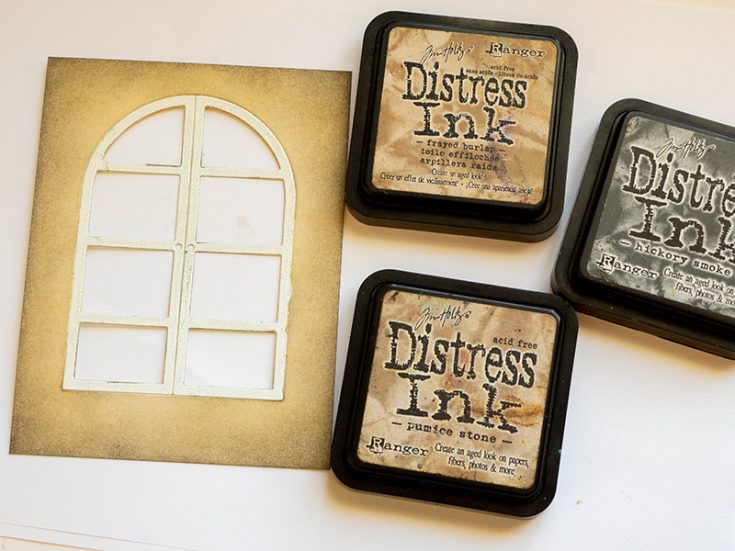
Ink the background with Frayed Burlap, Pumice Stone and Hickory Smoke. The embossing will resist the ink.
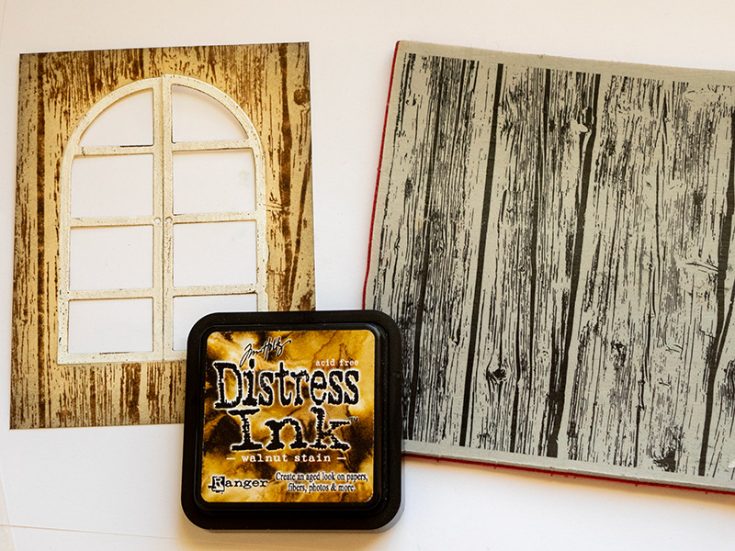
Ink Simon Says Stamp Wood Planks Background with Walnut Stain. Mist lightly with water and stamp on the window.
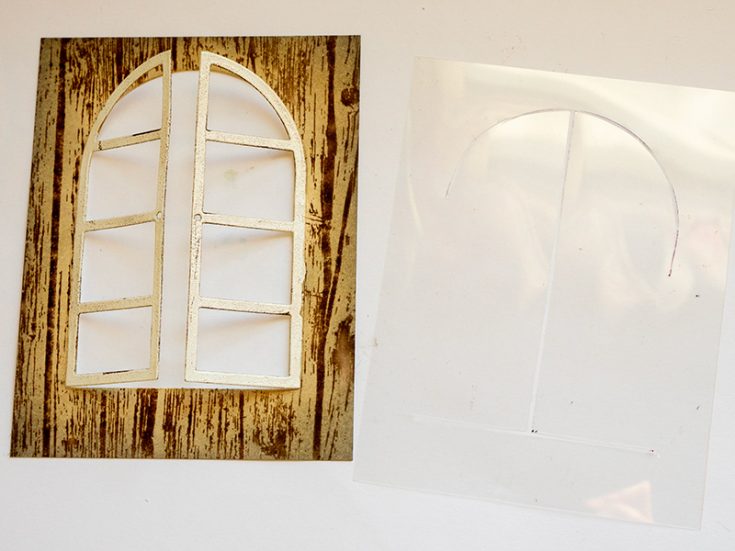
Die cut the Arched French Doors one more time from a Simon Says Stamp Acetate Sheet.
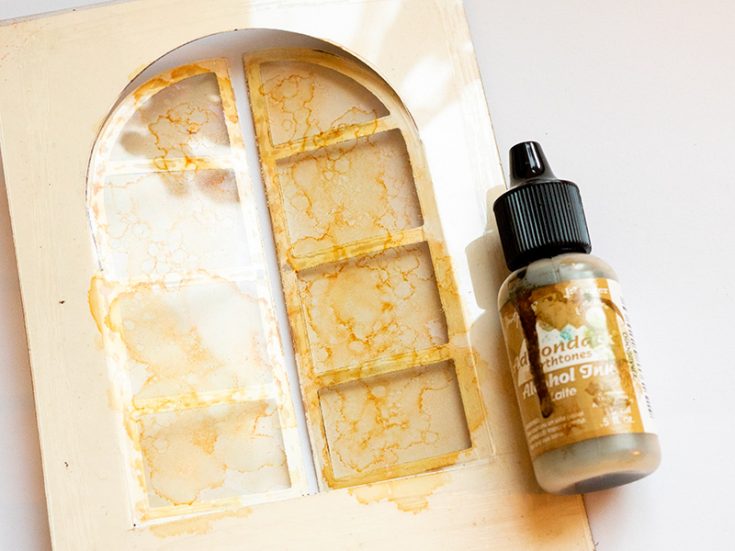
Glue the acetate window to the paper window. You might need to trim the edges slightly with scissors. Color the acetate with Latte Alcohol Ink.
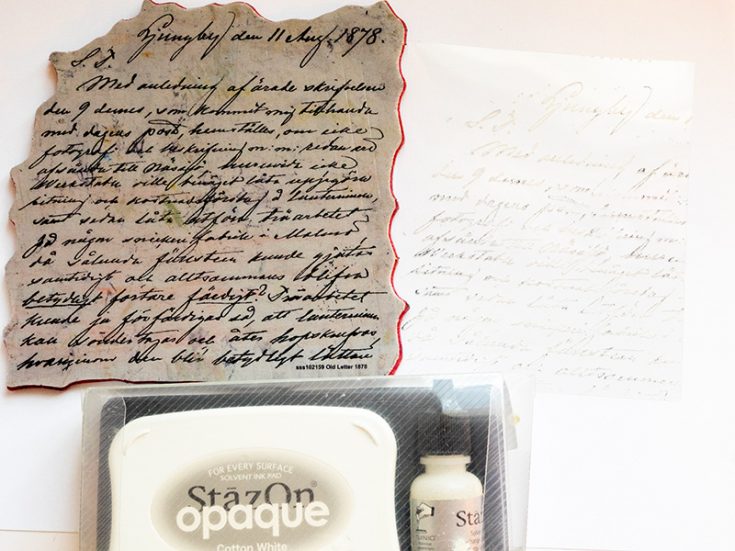
Stamp Simon Says Stamp Old Letter Background on an Acetate Sheet with Stazon Cotton White Ink. As you can see, there was a little black ink left on my stamp. I liked the look even though it was an accident.
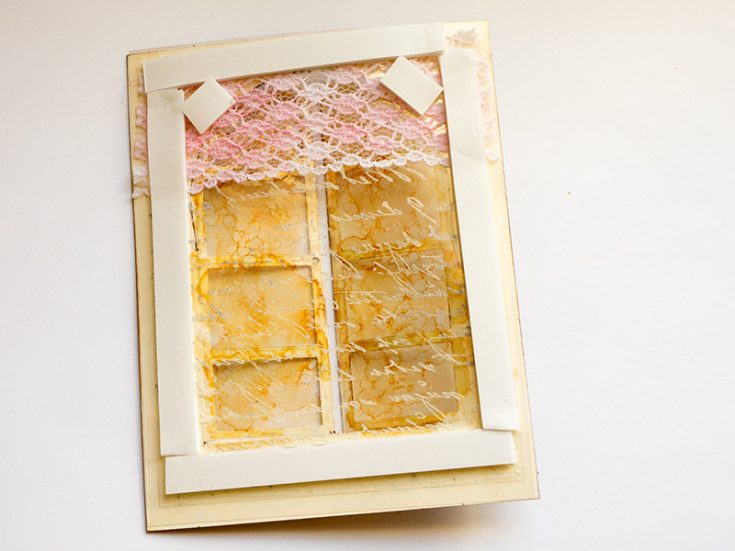
Glue the stamped acetate to the inside of the window. Add a piece of lace as a curtain. I had dyed the lace with Distress Ink beforehand. Apply Simon Says Stamp Pawsitively Perfect Foam Tape around the edges.
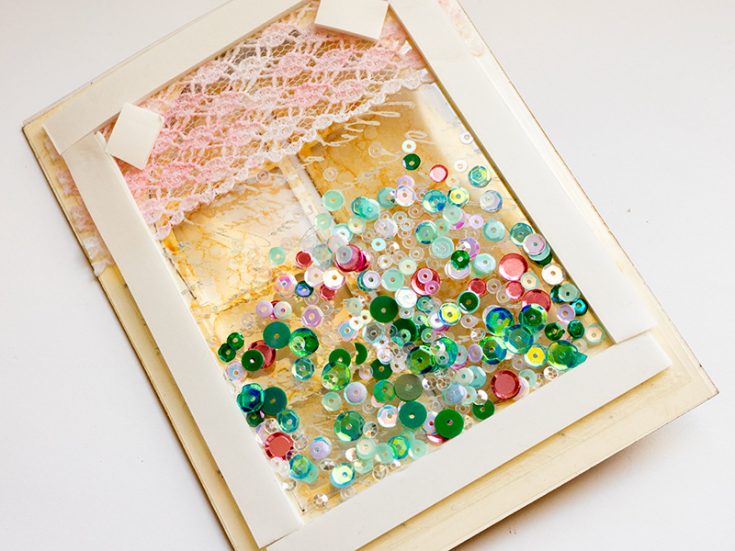
Fill the shaker with sequins and add another piece of acetate on top to seal it.
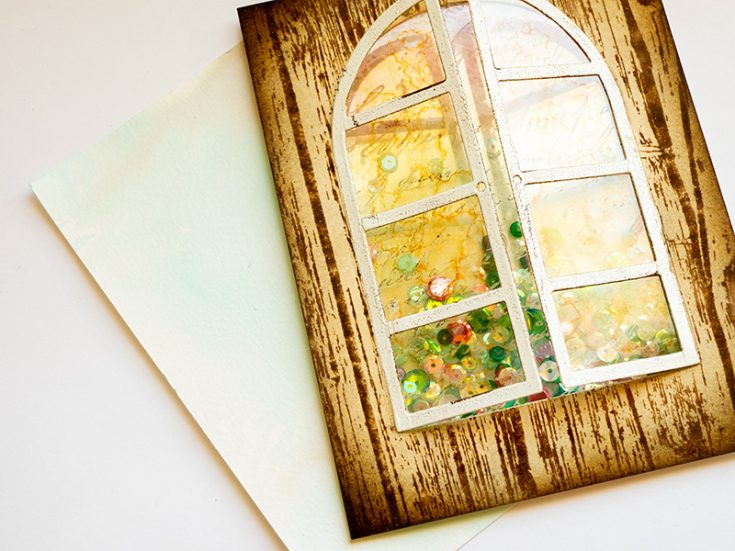
The window was mounted on heavystock paper, again using foam tape. You can also try various colored papers for a different effect.
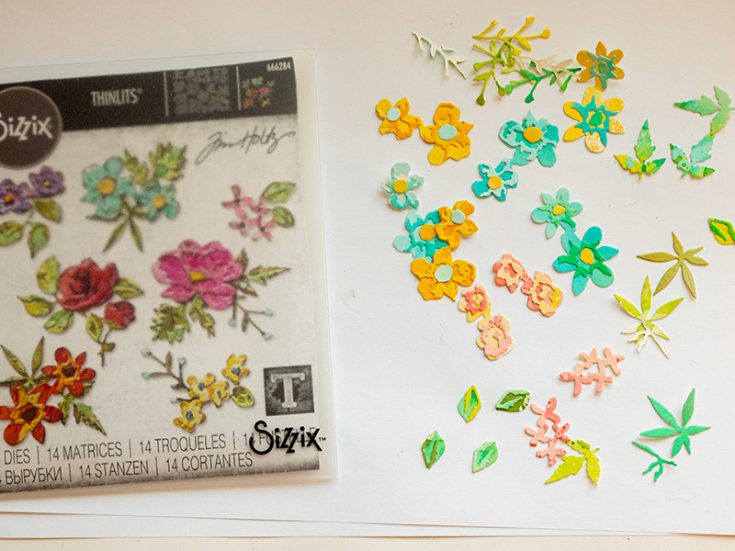
I used leftover scraps of inky watercolor papers to die cut the Tim Holtz Brushstroke Flowers Mini. If you don’t have scrap papers, smear Distress Inks on a non-stick craft sheet, mist with water and press watercolor paper into the ink. Assemble the flower pieces.

Use a Tim Holtz Shaping Kit to give shape and dimension to the flowers.
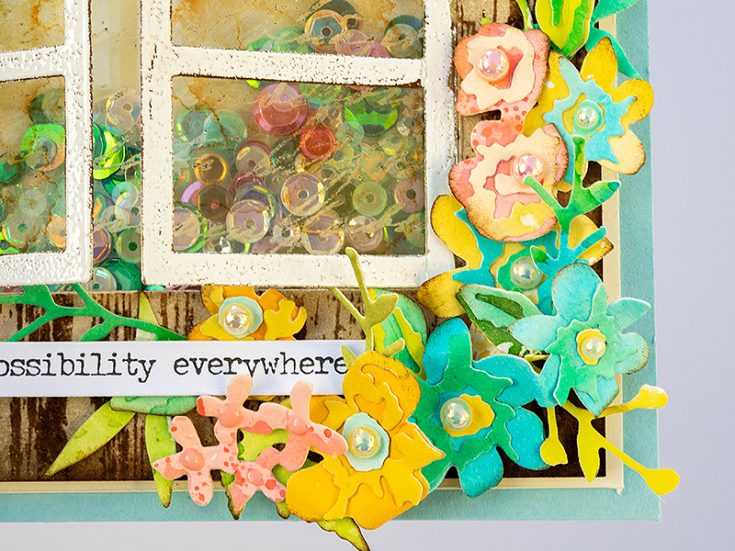
I inked some of the edges of the flowers with brown ink. Assemble the flowers and add a pearl to the centre.

Some of the flowers were glued to the background and the rest were adhered with foam tape.
The layers of lightly inky acetate ‘glass’ windows, the script stamped acetate and the sequins add depth to the card.
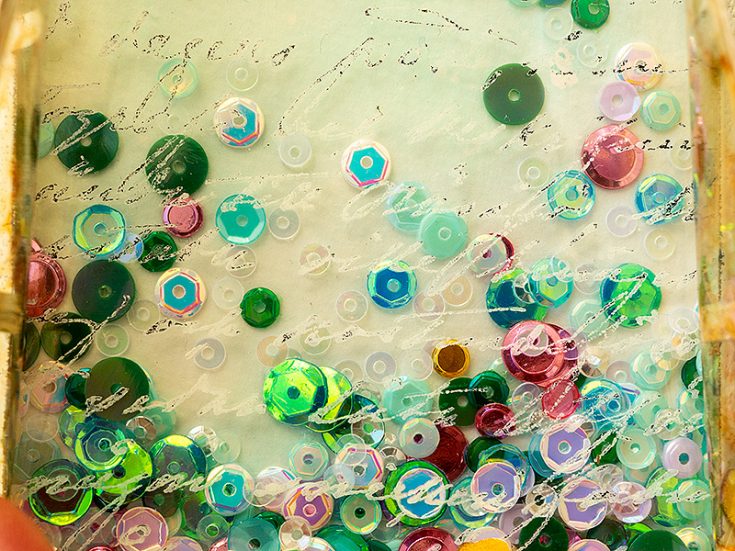
You can add beads, glitter or mica flakes to the shaker too.
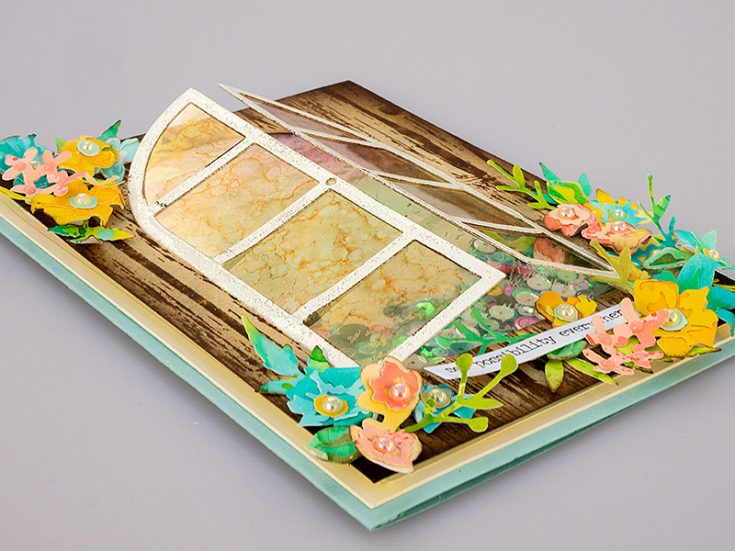
This card has quite a bit of dimension with the windows that open, the flowers and the shaker.
I hope this tutorial inspired you to make some shaker cards and to stamp on or color the acetate that you use for the shaker.
Thank you so much for looking! Happy crafting! -Anna-Karin
SUPPLIES:
|


Thanks so much for stopping by, and thanks to Anna-Karin for being our guest!
Easy Peasy CAS Birthday Card: EZ with CZ

Hi friends! Please join me in welcoming back our special guest Cathy Zielske in the latest edition of our monthly edition of EZ with CZ! Read on and be sure to watch the video for all the details! Enjoy!
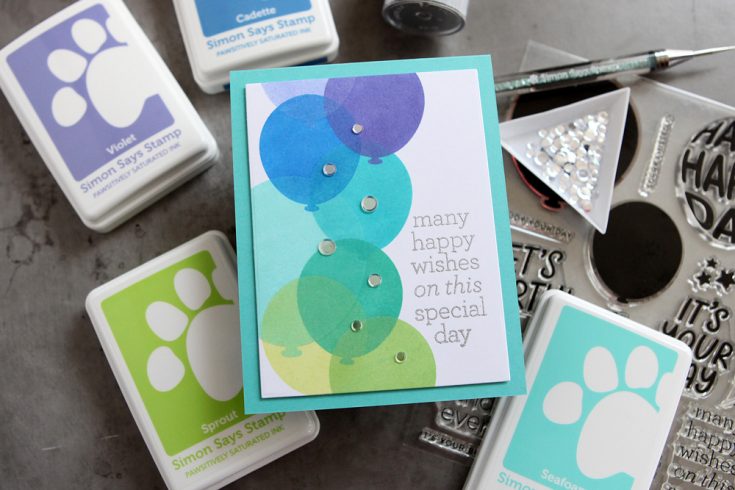
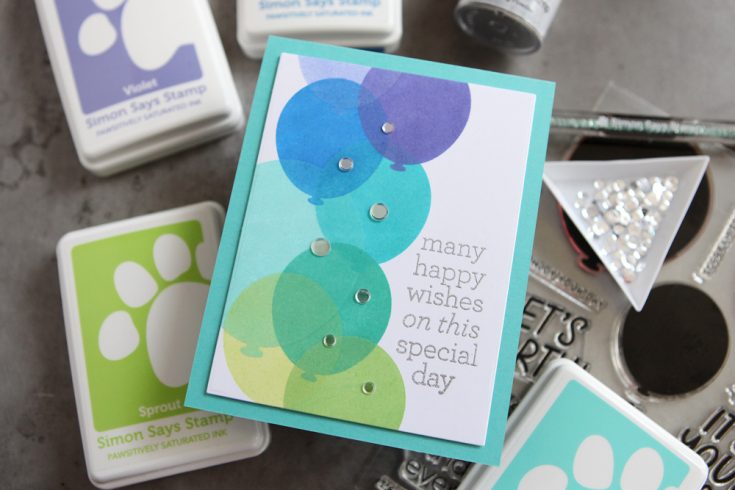
Hello everyone! It’s Cathy Zielske, back with another installment of EZ with CZ. Today I’m using just a few stamps to create a fun balloon background for a birthday card showcasing the Balloon Greetings stamp set. This is a really easy way to take a simple shapes stamp, overlap as you go, and keep your colors to one side of the rainbow.
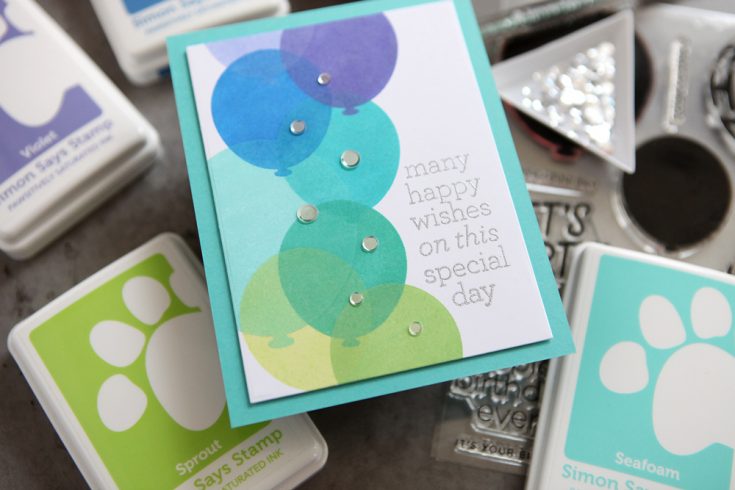
I’m choosing cool analogous colors for my project today. Analogous colors simply sit next to one another on the color wheel and you can work in rainbow order. In this card I am using Seafoam, Surf, Cadette, Violet, Tropic, Sprout, and Celery! Depending on how many times you stamp an image, dye inks appear a little translucent when they overlap, which is a really cool look.
You can change up the look of a design like this just by going with different colors. This would look really fun by choosing warmer colors, too! Here is my tutorial showing you how I created this card:
WATCH THE VIDEO:
Thanks so much for stopping by and I will see you back here with another simple card project next month!
SUPPLIES:
|


Thanks so much for stopping by, and thanks to Cathy for being our guest!!


