Try this: Non-Traditional Holiday Colors! Studio Monday with Nina-Marie

Hello everyone, it’s Nina-Marie Trapani here with you! Today I am featuring new products from Altenew and I will be using them to create two holiday cards with non-traditional colors!
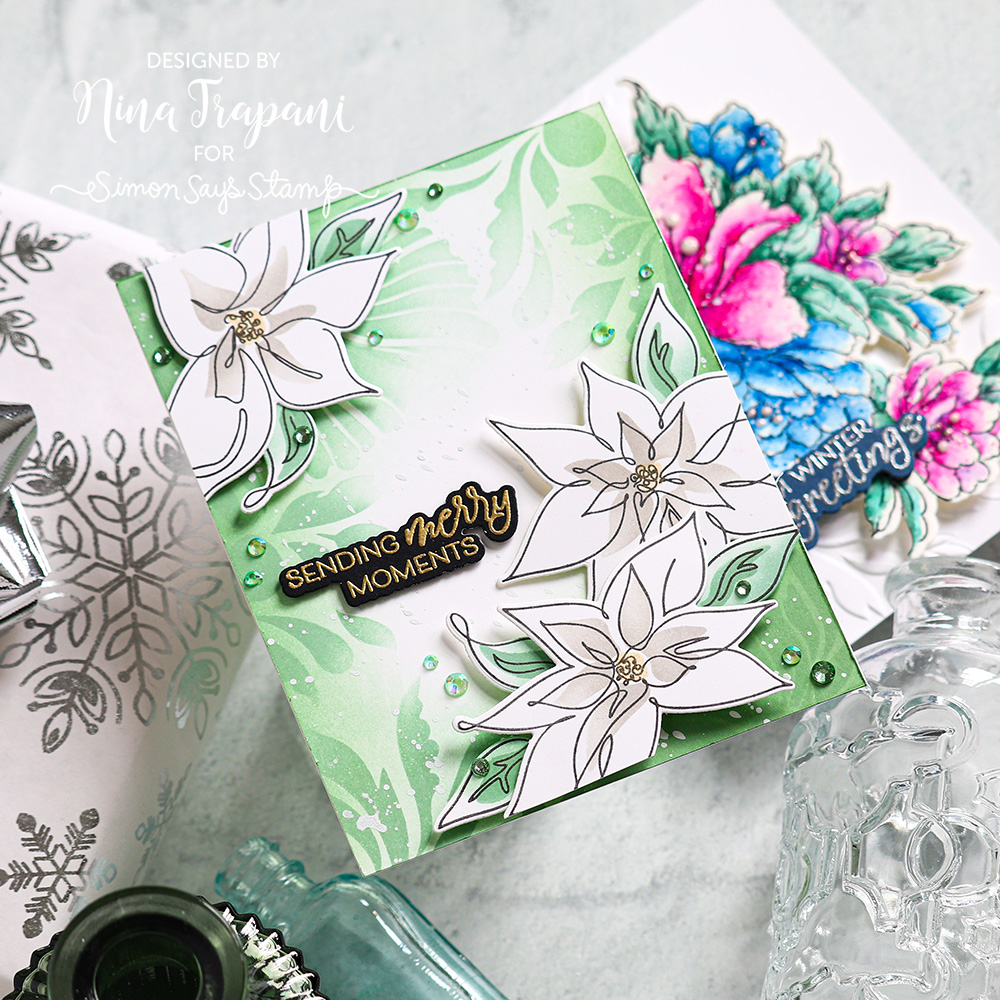
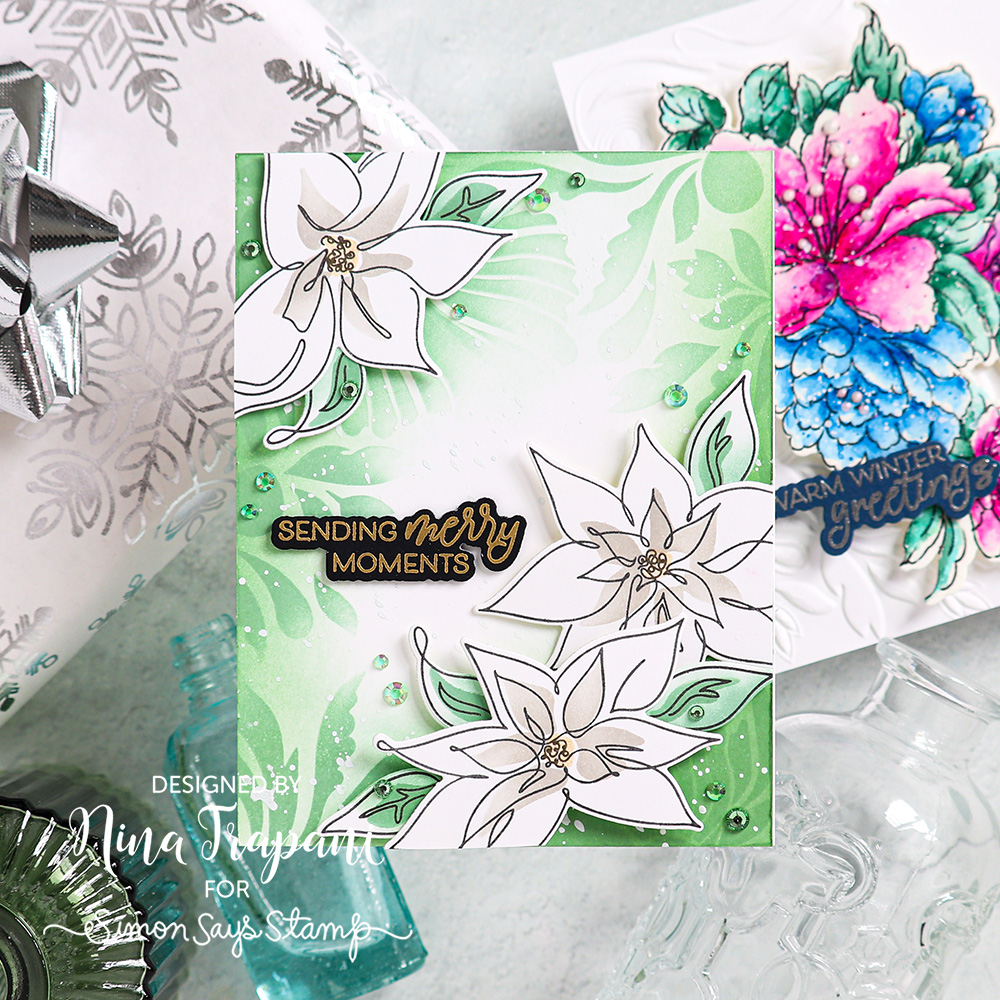
The Liner Life Poinsettias stamp, die, and stencil set make lovely modern florals that I used here with whites, grays, and greens. The background features Altenew’s Dynamic Foliage stencil.
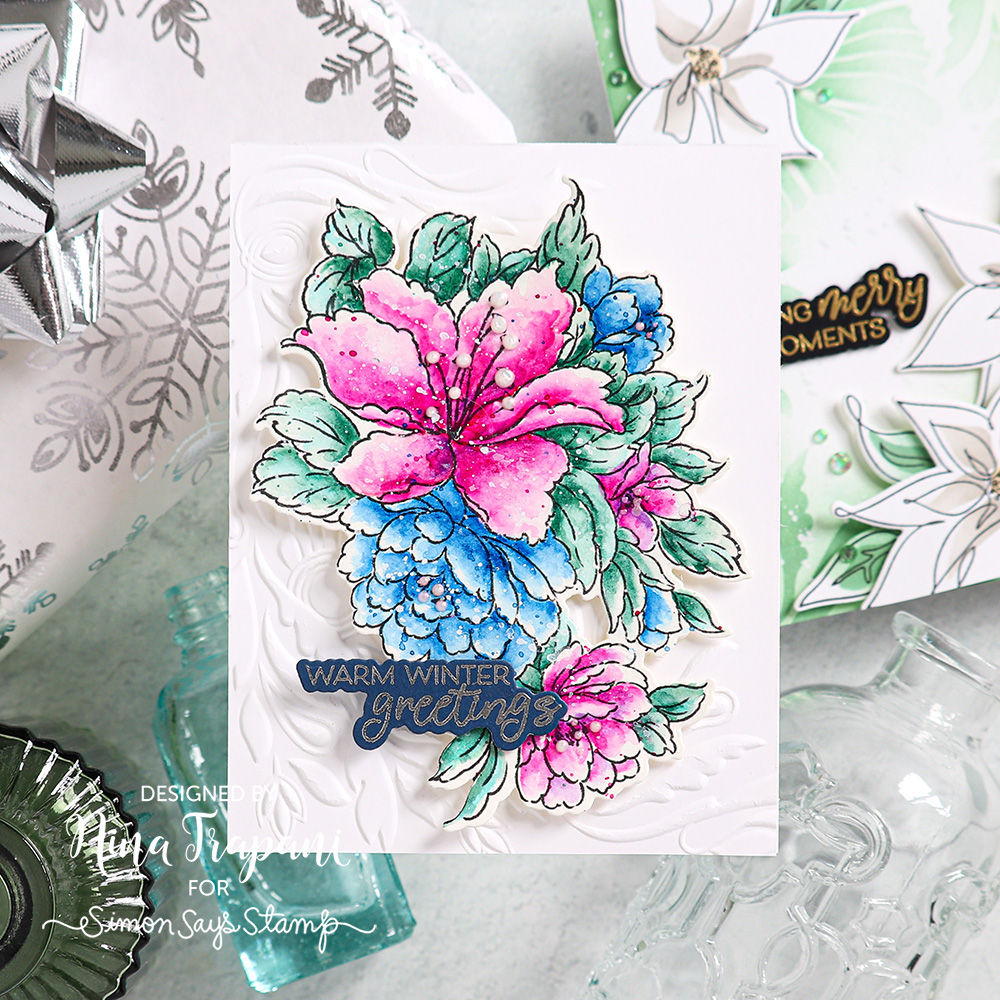
The second card features pine greens, fuchsia pinks, royal blues, and even a touch of purple. I used a non-holiday stamp set from Altenew called Bold Bouquet (as well as the coordinating dies) for the main focal image. To color the image, I used Altenew’s new Artistry Watercolors. The background features the Dynamic Foliage 3D embossing folder.
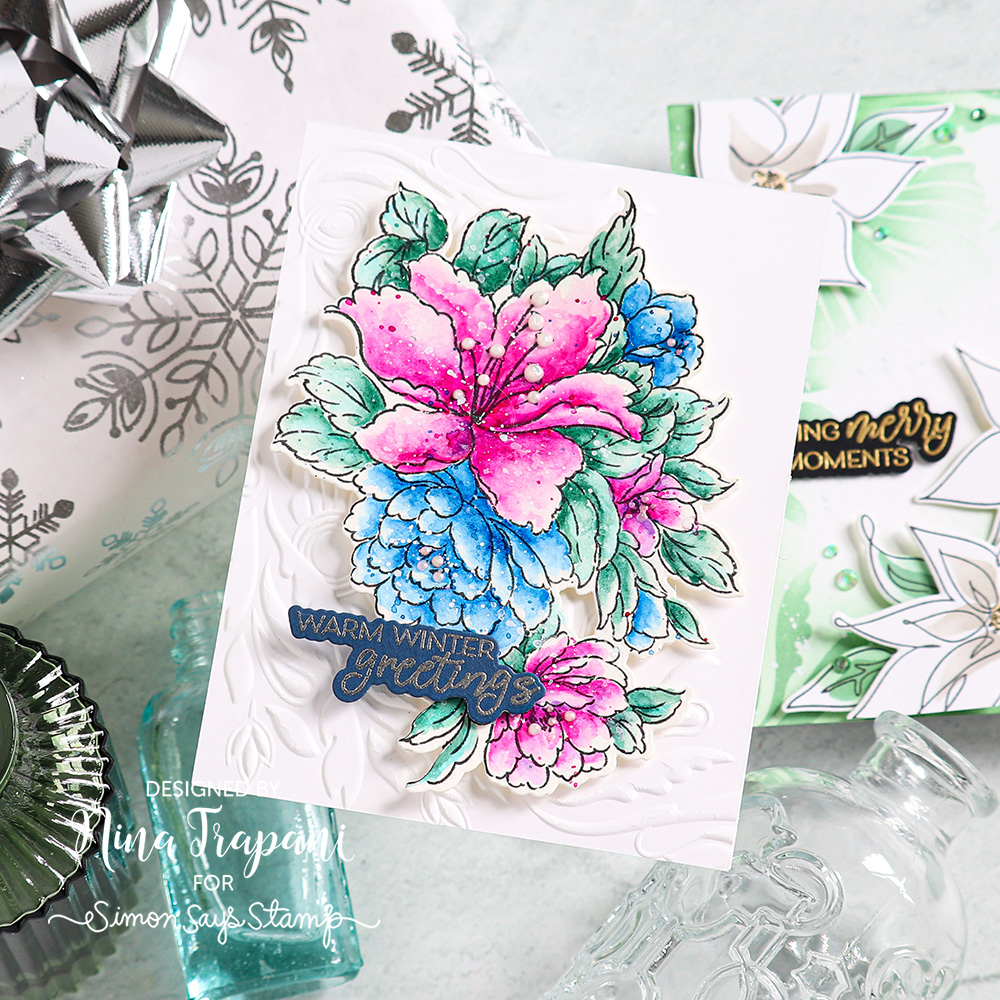
Want to learn how I created these two cards? Watch the video below for all the details!
WATCH THE VIDEO
SUPPLIES
|




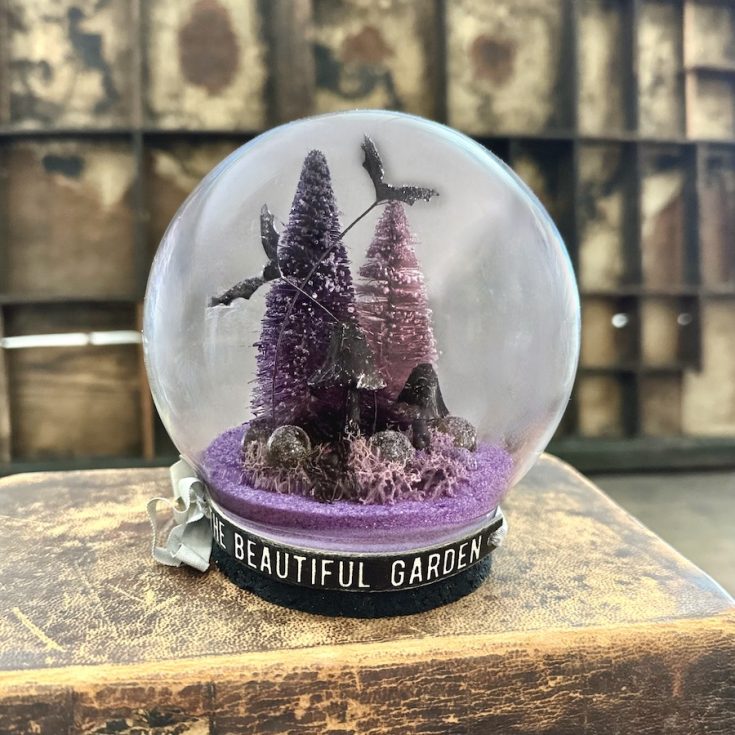
The Beautiful Garden Display Dome
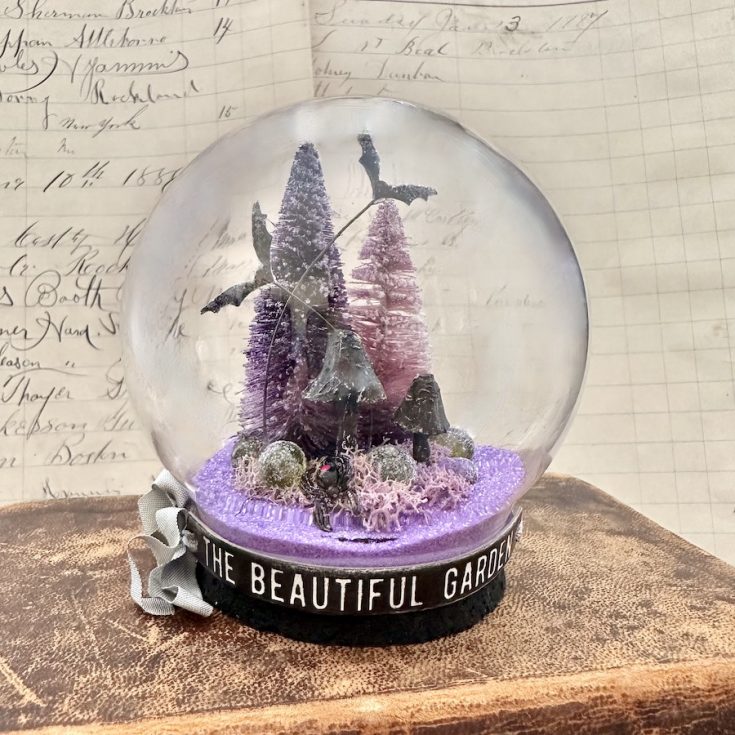
Hi friends! Happy Sunday! I’m beyond delighted to welcome back special guest Paula Cheney to our blog with this AMAZING globe decor piece! Be sure to read on for all the details and enjoy!
Steps 1-5
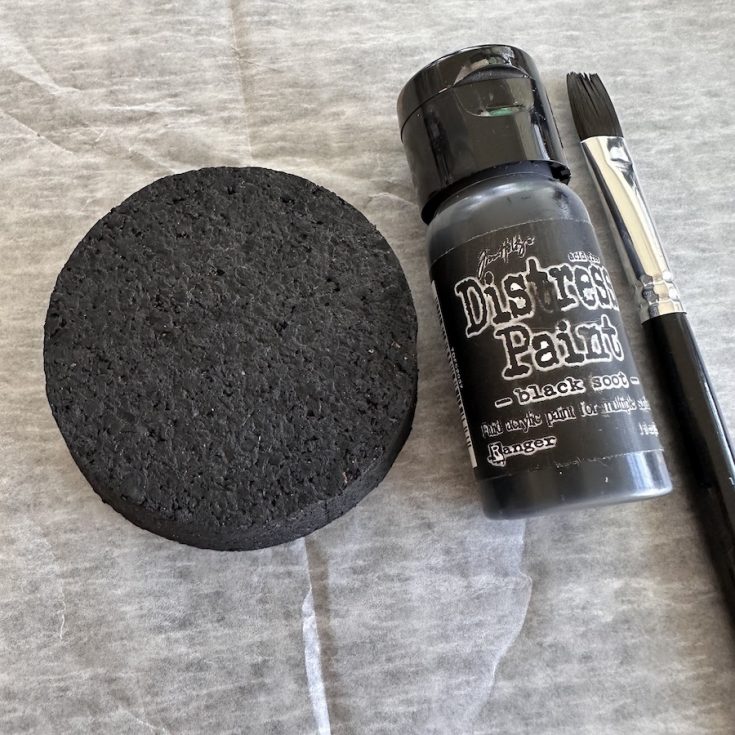
- Paint the cork of the Display Globe with Black Soot Distress Paint.
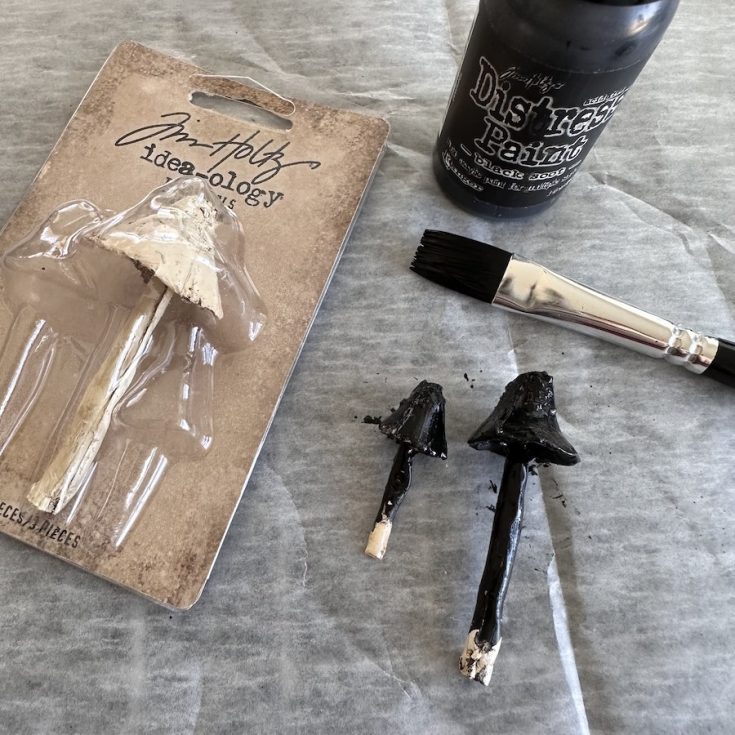
- Paint two Toadstools with Black Soot Distress Paint. Dry with a heat tool.
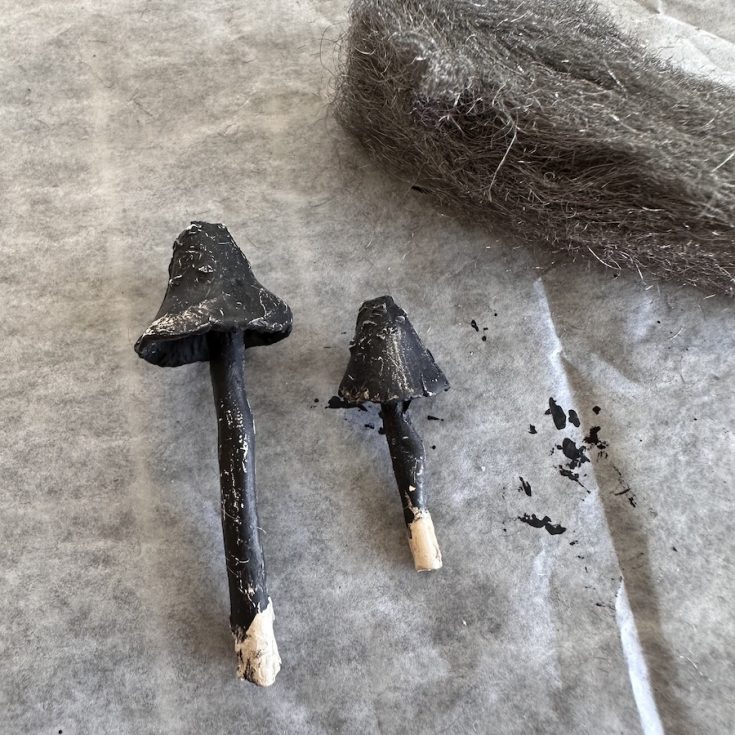
- Once dry, sand each Toadstool with steel wool.
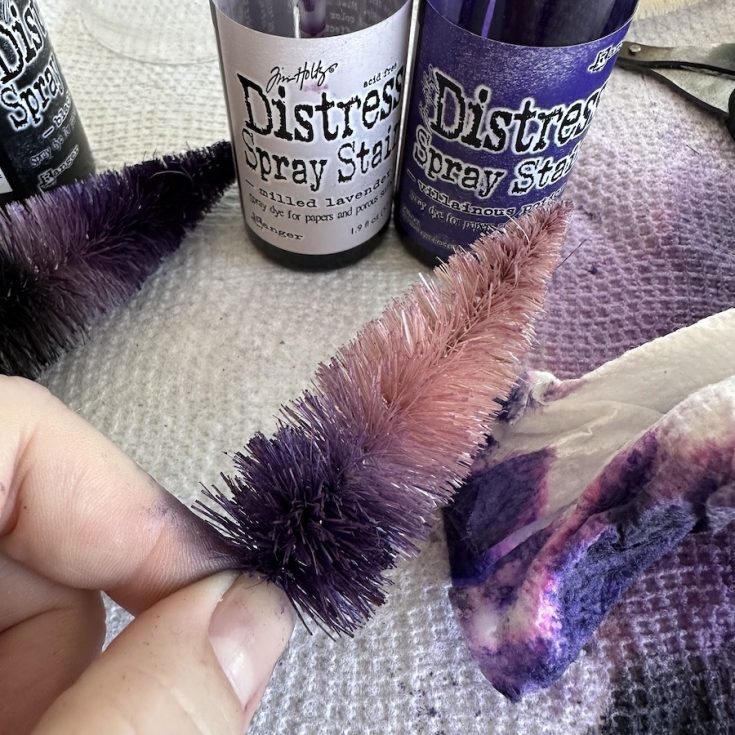
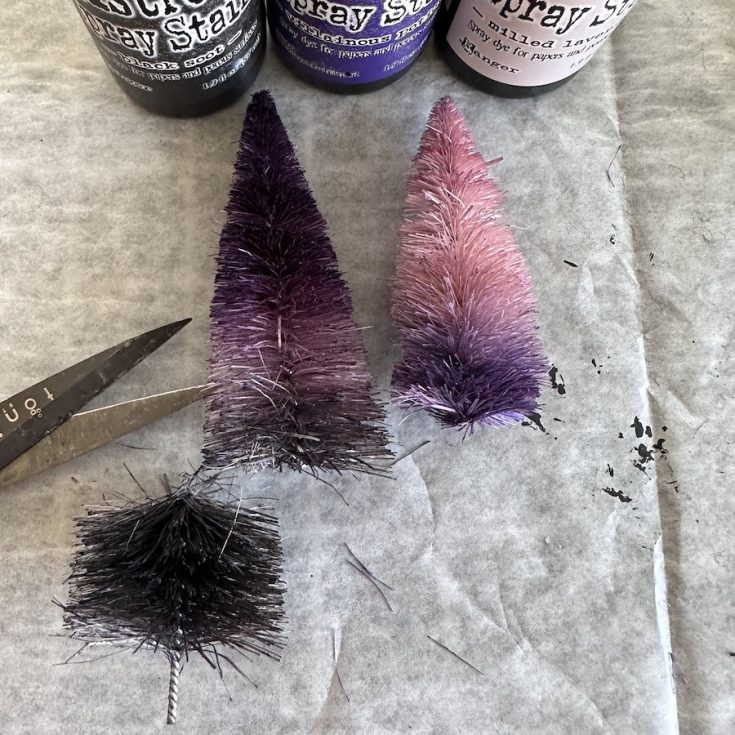
- Remove the base of 1 large and 1 small Woodland Alpine Tree. Use Distress Spray to color the trees. I wanted a variegated look so I used Black Soot, Villainous Potion and Milled Lavender. I didn’t tape anything off, I just sprayed the area I wanted. Once the tree was colored, I took a paper towel and brushed back and forth between the two colors so they start to blend together. Once you like the blend, dry tree with a heat tool.
- The larger Alpine tree does not fit in the Display Globe, so I just snipped off a bit with my Tonic Snips. I also cut the excess wire from the small tree.
Steps 6 -10
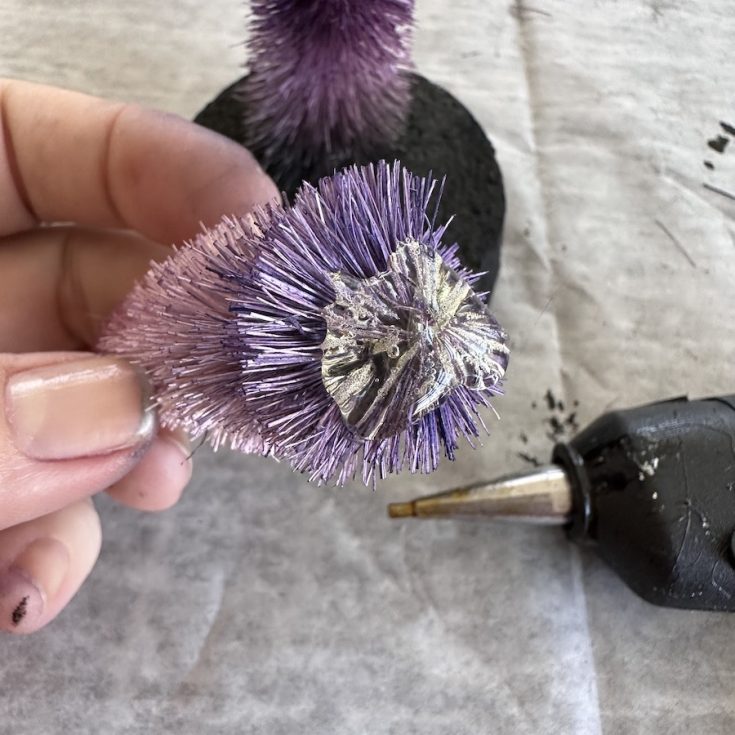
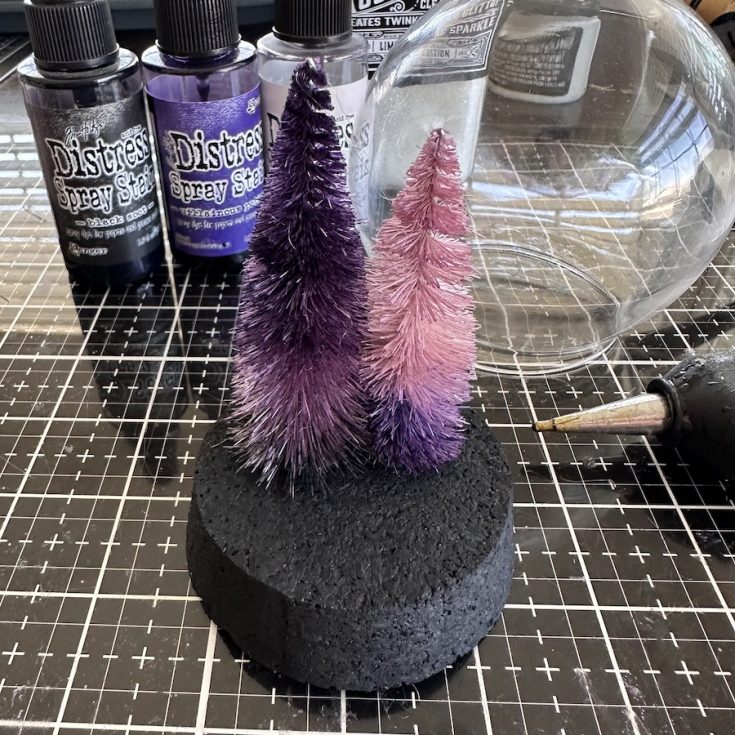
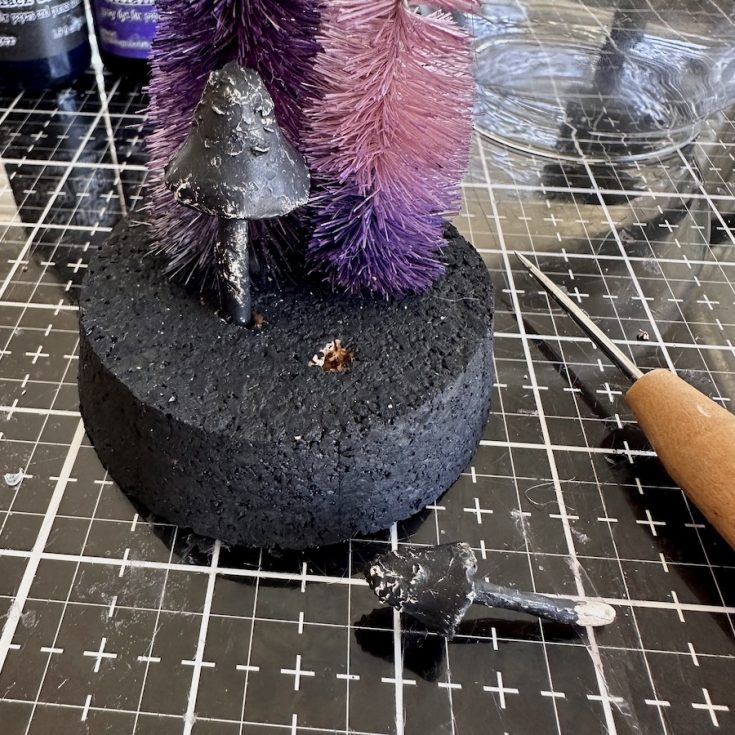
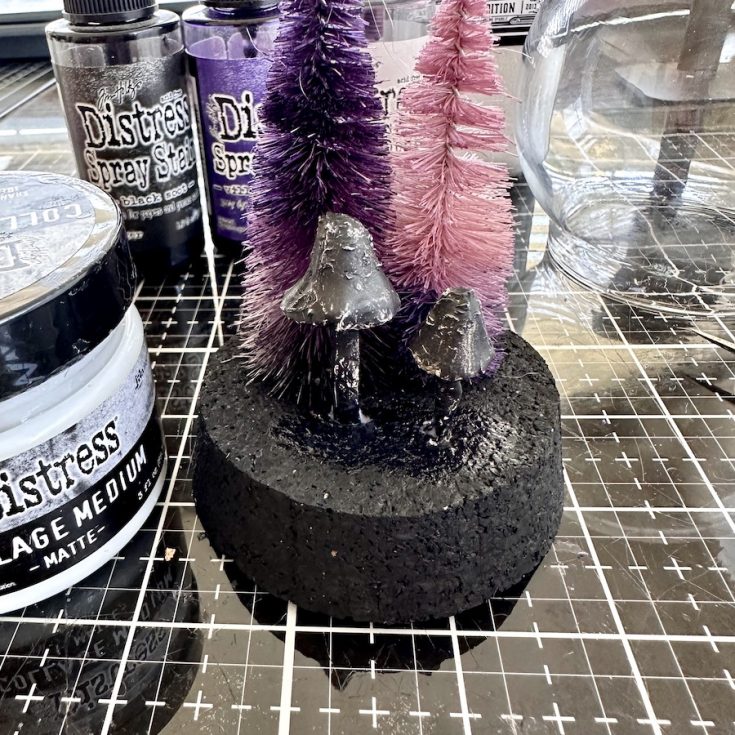
- Add hot glue to the bottom of tree.
- Place trees together on the cork so they are touching (almost embedded into each other).
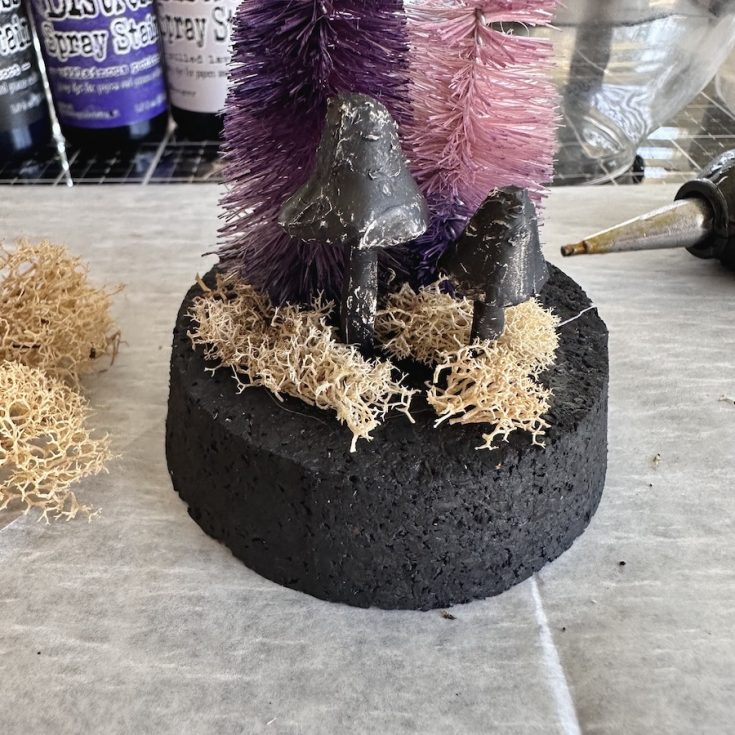
- Use a pick or awl to dig out two holes in the cork for Toadstools.
- Add Collage Medium to the bottom of Toadstool and place in hole. Let dry.
- Add some reindeer moss around the Toadstools.
Steps 11 – 15
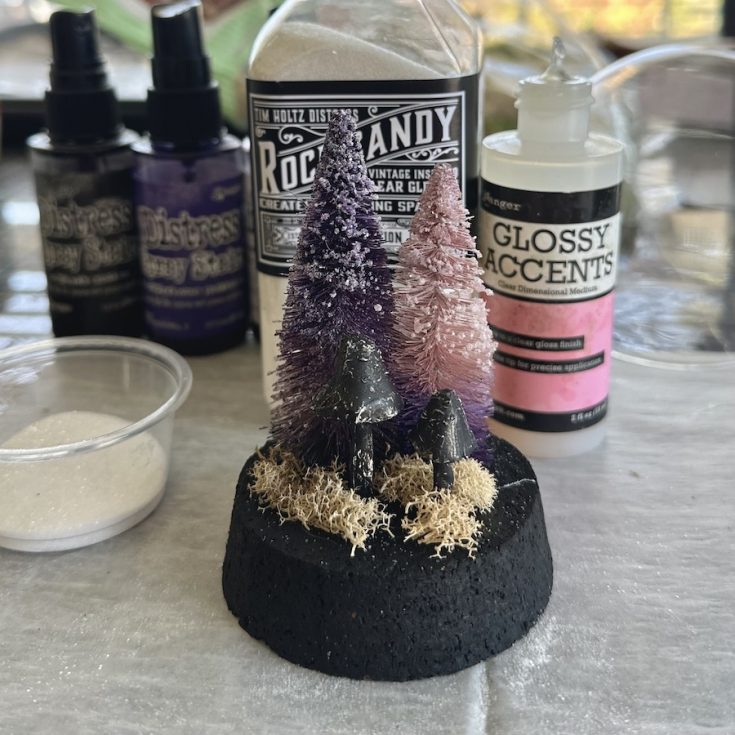
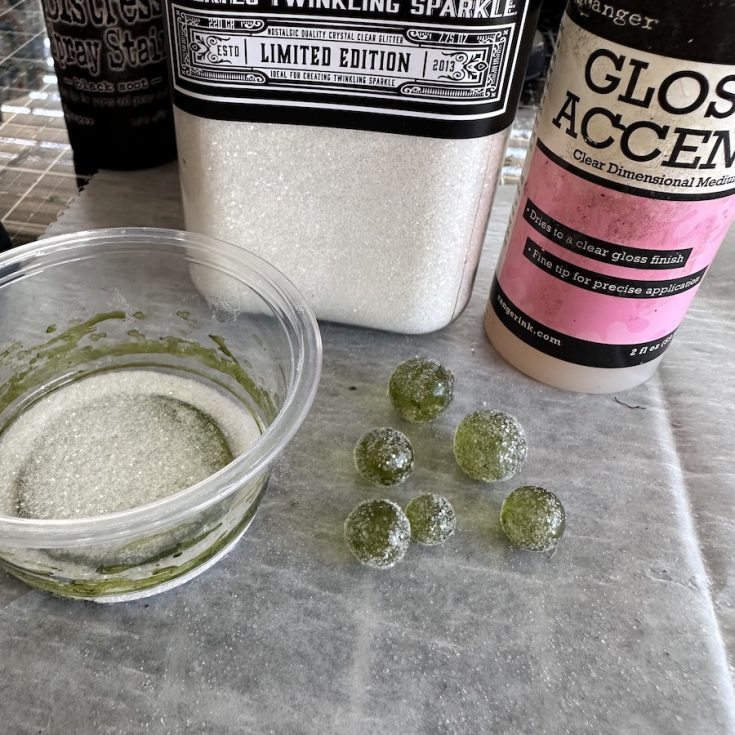
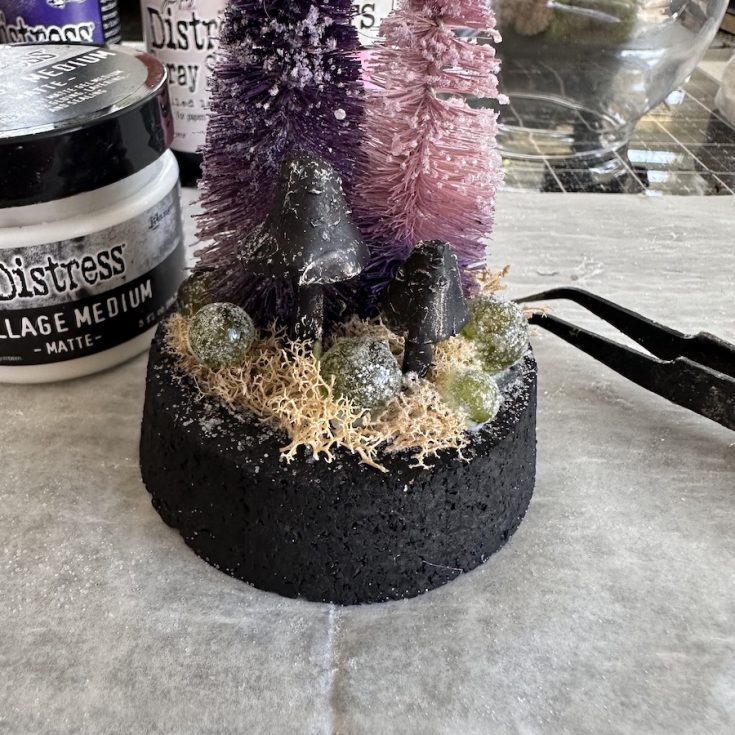
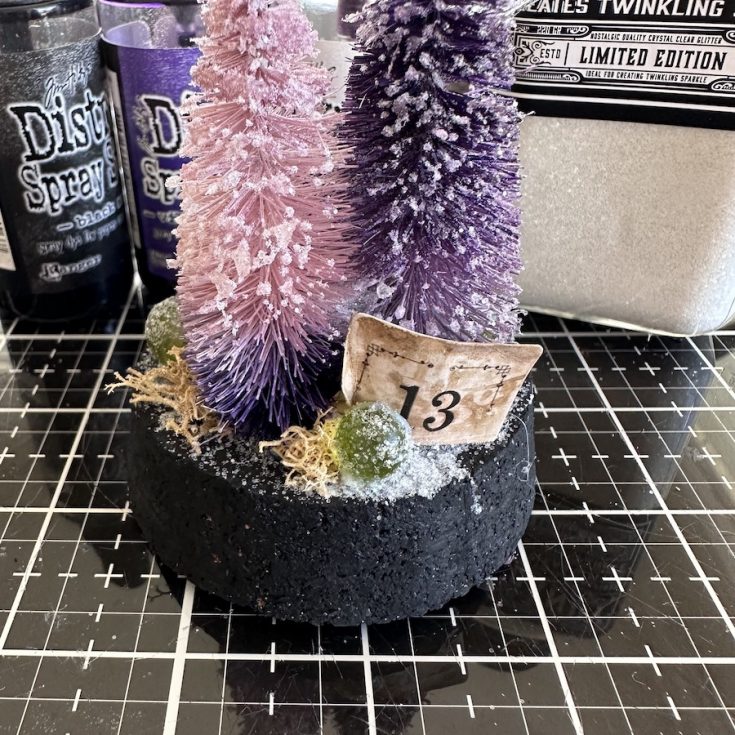
- Squeeze out about a quarter size of Glossy Accents onto a disposable paper. Dip your finger into Glossy Accents and run your fingertip down the top portion of one tree. Immediately sprinkle over the Glossy Accents with Rock Candy, dry with a heat tool. Repeat on second tree.
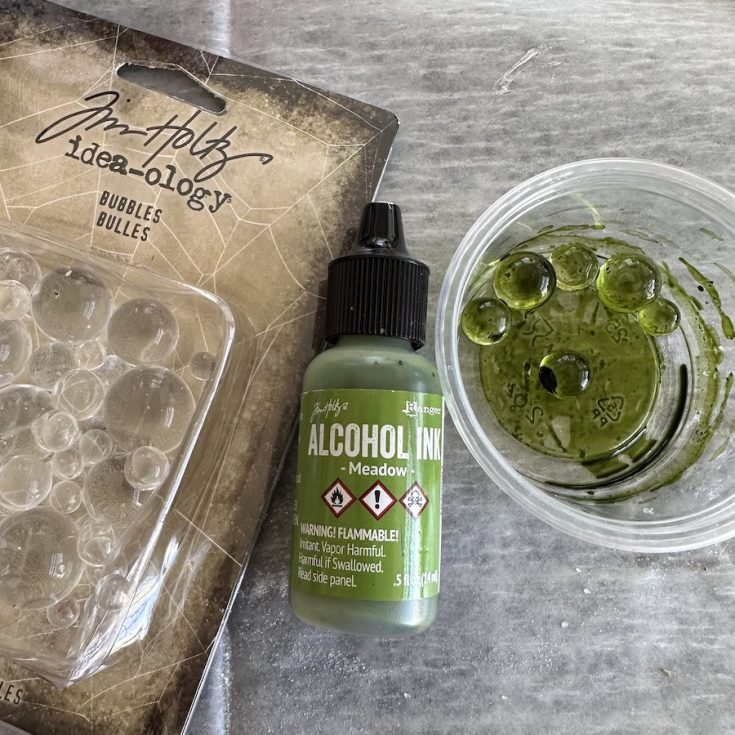
- Drop 5-6 Bubbles into a disposable cup. Squeeze a small amount of Meadow Alcohol Ink into cup and shake till they are covered with the Alcohol Ink.
- Add a little Rock Candy to the same disposable cup. Coat the Bubbles in Glossy Accents, then drop into cup with Rock Candy. Glossy Accents dries fast so you will need to work quickly.
- Once dry, add Bubbles to your garden using Collage Medium.
- Don’t forget the back of the Garden. I added moss and a Bubble, as well as a piece of ephemera from the idea-ology Halloween Ephemera pack.
Steps 16 – 20
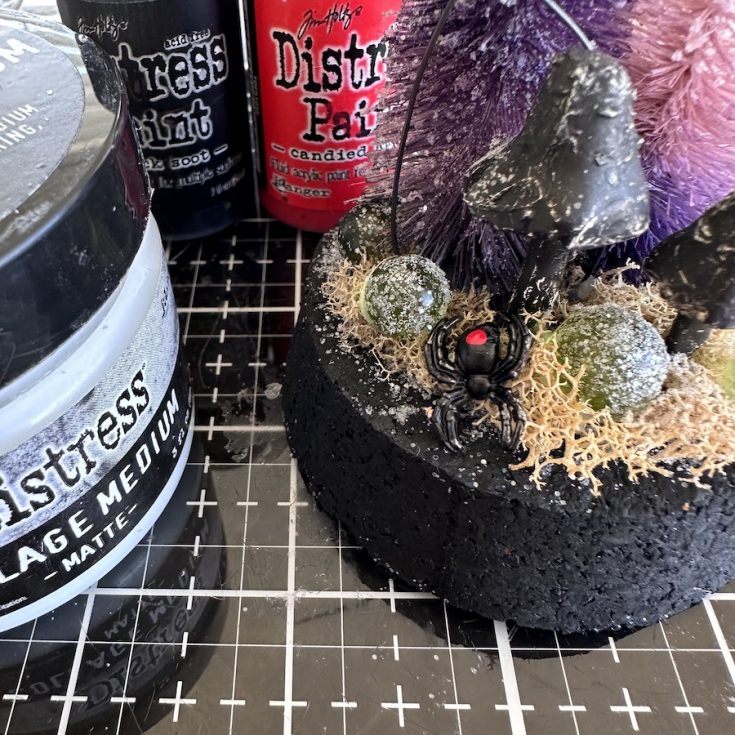
- Wipe Black Soot Distress Paint over metal Spider. Add a red spot on his back with Candied Apple Distress Paint. Once dry, add to the scene with Collage Medium.
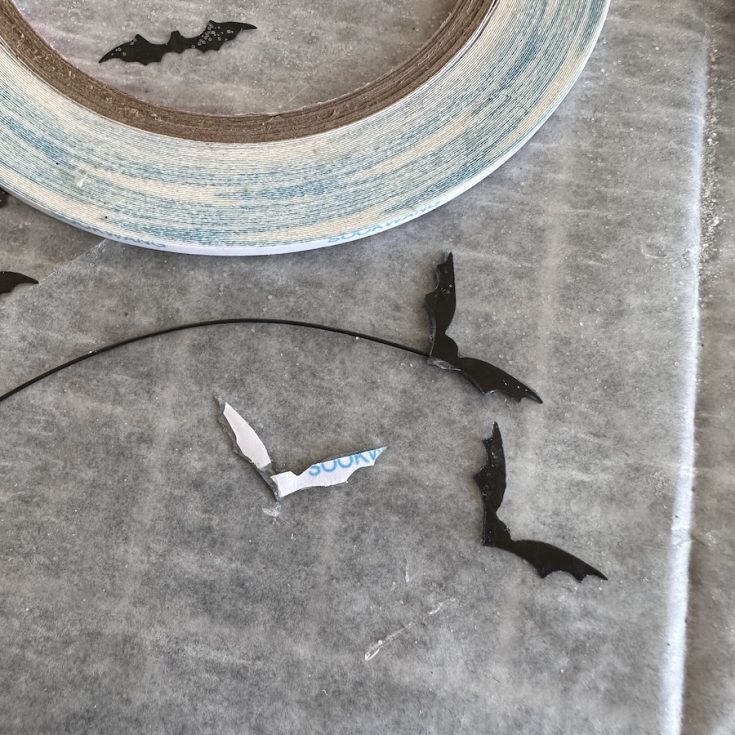
- Grab a few small bats that can be found in the Halloween Baseboards pack. Add Scor-Tape to the tiny bat (a bit challenging but it can be done), then add a wire (24 gauge) and a second bat on the back.
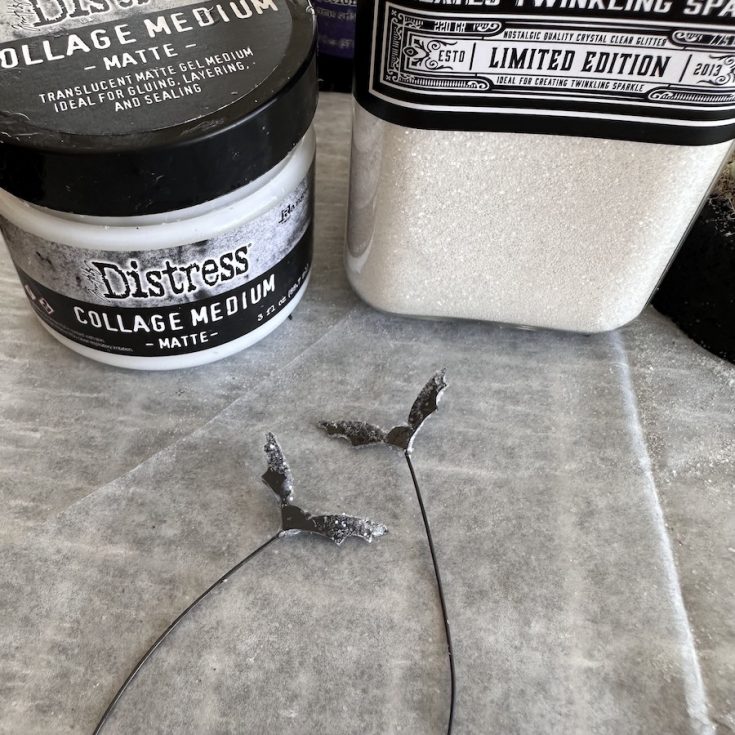
- Once secure, rub a small amount of Collage Medium on the edges of the bat, then dip into Rock Candy. It gives them great texture!
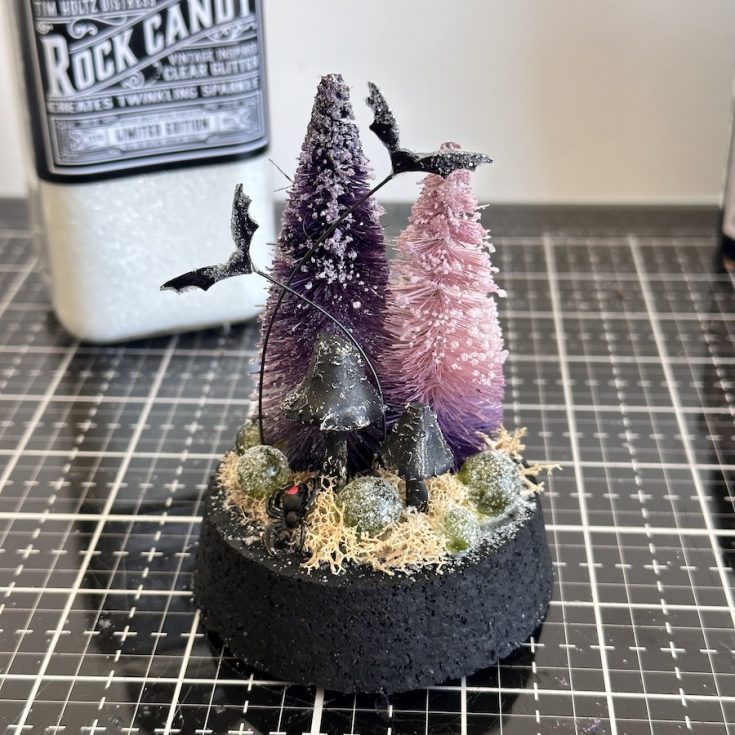
- Pierce the cork with a poke tool or awl then push the wire right into the cork. I criss-crossed the wires, keeping them in front of the trees, since the Display Globe is wide, not tall.
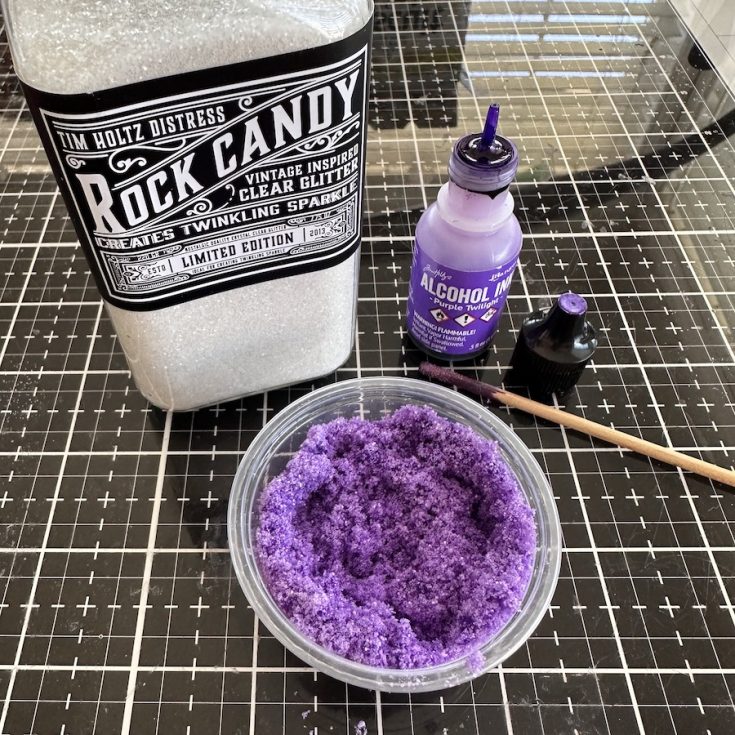
- Pour Rock Candy into a small disposable cup. Shake several drops of Purple Twilight Alcohol Ink into the Rock Candy. Stir with a craft stick or wooden skewer until colored. Add additional Alcohol Ink if necessary.
Steps 21 – 25
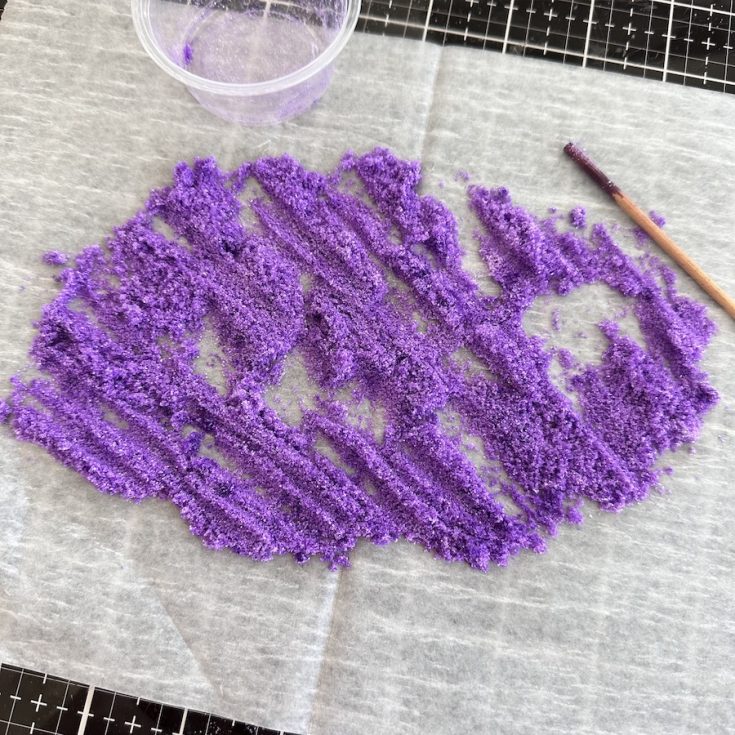
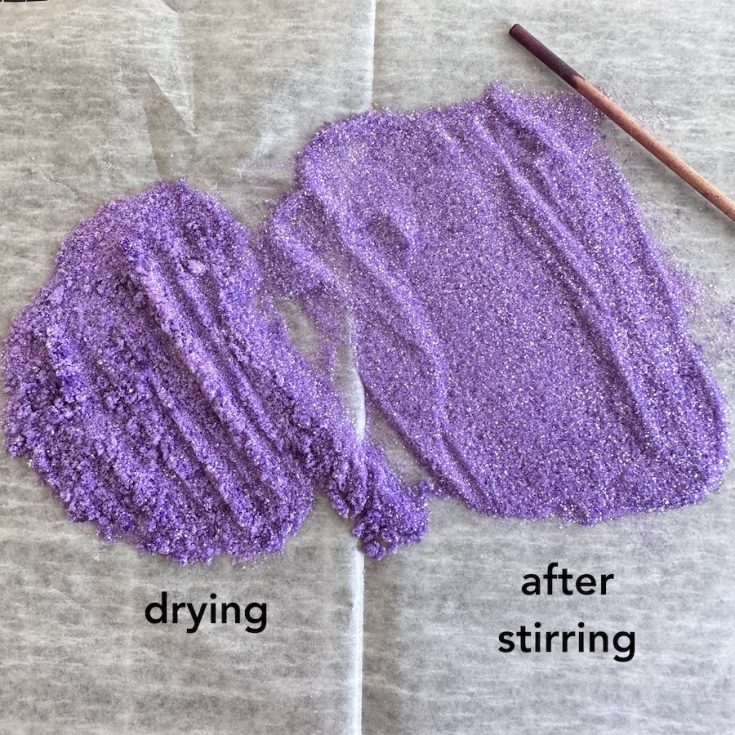
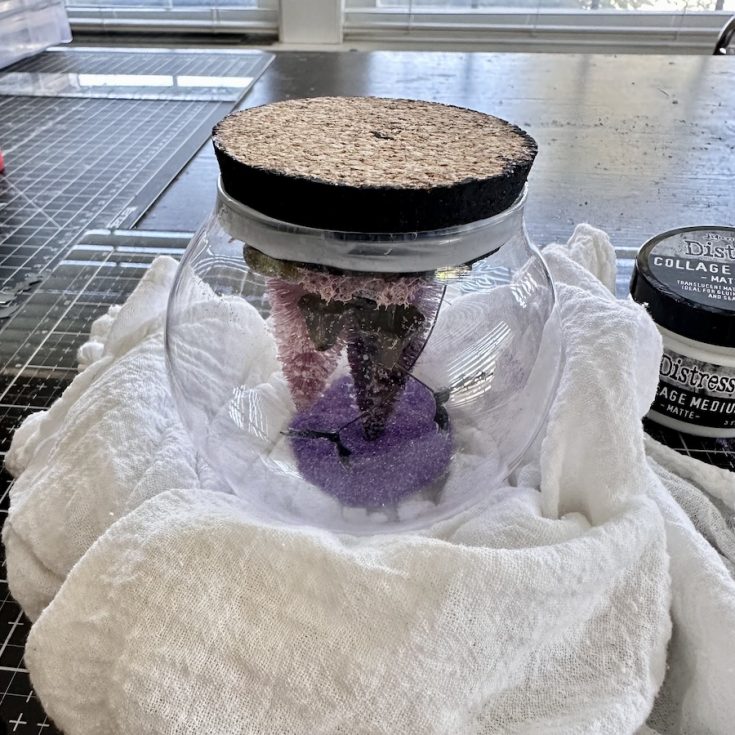
- Pour colored Rock Candy onto a disposable sheet or paper plate to dry. The texture should look like wet sand.
- After 10 -15 minutes, use a craft stick to stir the glitter, breaking up any clumps. NOTE: when the glitter is completely dry, the Alcohol Ink in the glitter will not stain the glass.
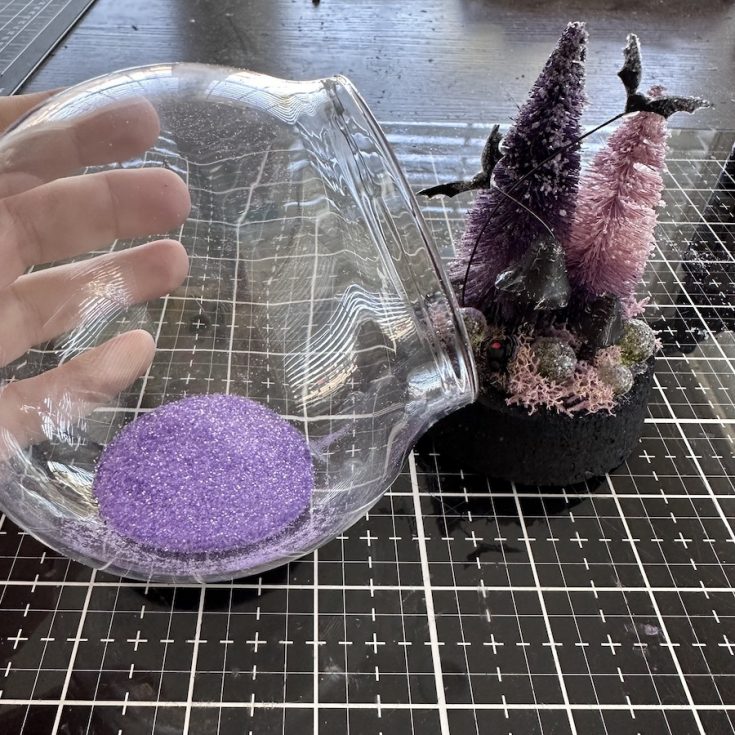
- Pour a small amount of Rock Candy Little into the Display Dome. Start with a Tablespoon and add more if needed. Insert the cork portion into the dome to test how much Rock Candy is needed.
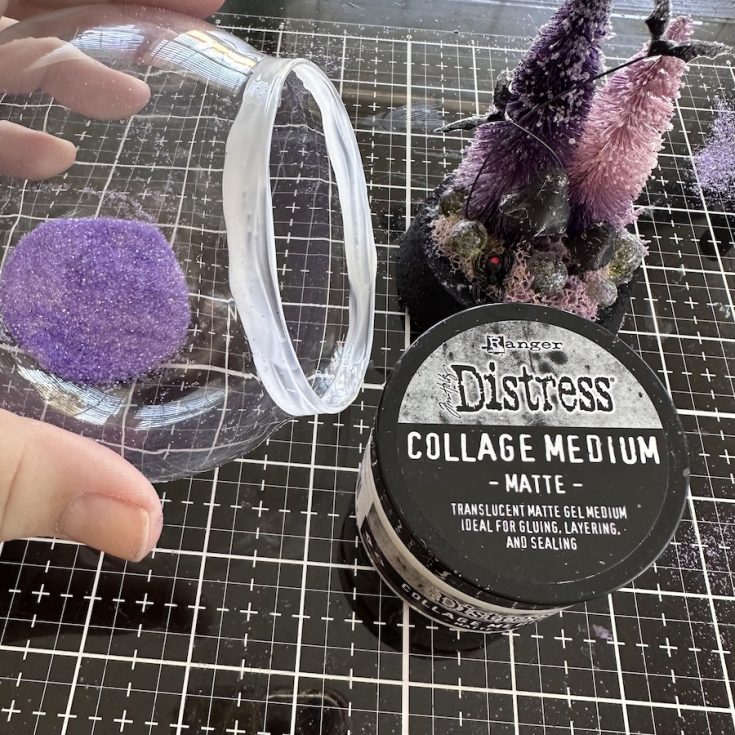
- Once you have the right amount of Rock Candy, add Collage Medium to the edge of the dome (it will dry clear).
- Add the cork to the dome, then nestle into a dishcloth to dry. I like to leave it in the dishcloth for a few hours, but it will depend on the amount of Collage Medium used.
Steps 26 – 29
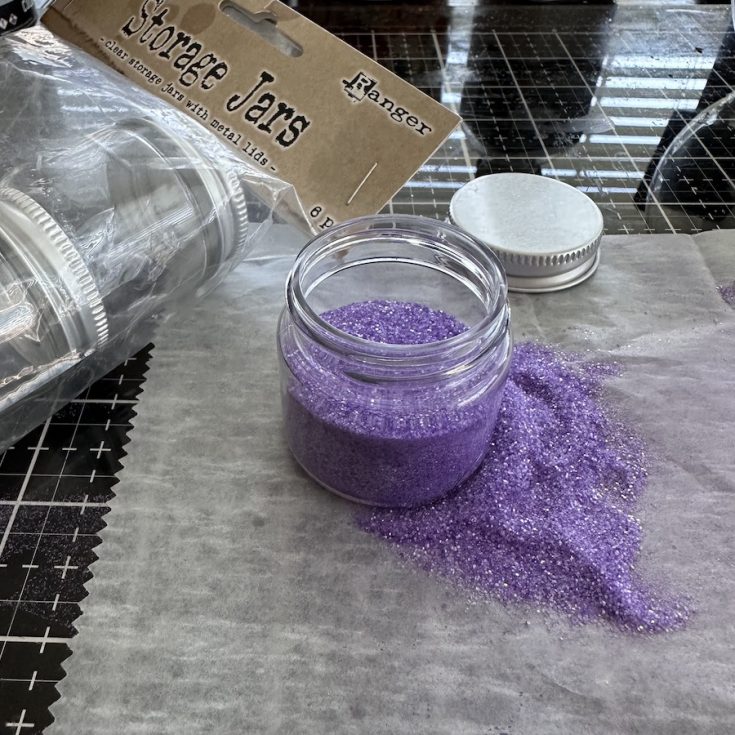
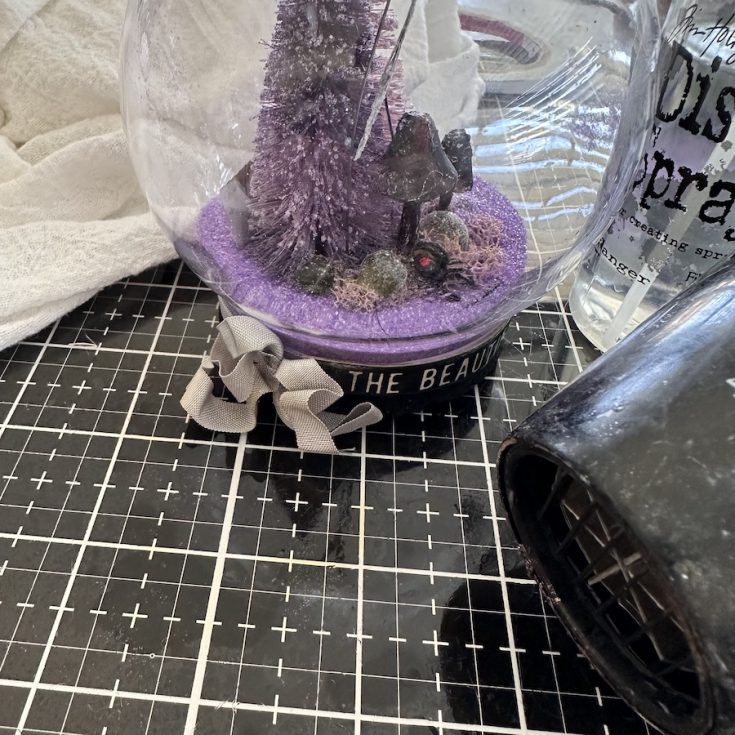
- Pour leftover glitter into a Ranger Storage Jar to use on other projects.
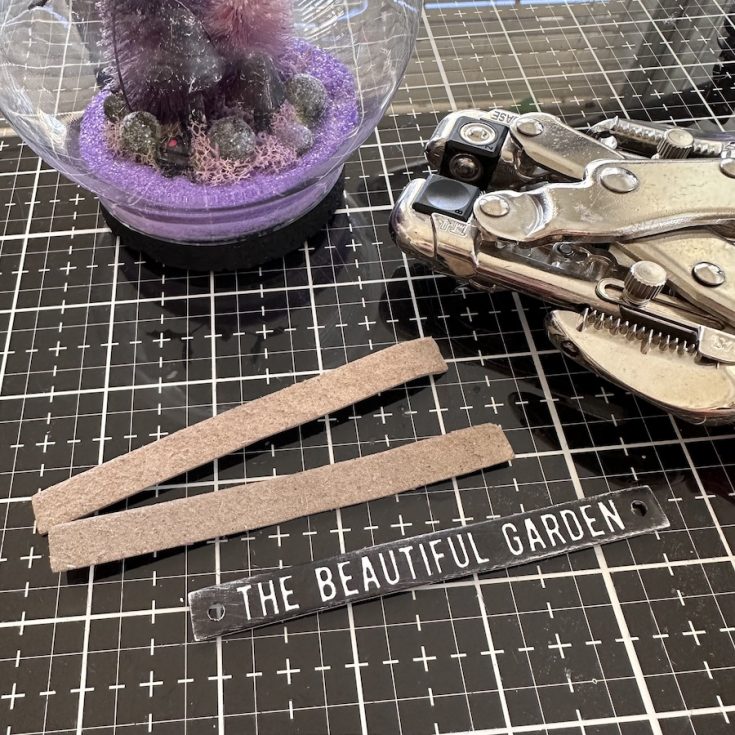
- Peel most of the backing off word stick from the Baseboards and Transparencies pack, so it can bend around the Globe. Use the small hole on a Crop-a-dile to punch a hole on each end of the strip.
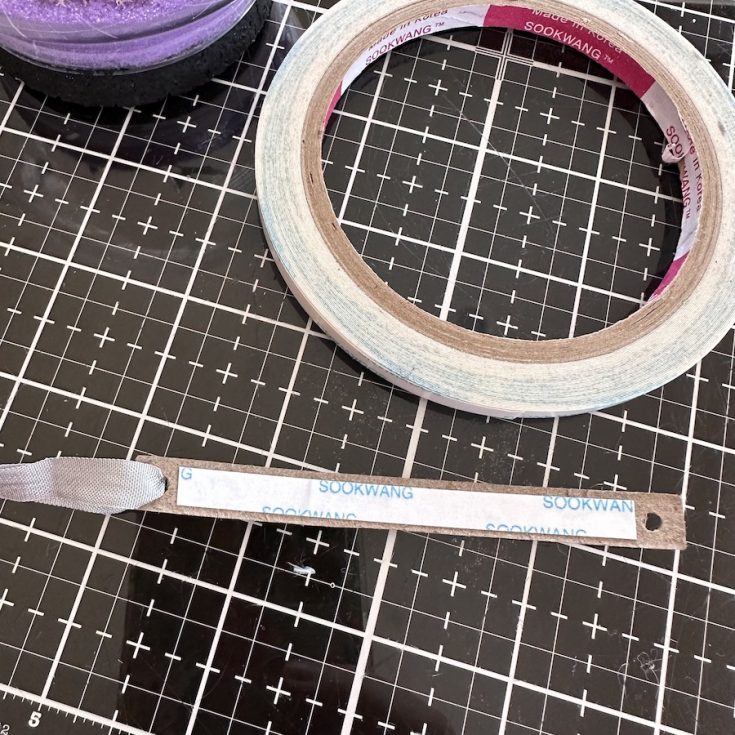
- Add Scor-tape to the back of the word stick, then thread 1/4” rayon ribbon into the hole on the right side.
- Peel the Scor-tape and adhere to the bottom of the globe. Wrap both ends of the ribbon around the globe. Thread ONE ribbon into the hole on the left and tie a bow. To crinkle the ribbon, spray with a little water, scrunch up and dry with heat tool.
SUPPLIES:
|


Thanks so much for stopping by, and thanks to Paula for being our guest!
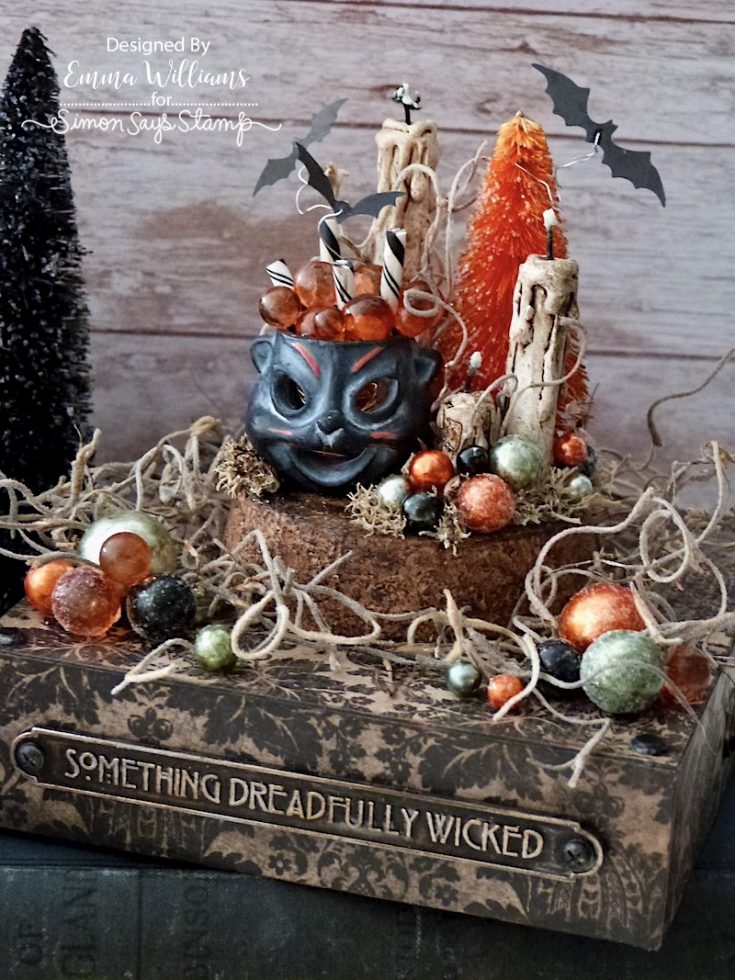
Something Dreadfully Wicked Halloween Globe by Emma
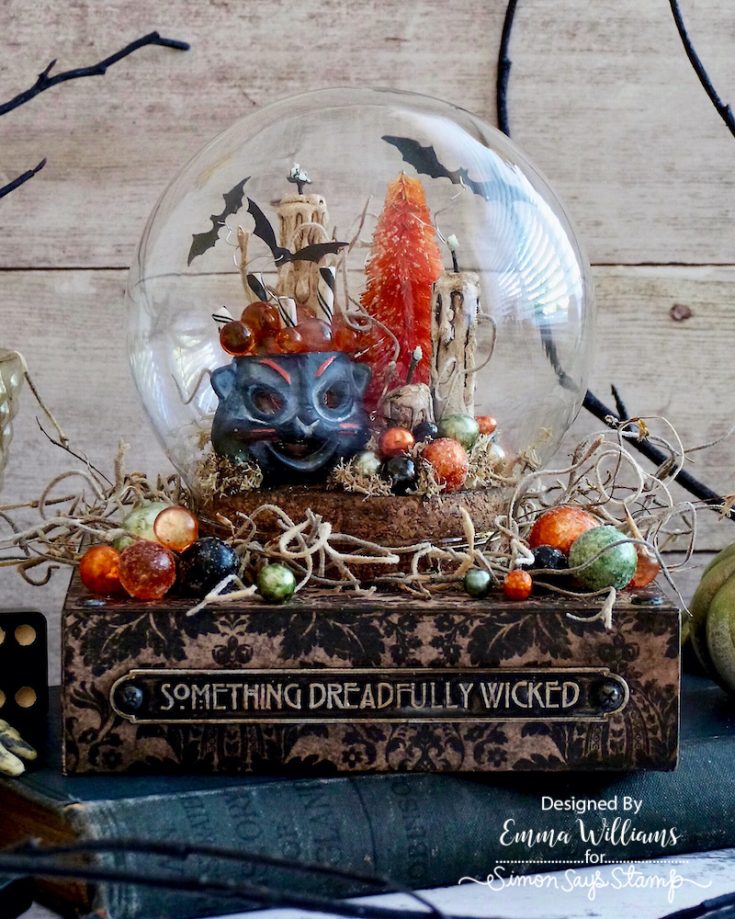
Hi friends! Happy Saturday! We are beyond delighted to welcome back special guest Emma Williams with this gorgeous globe project! Read on for all the fabulous details, and enjoy!
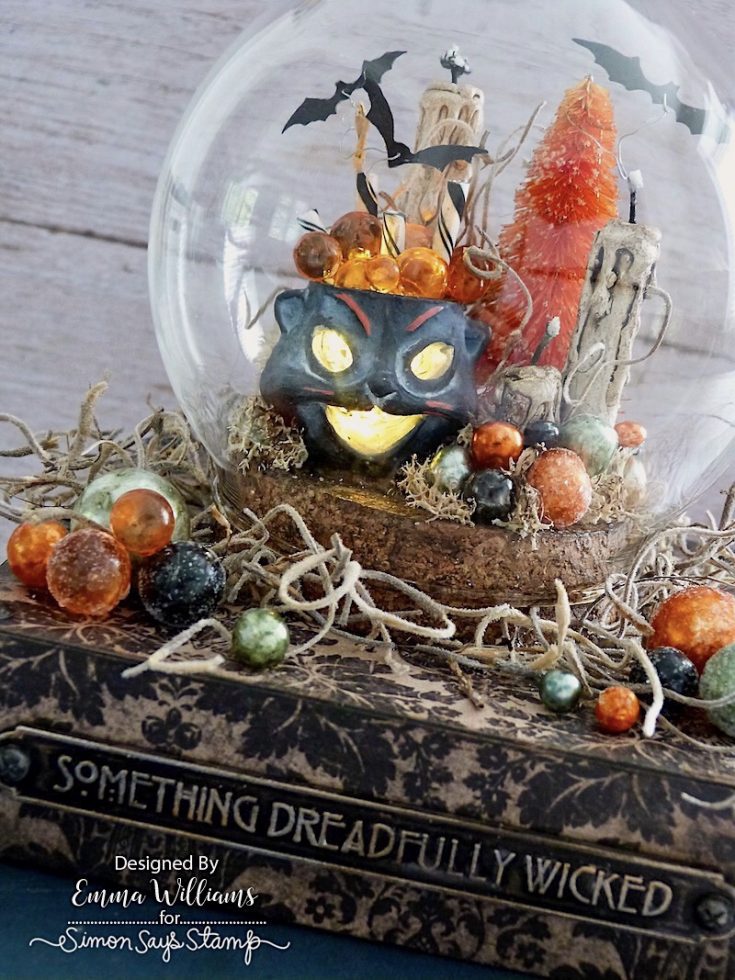
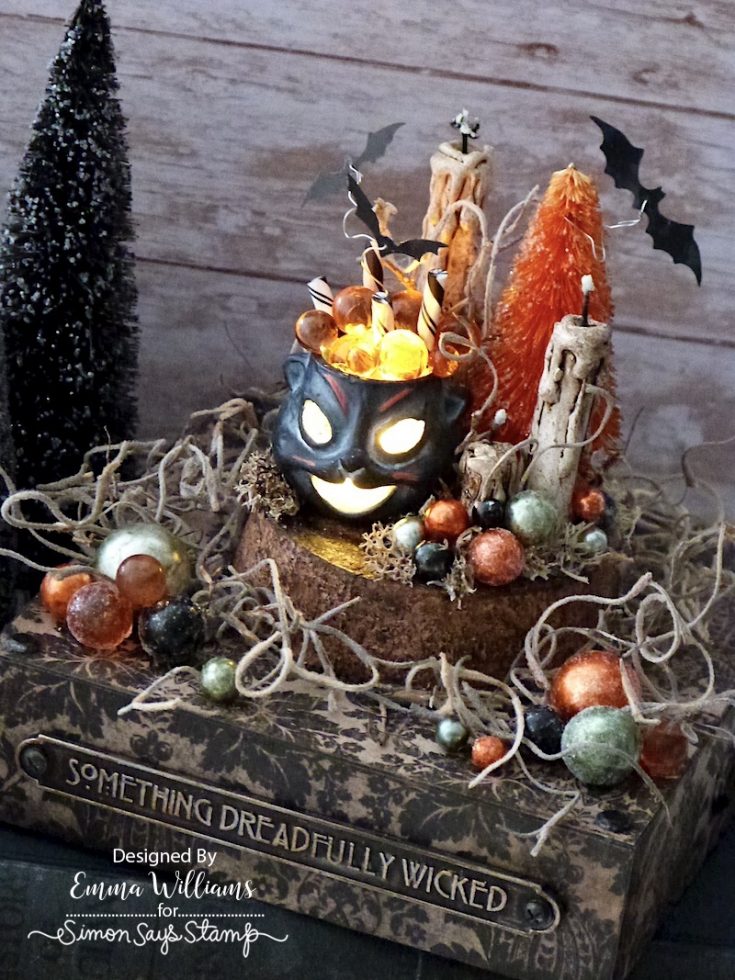
Hello everyone! I’m thrilled to be back on the SSS blog today and can’t wait to share all the details of my Halloween project, a dreadfully wicked display snow globe, complete with tiny lights and made using idea-ology products from Tim Holtz and mediums from Ranger Ink.
So, let’s begin ~ it’s time to get spooky…
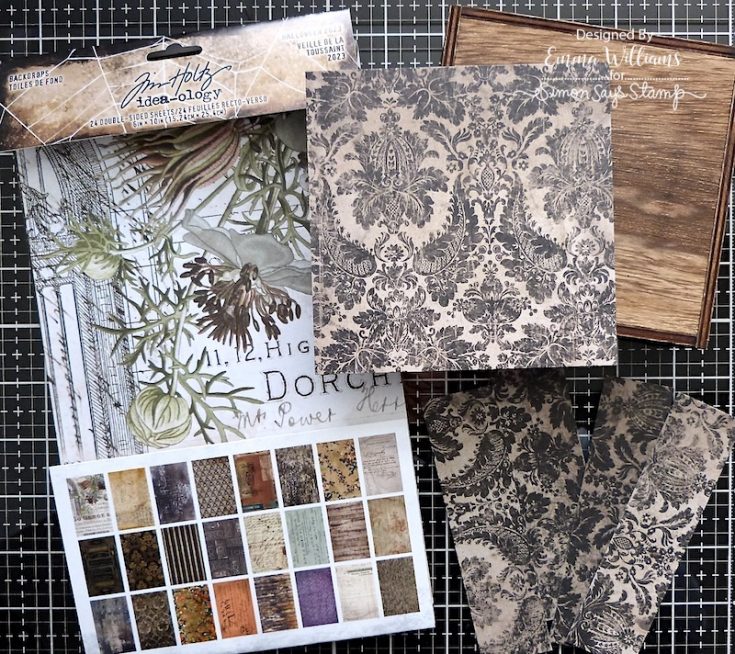
For this make I used the Tim Holtz Display Snowglobe, mounted on the medium sized square vignette box and began by cutting panels of the beautiful Halloween Backdrops paper, to fit each of the four sides, and a panel for the top of the square box.
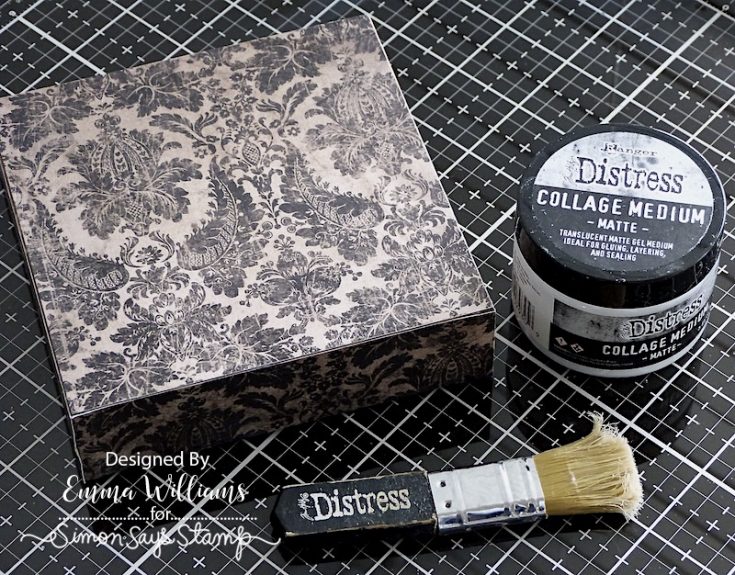
Using a Collage Brush, I adhered each panel onto the box with Matte Collage Medium. Don’t worry if you haven’t got this set of papers, because there are similar designs in the previous Halloween Backdrops packs. Sand the edges of the covered box with a sanding tool and then apply a layer of the medium to the surface to seal the paper before running Walnut Stain Distress Crayon around the edges of the box and blending out any harsh lines with your fingertip.
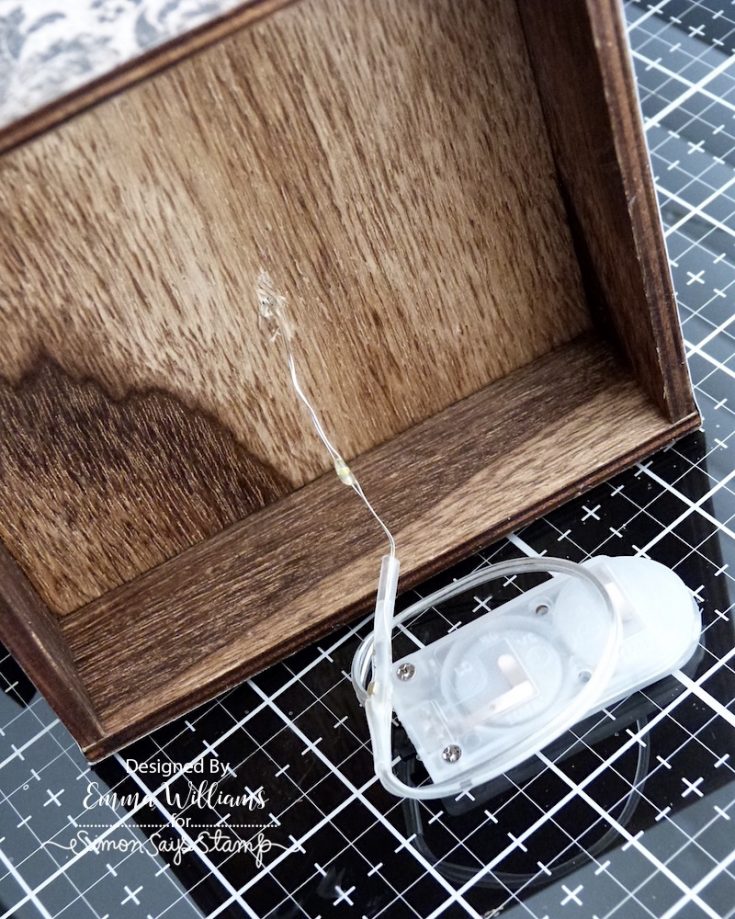
Using a drill or boring tool, make a hole through the top of the box, for the tiny lights to be threaded through.
Now for the fun part, we need to add the lights that will illuminate the finished scene…
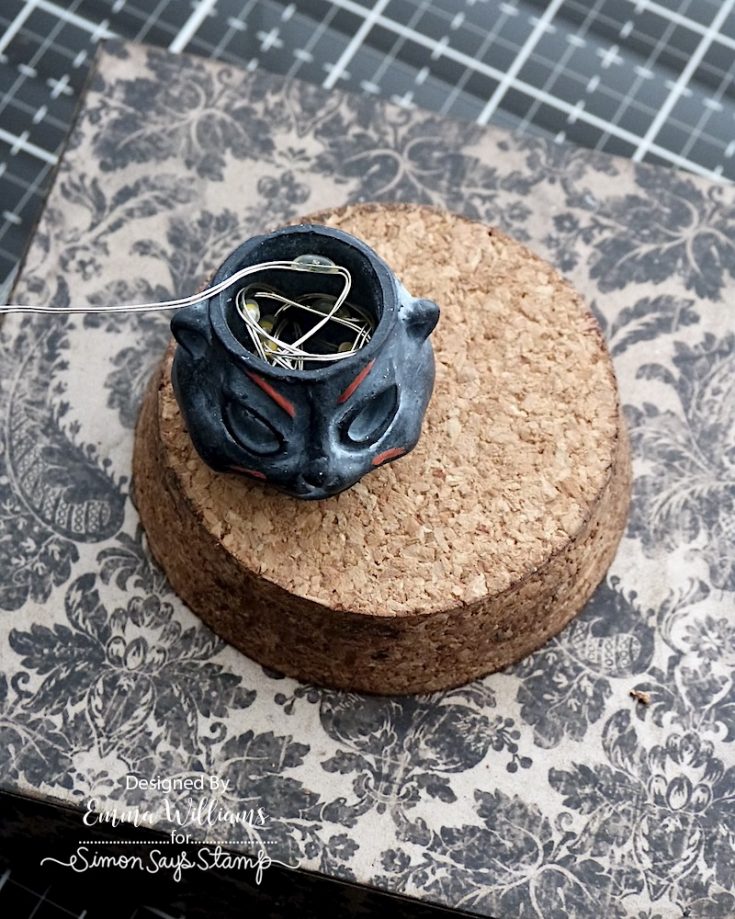
Take the box with the lights threaded through and place the cork base from the snow globe on the top, don’t attach anything at this point, but make a hole through the cork that will align to the hole in the vignette box. Thread the lights from the box, up through the cork base, then through the hole that is pre-drilled inside the cat bowl which is from the Trick Or Treat set (editors note: These cuties are gone for the season but a fabulous replacement are these Jack O Lanterns). At this stage, you will be left with quite a long strand of lights but I only placed 3 bulbs inside the bowl, so take a pair of scissors and snip the excess wire, cutting away the remaining lights on the rest of the strand. Secure the battery box on the underside of the wooden vignette box. Using Matte Collage Medium, adhere the cork base from the globe to the box, then the cat to the cork base before setting to one side to dry. Once the pieces are securely fixed into place, I tucked the tiny lights strand down inside the cat and secured it with a dab of hot glue.
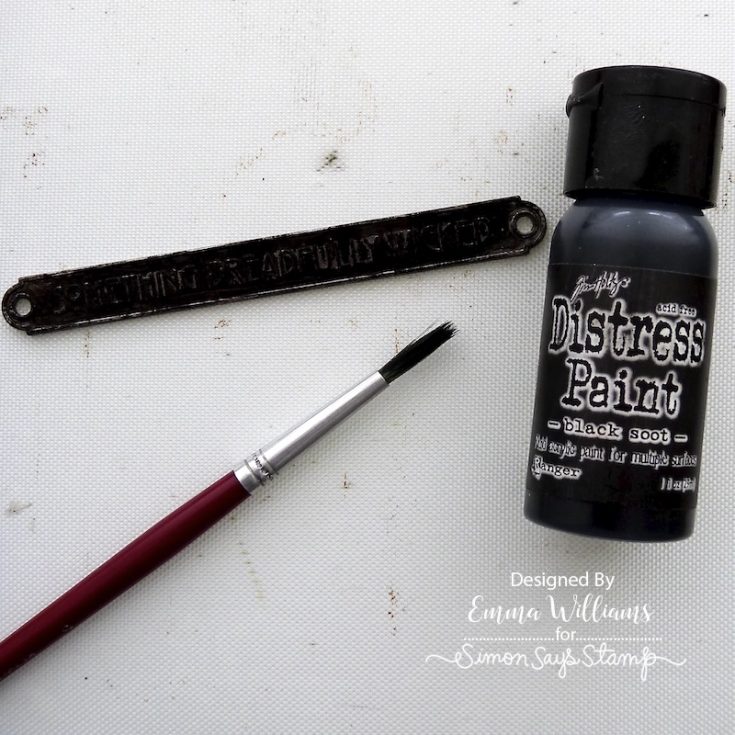
On all four sides of the box, I added embellishments, starting with the front of the box and the metal quote band, ‘Something Dreadfully Wicked” which I covered with Black Soot Distress Paint.
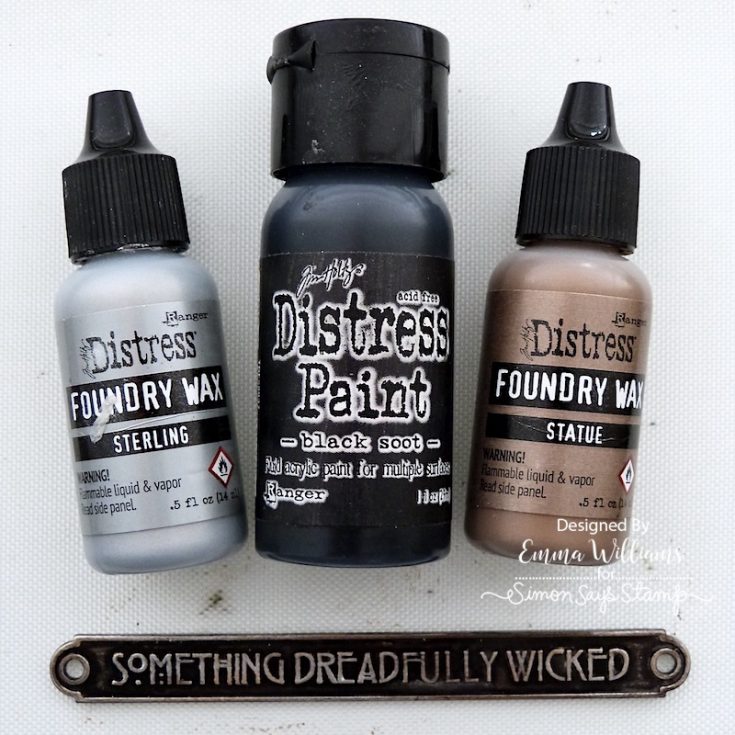
Heat dry the paint before applying Sterling Foundry Wax to accentuate the raised areas. Heat set the wax and then gently apply a small amount of Statue Foundry Wax over the top. You don’t want a block coverage, you want some of the silver to show through but just allow the wax to touch some of the raised areas. Heat set the wax…
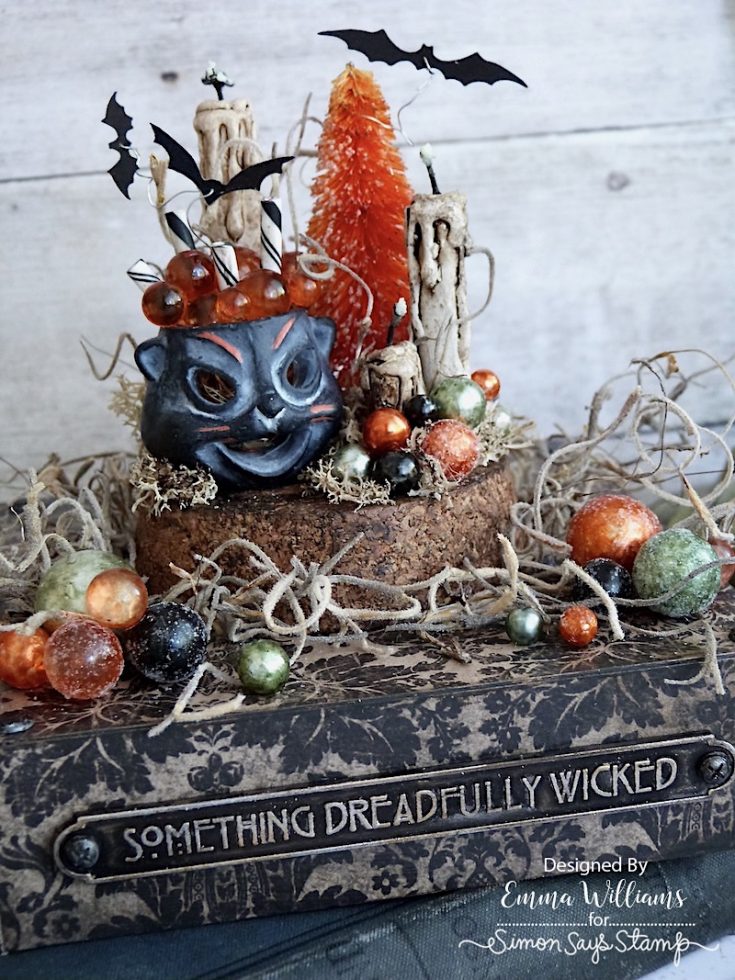
…and then attach the band to the front of your box.
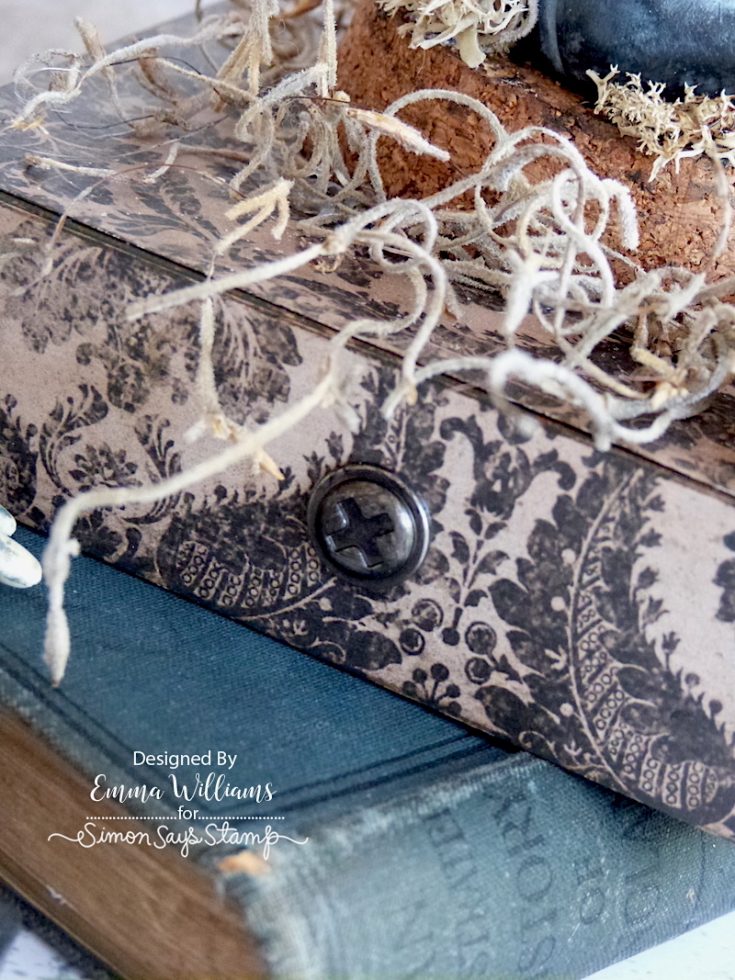
Use Matte Collage Medium to attach a Machinery Head painted with Black Soot Distress Paint to either side of the box.
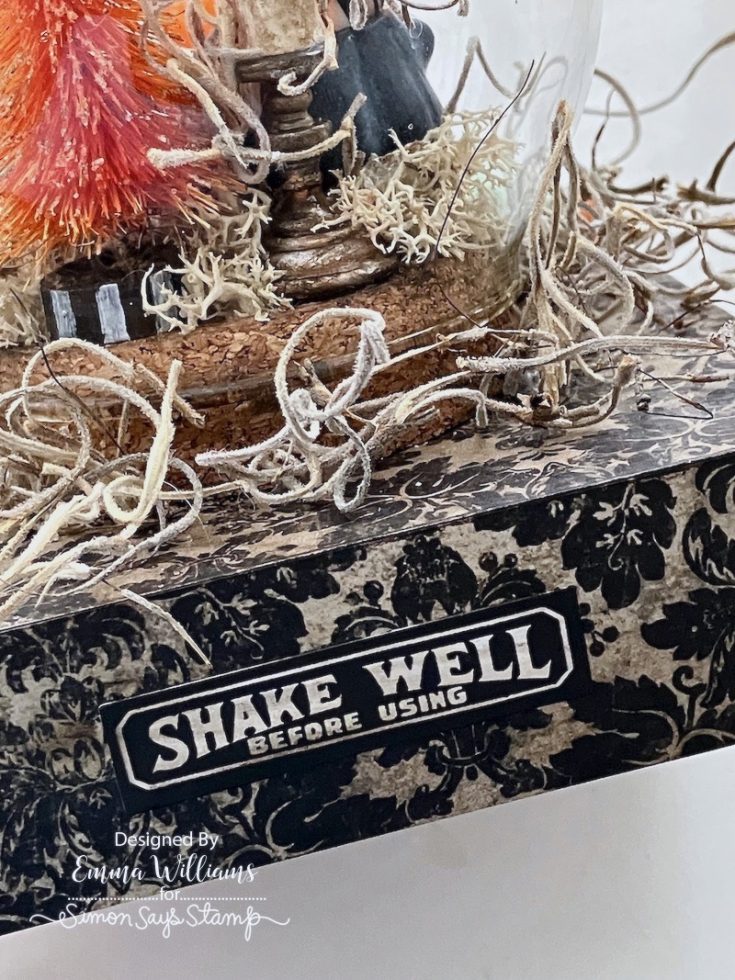
On the back, I used a Halloween Ephemera piece, “Shake Well Before Use” and adhered it into position with collage medium.
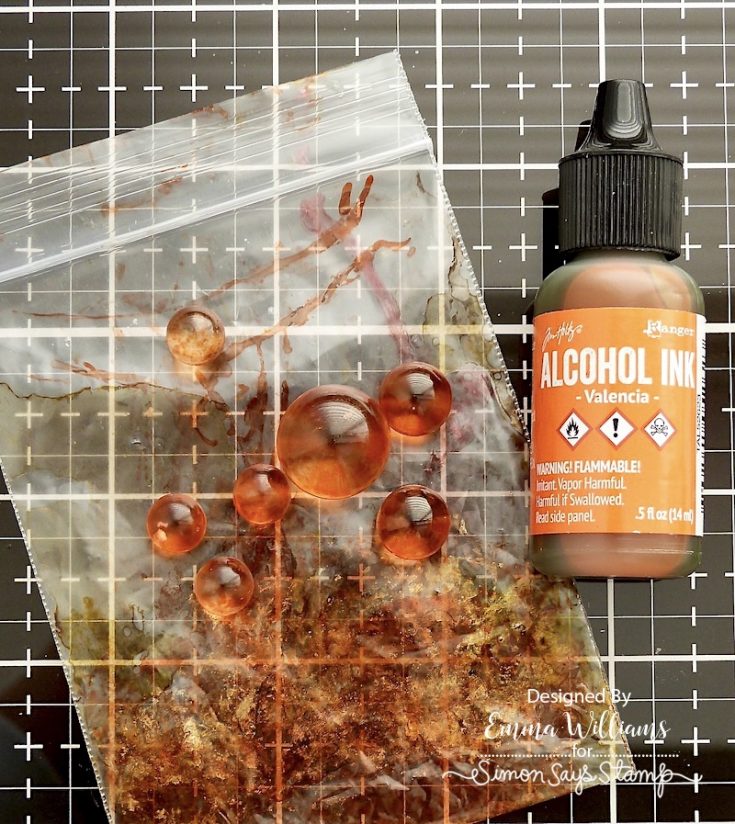
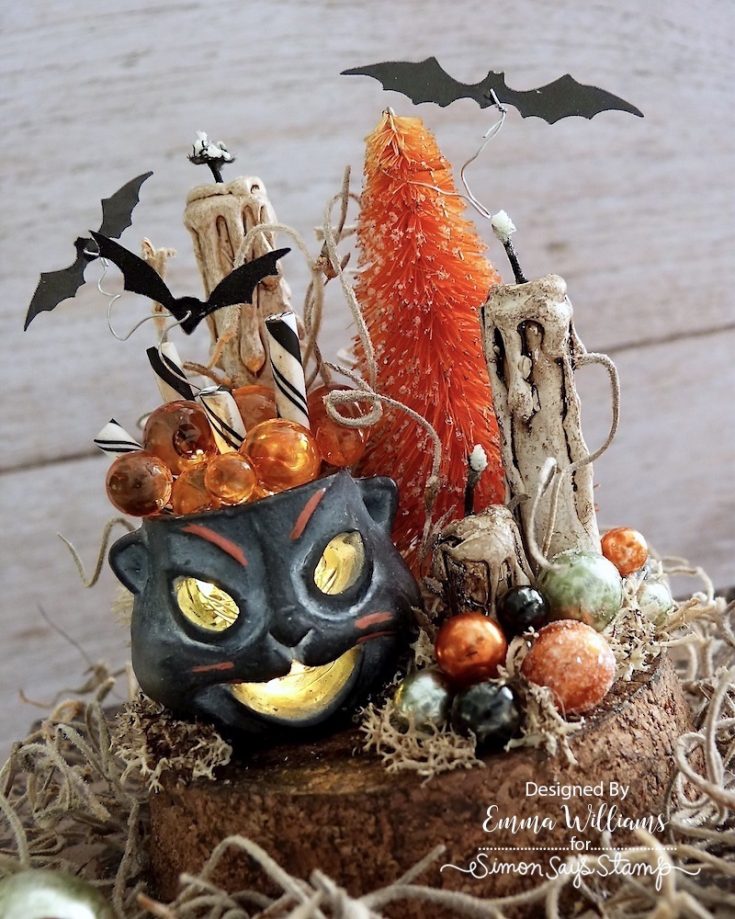
With the box complete, we can start building the scene and I began by adding idea-ology Bubbles and Confections inside the cat bowl, placing them over the top of the lights. I coloured the bubbles with Alcohol Ink, placing a selection of various sizes inside a zip lock bag. You can also use a plastic cup, but the ink will stain so make sure that this is something that you want to discard once you’ve finished. Add a couple of drops of the Valencia Alcohol Ink into the bag with the bubbles, make sure it is closed and sealed tightly and then gently shake from side to side to colour each bubble.
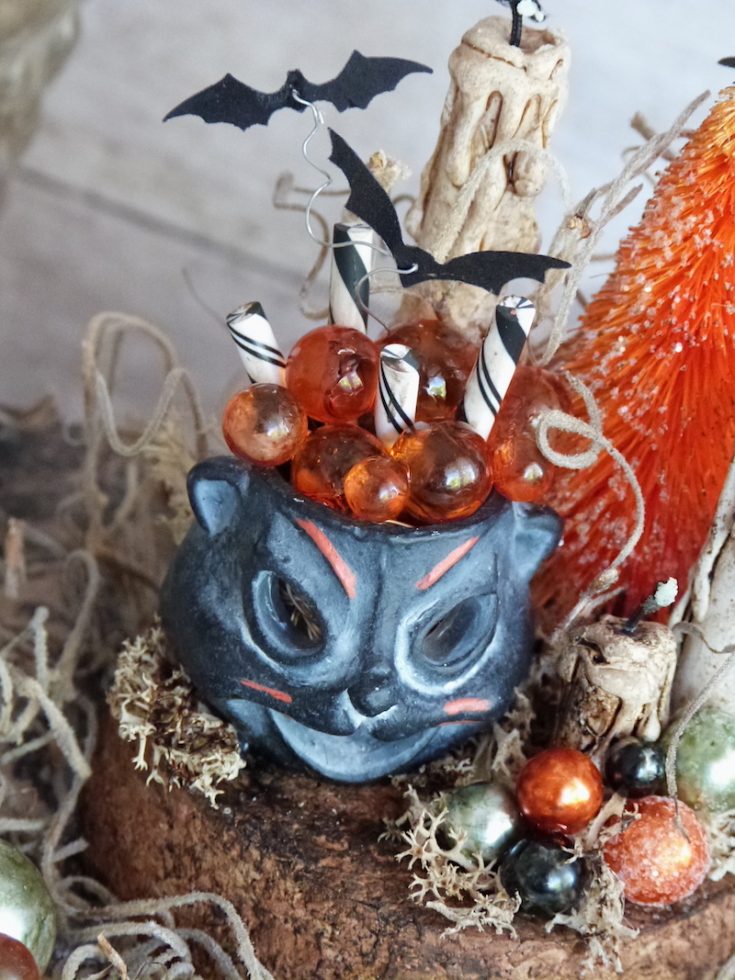
Tip the coloured bubbles out onto a kitchen towel and once touch dry, start adhering them to the bowl using Glossy Accents, making sure that the placement doesn’t compromise any of the lights. Cut the black and white confection sticks into half and run the Walnut Stain Distress Crayon over the top to give them more of a vintage feel before attaching these into the arrangement, again adhering them into position with Glossy Accents.
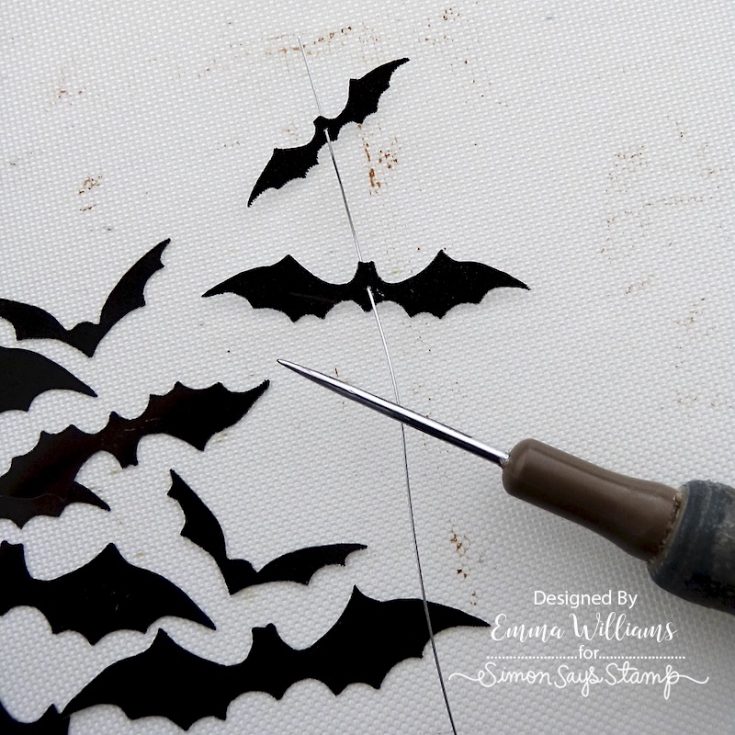
The next step is to add the flying bats which are from the Baseboard Frames and Transparencies pack. Using two bats of different sizes, I pierced a hole into the bodies of each one and then threaded florist wire through the holes, applying a small amount of glue behind each to secure them. The wire I used is very thin and can be easily twisted and manipulated and I just placed the wired bats into the centre of the bubble arrangement, adhering them with a dab of Glossy Accents.
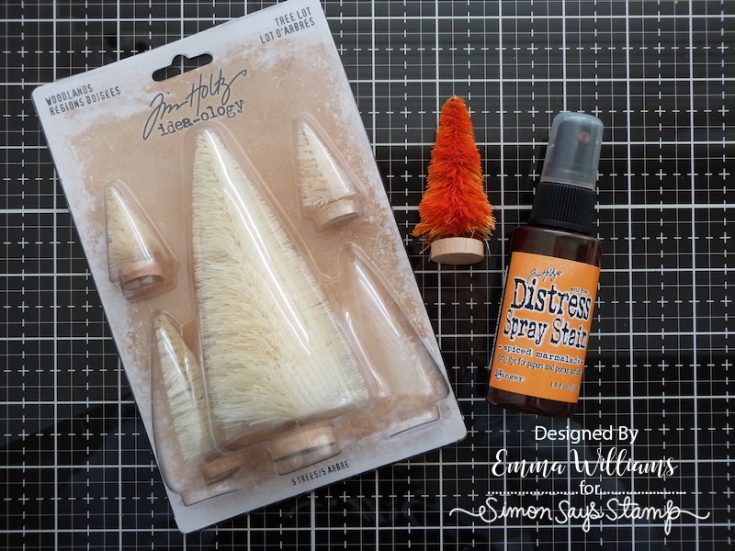
Moving onto the embellishments for inside the globe, I started with the woodland tree and used the medium sized tree for this make, and spritzed it with Spiced Marmalade Distress Spray Stain. Wrap a piece of kitchen towel around the tree to remove any excess stain and either carefully heat dry with a heat gun or allow to dry naturally before moving onto the next stage.
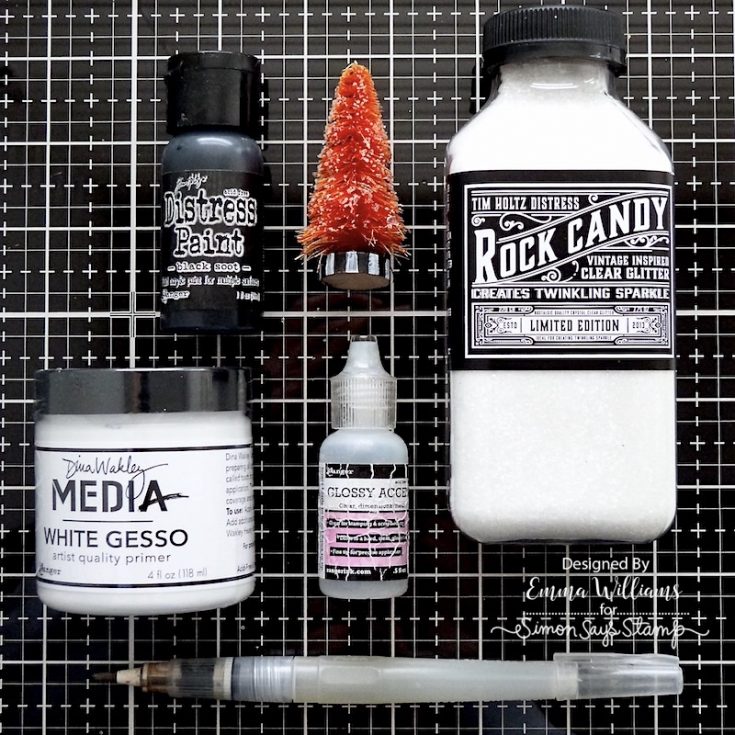
When the tree was touch dry, I used my fingertip to apply the lightest touch of Black Soot Paint to the tips. You don’t need a lot of paint, just enough to knock back the brightness, but you want orange to remain as the dominant colour. Paint the base of the tree with more of the Black Soot Distress Paint and once dry, use gesso to add white stripes.
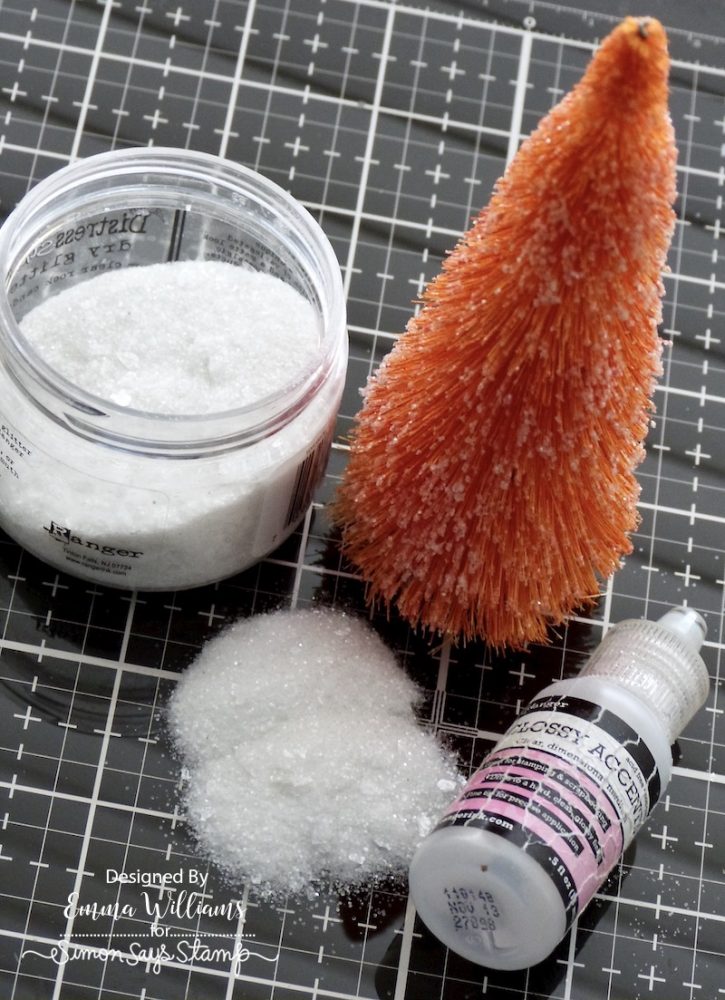
Making sure all the paintwork is completely dry, squeeze a small amount of glossy accents onto a non stick craft sheet, spread it out and then gently roll the tips of the tree into the medium. Working quickly, sprinkle Rock Candy Glitter over the tree and then tap away the excess and leave to dry.
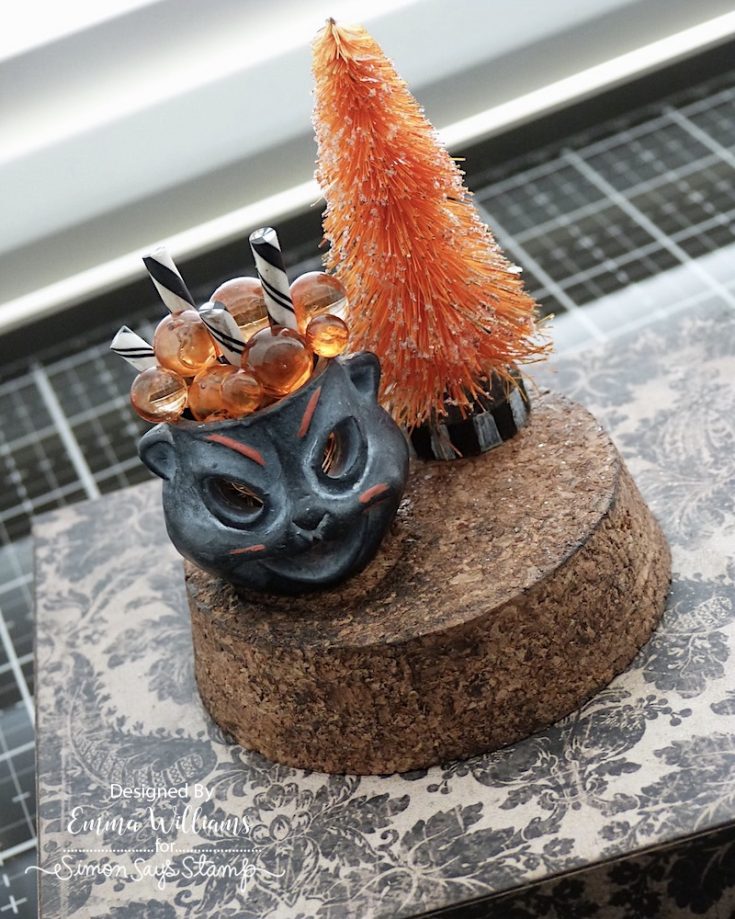
Once again leave to dry before attaching to the cork base, placing it to the right of the cat.
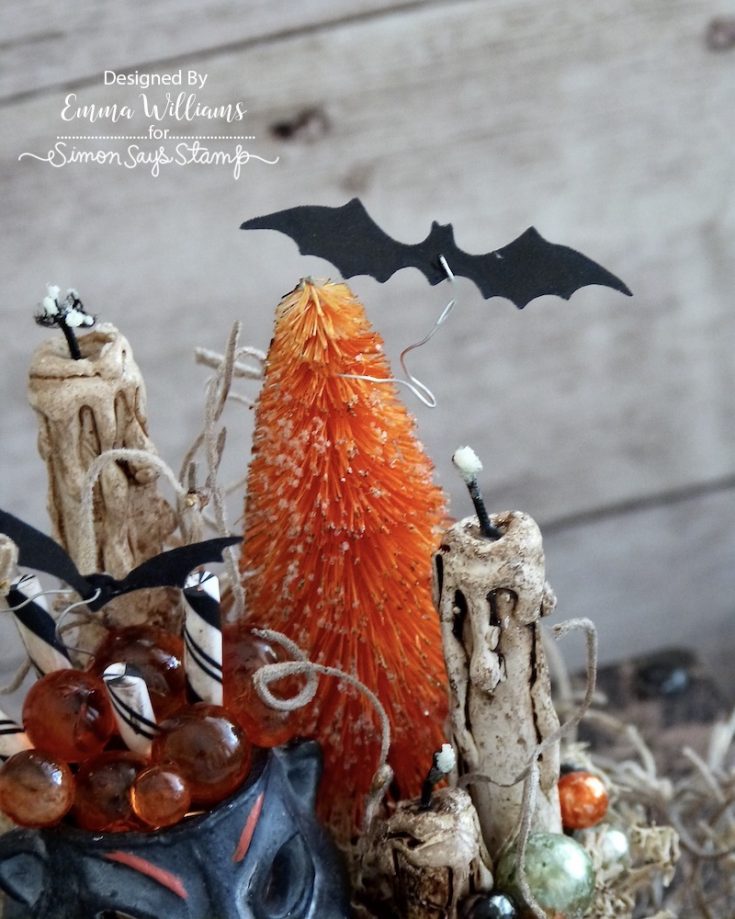
Place another of the bats onto a piece of wire and then wrap around the tree to secure it into position.
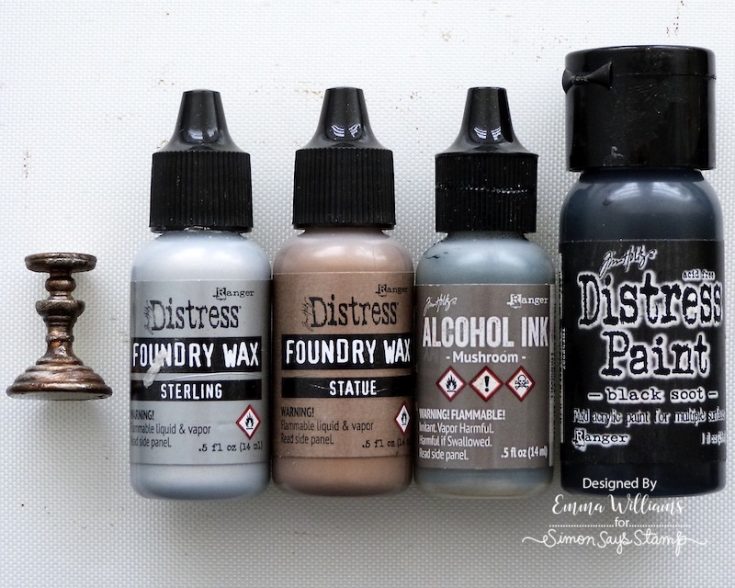
The globe needs to look as good from the back as the front and behind the cat bowl, I placed a Drippy Candle on a Candle Stand. I used the larger size of stand and altered the metal by adding Foundry Wax. I started with a layer of Statue, which I painted on with a brush, then heat set the wax before pouncing small amounts of Sterling over the top. Again heat set the wax. Pounce some Mushroom Alcohol Ink around the edges of the Candle Stand before finally applying Black Soot Distress Paint over the surface, making sure it seeps into all the nooks and crannies. Wipe away the excess paint, allow to dry and then attach the drippy candle with Matte Collage Medium.
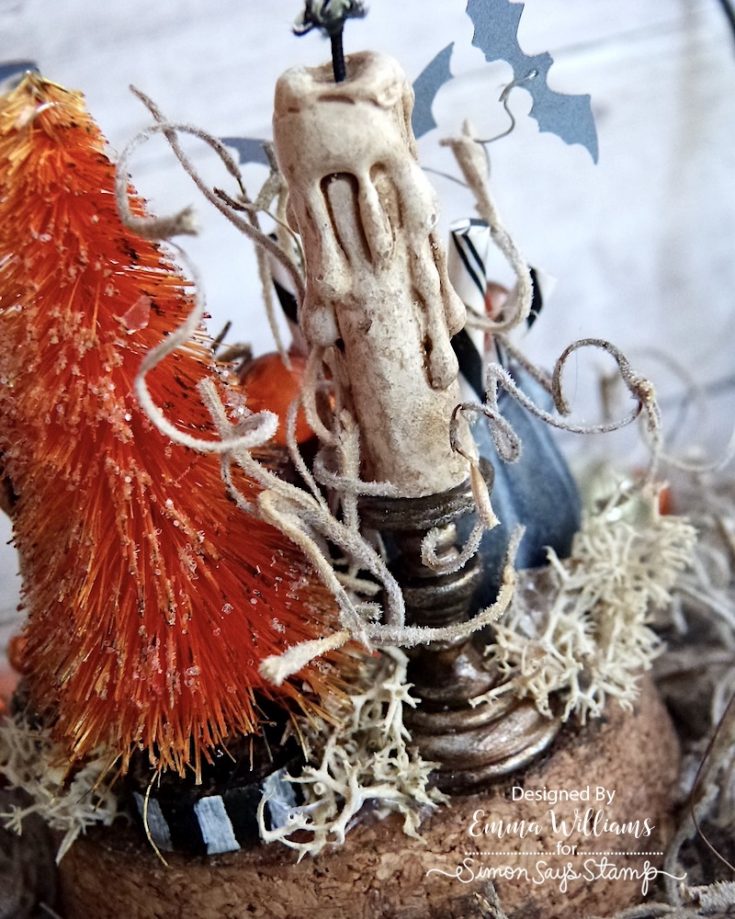
Attach the candle stand to the globe base, placing it behind the bowl and attach two further candles to the right hand side of the bowl.
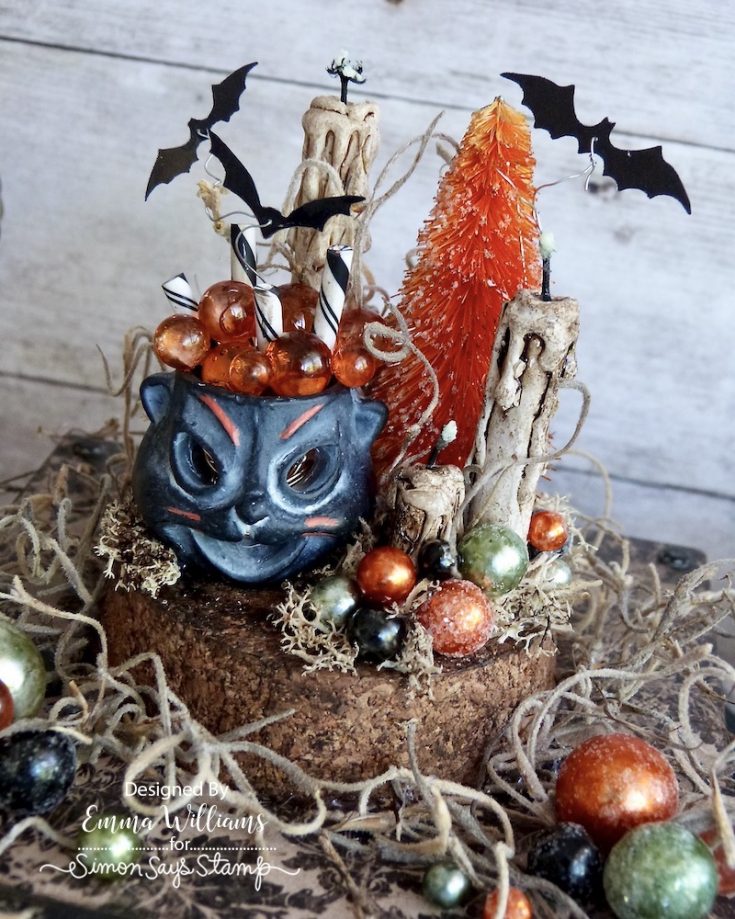
Attach moss around the base of all the pieces inside the globe and add dots of Glow Paste to each candle wick.
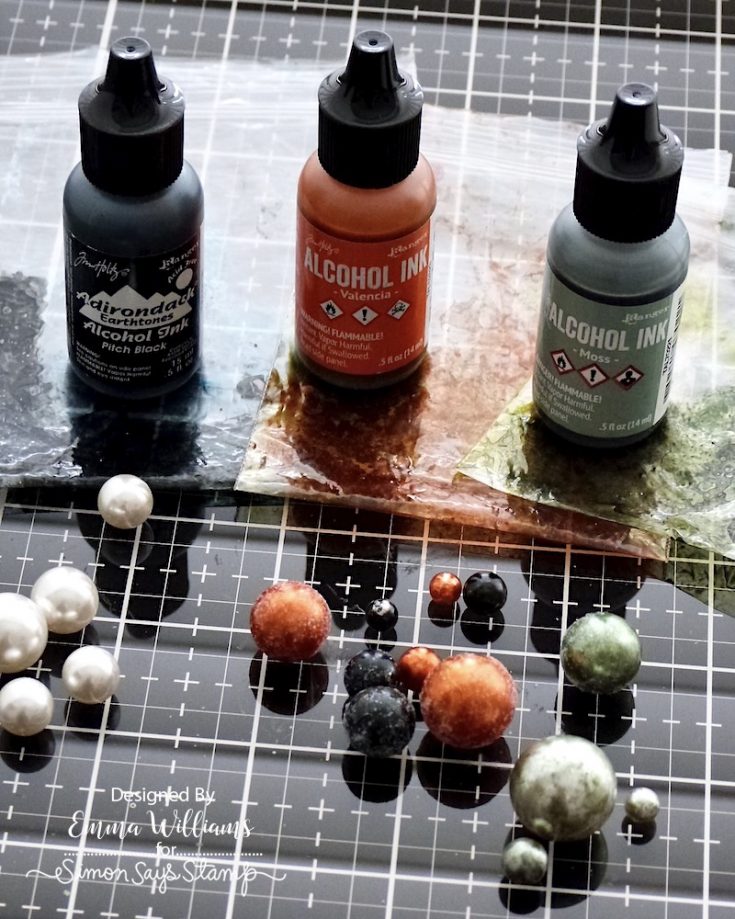
We’re nearly there and it’s time to colour the baubles and bubbles. I used Valencia, Pitch Black and Moss Alcohol ink to colour various sizes, applying each ink separately using the same method as in step 9.
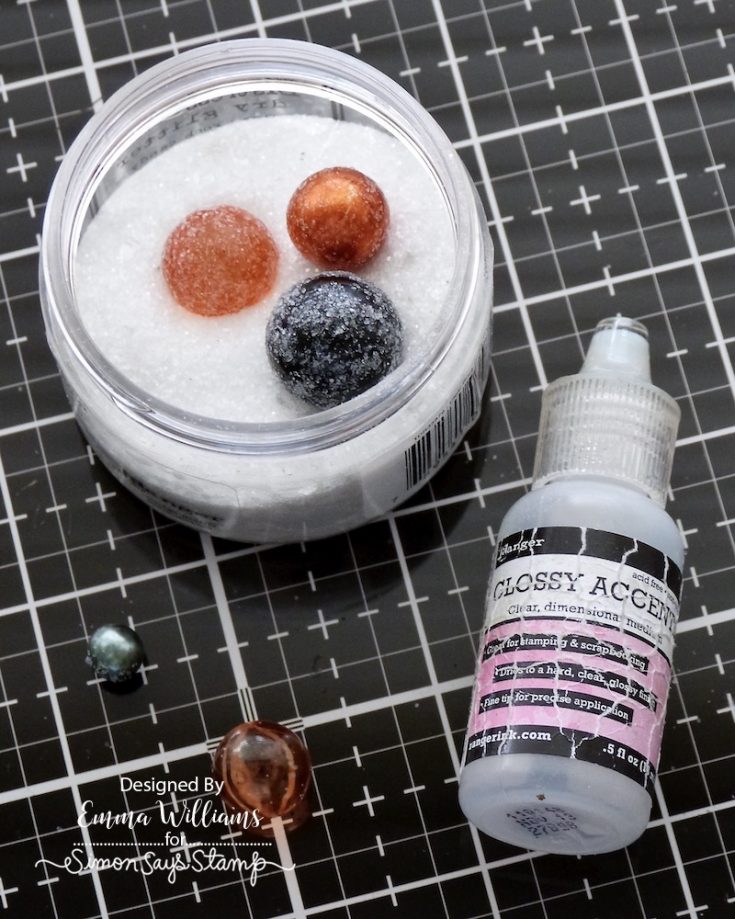
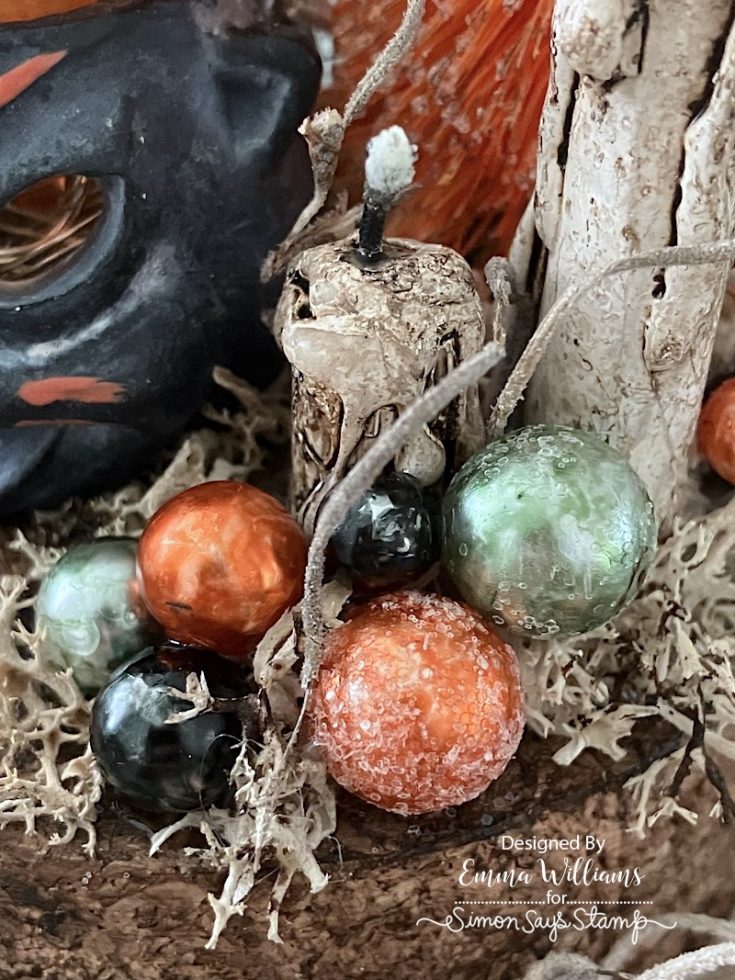
Rub Glossy Accents over the surface of half of the coloured baubles before rolling them in Rock Candy and once dry, arrange them onto the cork base of the globe, attaching them with Glossy Accents.
Arrange and attach the remaining coloured baubles on the left and right of the globe.
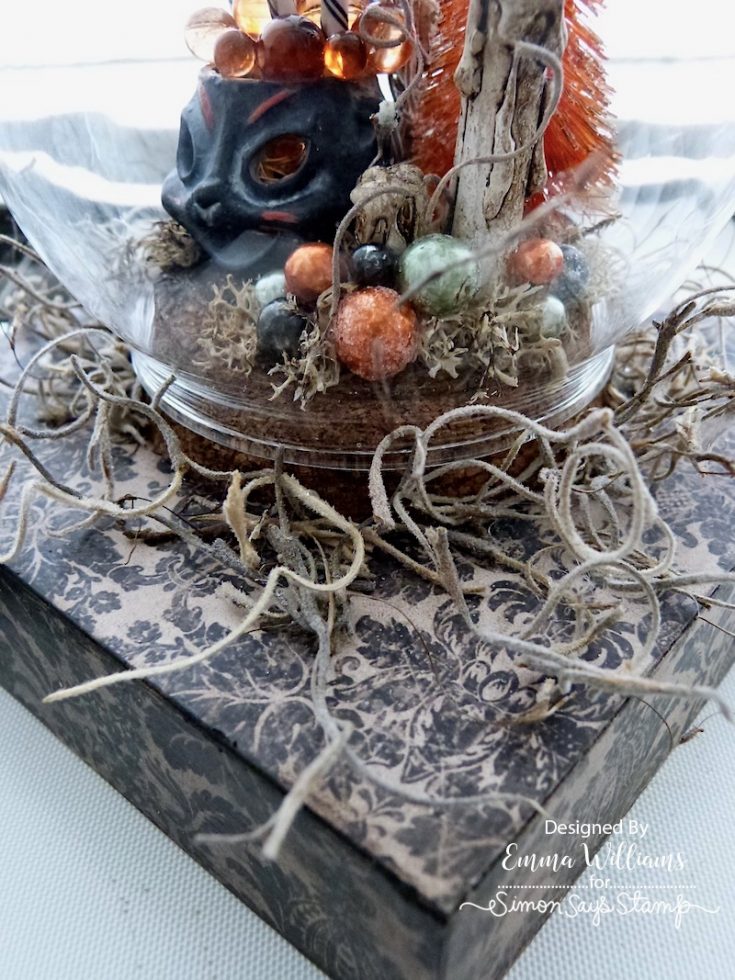
Place the glass dome over the scene and use hot glue to attach curly moss around the cork base.
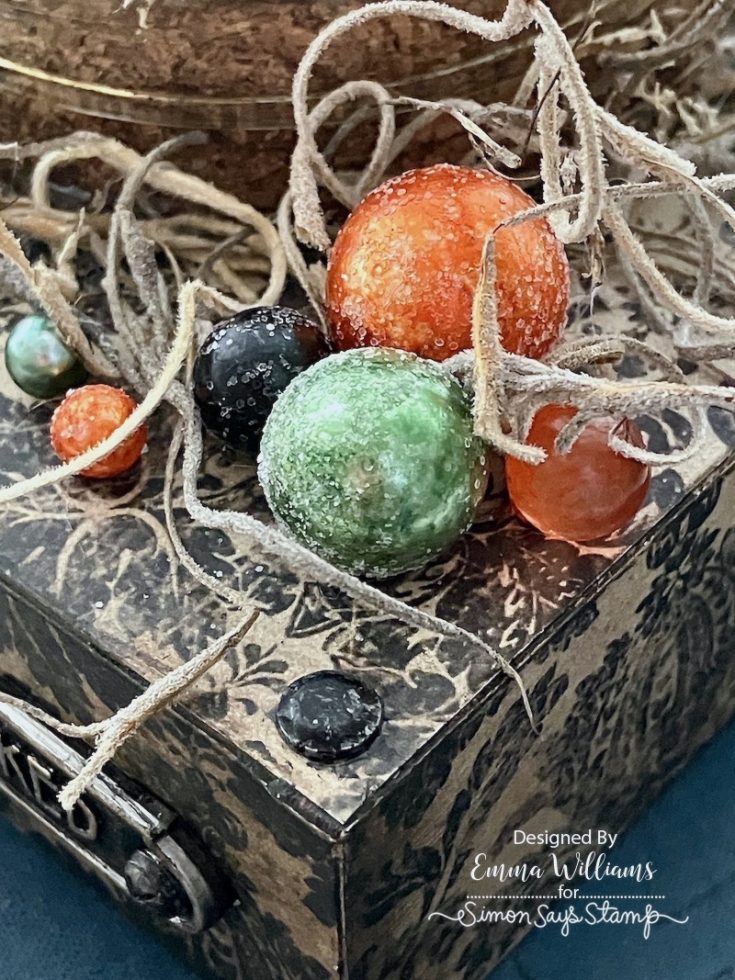
Finally, paint four Hardware Heads with Black Soot Distress Paint and attach them to each of the four corners on the surface of the box.
I really hope you’ve enjoyed this Halloween Globe tutorial and you love the finished piece ~ it’s so much fun to make and now all that’s left for me to do is place it on my shelf, ready to display for Halloween!
Thanks so much for stopping by today and see you again soon…Emma x
SUPPLIES:
|


Thanks so much for stopping by today, and to Emma for being our guest!