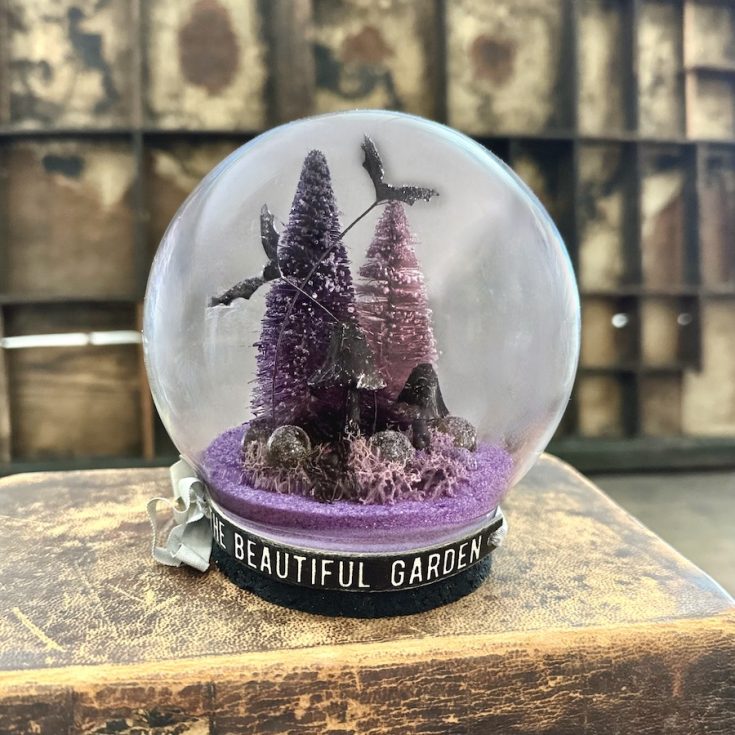
The Beautiful Garden Display Dome
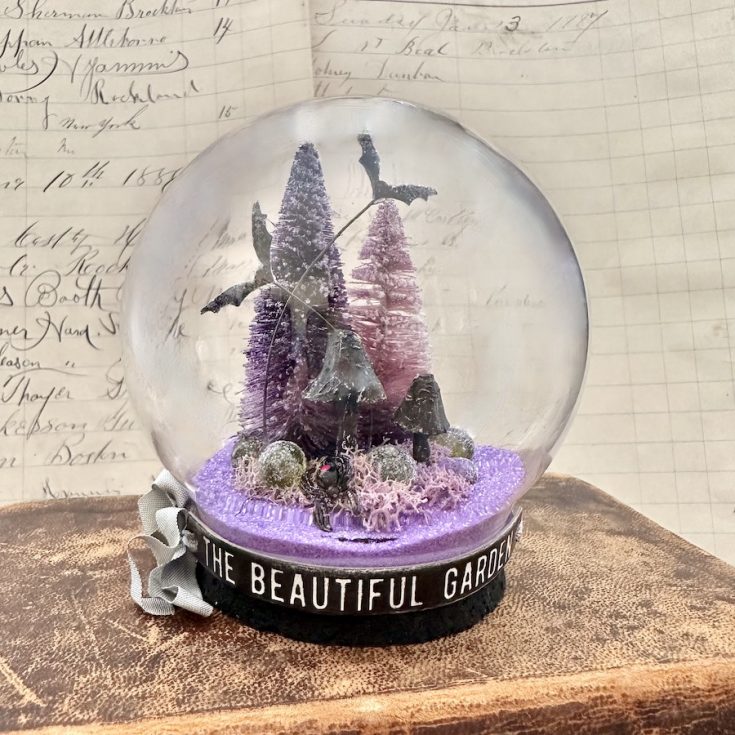
Hi friends! Happy Sunday! I’m beyond delighted to welcome back special guest Paula Cheney to our blog with this AMAZING globe decor piece! Be sure to read on for all the details and enjoy!
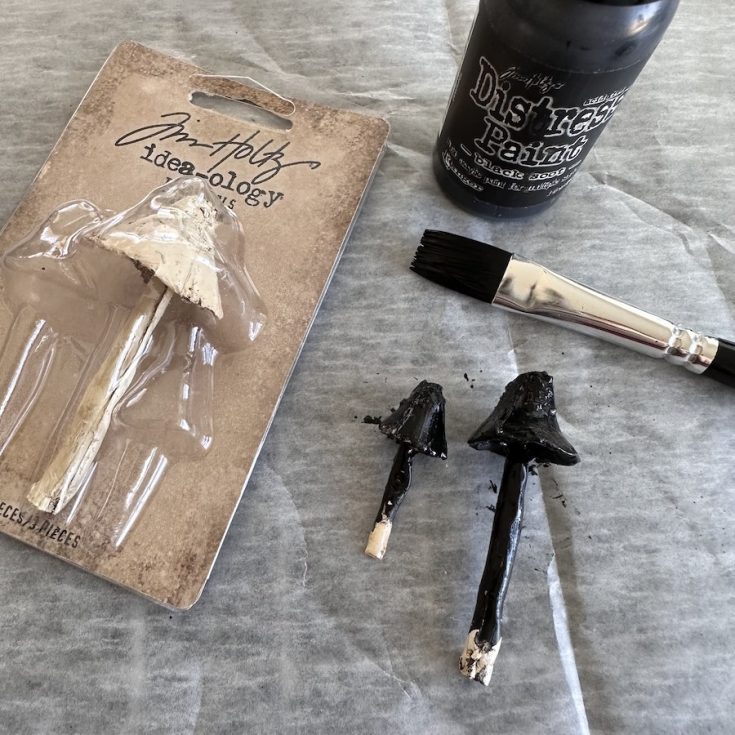
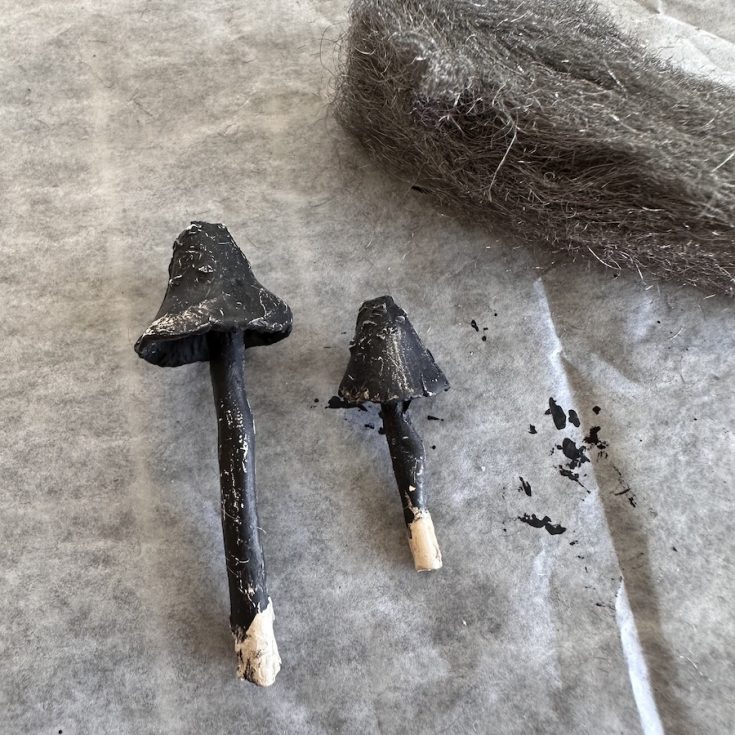
Steps 1-5
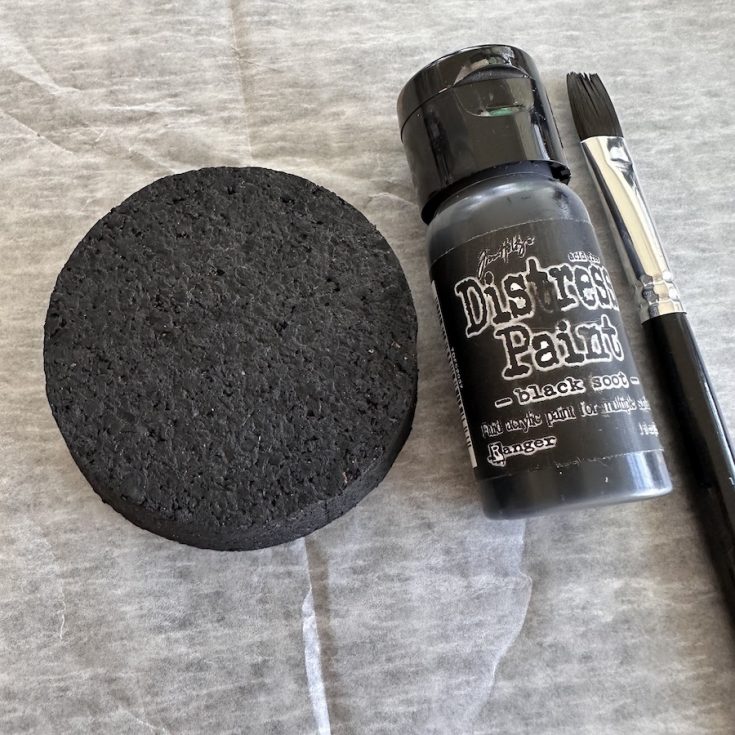

- Paint the cork of the Display Globe with Black Soot Distress Paint.
- Paint two Toadstools with Black Soot Distress Paint. Dry with a heat tool.
- Once dry, sand each Toadstool with steel wool.
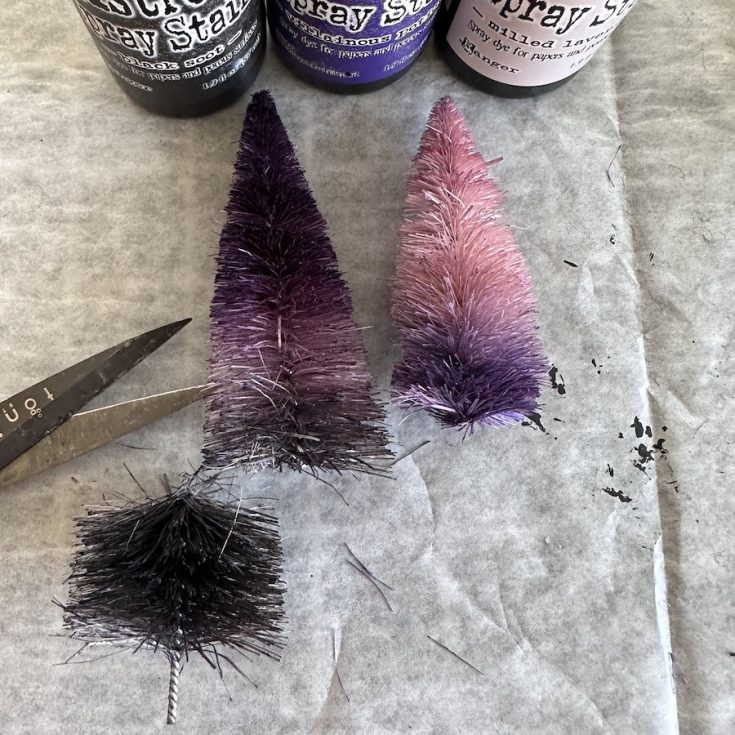
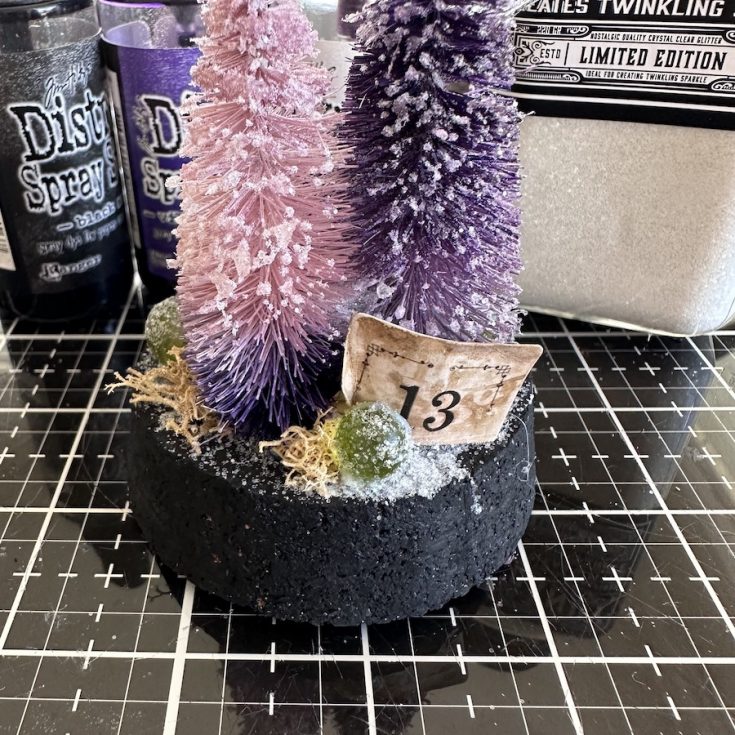
- Remove the base of 1 large and 1 small Woodland Alpine Tree. Use Distress Spray to color the trees. I wanted a variegated look so I used Black Soot, Villainous Potion and Milled Lavender. I didn’t tape anything off, I just sprayed the area I wanted. Once the tree was colored, I took a paper towel and brushed back and forth between the two colors so they start to blend together. Once you like the blend, dry tree with a heat tool.
- The larger Alpine tree does not fit in the Display Globe, so I just snipped off a bit with my Tonic Snips. I also cut the excess wire from the small tree.
Steps 6 -10
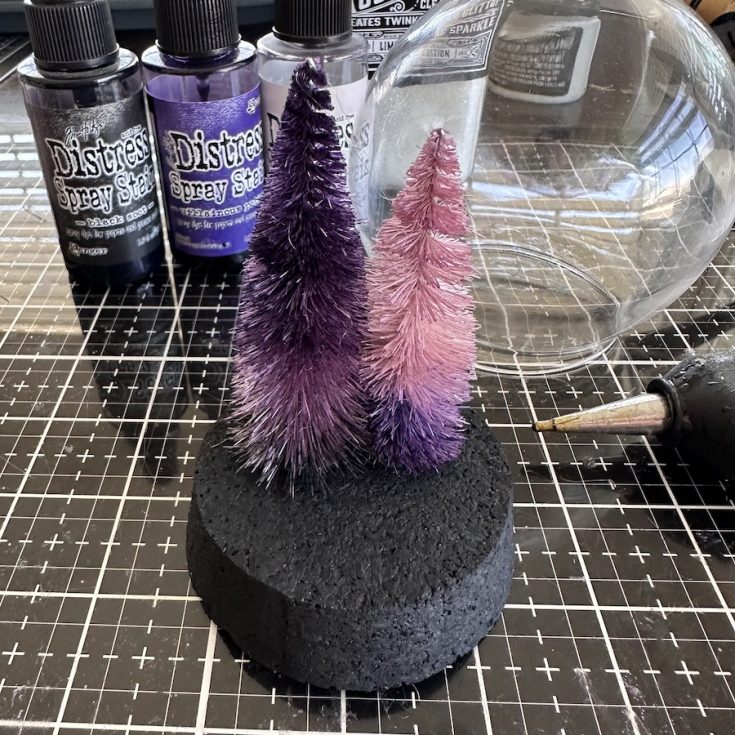
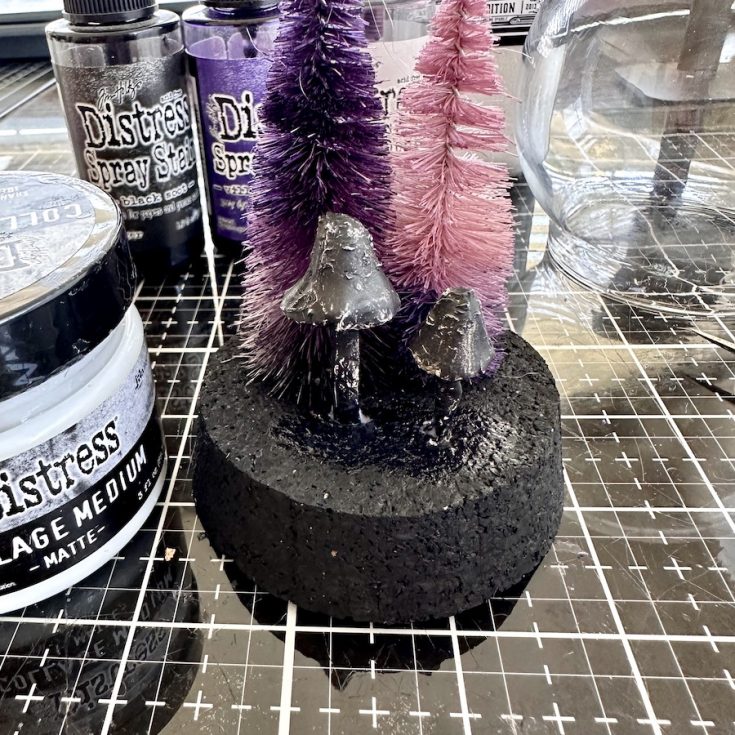
- Add hot glue to the bottom of tree.
- Place trees together on the cork so they are touching (almost embedded into each other).
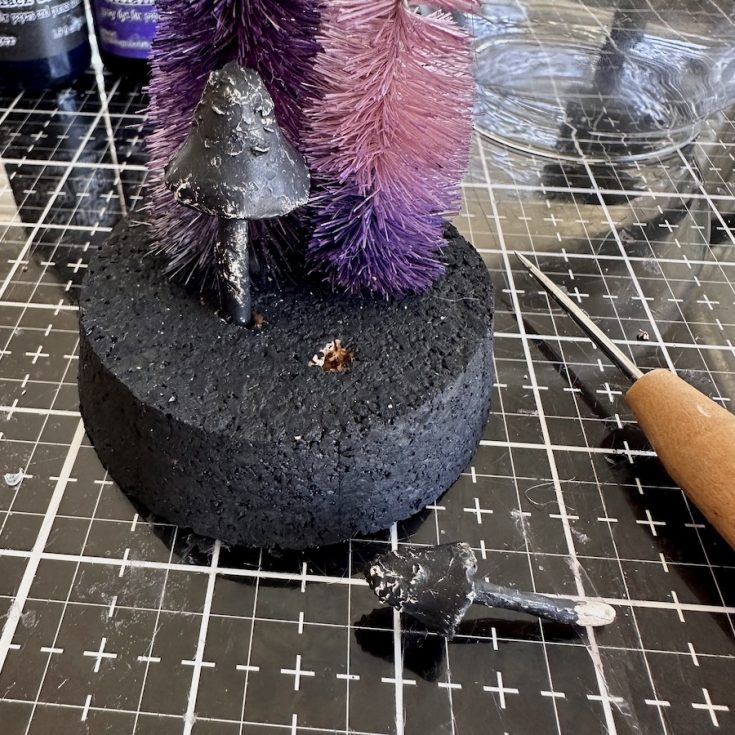
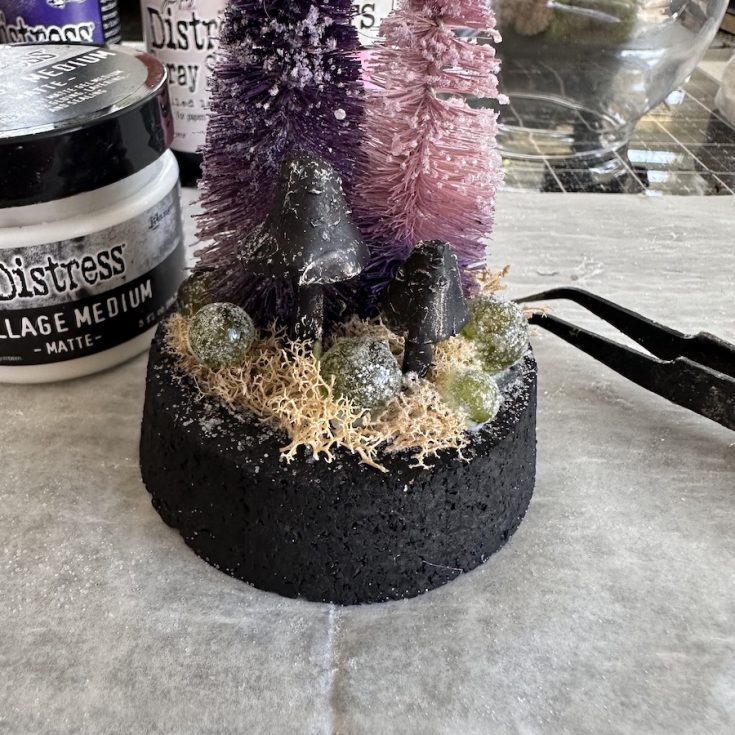
- Use a pick or awl to dig out two holes in the cork for Toadstools.
- Add Collage Medium to the bottom of Toadstool and place in hole. Let dry.
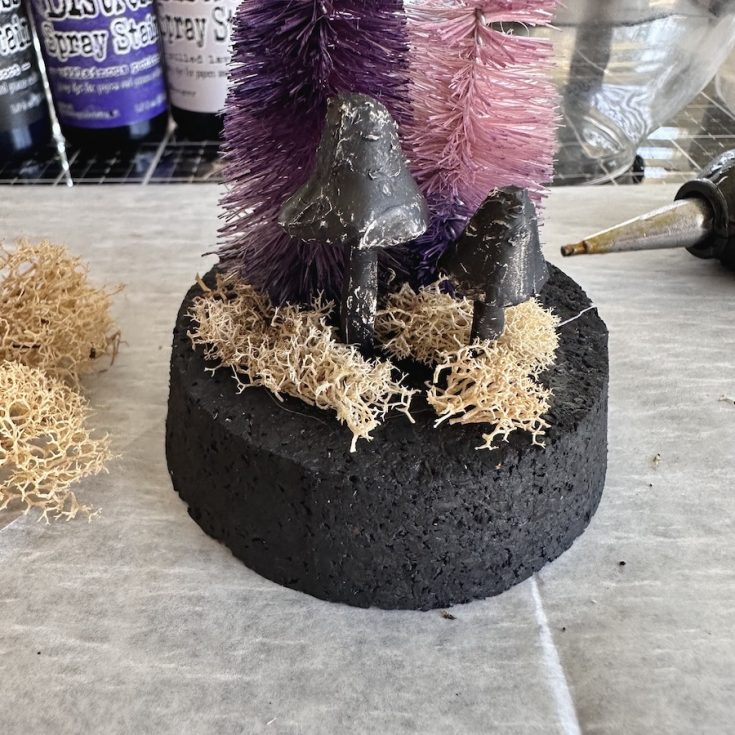
- Add some reindeer moss around the Toadstools.
Steps 11 – 15
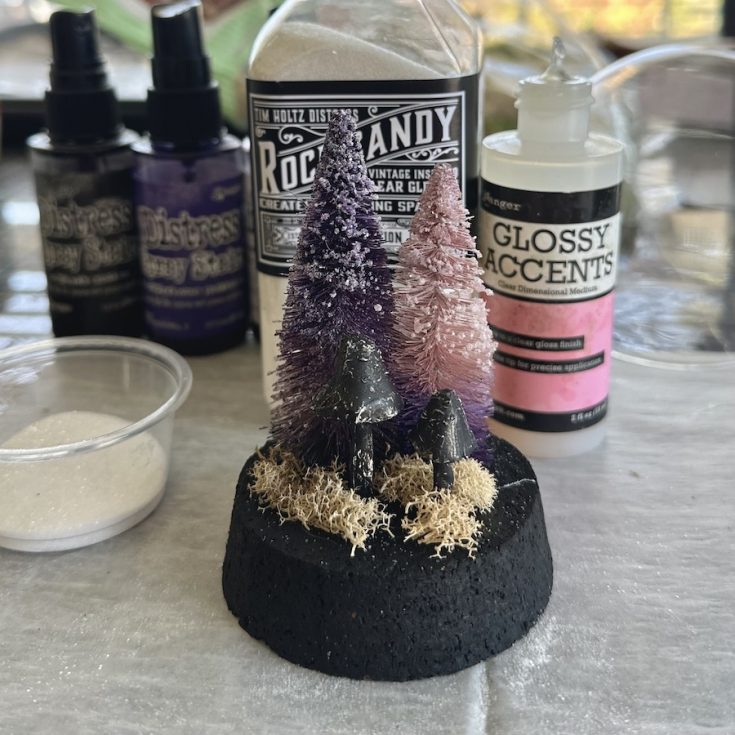
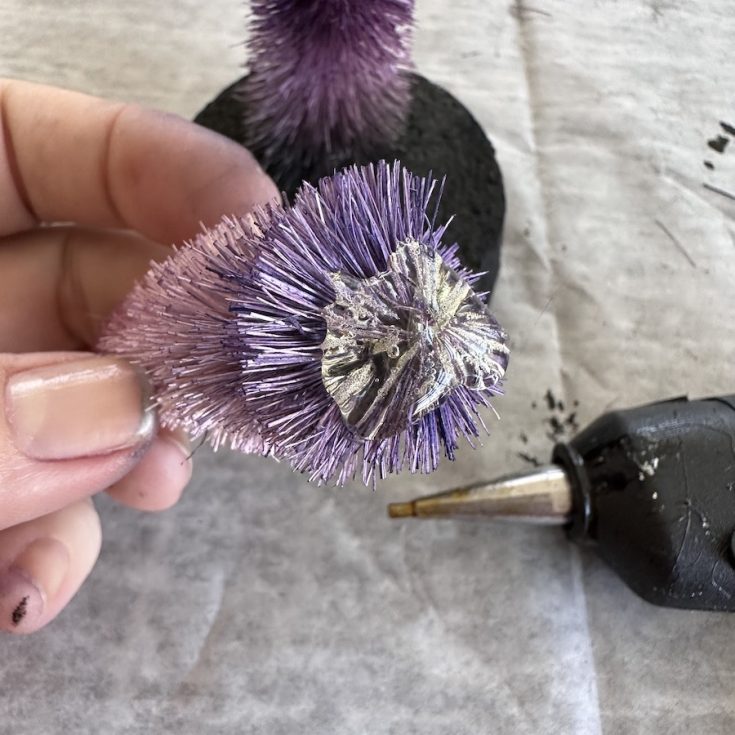
- Squeeze out about a quarter size of Glossy Accents onto a disposable paper. Dip your finger into Glossy Accents and run your fingertip down the top portion of one tree. Immediately sprinkle over the Glossy Accents with Rock Candy, dry with a heat tool. Repeat on second tree.
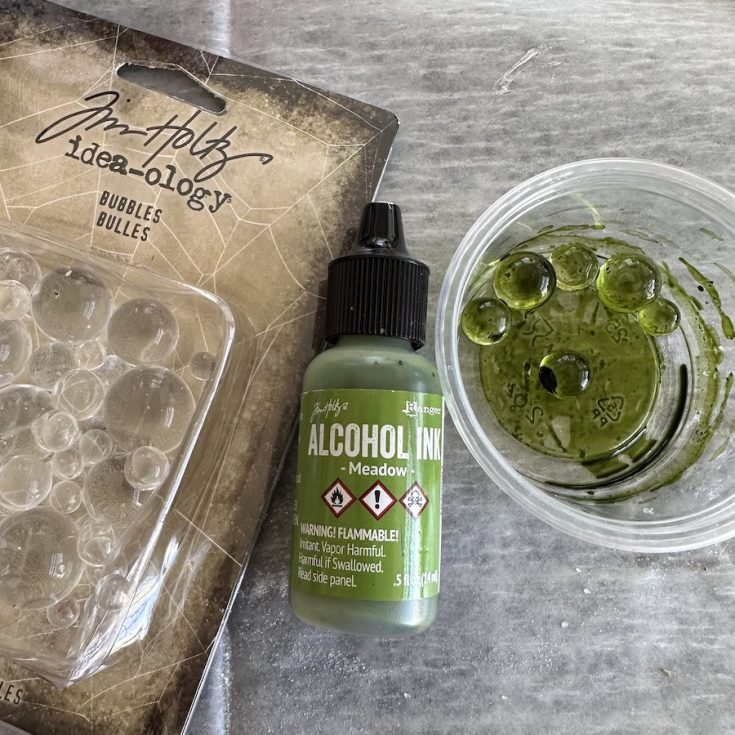
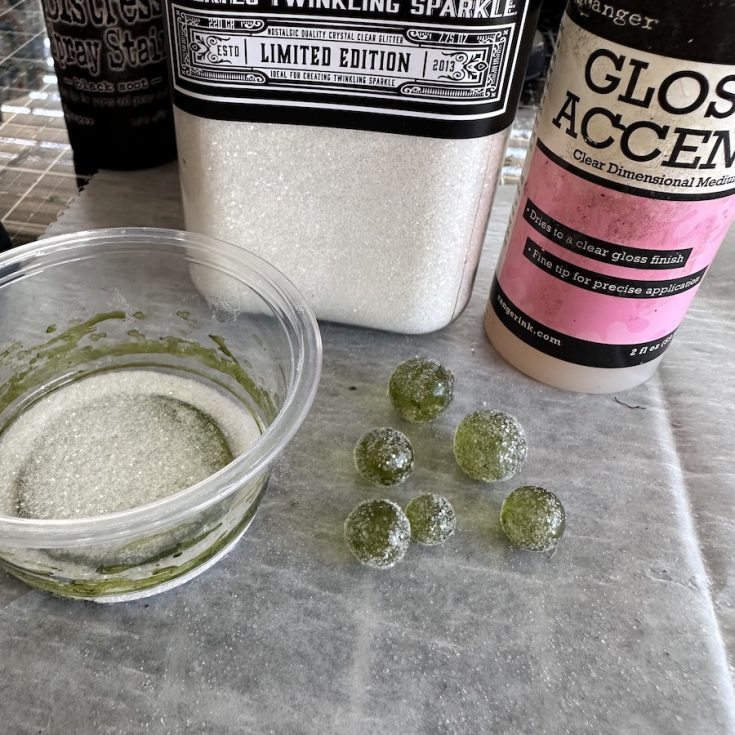
- Drop 5-6 Bubbles into a disposable cup. Squeeze a small amount of Meadow Alcohol Ink into cup and shake till they are covered with the Alcohol Ink.
- Add a little Rock Candy to the same disposable cup. Coat the Bubbles in Glossy Accents, then drop into cup with Rock Candy. Glossy Accents dries fast so you will need to work quickly.
- Once dry, add Bubbles to your garden using Collage Medium.
- Don’t forget the back of the Garden. I added moss and a Bubble, as well as a piece of ephemera from the idea-ology Halloween Ephemera pack.
Steps 16 – 20
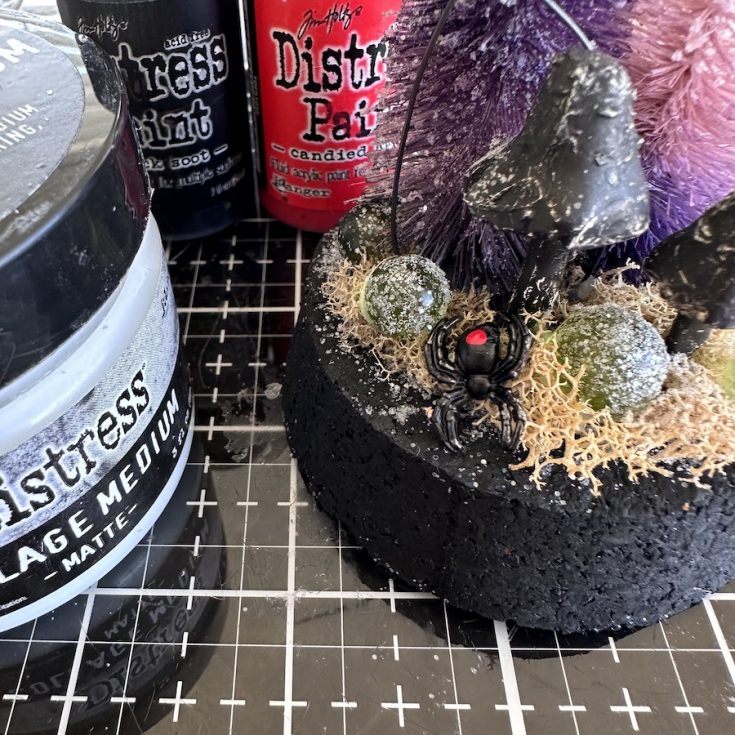
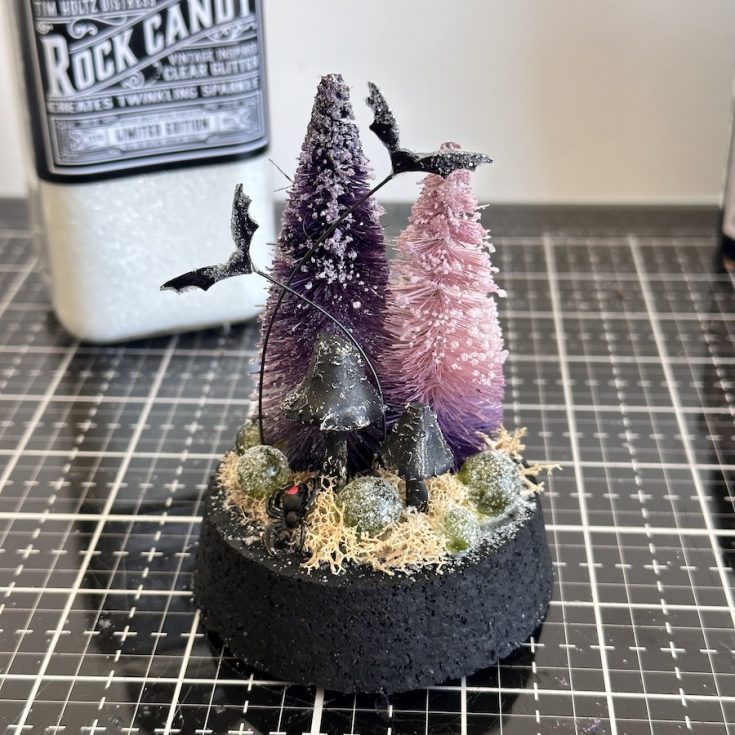
- Wipe Black Soot Distress Paint over metal Spider. Add a red spot on his back with Candied Apple Distress Paint. Once dry, add to the scene with Collage Medium.
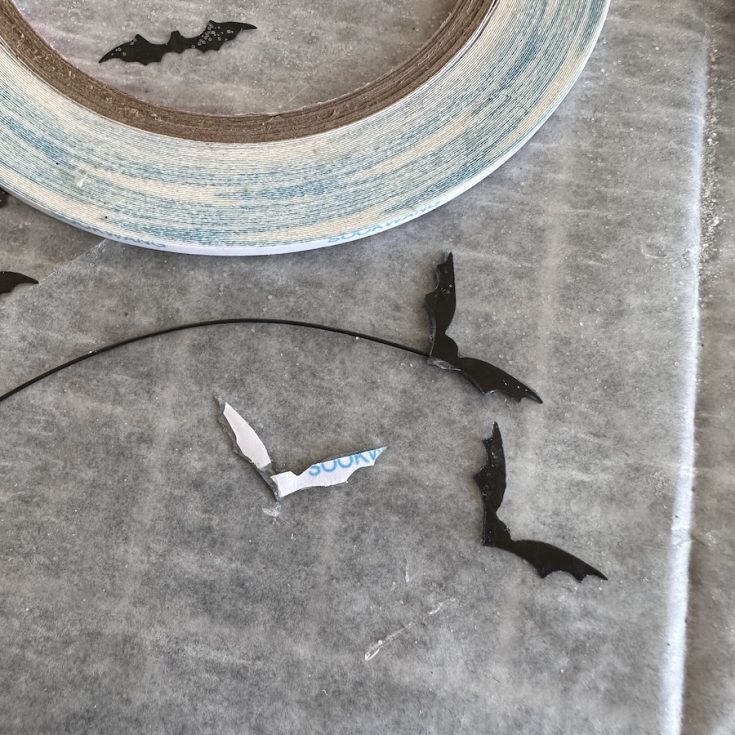
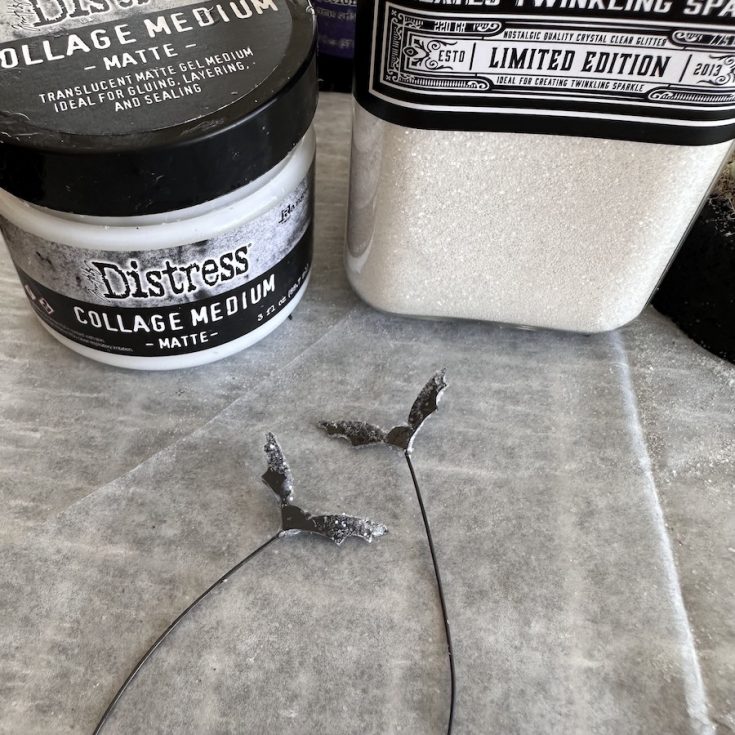
- Grab a few small bats that can be found in the Halloween Baseboards pack. Add Scor-Tape to the tiny bat (a bit challenging but it can be done), then add a wire (24 gauge) and a second bat on the back.
- Once secure, rub a small amount of Collage Medium on the edges of the bat, then dip into Rock Candy. It gives them great texture!
- Pierce the cork with a poke tool or awl then push the wire right into the cork. I criss-crossed the wires, keeping them in front of the trees, since the Display Globe is wide, not tall.
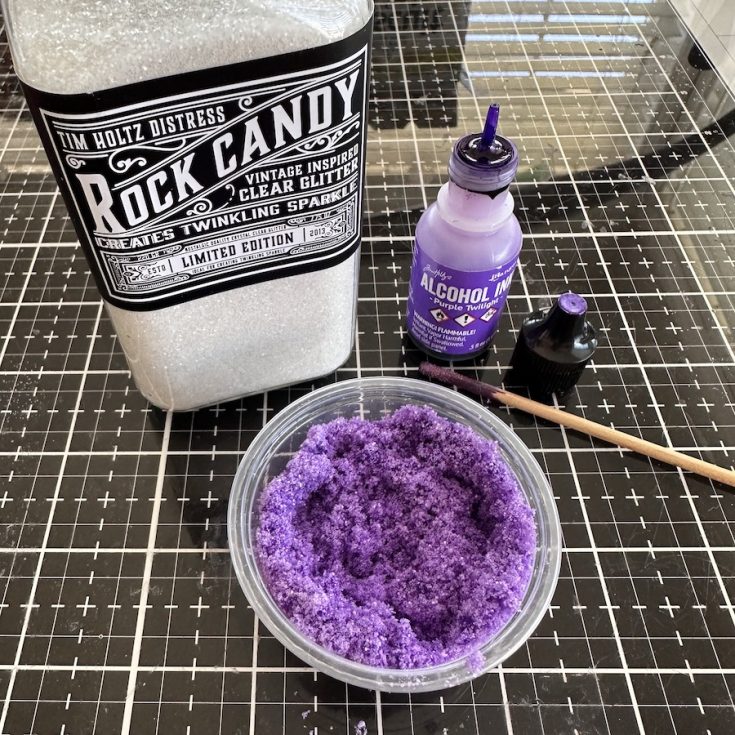
- Pour Rock Candy into a small disposable cup. Shake several drops of Purple Twilight Alcohol Ink into the Rock Candy. Stir with a craft stick or wooden skewer until colored. Add additional Alcohol Ink if necessary.
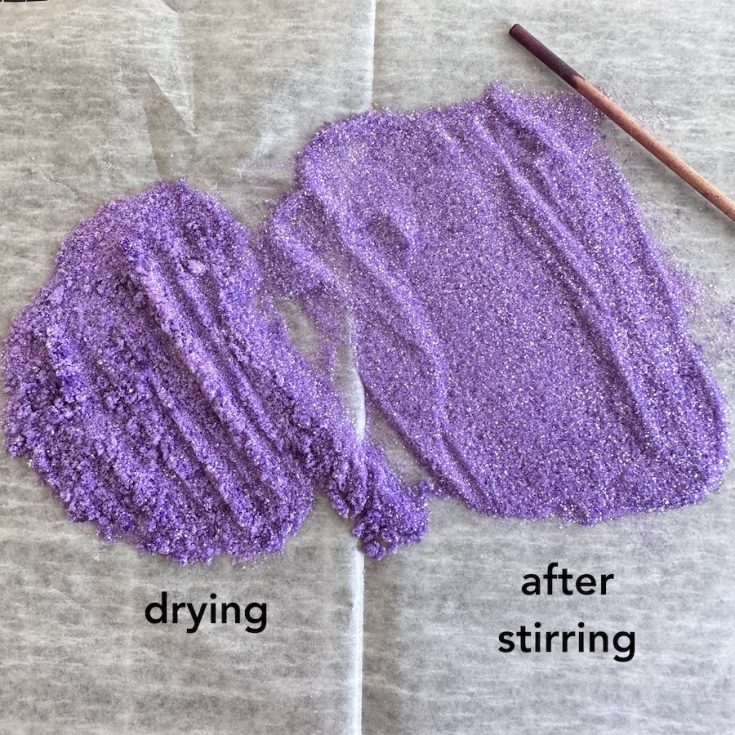
Steps 21 – 25
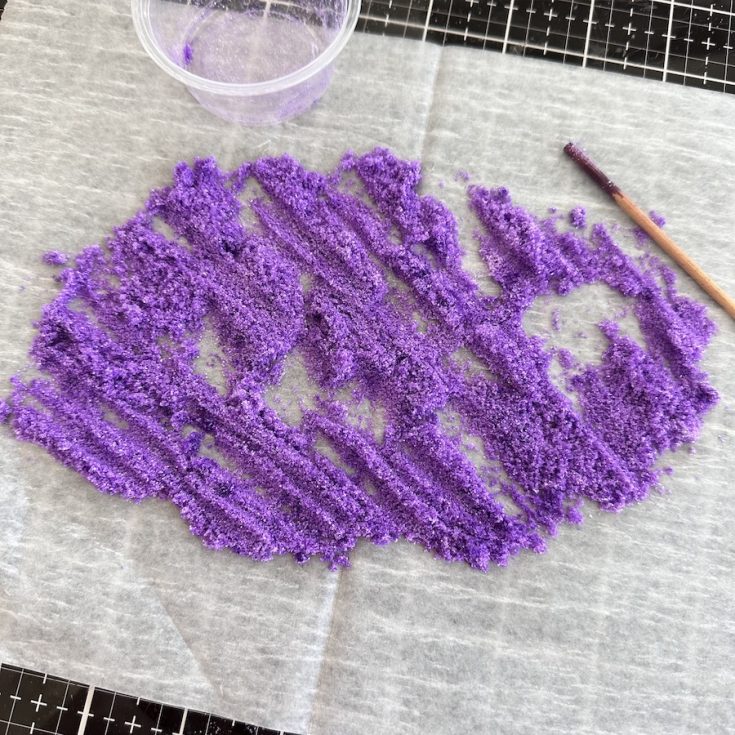
- Pour colored Rock Candy onto a disposable sheet or paper plate to dry. The texture should look like wet sand.
- After 10 -15 minutes, use a craft stick to stir the glitter, breaking up any clumps. NOTE: when the glitter is completely dry, the Alcohol Ink in the glitter will not stain the glass.
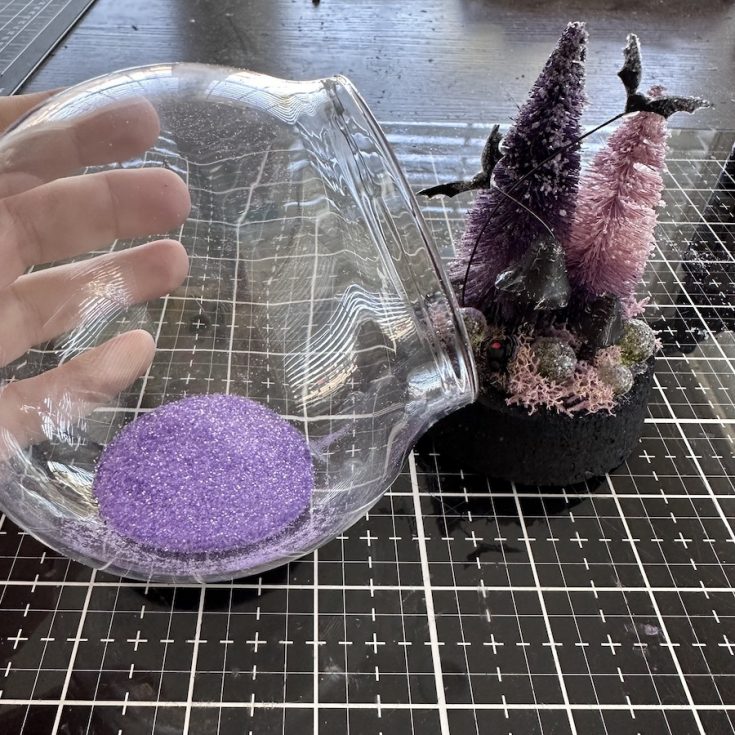
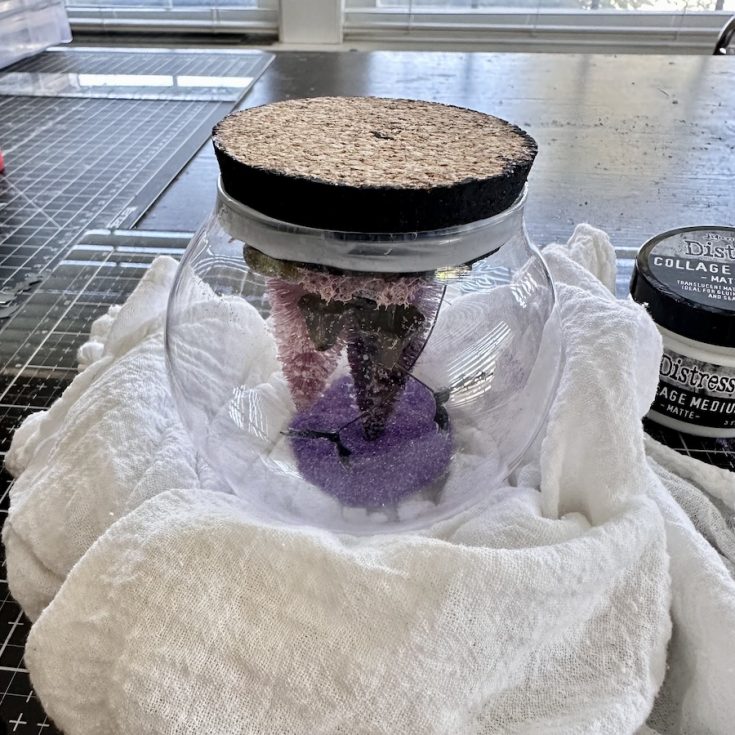
- Pour a small amount of Rock Candy Little into the Display Dome. Start with a Tablespoon and add more if needed. Insert the cork portion into the dome to test how much Rock Candy is needed.
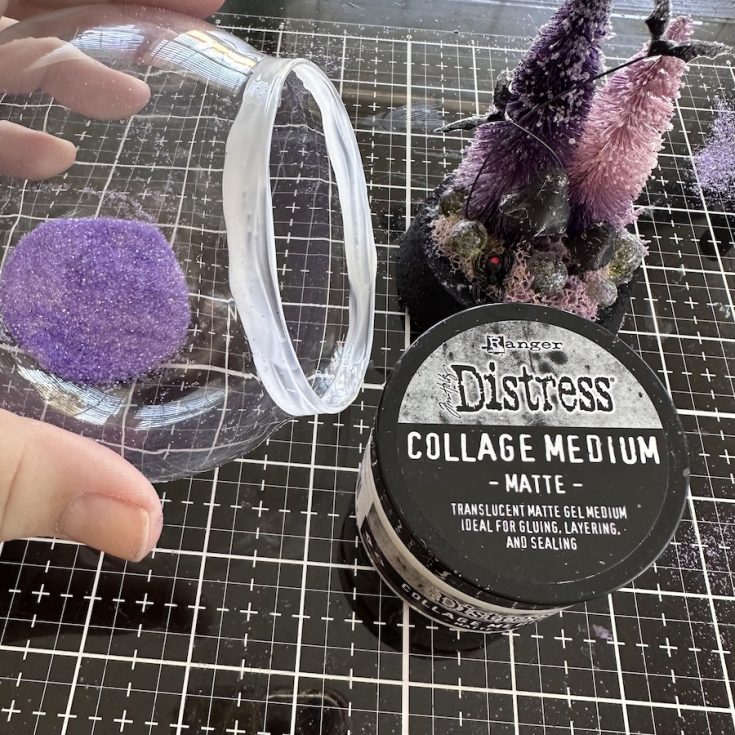
- Once you have the right amount of Rock Candy, add Collage Medium to the edge of the dome (it will dry clear).
- Add the cork to the dome, then nestle into a dishcloth to dry. I like to leave it in the dishcloth for a few hours, but it will depend on the amount of Collage Medium used.
Steps 26 – 29

- Pour leftover glitter into a Ranger Storage Jar to use on other projects.
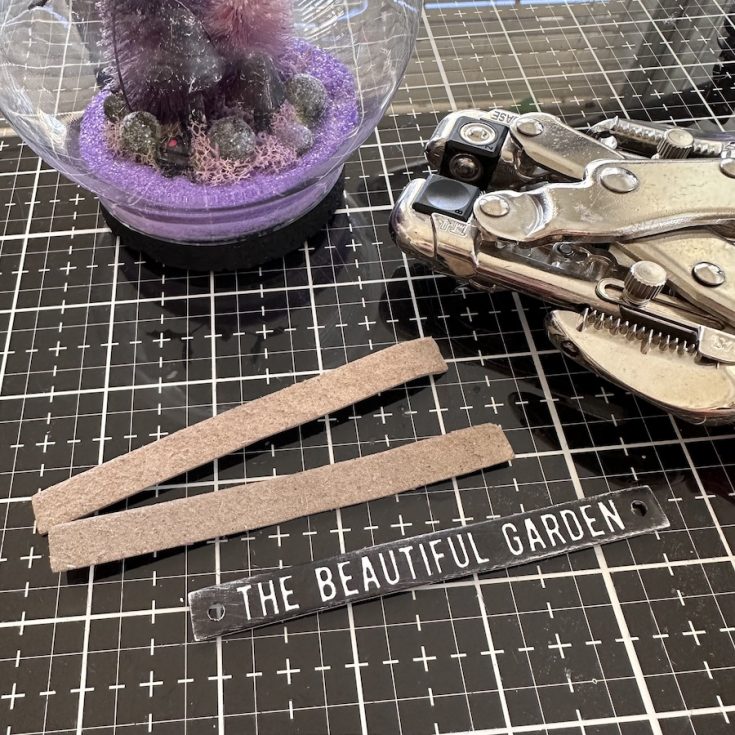
- Peel most of the backing off word stick from the Baseboards and Transparencies pack, so it can bend around the Globe. Use the small hole on a Crop-a-dile to punch a hole on each end of the strip.
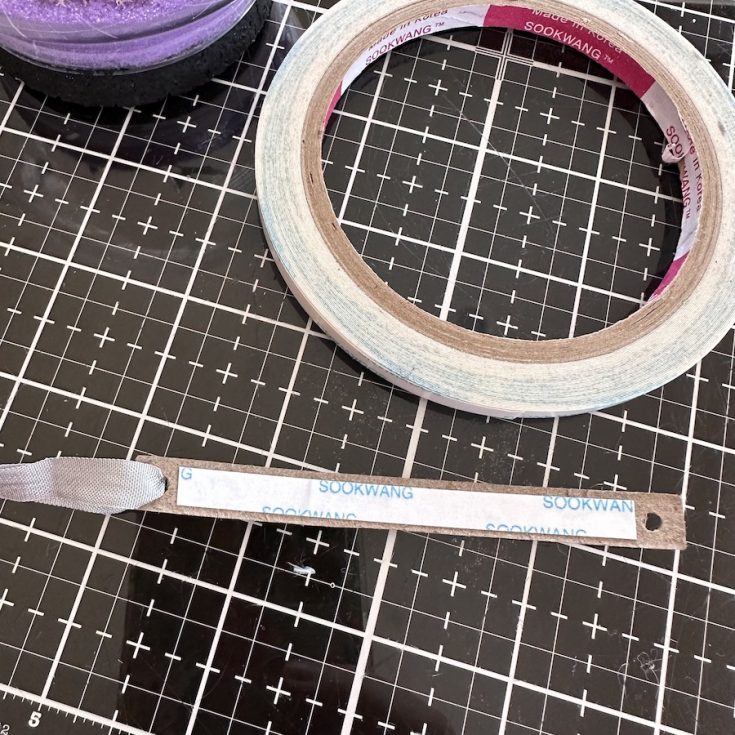
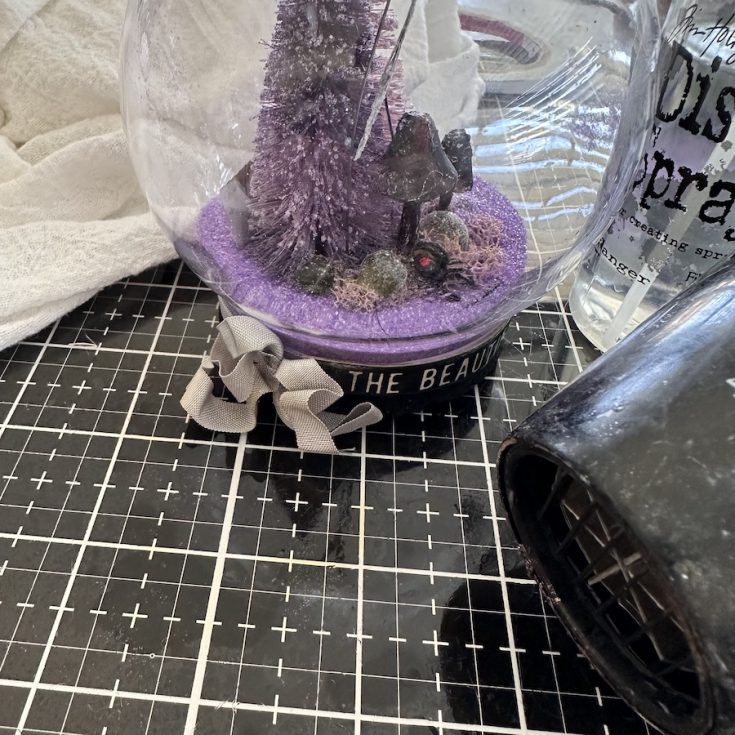
- Add Scor-tape to the back of the word stick, then thread 1/4” rayon ribbon into the hole on the right side.
- Peel the Scor-tape and adhere to the bottom of the globe. Wrap both ends of the ribbon around the globe. Thread ONE ribbon into the hole on the left and tie a bow. To crinkle the ribbon, spray with a little water, scrunch up and dry with heat tool.
SUPPLIES:
|


Thanks so much for stopping by, and thanks to Paula for being our guest!


so gorgeous!!
This was wonderful. Thanks so much for all the great tips and inspiration.
This is Gorgeous, Paula!!!! I love your purple trees!!!
This is so pretty
The baby books that I am procrastinating on will have to wait! I need to do one of these! I’m loving all the bubbles and coloring RCG, I totally forgot about that!
Thanks for another project to do!
Amazing!