Hello Honey!! Super cute Lawn Fawn card by Chari Moss!
Hi friends! Happy Saturday! I’m delighted to welcome back special guest Chari Moss today representing Lawn Fawn read on to learn more about this super cute card!
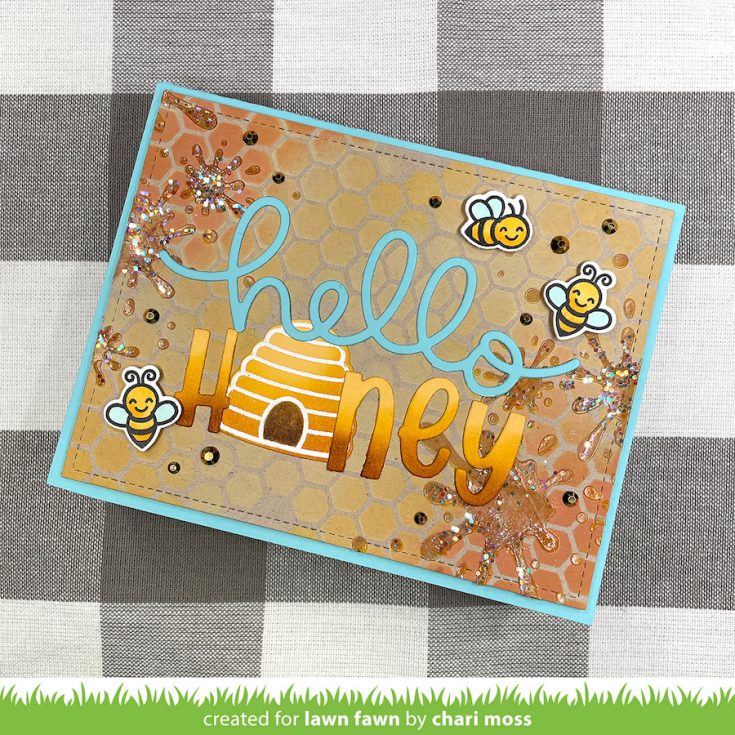
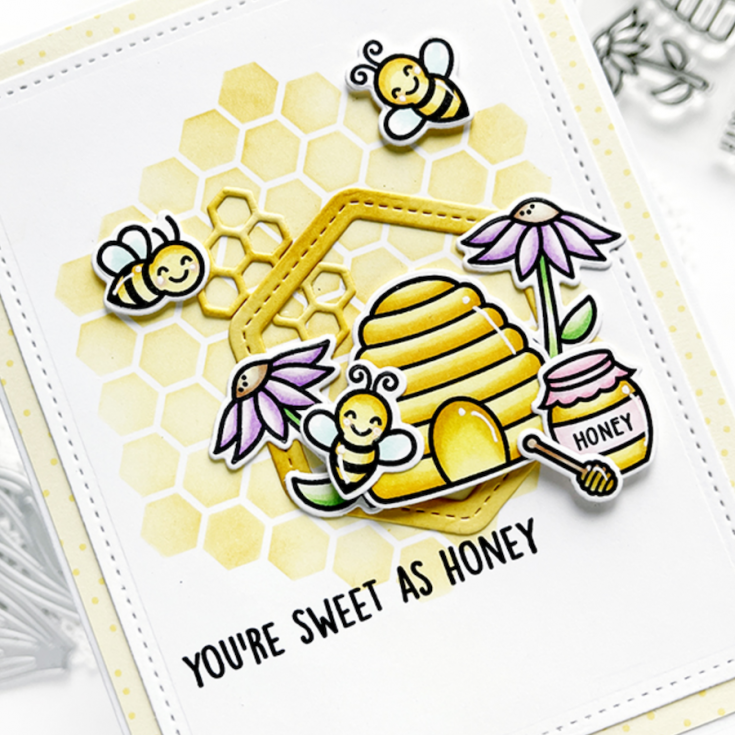
Hello Crafty Friends! Today I am sharing a fun card with some new products from Lawn Fawn. On today’s card I am mixing lots of products and techniques so let’s get started! First I created my background on a die cut rectangle of Kraft cardstock.
I used the Honeycomb Stencil to ink my background with distress oxide inks in scattered straw, wild honey and rusty hinge. Next I created some honey splatters around the edges. I started with tea dye distress ink through the Lawn Fawn Paint Splatter Background stencil. Then I layered clear stencil paste over top to create sticky, shiny honey. Before the paste dried I sprinkled on some chunky glitter and prisma glitter to make it sparkle.
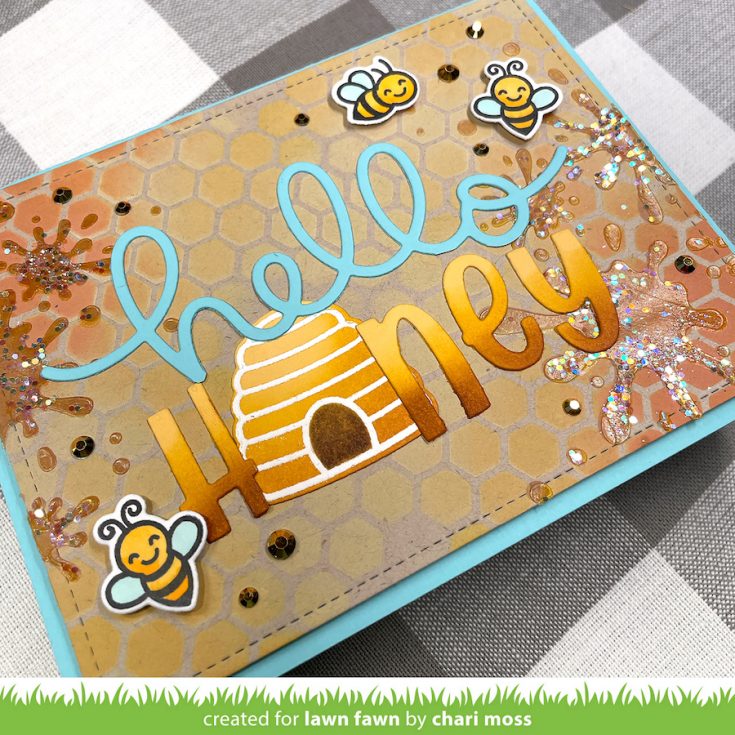
While my honey was drying I die cut my sentiment. The sentiment is a mixture of the scripty “hello” from the Giant Hello Sunshine die and Henry’s ABCs. The hello is cut from Mermaid cardstock with the bottom word trimmed off. The other letters are cut from Sunflower cardstock with ink blending on the bottom using fossilized amber, tea dye, and vintage photo distress inks. For the “O” I white embossed the bee hive from Hive Five on sunflower cardstock and added ink blending as well to match the letters.
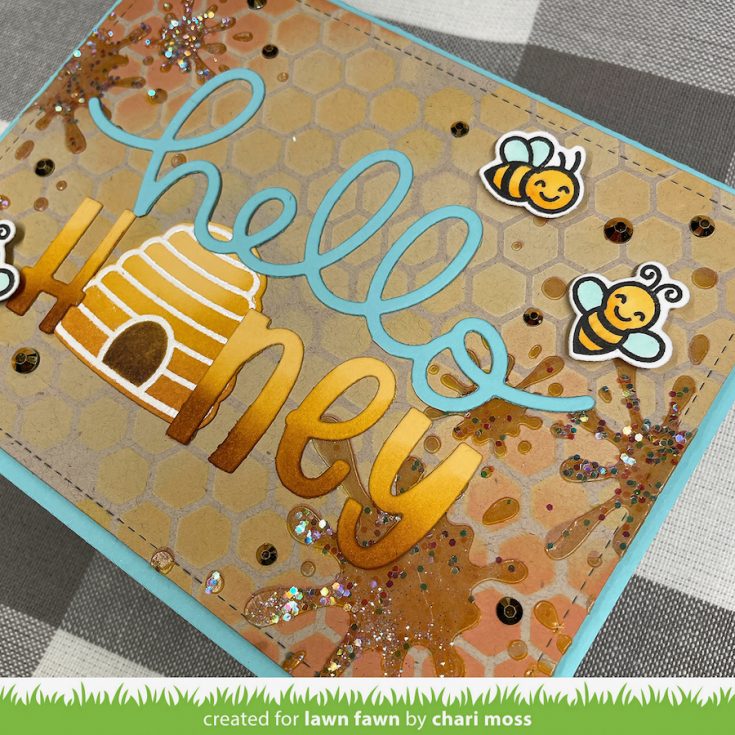
I adhered the honeycomb panel to a Mermaid cardstock card base and glued my sentiment directly to the background. Then I added a few bees from Hive Five, popped up on foam squares and finished it off with some Studio Katia gold crystals. I love how this card turned out! The stenciling with the shiny honey is so fun and I really like the mix of fonts for the sentiment. Thanks so much for joining me today!
SUPPLIES:
|


Thanks so much for stopping by, and thanks to Chari for being our guest!

A rare DEAL! Lawn Fawn SALE!
Hi friends! Happy Friday! We’re having a very rare sale! We are having a 20% off sale on one of our favorite brands, Lawn Fawn! Use code FWNLUV at checkout for savings!! Shop early for the best selection, and enjoy!
Who doesn’t love a little inspiration to get inspired?! Check out our friend Caly Person’s blog to learn more about ALL of these fabulous projects!!


Masked Floral Pattern Birthday Card: Yippee for Yana

Hi friends! Please join me in welcoming back the oh-so-talented and amazing Yana Smakula! (Please note: our dear friend Yana is Ukrainian. To show support to our brothers and sisters in Ukraine, please see Yana’s post HERE.)
Hello, crafters, this is Yana Smakula for Simon Says Stamp! Welcome back for another Yippee For Yana video!
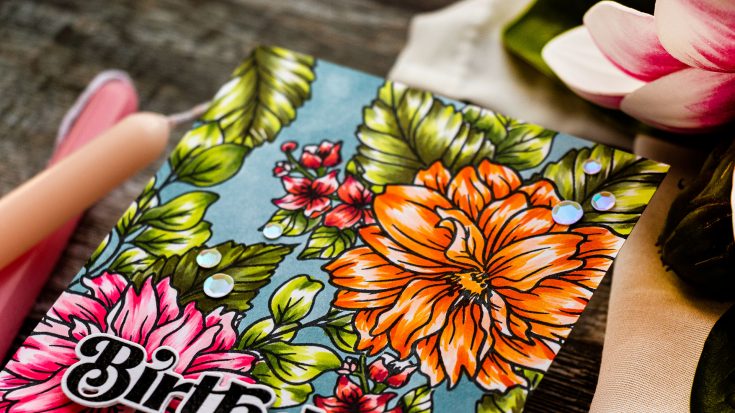
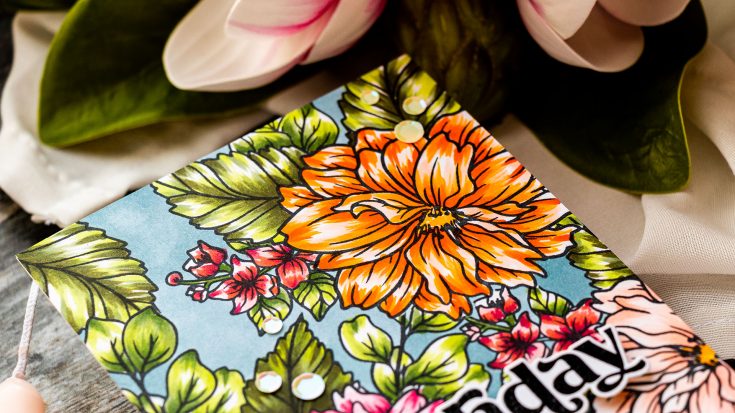
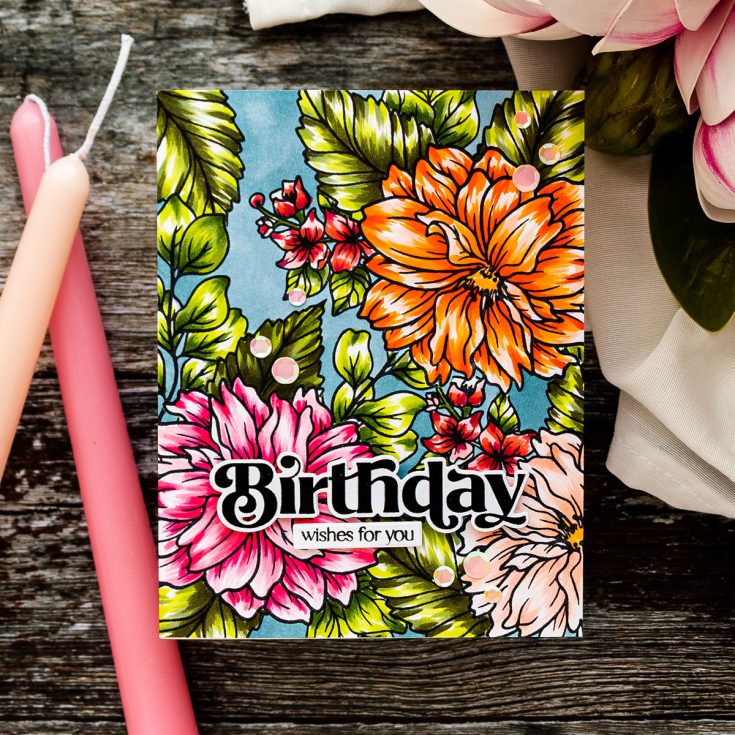
I’m creating with the Simon Says Stamp Blissful Bouquet stamp set to make a Birthday Card. It’s been a long time since I’ve stamped a custom floral pattern so I thought it was time I re-visited this amazing technique.
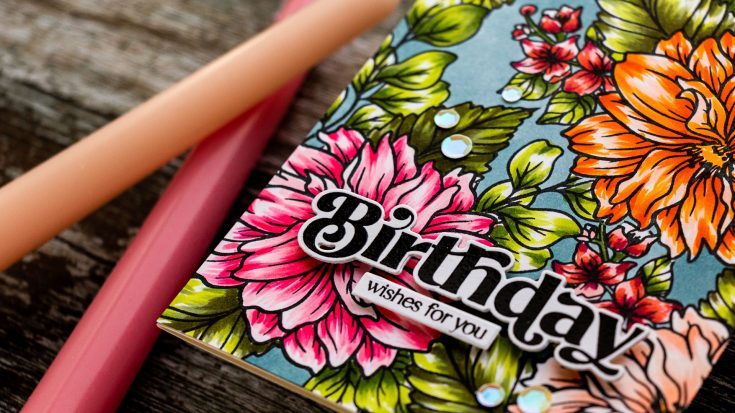
This stamp set features beautiful flowers, along with different types of foliage, some flower buds, and more – lots of great elements to create a floral arrangement, a bouquet, or just dress up your handmade card with some pretty flowers.
Because I’ll be stamping an overlapping pattern, meaning the elements will overlap, I need to create some masks for my images. I used to hate doing making, I didn’t like having to cut the masks out, but I’ve grown to love this technique, it is very easy, yet it lets you do so much more with your stamps. I stamped several of the images, some were stamped twice, and cut them out using scissors.
Next, I grabbed my mini MISTI stamping tool and started to create the pattern on Neenah Solar White cardstock. Watch my video for the step-by-step how-to.
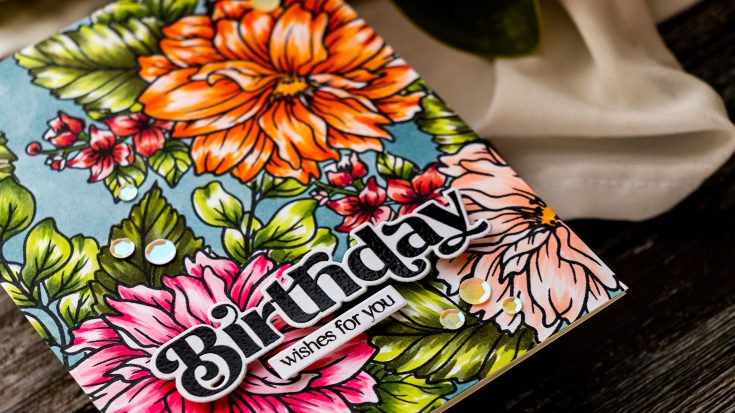
With the stamping done, I colored the image using Copic markers. I did simple flick-style coloring.
- Pink: RV14, RV13, RV11, RV10
- Orange: YR07, YR04, YR00
- Peach: E02, E00, E000
- Green: G99, G94, YG03
- Red: R39, R24, R05, R20.
- The background was colored using OLO BG 7.3.
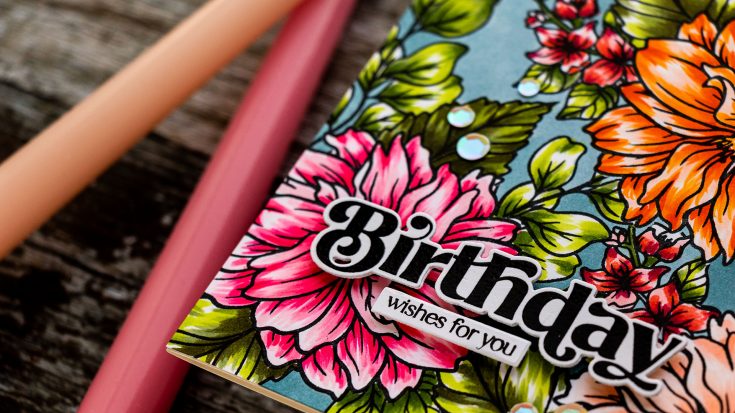
Next, I stamped the sentiment using the Elegantly Modern Greetings stamp set. I stamped the large Birthday in black ink and cut that out using a coordinating die and next added a small “wished for you”. Finally, I added a touch of sequins to dress up my card.
Have fun stamping!
WATCH THE VIDEO:
SUPPLIES:
|


Thanks so much for stopping by, and thanks again to Yana for being our guest!
Ways to support Ukraine:
If you are looking for ways to support Ukraine, we encourage you to visit this page on Yana’s blog:


