Hey Mama! New Amy Tangerine Layout featuring Rise & Shine!

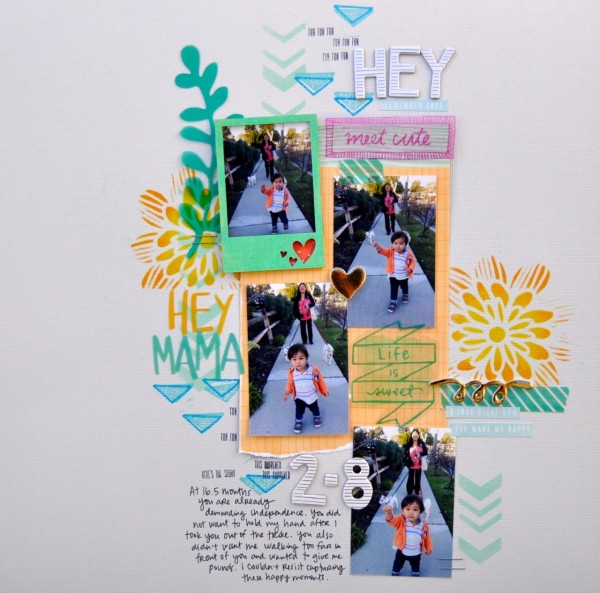
Hi readers! Happy Thursday to you! We have a special treat for you today! The one and only Amy Tan (of Amy Tangerine) made a layout combining her new collection Rise & Shine as well as some past favorite pieces! She even made a video explaining the whole process! I’m personally really loving the new Brooklyn stencils. The size is so great for a variety of products!
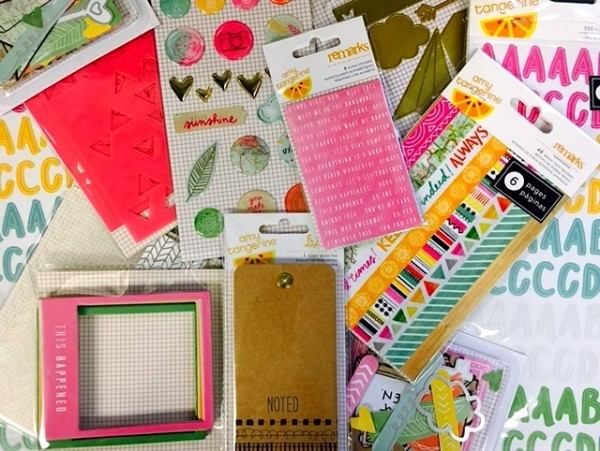
Have you seen the new collection? Here’s a little product shot to give you a taste of what Rise and Shine is all about…check it out!
Be sure to watch the video too and enjoy!
SUPPLIES:
 |
 |
 |
 |
 |
 |
 |
 |
 |
 |
 |
 |
 |
 |
 |
 |

Blog Candy Alert!! Follow our blog via email and comment on this post for a chance to win a special blog candy!
Congrats! Blog Candy Winner!
From: Clearly Kelly: Donna Phelan!
Please email Samantha ([email protected]) with your mailing address and the name of the blog you won from to claim your prize!
Clearly Kelly
Hi readers! Happy Wednesday to you! We’re excited to welcome the fabulous Kelly Purkey back as a guest on our blog! She’s showcasing some of her newest releases from her collection with Hero Arts called Clearly Kelly. Take a peek and be inspired!
Enjoy!
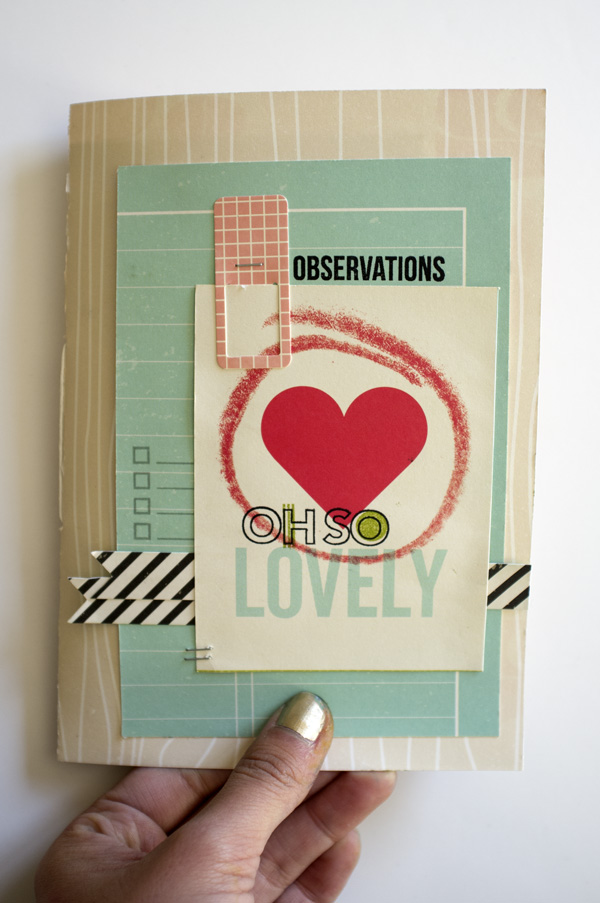
Hi everyone, it’s Kelly Purkey here and I am so happy that Simon Says Stamp is carrying my new Clearly Kelly products from Hero Arts. These little stamps have been designed for you to use on all different kinds of projects, but specifically for your pocket pages and mini albums. Today I’m sharing a mini album that I made using the new 3×4 clear stamps. You’ll see how easy it is to put together a quick album with the different sentiments and icons.
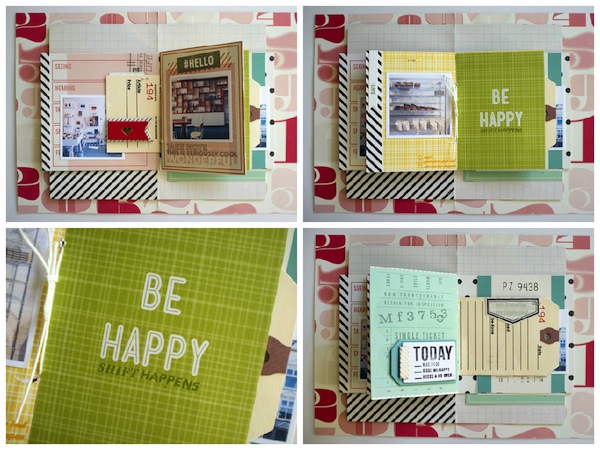
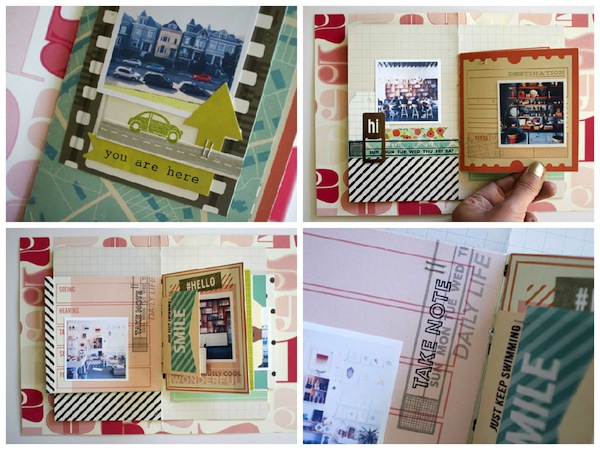
To create the cover and inside pages of my album, I cut down a variety of papers from Shimelle’s line. I trimmed them into various sizes to make the different pages peek through. I especially love the paper with the different 3×4 cards. When you trim it out so that two of the card designs are still attached, it makes for perfect pages in the book – you get a different design on each side. After all the pages were done, I poked two holes through the center of the papers and tied them together with a string in the middle.
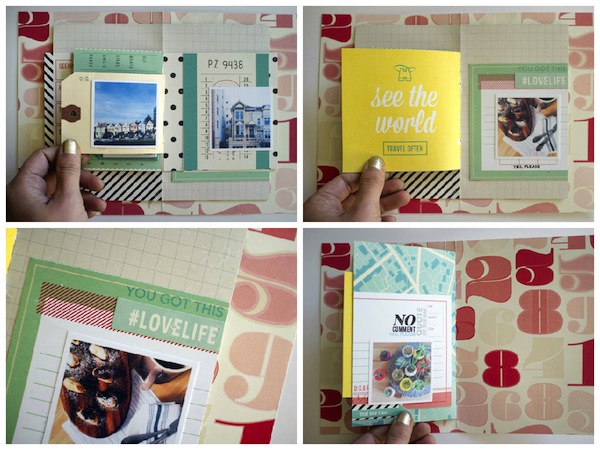
I added in 2×2 photos from a recent trip to San Francisco.The whole album took me about an hour to put together and was so easy to make. I hope this gives you some ideas for incorporating the Clearly Kelly stamps into your next little mini album!
SUPPLIES:
 |
 |
 |
 |
 |
 |
 |
 |
Blog Candy Alert!! Follow our blog via email and comment on this post for a chance to win a special blog candy!
Congrats! Blog Candy Winners!
From: A Trio of Thanks: SandraMaria!
From: Classes You Might Like: Margie Visnick!
From: Monday Challenge: Lions and Lambs, oh my!: Dee Earnshaw!
Please email Samantha ([email protected]) with your mailing address (if applicable) and the name of the blog you won from to claim your prize!
A Trio of Thanks
Hi readers, happy Tuesday, and happy St. Patrick’s Day! You may notice we asked Teri to add a bit of green to her gorgeous trio, for good luck, that is! No pinching here! ;) If you’re not familiar with the holiday or traditions, and would like to be, hop on over to the Wikipedia summary.
Now… let’s get to the good stuff! We’re pleased to welcome back the always amazing Teri Anderson to our blog. Thank you cards are great to have in a stash; in case you need one! Check them out and be inspired!

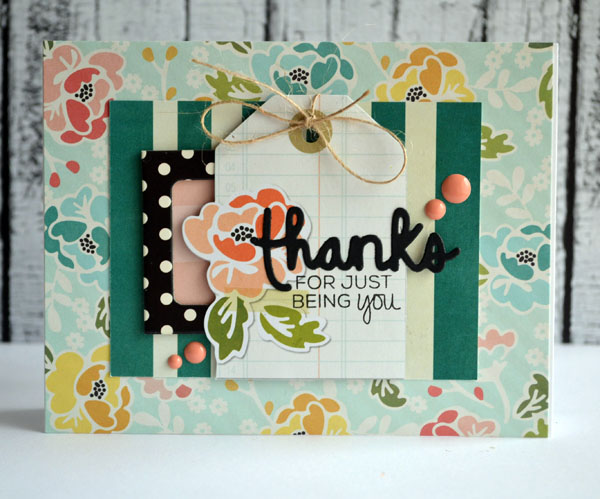
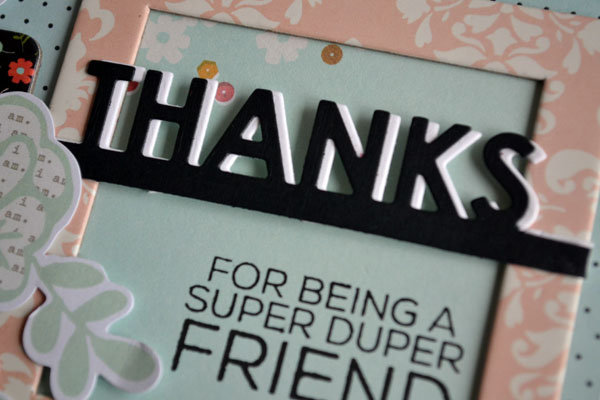
Hi everyone! I’m excited to be here again today! I feel like I am always in need of thank you cards. So I wanted to share with you some quick thank you cards I whipped up the other day with Technique Tuesday’s Say It – Thanks stamp set and dies (sold separately) and Straight Talk – Thanks die. The cool thing thing about these products (and the other Say It and Straight Talk products from Technique Tuesday) is you can use them on their own or you can use many of them together for lots of different possibilities! For this first card, I played it simple. I created a sentiment by die-cutting the large word with the Say It – Thanks dies and then stamping the smaller words onto the tag with the Say It – Thanks stamp set.
For this second card, I used the same Say It – Thanks stamp set to stamp the smaller words. This time, I die-cut words with the Straight Talk – Thanks die.
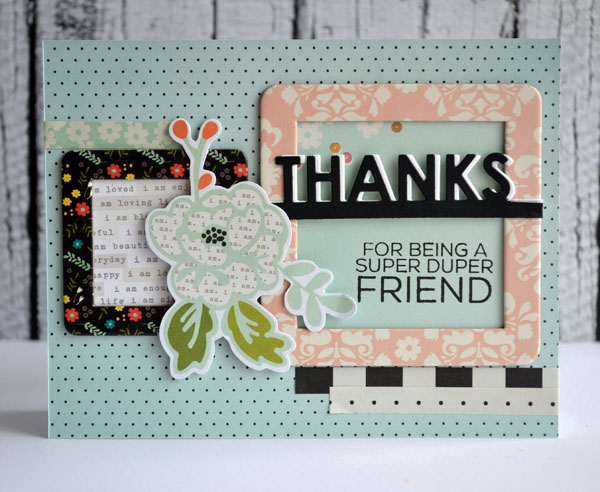
Look really close and you’ll notice I die-cut the thanks word in both white and black cardstock. I slightly offset them before adhering them to the frame. I totally love the the look.
I went all out for my third card by using words cut with the both the Straight Talk – Thanks die and Say It – Thanks dies and the Say It – Thanks stamp set.
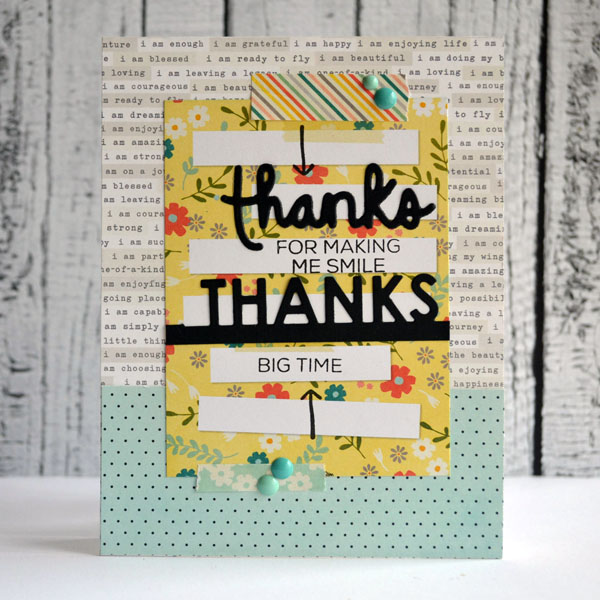
To help with the design flow, I stamped a couple arrows (also from the Say It – Thanks stamp set).

Thanks for having me again, Simon friends! I always enjoy stopping by!
Teri
SUPPLIES:
 |
 |
 |
 |
 |
 |
 |
 |
 |
 |
 |
Blog Candy Alert!! Follow our blog via email and comment on this post for a chance to win a special blog candy!


