Cool Card from Lawn Fawn
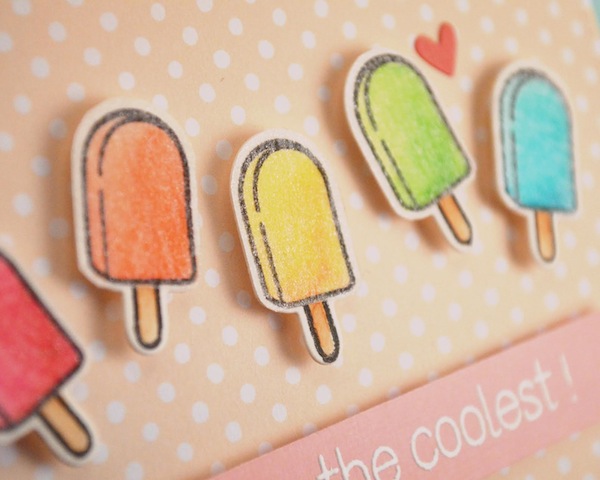
Hi readers! Happy Saturday! I hope you’ve made some COOL plans to get you through the weekend! Today we’re back with guest designer Chari Moss for Lawn Fawn, and she has made another adorable card using some cheerful Lawn Fawn designs! Wondering how she got that lovely texture on the popsicles?? Read on, be inspired, and enjoy!
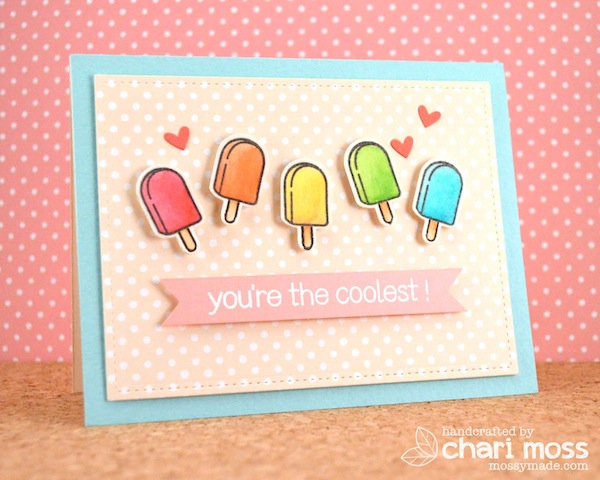
The inspiration for this card was the arrival of warmer temperatures! Who’s ready for summer? I also wanted to give the new Spectrum Aqua markers a try. My friend Mary Dawn was kind enough to let me play with her markers and try them out and that’s when I colored these bright popsicles from Best Pun Ever. They look so yummy! I also recently discovered the Tim Holtz Frosted Film and applied some of this over the tops to create perfect frosty popsicles. It’s a little hard to see the frost in the picture but it’s super cool in real life. The vanilla Let’s Polka, Mon Amie paper was perfect for the background, nice and soft cream color so the colorful popsicles really pop.
SUPPLIES:
 |
 |
 |
 |
 |
 |
 |
 |
 |
 |
 |
 |
 |
 |
 |
 |
 |

Blog Candy Alert!! Follow our blog via email and comment on this post for a chance to win a special blog candy!
A Frolic in the Flowers
Hi readers! Happy Friday, and thanks for stopping by our blog today! We’re pleased to welcome back the very talented Yoonsun Hur using some really pretty Simon Says Stamp exclusives! You’ve heard the classic saying of “April Showers bring Spring Flowers“, and ask we look forward to blooms, we can enjoy these lifelike creations made by Yoonsun!
Enjoy!
Hello crafty friends, Yoonsun here!
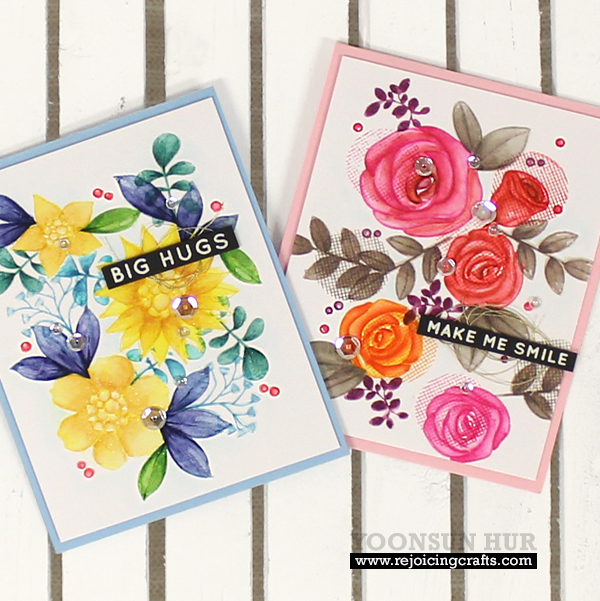
Today, I am so happy to be sharing the botanical themed cards with my favorite stamp sets here on the Simon Says Stamp blog. April is a very beautiful time of the year. The fields give forth a scent of spring. Yes! We can feel the pure joy of spring everywhere!!
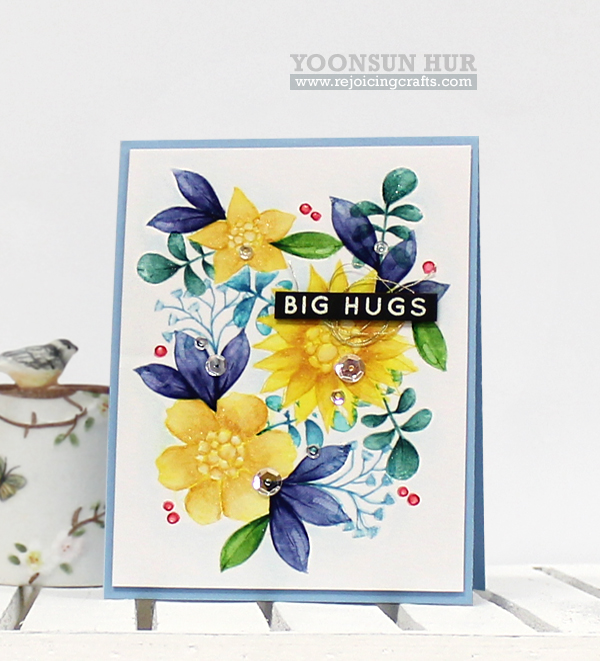
For my first card, I used Summer Garden Stamp Set as my main supply. At first, I stamped flowers & leaves on the watercolour panel with Distress inks and colored the inside of the stamped images using detailer waterbrush. I then coloured the details of flowers & leaves with Distress markers. For the sentiment, I stamped Big Hugs from Hello You Stamp Set on the black cardstock using VersaMark Embossing ink, white heat embossed, mounted on the card using dimensional foam tape. Mixed clear sequins were the finishing touches. This design was inspired by a print by Stephanie Ryan!

Supplies:
 |
 |
 |
 |
 |
 |
 |
 |
 |
 |
 |
 |
 |
 |
 |
 |
 |
 |
 |
 |
 |
 |
|
 |
 |
 |
 |
 |
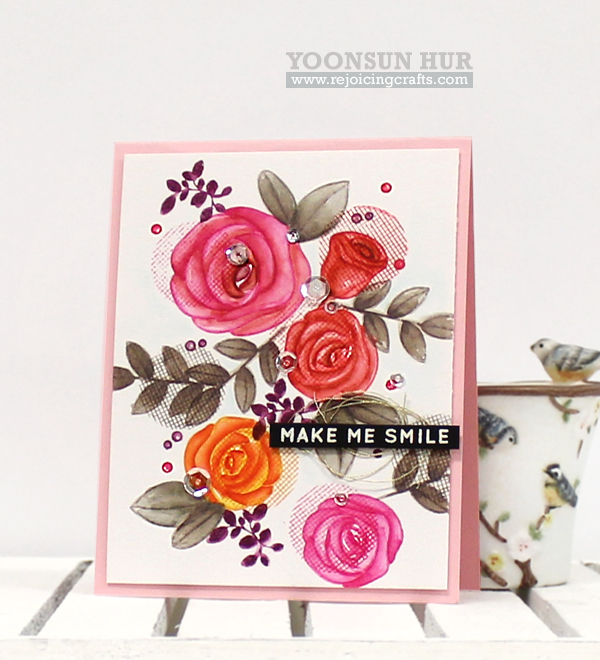
Mother’s day is just around the corner! Beautiful roses always remind me of my mother. So, I made it for my mom with Best Mom Ever Stamp Set. I used the same way as the first card but using different colors.

Supplies:
|
|
|
 |
 |
|
 |
 |
 |
 |
 |
 |
 |
 |
 |
|
|
|
|
|
|
 |
|
|
|
|
|
|
Blog Candy Alert!! Follow our blog via email and comment on this post for a chance to win a special blog candy!
Congrats! Blog Candy Winners!
From: Dip Dye Technique: Donna Rinckel!
From: Tea Time!: Tracey Magner!
Please email Samantha ([email protected]) with your mailing address and the name of the blog you won from to claim your prize!
Dip Dye Technique
Hi readers! Happy Thursday to you! I’m pleased to welcome back guest designer Jocelyn Olson to our blog for a fun technique and a spotlight on Paper Smooches stamps and dies! Doesn’t this dip dye technique have a pretty effect? Read on for more details!
Recently, I’ve seen some cards and tags with dip-dyed bottoms, like these examples on my Pinterest Design Inspiration page. I love this trend, and using some Paper Smooches stamps and dies, I went about trying to recreate the dip-dyed look:
I’ve got a step-by-step tutorial to achieve this look.
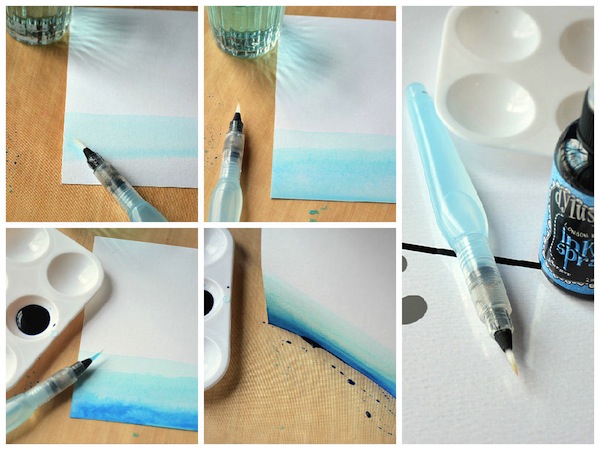
-
First, gather your supplies….a waterbrush, watercolor paper, a craft mat, and watercolor medium. I wanted an intense look, so I used spray mists. Dye reinkers (watered down) would work, too. When I tried watercolors, they worked, but the results were more muted.
-
The next step is to brush water onto the bottom half of the watercolor paper. While the paper is wet, dip the brush into the spray mist and then dip the brush in water. When most of the ink is removed, brush it onto the paper.
-
Next, water down the ink (a lot). When the lightest layer is still wet, brush on the next layer. I found the trick was to work quickly while the layers are wet and keep blending the layers.
-
For the third layer, add a little water to the ink and brush onto the paper. Once these layers are on, allow the panel to dry (or heat emboss if you’re impatient like me). When the paper is dry, lightly brush over the layers to blend them.
-
The last step is to put the spray mist on your craft mat and drag the bottom of the card into the ink. Once the card was dry, I added some white splatter and layers.
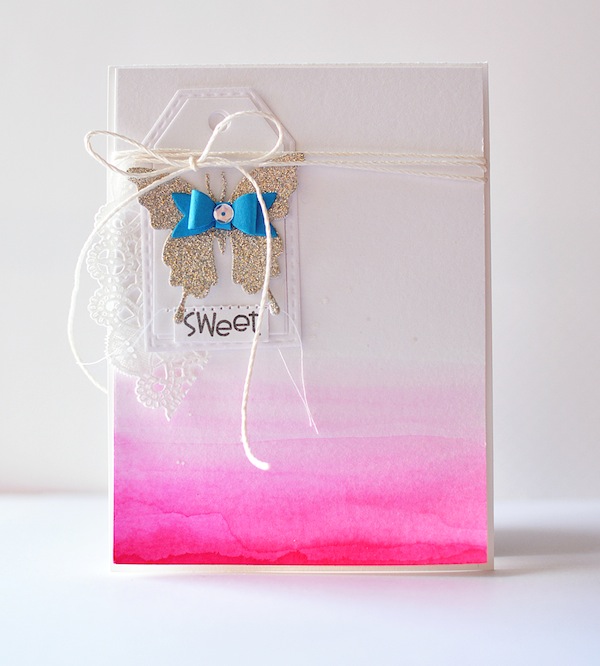
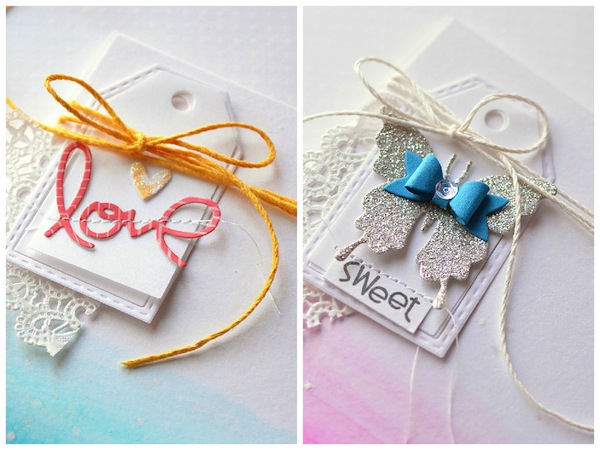
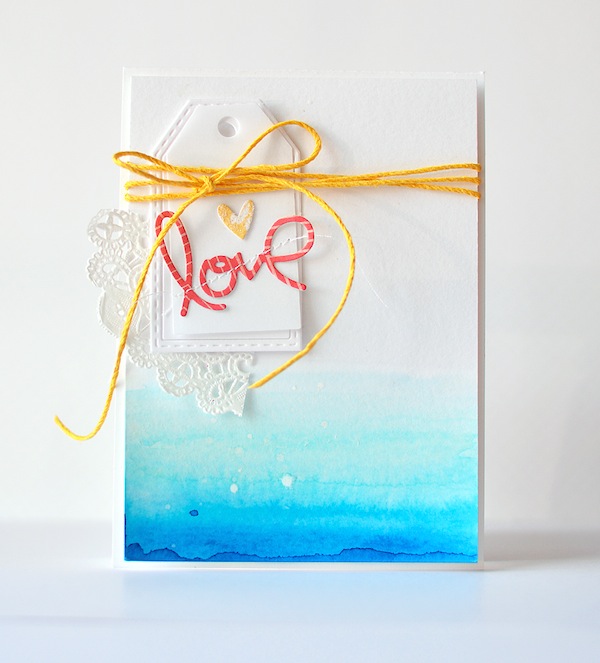
I die-cut the Paper Smooches Gift Tags 2 die out of both vellum and cardstock. The border of the die is separate from the inside, so I added tape on the back to hold the layers together. Using the Paper Smooches Love and Cherish dies, I die-cut the “love” and stitched it. The Love and Cherish dies have a heart, and I added glitter a little glitter.
Using the same technique, I made a second card:
For this card, I used the same Tag 2 die, and then layered the new Paper Smooches Butterfly Duet die and the Baby Bow die. Isn’t that bow so cute? I finished the card with a sentiment from the Fruitastic set.
Thanks to Stephanie and Heidi for having me on the blog!
SUPPLIES:
 |
 |
 |
 |
 |
|
 |
 |
 |
 |
 |
 |
 |
 |
 |
 |
 |
 |
 |
Blog Candy Alert!! Follow our blog via email and comment on this post for a chance to win a special blog candy!


