Celebrate!
Hi readers! Happy Tuesday! Please join me in a BIG Simon welcome to a first time guest designer on the Simon blog, Audrey Pettit! She’s made a lovely Birthday card full of dimension and fun, and perfect to send to someone special!
Enjoy!
Hi everyone, it’s Audrey, and I am so excited to be here on the Simon Says Stamp blog today! I have got a fun birthday project to share with you. It’s a pocket-envelope, gift-card-holder card. Now how’s that for a bit of a tongue-twister?

I know you guys are probably like me, and are always in need of birthday cards, right? This month, I’ve got a very special birthday to celebrate, and instead of a gift, the girls and I have chipped in together to get a gift card for the birthday girl for a luxurious day at the spa. Now I know you can present a gift card in those plain little envelopes, but that seems a little boring. So I’ve come up with a fun alternative. It’s a pocket, and a card, and a gift-card holder, all in one.
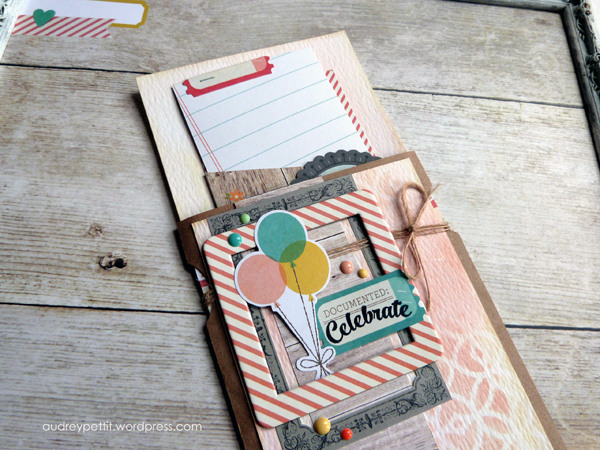
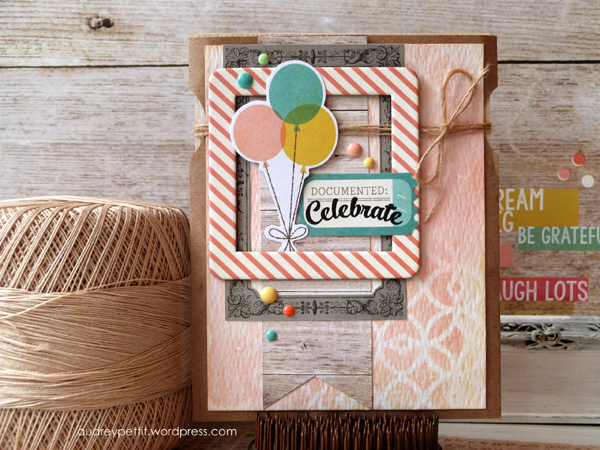
See? The pocket is made from an envelope, and the front of the pocket is dressed up like a card. Then for the inside of the pocket, there is an insert with yet another little pocket, perfectly sized for holding the gift card and a handwritten note. It looks fancy, but it’s really quite simple, thanks to lots of fabulous pre-made embellishments. And I’ve given this a touch of my own personal flair with the help of a favorite stencil and some Distress inks. Here’s a closer look at how.
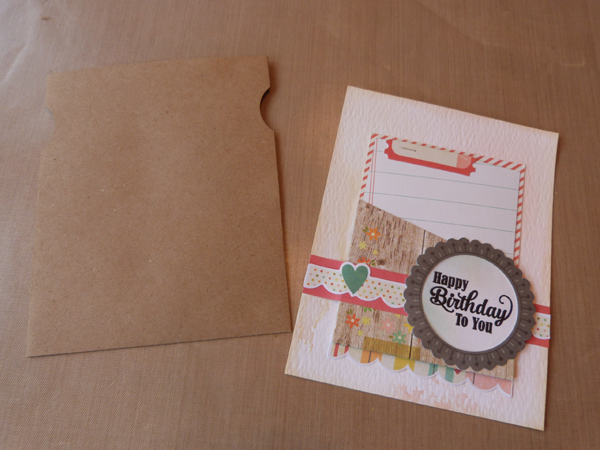
To create the pocket, seal an A2 kraft envelope, and slice off the tip of one end with your paper trimmer. Using an 1 1/4″ round paper punch, punch a slight notch on either side of the pocket, about an inch from the top. This is a small touch, but it adds a little eye catching detail, and shows your recipient there is something else inside.
The insert is made from a piece of Tim Holtz Distress Watercolor Paper, inked with Antique Linen and Tattered Rose Distress Ink. To create this light watercolor wash, dab the inks onto a non-stick craft sheet, and mist the inks liberally with water until water beads form. Then press and drag the paper through the ink mixture. Set the paper aside and allow it to dry completely.
Then take a second piece of watercolor paper and repeat the process with the remaining ink. We’ll use this piece on the cover of the pocket.
Once the watercolor paper is dry, embellish the insert with papers, die cuts, and a pre-made pocket. I used goodies from Simple Stories’ adorable Summer Vibes collection. The pocket and journaling card are from the SN@P Pages, and are all ready to go. I cut down a 3×4 journaling card slightly on one side to fit in the pocket, and added a die cut ticket stapled with a Tiny Attacher to the top for an instant handle. Dressed up the page with a strip of 6×6 patterned paper and die cut ephemera bits. A Sizzix stamped sentiment framed in a BasicGrey Barista die cut make a quick and easy greeting.
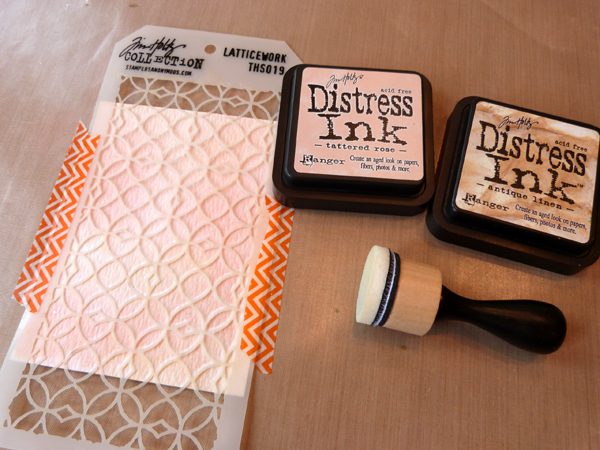
Once the cover paper is dry, trim 1/4″ off the top and one side to create a slightly smaller layer. Tape a favorite stencil onto the paper, and ink over the top using the same colors of Distress Inks and an ink blending tool. I wanted a random look, so I varied the amount of ink I used, applying some of the ink darker and heavier in some spots, and lighter in others.
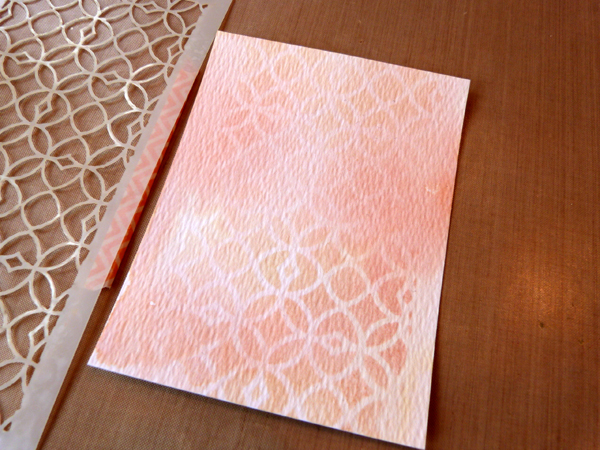
Peel back the stencil and look at the pretty background you have made!
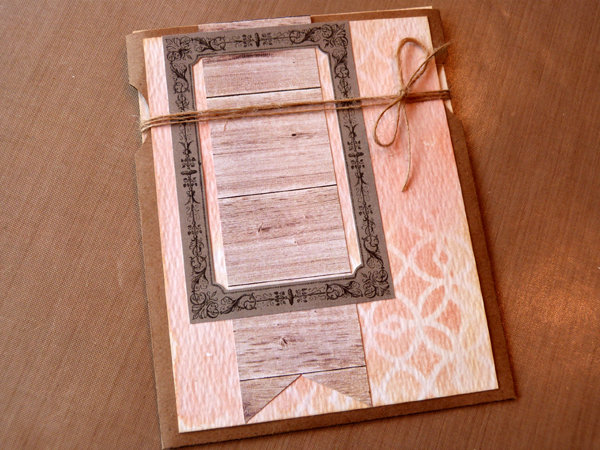
Slip the insert into the pocket, and adhere the stenciled background to the front of the pocket. I added a banner strip of Summer Vibes 6×6 woodgrain paper to the left side, topped with another BasicGrey Barista die cut frame. Then wrapped natural twine several times around the top, tied into a bow on the right side.

Then just a few final embellishments to finish things off. A Summer Vibes chipboard frame, enamel dots, and die cuts. The celebrate sentiment is from the same Sizzix stamp set used on the insert, stamped in Ranger Archival Ink in Jet Black.
I hope you’ve enjoyed my pocket card! And huge thanks to the team at Simon Says Stamp for having me today!
Supplies:
 |
 |
 |
 |
 |
 |
 |
 |
 |
 |
 |
 |
 |
 |
 |
 |
 |
 |

Blog Candy Alert!! Follow our blog via email and comment on this post for a chance to win a special blog candy!
Monday Challenge: What’s the Plan?
This week the Monday Challenge blog is all about the plans. Did you know they work weeks ahead? That’s right! Challenges come out and they work hard to create interesting things for you each week. So this week, they’re letting plans inspire the challenge! We’ve definitely noticed that planners are all the rage these days so we’d love to see your crafty planner pages, but this challenge can be taken many more ways! You can share a project about plans you’ve made, you could get a jump on holiday crafting, art journal a dream or hope for the future, or make a crafty plan of some other kind, and show us what happens!
Below are three projects created by team members this week – and you’ll want to check out the Monday Challenge blog to see the rest. Don’t forget that when you enter your projects into the challenge, you have a chance to win a $50 Gift Voucher to Simon Says Stamp!
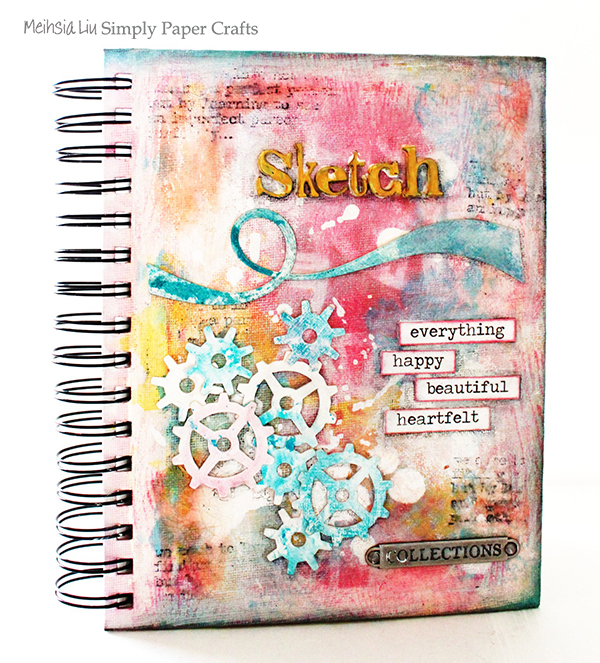
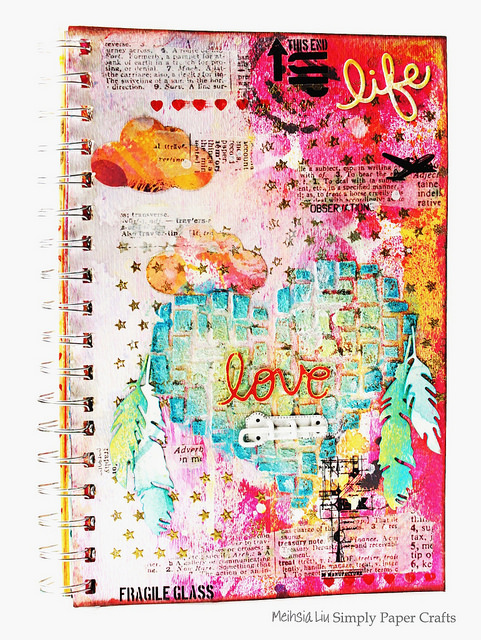
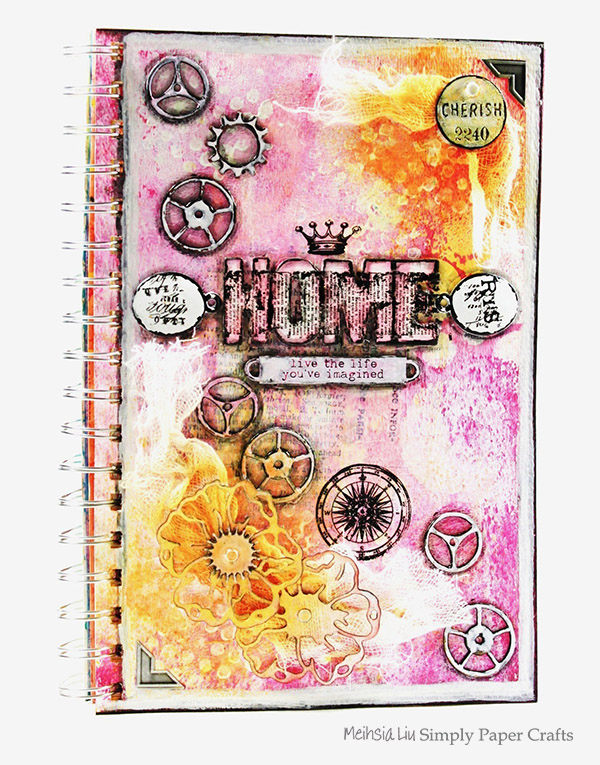
Made by: Meihsia Liu
 |
 |
 |
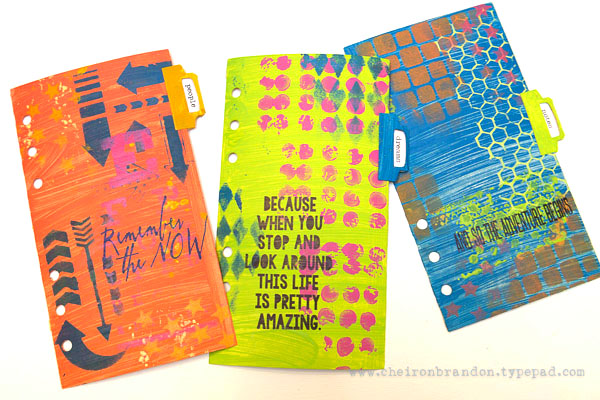
Made by: Cheiron Brandon
 |
 |
 |
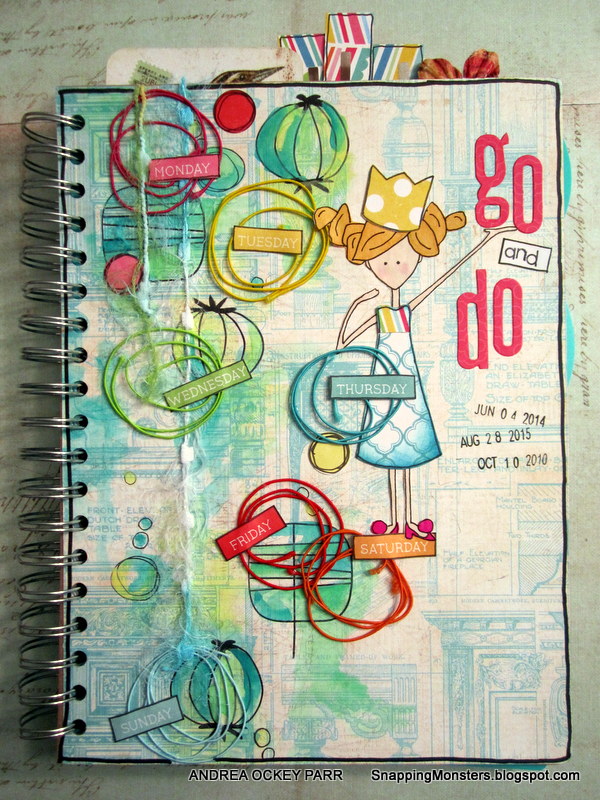
Made by: Andrea Ockey Parr
 |
 |
 |
From: Tim Holtz Distress Ink Color POP: Hickory Smoke!: Ericka Strange
Please email Samantha ([email protected]) with your mailing address (if applicable) and the name of the blog you won from to claim your prize!
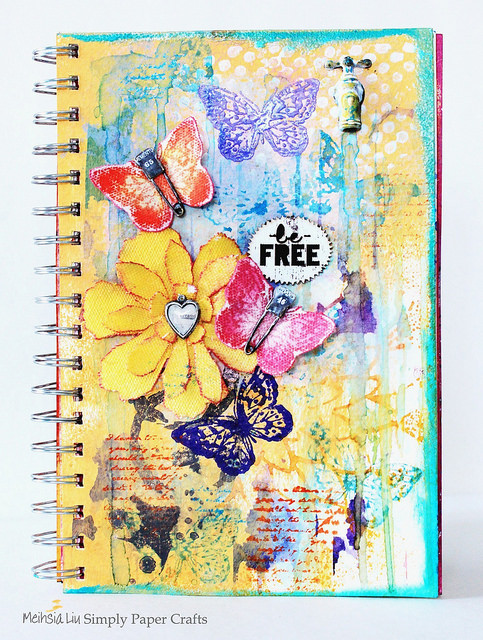
Mixed Media Artist: Meihsia Liu
Hi readers! Happy Sunday! I hope you love these mixed media features as much as I do. :) Today we’re featuring Meihsia Liu, who also happens to be a design team member on our Monday Challenge Blog. She inspires me each week. Her use of color, texture, and embellishments is always impeccably done, and we’re so happy to put a spotlight on three of her favorite projects!
Enjoy!
SUPPLIES:
 |
 |
 |
 |
 |
 |
 |
 |
 |
 |
 |
 |
 |
 |
 |
 |
 |
 |
 |
SUPPLIES:
 |
 |
 |
 |
 |
 |
 |
 |
 |
 |
 |
 |
 |
 |
 |
 |
 |
 |
 |
SUPPLIES:
 |
 |
 |
 |
 |
 |
 |
 |
 |
 |
 |
 |
 |
 |
 |
|
 |
Blog Candy Alert!! Follow our blog via email and comment on this post for a chance to win a special blog candy!


