Tim’s Tags Christmasfied!
Happy Friday everyone!! It’s Shari here with something special. Last month Heidi and I had the opportunity to visit Tim Holtz and Mario Rossi in Prescott AZ where we played in Tim’s studio. There was lots of laughter, Christmas music, 3:00pm coffees and amazingly enough… creating!
We decided to do a spin on Tim’s 12 tags for 2015 where each of us used a tag as inspiration and Christmasfied them! We were each working away on our own versions so I didn’t have a chance to see exactly what everyone was using, but will do my best to explain.
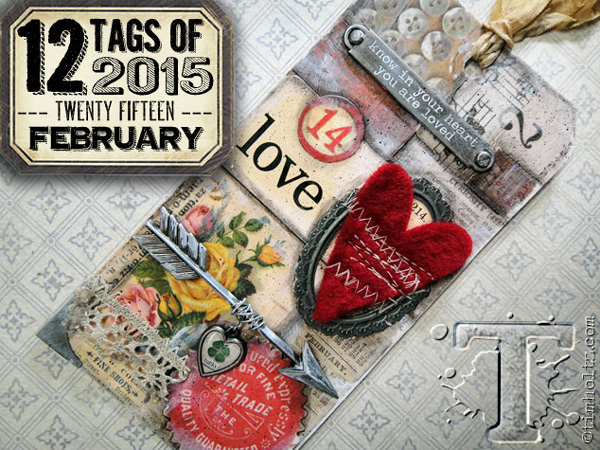
Tim chose to use the February tag for his inspiration. He started by using the Festive Ephemera pack as the base by gluing them down randomly. He used a Black Soot marker to outline the ephemera and smudged it with his finger. Picket Fence Distress paint was used to distress areas of the tag. From there he die cut a heart from this really cool vintage felt and sewed it in place using various stitches over an Industrious sticker frame. Then he used some Idea-ology pieces and stained Crinkle ribbon to finish it off.
Tim’s supplies
 |
 |
 |
 |
 |
 |
 |
 |
 |
 |
 |
 |
 |
 |
|
|
 |
 |
 |
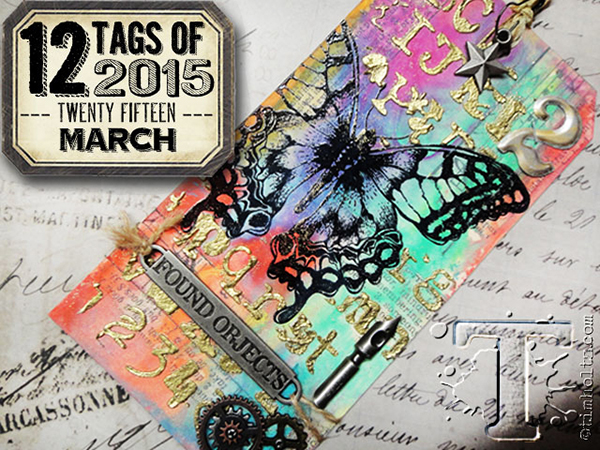
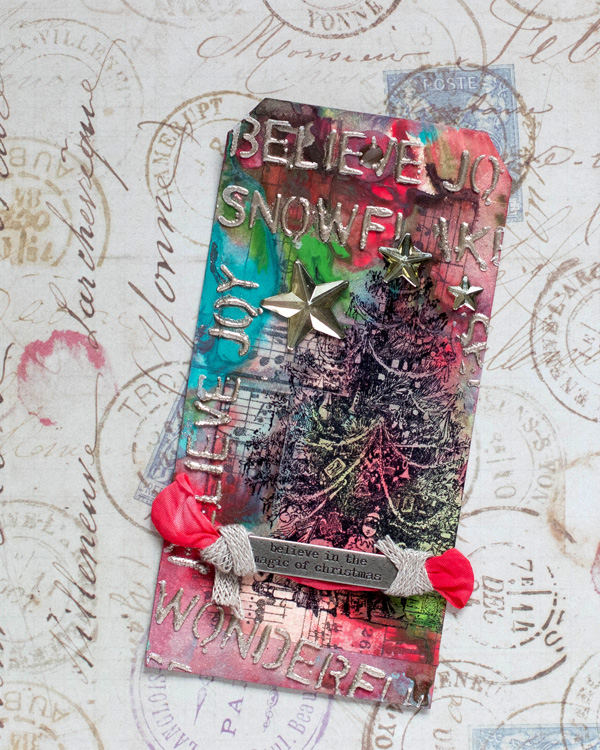
Heidi used the March tag for her inspiration where she changed out the butterfly and used a Christmas tree image. She started out covering areas of her tag with music tissue tape and used the marbling technique use bright Distress paints. The next step was to stamp the tree using black Archival ink. She stamped and cut a mask of the tree and set in in place. From there she used the Christmas stencil with Texture paste. Before the paste was dry, she used Platinum embossing powder and heated it with a craft tool. Once she removed the mask, she used stars and word band to finish it up.
Heidi’s Supplies
 |
 |
 |
 |
 |
 |
 |
|
|
 |
 |
 |
|
 |
|
 |
 |
 |
 |
 |
|
 |

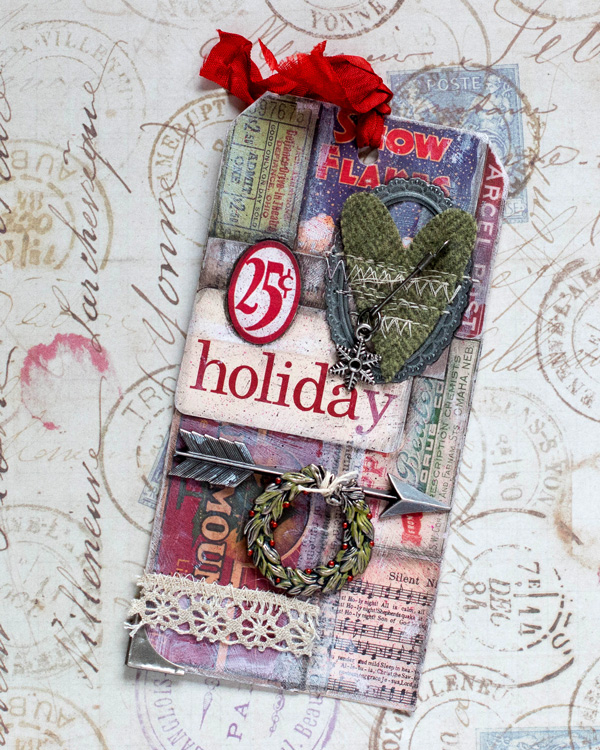
I took inspiration from the November tag and switched out the pumpkin for a poinsettia. I used the Linen stamp with Picket Fence Distress paint for the background. Once the paint dried I used Walnut Stain and Evergreen Bough Distress stains. My favorite technique for this tag was using silver foil on areas where I had applied strokes of a glue stick. I stamped and colored the Poinsettia on Watercolor paper, the used Distress Markers as my paint. I die cut Tidings from cork and used tiny brads to affix it on place.
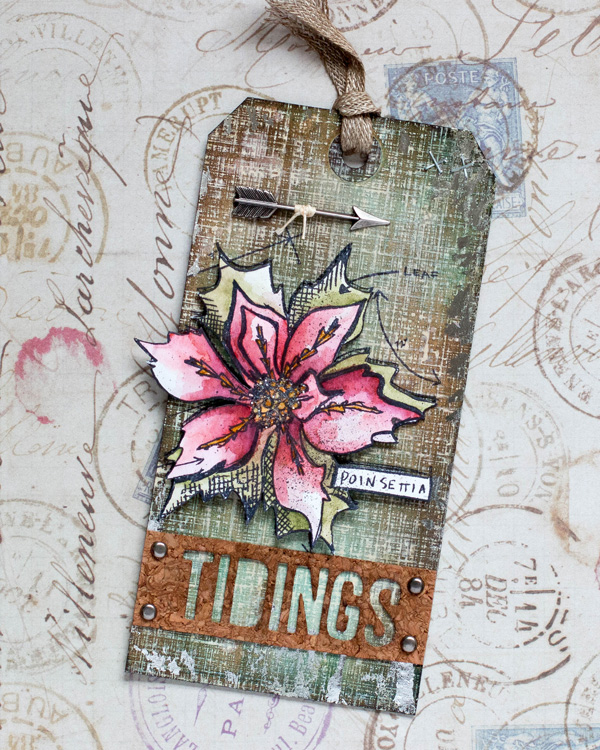
Shari’s Supplies
 |
 |
 |
 |
 |
 |
 |
|
|
 |
 |
 |
 |
|
|
|
|
 |
 |
 |
|
|
 |
 |
 |
 |
 |
|
 |
 |
 |
 |
|
 |

NEW Lawn Fawn Valentines
Hi readers! Happy Thursday! You have to check out the 2016 Lawn Fawn Valentines! They are SO cute and such original designs! We’re pleased to welcome back guest designer Chari Moss of Lawn Fawn to our blog who made a really adorable card for us to share to celebrate the release! Enjoy!
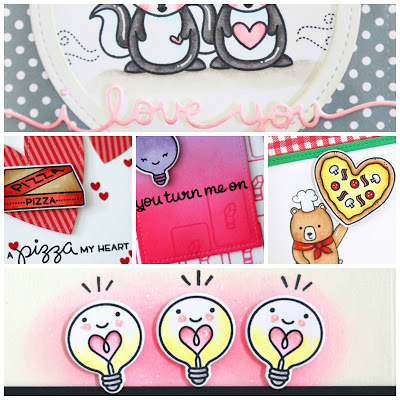
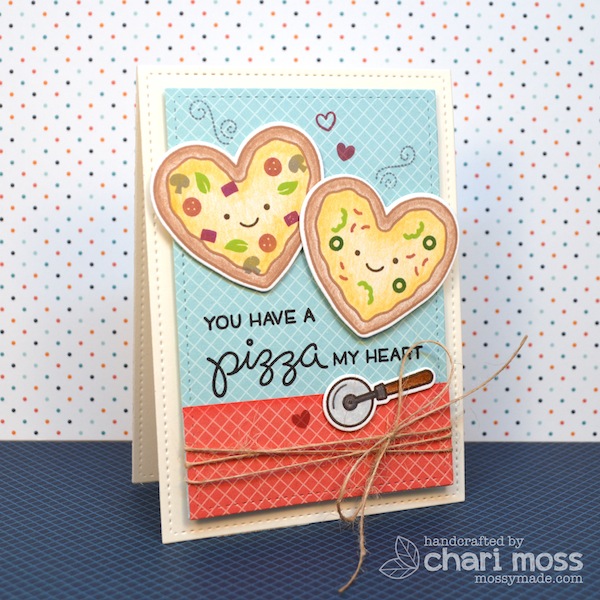
The newest Lawn Fawn releases are HERE! And as usual the new mini Valentine’s release will not disappoint. New dies and new stamps including the new Pizza My Heart set which I used in my card today…who doesn’t love pizza! I really like how you can customize your pizza pie with the toppings you like. For my card I wanted to utilize my many colors of ink to create my yummy pizzas so I stamped the solid topping images in various ink colors. I colored my images with pencils so that the stamping stood out more and I thought I could get the look of melted cheese a little better with my pencils.
I used the new 4 Bar size stitched rectangles to create my card and my pattern paper background. I also rearranged my sentiment to fit my card a little better. I think it’s awesome that you can customize your toppings and since they are separate stamps you can make them any color you like! This may be part of a Valentine release but it could certainly be used year round.
SUPPLIES:
 |
 |
 |
 |
 |
 |
 |
 |
 |
 |
 |
 |
 |
 |

Blog Candy Alert!! Follow our blog via email and comment on this post for a chance to win a special blog candy!
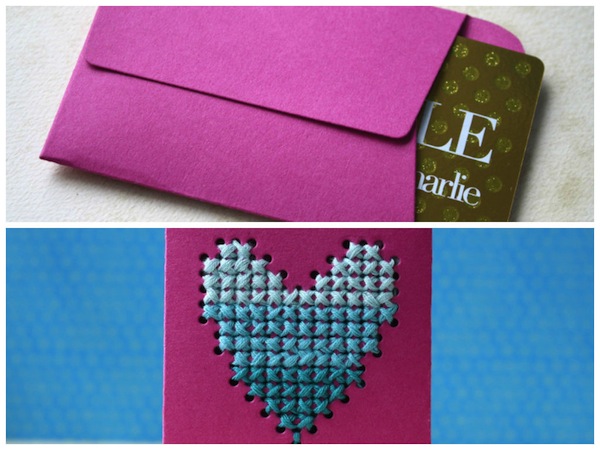
Reprise: 5 Ways to Gift a Gift Card
Hi readers! Happy Wednesday! How is your holiday shopping going? Have you even started? Never fear! Our amazing pal Laura Bassen is here to give us some fun inspiration that we can use all year long to gift a quick gift card in a fun, whimsical, & stylish way! Be sure to watch her fun video below for even more tips & tricks! Be sure to use your teflon bone folder for great enforced folds every time!
Enjoy!
Watch the Video:
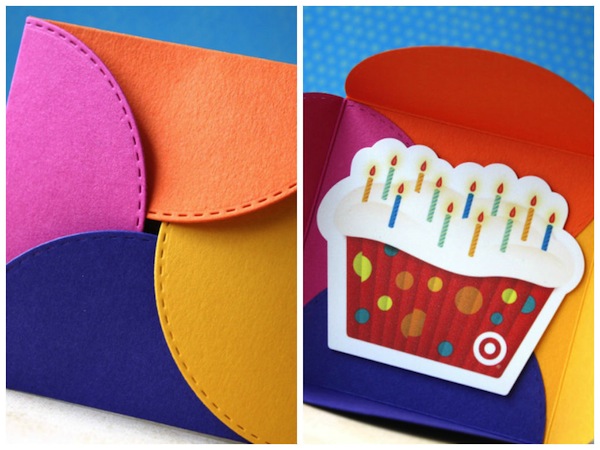
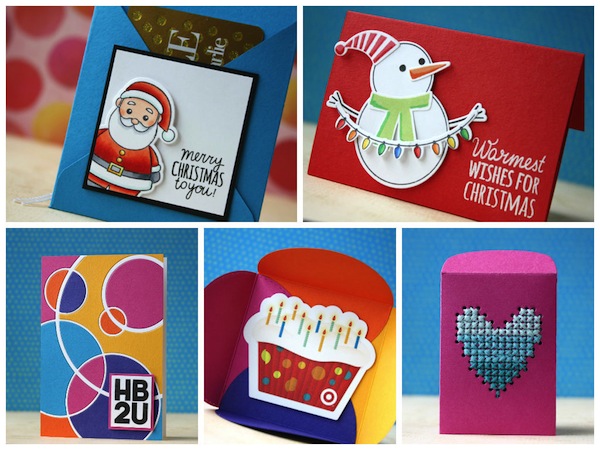
Featuring Stitched Circle Dies
Supplies:
 |
 |
 |
 |
 |
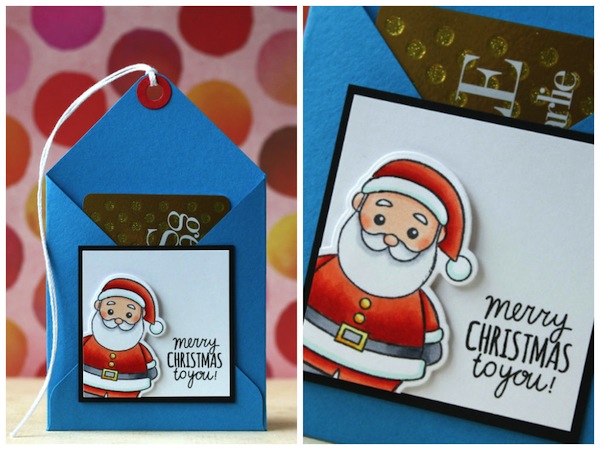
Featuring Winter Friends Stamps
Supplies:
 |
 |
 |
 |
 |
 |
 |
 |
 |
 |
 |
|
 |
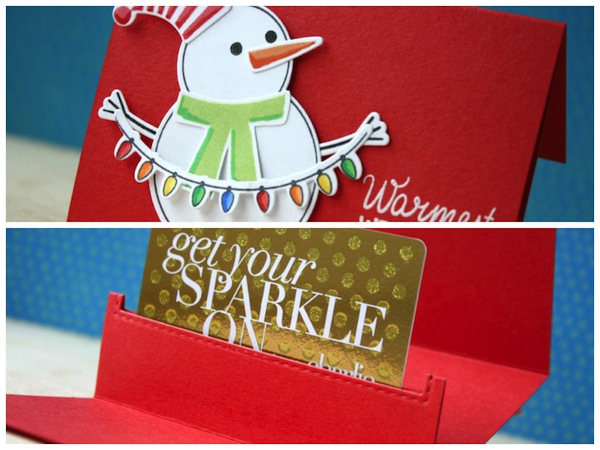
Featuring Build a Snowman Stamps
Supplies:
|
|
|
|
 |
|
 |
 |
 |
 |
|
 |
 |
 |
 |
 |
 |
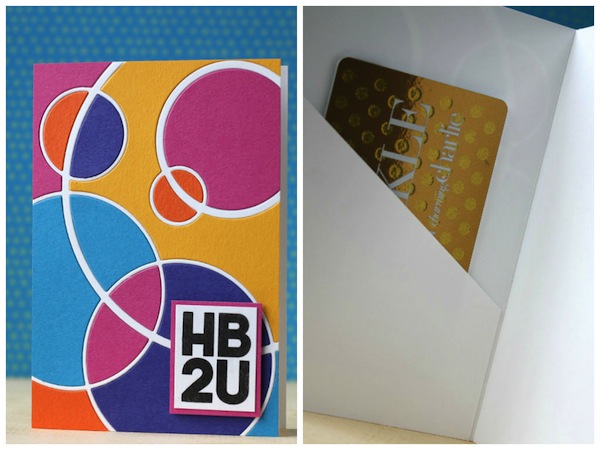
Featuring Mod Circle Die
Supplies:
|
|
|
|
|
|
|
 |
 |
 |
|
Featuring Screen Elements Dies
Supplies:
|
|
 |
 |
 |
|
 |
Thanks for reading today, and thanks to the awesome Laura for these great ideas!
Blog Candy Alert!! Follow our blog via email and comment on this post for a chance to win a special blog candy!


