Advent Calendar Extravaganza with Taheerah Atchia
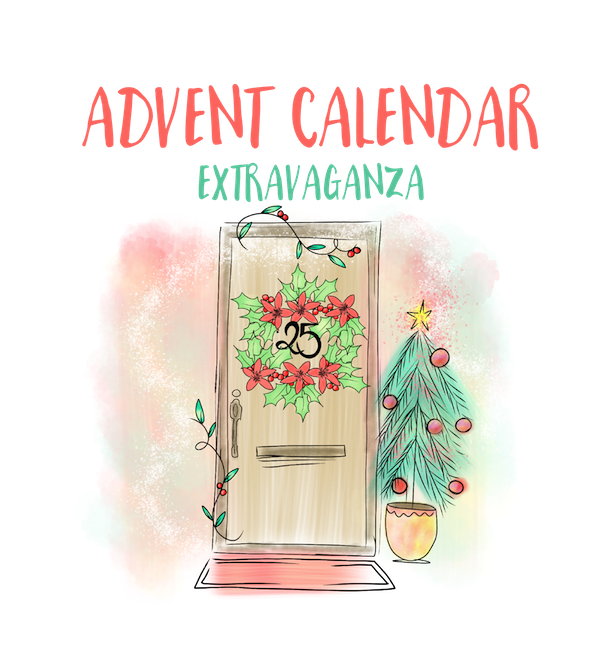
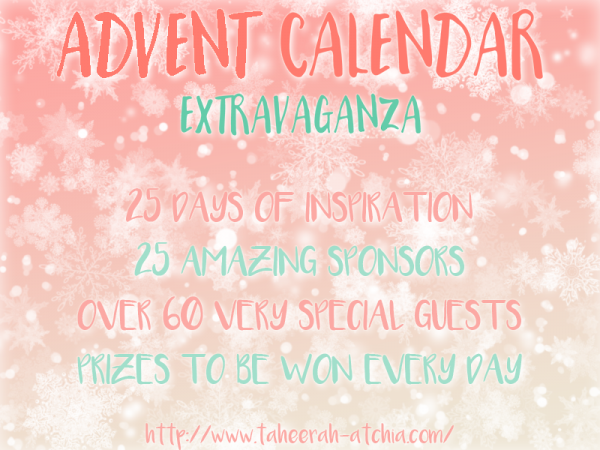
Advent Calendar Extravaganza is -the- festive event of the season! This ‘hop with a twist’ was dreamed up by Taheerah Atchia and features surprise destinations each day! Joining in the fun with Taheerah are over 60 special guests – each serving up some fantastic Christmas inspiration! Just like an Advent Calendar, you’ll never know where you’re going to be visiting next until you ‘open the door’!
And that’s not all! With 25 *amazing* sponsors taking part as well, your crafty wish list is bound to get a boost with a chance to win a prize EVERY SINGLE DAY!!
Join in the fun every day at taheerah-atchia.com to see what special surprises wait behind the door!
It’s not a party without a prize – and with prizes every day there are several chances to win! Today’s prize is supplied by us, so you’ll definitely want to get your hands on it! Simply leave a comment on this post to enter – then head back to taheerah-atchia.com and leave a comment there too to double your chances! Don’t forget to grab the other surprise destinations from Taheerah’s blog and head over to them to leave comments there as well to improve your odds even more! You have until 7am EST on Thursday 31st December to leave all your comments!
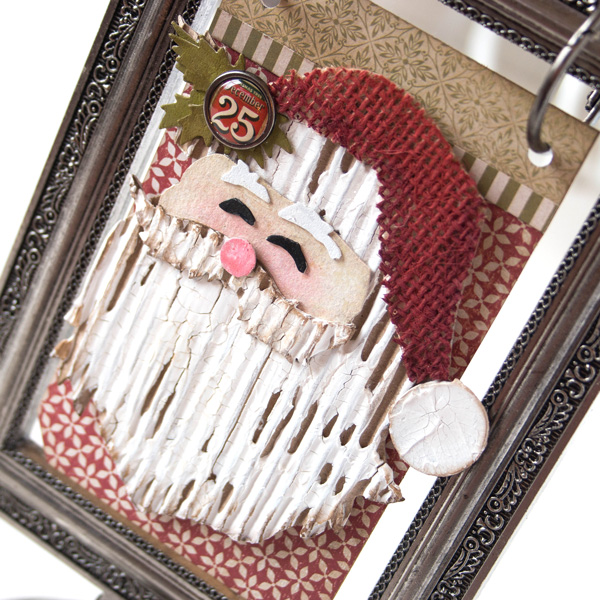
I have a project for you today using the Tim Holtz Texture Surfaces, St Nick Bigz Die, Flip Frame and Distress Paints!
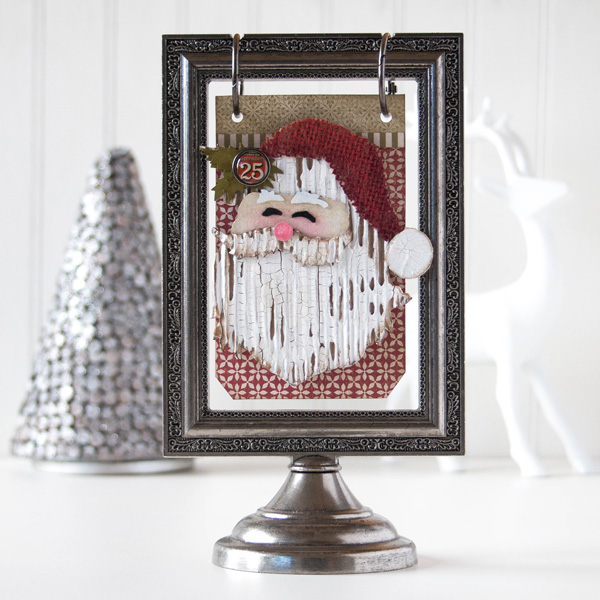
I love all the texture of the corrugated and burlap plus a bit of crackle paste! I’ve kept it simple to let all the different surfaces stand out.
I’ve shot a full process video, you can watch it below or on our YouTube channel. Enjoy!
Don’t forget the Advent Calendar Extravaganza runs from 1st-25th December inclusive so make sure you visit taheerah-atchia.com every day for fabulous inspiration and amazing prizes every single time! Merry Christmas!
 |
 |
 |
 |
 |
 |
 |
 |
 |
 |
 |
 |
 |
 |
 |
 |
 |
 |
 |
 |
 |
 |
 |
 |
 |
 |
Did someone say cake?
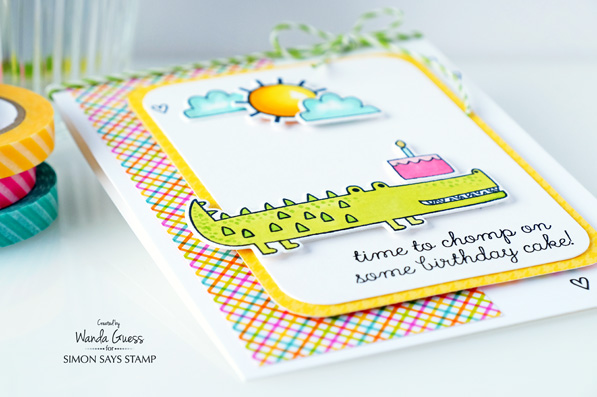
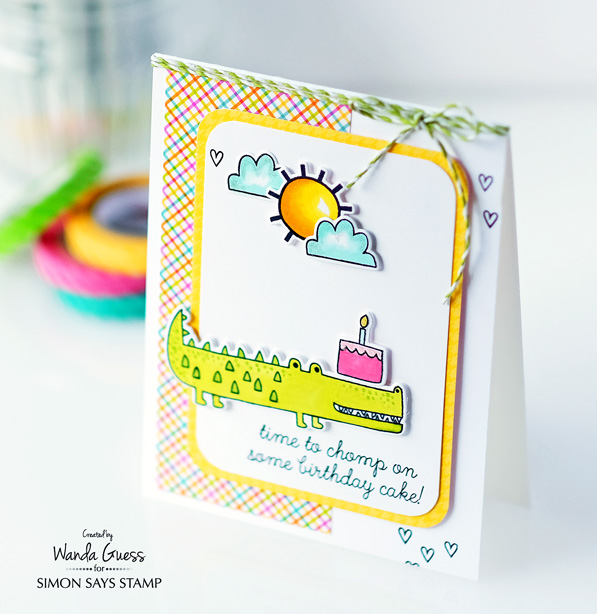
Hi there! Merry Christmas Eve! Everyone here at Simon Says Stamp wishes you a wonderful holiday with your friends and family! Thank you for sharing all of the fun around here during the holiday season. We so look forward to crafting with you in the new year too! Today I’m sharing a birthday card! I don’t know about you, but I’ve been so busy making Christmas cards that my stash of birthday cards is now really low. Today, I’m featuring adorable, fun and cheerful stamps from Reverse Confetti. A cute little gator ready to chomp on some cake!
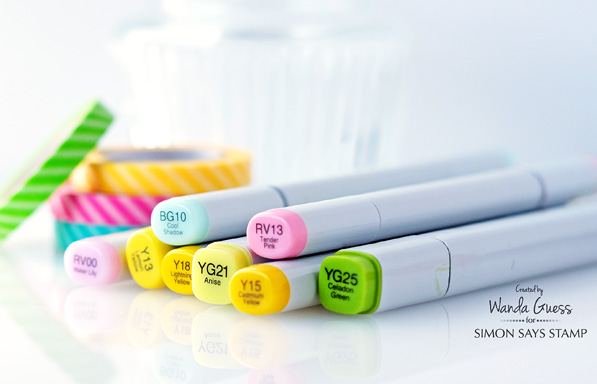
I used two stamp sets to make this card – they go together perfectly in scale and style. I used the Later Alligator and Weather it Together sets. I thought my Copic markers would be the perfect way to color the images, and then I paired it all up with some cute Doodlebug papers.

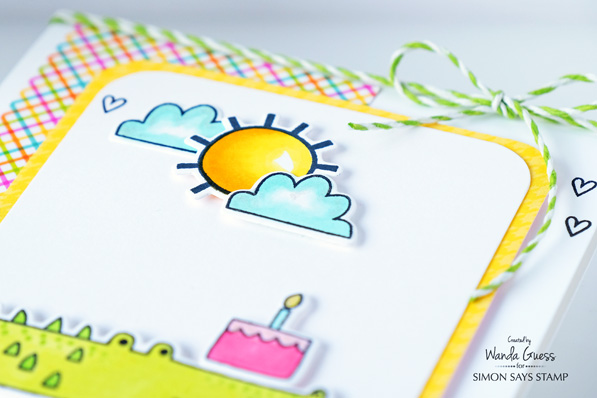
I stamped all the images in crisp black ink and die cut them out! Then I colored them all and set them aside. (I always cut my images out before I color them in case I make a boo boo with the die cutting!) Isn’t this sentiment so fun? I used a corner rounder on my top layer and the yellow layer.

The sun, clouds, gator and cake were all attached with foam squares. It’s hard to see in the photography, but I used a clear Wink of Stella pen to add a bit of sparkle to the cake and the clouds. I added a twine bow in green to match that sweet critter.
Here are my Copic colors for today’s card!
Thanks for dropping by today! See you soon!
SUPPLIES:
 |
 |
 |
 |
 |
 |
 |
 |
 |
 |
 |
 |
 |
 |
 |
 |
 |
 |
 |

Specific Holiday Greetings
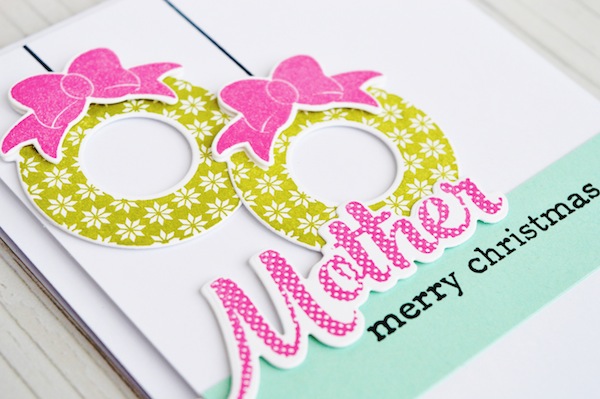
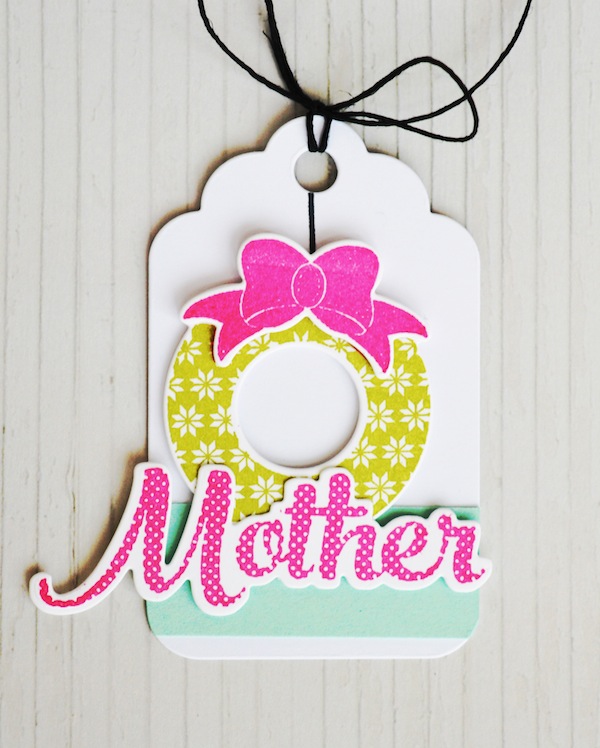
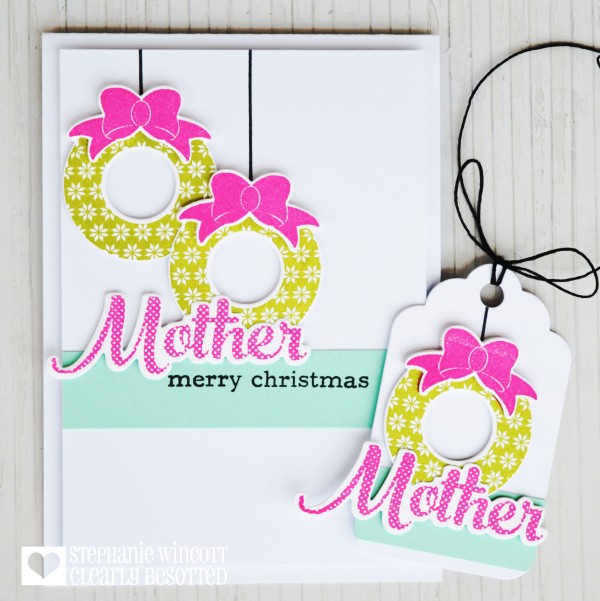
Hi readers! Happy Wednesday! Please welcome back the sweet as spice Stephanie Wincott of Clearly Besotted as a guest on our blog! She has created a gorgeous Merry Christmas Mother card and tag duo to share with us in a modern and gorgeous palette! I feel like the standard Christmas card does not address the recipient. This makes sense for mass sends, but I love the idea of a more personalized card for the extra special recipients and/or gifts you hand deliver.
Check it out and enjoy!
-
Stamp ‘Merry Christmas’ onto a strip of mint card and adhere onto a white mat (slighter smaller than A2 size).
-
Stamp and die cut 2 wreaths and bows, assemble with 3D foam and also adhere to white mat.
-
Stamp and die cut ‘Mother‘ and adhere below the wreaths.
-
Draw the ‘string’ using black marker and ruler
-
Attach the mat onto an A2 card base with 3D foam for dimension
Supplies:
 |
 |
 |
 |
 |
|
 |
 |
 |
 |
 |
 |
|
 |

Blog Candy Alert!! Follow our blog via email and comment on this post for a chance to win a special blog candy!


