The Daily Marker 30 Day Coloring Challenge Blog Hop
Welcome to “The Daily Marker 30 Day Coloring Challenge” Blog Hop. Kathy Racoosin from The Daily Marker loves to color and she is hosting her fourth 30 DAY COLORING CHALLENGE. The premise of the challenge is to color something everyday even if it’s for five minutes. It doesn’t matter what you color or what you are coloring with. Today Kathy has assembled a blog hop to give your creativity a jump start with some very talented ladies.
At the end of the hop you will find an awesome GIVEAWAY AND A COUPON CODE FOR Online Card Classes.
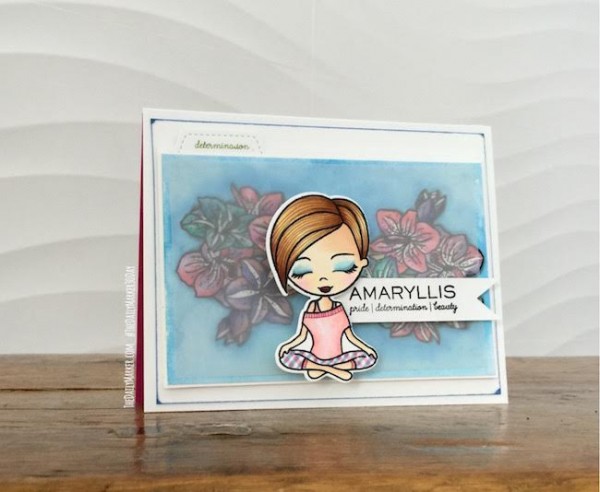
Kathy very graciously made this gorgeous card for us to share in the spirit of this coloring challenge:
Supplies:
 |
 |
 |
 |
 |
 |
 |
 |
 |
Happy Hopping!
Jennifer McGuire
Kristina Werner
Simon Says Stamp Blog <– You are here
Shari Carroll
Laura Bassen
Nichol Spohr Magouirk
Lydia Fiedler
Debby Hughes
Lawn Fawn Blog
WPlus9 Blog
Kelly Latevola
Kathy Racoosin
Additional information about the challenge:
Kathy from The Daily Marker is hosting her fourth coloring challenge called, “The Daily Marker 30 Day” it’s a super fun challenge and a great way to get full use of your supplies.
(When sharing use #TheDailyMarker30Day so Kathy can find your work)
THE GOAL IS: To color something daily even if it’s a few minutes but, certainly not required. It’s been proven that coloring can lower your blood pressure so it’s worth carving out a little time for yourself each day. You will find that Kathy encourages you along the way to stretch your creativity a little bit more and to feel successful with your coloring.
CAN YOU PARTICIPATE in the 30 DAY CHALLENGE? Yes! that would be awesome if you want to participate & feel free to jump in at any time during February! Everyone is welcome! If you miss a few days don’t feel like you have to catch up. The challenge is meant to be fun and with no stress.
WHAT’S NEW THIS TIME? Kathy will have a weekly feature that she will be sharing on her blog that showcases some of your work every Sunday.
Read more on Kathy’s blog, “The Daily Marker” to see how to share you work and if you have questions, how to share, giveaways etc. Prepare to be inspired with daily posts and many videos for 30 days.
Double Masked Watercoloring
Hi all! Kristina Werner here. :)
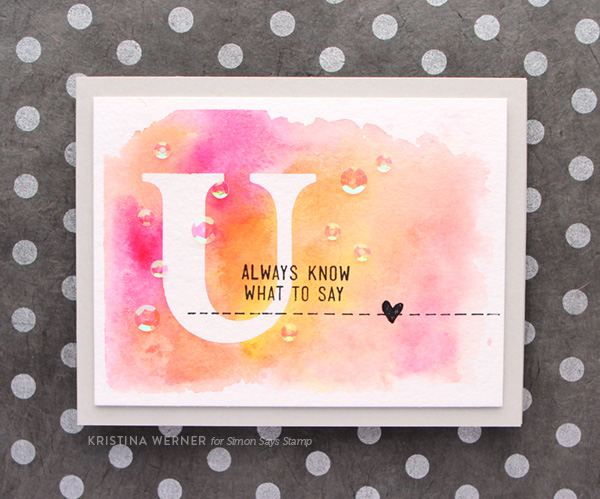
Today I have a new technique for you that I’m calling Double Masked Watercolor. It’s a fun way to use your dies with watercoloring.
As you may have discovered, you cannot use regular masking paper with watercolor. The masking paper cannot handle water. However, the Double Masking technique adds masking fluid to the equation, allowing you to use dies as masks…
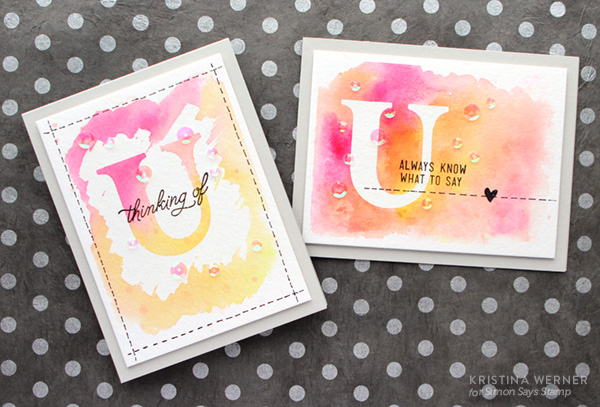
The first part of the double mask is a diecut “stencil” made from masking paper (I used the Big U dies). With the stencil temporarily adhered to the watercolor paper, you quickly paint masking fluid over the top. Immediately (before the masking fluid can dry) remove the masking paper. Then you have a liquid masking fluid shape that it exactly like your die!
For more explanation, please watch my video below. :)
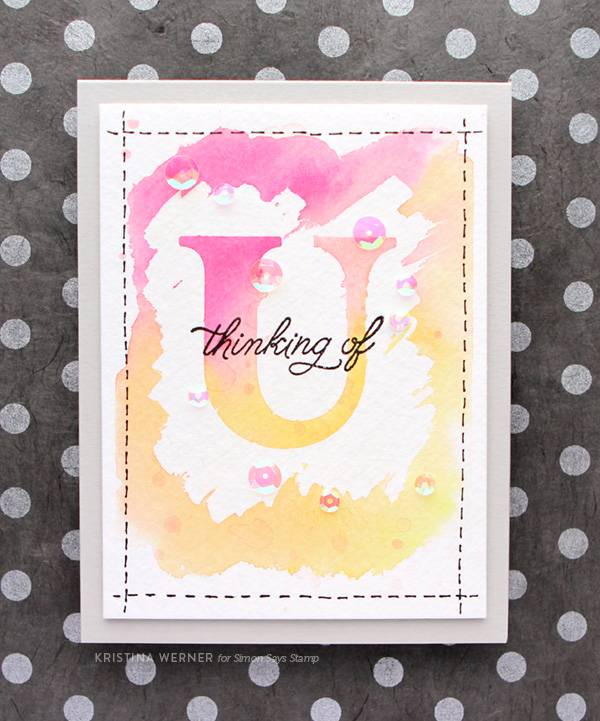
For the card above, I used the positive mask to paint around the letter U with masking fluid (leaving the interior exposed to the paint once the paper mask is removed). And the on the card below, I used the negative mask to paint the masking fluid inside of the letter U.
Let us know in the comments if you try out the technique! :)
Supply List
 |
 |
 |
 |
 |
 |
 |
|
|
 |
 |
 |
 |
 |
 |
 |
 |
|
 |
 |
 |
 |
 |
 |
 |
 |
 |
 |
|
Valentine’s Home Decor DIY Project featuring Tim Holtz Supplies
Hi friends! Happy Sunday! We’re so pleased to welcome back Monday Design Team member, Emma Williams as a guest on our blog! Today she made a stunning piece of art mounted on an altered clipboard. Read on for the full tutorial along with some detail and overall pictures of the project. Also be sure to leave a nice comment for Emma. :) Enjoy!
Hello everyone, Emma here!
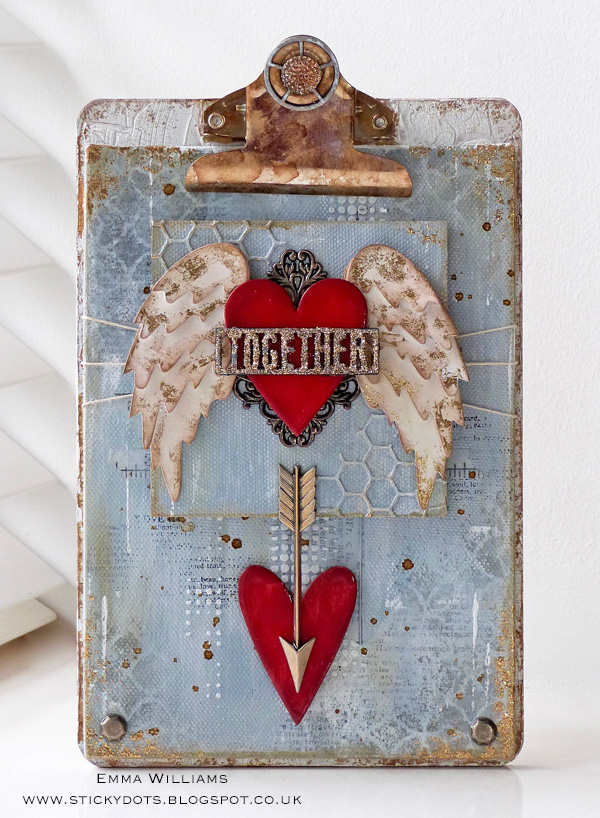
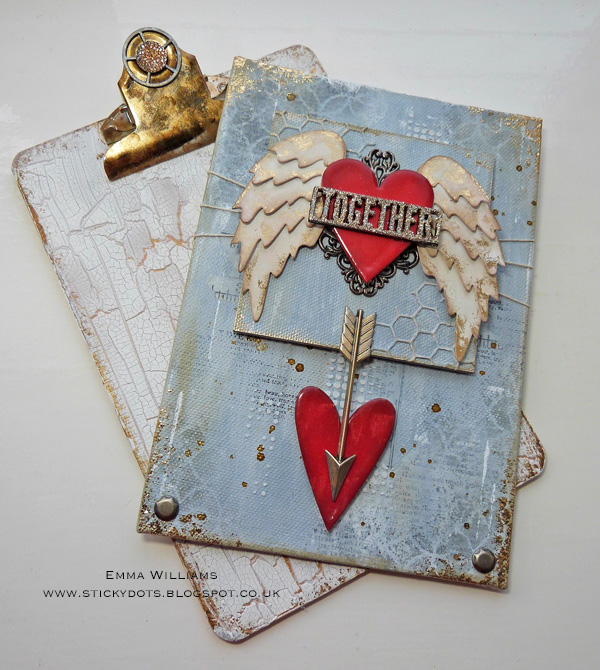
Hope you all had a great week and today, I’m thrilled to have been invited back on the Simon Says Stamp blog, to share a Valentine’s home decor project, which I created using canvas panels, mounted onto an altered clipboard. I was definitely struck by Cupid’s arrow when I started thinking about this project and it’s packed full of ideas that they can also be used for cards or gift tags, if you choose.
- I started my project with two canvas panels, the first measuring 8.25” x 5.75” and the second, 4” square and applied a coat of gesso over the surface of each panel.
- Working with the larger canvas, I applied a layer of Weathered Wood Distress Paint over the top. Let the paint dry before adding torn pieces of Tissue Tape and Tissue Wrap and adhering them randomly onto the surface of the canvas using Multi Medium. After a blast of heat to dry everything, I inked the Love Definition stamp with Jet Black Archival Ink and stamped onto random areas of the canvas.
- I then added a very light, second coat of Weathered Wood Distress Paint, allowing the design of the tissue and stamped wording to still show through the paint.
- Once completely dry, I took Picket Fence Distress Paint and using the dabber on the bottle, swiped the paint over the top canvas to give a worn distressed look. At this stage, I also dipped an old credit card into the paint and created scratch marks onto the panel.
- Apply Texture Paste through the Dot Fade Layering Stencil, adding it around the central area of the canvas.
- To complete the background, I wanted to add some more layers using a stencil and for this, you can use any stencil of your choice but I chose to use the Latticework Layering Stencil. I placed it directly onto each corner and using Pumice Stone Distress Marker Pen attached to the Distress Marker Spritzing Tool, I lightly misted the ink through the stencil, to create one further layer of interest. I then used a paintbrush to flick small amounts of Antiqued Bronze Distress Paint over the surface.
- Use Frayed Burlap Distress Paint to create a narrow border around the edge of the panel.
- Apply Collage Glue to one of the corners of the panel and using the gold coloured foil from the pack of Vintage Foil Transfer sheets, press the foil with the shiny side uppermost over the top of the glue to transfer the gold onto the canvas. Repeat on the remaining corners.

- Wrap a piece of twine, wrapping it three times around the canvas and securing the ends at the back.
- Take the smaller square canvas panel and apply a coat of Weathered Wood over the gessoed surface. Using the Mixed Media dies, die cut pieces of any card using the honeycomb die. Cut the die cut card to create two smaller pieces of honeycomb and apply these die cuts to the top left and bottom right hand corner of the panel using multi medium to secure them into place.
- Add a second layer of Weathered Wood Distress Paint over the top, dry thoroughly and then add a small amount of Picket Fence Distress Paint to create a shabby, distressed look. Set aside to dry before attaching the panel using foam pads to the larger panel, placing it directly over the top of the wrapped twine.
- Using your fingertip, apply light touches of Treasure Gold Gilding Wax around the edges of the small canvas panel and over the top of the die cut honeycomb to give a subtle shimmer.
- Use some more of the gilding wax over the surface of one of the Ornate Plates. Attach the plate onto the centre of your smaller mounted panel, using Glossy Accents to secure it into place.
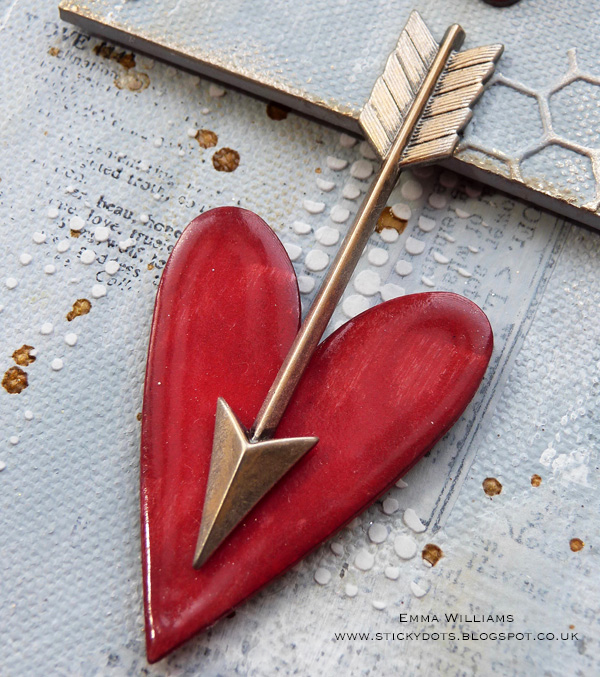
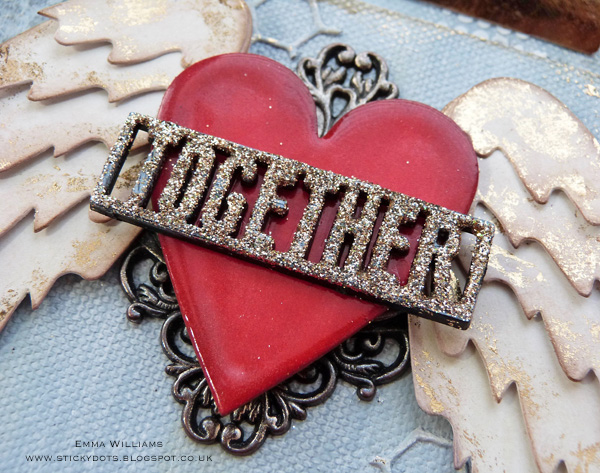
- To create the winged heart embellishment, being by using the Heartfelt die to die cut two of the larger hearts, two different shapes, from chipboard. Gesso each chipboard heart before painting them with Candied Apple Distress Paint. Ink the edges with Walnut Stain Distress Ink.
- Take one of the hearts and dab an embossing pad over the top of the surface. Apply clear embossing powder to the wet ink and tap away the excess before heat embossing. Repeat these steps another couple of times, building up the embossing powder to create a beautiful enameled effect to heart.
- Create a second enameled heart using the above method.
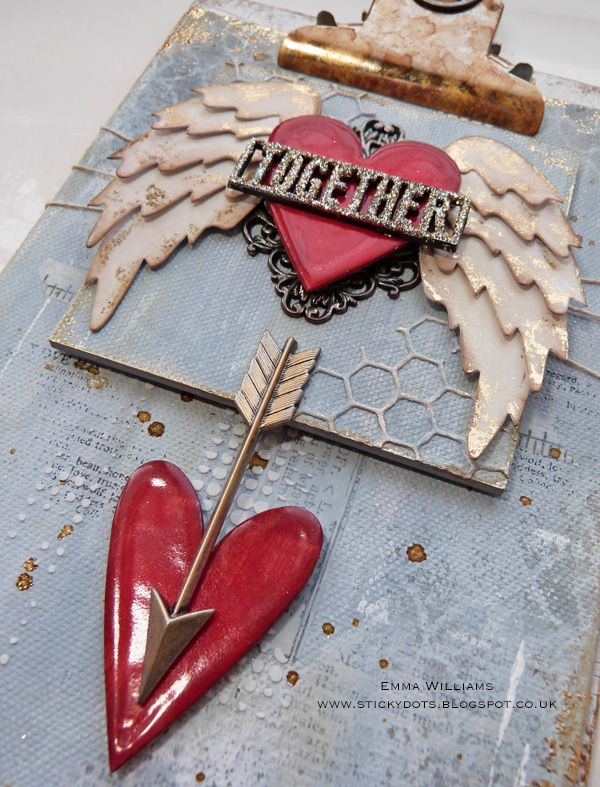
- Die cut the wings from white card and colour each die cut section with Antique Linen Distress Paint. Ink around the edges with Walnut Stain Distress Ink before adding foil highlights using Collage Glue and gold Transfer Foil. Layer and shape the wings using foam pads for added dimension.
- Attach the wings and heart over the top of the ornate plate and attach the second heart below the mounted panel.
- Use the “Together” wording from the Alpha Parts collection and apply a light layer of Glossy Accents over the top. Sprinkle with Vintage Distress Glitter Dust and tap away the excess. Attach the glittered wording across the centre of the heart.
- Colour a large Adornment Arrow with gilding wax and attach the arrow to the small panel, pointing it down towards the second heart, linking them together.
- Attach two hex fasteners to the bottom left and right hand corners as a finishing touch to the canvas.
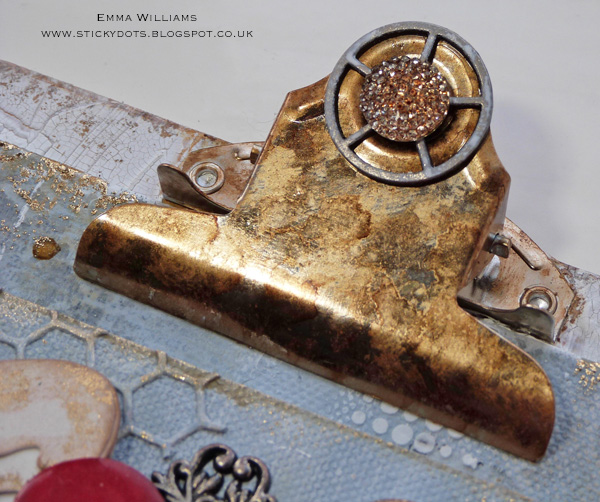
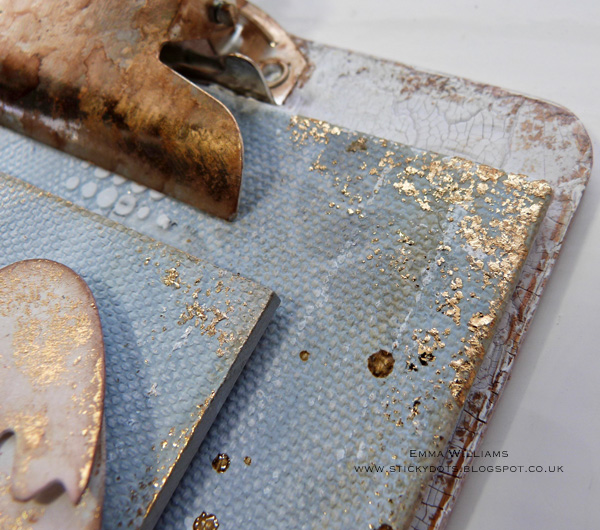
- To alter the clipboard ~ I began by covering it with a coat of gesso and then applied a layer of gold metallic paint over the top.
- Once the gold paint was dry, I used a palette knife to add a layer of Crackled Embossing Paste and allowed for the paste to dry and the cracks to appear.
- Apply a small amount of gold metallic paint around the edges of the board.
- Finally, I used an Alcohol Ink Applicator and used a pouncing motion, to apply a combination of inks to the metal clip. To complete the clip, I added a Sprocket Gear, with an alcohol inked gumdrop in the centre.
I really hope you’ve enjoyed the creative process for this project and that some of the techniques will inspire you to create some Valentine’s projects of your own!
Thank you so much for stopping by today… Happy Crafting!
Emma
Supply List:
 |
 |
 |
 |
 |
 |
|
 |
 |
 |
 |
 |
 |
 |
 |
 |
 |
 |
 |
 |
 |
 |
 |
 |
 |
 |
 |
 |
 |
 |
 |
 |
 |
 |
 |
 |
 |
 |
 |
 |
 |
 |
 |
 |
 |
 |
 |
 |
 |

Blog Candy Alert!! Follow our blog via email and comment on this post for a chance to win a special blog candy!


