Combining Acrylic & Watercolor Painting
Hi readers! Happy Monday! I’m so happy to welcome back blog guest Jocelyn Olson to the blog today! If you haven’t perused her blog at Red Balloon Cards, be sure to stop by! Are you loving these stylish bright cards? Be sure to read on to learn how to recreate them for yourself! Enjoy!
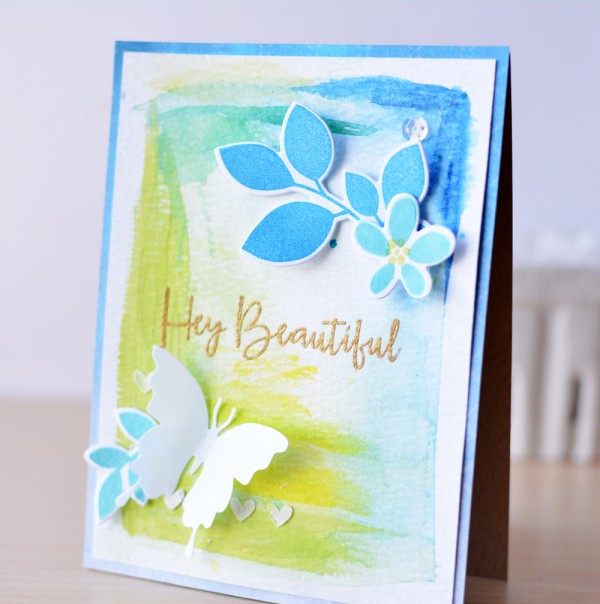
Hi everyone! I’m super happy to be on the Simon Says Stamp blog sharing a Paper Smooches project! We have snow on the ground where I live, but in hopes of Spring starting soon, I made a couple of cheery spring cards with a mix of Paper Smooches products.To start, I used a few techniques to make several backgrounds. I saw a post by Wilna Furstenburg using acrylic paints and watercolors together, and I thought I would try it.
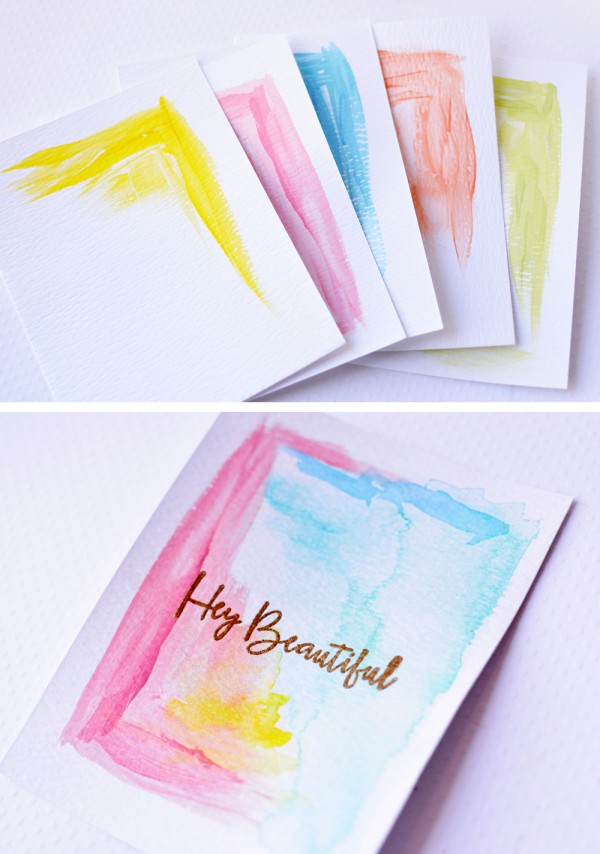
1. Using a flat brush, I painted the backgrounds with acrylic paint. I used acrylic paint to create a resist for the watercolor and to create texture.
2. After allowing the paint to dry, I did a watercolor wash in a contrasting color in the opposite corner.
3. Next, I watercolored around the acrylic paint with a similar color. I blotted the acrylic paint to wipe up the extra water.
4. Once the backgrounds were fully dry, I finished the backgrounds by splattering yellow spray mist.
Here are the results:
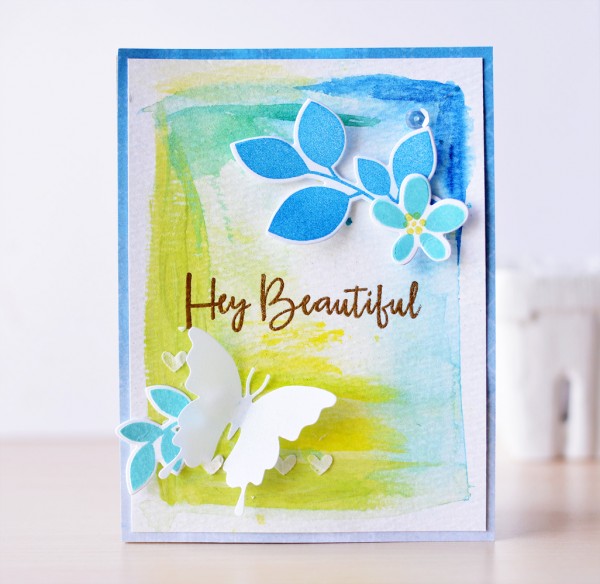
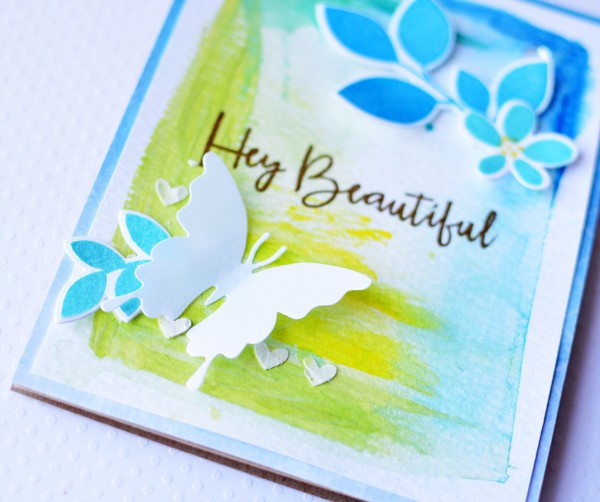
I heat embossed the beautiful sentiment from the Paper Smooches Fun and Flirty set in Ranger Gold embossing powder. Next, I stamped and die-cut leaves and a flower from the Botanicals 3 stamps and dies. This set has a great variety of leaves! I finished the card with a Butterfly Duet die-cut. To adhere the vellum butterfly, I used vellum adhesive (a must have!). Here’s a close-up:
For my next card, I went with the same stamps but a little different look:
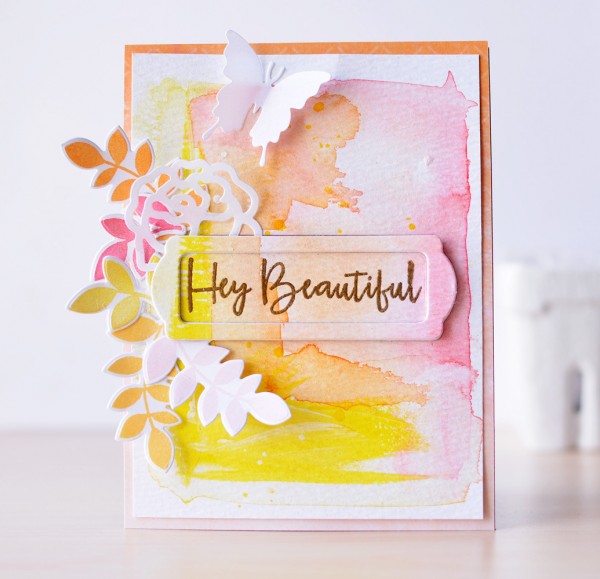
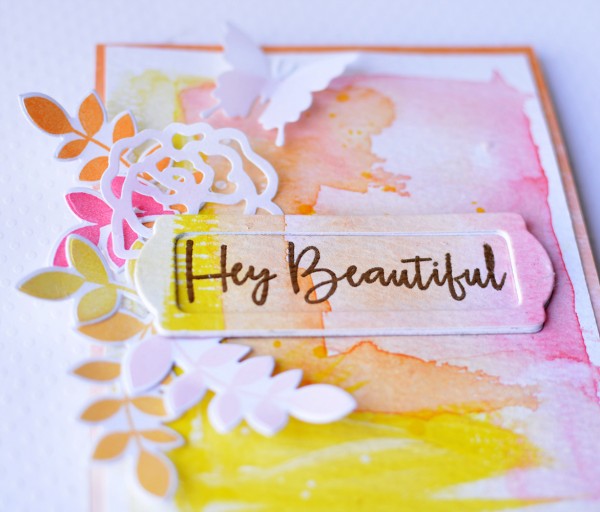
On this card, I scribbled a Lemon Gelato over the paint (under the sentiment). I used the same Fun and Flirty sentiment, but I die-cut the background using the Paper Smooches Bookplates die. I die-cut three more Bookplates to pop up the frame. In addition to the Botanicals 3 flowers, I added a smaller Roses vellum die-cut. I finished the card with the smaller butterfly from the Butterfly Duet.
SUPPLIES:
 |
 |
 |
 |
 |
 |
 |
 |
 |
 |
 |
 |
 |
 |
 |
 |
 |
 |
 |
 |
 |
 |
|
 |
Thanks for reading today, and thanks to Jocelyn for being our guest!

Blog Candy Alert!! Follow our blog via email and comment on this post for a chance to win a special blog candy!
Framed Photo Collage with Idea-Ology!
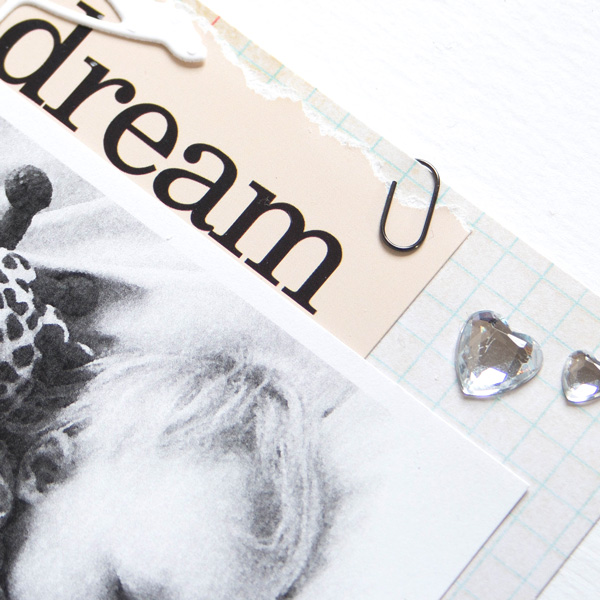
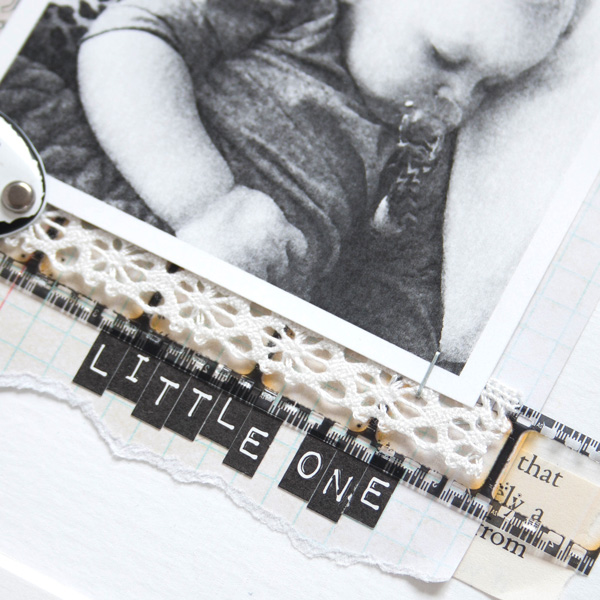
Happy Easter Sunday everyone. It’s Shari here with a frame project which starts out with a small photo and builds into a collage. I love small black and white photos, especially of sleeping babies!

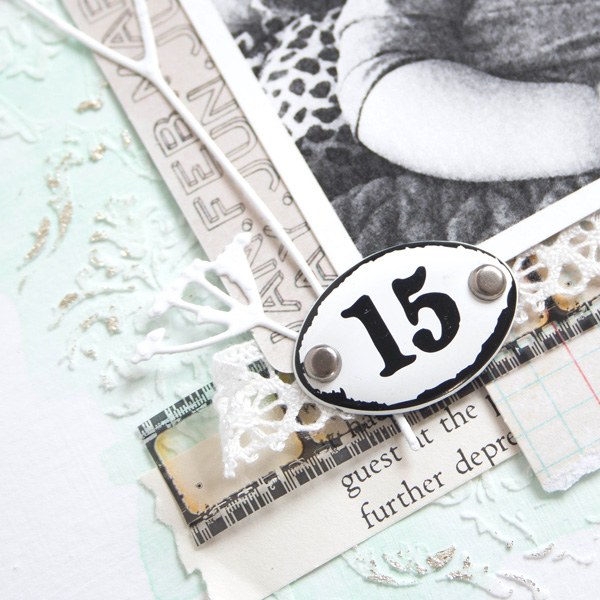
I started with watercolor paper from Ranger and added my first layer of Crazing medium from Tim Holtz; this gave me slightly textured background of brush strokes. Once it was dry, I painted an area with a wash of Cracked Pistachio Distress paint.

I kept my embellishments simple and meaningful. The mirrored hearts are a nice dainty touch; one large and one small to signify Gramma and Granddaughter.
In this shot you can see where I added foiling over the embossing paste. It’s one of those quick treatments you can do for maximum impact. The number plaquette “15” reminds me of Melody’s age (in months) when I took the photo.
Layers around a photo can be clean and simple but full of texture. Pull out your favorite papers, lace trimming, die cut flowers and embellishments to give it a try.
I’ve shot a full narrated process of this project which you can view below or on our YouTube channel.
Blog Candy Alert!! Follow our blog via email and comment on this post for a chance to win a grab bags and blog candy!

Thanks for stopping by today. Be sure to snap shots of your loved ones for future creations. Enjoy!
|
|
 |
 |
 |
 |
 |
 |
 |
 |
 |
|
 |
 |
 |
 |
 |
 |
 |
 |
 |
 |
|
|
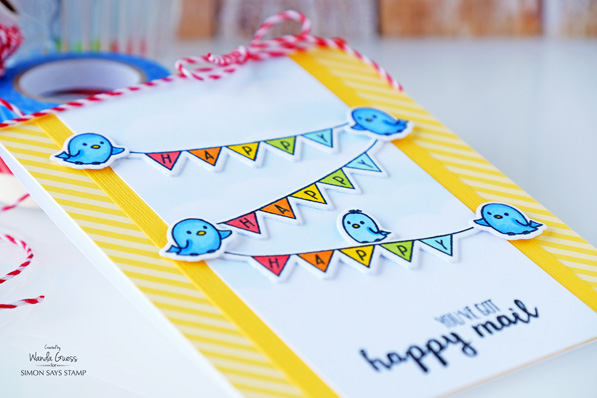
Weekender with Wanda – WPlus9 Happy Mail!

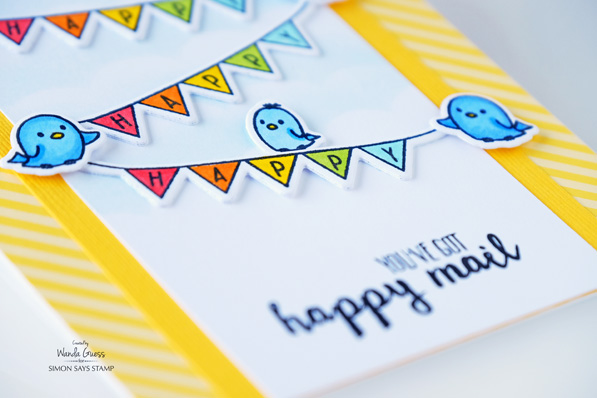
Happy Saturday! It’s time for the latest edition of “Weekender with Wanda” here on the Simon Says Stamp blog! I’m happy to see you today! It’s a lovely Easter weekend here in California. Hope you are having a beautiful weekend too. Today I’m sharing a card made with fun and happy products from one of my favorite companies – WPLUS9! I have lots of pretty stamps from them and they always make me smile. My card for this post was made using the adorable “Happy Mail” stamp set and matching dies. I had fun coloring with my Copic markers to create a cheerful card sure to bring sunshine to someone’s mailbox!
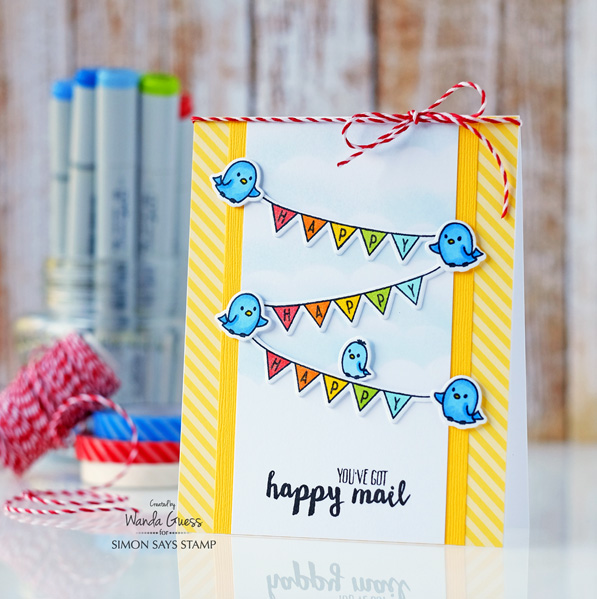
These little banners are so cute! I stamped, die cut and colored three identical banners for my card. I colored the banners with Copic markers (colors below) and then added just a hint of clear Wink of Stella Glitter Pen to them. You can see here that the banners are raised slightly off the page. I did this by stacking two banners on top of each other. I cut three plain banners and mounted the colored ones on top.
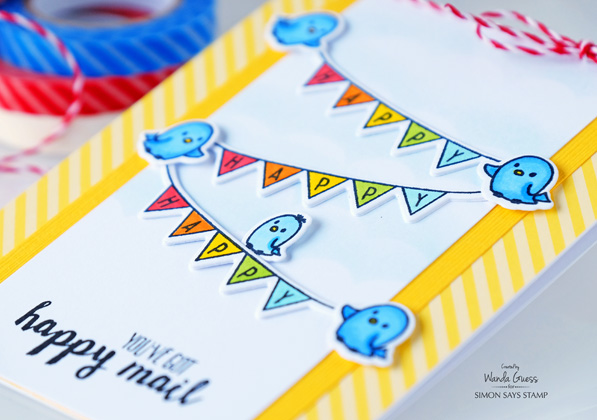
The little birdies were also colored with Copic Markers and they were attached to the card using foam squares. The background striped paper is from the Lawn Fawn “Let’s Polka, In the Meadow” collection. I cut the striped paper to A2 size so my entire card front is that pattern. It’s the perfect shade of happy yellow!
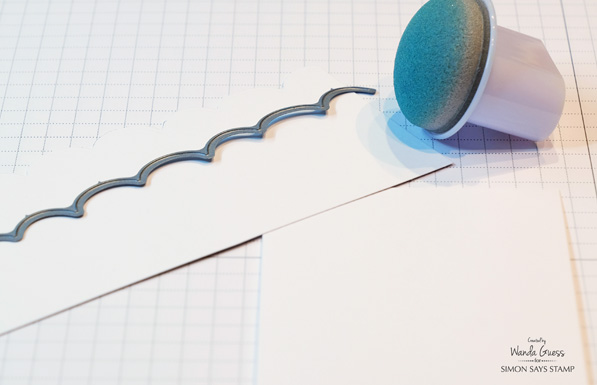
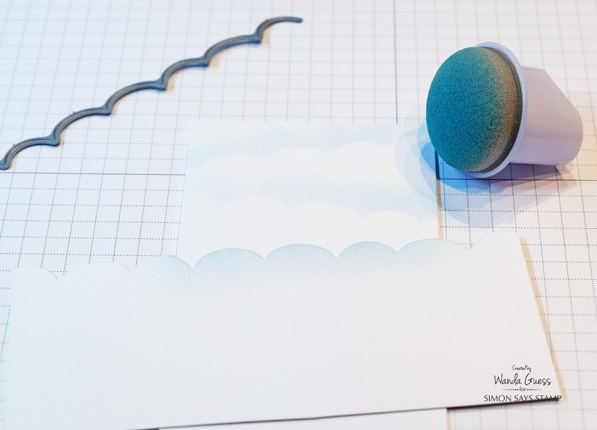
To make my background clouds I made my own cloud stencil using the Simon Says Stamp Wave Border dies set! I cut the die out of white paper. Then I used a sponge dauber and blue ink to make my own clouds. I used a light hand on the ink….and kept moving the stencil down the page making rows of clouds. This is a technique I use all the time!
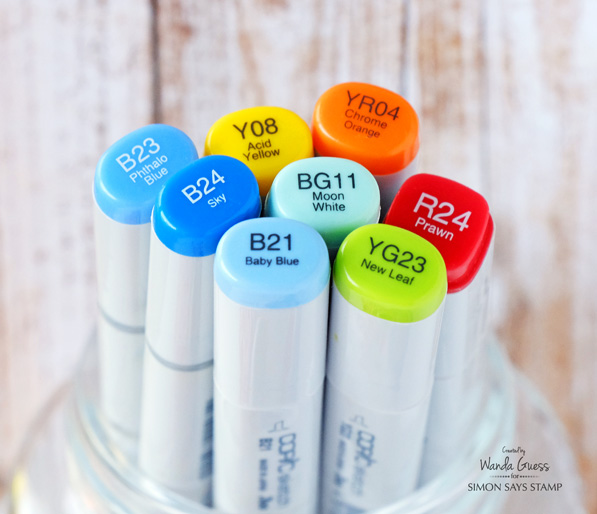
Here are the Copic colors I used for today’s card. The three shades of blue are what I used for the birdies.
You can see the Wink of Stella glitter on the banners in this photo!
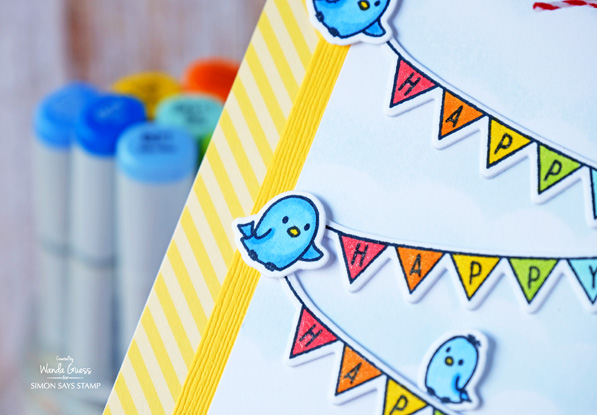
A tiny bit of red twine at the top of the card adds a bit of visual interest and whimsy.

Thank you for spending part of your weekend with us here at Simon Says Stamp! See you back here real soon! Don’t forget that Copic Markers are still on sale for 25% off. Use the code COPIC when you check out.
SUPPLIES:
 |
 |
 |
 |
 |
 |
 |
 |
 |
 |
 |
 |
 |
 |
 |
 |
 |
 |
 |
 |
 |


