Pink & Main: So Cool!
Hi friends! Happy Tuesday! I’m so exited to share this ADORABLE and brightly colored card using Pink & Main stamps and dies by their designer, Kimberly Jensen! Read on and enjoy!
Hi, I’m Kimberly Jensen and I’m a design team member for Pink & Main. I’m excited to share a fun summer inspired card.
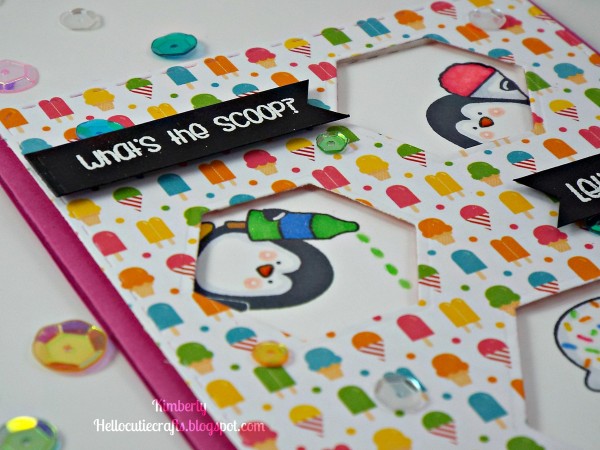
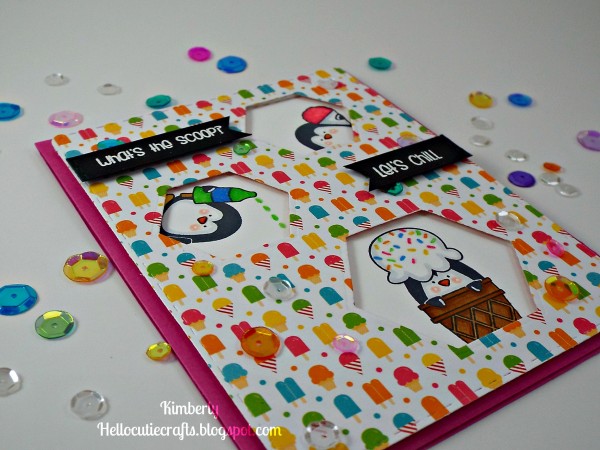
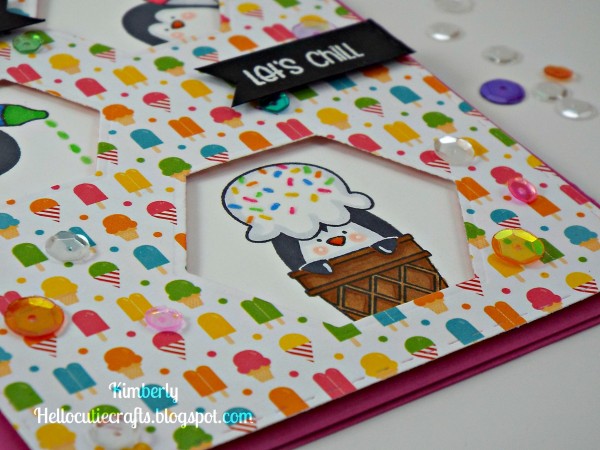
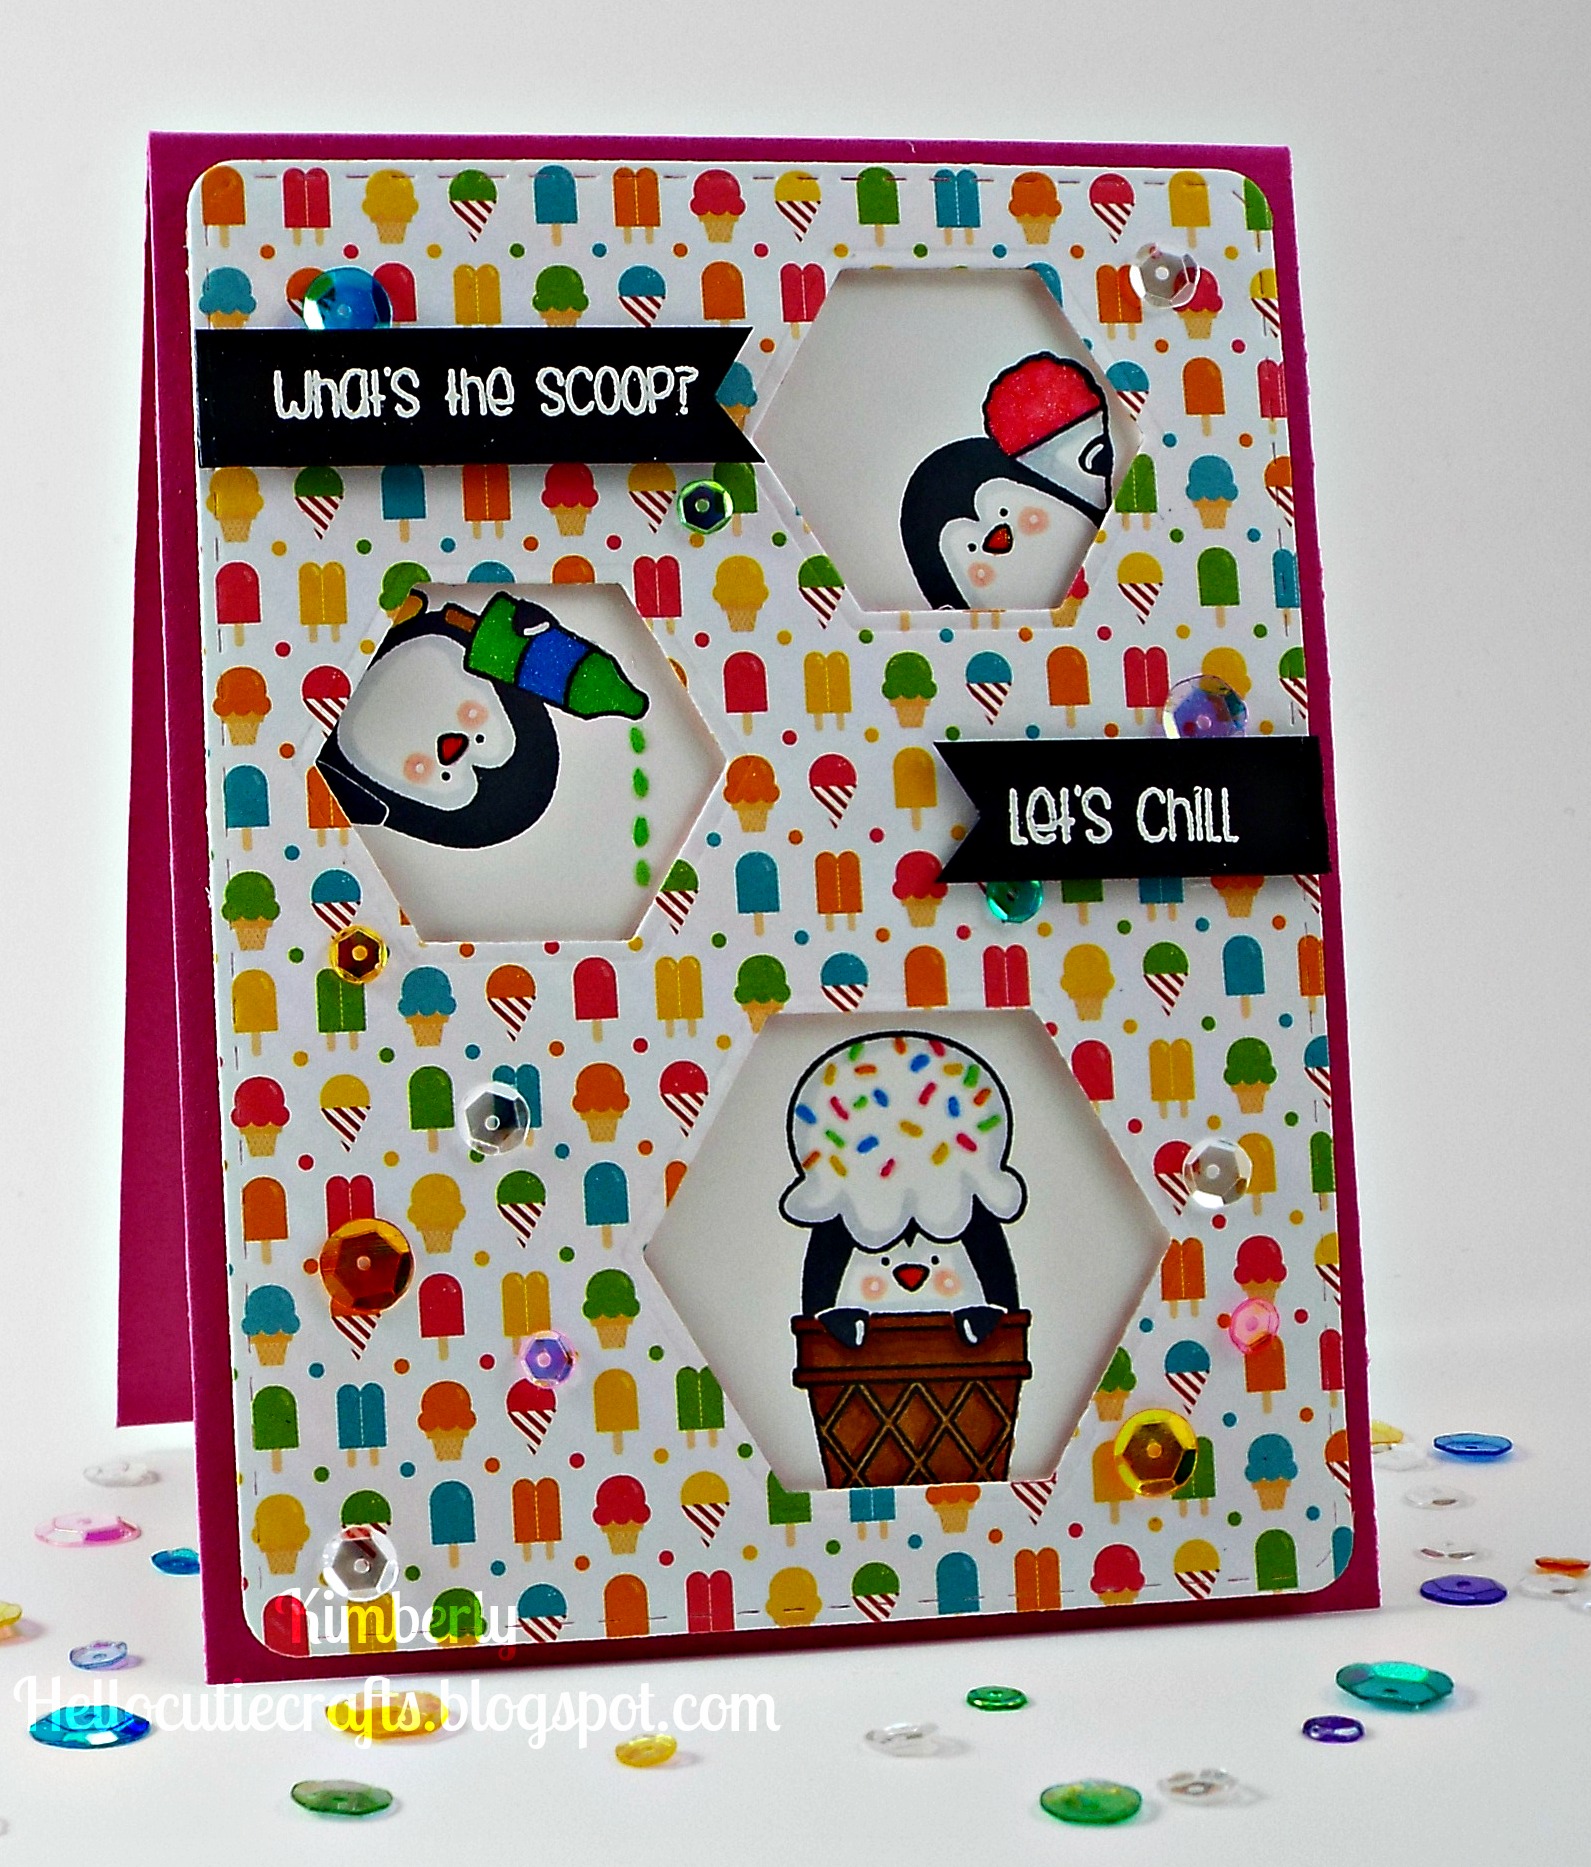
I started the card by creating a Doll Pink card base, then I used the Stitched Rounded Rectangle die and cut one out of white card stock and one out of Doodlebug patterned paper with some sweet treats. Next, I used a new die set called Nested Hexagons, and die cut three windows out of the patterned paper square.
Then I stamped the penguins from the So Cool stamp set, one in each window, and did some simple Copic marker coloring and white gel pen accents. I added some shimmer and shine to each little penguin using some clear Wink of Stella glitter and glossy accents. Then I popped up the patterned paper with some foam tape. I heat embossed two of the sentiments from the same stamp set in white on black card stock. Finally, I added sequins to finish off the card. I hope you were inspired to try out some Pink & Main stamps and dies! Have a wonderful day!
SUPPLIES:
 |
 |
 |
 |
 |
 |
 |
 |
 |
 |
 |
 |
 |
 |
 |
 |
 |
 |

Congrats! Blog Candy Winners!
From: Creative Uses with Debby Hughes; Spooky Eyes Halloween Edition!: Miriam Prantner!
From: Studio Monday with Nina-Marie: Stitched Watercolor Embellishments using Plush Dies: Anne Sturgeon!
Happy National Coloring Book Day!
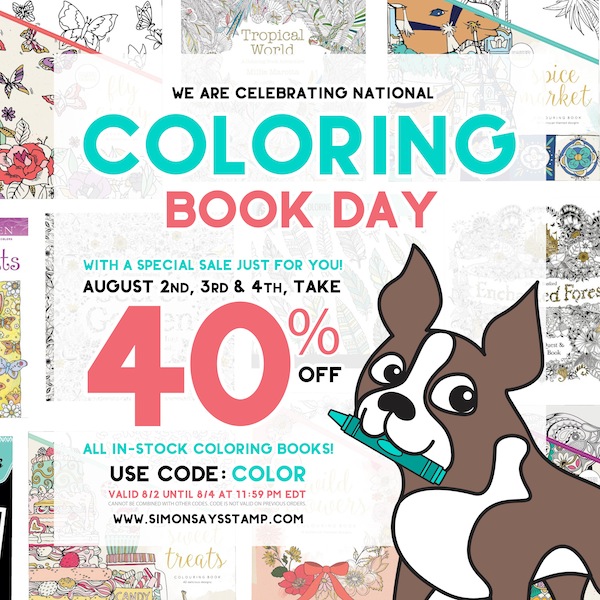
We’re celebrating with a SALE! Use code COLOR to take 40% off any coloring book we carry for a limited time!
Enjoy!
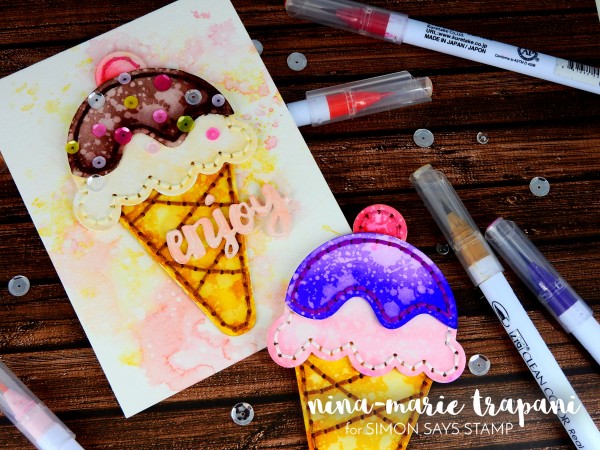
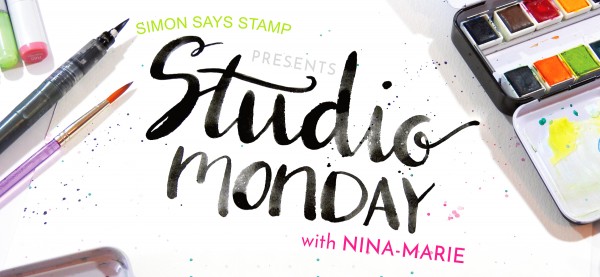
Studio Monday with Nina-Marie: Stitched Watercolor Embellishments using Plush Dies
Hey friends, it’s Nina-Marie back again today with a brand new Studio Monday video! Today I will be featuring some of our very own Simon exclusive dies and how to create some fun embellishments for your cards!
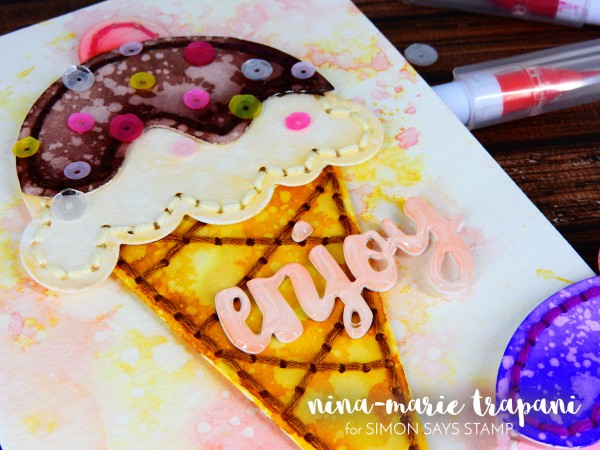
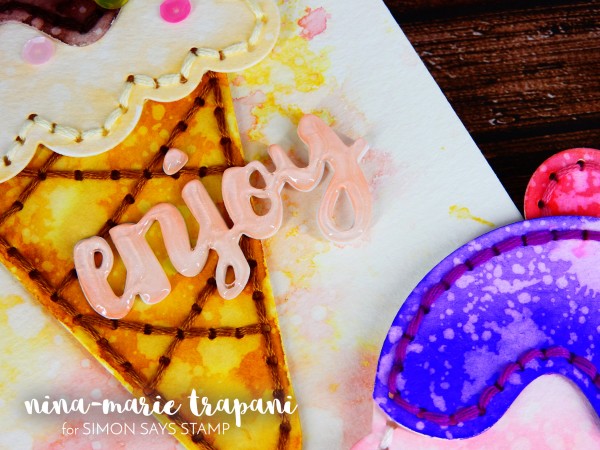
As many of you may know, here at Simon Says Stamp, we love “felties”; cute little critters and happy shapes, die cut from felt and stitched together with love! Our dies designed to help you make cute felt embellishments are called Plush Dies and they really are so much fun to make (click here to see all the inspiration we have on our blog featuring the Plush Dies). But what if you don’t have felt? Or what if you don’t like to use felt in your crafting? Well I’ll be sharing with you how to create these fun little ice cream cones using our newest exclusive Plush Die: Plush Ice Cream Cone!
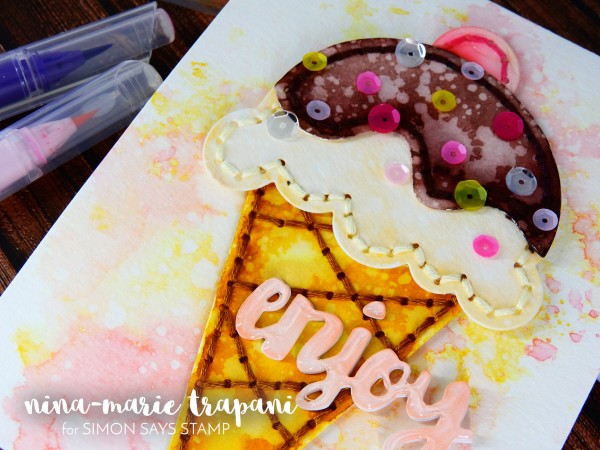
This is a great project for kids too! You could die cut the pieces for them from watercolor paper (or cardstock, depending on the medium they will use to color the ice cream cones) and then let them go to town coloring! If you want to go with adding the stitching details as I have on this card, you can find dull-point needles for the kids to use too; our Plush Dies all create the stitching holes for you when you run the dies through your die cutting machines, which make these super easy to sew together! And don’t feel like you have to add the stitching details; these look super cute too without the sewing as well!
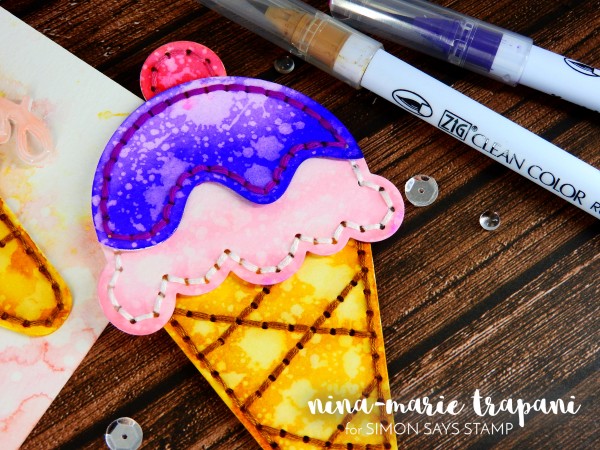
I used Zig Clean Color markers to do my watercoloring today; if you are interested in the color combinations I used, I’ll have them listed for you below and also in the video. I’ve named my ice cream cones with their very own “flavors” because you just HAVE to (there’s got to be a rule that says that somewhere)!
Vanilla Ice Cream Cone with Chocolate Fudge Icing: Flesh Colour 071, Light Brown 061, Beige 072, Light Pink 026, Wine Red 024, Dark Brown 062
Strawberry Ice Cream Cone with Berry Icing: Light Brown 061, Beige 072, Red 020, Wine Red 024, Light Pink 026, Deep Violet 084
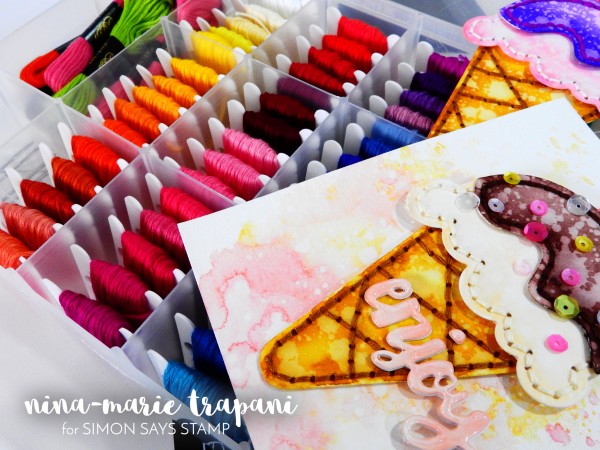
I also show in the video my FABULOUSLY pretty, rainbow assortment of embroidery floss; I use the Janlynn Cotton floss and I store it all in my Darice Floss and Needle organizer (which I LOVE because it’s so handy in keeping everything nice and tidy!). I don’t know about you, but I often times used to have trouble keeping my floss from getting tangled. When I found the Darice organizer, I bought a bunch of plastic floss cards as well and wound all my floss colors around the cards. This not only keeps the floss from getting tangled, but I also have it neatly stored in a portable storage case! I wanted to make sure I shared this with you in case it was any help in finding a storage solution for your own embroidery floss!
To see how I created these ice cream cone embellishments, be sure to check out the video below or on our YouTube channel! And be sure to subscribe to both our blog and YouTube channel for more weekly inspiration!
WATCH THE VIDEO
SUPPLIES:
 |
 |
 |
 |
 |
 |
 |
 |
 |
 |
 |
 |
 |
 |
 |
 |
 |
 |
 |
 |
 |
Blog Candy Alert!! Follow our blog via email and comment on this post for a chance to win a special blog candy!


