A Sweet Colored Treat!

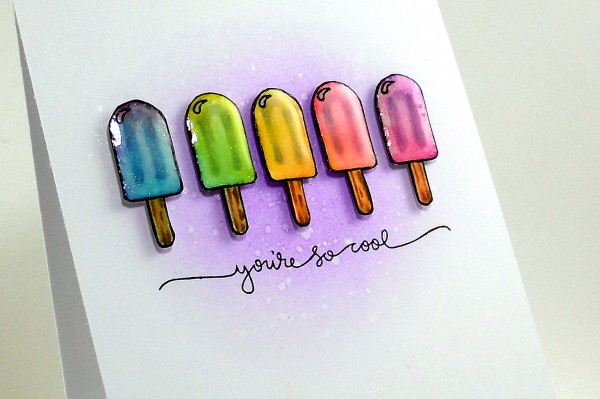
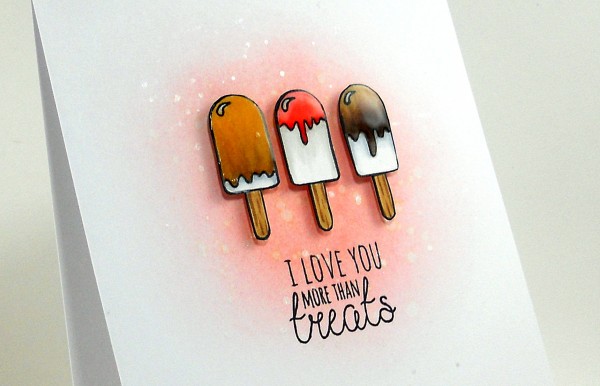
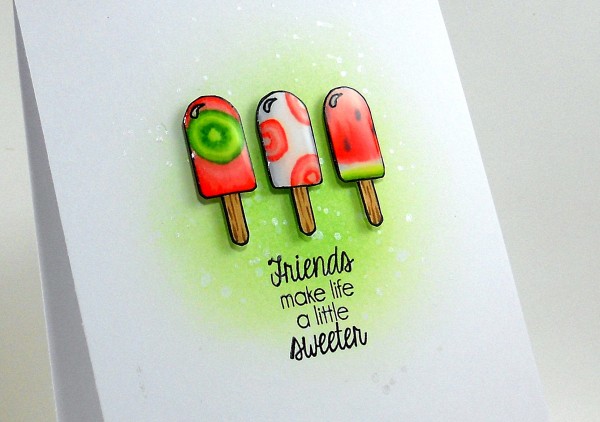
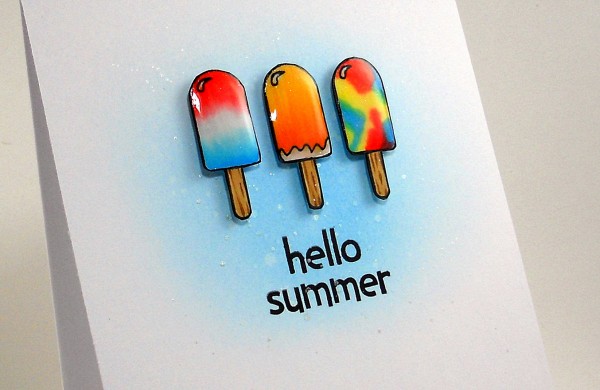
Hi friends! Happy Sunday! I hope you’re having a great weekend so far! It’s my pleasure to welcome back special guest Kelly Latevola to our blog as a guest. Ready to chill? Kelly took a super fun and creative approach to her designs with bright and cheery Copic coloring and the popsicle from our Summertime Animals as her muse! She found perfectly fitting sentiments in other perhaps unexpected places like the Dexter & Simon set, Love labels, and Ice Cream Dream! Please be sure to watch the video and enjoy!
Watch the video:
Supplies:
 |
 |
 |
 |
 |
 |
 |
 |
 |
 |
 |
 |
 |
 |
 |
 |
 |
 |
 |
 |
 |
 |
 |
 |
 |
 |
 |
 |
 |
 |
 |
 |
 |
 |
 |
 |
 |
 |
 |
 |
 |
 |
 |
 |
 |
 |
 |
 |
 |
 |
 |
 |
 |

Blog Candy Alert!! Follow our blog via email and comment on this post for a chance to win a special blog candy!
Weekender with Wanda – We all scream for ice cream!

Greetings and hello! Happy Saturday friends! I’m back with the latest edition of Weekender with Wanda here on the Simon Says Stamp blog! So glad to see you here today and thanks for sharing part of your weekend with me! This week was the Summer Solstice, with a big full moon and that signifies the longest day of the year. More time for Summer fun in the sun, right? Even though I am not a Summer person (I love Autumn) I really do love Summer crafting! I think because of all the cute pineapples and flamingos…and treats! There is a huge trend right now in our crafty world – popsicles and ice cream. So many adorable stamps sets with the theme of cool treats. It’s a happy, nostalgic thing! And that’s just what has inspired my post today.
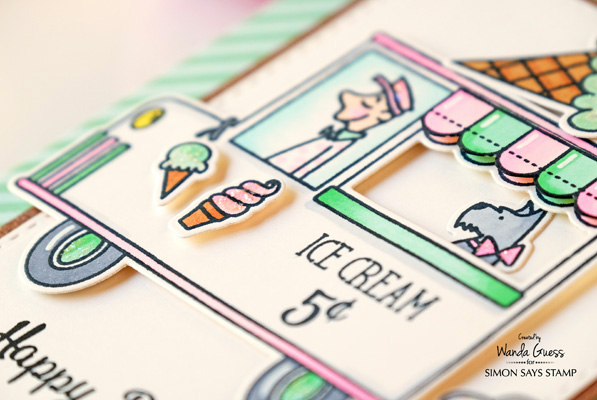
For this week’s post, I’m featuring stamps and dies from one of our favorite companies – Avery Elle Stamps. Their designs are so pretty and cheerful and really great to stamp with. I have tons of Avery Elle stamps in my studio. And, they just came out with an awesome new release too. I’m using one of the brand new stamps sets today – called The Scoop! It has the sweetest ice cream truck, a cute ice cream man, and the most lovable little doggie! The colors for my project were inspired by the look and feeling of an old time ice cream shoppe! Sweet pink and soft mint green, with brown accents.
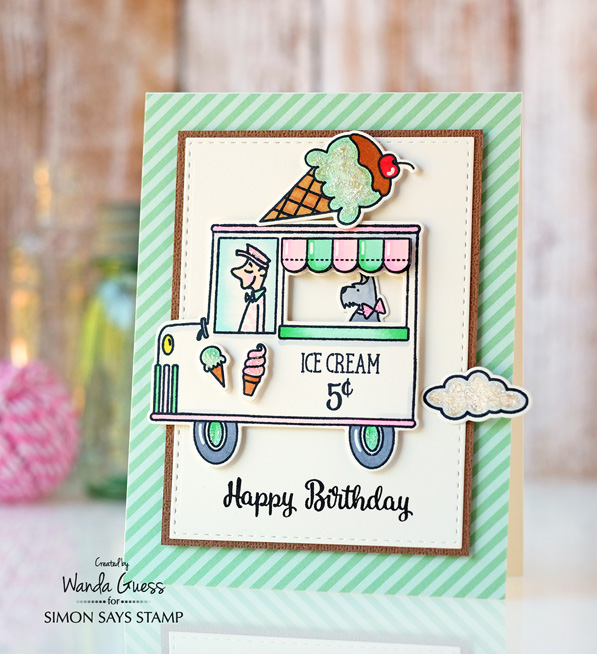
I stamped all of the images with Simon Says Stamp Intense Black Ink (perfect for Copic coloring) and then die cut them out with the matching dies. I like to die cut my images before I color them in case I make a mistake with the die cutting. Something I learned the hard way! I chose shades of soft pink and mint green with accents of grey and brown. I kept the colors to a minimum for an overall muted tone. The images were stamped on cream cardstock instead of pure white.
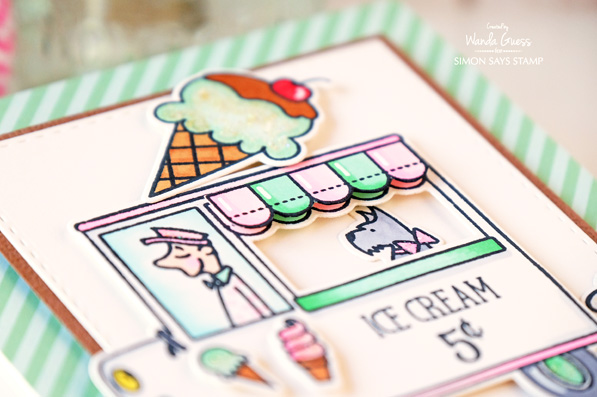
How cute are those tiny ice creams? EEP! I stamped and die cut a second part of the awning on the truck I colored it to match the first one and then layered that piece on with foam squares. This gives just a little bit more visual interest and dimension to the card. Sometimes these little touches make a big difference! The stamp set comes with a big ice cream cone, and I had the idea of adding it to the top of the truck. Too fun. I put the little doggie in the back as a cute passenger with a sweet pink bow.
When you color on cream cardstock, your Copic colors will look a bit different than they do on white paper. I keep a scratch piece of paper and test all my colors first to make sure they look how I want them too. Did you know you can also use your Copics on Kraft paper for a neat look? The exact colors I used are in the product links at the bottom of the post.
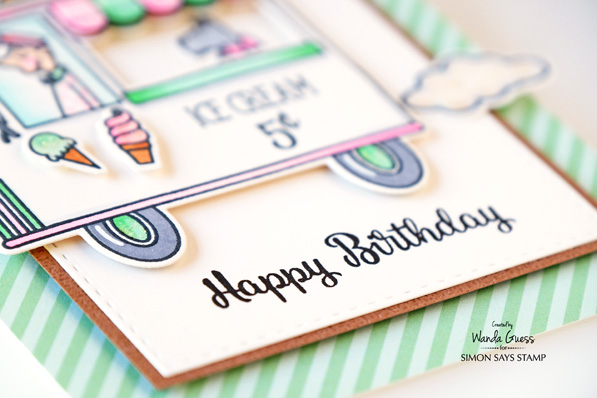
You can never have too many happy birthday cards on hand! See that little puff of exhaust coming out of the back of the truck? That’s a cloud! I stamped and die cut the small cloud from the Weather It stamp set and then added Stickles to it. I think it’s funny and makes the truck look like it’s jammin’ down the road.
My final steps for this project were to add some tiny accents with a white gel pen, and then to add Stickles to parts of the images. Here’s a tip for the Stickles – I put some down on my craft mat and used a tiny paint brush to paint it on those tiny parts. Sometimes the tip on the Stickles container is too large for certain projects.

Everything was attached to the card with foam tape and foam squares. My bottom layer was cut with the Simon Says Stamp Exclusive Stitched Rectangles Dies and then layered with a small frame of brown to offset it from the card base.

I’m wishing you sunny days and ice cream in your future! Have a fantastic weekend! See you soon!
SUPPLIES:
 |
 |
 |
 |
 |
 |
 |
 |
 |
 |
 |
 |
 |
 |
|
|
 |
 |
 |
 |
 |
 |
 |
 |
 |
 |
 |
 |
 |
|
|
 |

Tim Holtz Map die “Across the Miles” Card with Shari Carroll
Happy Friday everyone!
I have a card inspiration for you today which carries a lot of meaning. My oldest sister turns 60 next week and we are 1834 miles away (I Googled it :o)… So, since it’s such a milestone age, I thought it would be nice to make something special for her.
I started out with watercolor paper and the Tim Holtz United States thinlits die. I painted the states with mini Distress inks and a little water.I used a wide variety of colors and even mixed a few.

I put a string between Illinois and Nevada and added the distance of miles with Tim Holtz Number Brads. I also added Happy Birthday and “60” using Chit Chat stickers, Celebration Words and Mini Numerals.
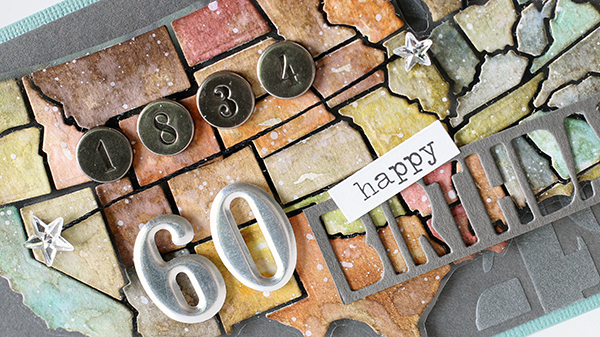
I figured a way to put all the tiny states back together on a card by using a sheet of acetate. I’ve put together a process video, you can view it below or on our YouTube channel.
Thanks for coming by today. I hope you have found some inspiration in my card and have a terrific weekend!

Blog Candy Alert!! Follow our blog via email and comment on this post for a chance to win a special blog candy!
 |
 |
 |
 |
 |
 |
 |
 |
 |
 |
 |
 |
 |
 |
|
|
 |
 |
|
 |
 |
 |
 |
 |
|
|
 |
 |
 |
|
|
|


