Celebrating Kindness Blog Hop and Marble Background Technique
Welcome everyone to the Celebrate Kindness Blog Hop! If you are coming from Sonja Kerkhoffs blog, then you’re in the right place! We are celebrating 10k YouTube followers for Julia Alderman with Just One More Card.
I’ve created a card using a fun technique that I learned from Wendy Vecchi. It involves Simon Says Stamp inks and a bit of plain ol’ rubbing alcohol!
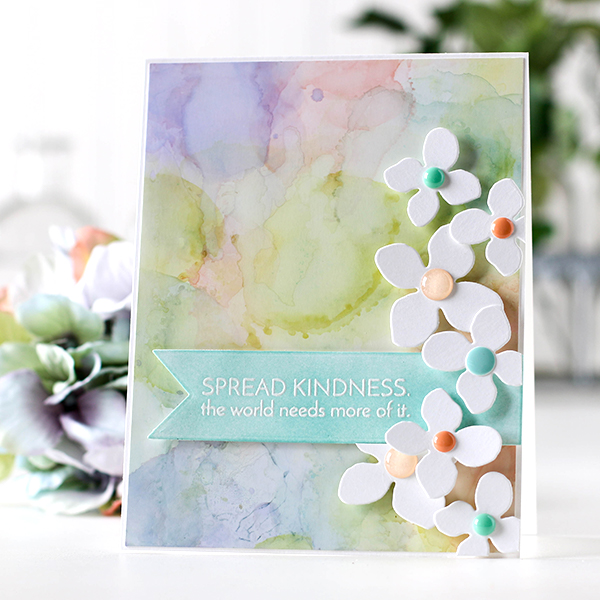
I used Tim Holtz Specialty Stamping Paper because it work really well with the alcohol and doesn’t warp. I built up my colors one at a time until I hade a nice mix.
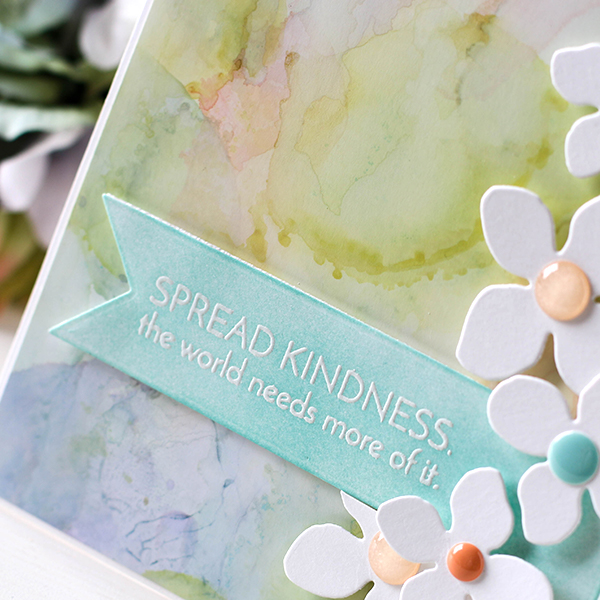
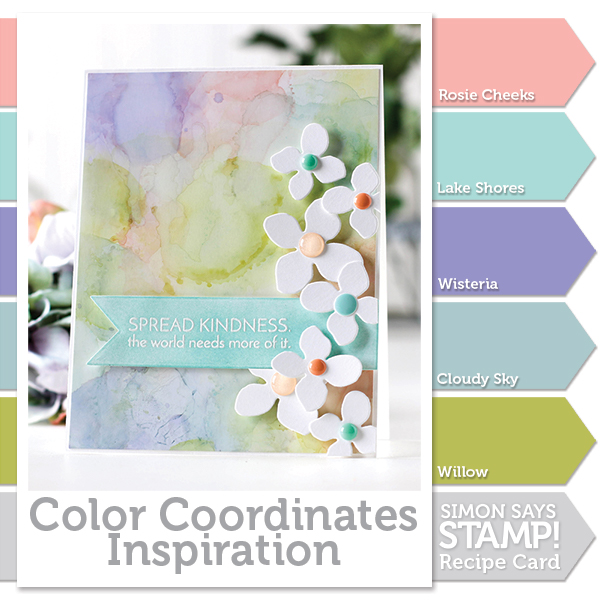
I decided to share a Color Coordinate Recipe with you because this combo turned out so pretty!
I’ve shot a video of the background technique, you can view it below or on our YouTube channel.
There are many giveaways for this hop from some very generous sponsors.
- $15 gift card to Altenew
- $100 gift card to CAS-ual Fridays
- $25 gift card to Concord & 9th
- $20 gift card to Gerda Steiner Designs
- $30 gift card to Kit & Clowder
- $25 gift card to My Favorite Things
- $25 gift card to Purple Onion Designs
- $30 gift card to Pretty Pink Posh
- A custom prize package from Seven Hills Crafts
- $40 gift card to Simon Says Stamp
- Three custom prize packages from Stabilo
Anyone can be a winner!
Everyone who leaves a comment by July 31 midnight enters into the drawing, and winners will be announced August 1 on the Just One More Card blog. There will be a total of 13 prizes up for grabs. Good Luck!
Your Next stop on the hop is to the talented Stephanie Klauck
 |
 |
 |
 |
 |
 |
 |
 |
 |
 |
 |
 |
 |
 |
 |
 |
 |
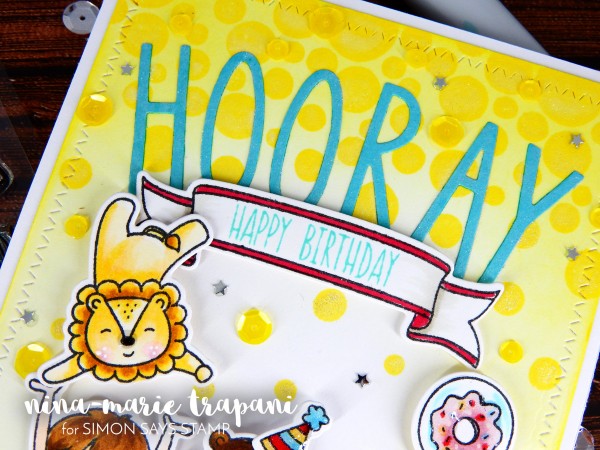
Studio Monday with Nina-Marie: Tall Scene Card Featuring Neat & Tangled

Hi friends, it’s Nina-Marie here with you today, sharing a brand new Studio Monday tutorial! Today I will be featuring Neat & Tangled products as I show you how to go outside the box of a standard A2 sized card and create larger scenes!
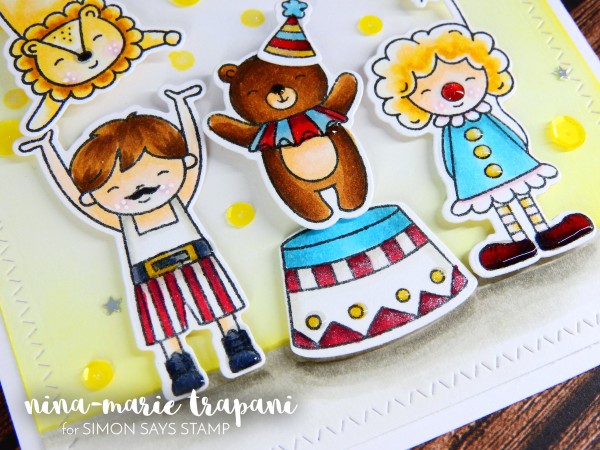
In today’s video we’ll be using the Big Top birthday stamp and die sets, the Journaling Alpha dies, and the Falling Circles stamp set; a combination of the newest stamp and dies sets from Neat & Tangled’s two most-recent releases! The Big Top Birthday sets are going to be the “stars of the show” (no pun intended!), but the additions of the Journaling Alpha and Falling Circle sets are an important “supporting cast”, what helps bring this scene to life!
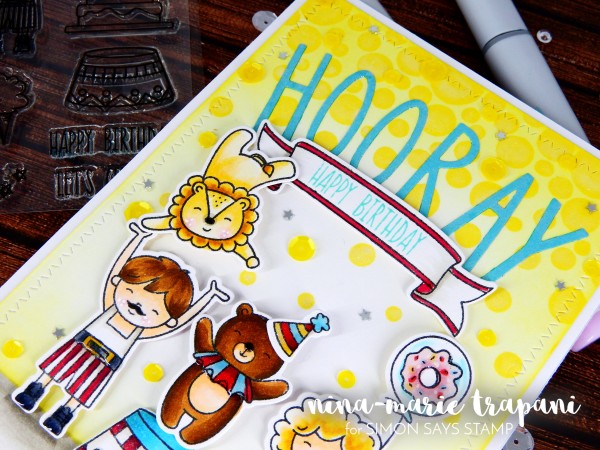
I colored the images on this card with Copic markers and used fairly easy shading on most of the pieces simply because the images are on the smaller side. It also illustrates the point of not needing to have lots of markers in your stash to create stunning, colored images!
For those of you interested in the color combinations I used, I have them listed down below and in the video during the coloring process.
- girl: BG01, BG53, BG57, RV00, RV93, YR30, YR23 (dress); C5, C7, R37, R59 (shoes); YR20, YR30, YR31, YR23 (hair); E0000, E00, E21 RV00, RV93 (skin); BG0000, BG01, RV00, RV23, RV93 (balloon)
- boy: W1, W3, W00 (shirt); R37, R59, W1, W00, C5, C7, YR30, YR23 (pants and belt); C5, C7 (shoes); E0000, E00, E21, RV00, RV93 (skin); E35, E57, E47 (hair)
- lion: YR20, YR30, YR31, YR23, E35, RV00, RV93
- bear: E35, E57, E47, E0000, E00, BG01, BG53, R37, R59
- pedestal: BG01, BG53, BG57, R37, R59, W00, W1, W3
- banner: R37, W1, W00, W3
- party hat: YR30, YR23, R37, R59, BG01, BG53
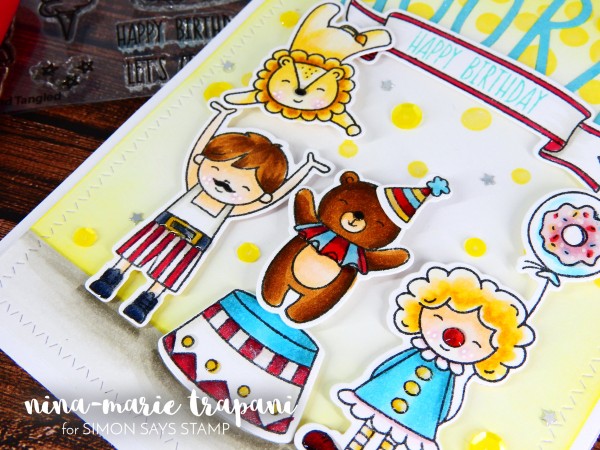
The card, as you can see, is much taller than the standard A2 size (4 1/4″ x 5 1/2″); this is because I not only wanted to do something different, but I also felt that the larger size fit the design of the card that I had in mind. Never feel that you have to create cards a certain size; cards can as small or large as you prefer! I think it’s fun to create cards of all shapes and sizes; something a bit unexpected! :)
So to see how I put this card together, be sure to watch the video below or on our Youtube channel! If you enjoy, please give the video a big thumbs up and subscribe to our YouTube channel if you haven’t already, so that you don’t miss any of our weekly inspiration videos!
WATCH THE VIDEO:
SUPPLIES:
 |
 |
 |
 |
 |
 |
 |
 |
 |
 |
 |
 |
 |
 |
 |
 |
 |
|
 |
 |
 |
 |
 |
 |
 |
 |
 |
 |
 |
 |
 |
 |
 |
 |
 |
 |
 |
 |
 |
 |
 |
 |
 |
 |
 |
 |
 |
 |

Blog Candy Alert!! Follow our blog via email and comment on this post for a chance to win a special blog candy!
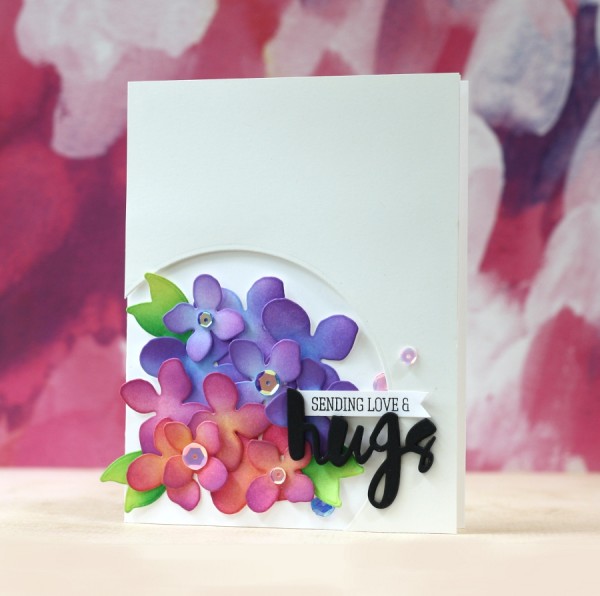
Hydrangea Ink Blending
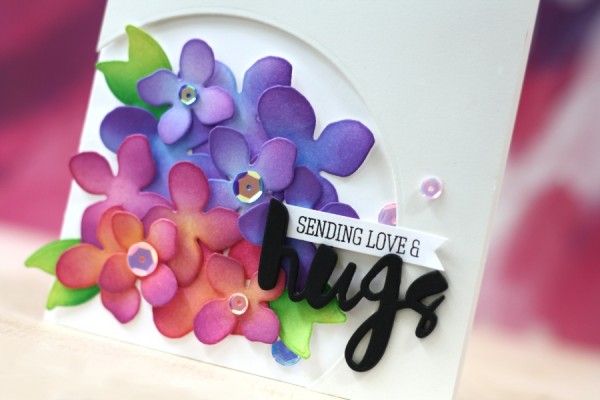
Hi friends! Thanks for stopping by today! Please join me in welcoming the fantastic Laura Bassen back to our blog as a guest today! Today she’s pulled out our Hydrangea die set from our Among the Stars collection, and used the photo inspiration included below to make this beauty POP, with the help of some special ink color choices! Some other key ingredients in Laura’s card are the Painted Hugs die, Cream Off cardstock, & Crystal Reflections sequins. Don’t forget to watch the video, and enjoy!

Watch the video:
Supplies:
|
|
 |
 |
 |
 |
|
 |
 |
 |
 |
 |
|
 |
 |
 |
 |
 |
|
 |
 |
|
Blog Candy Alert!! Follow our blog via email and comment on this post for a chance to win a special blog candy!


