Studio Monday with Nina-Marie: 4 Ways to Use the October Nuts About You Card Kit

Hello friends! It’s Nina-Marie here with you today, welcoming you back to our newest Studio Monday video! We took a break from our normal blog schedule to bring you all the amazing, fun excitement of STAMPtember and I hope you enjoyed every minute of it as much as I did!
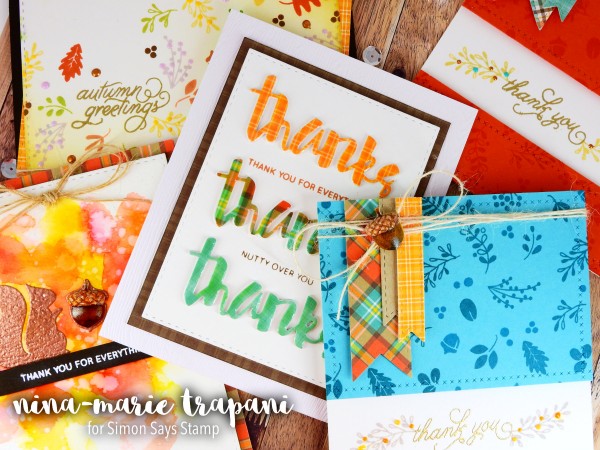
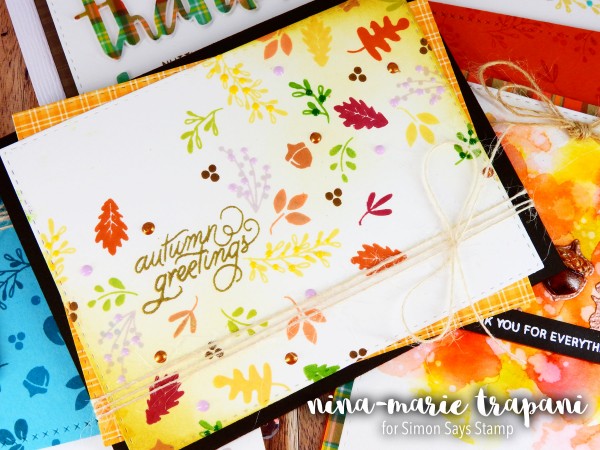
This week’s Studio Monday is going to be featuring our latest Monthly Card Kit, Nuts About You! I love this one, because not only are the products awesome, but the colors are DIVINE! I cannot tell you how inspiring these Fall colored papers, inks and embellishments were… this definitely put me into the Autumn Crafting kick!
We have sold out of the actual kit itself but some of the items included in the latest kit are available individually!!!! Those items include: our exclusive Nutty About You stamp set, Lawn Fawn’s Perfectly Plaid for Fall 6×6 papers, Little B’s Mini Acorn stickers, Ranger Archival Inks (in both Bright Tangelo and Paradise Teal) and Simon cardstocks in Audrey Blue, Burnt Orange, Dark Chocolate and pre-scored card 120# white card bases!
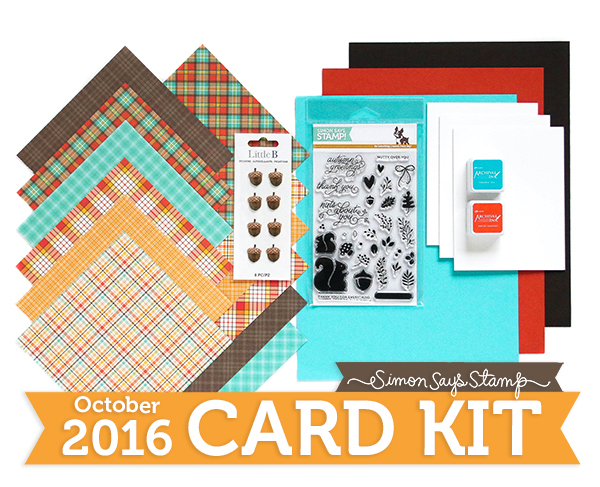
You can make SO much with this kit… so far I’ve made a total of seven cards using the kit’s contents, and I STILL have some things left over that I could use on other cards!
We are going to be looking at how I made five of those seven cards in today’s video; we’ve got a lot to talk about, so let’s get to it!
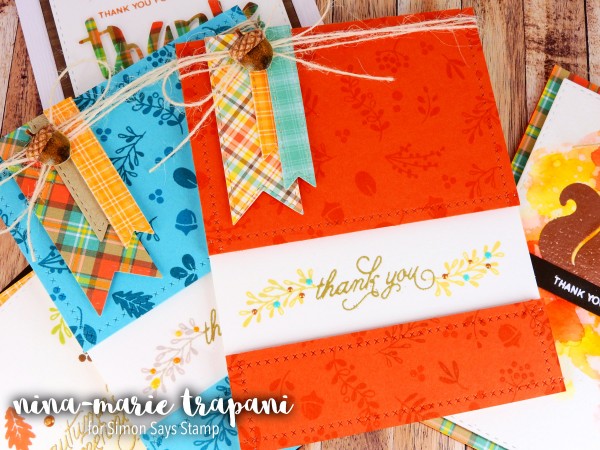
In the video, I’ll be sharing some techniques and designs that can be created with the items in the kit; I purposely did not use very many items that are not included in the kit, because I wanted to demonstrate how easy it is to make beautiful cards using items from the kit. Some of the techniques we’ll be touching on are tone on tone stamping, creating die cut embellishments, emboss resist, and more.
Because we are focusing on so many different ways to use the kit (and I didn’t want to have the video be too long!), I will be showing mostly just the techniques used and then a quick overview of how each card finished up. These cards were very simple to create and all five can be done in one afternoon! To see how, check out the video below!
WATCH THE VIDEO:
SHARE YOUR CREATIONS!
Did you know we have special Monthly Card Kit galleries that you can not only check out for inspiration? And did you know that we love it when YOU upload YOUR projects made with the card kits to the galleries too??? YES!
Please be sure to link up your projects to the October Card Kit gallery using the Nuts About You kit so that we too can be inspired by YOUR creativity! We have galleries for ALL of our past card kits and we post new gallery link-up each time a new monthly kit is released, so make sure you visit our galleries often!
SUPPLIES:
 |
 |
 |
 |
 |
 |
 |
 |
 |
 |
 |
 |
 |
 |
 |
 |
 |
 |
 |
 |
 |
 |
 |
 |
 |
 |
 |
 |
 |
 |
 |
 |
 |
 |
 |
 |
 |
 |
 |
BLOG CANDY!

Blog Candy Alert!! Follow our blog via email and comment on this post for a chance to win a special blog candy!
Tim Holtz Village Dies: Haunted Mansion
Hello everyone!!! I’m back again with another version of the Village Mansion… only this one is a bit more spoooooky!!
I’m amazed by these little houses and get completely immersed while I’m creating. When I’m done… it’s hard to believe they are made of paper!
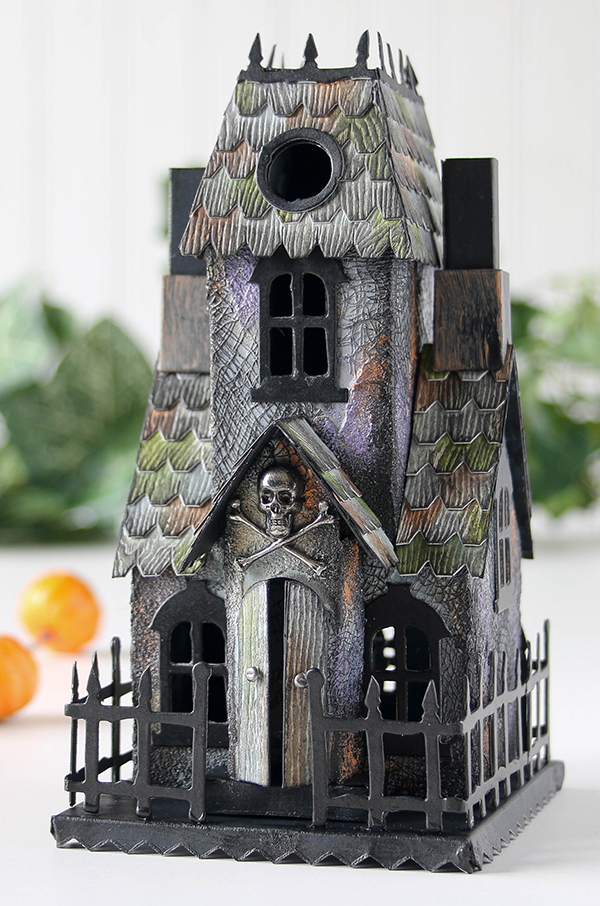
I tried something different on this one by using some cheesecloth and Distress Grit paste to gain some texture. I was going for a “The stucco has fallen off the walls look” and I think this combination did the trick. I used a variety of Distress paints to color the walls, then went over everything with Black Soot paint to give it a darker tone.
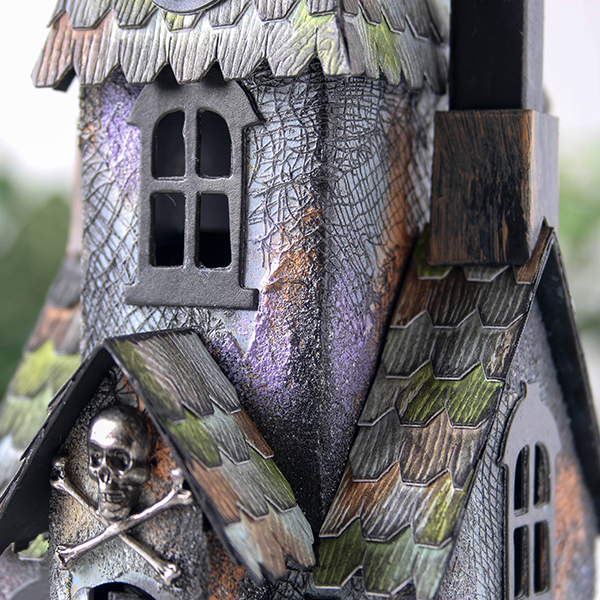
I used Distress Stains and Woodgrain cardstock for the roof tiles. Once the paper was colored and dry, I used the Village Rooftops die to cut out about 28 strips. Once I put them on the roof, I ran my blending tool with a slight amount of Black Soot paint over top to darken them.
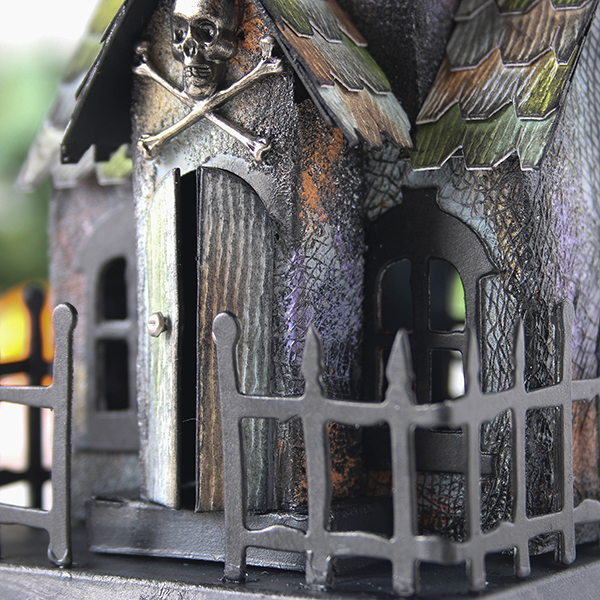
I’ve left the embellishments simple… one could really go crazy at this point, but I just used a Cross bones Adornment above the door.
I have put together a video of the process, you can view it below or on our YouTube channel.
Blog Candy Alert!! Follow our blog via email and comment on this post for a chance to win a special blog candy!
Be sure to check out my other Villages in the series, I have created a Surf Shack and Victorian Mansion. I hope you have a great week and thanks for stopping by!!!
 |
 |
 |
 |
 |
 |
 |
 |
 |
 |
 |
 |
 |
 |
 |
 |
 |
|
 |
 |
 |
 |
 |
 |
 |
 |
Weekender with Wanda – Happy World Card Making Day!

Happy World Card Making Day! I’m so happy and delighted to be back today with a new edition of Weekender with Wanda, and what a marvelous occasion too! Are you getting together with friends today to stamp and create? Will you send out some cards in honor of WCMD 2016? I am definitely going to be in my studio crafting away today. Let’s take just one second to go WOW about Stamptember! That was the best month don’t you think? It was crazy keeping up with all the awesome new stamp sets and the inspiration, but I loved it all. it’s going to seem really quiet now! We hope that you enjoyed it too!
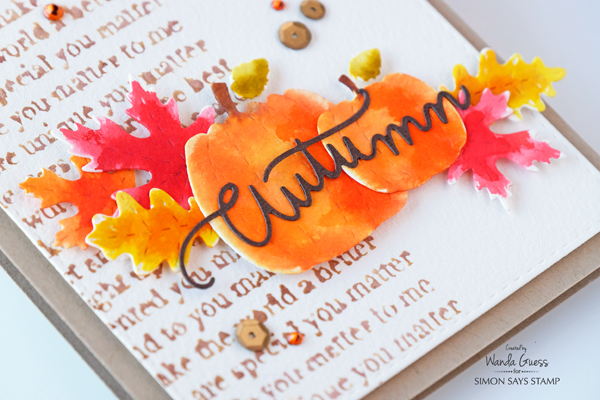
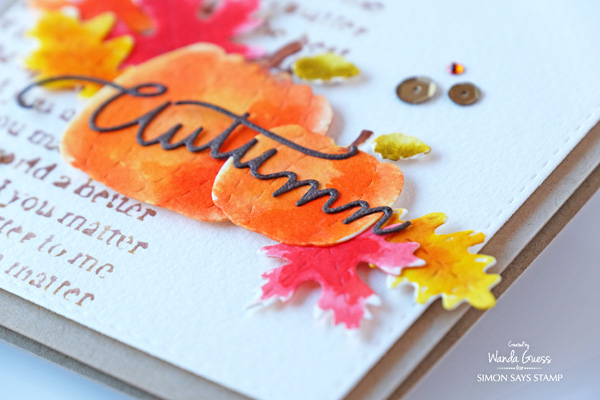
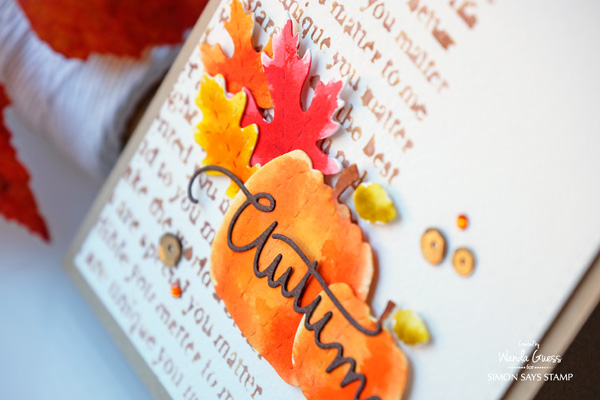
Today in honor of the first day of October, I’ve created an Autumn watercolor card to share with you. I used loads of beautiful Simon Says Stamp Exclusive Dies and Stamps. I used a couple of new things from Stamptember as well as some of my tried and true favorites. Everything was inked and colored with Distress Inks for a soft effect. All the supplies and colors I used are listed at the bottom of the post.

I started with an A2 card base made from Neenah Desert Kraft paper. Next I die cut a Stitched Rectangle from watercolor paper and set that aside. Then I die cut all the pumpkins and leaves from watercolor paper. Finally, the Autumn word die was cut from rich brown cardstock.
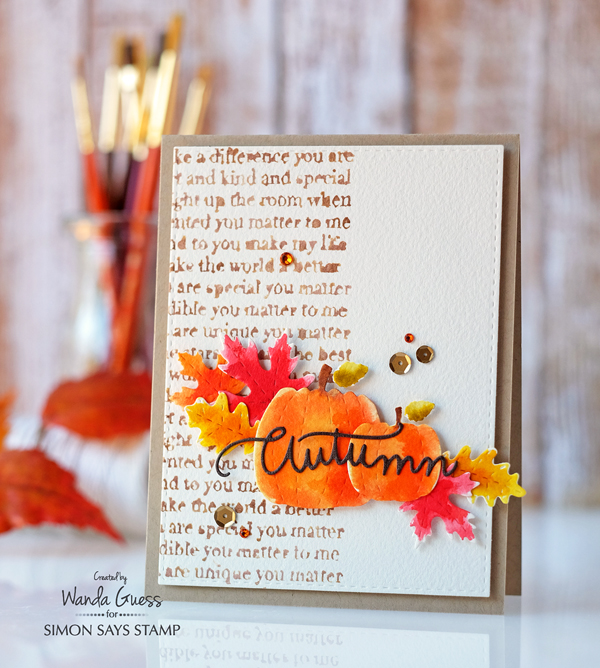
Since all of the elements were die cut from watercolor paper, they took the Distress Inks beautifully! It was fun to watercolor everything with gorgeous Fall colors. I used a paintbrush and lots of clean water and did a quick and easy wash of color. For this technique I ‘smush’ some Distress ink onto a clear stamping block and use that as my palette!

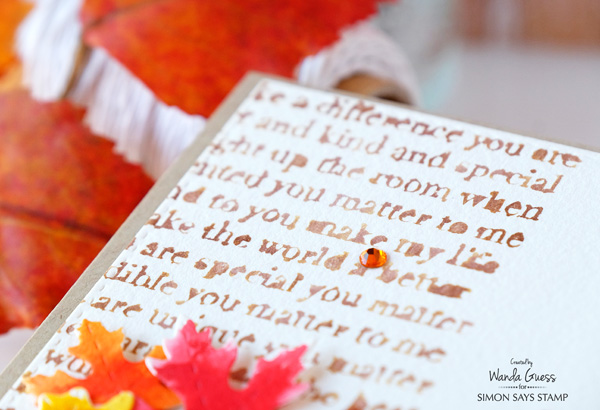
The words in the background were stamped using the gorgeous new SSS Exclusive You Matter Background stamp. I inked the stamp using Corduroy Distress ink. Once the ink was on the stamp, I used my water sprayer to mist over the ink (right on the stamp). Then I stamped it off center onto the watercolor cardstock. I gently set it aside to dry. That’s how all the imperfections appear. I think this came out really cool!
Once I had the pumpkins and leaves attached to the card front, I used a glue pen and tweezers to adhere the “Autumn” word across the front of the pumpkins. This sentiment die actually says “Autumn Blessings!”
Here is my little pumpkin patch forming on my desk…

I wanted just a few little accents. I thought about adding ink speckles, but the finally decided on some pretty matte gold sequins and a few orange rhinestones.
Thanks for joining me today on this first October weekend! I’m so glad to be back sharing with you! Take care and I’ll see you soon!
SUPPLIES:
 |
 |
 |
 |
 |
|
 |
 |
 |
 |
 |
 |
 |
 |
 |
 |
 |
 |
 |
 |
 |
 |
 |
 |
 |
 |
 |
|