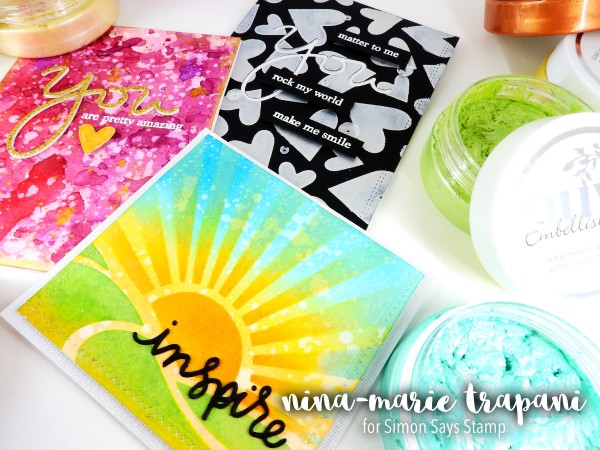
How To: Nuvo Products from Tonic Studios
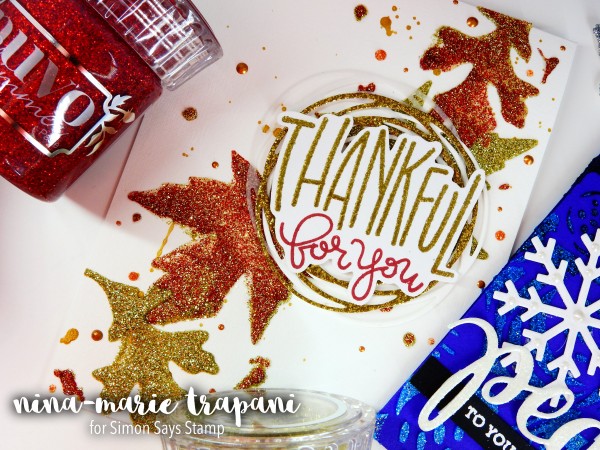
Hi crafty friends! Its Nina-Marie here with you today with a close up look at some of the fun Nuvo embellishment products from Tonic Studios!
Tonic’s Nuvo embellishment line consists of many different types of glitters, pastes, embossing powders, and more. Today we will be looking at the Pure Sheen Glitter, Crystal and Glitter Drops, Glimmer Pastes and Embellishment Mousse. I’ll be sharing not only a close up look at each product, but I’ll also be putting these products into action and showing a few different techniques that you can achieve with each product.
Because there are SO many things you can do with these products, I’m breaking this post up into separate videos (one for each product type). This will allow you to focus solely on the products you are interested in, rather than watching one long video of everything. So let’s get to it…!
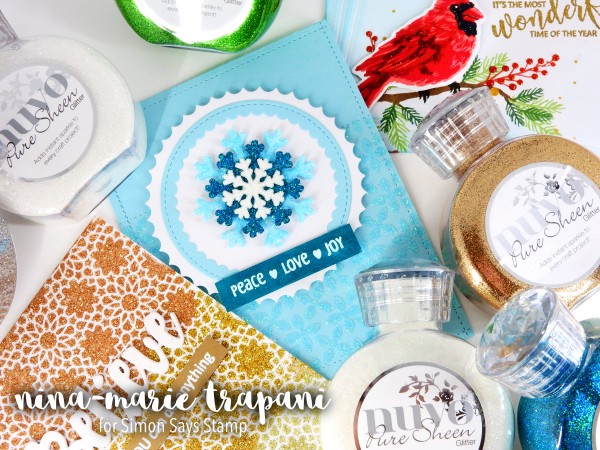
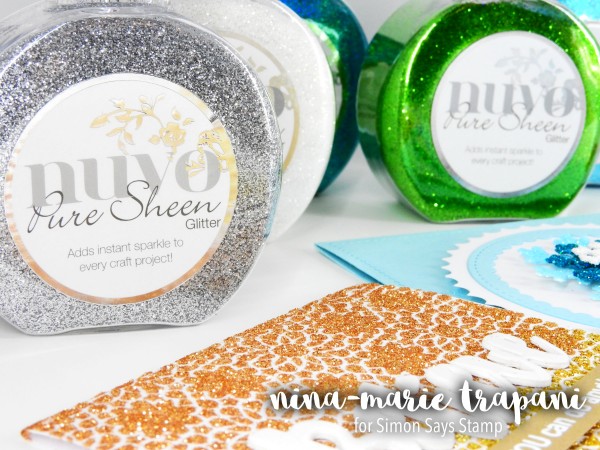
PURE SHEEN GLITTER
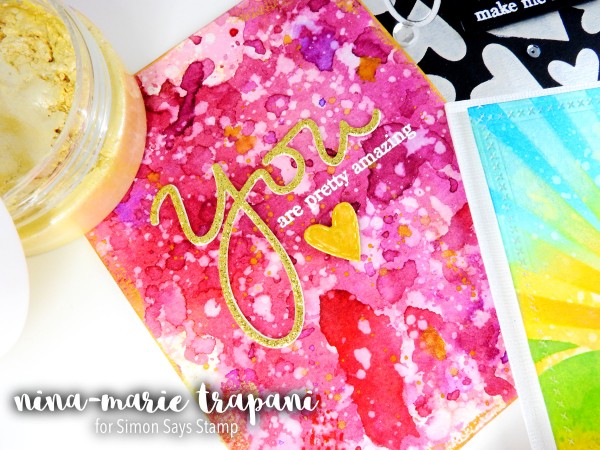
Our first close up is going to be the Nuvo Pure Sheen Glitters. The glitter colors in these bottles are DIVINE! I could literally line these up onto a shelf and use them as decoration, that’s how pretty they are!
The bottles are just over 3.3 oz, which means they contain A LOT of glitter! We carry 12 different colors of the glitter bottles here at the Simon Says Stamp store and you can find them all HERE.
Glitter can sometimes pose challenges in keeping it contained from flying all over your workspace; I find having coffee filters to use as a “catch-all” beneath the paper I am pouring glitter onto very handy. For clean up, both baby wipes and a microfiber cloth are something I reach for most often!
In the video below, I’ll be sharing techniques such as creating glitter die cuts, glitter backgrounds, adding accents of glitter and more, so be sure to check it out!
WATCH THE VIDEO
SUPPLIES
Many of the products featured in this Pure Sheen Glitter video are linked below:
 |
 |
 |
 |
 |
 |
 |
 |
 |
 |
 |
 |
 |
 |
 |
 |
 |
 |
 |
 |
 |
 |
 |
 |
 |
 |
 |
 |
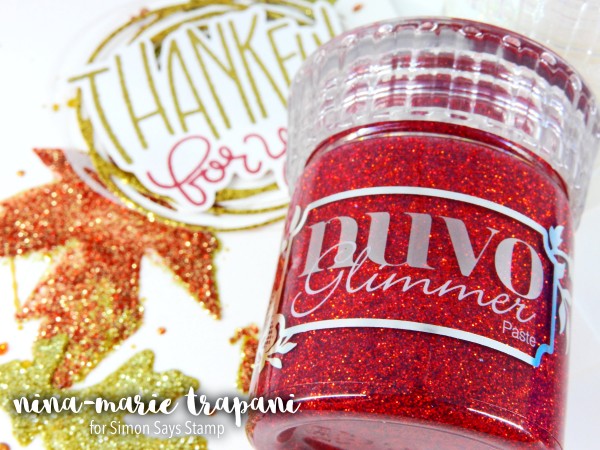
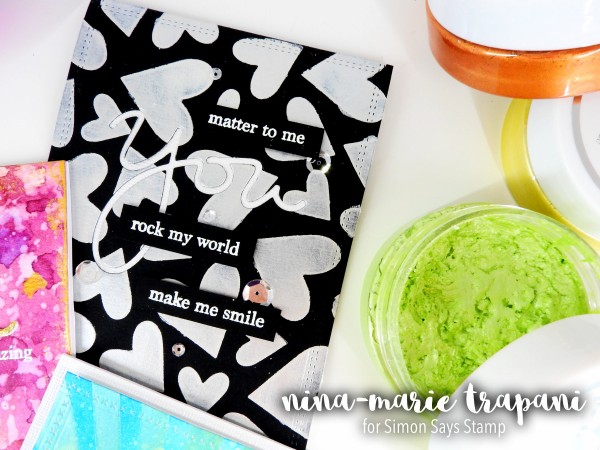
GLIMMER PASTE
Nuvo Glimmer Pastes are much like the many embossing and texture pastes on the market, except with one key difference… these are VERY glittery! The Glimmer Pastes come in 12 stunning colors, which you can find at the Simon Says Stamp store HERE. I love the fun sparkle that these pastes add to cards, and how beautifully they stand off both dark and light colored cardstocks alike.
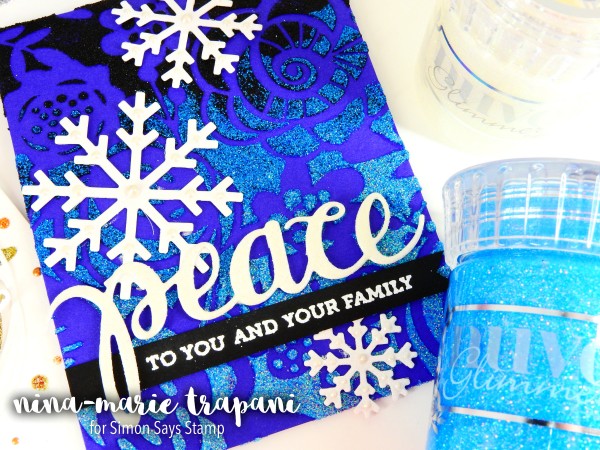
These pastes can obviously be applied through a stencil onto paper, but did you know that you can create embellishments with the pastes too? In the video below, I’ll walk you through the traditional application of paste onto cardstock, as well as a couple of fun ways to add pastes on both die cuts and as stand alone embellishments!
I find a good, metal palette knife very handy to use when applying pastes into my stencils, because the metal isn’t quite as “flexible” as a plastic palette knife; hence I feel as if I have a bit more control in the application process. I also like to use a non-stick surface underneath my paper as I apply the paste onto my project; the pastes do not bond onto non-stick surfaces, such as certain craft mats, adhesive backing sheets, photo sleeves/page protectors, or freezer paper. I like freezer paper most of all, because it is easy to clean up and reuse over and over, as well as disposable when I’m finished. I also like that I can make the freezer paper as large or as small as I like, making it fit to either my workspace or project perfectly!
Be sure to check out the video below for a look at these amazing pastes, techniques and additional information!
WATCH THE VIDEO
SUPPLIES
Many of the products featured in this Glimmer Paste video are linked below:
 |
 |
 |
 |
 |
 |
 |
 |
 |
 |
 |
 |
 |
 |
 |
 |
 |
 |
 |
 |
 |
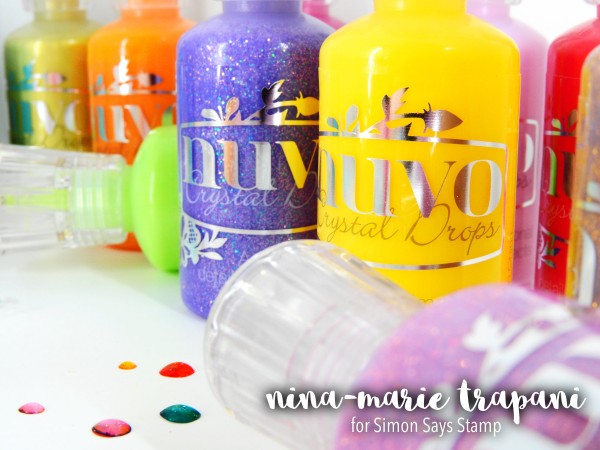
CRYSTAL & GLITTER DROPS
The Nuvo Crystal and Glitter Drops have probably been one of THE hottest items of this year! And after having even just one of these gorgeous embellishment bottles, you can see why… their versatility is endless, and the results are simply STUNNING. You can see all the amazing colors of these embellishment drops products at the Simon Says Stamp store here: Crystal and Glitter Drops.
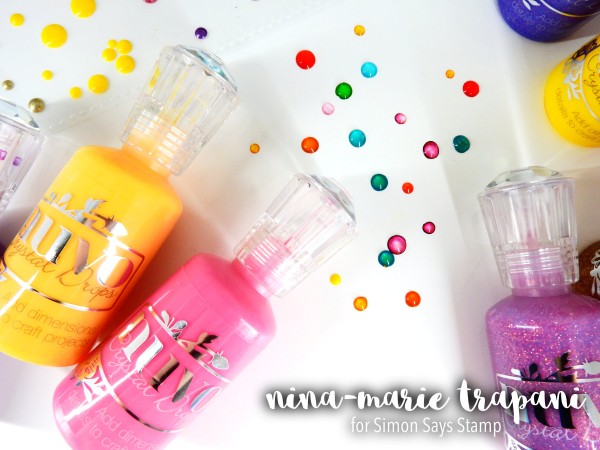
These Crystal and Glitter Drop embellishments can be used in a variety of ways; in the video below, I’ll be sharing details and examples of the obvious -and not so obvious- ways that they can add fun accent details to your cards!
COLOR CHART
I like to keep organized; so much so, that I like to have things labeled and sorted by color (as in, rainbow order… I know, I am weird! LOL!). I find that having color charts are very handy for me, not only to know what I have and what I’m missing, but also as I am working, I reference my color charts very frequently to help me select the right hue or shade for my project.
In the video, I referenced and shared a look at this color chart, which I use for keeping my Nuvo Crystal and Glitter Drops organized; you are welcome to download/print the chart to use for your organization needs as well.
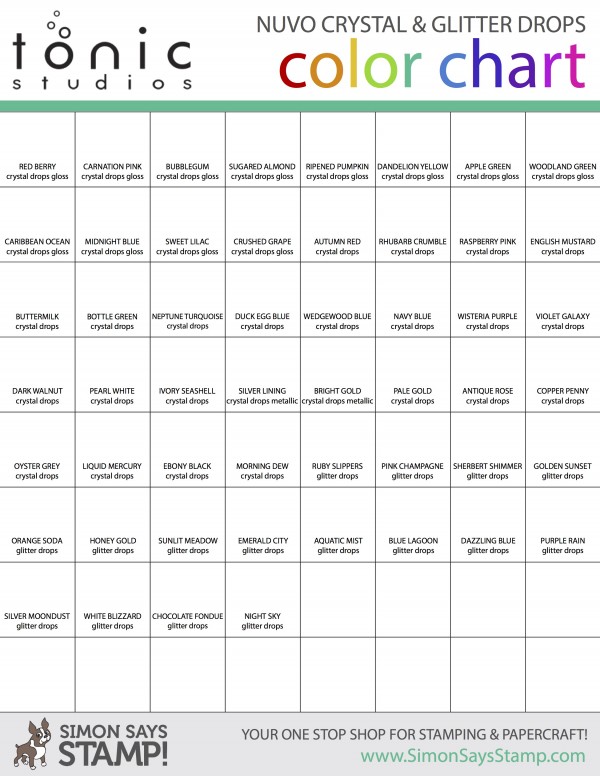
CLICK HERE for the Nuvo Crystal & Glitter Drops Color Chart PDF.
WATCH THE VIDEO
SUPPLIES
Many of the products featured in this Crystal & Glitter Drops video are linked below:
 |
 |
 |
 |
 |
 |
 |
 |
 |
 |
 |
 |
 |
 |
 |
 |
 |
 |
 |
 |
 |
 |
 |
 |
 |
 |
 |
 |
 |
 |
 |
 |
 |
 |
 |
 |
 |
 |
 |
 |
 |
 |
 |
 |
 |
|
 |
 |
 |
 |
 |
 |
 |
 |
 |
 |
EMBELLISHMENT MOUSSE
The Nuvo Embellishment Mousse in one word: butter. This stuff is like embossing paste, but even better! First, the metallic, shimmery colors are to die for. Second, they are REALLY easy to use. And three, they look AMAZING in a variety of techniques! From applying through a stencil, to adding over a die cut to create a beautiful embellishment, to even watercoloring, you can do so much with these Embellishment Mousse products! You can see all of the mousse products at the Simon Says Stamp store HERE.
I’ll be sharing all three of these techniques, a close up look at these Embellishment Mousse jars, plus tips and tricks along the way in the video below.
You can apply the Mousse with a palette knife, but I find it easiest to add the paste with either a soft, dry cloth or my finger (which is even more fun!). I’ll be showing both application processes in the video.
WATCH THE VIDEO
SUPPLIES
Many of the products featured in this Embellishment Mousse video are linked below:
 |
 |
 |
 |
 |
 |
 |
 |
 |
 |
 |
 |
 |
 |
 |
 |
 |
|
No-Line Watercoloring with Distress Inks (Critter Costume Party)
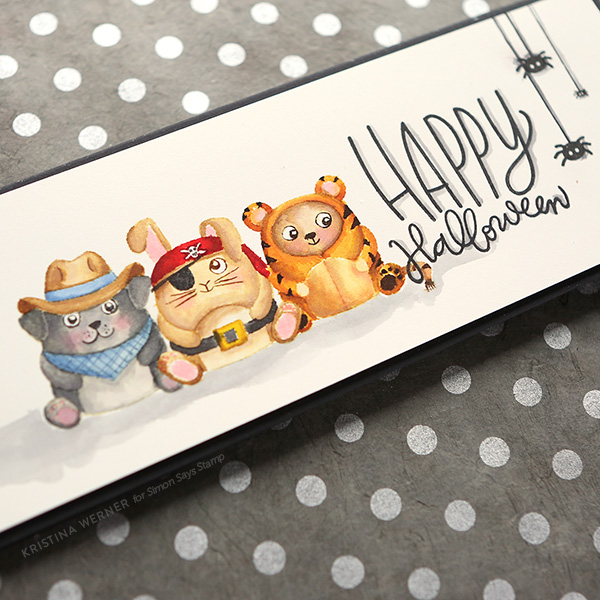
Happy Wednesday, all! Today I have a watercoloring card and video for you featuring no-line coloring. I love the look of no-line coloring–it reminds me of children’s book illustrations. :)
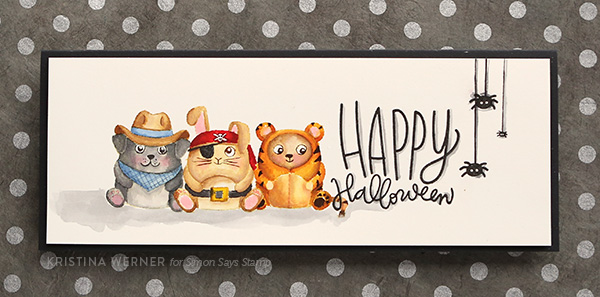
To start the card, I stamped the images from the Critter Costume Party stamp set in Antique Linen Distress Ink and then watercolored them with various mini Distress Inks.
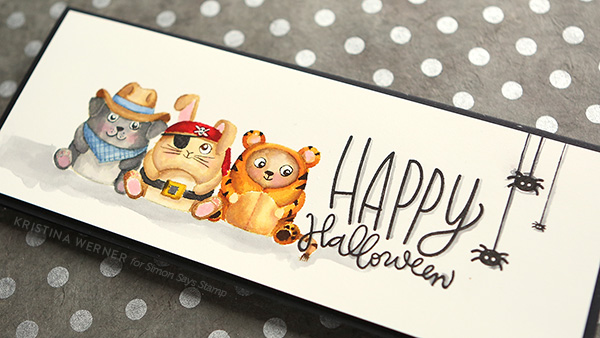
I also used the Happy Halloween stamp from Autumn Greetings and some spider stamps from the Ghostly Greetings stamp set to finish the scene.
I hope you enjoy the video! :)
 |
|
 |
 |
 |
 |
 |
 |
 |
 |
 |
 |
 |
 |
 |
 |
 |
 |
|
Spooky Halloween Goody Bag
Hi crafty friends! Thanks for stopping by today! I always look forward to see what the very clever Debby Hughes comes up with for her monthly Creative Uses posts on our blog and she sure didn’t disappoint this month with a spooky Halloween goody bag! Read on and be sure to watch the video! Enjoy!
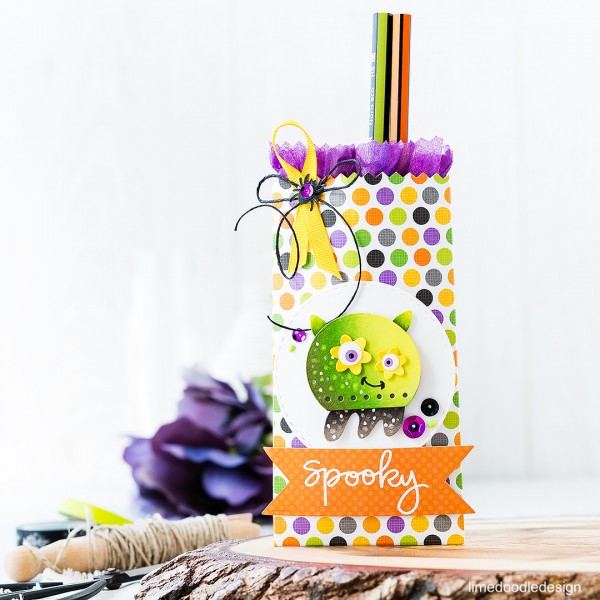
Hello, it’s Debby here today with a look at how to create cute monsters from our dies. I used my little monster on a spooky Halloween goody bag but he would’ve gone equally well on a fun children’s birthday card too.
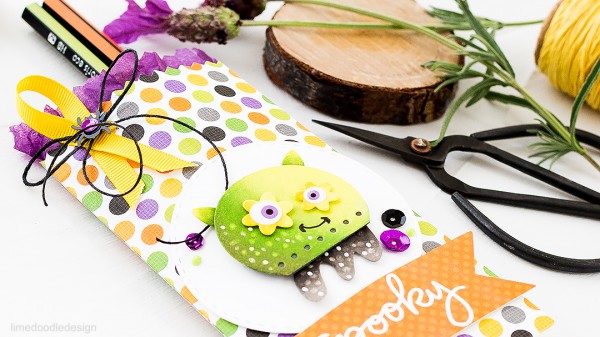
I used the ear from the Plush Sweet Elephant dies along with an antler from the Plush Deer dies as the base for my monster. I cut them from Neenah Solar White card and then added some simple Copic coloring accented with dots of Colorless Blender, glitter gel pen, white gel pen and finally I added Doodlebug Eerie Eyes.
I scored and folded a goody bag from Doodlebug patterned paper and accented with twine and ribbon. I then mounted the monster on a white Stitched Rectangle and added a sentiment from the Ghostly Greetings stamp set white heat embossed on patterned paper and then die cut with a Basic Banner die.
Watch the video:
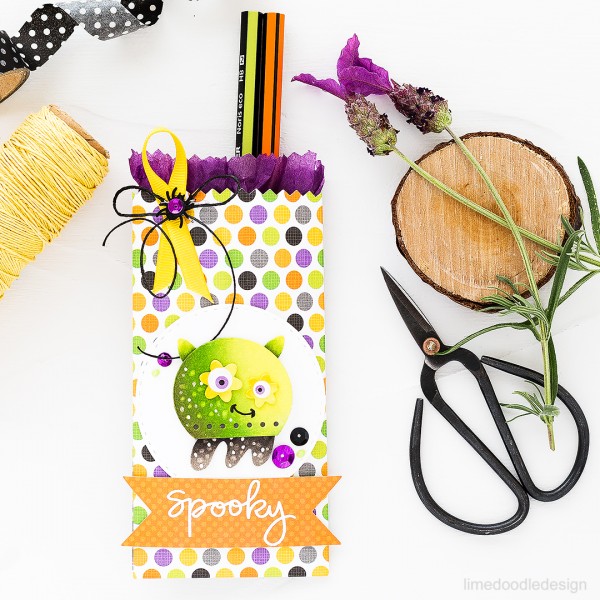
I tucked in some purple tissue paper and a couple of pencils in great Halloween colors. I do like to add things other than sweeties for Halloween – so much better for everyone’s teeth! Finally I added some Spider’s Web sequins and Nuvo Crystal Drops.
The advantage of creating for Halloween is that so many of our dies can be easily re-purposed in to cute monsters. I hope you take a second look at your supplies to see how you can stretch their use for the coming season.
SUPPLIES:
|
|
 |
 |
 |
 |
 |
 |
 |
 |
 |
 |
 |
 |
 |
 |
 |
 |
 |
|
 |
 |
 |
 |
 |
 |
|
Thanks for reading today, and thanks to Debby for being our special guest!

Blog Candy Alert!! Follow our blog via email and comment on this post for a chance to win a special blog candy!
Congrats! Blog Candy Winners!
From: STAMPtember® Feature: Your Next Stamp: Bonnie E!
From: STAMPtember® Feature: Winnie & Walter: Beverly Perdue!
From: STAMPtember® Feature: Carabelle Studios: Stephanie Sprague!
From: STAMPtember® Wrap Up + Dream Craftroom Giveaway WINNER!: Jennifer Hayes!*
From: Tim Holtz Village Dies: The Mansion!: Neha Parab!
From: Weekender with Wanda – Happy World Card Making Day!: Jamie Vanskiver!
From: Tim Holtz Village Dies: Haunted Mansion: Migdalia Rodriguez!
From: Studio Monday with Nina-Marie: 4 Ways to Use the October Nuts About You Card Kit: Christine Dring!
Please email [email protected] with your mailing address, the name of the blog you won from, and the prize you won to claim your prize!


